
After reading this chapter, you'll be able to
Understand how to validate the input to a Web form using JavaScript.
Work with radio buttons, select boxes, and check boxes, both to get their values and set their state.
Provide feedback based on validation, both through an alert() dialog box and inline within the document.
Understand the limitations of JavaScript form validation and see an example of validation gone wrong.
JavaScript has been used with Web forms for a long time. JavaScript is commonly used to instantly verify that form fields have been filled in correctly before sending the form to the server. Prior to JavaScript, the form, and everything in it, needed to be sent to the server to make sure that all the required fields were filled in. Even with JavaScript, it is good—no, required—that you still validate on the server side just in case the user has JavaScript disabled or is purposefully doing something malicious.
Remember that alert() function that I've been using throughout the earlier chapters to show simple examples? It's back. The alert() function is heavily used with form validation, though newer techniques use the DOM (document object model) to display friendlier feedback.
A Web page with a basic form might look like the one in Figure 11-1.
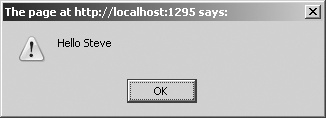
When this form is submitted, the JavaScript code in the background checks to make sure that the Name text box has been filled in. When filled out correctly, with the name "Steve", for example, the page displays the name that was filled in, as shown in Figure 11-2.
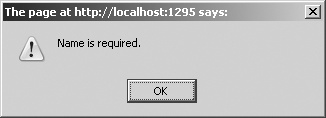
When the Name text box is left empty, an alert() dialog box indicates that the field was required, as you can see in Figure 11-3.

The code to do all this is as follows, including the Hypertext Markup Language (HTML):
<!DOCTYPE HTML PUBLIC "-//W3C//DTD HTML 4.01//EN"
"http://www.w3.org/TR/html4/strict.dtd">
<html>
<head>
    <title>A Basic Example</title>
    <script type = "text/javascript" >
    function formValid() {
        if (document.forms[0].textname.value.length == 0) {
           alert("Name is required.");
           return false;
        } else {
           alert("Hello " + document.forms[0].textname.value);
           return true;
        }
    }
    </script>
</head>
<body>
<p>A Basic Form Example</p>
<form action="#" onsubmit="return formValid();">
<p>Name <em>(Required)</em>: <input id="textbox1" name="textname" type="text" /></p>
<p><input id="submitbutton1" type="submit" /></p>
</form>
</body>
</html>
The JavaScript within the <head> element defines a function called formValid() to process the input from the simple form. This code is
function formValid() {
    if (document.forms[0].textname.value.length == 0) {
       alert("Name is required.");
       return false;
    } else {
       alert("Hello " + document.forms[0].textname.value);
       return true;
    }
}
Within the formValid() function, an if conditional test uses the document.forms[] array. By examining the first index value (0) of that array, the code finds the one and only form on this Web page. The conditional tests whether the length of the textname.value property on the form is 0. If it is, then an error is indicated using an alert() dialog box. If not, then whatever is in the textname.value property is displayed.
The return value is important. When the onsubmit or onclick event handlers are called and return false, the form submission process is stopped. This is why it's important to return false if validation fails. Event handling is discussed more in Chapter 14. Note that using onsubmit is preferred for validation purposes, as is explained at the end of this chapter.
The example shown used the first index value of the document.forms[] list. This is fine if there's only one form on the page. You'll frequently see the form being accessed through its name, and this is shown in the next section.
Before you can provide feedback based on the form data, you have to get access to it. The previous example showed how to access the form data by using the document.forms[] array. This section shows a different method for doing the same, by using the name of the form instead of its index.
Like other elements of an HTML page, the id attribute can be set for a form. Here's the previous example with an id attribute:
<form action="#" id="testform" onsubmit="return formValid();">
<p>Name <em>(Required)</em>: <input id="textbox1-id001" name="textname" type="text" /></p>
<p><input id="submitbutton1-id001" type="submit" /></p>
</form>
The form is then accessed using its name rather than its index, as follows:
document.forms["testform"]
In certain cases, you might not know the index value of the form being accessed. For example, if a form is dynamically created, the most consistent approach is simply to set the form's id and then access it through that id, rather than trying to figure out (or worse, guess) which index value the form really is within the document.
There's also a nonstandard way to access the form directly through the document object itself, like so:
document.testform
However, you should not use this direct method. It doesn't work consistently, and it's not that much more effort to type it correctly anyway, like this:
document.forms["testform"]
All elements of Web forms can be accessed through the DOM. The exact method for accessing each element differs depending on the type of element. For text boxes and select boxes (also known as drop-downs), the value property holds the text that the visitor enters. A different method is used to determine the state of radio buttons and check boxes, though, which this section will also show.
Select boxes hold groups of options. Here's an example of the HTML used to create a select box. Note that this example uses an event handler, which will be explained in Chapter 14.
<form id="starform" action="" onsubmit="return false;" >
Select A Constellation:
<select onchange="displayvalue() name="startype">
<option selected="selected"> </option>
<option value = "Aquila">Aquila</option>
<option value = "Centaurus">Centaurus</option>
<option value = "Canis Major">Canis Major</option>
<option value = "Canis Minor">Canis Minor</option>
<option value = "Corona Borealis">Corona Borealis</option>
<option value = "Crux">Crux</option>
<option value = "Cygnus">Cygnus</option>
<option value = "Gemini">Gemini</option>
<option value = "Lyra">Lyra</option>
<option value = "Orion">Orion</option>
<option value = "Taurus">Taurus</option>
<option value = "Ursa Major">Ursa Major</option>
<option value = "Ursa Minor">Ursa Minor</option>
</select>
</form>
This code produces a select box like the one shown in Figure 11-4.

When the user selects an option and submits the form, the value is set to the value of the particular option chosen. For this example, the select box named startype holds in its value property whatever the visitor chooses. You can access this property as follows:
document.forms["starform"].startype.value
For this particular example, the select box contains an onchange event. The onchange event, which you'll find out more about in Chapter 14, causes a function to be called every time a change is noticed within the select box, such as when the user selects an option through the drop-down. In this case, the function is a user-defined function called displayvalue(), shown in Example 11-1.
Example 11-1. The Function Called When the Form's Onchange Event Is Fired
function displayvalue(){
    var selected = document.forms["starform"].startype.value;
    alert("You selected " + selected);
}
This bit of JavaScript simply shows the value that's selected from the drop-down. For example, choosing Ursa Minor from the drop-down causes the alert() dialog box in Figure 11-5 to be shown.

The HTML for the select box includes an option element named selected, which indicates which option is shown. In the example, an empty option is selected so that the initial value of the select box is blank:
<option selected="selected"> </option>
It's also possible through JavaScript and the DOM to choose which option should be selected. Usage of this feature is common on forms with multiple inputs, where one choice automatically leads to preselecting other options.
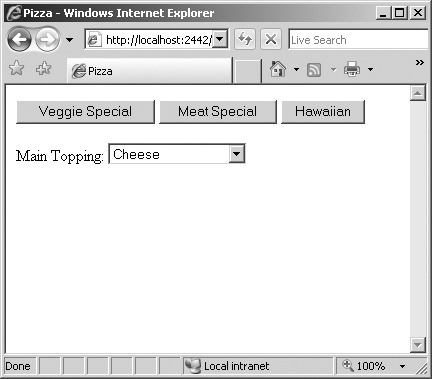
In the following scenario, we'll build a Web form that a pizza company might use to take orders. The company makes just a few special pizzas: one with vegetables, one with a variety of meats, and one that is Hawaiian style, with ham and pineapple toppings. The company would like a Web page with three buttons to help their pizza makers. The buttons will preselect the main topping on the pizza.
Selecting an option with JavaScript
Using Microsoft Visual Studio, Eclipse, or another editor, edit the file pizza.htm in the Chapter 11 sample files folder.
Within the page, add the code shown below in bold type:
<!DOCTYPE HTML PUBLIC "-//W3C//DTD HTML 4.01//EN" "http://www.w3.org/TR/html4/strict.dtd"> <html> <head> <title>Pizza</title> <script type = "text/javascript">function flip(pizzatype) {if (pizzatype.value == "Veggie Special") {document.forms["pizzaform"].topping.value = "veggies";} else if (pizzatype.value == "Meat Special") {document.forms["pizzaform"].topping.value = "meat";} else if (pizzatype.value == "Hawaiian") {document.forms["pizzaform"].topping.value = "hampineapple";}}</script> </head> <body> <form id="pizzaform" action="#" onsubmit="return false;"> <p><input type="button" name="veggiespecial" onclick="flip(veggiespecial)"value="Veggie Special" /><input type="button" onclick="flip(meatspecial)" name="meatspecial"value="Meat Special" /><input type="button" onclick="flip(hawaiian)" name="hawaiian"value="Hawaiian" /></p> Main Topping: <select name="topping"> <option value="cheese" selected="selected">Cheese</option> <option value="veggies">Veggies</option> <option value="meat">Meat</option> <option value="hampineapple">Ham & Pineapples</option> </select> </form> </body> </html>View the page within a Web browser. You'll get a page like this:
Choose one of the buttons. (Notice that the select box for Main Topping changes accordingly.)
The heart of the example is the flip() function:
function flip(pizzatype) {
    if (pizzatype.value == "Veggie Special") {
        document.forms["pizzaform"].topping.value = "veggies";
    } else if (pizzatype.value == "Meat Special") {
        document.forms["pizzaform"].topping.value = "meat";
    } else if (pizzatype.value == "Hawaiian") {
        document.forms["pizzaform"].topping.value = "hampineapple";
    }
}
Within this section, the value of the pizzatype variable that gets passed into the function is examined. Depending on the value of the pizzatype variable, the value of the select box called topping changes accordingly.
This example showed how to obtain information from a form and how to set information within a form. While the form doesn't look like much and the pizza company isn't making many pizzas right now, it's growing due to the popularity of its pizzas. Future examples in this chapter will expand on this form.
The previous example showed select boxes, and you've also already seen text boxes. There's another type of box—check boxes, which allow the user to select multiple items. The pizza ordering scenario explored in the previous section will serve as a good example of this.
Recall that in the initial pizza ordering system, when the pizza order taker selected one of three pizza types, the "Main Topping" select box changed to reflect the main ingredient of the pizza. However, it would be nice to allow more flexibility and more pizza types.
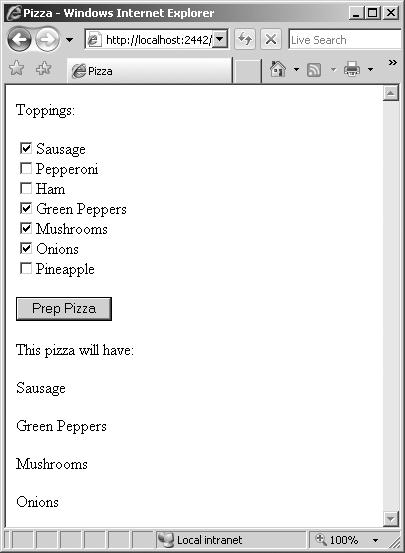
Take a look at Figure 11-6, which shows a new pizza prep form. The order taker can now select from a variety of ingredients in any combination.
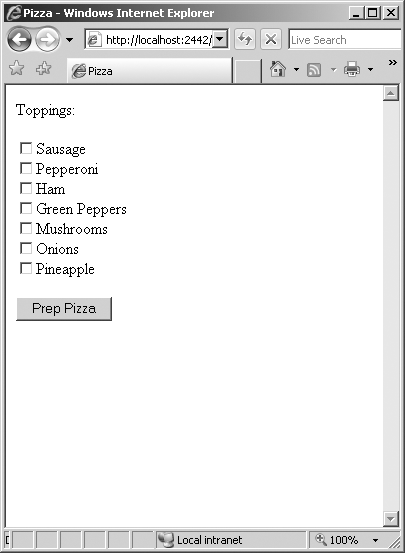
Selecting the various ingredients and clicking the Prep Pizza button causes the pizza's toppings to be displayed on the screen, as shown in Figure 11-7.
The code for this functionality is shown in Example 11-2. Note that some lines continue onto the next line and in such cases, they are sometimes escaped with a backslash character ().
Example 11-2. Using Check Boxes with the Order Form
<!DOCTYPE HTML PUBLIC "-//W3C//DTD HTML 4.01//EN"
"http://www.w3.org/TR/html4/strict.dtd">
<html>
<head>
    <title>Pizza</title>
    <script type = "text/javascript">
    function prepza() {
        var checkboxes = document.forms["pizzaform"].toppingcheck.length;
        var newelement = document.createElement("p");
        newelement.setAttribute("id","orderheading");
        document.body.appendChild(newelement);
        newelement.appendChild(document.createTextNode("This pizza will have:"));

        for (var i = 0; i < checkboxes; i++) {
            if (document.forms["pizzaform"].toppingcheck[i].checked) {
                  var newelement = document.createElement("p");
                  newelement.setAttribute("id","newelement" + i);
                  document.body.appendChild(newelement);
                  newelement.appendChild(document.createTextNode(
                          document.forms["pizzaform"].toppingcheck[i].value));
            }
        }
    }
    </script>
</head>
<body>
<form id="pizzaform-id001" action="#" onsubmit="return false;">
<p>Toppings:</p>
<input type="checkbox" id="topping1" value="Sausage"
    name="toppingcheck" />Sausage<br/>
<input type="checkbox" id="topping2" value="Pepperoni"
    name="toppingcheck" />Pepperoni<br/>
<input type="checkbox" id="topping3" value="Ham"
    name="toppingcheck" />Ham<br/>
<input type="checkbox" id="topping4" value="Green Peppers"
    name="toppingcheck" />Green Peppers<br/>
<input type="checkbox" id="topping5" value="Mushrooms"
    name="toppingcheck" />Mushrooms<br/>
<input type="checkbox" id="topping6" value="Onions"
    name="toppingcheck" />Onions<br/>
<input type="checkbox" id="topping7" value="Pineapple"
    name="toppingcheck" />Pineapple<br/>

<p><input type="submit" id="formsubmit"
    name="formsubmit" value="Prep Pizza" onclick="prepza();" /></p>
</form>
</body>
</html>
The heart of the page is the function prepza(). The first thing prepza() does is to gather the number of check boxes contained within the form "pizzaform". These are grouped together in the toppingcheck name, as follows:
var checkboxes = document.forms["pizzaform"].toppingcheck.length;
After setting up a <p> element with a heading, a for loop is created to walk through the check boxes. Each check box is examined to see if its checked property has been set:
if (document.forms["pizzaform"].toppingcheck[i].checked) {If the check box's checked property has indeed been set, a new element is created and placed into the document. The result is the page you saw back in Figure 11-7. (You saw examples of how to create and append elements in Chapter 10.)
Keep this example in mind because one of the exercises at the end of the chapter will ask you to combine this example with functionality to automatically select toppings when a button is pressed, like the select box example cited earlier.
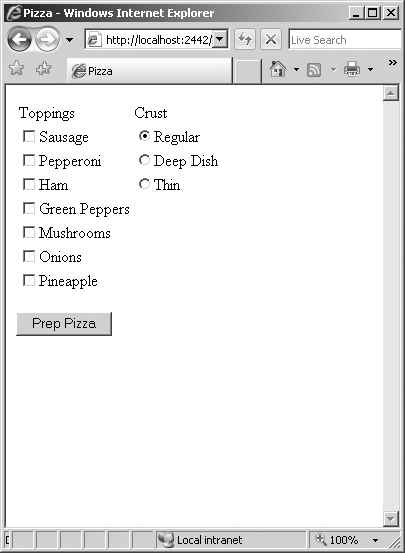
Radio buttons create a group of options, only one of which can be selected at any given time. In the context of our pizza restaurant example, visitors might use a radio button to select the type of crust for the pizza—thin, deep dish, or regular. Because a pizza can have only one kind of crust, this is the perfect place to use radio buttons. Adding radio buttons for the crust results in a page like that shown in Figure 11-8.
The HTML that adds these radio buttons and a simple table looks like this:
<body>
<form id="pizzaform-id002" action="#" onsubmit="return false;">
<table>
<tr><td>Toppings</td><td>Crust</td></tr>
<tr>
<td><input type="checkbox" id="topping1-id001" value="Sausage"
name="toppingcheck" />Sausage</td>
<td><input type="radio" name="crust" value="Regular"
checked="checked" id="radio1" />Regular</td>
</tr>
<tr>
<td><input type="checkbox" id="topping2-id001" value="Pepperoni"
name="toppingcheck" />Pepperoni</td>
<td><input type="radio" name="crust" value="Deep Dish"
id="radio2" />Deep Dish</td>
</tr>
<tr>
<td><input type="checkbox" id="topping3-id001" value="Ham"
name="toppingcheck" />Ham</td>
<td><input type="radio" name="crust" value="Thin" id="radio3" />Thin</td>
</tr>
<tr>
<td><input type="checkbox" id="topping4-id001" value="Green Peppers"
name="toppingcheck" />Green Peppers</td>
<td></td>
</tr>
<tr>
<td><input type="checkbox" id="topping5-id001" value="Mushrooms"
name="toppingcheck" />Mushrooms</td>
<td></td>
</tr>
<tr>
<td><input type="checkbox" id="topping6-id001" value="Onions"
name="toppingcheck" />Onions</td>
<td></td>
</tr>
<tr>
<td><input type="checkbox" id="topping7-id001" value="Pineapple"
name="toppingcheck" />Pineapple</td>
<td></td>
</tr>
</table>
<p><input type="submit" id="formsubmit-id001" name="formsubmit"
value="Prep Pizza" onclick="prepza();" /></p>
</form>
</body>
The code for processing radio buttons is similar to that for check boxes. The main difference is that radio buttons all share the same name and logical grouping, meaning that they are grouped together and only one can be checked at a time. The code for processing the radio buttons is added to the prepza() function, like this:
var crusttype = document.forms["pizzaform"].crust;
var crustlength = crusttype.length;
for (var c = 0; c < crustlength; c++) {
    if (crusttype[c].checked) {
          var newelement = document.createElement("p");
          newelement.setAttribute("id","crustelement" + i);
          document.body.appendChild(newelement);
          newelement.appendChild(document.createTextNode(crusttype[c].value + " Crust"));
    }
}JavaScript is frequently used to validate that a given form field is filled in correctly. You saw an example of this behavior earlier in this chapter, when a form asked you to fill in a name. If you didn't put anything in the field, then an error appeared. JavaScript is good at prevalidating data to make sure that it reasonably resembles valid input. However, JavaScript is poor at actually validating the data that makes it to your server.
You should never, at any time, assume that what gets to the server is valid. I can't count the number of Web developers that I've heard say, "We have a JavaScript validation on the data, so we don't need to check it on the server." This couldn't be further from the truth. People can and do have JavaScript disabled in their browsers; and people also can send POST-formatted and GET-formatted data to the server-side program without having to follow the navigation. No matter how many client-side tricks you employ, they're just that—tricks. Someone will find a way around them.
The bottom line is that you can and should use JavaScript for prevalidation, a small sanity check that may be helpful to provide quick feedback to the visitor if your code notices something blatantly wrong with the input. But you must perform the actual validation of all input on the server side, after users have completely submitted their input.
This section looks at some ways to use JavaScript for prevalidation, but to frame that discussion, I'll illustrate the dangers of using JavaScript as the sole validator for your site.
This section will use a server-side program to create a catalog order system with three simple elements: a product, a quantity, and a price. The items to be sold are blades of grass from my lawn. My area has had an extremely dry summer, so there's not much lawn left at this point—lots of weeds and sand, but not much of what I would call proper lawn. Because blades of grass from my lawn are so rare, orders will be limited to three blades per household, and the price will be high. I'll limit the order quantity by using some JavaScript code.
I've created a page to sell the blades of grass. When viewed in a browser, the page looks like Figure 11-9.

Here's the HTML and JavaScript to produce the page. Note the use of document.forms (shown in bold type) to access the quantity filled in within the form. Also, you won't be able to submit the form because the form action, catalog.php, doesn't actually exist. The action of the form isn't that important to this example.
<!DOCTYPE HTML PUBLIC "-//W3C//DTD HTML 4.01//EN"
"http://www.w3.org/TR/html4/strict.dtd">
<html>
<head>
<title>Catalog Example</title>
<script type = "text/javascript">
    function formValid() {
        if (document.forms["catalogform"]["quantity"].value > 3) {
           alert("Limit 3 per Household.");
           return false;
        } else {
           return true;
        }
    }
</script>
</head>
<body>
<form name="catalogform" id="catalogform" action="catalog.php" method="POST">
<p>Order Blades of Grass From Steve Suehring's Lawn</p>
<div id="lawndiv-id001"><img alt="steve suehring's lawn is dead" src="lawn.png"
id="lawnpic-id001"><br/></div>
<p>Description: Steve is terrible at lawn care, therefore there's not much
   grass on his lawn. Quantities are extremely limited.</p>
<p>Price: $100.00 per blade</p>
<p>Quantity to order (Limit 3 per Household): <input type="text" name="quantity"></p>
<p><input type="submit" onclick="return formValid();" value="Place Order"></p>
</form>
</body>
</html>
Note
An improvement you could make to this validation would make sure that the visitor doesn't try to order less than one blade of grass, either!
With JavaScript enabled in my browser, the user's attempt to order a quantity of three or fewer blades of grass is acceptable and follows on through to the server-side script to handle the request and give me an order total, shown in Figure 11-10.

Figure 11-10. Ordering a quantity of three blades of grass or fewer gives the expected results, including an order total.
If the user goes back to the page, still with JavaScript enabled, and attempts to order a quantity of four blades of grass, she or he sees an alert() dialog box, like the one shown in Figure 11-11.

Now imagine that I don't have JavaScript enabled in my browser. There's no noticeable change in the page when I go to the order form, so it looks exactly like the one in Figure 11-9. However, I'm now able to order a quantity of 1500. Simply entering 1500 into the quantity and clicking Place Order results in the server-side Web form happily receiving and processing the order, as shown in Figure 11-12.

Figure 11-12. Because JavaScript was disabled, nothing validated this order before it hit the server.
Because there was no validation on the server side, this input was perfectly valid and the order would be processed. The only problem is that I don't have 1500 blades of grass on my lawn (I counted), so I can't possibly fulfill this order.
You might be tempted to dismiss this scenario as contrived, but it represents an all-too-common occurrence in Web applications. In fact, this example is relatively tame compared to some instances where a site will actually let the visitor change the price of an item during the ordering process and never bother to validate that input, simply "because no one will ever do that." Well, people have done that, and they will—if you don't stop them.
You might be tempted to try to solve the problem by requiring that all visitors have JavaScript enabled in their browsers before they can place an order. This doesn't work. You can attempt to figure out if JavaScript is enabled, but you can never be 100 percent certain.
The only correct way to solve this issue is to validate and enforce these rules on the server side. The back-end script should check the business rule of the quantity limitation. This won't be a problem the vast majority of the time, but it only takes that one time—and then I'd be outside trying to dig up 1500 blades of grass for my customers.
This section helped to show how easy it is to bypass JavaScript validation. The next section shows you how to use JavaScript for prevalidation. JavaScript should be used only for prevalidation and never as the sole means of ensuring that input is clean.
Back in the beginning of this chapter, you saw an example of how to validate a text field. If the field wasn't filled in, an alert() dialog box appeared. I'll use this section to show how to provide feedback inline, next to the form field, rather than using an alert() dialog box.
Here's the code to achieve this:
<!DOCTYPE HTML PUBLIC "-//W3C//DTD HTML 4.01//EN"
"http://www.w3.org/TR/html4/strict.dtd">
<html>
<head>
<title>Catalog Example</title>
<script type = "text/javascript">
    function formValid() {
        if (document.forms["catalogform"]["quantity"].value > 3) {
            var submitbtn = document.forms["catalogform"]["submitbutton"];
            var quantityp = document.getElementById("quantityp");
            var errorel = document.createElement("span");
            errorel.appendChild(document.createTextNode(" Limit 3 per Household"));
            quantityp.appendChild(errorel);
            return false;
        } else {
            return true;
        }
    }
    document.forms["catalogform"].onsubmit = formValid();
</script>
</head>
<body>
<form name="catalogform" onsubmit="return formValid();" id="catalogform-id001"
 action="catalog.php" method="POST">
<p>Order Blades of Grass From Steve Suehring's Lawn</p>
<div id="lawndiv-id001"><img alt="steve suehring's lawn is dead" src="lawn.png"
id="lawnpic-id001"><br/></div>
<p>Description: Steve is terrible at lawn care, therefore there's not much
   grass on his lawn. Quantities are extremely limited.</p>
<p>Price: $100.00 per blade</p>
<p id="quantityp">Quantity to order (Limit 3 per Household): <input type="text"
   name="quantity"></p>
<p id="submitp"><input id="submitbutton" type="submit" value="Place Order"></p>
</form>
</body>
</html>
Basically this code doesn't do anything that you haven't already seen, with one notable exception. Rather than using the onclick event, as in the previous example, this form uses the onsubmit event. Using the onsubmit event is preferred because it will fire regardless of whether the visitor clicks the Submit button or presses the Enter key on the keyboard. Welcome to JavaScript programming!
The code simply checks whether the form is valid. If the form is not valid, the code builds and appends an HTML span element with the text "Limit 3 per Household", as seen in Figure 11-13, rather than showing an alert() dialog box.

Create a Web form that displays an alert() dialog box based on a select box input type.
Add a set of radio buttons to the pizza form exercise seen earlier in this chapter to accept three pizza sizes: small, medium, and large. Display the results along with the result of the pizza order.
Redesign the pizza order system to add the buttons from the original pizza example, enabling the order taker to select the Veggie Special, Meat Special, or Hawaiian pizza types. These buttons should then select the correct topping check boxes for the special type of pizza to be made. For the Veggie Special pizza, select Green Peppers, Mushrooms, and Onions. For the Meat Special pizza, select Sausage, Pepperoni, and Ham; and for the Hawaiian pizza, select Pineapple and Ham.