Chapter 9: Git GUI Tools
Until now, we’ve performed all our Git-related actions through the terminal, looking in detail at what each command does. The advantage of terminal commands is that they work across all platforms.
In Chapter 1, I mentioned that there are various GUI (graphic user interface) tools that can be used instead of the terminal. Although GUI tools can appear to make life simpler, applications can use differing UIs, terminology, and Git concepts. GUI tools also lack some of the power and features of the terminal, and terminal commands execute more quickly. For these reasons, I’ve avoided the use of Git GUI tools so far.
In this chapter, we’ll look at the GUI tools that serve as Git clients. First, we’ll review GitHub Desktop, GitHub’s own GUI tool, and then Atlassian’s Sourcetree. Both of these applications have macOS and Windows versions, but neither supports Linux. Other popular GUI clients are Tower (macOS), GitBox (macOS), SmartGit (Windows, macOS, Linux), Fork (Windows, macOS, Linux), and GitKraken (Windows, macOS, Linux). All of these applications are either free or have free trial versions.
You can also use Git’s capabilities through extensions in your text editor. Atom, a text editor by GitHub, has built-in Git and GitHub functionality. Sublime Text’s Git Integration package enables the use of many Git-related features from within the confines of the text editor. Visual Studio’s version control tools enable you to integrate with multiple version control systems to manage repositories hosted in remote locations.
GUI tools are an attractive option to many developers, as they provide an easy interface for managing a project with Git. Though we arguably gain a deeper understanding of Git by learning it through the command line, GUI tools have their place, especially in simple situations. One issue with using GUI tools is that it’s easy to forget proper Git commands. This is problematic if you find yourself in an environment without GUI software, or if you need to run emergency commands from the command line—such as working on a remote server. I suggest using a combination of GUI tools and the command line, utilizing the advantages of each.
I’ll now look at GitHub Desktop and Sourcetree in turn, evaluating their features and ease of use. Note that Git GUI tools frequently change their UI, so the screenshots below may differ a little across versions and operating systems.
GitHub Desktop
Let’s first take a look at the GUI client of GitHub itself. It supports both Windows and macOS. The Windows and macOS versions of GitHub’s previous clients differed, but in August 2015 GitHub launched GitHub Desktop as a new, unified client for both platforms.
After installation, you should add your GitHub account details.
Not Just for GitHub
You can manage other local Git repositories with GitHub Desktop too, but it’s tailor made for GitHub repositories. Although a bit confusing, you can even manage Bitbucket repositories through the GitHub GUI tool!
When you successfully log in to your account, all your repositories are linked to your GUI tool. You can create a new repository through the New Repository… option from the File menu. You can also see a list of your repositories under the Clone Repository… option.
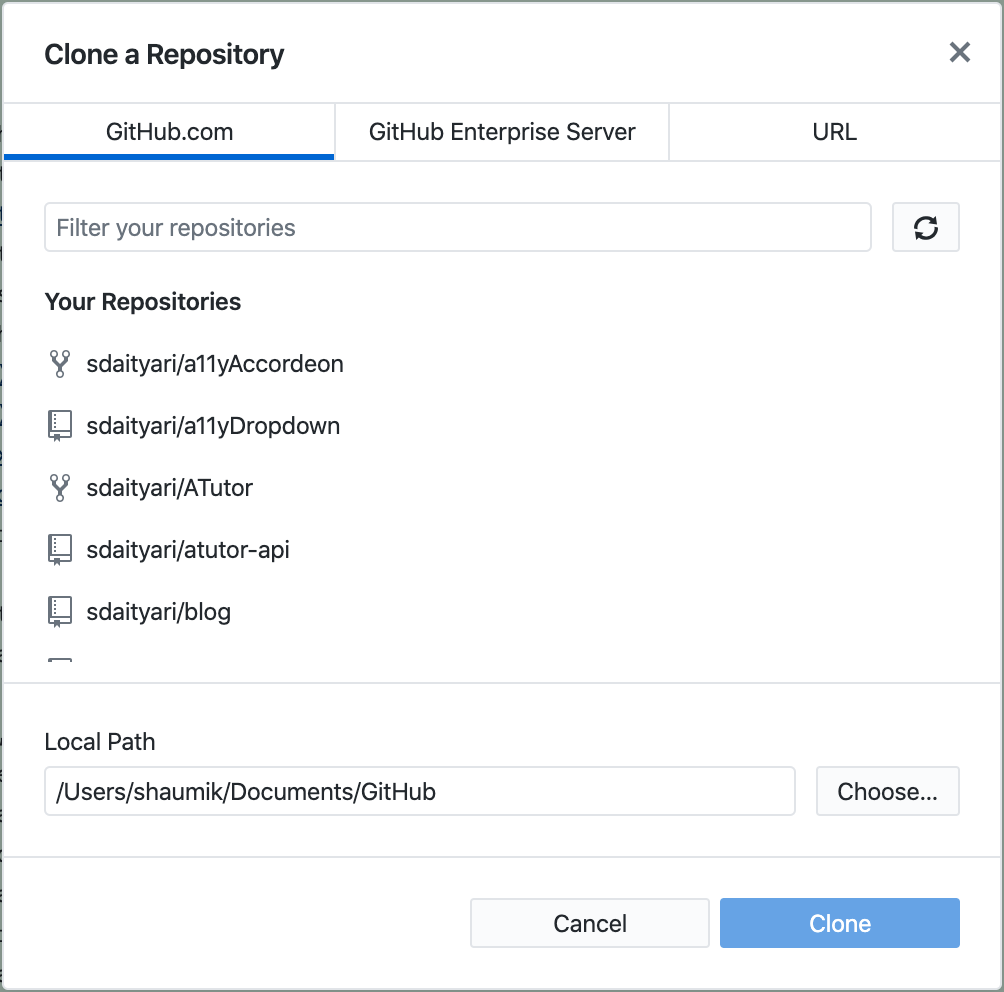
Select the repository you want to clone, and click on Clone to clone it.
Alternatively, you can add a local Git repository by choosing the Add Local Repository… option in the File menu. You’re then asked to select the path to an existing Git repository on your local system.

Once you’ve added your repository, you’ll notice that it’s now listed among the tracked repositories in the repositories list (Current Repository tab, top-left). If you add a GitHub repository, it will be listed under your username on GitHub, whereas if you add a local repository, it will be listed under Other.

Once a repository is selected, the commits in the current branch are listed. The UI resembles the GitHub website. If any commit is selected, the commit details are shown too. The workflow in the current branch is shown at the top.
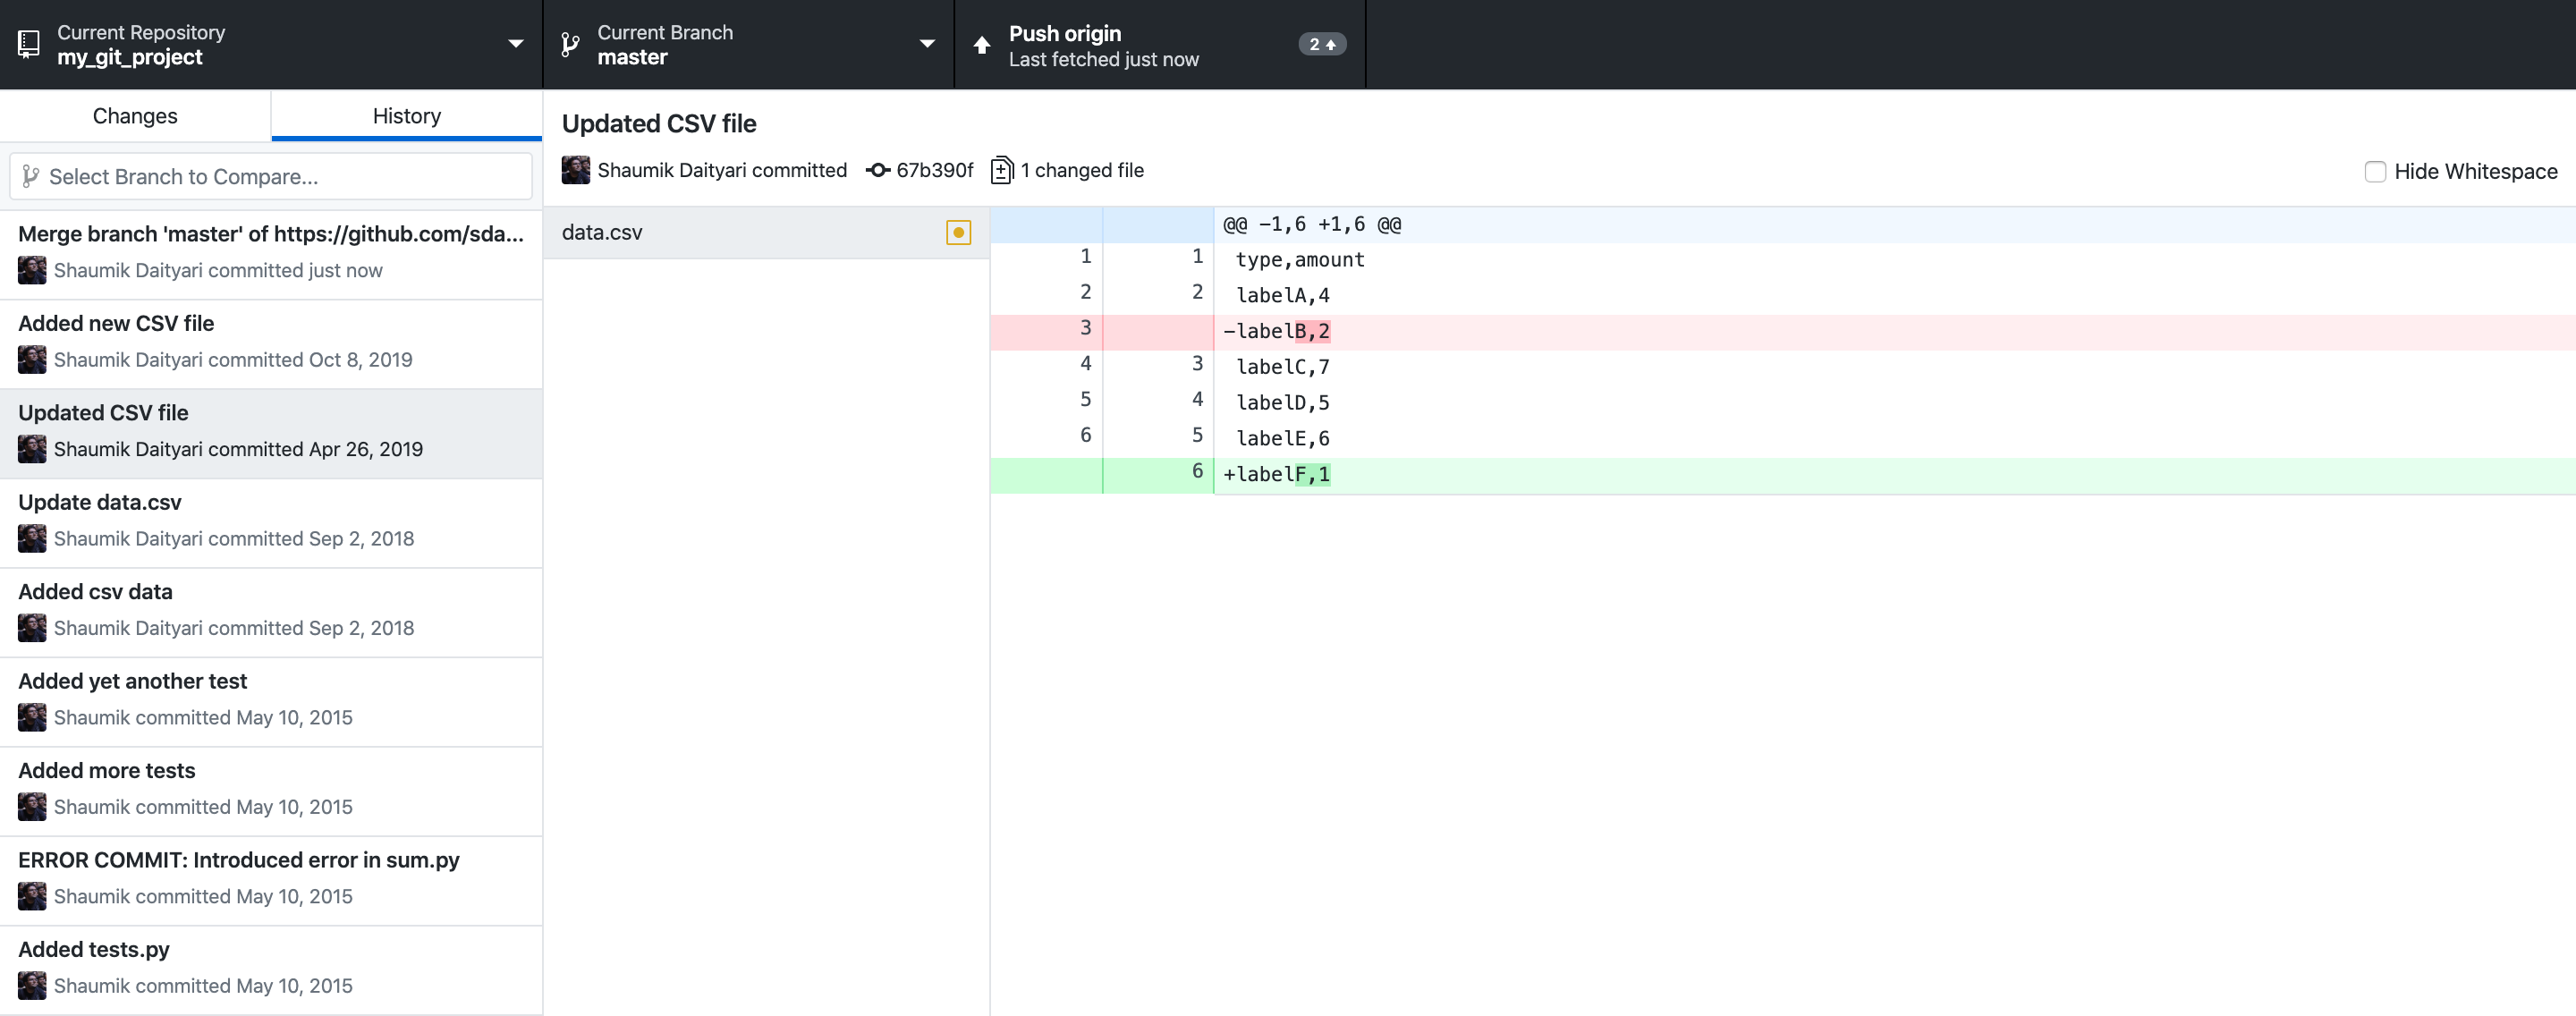
On selecting Show History from the View menu, you’re shown the commits in the active branch. On selecting a specific commit, you’re shown the changes that were made in that commit:
Let’s move on from comparing branches to creating or changing a branch. To create a branch, click on the Current Branch tab and enter the name of the new branch. It will be created from the current active branch.
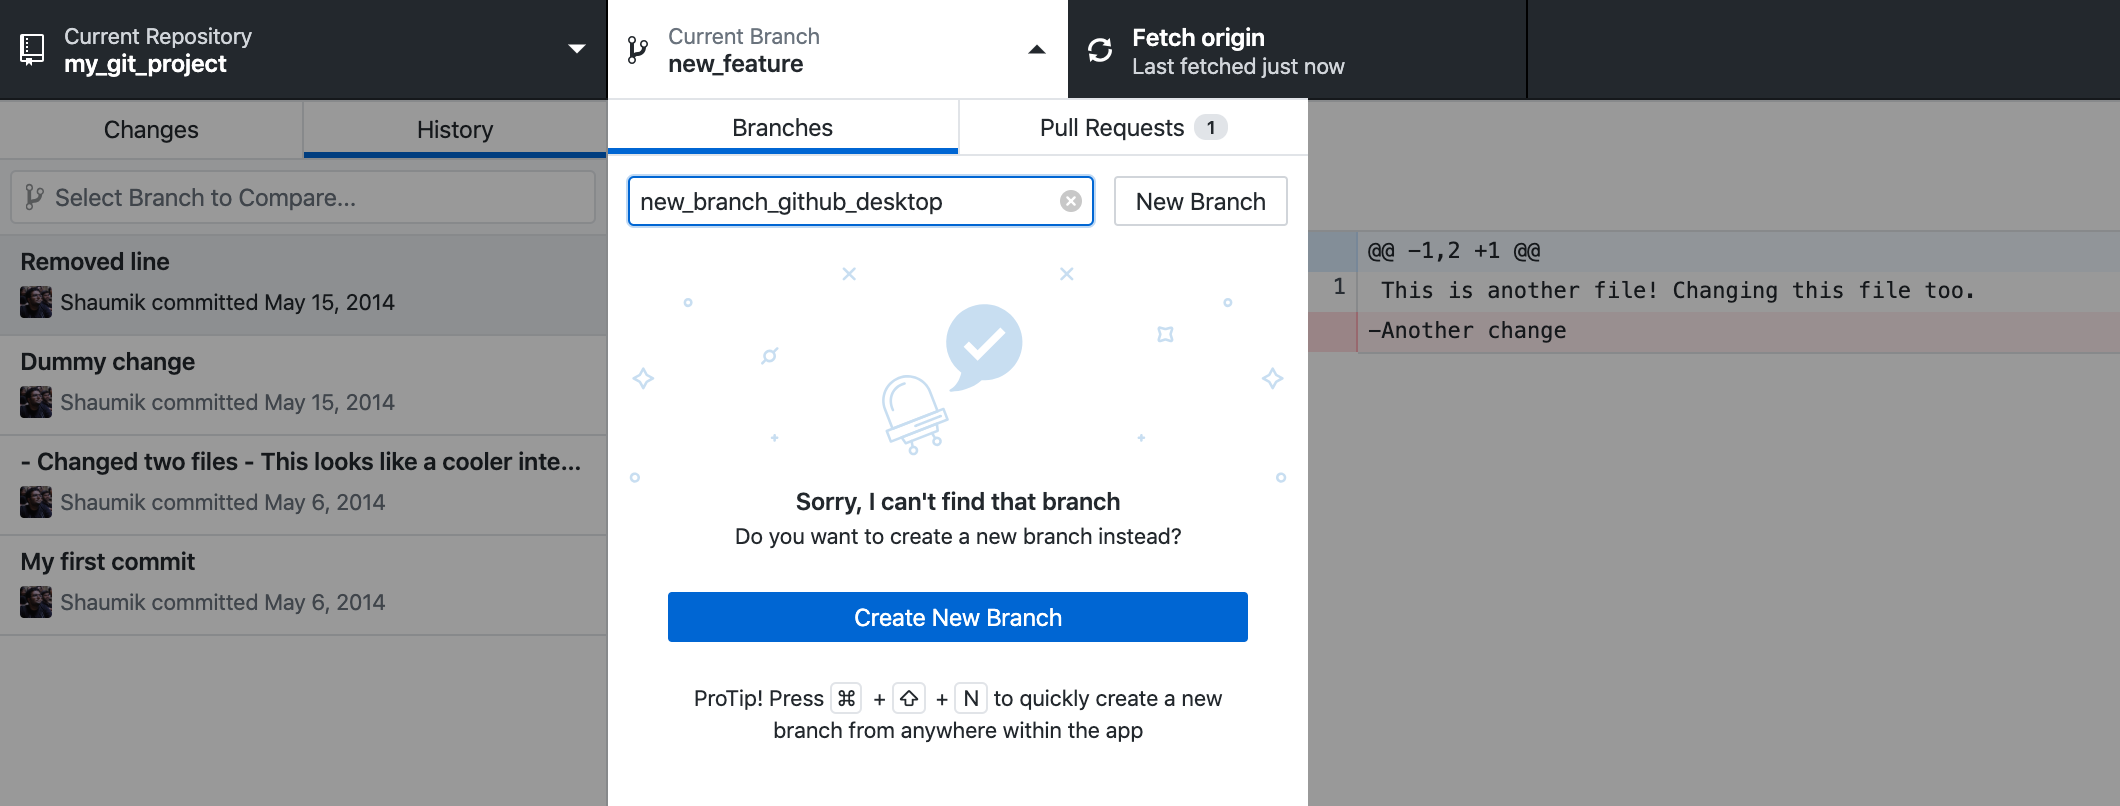
To change your current active branch to a different one, simply select a new branch from the list of branches.
On the top right of the window, there’s the Fetch Origin option, which gets the latest commits from your origin remote. You can create a pull request from within the GUI client by first comparing two branches and then creating the pull request, just like you do on the GitHub website.
Any changes made to the repository are visible in the Changes tab (top left). It lists the changes in the files, but note that there’s no mention of the term “staging”. You simply select the files you want to include in the commit and add a commit message before committing the changes, which makes the process simpler for beginners.
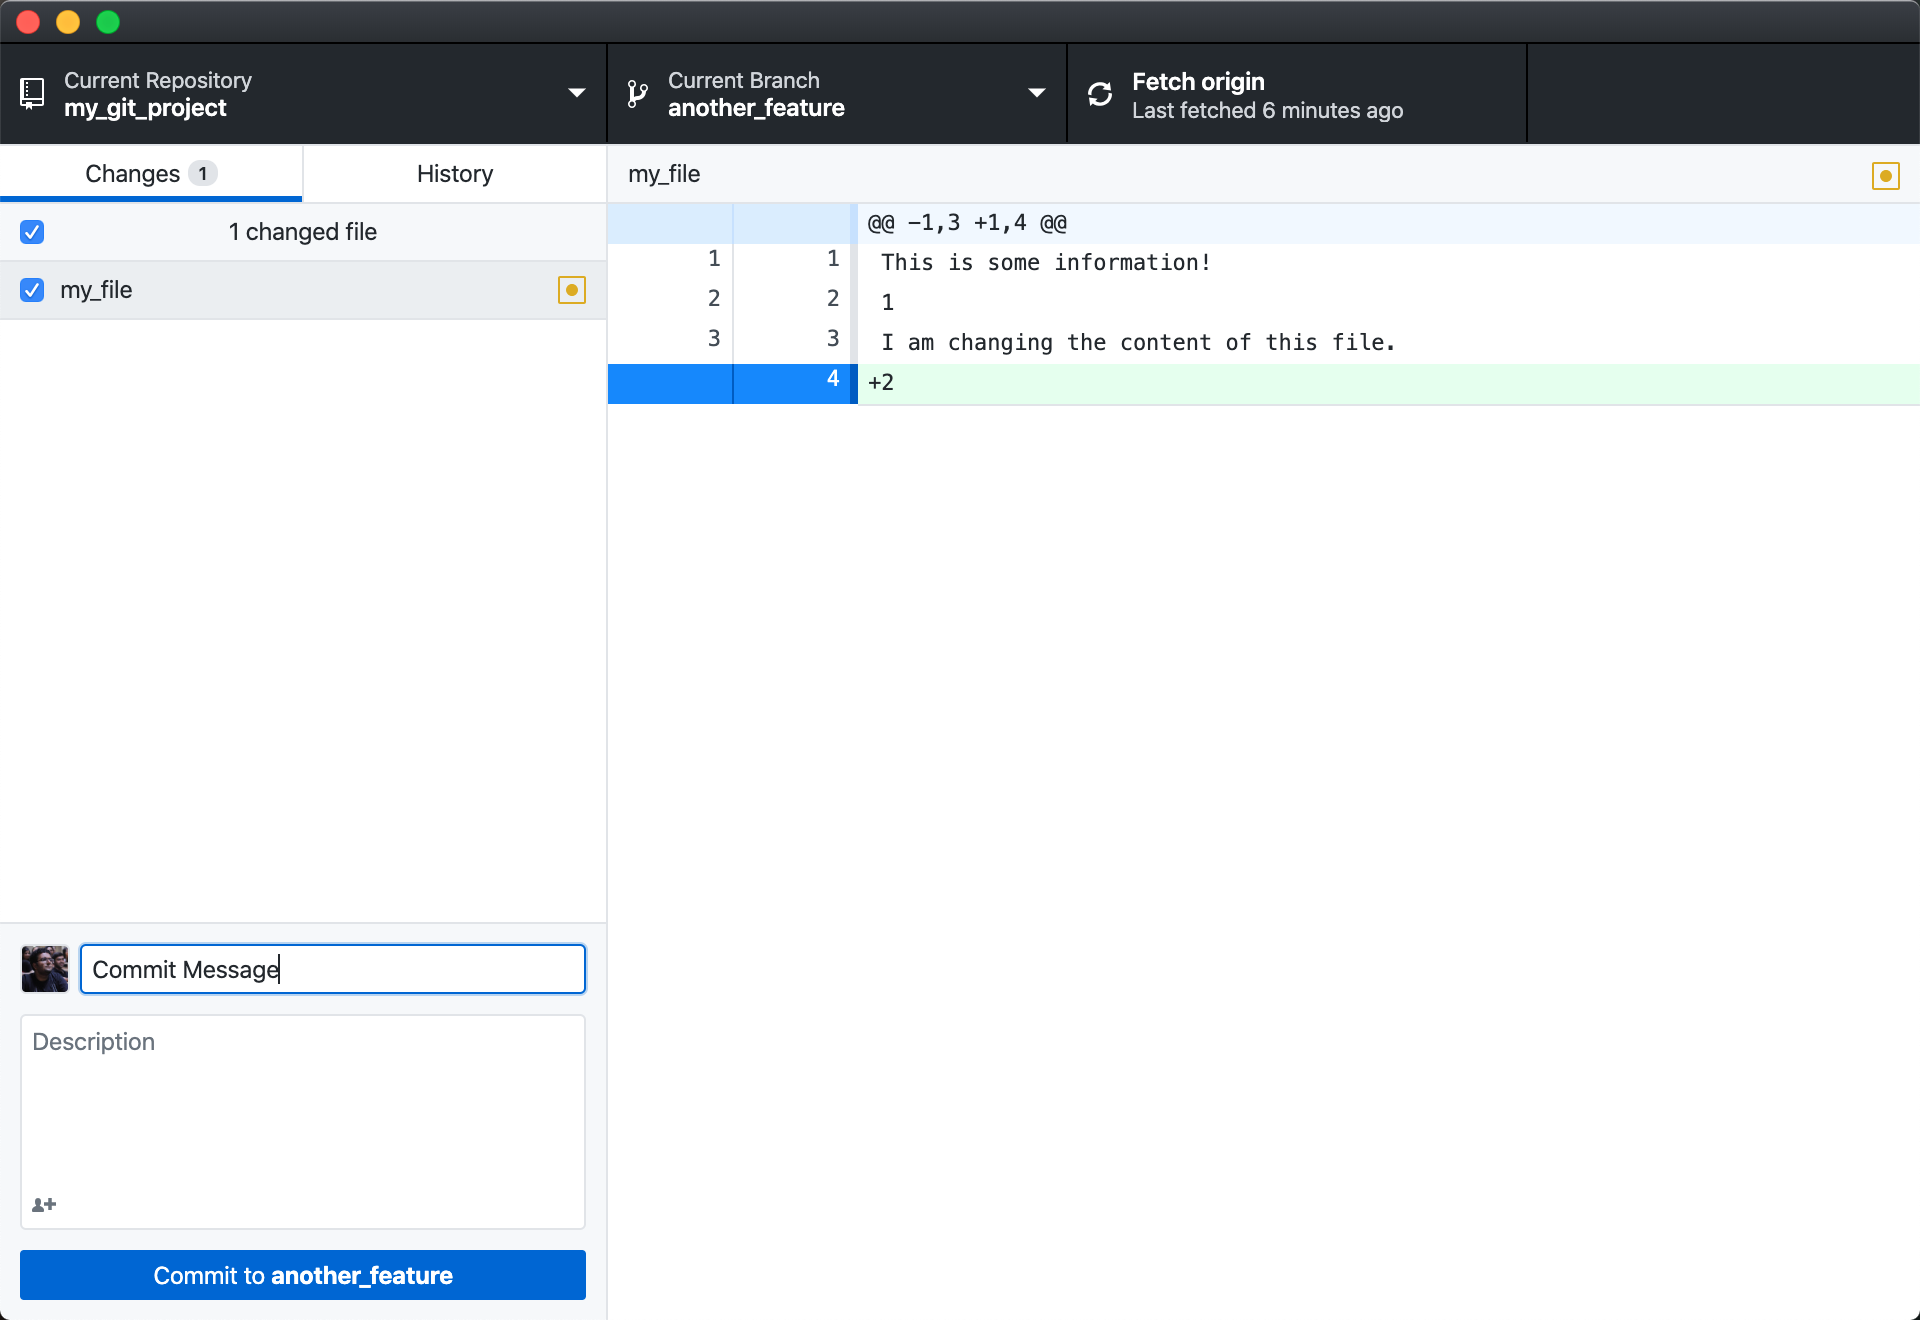
Once you’ve committed the changes, the Fetch Origin button changes to Push Origin, which first fetches commits from the origin and then pushes your new commits. On pushing to a branch of origin that’s not the master branch, a Create Pull Request button comes up, which redirects you to the appropriate link on the GitHub website.
GitHub Desktop tries to simplify the process of source code management, which is good for a beginner who’s trying to learn Git. Let’s now explore Sourcetree, which has a wider range of functions.
Sourcetree
Sourcetree is a GUI client developed by Atlassian. It’s compatible with repositories managed by both Git and Mercurial, another distributed VCS. Sourcetree can use the version of Git already installed on your local system, or a version that’s bundled with Sourcetree itself. You can download and install the application from the Sourcetree website.
Sourcetree offers a wider range of features than GitHub’s tool, and gives you more control over your repositories. Its various options also better match the corresponding terminal commands.
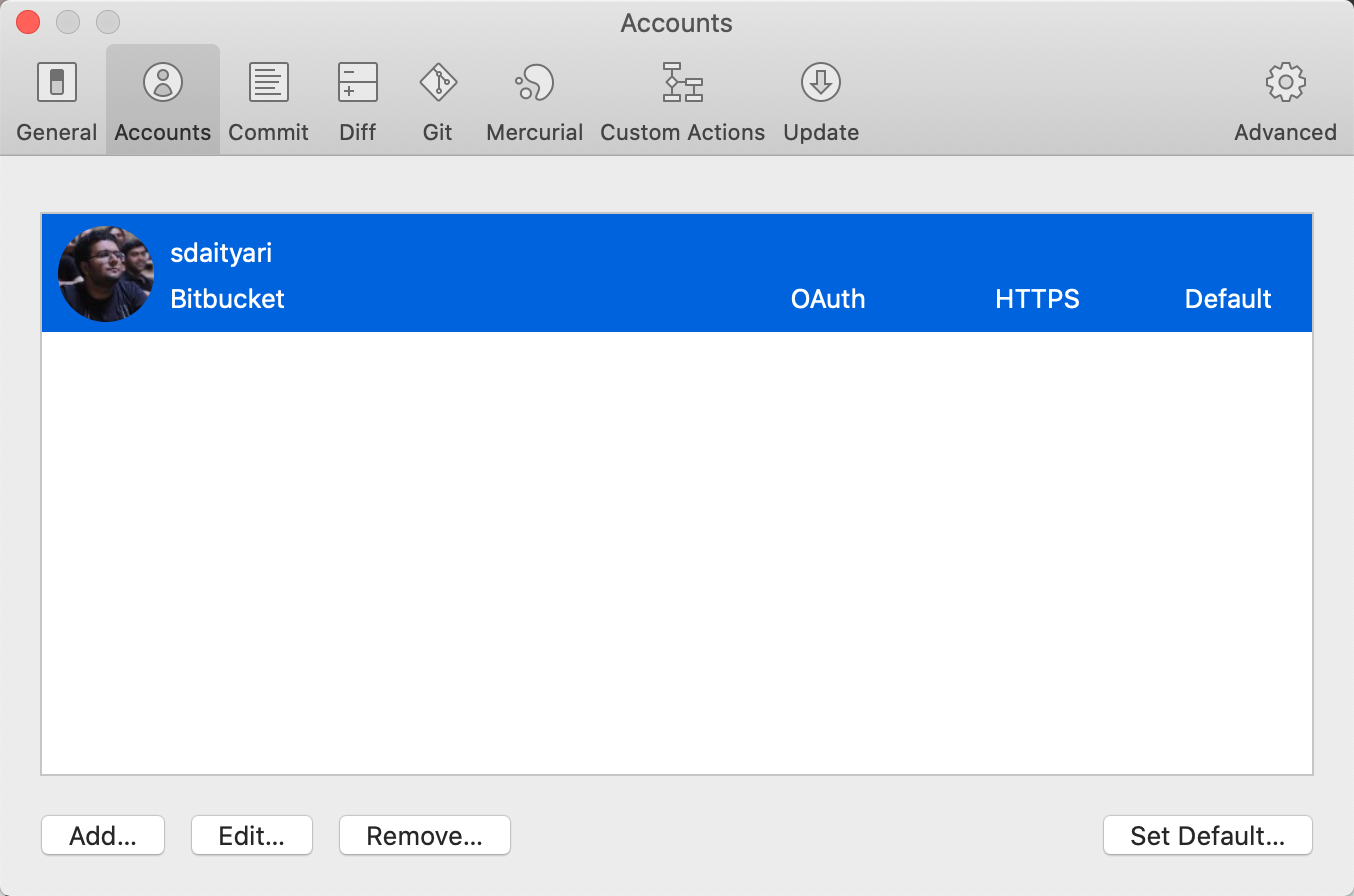
During installation, you’re invited to add details of any accounts you hold at code sharing websites like GitHub and Bitbucket. If you skip this step, you can add accounts later in the Accounts tab of Preferences.
After adding your cloud accounts, you’re shown the list of repositories in your connected accounts.
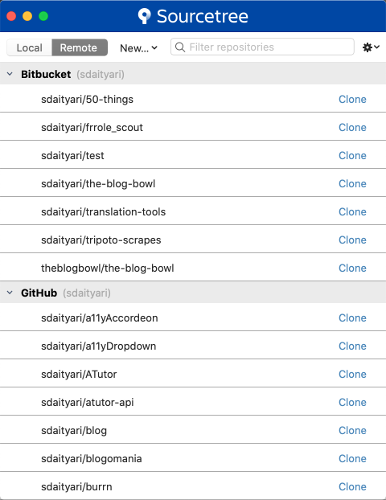
The repositories listed here are present only on the cloud, so they need to be cloned before you can start working on them locally. Click on the Clone link on the right of any repository to clone it.

After confirming the details, the remote repository is cloned to the location you specified in the last step.
Alternatively, you can add a local repository to Sourcetree by clicking on the +New Repository button. Once you’ve added a repository, a new window opens with the details of the repository.

As highlighted in the image above, the window has three parts: the top menu, the left menu, and the main body. The top menu contains buttons that perform important actions in Git. The left menu lists the branches, remotes, stashes and submodules. The main body contains the list of commits in the active branch and the details of each commit.
If you look at the top menu (Figure 9-11 below), you’ll notice that it contains buttons for performing basic Git actions like commit, pull and push. There’s also an option to open up a terminal in case you want to run a custom command.

The Branch button helps you checkout to a new or an existing branch.

When you make changes to any file, the list of changed files pops up in the space for unstaged files (Figure 9-13 below). You can stage them by clicking the Add button on the top—after which they appear in the staged list. You can also remove staged files using the Remove button at the top.

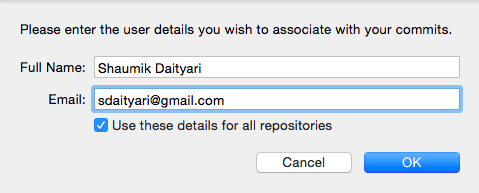
Once you’re ready to make a commit, click on the Commit button. For your first commit, you’re asked to nominate a name and email address to be associated with your commits (Figure 9-14 below). This is similar to setting the global configuration settings through the terminal. From now on, your email address and name will be associated with this commit, as well as any future commits.
After adding your name and email, you’re asked to add a message describing your commit.

After a successful commit, notice the state of the repository and the change in the branch workflows: the blue color shows the current commit—which hasn’t been merged with origin/master, denoted by yellow.

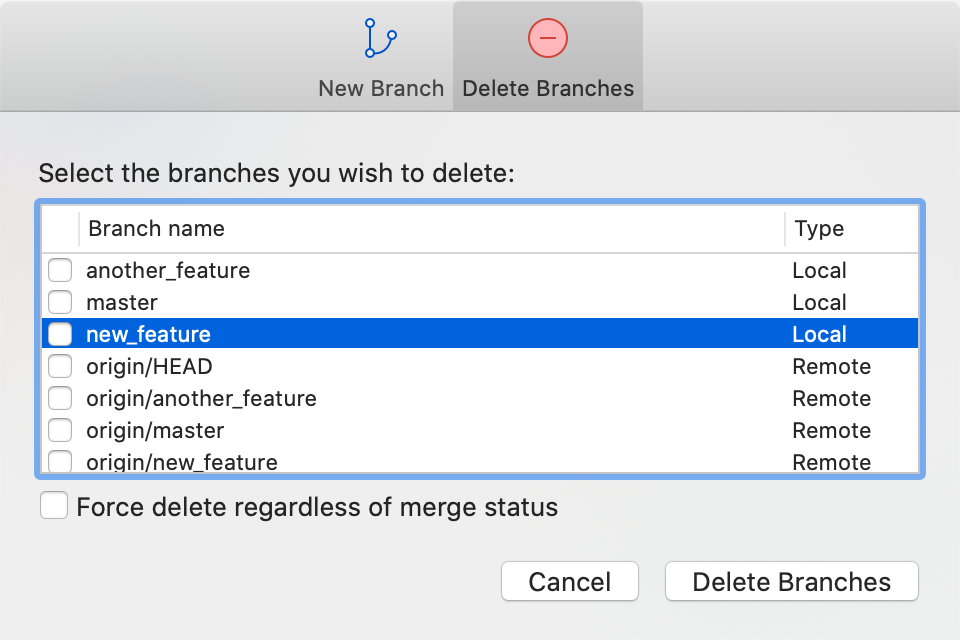
You can add or remove branches by clicking the Branch button in the top menu. You can force delete a branch even if it hasn’t been merged yet, as shown in Figure 9-17 below. (This is analogous to the -D option in the terminal.) You can merge branches through the Merge button in the top menu. If you want to merge branch_A into branch_B, make sure branch_B is active when you perform the merge operation.
Let’s now have a look at the left menu, shown in Figure 9-18 below. It shows a list of branches, tags, remotes, stashes and submodules.

In this case, master and gh-pages are the two branches, and origin is the only remote. We also have one stash created on the master branch, which is shown in the screenshot above. Sourcetree’s stash option is a powerful, easy-to-use feature. You can apply any stash to your HEAD, with the option of keeping or removing the stash. Submodules are Git repositories within a parent repository. We haven’t covered submodules in this book. This repository uses a google_app submodule.
In addition, commit-based actions like checking out to the commit, cherry picking or creating a patch can be performed by right-clicking on a commit, as shown below.

Sourcetree versus GitHub Desktop
Both Sourcetree and GitHub Desktop are free to use.
Sourcetree has a lot of features, with an information-rich display that directly relates to Git’s terminal commands. Desktop, on the other hand, focuses more on bridging the gap between a local GitHub repository and the GitHub website, often substituting standard Git terms and processes with easier terms for beginners. It eases the process of hosting your repositories on GitHub, but makes it difficult—though not impossible—to host your repository elsewhere.
Finally, Desktop simplifies the whole process by cutting down on certain features, whereas Sourcetree offers a full-featured dashboard that might be overwhelming for beginners. I encourage you to try both GUI tools, perhaps along with a few more listed at the beginning of this chapter, to work out which best suits your needs.
Conclusion
In this chapter, I reviewed two GUI tools for Git—Sourcetree and GitHub Desktop.
GUI tools are definitely useful. When using them, the history of a project, with respect to the different branches, is easily visualized. Even when you’re working on a project, it’s useful to graphically analyze the changes you’ve made before committing them into the project history. Even when you’re reviewing the work of others, it’s a good idea to use a GUI tool to quickly review the changes.
Even though I find GUI tools to be great, if you’re a beginner, I’d still recommend you learn the terminal commands first. As I mentioned above, GUI tools aren’t cross platform, whereas terminal commands are. There’s no single tool that works the same in Windows, macOS and Linux. Also, if you’re working on a remote server (which is often a virtual machine), only command-line tools can help you work with Git. And knowing terminal commands will help you understand how these GUI tools work.
So for beginners and experienced users alike, I recommend using a combination of GUI tools and the terminal. Each has its pros and cons, which you’ll discover through practice.