If you want to know how a malware will behave, the easiest way to achieve that goal is to let it run rampant in your network, and track its behavior in the wild. This is not how you want to get to understand the malware's behavior. You might easily miss something that your network environment doesn't enact, and now you have to remove the malware from all of the machines in your network. Kali has some selected tools to help you do that. This chapter also covers stress testing your Windows server or application. This is a great idea, if you want to discover how much DDoS will turn your server belly-up. This chapter is the beginning of how to develop an anti-fragile, self-healing, Windows network.
This chapter will cover the following topics:
- Setting up a test environment
- Reverse engineering theory
- Working with Boolean logic
- Practicing reverse engineering
- Debuggers
- Disassembly
- Miscellaneous RE tools
- Stress testing your Windows machine
There are some changes in the reverse engineering tools available in Kali Linux 2.0 compared to the tools in Kali Linux 1.x. Some tools have disappeared from the menu structure, and you can use the last section of Chapter 6, Password Attacks of this book to put them back if you wish. Some tools have not been included in Kali Linux 2 at all, though there are traces of them here and there. The following table below shows the changes.
Tools showing full paths are not in the default Kali 2.0 menu at all, and NASM Shell, a part of the Metasploit Framework suite of tools, was not in the Kali 1.x menu:

Developing your test environment requires virtual machine examples of all of the Windows operating systems you are testing against. For instance, an application developer might be running very old browser/OS test machines, to see what breaks for customers running antique hardware. In this example, we are running Windows XP, Windows 7, and Windows 10. We are using Oracle VirtualBox for desktop virtualization, but if you are more comfortable using VMWare, then use that instead. It is important to use machines that you can isolate from the main network, just in case the malware acts as it should, and attempts to infect the surrounding machines.
If you already have Windows VMs set up for some other purpose, you can either clone them (probably safest) or run from a snapshot (fastest to set up). These machines should not be able to access the main network, after you have built them, and you should probably set them up only to communicate with an internal network.
- Bring up your Kali VM.
- Make sure your Kali instance can talk to the Internet, for ease of getting updates.
- Make sure your Kali instance can talk to your host machine.
- Bring up your target Windows instances.
- Make sure your Windows victims are not able to contact the Internet or your private Ethernet LAN, so to avoid unexpected propagation of malware.
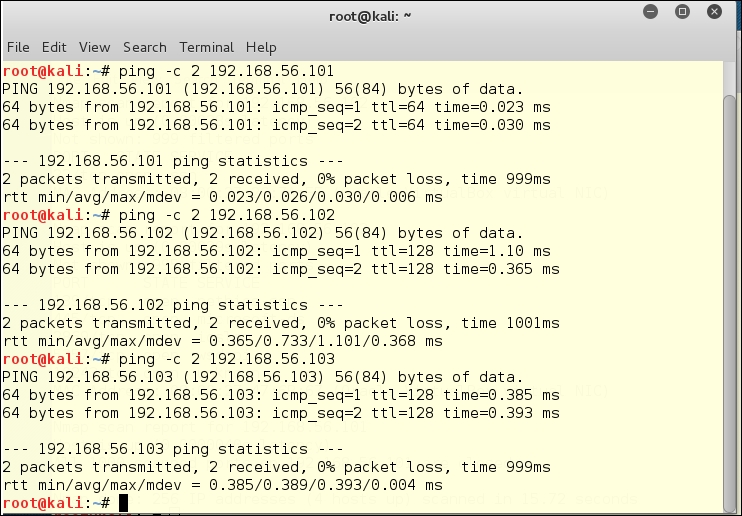
The three virtual machines on our test network are on a host-only network inside Oracle VirtualBox. The DHCP is provided by the host (192.168.56.100), and the three testing network machines are 101, 102, and 103.