
Document data displays all the documents in the selected index. By default, document data shows 500 documents listed, with the most recent documents shown first. By default, document data displays the localized version of the specified time field in the selected index and document of field _source. In document data you can add field columns, remove field columns, view document data, and sort documents.
It is very simple to add a field to document data. Fields can be added from the Fields list, which is at the left side of the Discover page and below the index name.
To add a field to document data:
- Hover your mouse over any field from the Fields list and click on the Add button as shown:

- Repeat the previous step until all fields that you want to be displayed have been added to the document data.
For example, you want to add fields such as _index, user.name, user.screen_name, language, then by adding such fields document data would display all the documents on the basis of these fields only.
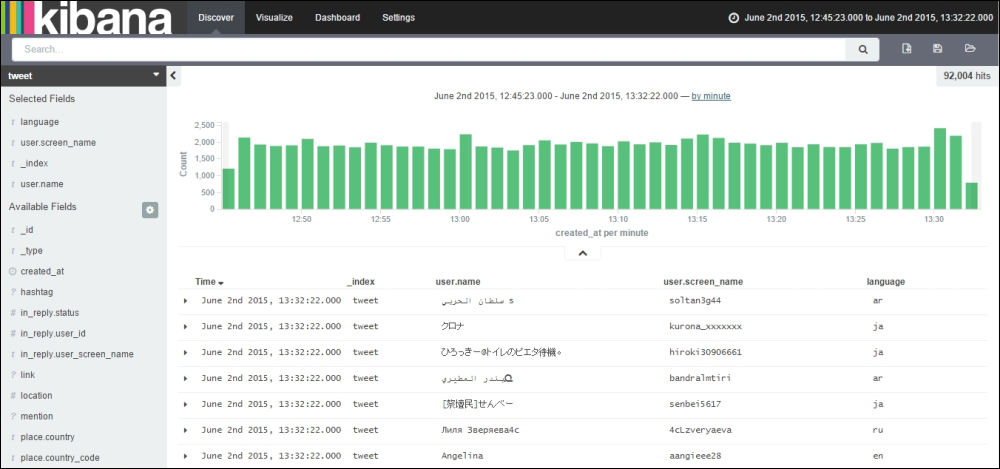
In the previous figure, you can see all the document data containing the selected fields.
It is very simple to remove a field from document data. Fields can be removed from the selected Fields list, which is at the left-hand side of the Discover page and below the index name.
To remove a field from document data, perform the following steps:

To view the data in document data, perform the following steps:
-
Click on the expand button option characterized by the
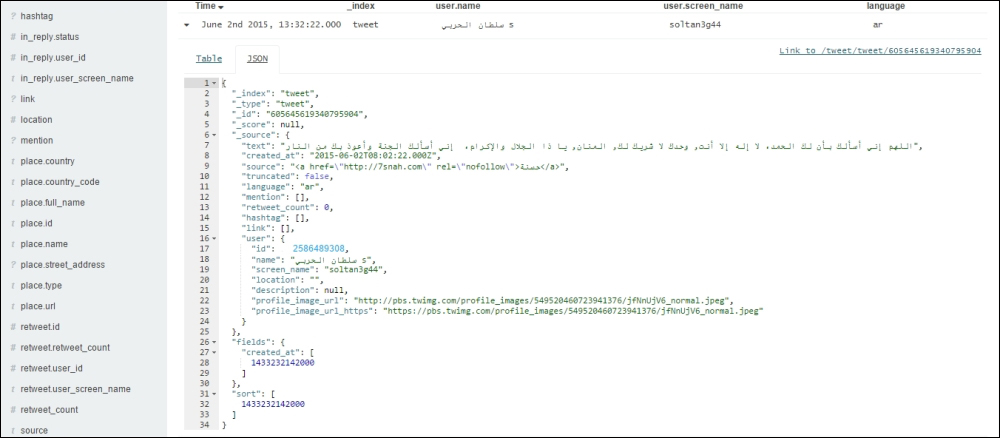
 symbol, which is found in the extreme left at the start of a document, beside the document's first column (generally, this is Time). Kibana reads the document stored in Elasticsearch and displays it in tabular format showing all the document's fields. In the table, each row contains the field name followed by two filter buttons (the positive filter and the negative filter) and the field value:

- Kibana can also display the document with all the field names and values in JSON format (pretty-printed), which was the original input format to Elasticsearch. To view documents in JSON format, click on the JSON tab:
- Kibana can also display document data in a separate page, which can be accessed by clicking on the hyperlink provided, mentioned as Link, followed by index name, type name, and
_idname. The link is provided on the right-hand side of the Table tab and JSON tab:
- After clicking on the link, you will be redirected to a new tab in which the document is displayed in both the Table format and the JSON format. Also you can then share the link (URL) or bookmark the link (URL) for directly accessing the particular document:

In the previous figure, you will notice the URL follows a format that is defined by specifying the host name on which Kibana is running, followed by
doc(indicating document), index name, type name, and the_idname for the particular document.
To collapse document data, click on the collapse button characterized by the ![]() symbol, which is found in the extreme left at the start of a document, beside the document's first column (generally, this is Time).
symbol, which is found in the extreme left at the start of a document, beside the document's first column (generally, this is Time).
The sorting of document data can be done using the values in the indexed field. If there is any time field configured for a particular index name then, by default, documents are listed in reverse chronological order, with the newest documents on the basis of time shown first. For sorting documents, fields have to be added first to document data, which has been explained earlier in this chapter.
To change the sorting order within document data after adding a field, choose the field on the basis of which you want to sort your data. Then click on that specific field. The fields on the basis of which you can sort have a small Sort button, which is to the immediate right of the field name. You can also reverse the sort order by clicking on the field name the second time:

You can rearrange the fields displayed in document data after adding the fields.
To rearrange the fields in the table, hover your mouse over the field name that you want to move. Just to the right-hand side of the field name (beside the Sort button), there is the option to move a column either to the right-hand side (>>) or left-hand side (<<) wherever applicable. If there is a time field specified in the index, the time value does not have an option of moving as the field is, by default, added and is not the added field. The left-most field name (after the time field) can only be moved towards the right-hand side:
The right-most field name can only be moved towards the left-hand side:
All the fields between them can be moved either to the left side:
Alternatively, they can be moved to the right-hand side: