
CHAPTER 12
Understanding Basic Security
Objectives: This chapter changes that; it describes important account principles and a few commands that you can use to begin investigating accounts. Related to accounts are groups, which are collections of accounts that can be given special permissions on the computer, so this chapter also describes groups. One account, known as root, has special privileges on the computer. Some administrators use this account to perform system administration tasks, but that is now considered a bad practice. So you should understand this account and what to use in its place before tackling the administrative tasks described in the last few chapters of this book. These important topics are at the foundation of system security. Accounts enable multiple users to share a single computer without causing one another too much trouble. They also enable system administrators to track who is using system resources and, sometimes, who is doing things they shouldn’t be doing. Account features help users use a computer and administrators administer it. Understanding these features is the basis for enabling you to manage accounts. Some account features help you identify accounts and the files and resources associated with them. Knowing how to use these features will help you track down account-related problems and manage the computer’s users. The information contained in the fields of this record includes the following: Username An account’s username is its most relevant feature. Most Linux account usernames consist of lowercase letters, and occasionally numbers, as in rich or thx1138. Underscores (_) and dashes (-) are also valid characters in some Linux distributions’ usernames. Password User accounts are typically protected by a password, which is required to log into the computer. Direct login to most system accounts is disabled, so they lack passwords. (The root account is an important exception on some distributions; it may have a password.) The password field in the /etc/passwd file usually contains an x, which is a code meaning that the password is stored in /etc/shadow, as described shortly. UID In reality, the username is just a label that the computer displays to us numerically challenged humans. The computer employs a user identification (UID) number to track accounts. UID numbers begin with 0 (which refers to the root account). In most distributions, user accounts have UID numbers at 1,000 and above, with lower numbers reserved for system accounts. GID Accounts are tied to one or more groups, which are similar to accounts in many ways; however, a group is a collection of accounts. One of the primary purposes of groups is to enable users to give certain other users access to their files, while preventing users not in a designated group from accessing them. Each account is tied directly to a primary group via a group ID (GID) number (100 in the preceding example). By including an account in a group’s definition, accounts can be tied to several groups as described in Chapter 13, “Creating Users and Groups.” Comment Field The comment field normally holds the user’s full name (Richard Blum in this example), although this field can hold other information instead of or in addition to the user’s name. Home Directory User accounts, and some system accounts, have home directories
(/home/rich in this example). A home directory is an account’s “home base.” Normally, ownership of an account’s home directory belongs to the account. Certain tools and procedures make it easy for users to access their home directories; for instance, the tilde (~) refers to a user’s home directory when used at the start of a filename. Default Shell A default shell is associated with every account. In Linux, this shell is normally Bash (/bin/bash), but individual users can change this if they like. Most non-root system accounts set the default shell to /usr/sbin/nologin (or /sbin/nologin) as an added security measure—this program displays a message stating that the account is not available. Using /bin/false works in a similar way, although without the explanatory message. Passwords today are stored in another file, /etc/shadow, that ordinary users can’t read. This file associates a salted and hashed password, as well as other information, with an account. This information can disable an account after a period of time or if the user doesn’t change the password within a given period of time. A typical /etc/shadow entry looks like this: The meaning of each colon-delimited field on this line is as follows: Username Each line begins with the username. Note that the UID is not used in
/etc/shadow; the username links entries in this file to those in /etc/passwd. Password The password is stored as a salted hash, so it bears no obvious resemblance to the actual password. An asterisk (*) or exclamation mark (!) denotes an account with no password (that is, the account doesn’t accept logins—it’s locked). This is common for accounts used by the system itself. Last Password Change The next field (18114 in this example) is the date of the last password change. This date is stored as the number of days since January 1, 1970. Days Until a Change Is Allowed The next field (5 in this example) is the number of days before a password change is allowed. This is used to prevent users from changing their passwords (as required) and then changing them right back to the original password. Days Before a Change Is Required This field (30 in this example) is the number of days before another password change is required (since the last password change). Days of Warning Before Password Expiration If your system is configured to expire passwords, you may set it to warn the user when an expiration date is approaching. A value of 7 is typical. However, 14 days, as shown in the preceding example, may be appropriate if your company’s employees take two-week vacations. Days Between Expiration and Deactivation Linux allows a gap between when the account expires and when it is completely deactivated. An expired account either can’t be used or requires that the user change the password immediately after logging in. In either case, its password remains intact. A deactivated account’s password is erased, and the account can’t be used until the system administrator reactivates it. A -1 in this field, as shown in the preceding example, indicates that this feature is disabled. Expiration Date This field shows the date on which the account will expire. As with the last password change date, the date is expressed as the number of days since January 1, 1970. A -1 in this field, as shown in the preceding example, indicates that this feature is disabled. Special Flag This field is reserved for future use and normally isn’t used or contains a meaningless value. This field is empty in the preceding example. For fields relating to day counts, typically a value of -1 or 99999 or no value (blank) indicates that the relevant feature has been disabled. The /etc/shadow values are generally best left to modification through commands such as usermod (described in Chapter 13) and chage. Understanding the format of the file enables you to review its contents and note any discrepancies, which could indicate that your system has been compromised. The /etc/shadow file is usually stored with restrictive permissions, with ownership by root. This fact is critical to the shadow password system’s utility because it keeps non-super users from reading the file and obtaining the password list, even in a salted and hashed form. By contrast, /etc/passwd must be readable by ordinary users and usually has less restrictive permissions. It’s important to realize that an account isn’t a single entity like a program binary file. Account information is scattered across several configuration files, such as /etc/passwd,
/etc/shadow, /etc/group, and possibly in other configuration files that refer to accounts. User files reside in the user’s home directory and perhaps elsewhere. Thus, managing accounts can require doing more than just maintaining a file or two. For this reason, various utilities exist to help create, manage, and delete accounts, as described in the rest of this chapter and in Chapter 13. One way to identify user accounts is to use a GUI tool for account management. Such tools vary from one distribution to another. One example is the Users and Groups account tool on a Linux Mint system. You can reach this tool by clicking Menu in the main window and then typing
user in the search box, as shown in Figure 12.1. Figure 12.1 Locating the Users and Groups account tool on Linux Mint Accessing this option produces a window similar to the one shown in Figure 12.2 but only if you have super user privileges and provide the appropriate password. This tool shows only user accounts, not system accounts. It enables changing a few features, such as a user’s password, by clicking them, but its usefulness as an account management tool is limited. Figure 12.2 The Users and Groups account tool provides minimal account information. You can identify all of a computer’s accounts by viewing the /etc/passwd file’s contents with cat or less. Doing so will reveal all accounts, including both system and user accounts. Alternatively, if you’re searching for information on a specific account, you can use grep to find it in /etc/passwd, as in
grep rich /etc/passwd to find information on any account that’s tied to a user with the username rich. (This specific example assumes that the string rich appears in the passwd file, of course.) An alternative that’s similar to perusing /etc/passwd is to type
getent passwd. The getent command retrieves entries from certain administrative databases, including the
/etc/passwd file. In most cases, typing
getent passwd produces results that are identical to typing cat /etc/passwd; however, sometimes the two aren’t identical. The
/etc/passwd file defines only local user accounts. It’s possible to configure Linux to use
a network account database to define some or all of its accounts. If you use such a configuration, typing
getent passwd returns both local accounts and accounts defined on the network server. Many networks employ network account databases. Such systems may include the Lightweight Directory Access Protocol (LDAP), Kerberos realms, and Active Directory (AD) domains. All of these systems move account database management onto a single centralized computer (often with one or more backup systems) or distributed across a designated system set. The advantage is that users and administrators need not deal with maintaining accounts independently on multiple computers. A single-account database can handle accounts on dozens (or even hundreds or thousands) of different computers, greatly simplifying day-to-day administrative tasks and also simplifying users’
lives. Using such a system, though, means that most user accounts won’t appear in
/etc/passwd and /etc/shadow, and groups may not appear in /etc/group (described shortly, in “Understanding Groups”). These files will still hold information on local system accounts and groups, though. Linux can participate in these systems. In fact, some distributions provide options to enable such support at OS installation time. Typically, you must know the name or IP address of the server that hosts the network account database, and you must know what protocol that system uses. You may also need a password or some other protocol-specific information, and the server may need to be configured to accept accesses from the Linux system that you’re configuring. Activating use of such network account databases after installing Linux is a complex topic that is not covered in this book. Such systems often alter the behavior of tools such as passwd and usermod (described in Chapter 13) in subtle or not-so-subtle ways. If you need to use such a system, you’ll have to consult documentation specific to the service that you intend to use. The fields in /etc/group are as follows: Group Name The first field, users in the preceding example, is the name of the group. You use it with most commands that access or manipulate group data. Password Groups, like users, can have passwords. A value of x means that the password is defined elsewhere (but may be disabled), and an empty password field means that the group has no password. GID Linux uses GID values, like UID values, internally. Translation to and from group names is done by the system for the benefit of users and administrators. User List You can specify users who belong to the group in a comma-delimited list at the end of the /etc/group record. It’s important to recognize that users can be identified as members of a group in either of two ways: By Specifying the Group’s GID in Users’ Individual
/etc/passwd Entries Because
/etc/passwd has room for only one GID value, only one group can be defined in this way. This is the user’s primary (or default) group. By Specifying Usernames in the User List in the
/etc/group File A single user can appear multiple times in /etc/group, and a single group can have multiple users associated with it in this way. If a user is associated with a group in this way but not via the user’s
/etc/passwd entry, this group association is secondary. When you create new files, those files will be associated with your current group. When you log in, your current group is set to your primary group. If you want to create files that are associated with another group to which you belong, you can use the newgrp command, as follows: This command makes project1 your current group, so that the files you create will be associated with that group. Group ownership of files is important in file security, which is described in more detail in Chapter 14. A few commands can help you learn about the users and groups on your computer. Most notably, the whoami and id utilities can tell you about your own identity, and the who and w utilities can give you information about who is currently using the computer. If you maintain multiple accounts for yourself and you don’t recall which one you used to log in, you might become confused about your current status. In such a case, the whoami command can come in handy. It displays your current user ID: This example shows information on both users and groups:
The id command displays both the numeric UID and GID values and potentially the associated names. The current group is the one that’s active, either by default or because you used the newgrp command. You can limit id’s output by specifying various options, as summarized in Table 12.1. In addition, you can specify a username, as in
id rich, to obtain information on that user rather than on yourself. Table 12.1 Options for
id Linux permits multiple users to access the computer simultaneously. Most often, this is done by means of remote access servers such as the Secure Shell (SSH); however, you can use Linux’s virtual terminal (VT) feature to log in multiple times with a single keyboard and monitor. Sometimes, you might want to know who is using the computer. You might do this before shutting down the computer, for instance, to ensure that you don’t inconvenience another user. This example shows five logins—christine, steph, rich, devon, and ken. Information provided in the default output includes the following: Username The first column of who’s output shows the username. Terminal Identifier The second column of who’s output shows a code associated with the terminal. In this example, christine’s first login shows tty7 and it is a local GUI login, but some distributions use the 0 as a GUI identifier. The remaining logins all have terminal identifiers of the form pts/
# or tty#, indicating text sessions. A text session can be a terminal launched in a GUI, a text-mode console login, or a remote login via SSH or some other protocol. Login Date and Time who displays the date and time of each login. You can see that christine’s session began several minutes before steph logged in. Remote Host The final column of who’s output, if present, shows the login source. Console logins (including both text-mode and GUI-based logins) don’t include a source. A source of the form
# or
#
.
# or :
# often indicates a terminal opened in a GUI, such as in christine’s source: (:0). A hostname or IP address, as in rich’s session, indicates remote access from the specified computer. You can obtain additional information, most of which is obscure or specialized, by passing options to who. One that’s more likely than others to be useful is --count (or -q), which produces a more compact summary of the data: This output includes just the usernames and a line specifying the total number of sessions. Notice that the users number counts one user with multiple logins multiple times. Similar to the whoami command but showing more information, passing the am i
arguments to the who command displays data only for your current user ID: In this example, the current user account is rich, who is logged into the pts/0 terminal session. For information on additional who options and arguments, consult its man page. As you can see, w displays much of the same information as who, including the terminal identifier (TTY) and login time (in a different format). In addition, w displays further information:
Some configurations also display a FROM column, which shows a remote hostname. Using the -f option toggles this option on or off. A few other options can eliminate or modify w’s output. Consult the program’s man page for details. Linux is modeled after Unix, which was designed as a multiuser OS. In principle, you can have thousands of accounts on a single Unix (or Linux) computer. At least one user, though, needs extraordinary power in order to manage the features of the computer as a whole. Historically, this is the root user account, also known as the super user or the administrator. Knowing why root exists, how to do things as root (if you must), and how to use root privileges safely is important for managing a Linux system. To facilitate performing these tasks, root can read and write every file on the computer. Since Linux relies on files to store system settings, this effectively gives root the power to change any detail of the OS’s operation, which is the point of having a super user account. If the computer is a workstation that’s used by just one individual, you may wonder why the distinction between root and the user account is necessary. The explanation is that the power of the root account can lead to accidental damage. For instance, take the rm command. If you mistype an rm command as an ordinary user, you can accidentally delete your own files but not system files. Make the same mistake as root, however, and you can delete system files, perhaps making the computer unbootable. Therefore, you should be cautious when using the root account (or not use it at all), a topic covered more thoroughly in the upcoming “Using root Privileges Safely” section. When you need to perform a command-line task that requires root privileges, you can do so in any of three ways: Log In as
root You can log in directly as root at a text-mode shell or by using a remote login tool such as SSH. You can even log into GUI mode as root on some Linux distributions. Some distributions don’t allow root to log in directly by default because it’s dangerous. You must, however, know the password for the target account (root or otherwise) for this command to work. After you acquire root privileges in this way, you can type as many commands as root as you like. When you’re done, type
exit to relinquish your super user status. You can also use su to run a single command as root. Use the -c option, as in
su -c
command to run
command as root. If you use a dash (-) within the command, as in
su - or
su - luke, the program opens a login session that runs the target user’s login scripts. This can be important because these scripts often set environment variables such as $PATH that can be important for that user. If your Linux system is in the workplace, it is important to determine your company’s policies concerning acquiring root privileges. Logging directly into the root account or using the su command to obtain root privileges sets up what is called a repudiation environment. In this environment, a person can deny actions; in this case, the person can deny that they logged in as root. This environment could allow a root account user to perform illegal or troublemaking activity and then legally deny being responsible for that activity. This is a potentially dangerous situation. Many companies have (or should have) a policy that insists the sudo command is used for anyone needing to acquire root privileges. The sudo command tracks and logs a user’s activity and therefore sets up what is called a nonrepudiation environment in which actions cannot be legally denied. Many modern distributions do not let you log into the root account. However, if you can acquire root privileges by logging in directly as root or by using su -, your shell prompt will change: In this example, the username has changed from rey to root and the last character of the prompt has changed from a dollar sign ($) to a hash mark (#). Because just the last prompt character was used for most examples printed on their own lines in this book, such examples implicitly specify whether a command requires root privileges by the prompt used. For instance, consider accessing the /etc/shadow file mentioned earlier: The use of the hash mark prompt indicates that you must type this command using root privileges. Some of this book’s chapters describe both GUI and text-mode methods of system administration. How, then, can you administer Linux in GUI mode if you must use the text-mode sudo command to acquire root privileges? Most distributions allow you to launch administrative tools from the computer’s desktop menus, and the GUI tools will then prompt you for the super user password when administrative privileges are needed, as shown in Figure 12.3. If you type the password correctly, the program will continue. The result is similar to that of launching the program from a shell using sudo. Figure 12.3 Administrative tools in the GUI ask for a password when administrator privileges are needed. As already described, root power is dangerous. You could accidentally wipe out critical application files and cause hours of downtime. Imagine what would happen if you mistakenly corrupted an important configuration file or destroyed a set of important backups. Everyone makes mistakes—unfortunately, some mistakes can be absolutely disastrous for a company. Imagine intruders gaining root access to your computer: unintended changes to configuration files, damage to some (even if not all) of the computer’s system files, and changes to ownership or permissions on ordinary user files, rendering them inaccessible to their true owners. You should take the following precautions whenever you need root access:
Following these rules of thumb can help keep you from damaging your computer or giving somebody else root access to the computer. Accounts are critical to Linux’s normal functioning. Ordinarily, most of the tasks that you perform on a Linux computer require the privileges of a standard user, so you’ll use your own user account to handle these tasks. You can use tools such as whoami, id, who, and w to identify your account and to determine who else might be using the computer. Occasionally, you’ll need to perform administrative tasks that require the root account’s privileges, which can read and write any ordinary file, access hardware in a low-level way, reconfigure the network, and perform other tasks that ordinary users aren’t allowed to do. Because root is so powerful, you should use that power sparingly and be extremely careful when you do use it, lest a typo or other accident cause serious problems. Explain the difference between various Linux accounts. User accounts generally fall into three categories: the root user, standard users, and system accounts. The root account has a UID of 0 and is often disabled on many modern Linux distributions so that no one can directly log into it. This is due to the fact that root can read and write every file on the computer, making it a rather dangerous user. In addition, if multiple individuals use the root account, it sets up an insecure repudiation environment. Users are each given an account on the system to perform productive work. They typically have regular privileges, but those who perform special administrative system duties may have access to super user privileges through commands such as sudo. These accounts have UIDs that start at 500 or 1,000 depending on the distribution configuration. System accounts help keep the computer running. You cannot log into these accounts, because they lack passwords, and their default shell is often set to /sbin/nologin. The UIDs for system accounts are numbers that are lower than the configured base for user account UIDs. Describe the files involved in Linux account configuration. The /etc/passwd file has a record for each account on the system. These records consist of the following fields: username, password, UID, GID, comment, home directory, and default shell. The /etc/shadow file has password information and data for each account on the system. Each records contains the following fields: username, salted and hashed password (if a password is set for the account), the last password change in Epoch format, days until a password modification is allowed, days before a password change is required, number of days warning before the password expires, days between account expiration and deactivation, account expiration date, and a special flag. The /etc/group file has a record for every defined group on the system. These records consist of the following fields: group name, group password, GID, and the group’s user list. Compare the utilities to show who is on the system. The whoami command will display the current account name in use. For additional information, you can use the id command. To learn who is currently online besides yourself, the who utility works, but the w command provides more information. Summarize methods to gain super user access. You can directly log into the root account on distributions that allow such access to gain super user access, but it is generally frowned on due to security issues. The su command will allow you to switch to another account as long as you have its password; this includes the root account if it is enabled for such use. The sudo command is the preferred method for gaining super user privileges. Type
sudo in front of the command that needs the privileges and press Enter. It will demand your password if not recently used. You can find the answers in Appendix A. What is the purpose of the system account with a UID of 0? What type of information will you find in /etc/passwd for ordinary user accounts? (Choose all that apply.) You want to run the command cat /etc/shadow as root, but you’re logged in as an ordinary user. Which of the following commands will do the job, assuming that the system is configured to give you super user access via the appropriate command? True or false: whoami provides more information than id. True or false: Linux stores information on its groups in the /etc/groups file. True or false: As a general rule, you should employ extra care when running programs
as root. The file that associates usernames with UID numbers in Linux is ___________. To learn who is currently logged into the computer and what programs they’re currently running, you can type _______. UIDs above 0 and below 500 or 1,000 (depending on the distribution) are reserved for use by _______ account(s). A _______ environment means that a person cannot deny actions, and the sudo command helps establish this environment.
![]() 5.1 Basic Security and Identifying User Types
5.1 Basic Security and Identifying User Types Linux is a multiuser OS, meaning that it provides features to help multiple individuals use the computer. Collectively, these features constitute accounts. Previous chapters of this book have referred to accounts in passing but haven’t covered them in detail.
Understanding Accounts
![]() Even a single-user workstation uses multiple accounts. Such a computer may have just one user account, but several system accounts to help keep the computer running.
Even a single-user workstation uses multiple accounts. Such a computer may have just one user account, but several system accounts to help keep the computer running.![]() There are various account types—common user accounts, system accounts, and the root account. Common accounts are built for users who do not need special privileges to complete their daily tasks, such as creating a word processing document. System accounts are set up for special services or programs, such as one that serves up web pages. The root account was historically (and sometimes still today) used for performing system administration tasks. These topics are covered in more detail in the “Understanding User Types” section later in this chapter.
There are various account types—common user accounts, system accounts, and the root account. Common accounts are built for users who do not need special privileges to complete their daily tasks, such as creating a word processing document. System accounts are set up for special services or programs, such as one that serves up web pages. The root account was historically (and sometimes still today) used for performing system administration tasks. These topics are covered in more detail in the “Understanding User Types” section later in this chapter.Understanding Account Features
![]() Most account features are defined in the /etc/passwd file, which consists of colon-delimited lines, with each line (or record) defining a single account. An entry might resemble the following:
Most account features are defined in the /etc/passwd file, which consists of colon-delimited lines, with each line (or record) defining a single account. An entry might resemble the following:rich:x:1001:1001:Richard Blum:/home/rich:/bin/bash
![]() Some distributions number user accounts starting at 500 rather than 1,000.
Some distributions number user accounts starting at 500 rather than 1,000.![]() File ownership and permissions are described in Chapter 14, “Setting Ownership and Permissions.”
File ownership and permissions are described in Chapter 14, “Setting Ownership and Permissions.”![]() You might guess by its name that /etc/passwd holds password information. This
isn’t normally the case today, although it was many years ago. For historical reasons,
/etc/passwd must be readable by all users, so storing passwords there, even as a salted and hashed password, is risky.
You might guess by its name that /etc/passwd holds password information. This
isn’t normally the case today, although it was many years ago. For historical reasons,
/etc/passwd must be readable by all users, so storing passwords there, even as a salted and hashed password, is risky.![]() Passwords are stored using a salted hash, a one-way mathematical process with additional random input (salt), that produces what looks like nonsense to humans. When a user types a password, it’s salted and hashed, and if the salted hashes match, access is granted.
Passwords are stored using a salted hash, a one-way mathematical process with additional random input (salt), that produces what looks like nonsense to humans. When a user types a password, it’s salted and hashed, and if the salted hashes match, access is granted.rich:$6$E/moFkeT5UnTQ3KqZUoA4Fl2tPUoIc[...]:18114:5:30:14:-1:-1:
![]() Unix Epoch time, which is also called POSIX time, is the number of seconds since January 1, 1970, although the /etc/shadow file expresses it in days. It has a long history with Unix and Linux systems. You don’t have to drag out your calculator to determine what a field’s date is using
the Epoch. Instead, the chage utility does that for you by displaying the /etc/shadow file record for a designated user account in a human-friendly format. POSIX time may cause problems in the year 2038 on any small systems still using 32-bit processors, because the computer will run out of storage to track time properly in this way.
Unix Epoch time, which is also called POSIX time, is the number of seconds since January 1, 1970, although the /etc/shadow file expresses it in days. It has a long history with Unix and Linux systems. You don’t have to drag out your calculator to determine what a field’s date is using
the Epoch. Instead, the chage utility does that for you by displaying the /etc/shadow file record for a designated user account in a human-friendly format. POSIX time may cause problems in the year 2038 on any small systems still using 32-bit processors, because the computer will run out of storage to track time properly in this way.![]() The terms encrypted and hashed are often confused when used with computer objects. You can decrypt an encrypted object, but you cannot “dehash” a hashed object. Passwords on Linux are salted and hashed, though often you’ll see the term encrypted mistakenly used instead in Linux documentation.
The terms encrypted and hashed are often confused when used with computer objects. You can decrypt an encrypted object, but you cannot “dehash” a hashed object. Passwords on Linux are salted and hashed, though often you’ll see the term encrypted mistakenly used instead in Linux documentation.![]() Examples of user files stored outside the user’s home directory may include email in /var/spool/mail and temporary files in /tmp.
Examples of user files stored outside the user’s home directory may include email in /var/spool/mail and temporary files in /tmp.Identifying Accounts

![]() Passwords are typically displayed as dots or asterisks in a GUI environment as a security feature.
Passwords are typically displayed as dots or asterisks in a GUI environment as a security feature.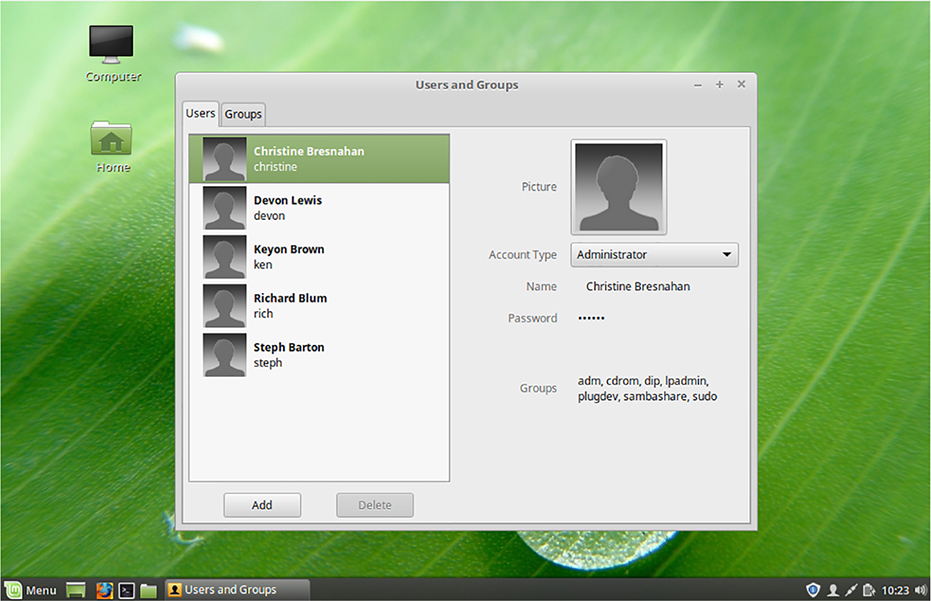
![]() You can pull out individual records by using the getent command too.
Just add the username to the command’s end—for instance,
getent passwd rich.
You can pull out individual records by using the getent command too.
Just add the username to the command’s end—for instance,
getent passwd rich.![]()
Network Account DatabasesUnderstanding Groups
![]() As noted earlier, groups are collections of accounts that are defined in the /etc/group file. Like /etc/passwd, the /etc/group file contains colon-delimited lines (records), each defining a single group. An example looks like this:
As noted earlier, groups are collections of accounts that are defined in the /etc/group file. Like /etc/passwd, the /etc/group file contains colon-delimited lines (records), each defining a single group. An example looks like this:users:x:100:games,christine
![]() The use and management of group passwords is a topic that’s beyond the scope of this book. However, group passwords are typically frowned on by security professionals.
The use and management of group passwords is a topic that’s beyond the scope of this book. However, group passwords are typically frowned on by security professionals.$ newgrp project1
Using Account Tools
Discovering Your Own Identity
$ whoami

christine
![]() This example reveals that the current account is christine. If you need more information, you can use the id utility:
This example reveals that the current account is christine. If you need more information, you can use the id utility:$ id
uid=1002(christine) gid=100(users) groups=100(users)[...]
![]() On some distributions, the id command provides more information than shown in our examples.
On some distributions, the id command provides more information than shown in our examples.
Long option
Short option
Effect
--group
-g
Displays only the effective group ID
--groups
-G
Displays all the groups to which you belong
--user
-u
Displays only the user data
--name
-n
Used in conjunction with -g, -G, or -u; displays only the name, not the UID or GID
--real
-r
Used in conjunction with -g, -G, or -u; displays only the UID or GID, not the name
Learning Who’s Online
![]() To learn who is online, you can use a command known as who:
To learn who is online, you can use a command known as who:$ who
christine tty7 2019-08-06 10:14 (:0)
steph tty2 2019-08-06 10:57
rich pts/0 2019-08-06 10:56 (192.168.0.102)
devon tty3 2019-08-06 10:57
ken tty4 2019-08-06 10:57
$
![]() By default, the who command pulls its data from the /var/run/utmp file.
By default, the who command pulls its data from the /var/run/utmp file.$ who -q
christine steph rich devon ken
# users=5
$
![]() Different distributions have varying minor details for the who command. However, the major elements are the same.
Different distributions have varying minor details for the who command. However, the major elements are the same.$ who am i
rich pts/0 2019-08-06 10:56 (192.168.0.102)
$
![]() The who command, on some distributions, ignores the am i arguments and returns nothing. If your system does accept them, for a little humor, use the arguments mom likes in place of the am i arguments.
The who command, on some distributions, ignores the am i arguments and returns nothing. If your system does accept them, for a little humor, use the arguments mom likes in place of the am i arguments.![]() An alternative to who is w, which is similar to who but produces somewhat more verbose output:
An alternative to who is w, which is similar to who but produces somewhat more verbose output:$ w
11:17:26 up 1:10, 5 users, load average: 0.00, 0.03, 0.04
USER TTY FROM LOGIN@ IDLE JCPU PCPU WHAT
christin tty7 :0 10:14 1:09m 17.12s 0.64s cinnamon[...]
steph tty2 10:57 4:30 0.21s 0.16s -bash
rich pts/0 192.168.0.102 10:56 1.00s 0.20s 0.00s w
devon tty3 10:57 20:05 0.21s 0.15s -bash
ken tty4 10:57 19:58 0.23s 0.16s -bash
$
Working as root
Understanding User Types
![]() Most people use computers to do ordinary day-to-day computer tasks—browse the web, write letters, manage a music collection, and so on. These activities are known collectively as user tasks, and they don’t require special privileges. As just noted, a Linux computer can have many user accounts, and the users can use the computer from these user accounts (also known as unprivileged accounts, unprivileged users, or standard users) to perform such user tasks.
Most people use computers to do ordinary day-to-day computer tasks—browse the web, write letters, manage a music collection, and so on. These activities are known collectively as user tasks, and they don’t require special privileges. As just noted, a Linux computer can have many user accounts, and the users can use the computer from these user accounts (also known as unprivileged accounts, unprivileged users, or standard users) to perform such user tasks.![]() The root account exists to enable you to perform administrative tasks. These tasks include installing new software, preparing a new disk for use in the computer, and managing ordinary user accounts. Such tasks require access to system files that ordinary users do not need to modify or even read.
The root account exists to enable you to perform administrative tasks. These tasks include installing new software, preparing a new disk for use in the computer, and managing ordinary user accounts. Such tasks require access to system files that ordinary users do not need to modify or even read.![]() Another user type is a system user. These are nonlogin accounts for daemons, services, or applications. System user accounts typically have a low UID number; no password (so the account is locked); and /usr/sbin/nologin, /sbin/nologin, or /bin/false as their default shell.
Another user type is a system user. These are nonlogin accounts for daemons, services, or applications. System user accounts typically have a low UID number; no password (so the account is locked); and /usr/sbin/nologin, /sbin/nologin, or /bin/false as their default shell.Acquiring root Privileges
![]() Use
su The su command enables you to change your identity within a shell. Type
su
username to change your identity to that of the specified
username. If you omit
username, root is assumed, so typing
su enables you effectively to become root.
Use
su The su command enables you to change your identity within a shell. Type
su
username to change your identity to that of the specified
username. If you omit
username, root is assumed, so typing
su enables you effectively to become root.![]() su stands for switch user or substitute user.
su stands for switch user or substitute user.![]() Use
sudo The sudo command is similar to su, but it works for just one command at a time, which you type after sudo, similar to using su -c. For instance, typing
sudo cat
/etc/shadow enables you to see the contents of the /etc/shadow file, which is not readable by ordinary users. You must type either your own password or the root password, depending on the sudo configuration, when you use this program. (When using su -c, you must always type the root password.) The next command you type will be executed using your ordinary account privileges. Some distributions, such as Ubuntu and Fedora, rely heavily on sudo and don’t permit direct root logins by default.
Use
sudo The sudo command is similar to su, but it works for just one command at a time, which you type after sudo, similar to using su -c. For instance, typing
sudo cat
/etc/shadow enables you to see the contents of the /etc/shadow file, which is not readable by ordinary users. You must type either your own password or the root password, depending on the sudo configuration, when you use this program. (When using su -c, you must always type the root password.) The next command you type will be executed using your ordinary account privileges. Some distributions, such as Ubuntu and Fedora, rely heavily on sudo and don’t permit direct root logins by default.![]()
The Legalities of Acquiring root Privileges[rey@jakku ~]$ su -
Password:
[root@jakku ~]#
![]() It’s a good idea to always use su -, instead of just the su command. The dash (-) sets up the user account environment correctly. If you don’t use the dash, you may experience command problems.
It’s a good idea to always use su -, instead of just the su command. The dash (-) sets up the user account environment correctly. If you don’t use the dash, you may experience command problems.# cat /etc/shadow
![]() To use root commands in Linux Mint and Fedora Workstation, you must either precede them with sudo (as in sudo cat /etc/shadow) or type sudo su to acquire a longer-lasting root shell.
To use root commands in Linux Mint and Fedora Workstation, you must either precede them with sudo (as in sudo cat /etc/shadow) or type sudo su to acquire a longer-lasting root shell.
Using root Privileges Safely
![]() If a program asks you for your password, or the root password, and it’s not an administrative program that you trust, be suspicious! Research the program before giving it the password!
If a program asks you for your password, or the root password, and it’s not an administrative program that you trust, be suspicious! Research the program before giving it the password!
![]() Chapter 13 describes how to select a strong password.
Chapter 13 describes how to select a strong password.Summary
Exam Essentials
Review Questions