Google developed Resonance Audio as a tool for developers who need to include 3D spatial audio in their AR and VR applications. We will use this tool to put 3D sound in our demo app. Let's get started by opening up the spawn-at-surface.html file in your favorite text editor and then follow the given steps:
- Locate the beginning of the JavaScript and add the following lines in the variable declarations:
var cube;  //after this line
var audioContext;
var resonanceAudioScene;
var audioElement;
var audioElementSource;
var audio;
- Now, scroll down to just before the update function and start a new function called initAudio, like this:
function initAudio(){

}

function update(){  //before this function
- Next, we need to initialize an AudioContext, which represents the device's stereo sound. Inside the initAudio function, enter the following:
audioContext = new AudioContext();
- Then, we set up the audio scene in Resonance and output the binaural audio to the device's stereo output by adding this:
resonanceAudioScene = new ResonanceAudio(audioContext);
resonanceAudioScene.output.connect(audioContext.destination);
- After this, we define some properties for the virtual space around the user by adding the given code:
let roomDimensions = {   width: 10, height: 100, depth: 10 };
let roomMaterials = {
   // Room wall materials
   left: 'brick-bare',
   right: 'curtain-heavy',
   front: 'marble',
   back: 'glass-thin',
   // Room floor
   down: 'grass',
   // Room ceiling
   up: 'transparent' };
- As you can see, there is plenty of flexibility here to define any room you want. We are describing a room in this example, but that room can also be described as an outdoor space. There's an example of this for the up direction at the bottom where the transparent option is used. Transparent means sound will pass through the virtual wall in that direction, and you can represent the outdoors by setting all directions to transparent.
- Now, we add the room to the audio scene by writing this:
resonanceAudioScene.setRoomProperties(roomDimensions,
                                      roomMaterials);
- Now that room is done, let's add the audio source by entering the following:
audioElement = document.createElement('audio');
audioElement.src = 'cube-sound.wav';

audioElementSource = audioContext.createMediaElementSource(audioElement);
audio = resonanceAudioScene.createSource();
audioElementSource.connect(audio.input);
- The audioElement is a connection to an HTML audio tag. Essentially, what we are doing here is replacing the default audio of HTML with the audio routed through resonance to provide us with spatial sound.
- Finally, we need to add our audio object when we spawn our box and play the sound. Enter the given code just following the function call to THREE.ARUtils.placeObjectAtHit inside the onClick function:
audio.setPosition(cube.position.x,cube.position.y,cube.position.z);

audioElement.play();
Before we run our sample, we need to download the cube-sound.wav file and put it in our sample folder. Open the folder where you downloaded the book's source code and copy the file from Chapter_5/Resources/cube-sound.wav to your Android/three.ar.js/examples folder.
Now when you are ready to run the app, save the spawn-at-surface.html page, start your device, and close and reopen the WebARCore app. Play around with the app and spawn a box by tapping a surface. Now when the box spawns, you will hear the cube sound. Move around the scene and see how the sound moves.
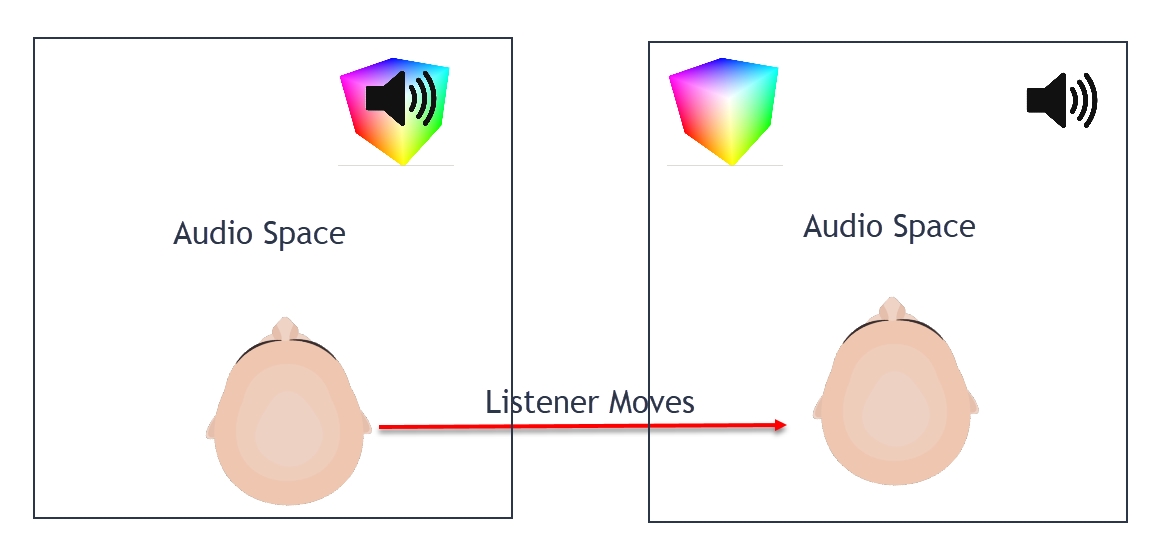
Not what you expected? That's right, the sound still moves with the user. So what's wrong? The problem is that our audio scene and 3D object scene are in two different virtual spaces or dimensions. Here's a diagram that hopefully explains this further:

The problem we have is that our audio space moves with the user. What we want is to align the audio space with the same reference as our camera and then move the listener. Now, this may sound like a lot of work, and it likely would be, if not for ARCore. So thankfully, we can do this by adding one line right after those couple of console lines we put in earlier, like this:
- Find the two console.log lines we added in the previous section and comment them out like this:
//console.log("Device position (X:" + pos.x + ",Y:" + pos.y + ",Z:" + pos.z + ")");
//console.log("Device orientation (pitch:" + rot._x + ",yaw:" + rot._y + ",roll:" + rot._z + ")");
- Add our new line of code:
audio.setPosition(pos.x-cube.position.x,pos.y-cube.position.y,pos.z-cube.position.z);
- All this line does is to adjust the audio position relative to the user (camera). It does this by subtracting the X, Y, and Z values of the position vectors. We could have also just as easily subtracted the vectors.
- Run the sample again. Spawn some boxes and move around.
Note that when you place a box and move around, the sound changes, as you expect it to. This is due to our ability to track the user in 3D space relative to where a virtual sound is. In the next section, we will look at extending our ability to track users by setting up a tracking service.
