
![]()
One of the key things that many people who come to Linux want to know is how to establish themselves by setting up a small website of their own. And many have difficulty finding a place to start. Which OS, which applications, what hardware, and how exactly to do all this? All these are legitimate questions as there are so many facets to the greater Linux environment that it is very easy to get lost.
Our goal is to provide the first few stepping stones on your way to being able to navigate the Linux environment. One of the key stepping stones on this path is to show you how to install, configure, and maintain a web server. Although you will be able to connect this server to the Internet, in these examples we will only cover using your Pi as a local network server (in other words, for running an intranet). In addition, there is also the extra challenge of learning how to make a basic interactive website. While this may seem a lot to take on, and others devoted entire books and lives to finding the absolute optimum solution this problem, we aim to cover it for the Raspberry Pi in one chapter.
To this end we will be using a LAMP. No, not one of those bedroom luminescence devices, but a Linux, Apache, MySQL, and PHP system designed to make delivering web content easy. This is one of the easiest ways to create your own web server and there are a number of variations on the original LAMP, which include, but are not limited to, the following:
- WAMP (Windows, Apache, MySQL, PHP)
- MAMP (Mac OS, Apache, MySQL, PHP)
- Replacement Ps with Python or Perl
- Replacement M with MariaDB
So, as you can gather from the amount of mixing, matching, and improving that people have done, it is a great way to get a powerful web server up and going. Best of all, it is simple to set up and can be run on just about any hardware.
One of the most regularly cited potential uses of the Pi is to enable the ability to build, run, and maintain a website. What better way to inspire a generation of young developers than to teach them how to make their own websites with a minimum of cost!
First Steps
Now it is time to get real about what we can accomplish here. Within this chapter, we will provide you the skills to set up a full website stack and show you how to integrate the functions of a MySQL database into a website using PHP to dynamically generate website content. However, there are a few things we won’t be able to do for you here:
- Set up and configure a DNS or domain naming
- Advanced SQL and database administration
- Full coverage of HTML and HTML development methods
- Full coverage of PHP development and PHP development methods
- JavaScript
- CSS
There are a number of resources that you can take advantage of to get help with these other areas, including other great and weighty texts by Apress. We still have our work cut out for us, so let’s get started.
L is for Linux
There are only a few prerequisites for setting up a LAMP stack. You will need to
- Have the Raspbian OS (the L of LAMP) installed and configured
- Have the memory split set to 240/16 (run sudo raspi-config)
- Be familiar with working within the Raspbian OS using the command line
- Have a basic understanding of how to write simple software
- Have your Pi connected to a network and the Internet (how else can we serve content if we aren’t?)
There are only a few other provisos for Raspberry LAMP. We will be doing all of this from a shell. Given that the website will be viewed from outside the Pi, there is no need to use any extra resources to run the GUI. Now that we know what we need to get going, let’s do it.
A is for Apache
Probably the most important part of any web server is the web server application. A web server is an application that will take requests for a website and then return the requested web page content. Most web servers can also provide a large number of other functions that can help enhance their capability to provide web content to end users. For our LAMP stack, we will be using the Apache web server.
Apache is considered by many to be the world’s premiere web server. It was first released in 1995 and has become renowned for playing a role in the growth of the World Wide Web by providing a simple, powerful, and free web server to the masses.
As reinforcement of this fact, it is estimated that Apache delivers between an estimated 54 to 58 percent of the world’s websites.
There are two stories that are told about how Apache came to be named:
- The first is that it was named for it being “A patchy web server” when first developed all those years ago.
- The second (and much better from a storytelling perspective) is that Apache is said to be named for the Apache tribes of America.
Being named for a tribe is not even a misnomer as acting like a tribe is one of the key features of Apache. Apache’s first task when it starts is to create its own small tribe of “workers” that are tasked with the actual serving up of your website’s content. Now that you have a clearer understanding of what Apache does, the first step becomes to get Apache installed, up and running.
For our installs, we will rely (as ever) on the ever-faithful apt-get tool:
$ sudo apt-get install apache2
Reading package lists... Done
Building dependency tree
Reading state information... Done
The following extra packages will be installed:
  apache2-mpm-worker apache2-utils apache2.2-bin apache2.2-common libapr1
  libaprutil1 libaprutil1-dbd-sqlite3 libaprutil1-ldap ssl-cert
Suggested packages:
  apache2-doc apache2-suexec apache2-suexec-custom openssl-blacklist
The following NEW packages will be installed:
  apache2 apache2-mpm-worker apache2-utils apache2.2-bin apache2.2-common
  libapr1 libaprutil1 libaprutil1-dbd-sqlite3 libaprutil1-ldap ssl-cert
0 upgraded, 10 newly installed, 0 to remove and 71 not upgraded.
Need to get 1,348 kB of archives.
After this operation, 4,990 kB of additional disk space will be used.
Do you want to continue [Y/n]?
Now that you have installed Apache, we should go and validate that it is all up and running. There are a few ways we can do this. First, run this:
$ ps -ef | grep apache
root      2306     1  0 Sep17 ?        00:00:09 /usr/sbin/apache2 -k start
www-data  2309  2306  0 Sep17 ?        00:00:00 /usr/sbin/apache2 -k start
www-data  2311  2306  0 Sep17 ?        00:00:00 /usr/sbin/apache2 -k start
www-data  2315  2306  0 Sep17 ?        00:00:00 /usr/sbin/apache2 -k start
From this output, you can see that Apache is indeed up and running. From this point, there are another few important things to note. The first process listed with the following line is different from the others:
root 2306 1 0 Sep17 ? 00:00:09 /usr/sbin/apache2 -k start
This is the chief of the Apache tribe mentioned earlier. It is owned by root (as indicated in the first column), and its process ID (PID) is 2306. The other three are owned by a user called www-data, which is a user specifically for Apache. While each worker has a different PID, they all have a PPID (parent process ID) of 2306, meaning that the Apache chief process made them (its PID is 2306).
Now for the second and by far more fun test; on this test, we will actually get Apache to display its default starting web page! For this, you can either log in to the GUI or you can get the system’s IP address using ifconfig . Your output should look like the one following with the relevant IP addresses highlighted:
$ ifconfig
eth0      Link encap:Ethernet  HWaddr b8:27:eb:8a:46:ba
          inet addr: 10.0.0.20  Bcast:10.0.0.255  Mask:255.255.255.0
          UP BROADCAST RUNNING MULTICAST  MTU:1500  Metric:1
          RX packets:213812 errors:0 dropped:0 overruns:0 frame:0
          TX packets:5119 errors:0 dropped:0 overruns:0 carrier:0
          collisions:0 txqueuelen:1000
          RX bytes:19226371 (18.3 MiB)  TX bytes:495394 (483.7 KiB)

lo        Link encap:Local Loopback
          inet addr: 127.0.0.1  Mask:255.0.0.0
          UP LOOPBACK RUNNING  MTU:16436  Metric:1
          RX packets:8 errors:0 dropped:0 overruns:0 frame:0
          TX packets:8 errors:0 dropped:0 overruns:0 carrier:0
          collisions:0 txqueuelen:0
          RX bytes:1104 (1.0 KiB)  TX bytes:1104 (1.0 KiB)
Assuming your system is (like mine) attached to a network, you can use the first IP address (10.0.0.20). This address in the eth0 block represents its network port. The address in lo block is the loopback address, which is used for internal self-reference and is always 127.0.0.1.
The next test is to access the Apache default web page; and to do so, you simply need to input one of those IP addresses into a browser (assuming that you are on the same network as the Pi, of course!). If you want to test using the Pi’s onboard browser, that’s completely fine, too, and you can choose between either address (10.0.0.20 or 127.0.0.1). So what are you waiting for? Open a browser window and have a look at the default web page, as shown in Figure 8-1.
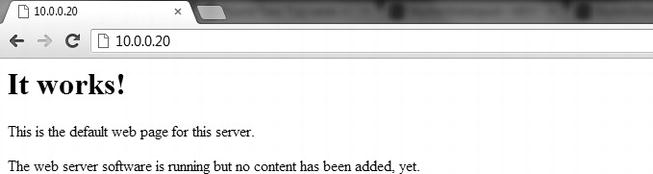
Figure 8-1. It works!
As you should by now be aware, it works! This is the default web page for the Apache web server and as it suggests there is no content added yet, we will be getting to that later. For now, let’s have a look at how that one default page is generated, as this will give you some insight into how Apache truly works.
Apache Configuration
Getting your head around the Apache config is, to be frank, a bit of a nightmare. If you’re game, go ahead and have a look in /etc/apache2 for an idea of what I mean. There are a number of folders in there with different meanings and how those folders interrelate changes how your Apache server instance works. Thankfully, though, once you understand where you need to make changes, everything becomes much easier.
The first file of note in the Apache configuration is the apache2.conf file. This is the governing config file that says where each of the other separate pieces are located, and how the application should load them. The second things to be aware of are the mods-available and mods-enabled folders. If you have a look at the mods-available file, you will see that there are a large number of .load and .conf files. These files represent where Apache should load a module from and any configuration information this module needs, respectively.
Next is mods-enabled, an initial look over this folder will make it seem just like mods-available . However, if you run an ls –l on this directory, you will see this:
$ ls -l /etc/apache2/mods-enabled/
total 0
lrwxrwxrwx 1 root root 28 Sep 17 21:44 alias.conf -> ../mods-available/alias.conf
lrwxrwxrwx 1 root root 28 Sep 17 21:44 alias.load -> ../mods-available/alias.load
lrwxrwxrwx 1 root root 33 Sep 17 21:44 auth_basic.load -> ../mods-available/auth_basic.load
lrwxrwxrwx 1 root root 33 Sep 17 21:44 authn_file.load -> ../mods-available/authn_file.load
...
This shows that, in fact, each of the files in mods-enabled is actually a link to a file in mods-available! This is the first intricacy of the Apache configuration, while there are a number of available modules at any given time only a certain number are actually loaded. Using symlinks like this means that only one copy of the configuration needs to be kept and maintained at a given time. And more to the point, any changes made to one will be made to both.
If you look inside the sites-available and sites-enabled folders, you will see the same layout, except there might be fewer sites. This brings us to the true object of our search: the first default site that is available within the Apache system. So open up either /etc/apache2/sites-available/default or /etc/apache2/sites-enabled/000-default because it doesn’t matter; they are the same thing! So, now that you’re inside, go over what everything in the config means. Many of them will be important for you later on if you wish to add additional websites or modify how websites are displayed.
<VirtualHost *:80>
        ServerAdmin webmaster@localhost
        DocumentRoot /var/www
        <Directory />
                Options FollowSymLinks
                AllowOverride None
        </Directory>
        <Directory /var/www/>
                Options Indexes FollowSymLinks MultiViews
                AllowOverride None
                Order allow,deny
                allow from all
        </Directory>
        ScriptAlias /cgi-bin/ /usr/lib/cgi-bin/
        <Directory "/usr/lib/cgi-bin">
                AllowOverride None
                Options +ExecCGI -MultiViews +SymLinksIfOwnerMatch
                Order allow,deny
                Allow from all
        </Directory>
        ErrorLog ${APACHE_LOG_DIR}/error.log
        # Possible values include: debug, info, notice, warn, error, crit,
        # alert, emerg.
        LogLevel warn

        CustomLog ${APACHE_LOG_DIR}/access.log combined
</VirtualHost>
The first line is probably one of the most important; it specifies that this web server is available to any incoming address on port 80. Changing this means you can run multiple web servers on the same site by using different ports to reference each.
![]() Note You can specify a port when connecting to just about any application by adding :<port number> at the end of the URL.
Note You can specify a port when connecting to just about any application by adding :<port number> at the end of the URL.
Following the VirtualHost address, the next relevant thing is the DocumentRoot. This is critical as it says where Apache will load all the web server content from. This means that anything that is in the /var/www folder will become available via the basic website on port 80. For example, if you go into the /var/www folder, you will see one file: index.html. If you examine this file, you will see some very familiar content:
<html><body><h1>It works!</h1>
<p>This is the default web page for this server.</p>
<p>The web server software is running but no content has been added, yet.</p>
</body></html>
Yep, that’s the website content that is used to generate the basic start page that Apache is currently showing. I try to think of it this way: the web server is providing you access to that folder (and all subfolders and documents within it). As proof of this, try executing the following command as root:
$ echo "Hello World" > /var/www/foo
![]() Note You can gain root by executing sudo su –.
Note You can gain root by executing sudo su –.
Once you have successfully executed this command, direct your browser to http://<IP Address>/foo and you should see hello world displayed there. You may be wondering why we didn’t need to use index.html in the first request to our website (i.e., use http://10.0.0.2/index.html). This is because files named “index” are special ones. They are the default page displayed if no other content is available.
The next portions of the config you should be aware of are the Directory config sections. These are a list of directories that can provide special rules as to how they are accessed and even who can access them. In this instance, there are two directories that Apache has configuration settings for: the / root directory and /var/www. While there are a number of very interesting things you can do with the directory values, there isn’t much we need to do with them here. For more information, you should head over to the Apache website and read through the far more detailed documentation available there.
After the directory details comes ScriptAlias, which governs how CGI scripts are accessed by the application. The ScriptAlias is a special directory in which these CGI programs live and are executed from. As PHP is a scripting system much like BASH (covered in Chapter 7), you may think this has a direct bearing, but it is not the case. PHP is run by a special interpreter module (modphp) rather than by a single CGI program.
The directory value below the ScriptAlias is related to it. The quick give away is that both reference /usr/lib/cgi-bin/. This directory contains the +ExecCGI directive. Again, this relates to how scripts and things such as PHP are executed. Finally, the configuration file comes to a close with a few very useful config lines. These values are the logfile directives for the Apache server; they say where the logfiles will go and which files they will write to. Both access logs (so you can spy on everyone who visits you) and the much more standard error logs are covered here. The LogLevel directive in the middle governs at which level logs regarding the running of the server should be output, and right now it is set at WARN, which is sensible.
Given that you will probably need to take advantage of these logs later when working with PHP, you should become familiar with them now. But first let’s make a small change to the log that we will make Apache incorporate. Let’s change that logging level to notice, so go ahead and change it then save the newly edited file. Once the file has been changed, we need to tell Apache this so it will reload the config. Unlike making a content change to your website, we need to inform Apache of config changes. Thankfully, Apache makes this easy by including a reload function that we can issue to it. Go ahead and issue this:
$ sudo /etc/init.d/apache2 reload
[....] Reloading web server config: apache2apache2: Could not reliably determine the server's fully qualified domain name, using 127.0.1.1 for ServerName
. ok
This has told Apache to reload its config and get going again. Now have a look at the logfiles to see the changes we made. The Apache log directory is /var/log/apache2, and the file we are interested in is the error.log. Once you are looking inside, you should see something like this:
[Tue Sep 18 22:46:56 2012] [notice] SIGUSR1 received.  Doing graceful restart
apache2: Could not reliably determine the server's fully qualified domain name, using 127.0.1.1 for ServerName
[Tue Sep 18 22:46:56 2012] [notice] Apache/2.2.22 (Debian) configured -- resuming normal operations
This says that my Apache instance was given a signal and it performed a graceful restart; then it resumed normal operation within the same second. This is the configuration reload we performed just now. We can also look at the access log and see ourselves accessing content off the web server, go ahead and open up the access.log file in /var/log/apache2 and have a look. You should see something like this:
10.0.0.104 - - [18/Sep/2012:20:31:17 +1000] "GET / HTTP/1.1" 200 482 "-" "Mozilla/5.0 (Windows NT
6.1; WOW64) AppleWebKit/537.10 (KHTML, like Gecko) Chrome/23.0.1262.0 Safari/537.10"
10.0.0.104 - - [18/Sep/2012:22:21:22 +1000] "GET /favicon.ico HTTP/1.1" 404 498 "-" "Mozilla/5.0
(Windows NT 6.1; WOW64) AppleWebKit/537.10 (KHTML, like Gecko) Chrome/23.0.1262.0 Safari/537.10"
10.0.0.104 - - [18/Sep/2012:22:28:36 +1000] "GET /foo HTTP/1.1" 200 274 "-" "Mozilla/5.0 (Windows NT
6.1; WOW64) AppleWebKit/537.10 (KHTML, like Gecko) Chrome/23.0.1262.0 Safari/537.10"
These lines show that someone on IP 10.0.0.104 made a GET request on the / of the web server, which is the /var/www folder and the index.html file within (because index is the default file). It also shows someone accessing the foo file within this directory. They were both me accessing the website in sequence. You will also notice that there is a request in the middle, which is for a favicon.ico . This represents my browser trying to request the favorite’s icon of this website; there is not one, unfortunately.
Troubleshooting
For the most part, setting up an Apache server is a breeze. It’s only when you start making a lot of changes that you might run into trouble. However, if you did find yourself running into issues, try the following. Check that you can see the Apache process running with ps –ef. If Apache is not running, try and start it. If that fails, try examining the error logfile as this will contain information on any errors that Apache has suffered. Most of the entries in the error log are fairly self-explanatory. However, if you find yourself at a loss, head over to the Apache website where there is a large amount of help available there for those in need.
M is for MySQL
Now that you have your web server up and running, you are probably asking, “I see that you can make a website by just writing content into a web server and it will be displayed. What more software could I possibly need?” And it’s true; right now, you could write a web page in basic HyperText Markup Language (HTML) and be done with it. The problem with writing in HTML alone is that HTML is static, meaning that any time you wish to change what is displayed, you need to open up and edit the file to change what is said. This is not going to make for very good management when you want to display different things to different people. You would need to be manually sitting there and editing a whole bunch of things—that’s pointless.
This is where we begin to see the power of the full LAMP stack. We have Apache to serve content, PHP will handle the dynamic portion, and the MySQL database will actually contain the various different bits of information you want to display. It is only when you have all these components in and working together that you begin to see the true power of a LAMP system.
Installing MySQL
A database (DB) is a system for the easy storage and retrieval of data. They take large volumes of input and then structure the data so that information can be easily retrieved with a query. All SQL databases are named for the Structured Query Language, which they use to process requests for information retrieval. MySQL is the world’s most widely deployed open source database. It is what is called a relational database system that is used because it is easy to set up and to work with, thus its wide adoption. To install MySQL, we will again turn to our old friend apt-get; this time, we will be installing the mysql-server package. Execute the following:
$ sudo apt-get install mysql-server
Reading package lists... Done
Building dependency tree
Reading state information... Done
The following extra packages will be installed:
  heirloom-mailx libaio1 libdbd-mysql-perl libdbi-perl libhtml-template-perl
  libmysqlclient16 libnet-daemon-perl libplrpc-perl mysql-client-5.5
  mysql-common mysql-server-5.5 mysql-server-core-5.5
Suggested packages:
  libipc-sharedcache-perl libterm-readkey-perl tinyca
The following NEW packages will be installed:
  heirloom-mailx libaio1 libdbd-mysql-perl libdbi-perl libhtml-template-perl
  libmysqlclient16 libnet-daemon-perl libplrpc-perl mysql-client-5.5
  mysql-common mysql-server mysql-server-5.5 mysql-server-core-5.5
0 upgraded, 13 newly installed, 0 to remove and 84 not upgraded.
Need to get 9,770 kB of archives.
After this operation, 91.5 MB of additional disk space will be used.
Do you want to continue [Y/n]?
Once the actual MySQL install has finished, you will be asked to provide a root password for your DB; this is the master admin password for your database. Make sure you remember it; you will need it later. Now that the installation has finished, confirm that the process has started with this:
$ ps –ef | grep mysql
The output should show a few different things, including the MySQL daemon, which is highlighted here:
root      5254     1  0 20:23 ?        00:00:00 /bin/sh /usr/bin/mysqld_safe
mysql     5592  5254  3 20:23 ?        00:00:03 /usr/sbin/mysqld --basedir=/usr --datadir=/var/
lib/mysql --plugin-dir=/usr/lib/mysql/plugin --user=mysql --pid-file=/var/run/mysqld/mysqld.pid --socket=/var/run/mysqld/mysqld.sock --port=3306
root      5593  5254  0 20:23 ?        00:00:00 logger -t mysqld -p daemon.error
That’s one big process command, but it does show that MySQL is up and running. We can go over the MySQL config, but thankfully the system will work for all our basic needs without the need to modify the configuration. Given that, let’s start working on some basic ways to both insert data and retrieve it.
Structured Query Language (SQL) is a language for inserting and retrieving information from an SQL database. In SQL, there are a number of different queries you can do, ranging from the simple to the extremely complex. Given that there are (as with everything) a number of other resources that spend much more time and go into far more detail about syntax and origin and whatever, we won’t cover those here. Besides, for our purposes there should only be five types of queries we need:
- Basic admin commands
- Insert new data
- Find data
- Update data
- Delete data
While it sounds incredibly simple, it is very easy to get lost in the syntax if you wish to do something more complex. If that is the case, and you wish to do something slightly more complex than what we have covered here please head over to the MySQL web page as they have full documentation on how exactly to perform each query and what the large number of options on each command entail. If you want something a little more focused on web development with all the Apress niceties, have a look at Beginning PHP and MySQL 5, by Jason W. Gilmore.
Anyway, enough product placement; let’s start with the basic administration stuff and make a database. The syntax for this one is dead simple:
create database <database name>
To perform commands on your MySQL instance, you need to connect to it and get into the mysql shell. This is the command to do this:
mysql –uroot –p
So jump into the shell, provide your root password, and execute create database pi; which should generate the following output:
mysql> create database pi;
Query OK, 1 row affected (0.00 sec)
Okay, awesome. We have a database called pi. In an SQL database system, a database is the highest-level construct. Underneath that is a table, which is the object that holds your data (a database holds multiple tables). Each of these items of data in a table is called a row. So our next step is to create a table; the problem is that we need to give our table some structure. We need to tell it what kind of data it should hold and how we will lay out that data, which means we need a project. The most obvious for now is a simple to-do list, so let’s make one of those.
![]() Note All MySQL commands end with a semicolon (;). It signifies that this is the end of a statement. This is done as you can put lines in for one command over multiple lines to make it easier to follow.
Note All MySQL commands end with a semicolon (;). It signifies that this is the end of a statement. This is done as you can put lines in for one command over multiple lines to make it easier to follow.
Creating Tables
Just stepping aside quickly, I have departed from the normal project planning method a little here so that we can run through a basic database setup together. When undertaking a big project, it is far better to plan ahead and fully understand what will be going into a database long before any data is ever added to it.
So, for our to-do list, we want to keep the following information for each “thing to do”:
- Description
- Person doing the task (owner)
- Date to be done by (date)
- Location
- Importance
- Who set the task (creator)
Okay, so with this information, we have our rough table structure; so now let’s go ahead and create it. The syntax for a table creation is this:
create table <tablename> (
<column name> <column type>,
<column name> <column type>,
...
<column name> <column type>
);
That’s the basic syntax, but there is one final thing we need to make sure we have when creating our table: a key. Given that we need to ensure we are getting the right value back each time, we need to have something unique about each individual piece of data. Many of these tasks could wind up almost identical, excluding one or two minor variations. For this reason, we will need what is called a primary key , which is a unique identifier for each row. In this case, it’s best just to use a simple count that will automatically go up for each row we add. Now we know what we want; let’s flesh it out into the syntax from before and see what we have.
create table todolist (
idnumber <column type>,
description <column type>,
owner <column type>,
date <colunm type>,
location <column type>,
importance <column type>,
creator <column type
);
Well, looking better, but we still don’t have those <column types>, nor do we have anything that will say that our idnumber is the primary key, or should be automatically updated for each new row. This brings us nicely to what the column types are about. MySQL will need to know what kind of values each of our data elements will be so it can know how to store them and what kind of queries they can be involved in. There are at least 30 different data types in MySQL, which can perform all kinds of operations, but for our simple purposes there are only three we need to be concerned with: one is text or a string of text that is known as a VARCHAR and is given a maximum number of characters, the second is a number or integer known as an INT, and the last is a date value that is known as a DATE . Given that we now know some data types, we can set them out into our create table command. Go ahead and do that now and remember that text strings (VARCHAR ) need to be given a maximum number of characters long:
create table todolist (
idnumber INT,
description VARCHAR(200),
owner VARCHAR(40),
date DATE,
location VARCHAR(40),
importance VARCHAR(10),
creator VARCHAR(40)
) ;
That looks much better and will probably run, but remember we wanted to have that number be our unique identifier and be automatically updated for us to make our lives easier. The syntax for the idnumber being automatically incremented (updated to be +1) is PRIMARY KEY NOT NULL AUTO_INCREMENT . This gives us a final command of this:
create table todolist (
idnumber INT PRIMARY KEY NOT NULL AUTO_INCREMENT,
description VARCHAR(200),
owner VARCHAR(40),
date DATE,
location VARCHAR(40),
importance VARCHAR(10),
creator VARCHAR(40)
);
So, go ahead and run it:
ERROR 1046 (3D000): No database selected
Oh, whoops. We need to tell MySQL which database we are using, and thus under which database this table will reside. To change which database we are using, we need to use the USE command. To change to using the Pi database we simply execute USE pi; and MySQL will tell us that the database has changed. If you have forgotten your database name, you can use the SHOW command to see things, SHOW DATABASES; will show you all the databases on your system. Now go ahead and execute the table creation again. This time you should see this:
Query OK, 0 rows affected (0.91 sec)
Fantastic, we have a table. Let’s have a look and see if we can see it. Issue the SHOW command, but this time for tables. You should see the following output, which lists off all the tables within the Pi database:
mysql> SHOW TABLES;
+−−------------+
| Tables_in_pi |
+−−------------+
| todolist     |
+−−------------+
1 row in set (0.00 sec)
Yahoo! Now, say for example that you have forgotten what exactly the table looks like; you will want MySQL to describe how the table is made up. You can use the DESCRIBE command to do just this, so let’s try describing our new todolist table so we can see how MySQL understands it.
mysql> DESCRIBE todolist;
+−−-----------+−−------------+−−----+−−---+−−-------+−−--------------+
| Field       | Type         | Null | Key | Default | Extra          |
+−−-----------+−−------------+−−----+−−---+−−-------+−−--------------+
| idnumber    | int(11)      | NO   | PRI | NULL    | auto_increment |
| description | varchar(200) | YES  |     | NULL    |                |
| owner       | varchar(40)  | YES  |     | NULL    |                |
| date        | date         | YES  |     | NULL    |                |
| location    | varchar(40)  | YES  |     | NULL    |                |
| importance  | varchar(10)  | YES  |     | NULL    |                |
| creator     | varchar(40)  | YES  |     | NULL    |                |
+−−-----------+−−------------+−−----+−−---+−−-------+−−--------------+
7 rows in set (0.00 sec)
Awesome; you can even see that our idnumber is the PRI key and has automatic incrementing on the end! Everything registered successfully. We have successfully created a database and a table. We have given structure to our table. Now it is time to put it to good use, but before we start playing with data there’s one last admin command I want to cover: creating a user other than root. This way, we don’t have to constantly use the root user, which will cut down the potential security risk. The syntax for this command (called a GRANT) is this:
GRANT ALL ON <databse>.<table> TO '<username>'@'<user location>' IDENTIFIED BY '<password>';
So, let’s say we want to grant the default pi user on our system access to our todolist table with the password raspberry. The command will become this:
GRANT ALL ON pi.todolist TO 'pi'@'localhost' IDENTIFIED BY 'raspberry';
Run this command and then quit MySQL shell by typing quit . Now try logging back in with your new username and password. Remember, the syntax for this:
$ mysql –u<username> −p
![]() Note Quotation marks are needed when putting in any text data in MySQL that is not for something that MySQL already “understands” (i.e., table names and column names).
Note Quotation marks are needed when putting in any text data in MySQL that is not for something that MySQL already “understands” (i.e., table names and column names).
Inserting Data
Now you’re logged back in as the pi user, let’s start learning some actual commands to insert data into MySQL. The first command to cover is one for inserting data. How else can we be expected to work with MySQL data if there is no data available! The command for inserting data is the aptly named INSERT command. The basic syntax for INSERT is this:
INSERT INTO <TABLE> (<FIELD1>, <FIELD2>, ... <FIELDX>) VALUES ('<VAL1>', '<VAL2>', ... '<VALX>'),
So, now that we know how an insert is supposed to look, let’s go ahead and make one into the database. Let’s insert a pair of tasks into our to-do list. The first one will be my writing of this chapter. So the command will be this (after ensuring we typed USE pi ):
INSERT INTO todolist (description, owner, date, location, importance, creator) VALUES ('Finish LAMP
Chapter', 'David','2012-09-22', 'Australia', 'HIGH', 'David'),
Query OK, 1 row affected (0.43 sec)
That worked. Let’s add another, just for good measure. Let’s make Peter do something now:
INSERT INTO todolist (description, owner, date, location, importance, creator) VALUES ('Finish GUI
Chapter', 'Peter', '2012-09-22', 'Hong Kong', 'HIGH', 'David'),
Query OK, 1 row affected (0.48 sec)
Now that we have a pair of records to play with. But how are we certain that they are correct? How can we check that the idnumbers are incremented, given that we didn’t even add them into our insert statement? For that we will need to issue a query to our SQL database!
Querying a Database
Unlike most of the other statements, a data query is not done with a QUERY command. This is because all of the commands we have been executing are considered to be queries themselves. The command for retrieving data is called a SELECT and its syntax is as follows:
SELECT <Fields1>, <Field2>... <FieldX> FROM <TABLENAME> WHERE <INFORMATION QUERY>
Yes, I know that syntax is a little strange, but once we fill it out you will get more of an idea of why it is the way it is. For starters let’s just grab everything. Normally you put field names that you wish to get, which limits the amount of excess data being transmitted, but in this case we can use the special wildcard *. Thus to query everything from our todolist table, we will execute this:
mysql> SELECT * FROM todolist;
+−−--------+−−-------------------+−−-----+−−----------+−−---------+−−----------+−−-------+
| idnumber | description         | owner | date       | location  | importance | creator |
+−−--------+−−-------------------+−−-----+−−----------+−−---------+−−----------+−−-------+
|        1 | Finish LAMP Chapter | David | 2012-09-22 | Australia | HIGH       | David   |
|        2 | Finish GUI Chapter  | Peter | 2012-09-22 | Hong Kong | HIGH       | David   |
+−−--------+−−-------------------+−−-----+−−----------+−−---------+−−----------+−−-------+
2 rows in set (0.00 sec)
You will notice that I left off the WHERE, this is done, as there is no actual limitation of what we want, we want everything. After this, you can see that everything else we entered is in the format we gave it and more importantly the ID numbers are incrementing! This validates everything that we inserted before. Now that you understand the very basic syntax we can do some slightly more advanced queries. Let’s say I want to find out whom to blame for assigning me (David) a task. The relevant information in this case is the creator as that’s all we want, whom to blame. This will give us the first half of a query:
SELECT creator FROM todolist
Now the next part we need is the portion in which we specify that the owner must be David. The syntax for this is a very simple WHERE owner = "David" giving us the final query:
SELECT creator FROM todolist WHERE owner = "David";
+−−-------+
| creator |
+−−-------+
| David   |
+−−-------+
1 row in set (0.00 sec)
Beautiful. I now know that I have only myself to blame for this mess. In the same vein, let’s try another. I want to know the description and priority of all tasks that are due after today (which, in this example, is the 20th of September). So again we start building our query. We want the description and importance fields this time, so in they go. We also want a date greater than 2012-09-20. Thankfully, MySQL understands date data, so all we need to do is give it our date and the greater-than symbol, which is >. This will give you the query:
mysql> SELECT description, importance FROM todolist WHERE date > "2012-09-20";
+−−-------------------+−−----------+
| description         | importance |
+−−-------------------+−−----------+
| Finish LAMP Chapter | HIGH       |
| Finish GUI Chapter  | HIGH       |
+−−-------------------+−−----------+
2 rows in set (0.01 sec)
There is one last simple part of a SELECT query that will likely be relevant later. This is the ORDER BY statement that can be added to the end of a query. Take our last one for instance; let’s say we want them ordered by the order in which they were added (by idnumber). This will make our query into this:
mysql> SELECT description, importance, idnumber FROM todolist WHERE date > "2012-09-20" ORDER BY idnumber;
+−−-------------------+−−----------+−−--------+
| description         | importance | idnumber |
+−−-------------------+−−----------+−−--------+
| Finish LAMP Chapter | HIGH       |        1 |
| Finish GUI Chapter  | HIGH       |        2 |
+−−-------------------+−−----------+−−--------+
2 rows in set (0.00 sec)
And there it is, sorted. Okay, so we can’t see it as it is in ascending order and has been previously displayed as such. To reverse (or force) an order, we can add an ASC or DESC to the end of the statement, so let’s try that with the same query as before and watch the change:
mysql> SELECT description, importance, idnumber FROM todolist WHERE date > "2012-09-20" ORDER BY idnumber DESC;
+−−-------------------+−−----------+−−--------+
| description         | importance | idnumber |
+−−-------------------+−−----------+−−--------+
| Finish GUI Chapter  | HIGH       |        2 |
| Finish LAMP Chapter | HIGH       |        1 |
+−−-------------------+−−----------+−−--------+
2 rows in set (0.00 sec)
That’s better; you can see the change in order now! Having things returned in order is great as this means the database system is doing the sort for you—something that it is programmed to do very easily. If we were to attempt to write this sort, it would likely take us much longer than the database to perform. Now we have covered our second basic command, and we can insert and retrieve data. The next command we will look into is one to update our data.
Updating a Database
Now that we are past the slight silliness of the SELECT command to query, we are back into named-as-they-mean territory with the UPDATE command. An update is somewhat of a hybrid of both the INSERT and SELECT queries, and rightfully so, given that we need to both find something and then update that something. The basic syntax of an UPDATE is this:
UPDATE <table name> SET <column name1> = "<value1>",<column name2> = "<value2>"... <column nameX> = "<valueX>" WHERE <Information Query>
Let’s work our way through an example. Let’s say I need a deadline extension on this chapter because I’m working way too hard and want to take it easy for a night. This means I will want to increase my deadline to the 23rd instead of the 22nd. So we know what we want to update, which gives us this command:
UPDATE todolist SET date="2012-09-23" WHERE
Now we just need a query; we can’t pick something on the 22nd as there are two things using that date; the same with severity and creator. We could use owner or description or idnumber. In this case I would choose ID number, as we have set this as the primary key and thus totally unique identifier. This makes our UPDATE query into
mysql> UPDATE todolist SET date="2012-09-23" WHERE idnumber=1;
Query OK, 1 row affected, 1 warning (0.48 sec)
Rows matched: 1  Changed: 1  Warnings: 0
You will notice that I did not add quotation marks around number 1 on the end. This is because MySQL treats numbers as INT differently to numbers as a VARCHAR; while this seems semantic. it is an important distinction as mathematical operations cannot be carried out against a VARCHAR, but can be against an INT. MySQL has not displayed the actual output of the data; to see it we will need to issue another select, so let’s go ahead and examine the change:
mysql> SELECT * FROM todolist WHERE idnumber=1;
+−−--------+−−-------------------+−−-----+−−----------+−−---------+−−----------+−−-------+
| idnumber | description         | owner | date       | location  | importance | creator |
+−−--------+−−-------------------+−−-----+−−----------+−−---------+−−----------+−−-------+
|        1 | Finish LAMP Chapter | David | 2012-09-23 | Australia | HIGH       | David   |
+−−--------+−−-------------------+−−-----+−−----------+−−---------+−−----------+−−-------+
1 row in set (0.00 sec)
And there you have it; I’ve just given myself a night off. But because of this, Peter and I will both have to work harder on the chapters we have remaining. This means that we will need to set the importance of both our chapters up to highest! The first part is simple:
UPDATE todolist SET importance="HIGHEST" WHERE
This is where we can look at changing how we do queries again. Do we wish to do everything? And set everything to HIGHEST by removing the WHERE? Let’s search for HIGH and make it HIGHEST, which makes our final query:
mysql>  UPDATE todolist SET importance="HIGHEST" WHERE importance="HIGH";
Query OK, 2 rows affected (0.49 sec)
Rows matched: 2  Changed: 2  Warnings: 0
Again there is no output, so we must retrieve the data again:
mysql> SELECT * FROM todolist;
+−−--------+−−-------------------+−−-----+−−----------+−−---------+−−----------+−−-------+
| idnumber | description         | owner | date       | location  | importance | creator |
+−−--------+−−-------------------+−−-----+−−----------+−−---------+−−----------+−−-------+
|        1 | Finish LAMP Chapter | David | 2012-09-23 | Australia | HIGHEST    | David   |
|        2 | Finish GUI Chapter  | Peter | 2012-09-22 | Hong Kong | HIGHEST    | David   |
+−−--------+−−-------------------+−−-----+−−----------+−−---------+−−----------+−−-------+
2 rows in set (0.00 sec)
We were able to update both those HIGH values to HIGHEST. Now for the one last remaining task: delete.
Deleting Data
We want to be able to remove tasks as they are finished. The syntax of a DELETE command is constructed almost exactly like a SELECT command:
DELETE FROM <table name> WHERE <information query>;
Here’s one final example. Let’s say my reason for a night off wasn’t that I was tired; it was because I was finished with this chapter early! Woohoo! So let’s build the delete. Again let’s go by the idnumber to be certain. The command will be this:
mysql> DELETE FROM todolist WHERE idnumber=1;
Query OK, 1 row affected (0.42 sec)
As with UPDATE, there is no information returned other than the short output saying that we deleted one row. Let’s issue a SELECT again and see what has changed:
mysql> SELECT * FROM todolist;
+−−--------+−−------------------+−−-----+−−----------+−−---------+−−----------+−−-------+
| idnumber | description        | owner | date       | location  | importance | creator |
+−−--------+−−------------------+−−-----+−−----------+−−---------+−−----------+−−-------+
|        2 | Finish GUI Chapter | Peter | 2012-09-22 | Hong Kong | HIGHEST    | David   |
+−−--------+−−------------------+−−-----+−−----------+−−---------+−−----------+−−-------+
1 row in set (0.01 sec)
Only Peter’s chapter remains, and he has to work the hardest since it’s on highest. Okay, let’s be kind—one last command. This one gets rid of a table; it’s called the DROP command and is very simple:
DROP TABLE <table name>;
Let’s drop our todolist table since we are done with these MySQL examples and we don’t want it taking up room:
mysql> DROP TABLE todolist;
Query OK, 0 rows affected (0.49 sec)
Okay, now we only have our pi database left. If you wish to delete it, you simply need to replace the world TABLE with the word DATABASE in the DROP command. It’s up to you; we will be reusing this one later. For now, let’s head on to the last part of our LAMP stack: PHP.
P is for PHP
PHP is a system for allowing you to add dynamic functions into your web page. Originally, all web pages were made from HTML alone, which doesn’t allow for much flexibility based on inputs and actions. HTML just displays a static page of content that needs to be modified to show something different. To solve this initial issue, the Common Gateway Interface (CGI) was developed. This provided a way for web servers to take requests that would allow them to return content.
Originally, most CGIs were full-blown applications that output various pieces of HTML depending on their input, and whole portions of these applications were dedicated to outputting large chunks of the same HTML over and over. This is where the development of PHP came in. PHP was designed to be a language in which one could add snippets of actual dynamic code into the static HTML and presto: a dynamic web page would be formed.
Since its creation, PHP has become widespread with installation figures of 20 million being cited. This success is in no small part due to the ease in which PHP can be used as a CGI compared with the original application form CGIs. Now that you have an understanding of what PHP is, let’s install it on the Raspberry Pi. As ever, we will rely on the services of apt-get to fetch and install PHP for us. The command to run is this:
$ sudo apt-get install php5
Reading package lists... Done
Building dependency tree
Reading state information... Done
The following extra packages will be installed:
  apache2-mpm-prefork libapache2-mod-php5 libonig2 libqdbm14 php5-cli php5-common
Suggested packages:
  php-pear
The following packages will be REMOVED:
  apache2-mpm-worker
The following NEW packages will be installed:
  apache2-mpm-prefork libapache2-mod-php5 libonig2 libqdbm14 php5 php5-cli php5-common
0 upgraded, 7 newly installed, 1 to remove and 84 not upgraded.
Need to get 5,707 kB of archives.
After this operation, 16.3 MB of additional disk space will be used.
Do you want to continue [Y/n]?
Notice that PHP is making a modification to our Apache installation. This is to replace the Apache tribesman modules with ones that are preferred for utilizing PHP. Once the PHP has finished installing, we want to go ahead and test that it is working. There is a simple PHP page that we can write, which will show all our installation settings and confirm that PHP is up and running. To test this first page, we need to replace index.html in /var/www with a new index.php that has the following line inside it:
<?php phpinfo(); ?>
Once you have removed index.html and added index.php, direct your browser to your Apache server. Figure 8-2 will be your reward.
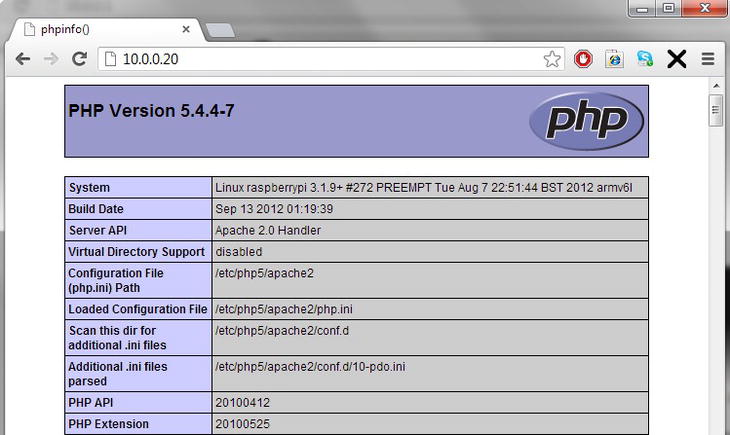
Figure 8-2. PHP info page
This is the PHP info page, which describes the entire current configuration of your newly installed PHP instance. Since we are viewing it, it also proves that the PHP interpreter is working correctly. It also shows that index.php has been picked up as a default page by Apache. The code that we added to generate this was the following:
<?php phpinfo(); ?>
This is a great example of PHP code; first we have the opening markers that show that this is PHP and to be interpreted as such ( <?php and ?> to close) and we have a single function call inside to phpinfo(); that displays all our data.
A function is a reference to a predefined piece of code that we run by invoking the function name. Functions always end with a pair of parentheses, which can contain data (variables that will be passed into the function for use there). In addition to functions, PHP uses arrays, much like the arrays you saw in Chapter 7. To recap, arrays are variables that contain a number of values rather than one. An array can be manipulated as a whole array or by each of its individual elements. To access the array elements, you need to add a pair of square brackets to the end of the array variable and enter the number of the element you wish to access. These element numbers start from 0 as the first element and increment.
The other important things one needs to know for PHP are these:
- All PHP statements end with a semicolon
- All PHP variables start with a $ sign (recall variables from BASH in Chapter 7; PHP variables are used for the same thing)
- All PHP array variables start with an @ sign
- All PHP function’s internal code are surrounded with curly braces { and }
Next we need to have a look through the PHJP Info page; start by searching for MySQL. Oh dear, there’s no mention of it. PHP will need to understand how to communicate with MySQL in order for us to be able to display database content on our web page. Thankfully, apt-get comes to the rescue again. This time, we need to install the php5-mysql package:
$ sudo apt-get install php5-mysql
Reading package lists... Done
Building dependency tree
Reading state information... Done
The following extra packages will be installed:
  libmysqlclient18
The following NEW packages will be installed:
  libmysqlclient18 php5-mysql
0 upgraded, 2 newly installed, 0 to remove and 84 not upgraded.
Need to get 711 kB of archives.
After this operation, 3,547 kB of additional disk space will be used.
Do you want to continue [Y/n]?
Again, you will see that this install adds a new MySQL client library for communications and the new PHP MySQL interleave. It will also automatically restart your Apache web server and change several PHP configuration files for you. Once again, open up and direct your browser to the Apache web page and search for MySQL, and there we go! (See Figure 8-3.)

Figure 8-3. PHP MySQL config info
We have confirmed the following:
- We have a working PHP system
- Apache can render the PHP
- MySQL and PHP know how to communicate
This means that we have just accomplished creating a working LAMP setup! Now let’s put it to use.
Simple Web App
Now that we have built our new LAMP stack and it is up and running on your Pi, it is time to make good use of it. Good use can be literally anything you want as you now have a web server of your own that you can write web applications on. For many of you, however, this may seem a daunting task, as you are unfamiliar with PHP or even HTML. Fear not; like Linux in general this seems daunting at first and there are intricacies, but nothing insurmountable and nothing that you can’t get over with a little help. I’ve always found that the best way to learn is to actually do it, which means we can undertake a project together, which will illustrate how you can use your new LAMP stack to create a web application.
In order to build a web application, we need to understand both HTML and PHP. One final thing: this will be a bare-bones web page and may look a little rough. There are so many ways to improve the visual aspect of your web page, but there are whole books dedicated to this, which will cover a larger amount of content and interactions. So with this in mind, let’s have a look at understanding HTML.
HTML
Hyper Text Markup Language (HTML) is the language that makes the Internet. HTML provides the basis for all transmitted web application content, it is made up as a series of tags and they are sent as a HTML document to your browser. Your browser then uses these tags to assemble its version of your web page. This means that web content can be very small and can be viewed by any system that has the capacity to decode HTML tags. The downside here is that different software can display websites with slight differences in them.
HTML tags are words surrounded by angle brackets. These tags are written in what is called a markup language. HTML tags come in two varieties, on their own or in pairs, with pairs being the much more common. Here are two sets of HTML tags
- <html></html>: An open and a close HTML tag (these tags tell your browser where the HTML page starts and finishes)
- <hr/>: An hr tag on its own (<hr/> will draw a line across your web page because it stands for headed rule)
The slashes at the front of the second HTML tag show that this is the close of this tag. The slash at the end of the hr tag shows it is meant to be on its own. Have a look at a very basic website:
<html>
        <head>
                <title>Pi Brand - Todo List App</title>
        </head>
        <body>
                <h1>Pi Todo List App</h1>
        </body>
</html>
If you place this into index.php on your Pi, open up your browser you should see a basic white page with the phrase Pi Todo List App in large black text. Additionally up the top of your browser should say the same. This website is wholly generated by the HTML tags we just entered. Let’s go over these as an explanation of how the website works:
- First you will see that all the content is wrapped within a pair of HTML tags, which say that all the content within them is HTML.
- At the next level are the head and body tags, which represent the next level of tags, the heading information of the page and the actual body of the page.
- The title tags are used to set the title bar at the top of the page.
- And within the body is one pair of h1 tags that are the big block of text. The h1 is short for header 1, which represents the largest size of header tags. There are an almost unlimited number of hx tags you can use; as long as they are defined, most browsers will only go as far as h4 or h5 without one being defined separately.
So we have now covered five basic HTML tags but there are many, many more. For a reference of a host of the common HTML tags, some examples and great tutorials, head over to wc3schools.com or have a look at “Beginning HTML with CSS and XHTML,” by Craig Cook and David Schultz.
Here are a few more HTML tags and how they are used:
- <p>: Paragraph tag, used to create text into a paragraph block
- <br>: Break tag, used to insert a break into the page
- <hr>: Horizontal rule, creates a horizontal line across the screen
- <a>: Hyperlink tag, for a link to another page
- <img>: Image tag, for adding images to a page
- Table tags
- <table>: Top-level tag of a table
- <th>: Element of the tables heading row
- <tr>: Row for the table
- <td>: Cell of a table within a row
- Form tags
- <form>: Top-level element of a form
- <input>: Input element of a form
These are some of the basic HTML tags we will use in our project to create output and drive input to the to-do list. In addition to the raw tags, there are a number of different options you can use to change the various aspects of how these elements are displayed; unfortunately, it would take more than the rest of this book to cover each element, so we will have to discuss them as they come along. Now that you’re familiar with what HTML can do and what some of these tags look like, we can move on to trying to add some PHP into the mix here. But first, let’s have a look at actually designing our page.
Starting Our Page
The basic concept for our page will be a website in two parts; first will be a page that contains a to-do list, listing off all the elements in the database. Next will be a form for the submission of new elements to the database down the bottom. We will also add a check box that will allow you to delete elements you no longer need. Now that we have the basic layout, there are some functional decisions that need to be made regarding how the processing of the page should occur. Since the design and output will remain constant with just some processing to connect to the database to load the elements or remove elements, we can just go ahead and have one page, which will attempt to perform any of the actions it needs (the additions and deletions before displaying the page.
Now we can start actually writing the page out. To start, add all the content to the page and get the output going. However, first we need to have our database set up so we have data to display. We have already created the Pi database and we have the to-do list table structure from earlier, so let’s use them. The create statement for this table was as follows:
create table todolist (
idnumber INT PRIMARY KEY NOT NULL AUTO_INCREMENT,
description VARCHAR(200),
owner VARCHAR(40),
date DATE,
location VARCHAR(40),
importance VARCHAR(10),
creator VARCHAR(40)
);
Now that we have a dataset to work with and a layout for our data, we can begin to add display elements. Since our data is tabular, we can use the table elements to display it. This will make arranging the data much easier. So, we have our basic page layout from earlier; next we should set up our data connection. A MySQL PHP connection uses the mysqli interface. Thus to establish a connection to the database we must create a new mysqli that has the details of our database and connection:
<?php
$mysqli = new mysqli('localhost', 'pi', 'raspberry', 'pi'),
if ($mysqli->connect_error) {
    die('Connect Error (' . $mysqli->connect_errno . ') '
            . $mysqli->connect_error);
}

$mysqli->close();
?>
The preceding is a small segment of PHP code, which does the following:
- Creates a new mysqli object to connect to the system, which is available on the local machine using the username pi and password raspberry.
- Checks that the connection to the database was successful; and if not, displays an error message.
- Closes the connection as we don’t want to leave a potentially open connection there unused.
Now that we have this block of code for database connectivity, add this to the original block of code in index.php:
<html>
<head>
<title>Pi Brand - Todo List App</title>
</head>
<body>
<h1>Pi Todo List App</h1>
<?php
$mysqli = new mysqli('localhost', 'pi', 'raspberry', 'pi'),
if ($mysqli->connect_error) {
    die('Connect Error (' . $mysqli->connect_errno . ') '
            . $mysqli->connect_error);
}
$mysqli->close();
?>
</body>
</html>
We now have that original piece of HTML from before, with the addition of one little mysqli connection object. This won’t do much unless there is an error because nothing else will be displayed. Now it’s time to add another block of code to display the to-do list. This will take two forms: the table block and the table head. Then we will need to display everything within the MySQL table. Displaying them means creating a loop that will display the content of each row, and placing it within the correct set of HTML tags. Let’s start with the basic HTML table layout:
<table>
<tr>
<th>Description</th>
<th>Owner</th>
<th>Due Date</th>
<th>Location</th>
<th>Importance</th>
<th>Creator</th>
</tr>
...
</table>
This code sets out the table and its first row, which are all tagged as being table header elements. Now add the PHP to display all the content from the MySQL table:
<?php
$result = $mysqli->query("SELECT * FROM todolist");
while($row = $result->fetch_assoc()){
        print "<tr>";
        print "<td>".$row["description"]."</td>";
        print "<td>".$row["owner"]."</td>";
        print "<td>".$row["date"]."</td>";
        print "<td>".$row["location"]."</td>";
        print "<td>".$row["importance"]."</td>";
        print "<td>".$row["creator"]."</td>";
        print "</tr>";
}
?>
The PHP section performs this nicely. First, it creates a new variable, $result, which contains the output of executing a query on mysqli. The query is, of course, SELECT * FROM todolist. Each line of the result is then passed out one by one in the while loop by the $result->fetch_assoc() call and assigned to the row variable. For each row that comes out, we print the row value for each field we request. You can see the resemblance between the output section of the PHP and the raw HTML. This is deliberate as we want the output of the PHP to marry up with the table header.
Now we should add this back to the original code block, but when doing so we need to make one more change, which is to move the $mysqli->close(); to the bottom of the new block, just before the close of the PHP segment. This move needs to occur because otherwise we will have closed off the database connection before we have actually pulled the data out of the database.
...
<body>
<h1>Pi Todo List App</h1>
<?php
$mysqli = new mysqli('localhost', 'pi', 'raspberry', 'pi'),
if ($mysqli->connect_error) {
    die('Connect Error (' . $mysqli->connect_errno . ') '
            . $mysqli->connect_error);
}
?>
<table>
<tr>
<th>Description</th>
<th>Owner</th>
<th>Due Date</th>
<th>Location</th>
<th>Importance</th>
<th>Creator</th>
</tr>
<?php
$result = $mysqli->query("SELECT * FROM todolist");
while($row = $result->fetch_assoc()){
        print "<tr>";
        print "<td>".$row["description"]."</td>";
        print "<td>".$row["owner"]."</td>";
        print "<td>".$row["date"]."</td>";
        print "<td>".$row["location"]."</td>";
        print "<td>".$row["importance"]."</td>";
        print "<td>".$row["creator"]."</td>";
        print "</tr>";
}
$mysqli->close();
?>
</table>
</body>
</html>
This HTML is now working in concert with the PHP to generate a full page of content. The static HTML provides a framework and then we have two pieces of PHP: one piece to establish a connection and a second to pull the results out of the to-do list table and add them to the page. Now that we have the basic display working, we need to add a form to give ourselves a form to submit new content. This basic form should have an input stream for each of the elements we will insert into the table. We will also need one more element, a special hidden one that will tell our processor what kind of things it is to do with the data. In this case, I like to use a variable called "action" and assign it as needed. The final element we will need is a submission one, which allows us to push the data to the server to be processed. In addition to all these elements, we need to give the form an action and method variable, which says how it is to invoke CGI on our web server and what method it should use. This block when it is put together looks like this:
...
</table>
<form action="index.php" method="POST">
<input type="hidden" name="action" value="insert" />
Description: <input name="description" /><br/>
Owner: <input name="owner" /><br/>
Date: <input name="date" /><br/>
Location: <input name="location" /><br/>
Importance: <input name="importance" /><br/>
Creator: <input name="creator" /><br/>
<input type="submit" />
</form>
</body>
</html>
This code block can then be added below the table and even separated with an <hr /> tag, which means that you will have a table of display content and a section below it that will give you the ability to add new content. When put together and installed into the web server, the content that it generates will look like Figure 8-4.
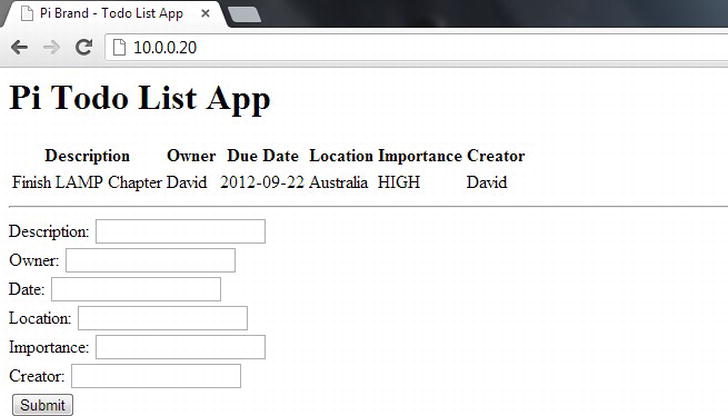
Figure 8-4. To-do list app with insert table
If you press the submit button, you will wind up right back on the page, but you can see that the page is referenced in the URL. This is the action block sending the CGI command to run on this page. So now we will need to add some CGI processing to our PHP in order to process this data.
Recall that we set a method of POST earlier, which is one of two methods that we can use to pass data from our page into the CGI system to be processed. The other method is GET, and the difference between the two is limited as both pass data in basically the same manner. For all practical purposes, the only difference is that GET will display the content data on the web address, whereas POST will keep it hidden. You can check this out for yourself by changing the POST to GET and then pressing the submit button. Your URL will look something like http://10.0.0.20/index.php?action=insert&description=&owner=&date=&location=&importance=&creator =.
There is actually a large amount of data being transmitted that will need to be processed. Thankfully, PHP has methods to make this much easier; it has special variables that are automatically populated with the data from CGI requests. There are three special variables that you can access (as we did with the SQL assoc variables): _POST, _GET, and _REQUEST.
To process our CGI, we need to do quite a few things. First, check if the action variable is set and contains data; that it will when we press the submit button as we have it set to insert (and later have an action of remove). Once we have ensured that action is set, we can check what it is set to. Once we know which action we are performing, we can simply pull apart the remainder of the output and then perform the required actions on the database. Finally, if we do this before the main page load, we will actually have the latest version of the data displayed automatically!
Our CGI should start looking like this:
if(isset($_REQUEST["action"])){
switch($_REQUEST["action"]){
        case "insert":
                $SQL="INSERT INTO todolist (description, owner, date, location, importance, creator) VALUES (";
                $SQL=$SQL."'".$_REQUEST["description"]."',";
                $SQL=$SQL."'".$_REQUEST["owner"]."',";
                $SQL=$SQL."'".$_REQUEST["date"]."',";
                $SQL=$SQL."'".$_REQUEST["location"]."',";
                $SQL=$SQL."'".$_REQUEST["importance"]."',";
                $SQL=$SQL."'".$_REQUEST["creator"]."'";
                $SQL=$SQL.");";
if ($mysqli->query($SQL)=== FALSE) {
    printf("Error – Unable to insert data to table " . $mysqli->error);
}

                break;
        case "delete":
                print "Delete function yet to be added!";
                break;
}
}
The first thing is to see whether the action variable specified in the hidden field within the form is set. If it is, we can be reliably certain that an action needs to be performed. Next, if action is set, we go into a switch (or case) statement to work out which function we are performing. I’ve added a case for both insert and delete, but the delete function is just printing that we will add it later. Besides, how would we access it without a submit method for it and an action field in a form?
Inserting to the Database
In the insert case, we simply need to create and the build the SQL command. The command we are trying to build is exactly like the previous SQL inserts. First, I laid out the static content: the frame of the INSERT statement, the table name, and which fields we will be writing into. Then I have started adding variable by variable to that statement. You can see that the additions have a lot of funny stuff around them because each of these variables will need to be surrounded by single quotation marks and have a comma on the end. Each of these little pieces of text needs to be treated as such, which means wrapping them in a pair of double quotation marks like so:
$SQL=$SQL."'".$_REQUEST["description"]."',";
This assigns the SQL variable the value of the current SQL value (given by $SQL=$SQL ) and then adds to it (marked by the period) a single quote (given by "'") and the value of the REQUEST variable description, then a single quote, and then a comma. I know it seems a lot of work, but we have been able to pull out each of the variables we need and have the whole SQL statement in one tiny variable.
![]() Caution It’s also important to note at this point that the above is not to be considered secure. Those variables can quite literally be anything and there are special functions that you can use to perform some sanity checking on those values. The recommended function for performing a good selection of these sanity checks is the mysqli_real_escape_string.
Caution It’s also important to note at this point that the above is not to be considered secure. Those variables can quite literally be anything and there are special functions that you can use to perform some sanity checking on those values. The recommended function for performing a good selection of these sanity checks is the mysqli_real_escape_string.
Once we have created the SQL variable, we need to insert it by simply invoking the mysqli query function again. In this example, I’ve also added a check to see that the execution of the query failed. And that’s it; this block of code will process the CGI insert into our database from our PHP. All that remains is to insert the block correctly into the right place in our code. I have chosen to append this to the first block of PHP we added instead of giving it its own. This means the flow of the page becomes first to draw the header of the page, then to create the database connection and perform any CGI actions, then to display the actual content of our to-do list, and then to display the final form. Once the code is in, you can test that it works by placing values into the form and pressing submit. This should go ahead and add an extra row that will show up in your table, as shown in Figure 8-5.

Figure 8-5. All work and no play…
Remove Entries
Now that the add functionality is working, we need to create a delete functionality. As with all things in life, there are a number of ways to can approach it. The easiest is to simply add a form and delete option for each individual row, which means that if you want to delete, you need to issue them one at a time. The second option is to have a series of check boxes that will delete all the ticked elements. I am a fan of the second option as it gives a lot more flexibility with the deletions.
We need to make two changes for this process to work. The first change is to add a form around the table that will be the delete form, a hidden field with the action delete, a submission button below the form, and check boxes to each element. To add the check boxes, we will also need to add an empty element to the start of the table header row. Figure 8-6 is what your page should look like with the added check boxes and submit button.

Figure 8-6. Now with extra check boxes
The code section for the form content generation is shown following. You can see that there is another form wrapping the table that has the same method and action. Next is the new hidden input value that sets the action to delete, allowing us to access the correct section in our case statement. Probably the most important change is the addition of the empty td pair and the additional input of type check box. This check box is probably the most complex set of elements we have added—it contains the type of check box, the value that is specially configured to be accessible as an array that is done by adding the square brackets before and after. The final element is the value, which I have set to be the value of the check box. This means that when we go into CGI mode, we will take the array value of check boxes and it will contain a list of the idnumber values for the elements we wish to delete.
Here is a short summary of all the changes we have made to the form to add the check boxes:
...
<h1>Pi Todo List App</h1>
<form action="index.php" method="POST">
<input type="hidden" name="action" value="delete" />
<table>
<tr>
<td></td>
...
</tr>
<?php
$result = $mysqli->query("SELECT * FROM todolist");
while($row= $result->fetch_assoc()){
        print "<tr>";
        print “<td><input type='checkbox' name='checkboxes[]' value='".$row[“idnumber"]."' /></td>";
        print "<td>".$row["description"]."</td>";
        print "<td>".$row["owner"]."</td>";
        print "<td>".$row["date"]."</td>";
        print "<td>".$row["location"]."</td>";
        print "<td>".$row["importance"]."</td>";
        print "<td>".$row["creator"]."</td>";
        print "</tr>";
}
$mysqli->close();
?>
</table>
<input type="submit"/>
</form>
...
Remove Data from DB
We have one final change to make, which is adding the delete processing in the case statement. We can use a similar logic to the insert statement, whereby we create a SQL variable and then iteratively add the remove for the idnumbers one after another. In this case, we will need to have a for loop that will run through each element of the _REQUEST['checkboxes'] variable that we can get from the count function being run on the variable. This gives us a full for loop as follows:
for($i=0; $i < count($_REQUEST['checkboxes']); $i++){
Once we are within the loop, we simply need to pull out the $i’th element of the _REQUEST['checkboxes'] array each time in the loop. In addition, we will need to add an or to the end of each of them so that we will delete each of the elements by idnumber; we use or because we want it to delete the variable if the idnumber is the first number, the second number, or the third, and so on.
However, we will have one issue with the or: we will add it to the end of the last element that we don’t want. We will need to use the rtrim function to trim off the or from the end. The rtrim function will trim off a given value from the right side of a string, which will give us the SQL we want. Finally, we perform the same query action as in the insert and will again check to see whether there is an error. This will give us a code block like this:
$SQL="DELETE FROM todolist WHERE";
for($i=0; $i < count($_REQUEST['checkboxes']); $i++){
        $SQL=$SQL . " idnumber=" . $_REQUEST['checkboxes'][$i] . " or";
}
$SQL= rtrim($SQL, "or");
if ($mysqli->query($SQL)== FALSE) {
printf("Error Unable to delete value " . $mysqli->error);
}
Figure 8-7 is the final result. I have used the delete to remove the original entry so we are just left with the one. Remember that all examples from this book are available online via the Apress website. If you are unsure about how all this code is assembled, please download a copy and have a look!

Figure 8-7. Lowering my workload
Troubleshooting
Now let’s go over some ways to troubleshoot some issues. First, try making each code change in sequence and then reload the page. You can use the view source command to see the full HTML that is being generated by the PHP and see whether the values are showing up correctly. If you can’t get that far, have a look at the error log, (the one from right back at the start when we configured Apache). This file will list all of the PHP errors that occur. Have a look to ensure that your quotation marks are open and closed correctly and you haven’t left any dangling. Check that you have a semicolon on the end of each of your statements (I always forget this one). Check that your parentheses, square brackets, and circle brackets are opened and closed correctly with no overlap.
Much of the stuff in PHP and web development is trial and error. You should check that each statement or block of code that you add functions and generates as expected. You can use a print statement to output variables as they are generated to see what exactly you are doing, which is a great way to diagnose any problems with your SQL statements. Finally, remember that you have access to the full system, go ahead and test inserting values into your SQL and delete them as needed; use the system to work out what it is doing and what causes your problems.
Where From Here?
We’ve done all this development and we have a functional to-do list that you can use to display, add, and delete entries with. We have used a variety of different programming tools to do things, but there are a lot of things we can do from here. These are some of the changes you could make to your to-do list:
- Add isset(); checks to each of the insert values to check that you are actually inserting values, not just blank spaces.
- Wrap each of the inserted values with the mysqli_real_escape_string function. This will increase the security of the to-do list because it prevents people writing “nasty” values into your application that will execute as separate SQL queries.
- Change the value option of each of the submit elements, so that they say what we are using them for: inserting or deleting.
- Create a table around the form elements for inserting and give each of the labels and insert fields their own row and own cell. Wrapping them in a table makes the display much more uniform.
- Start looking into CSS because it can make a big difference in how your to-do list looks. Twitters “bootstrap” is a great starting point.
Summary
So we’ve come a long way since we started. We’ve done a lot. We have installed and configured Apache, MySQL, and PHP. You have learned how to create simple SQL statements to create and delete databases and tables and then learned how to insert and delete data from these tables. Finally, you have learned how web content is displayed from an Apache web server. Then we combined all and went through some PHP and HTML to generate a whole application that provides access to a database to-do list table.
This has been a monumental undertaking because we have not only gone and installed three different applications and created an interconnected application stack but also gone over three languages to create an application on top of the application stack.
Congratulations—job well done!