
![]()
Everyone wants to be James Bond. Or at least I know I do. He seems to get into all sorts of situations; then whips out a handy gadget to save the day. The Raspberry Pi is, as we have shown, supremely versatile for such a tiny little piece of hardware. This makes it the perfect tool for a secret agent because with just a little bit of energy you can provide a fully-fledged technological solution at a fraction of the expense of employing John Cleese (admittedly the Pi is not as funny). So, with this in mind, we can now don our tuxedos and get down to secret agent business.
All good secret agents know that you need to be able to detect and be alerted to intruders in your secret hideout. So this makes it the perfect time to introduce you to the Raspberry sPi! The Raspberry sPi is a combination spy camera and alerting system, the perfect solution for spotting dastardly intruders into your inner sanctum! Or for monitoring your pets over the Internet. The basic concept here is that we will be configuring our Raspberry Pi. So without further ado, let’s get started.
Materials Needed
Here are the materials needed for this project (also shown in Figure 10-1):
- 1x Raspberry Pi
- 1x Micro USB cable (for power)
- 1x Ethernet cable
- 1x USB webcam
- 1x SD card

Figure 10-1. The Raspberry sPi kit
At this point, you should note that not all webcams are compatible with the Raspberry Pi. This document was created with a Logitech C525 webcam. Thankfully, the Pi community maintains a list of compatible hardware, which is available at http://elinux.org/RPi_VerifiedPeripherals#USB_Webcams. If you are in doubt, please check there to see which peripherals will work with your Pi.
Nothing special here; just attach your micro USB for power, attach the Ethernet for network access, attach the SD for storage, and make sure you leave the camera unattached—we will do that later. The rest of this process assumes you are familiar with the following:
- Installing the Raspbian OS
- Knowledge of how to work within a Raspbian Linux environment
If you aren’t familiar with either of these two, that’s perfectly okay. That’s what this book is for after all, so please go back and read Chapter 1 for how to get started with Raspbian and Part 2 of this book to gain familiarity with working in a Raspbian Linux environment.
Getting Started
So, without further ado, let’s get started. Go ahead and load up Raspbian and connect your Pi to your network. Go through the Raspbian setup procedures and make sure to enable SSH because you will need to remote in later. (We don’t see James Bond carrying round a keyboard, HDMI cable, and a monitor, do we?) Once you are set up, go ahead and SSH into your Pi (covered in Chapter 3).
Okay, once you’re logged in, go ahead and issue the command dmesg and have a look at the output.
dmesg
The dmesg command is a tool called a driver message that shows a logged output of all the messages to the kernel, which includes messages from devices and the drivers that are attached to your system. dmesg is infinitely useful in determining which devices are attached, and where and how you should interface with them. It also lists driver and kernel messages that are incredibly useful when diagnosing low-level problems. So, let’s have a look at the relevant section of the output.
![]() Note less is more. If you find that the output for a command is running over the top of the screen and you can’t see it any more, reissue the command and then pipe it to less (i.e., dmesg | less). This should allow you to navigate the output of just about any command using the arrow keys and spacebar to page down.
Note less is more. If you find that the output for a command is running over the top of the screen and you can’t see it any more, reissue the command and then pipe it to less (i.e., dmesg | less). This should allow you to navigate the output of just about any command using the arrow keys and spacebar to page down.
[    1.998581] Waiting for root device /dev/mmcblk0p2...
[    2.071268] mmc0: new high speed SD card at address 7d37
[    2.079917] mmcblk0: mmc0:7d37 SD02G 1.83 GiB
[    2.088723]  mmcblk0: p1 p2
[    2.132278] EXT4-fs (mmcblk0p2): mounted filesystem with ordered data mode. Opts: (null)
[    2.145275] VFS: Mounted root (ext4 filesystem) on device 179:2.
[    2.155272] Freeing init memory: 200K
[    2.187333] usb 1–1: new high speed USB device number 2 using dwc_otg
[    2.418045] usb 1–1: New USB device found, idVendor=0424, idProduct=9512
[    2.427750] usb 1–1: New USB device strings: Mfr=0, Product=0, SerialNumber=0
[    2.438708] hub 1–1:1.0: USB hub found
[    2.445041] hub 1–1:1.0: 3 ports detected
[    2.727674] usb 1–1.1: new high speed USB device number 3 using dwc_otg
[    2.837920] usb 1–1.1: New USB device found, idVendor=0424, idProduct=ec00
[    2.857413] usb 1–1.1: New USB device strings: Mfr=0, Product=0, SerialNumber=0
[    2.878968] smsc95xx v1.0.4
[    2.942985] smsc95xx 1–1.1:1.0: eth0: register 'smsc95xx' at usb-bcm2708_usb-1.1, smsc95xx USB 2.0 Ethernet, b8:27:eb:8a:46:ba
[   11.006171] EXT4-fs (mmcblk0p2): re-mounted. Opts: (null)
[   11.426960] ### snd_bcm2835_alsa_probe c05c88e0 ############### PROBING FOR bcm2835 ALSA device (0):(1) ###############
[   11.442869] Creating card...
[   11.448268] Creating device/chip ..
[   11.454771] Adding controls ..
[   11.460340] Registering card ....
[   11.475463] bcm2835 ALSA CARD CREATED!
[   11.487786] ### BCM2835 ALSA driver init OK ###
[   18.493739] smsc95xx 1–1.1:1.0: eth0: link up, 100Mbps, full-duplex, lpa 0x45E1
[   24.672322] Adding 102396k swap on /var/swap.  Priority:-1 extents:1 across:102396k SS
As you can see, the output from dmesg is a little offputting and hard to understand. Much of the information relies on understanding a few basic tenets of how the dmesg system works. First is the numerical values within the square brackets [ and ]. This value is a timer value that registers the amount of time that has passed since system launch. This is a good way to follow the sequence of events in your system and to tell recent ones from those that occurred in the past.
Next is the content itself. Most of these lines are diagnostically useless alone, but together they form a very interesting picture of what exactly has gone on in my Pi. Let’s start with the first line:
waiting on root device /dev/mmcblk0p2
The first few lines are obvious: the system is waiting for something, but what is /dev/mmcblk0p2? Well, the first giveaway is the /dev; this is where the Linux OS lists all its devices so we know /dev/mmcblk0p2 is a device. Second is the mmcblk0p2, which looks like a string of garbage but is actually a series of abbreviations.
- mmc means multimediacard (the flash device standard)
- blk means a block storage device
- 0 means the first logical device of this type
- p2 means partition two of the device
So we are waiting for the SD card. The second through fourth lines are what we are waiting for: the SD card to register as you can see it actually registers as each of the subdevices we mentioned, in order no less! After that, the next two lines are the device mounting the filesystem on this device as readable. Continuing down, you can see the registration of the Pi’s USB devices (lines 8–15), its Ethernet port (lines 16, 17, and 26) and finally an Advanced Linux Sound Architecture (ALSA) device, which is the audio port (lines 19–25).
Now that you understand why we didn’t just attach the webcam to begin with, I wanted to view the dmesg output. Given that you know what to look for, now go ahead and attach your webcam and run dmesg again. Have a look at the new lines that have shown up. These should all be related to your newly attached webcam! Here is the output from me attaching mine:
[ 8168.793423] usb 1–1.2: new high speed USB device number 4 using dwc_otg
[ 8169.147691] usb 1–1.2: New USB device found, idVendor=046d, idProduct=081d
[ 8169.147736] usb 1–1.2: New USB device strings: Mfr=0, Product=0, SerialNumber=1
[ 8169.147758] usb 1–1.2: SerialNumber: 8627F4C0
[ 8169.314171] Linux video capture interface: v2.00
[ 8169.336482] uvcvideo: Found UVC 1.00 device <unnamed> (046d:081d)
[ 8169.402071] input: UVC Camera (046d:081d) as /devices/platform/bcm2708_usb/usb1/1-1/1-1.2/1-1.2:1.2/input/input0
[ 8169.402280] usbcore: registered new interface driver uvcvideo
[ 8169.402299] USB Video Class driver (1.1.1)
[ 8169.460903] usbcore: registered new interface driver snd-usb-audio
So, what can you tell from these lines? For starters, you can see a large difference in timing for this particular entry in the dmesg log, which represents the delay from start up until I connected my device. Next, you will recognize that the first four lines represent the USB ports picking up a new attached device; in fact, the first line references the module used to do this dwc_otg (short for DesignWare Cores—On The Go). Line 5 shows that it’s a video capture interface, and line 6 shows that the module uvcvideo found a USB Video Class (UVC) device that it identifies and registers. Finally, we can also see that the webcam’s microphone has also been registered on the last line as a snd-usb-audio device. From this we can see that my webcam has been attached and has registered itself with a driver into the OS.
Now that the device has been registered, we need a way to reference it so it can be used by an application. You will notice that the dmesg output didn’t actually specify which device we added, so let’s have a look and see if we can’t match it the other way. Let’s start by listing the contents of /dev (results shown in Figure 10-2).
$ ls /dev/

Figure 10-2. Contents of /dev directory
That is a few devices. We can quickly eliminate a few right off the bat: all the tty devices because they are teletype devices, all the ram devices because that’s the Pi’s RAM, all the loop devices because they are loop back connectors, all the memblck devices because they relate to the SD card, and all the vcs devices because they are virtual consoles. There are still a few, but the best looking is video0. We are looking for a webcam, right? It registered as a video capture device didn’t it? Okay, so we think that’s right—but how can we tell?
udev, more specifically the udev administration function, is the device manager for the Linux kernel. It governs how and where devices register themselves so that they can be accessed as part of the OS by applications. In Debian (and thus Raspbian), the inner workings of udev can be accessed with the udevadm command, so let’s go ahead and use it. Execute the following:
$ udevadm info –q all –n /dev/video0
P: /devices/platform/bcm2708_usb/usb1/1-1/1-1.2/1-1.2:1.2/video4linux/video0
N: video0
S: v4l/by-id/usb-046d_081d_8627F4C0-video-index0
S: v4l/by-path/platform-bcm2708_usb-usb-0:1.2:1.2-video-index0
E: DEVLINKS=/dev/v4l/by-id/usb-046d_081d_8627F4C0-video-index0 /dev/v4l/by-path/platform-bcm2708_usb-usb-0:1.2:1.2-video-index0
E: DEVNAME=/dev/video0
E: DEVPATH=/devices/platform/bcm2708_usb/usb1/1-1/1-1.2/1-1.2:1.2/video4linux/video0
E: ID_BUS=usb
E: ID_MODEL=081d
E: ID_MODEL_ENC=081d
E: ID_MODEL_ID=081d
E: ID_PATH=platform-bcm2708_usb-usb-0:1.2:1.2
E: ID_PATH_TAG=platform-bcm2708_usb-usb-0_1_2_1_2
E: ID_REVISION=0010
E: ID_SERIAL=046d_081d_8627F4C0
E: ID_SERIAL_SHORT=8627F4C0
E: ID_TYPE=video
E: ID_USB_DRIVER=uvcvideo
E: ID_USB_INTERFACES=:010100:010200:0e0100:0e0200:
E: ID_USB_INTERFACE_NUM=02
E: ID_V4L_CAPABILITIES=:capture:
E: ID_V4L_PRODUCT=UVC Camera (046d:081d)
E: ID_V4L_VERSION=2
E: ID_VENDOR=046d
E: ID_VENDOR_ENC=046d
E: ID_VENDOR_ID=046d
E: MAJOR=81
E: MINOR=0
E: SUBSYSTEM=video4linux
E: TAGS=:udev-acl:
E: UDEV_LOG=3
E: USEC_INITIALIZED=8168852755
Wow, okay, that’s a big block of scary looking output. As I’m sure you’ve guessed by now, we just asked the udev system to give us an info query for all info relevant to the device with name /dev/video0, which it well and truly has. However, before hyperventilation sets in, actually have a look at the first few lines. The first line should spring out as familiar—it’s the device identifier that we saw in dmesg from when the webcam was attached! In fact, most of the information in here is all data that was referenced somewhere in the dmesg block. Okay, so given that we can match the device from dmesg to the device here in our system, it’s safe to say that the USB webcam we attached is available on the filesystem as /dev/video0.
If, unlike mine, your webcam had issues when registering with the kernel in dmesg, you may need to install a driver. You should check with the manufacturer and online to see whether there is a driver that’s available for your webcam. If so, install the driver and then try reattaching your webcam to see if it can be registered. You may even get lucky, and your device driver will have the kernel list where the webcam is registered in /dev in dmesg—as it did with my SD card in the preceding example.
Additionally, if you don’t have a device such as /dev/video0 listed, you should check to see whether any of the other devices match up with output that relates to your device from dmesg. While Linux tries to be sensible in how the /dev filesystem is laid out, manufacturers and software engineers can do funny things to try and stand out—with the upshot that you sit there screaming about how you cannot find a device. So just be patient and have a look around and use the process of elimination to try and work out where your device has been attached. The goal here is to ensure that you know which /dev file references your webcam.
Okay, system configured, check. Webcam attached, check. Now let’s make all this actually do something! To do the webcam capture, we will be using the Linux motion capture ironically named motion. So let’s go ahead and install it. Run the following command to direct apt-get to download and install the motion package:
$ sudo apt-get install motion
Your output should resemble the following:
Reading package lists... Done
Building dependency tree
Reading state information... Done
The following extra packages will be installed:
  ffmpeg libav-tools libavcodec53 libavdevice53 libavfilter2 libavformat53 libavutil51 libdc1394-22 libdirac-You
  libjack-jackd2-0 libmp3lame0 libpostproc52 libpq5 libraw1394-11 libschroedinger-1.0-0 libspeex1 libswscale2 libtheora0 libva1
  libvpx1 libx264-123 libxvidcore4
Suggested packages:
  jackd2 libraw1394-doc speex mysql-client postgresql-client
The following NEW packages will be installed:
  ffmpeg libav-tools libavcodec53 libavdevice53 libavfilter2 libavformat53 libavutil51 libdc1394-22 libdirac-encoder0 libgsm1
  libjack-jackd2-0 libmp3lame0 libpostproc52 libpq5 libraw1394-11 libschroedinger-1.0-0 libspeex1 libswscale2 libtheora0 libva1
  libvpx1 libx264-123 libxvidcore4 motion
0 upgraded, 24 newly installed, 0 to remove and 71 not upgraded.
Need to get 8,365 kB of archives.
After this operation, 17.6 MB of additional disk space will be used.
Do you want to continue [Y/n]? y
I don’t know about you, but I’m way too excited to bother with all the setup and config; let’s just fire up motion and see what it does! Start it up with this:
$ motion –s
The light on the camera goes on and action! Start waving and moving about, because you want it to capture you!
[1] Changes:  3374 - noise level: 15
[1] Changes:  3198 - noise level: 15
[1] Changes:  3011 - noise level: 15
[1] Changes:  2922 - noise level: 15
[1] Changes:  2555 - noise level: 15
[1] Changes:  2390 - noise level: 15
[1] Changes:  2491 - noise level: 15
[1] Changes:  2874 - noise level: 15
[1] Changes:  2817 - noise level: 15
[1] Changes:  3238 - noise level: 15
[1] Changes:  3093 - noise level: 15
[1] Motion detected - starting event 1
[1] File of type 1 saved to: ./01-20120910203217-05.jpg
[1] Changes:  2912 - noise level: 15
[1] File of type 1 saved to: ./01-20120910203217-06.jpg
[1] Changes:  2480 - noise level: 15
[1] File of type 1 saved to: ./01-20120910203217-07.jpg
There you go, you can see it capturing changes in the image and registering any changes in noise level as you move. And finally, it’s capturing images! If it may take a moment to write the image file out, depending on your SD card speed—so be patient. Awesome, works like a charm, to cancel out of the application you can go ahead and press Ctrl+C. If you want, you can go ahead and log in with console to have a look at any images it’s captured. Inspecting the output is generally a good idea because your webcam driver may need fine tuning or may not generate valid output. If you don’t want to get out a cable and HDMI, you can copy these images off with tools such as scp. From a Windows machine, you can use a tool such as winscp to copy any files off. If you are copying to a Mac or Linux system, you just need to copy the files by issuing the following command:
$ scp <raspberry pi's ip>:/home/pi/*.jpg .
![]() Note Please remember the period on the end of the scp command It’s important because it is the destination identifier for the command.
Note Please remember the period on the end of the scp command It’s important because it is the destination identifier for the command.
This command says to copy from the server on the Raspberry Pi identified by IP in the directory /home/pi the home directory of the pi user and the first place you will be when you log in (I said I was excited, didn’t I?) and match any file that ends in .jpg. The final period on the end is the destination: in Linux a period is a reference to the current directory, so that’s where we are copying.
OK, now that we have had fun with the pictures, let’s get down to business. The aim for the Raspberry sPi is to have it function with no intervention; this means we will need to have the motion application function without us telling it to. Raspbian has handled most of this for us already, but there are still a few little things we need to do.
![]() Note You will need to edit these files as root, so remember to start your text editor with sudo.
Note You will need to edit these files as root, so remember to start your text editor with sudo.
First, open and edit the file /etc/default/motion and change the line start_motion_daemon=no to be start_motion_daemon=yes; this file governs whether the daemon will start when we issue the daemon’s start command, and having it run on command is exactly what we want. Now we tackle the config, so go ahead and open it. The file is /etc/motion/motion.conf, so open it up. First thing you will note is that daemon mode will be set to off, so go ahead and set that to on because we want motion to be started as a daemon, which means it will run in the background. Next thing to check is the videodevice line and ensure that the listed device matches the devices we confirmed earlier (for most of us, that should be /dev/video0).
Following this, we begin getting into the nuts and bolts of the situation. First we can modify the height, width, and framerate. The defaults are to capture two images per second at a resolution of 320 x 240. This creates a file about 12 Kb in size—you can check by examining the files that we generated earlier during our testing of the motion capture. You can increase this as you see fit; just remember not to exceed the maximum available resolution of your webcam and also that each file will increase in size as resolution increases.
Next is threshold. The threshold value is the amount of change that needs to occur so that an image will be captured. You can leave this value for now, but remember it later because you may want to make the capture more or less sensitive.
Next is ffmpeg_cap_new, which determines whether or not you want to capture a video file. I have turned this one off, but you can keep it on if you want to generate video files of your motion captures. These files are generated as .swf files now (think YouTube) but you can change them by editing the ffmpeg_video_codec variable.
Finally, you can change the target_dir, which says where you will output the image files when running as a daemon. This one is important because you will need to know where you are to copy your files from. Additionally, it’s important to be aware that the /tmp directory is just that, a temporary space. This temporary space is emptied each time your OS is restarted.
This kind of functionality is perfect for what we intend because we don’t want to have to deal with extra files that will stay on the disk until we clean it out; simply reboot your Raspberry sPi and off you go again. However, there are cases where we may want these files to be saved beyond a restart of the system—but more on them later.
Finally, save all your changes and exit so we can test the new config! My config is displayed here for your reference:
daemon on
process_id_file /var/run/motion/motion.pid
setup_mode off
videodevice /dev/video0
v4l2_palette 8
input 8
norm 0
frequency 0
rotate 0
width 320
height 240
framerate 2
minimum_frame_time 0
netcam_tolerant_check off
auto_brightness off
brightness 0
contrast 0
saturation 0
hue 0
roundrobin_frames 1
roundrobin_skip 1
switchfilter off
threshold 1500
threshold_tune off
noise_level 32
noise_tune on
despeckle EedDl
smart_mask_speed 0
lightswitch 0
minimum_motion_frames 1
pre_capture 0
post_capture 0
gap 60
max_mpeg_time 0
output_all off
output_normal on
output_motion off
quality 75
ppm off
ffmpeg_cap_new off
ffmpeg_cap_motion off
ffmpeg_timelapse 0
ffmpeg_timelapse_mode daily
ffmpeg_bps 500000
ffmpeg_variable_bitrate 0
ffmpeg_video_codec swf
ffmpeg_deinterlace off
snapshot_interval 0
locate off
text_right %Y-%m-%d
%T-%q
text_changes off
text_event %Y%m%d%H%M%S
target_dir /tmp/motion
snapshot_filename %v-%Y%m%d%H%M%S-snapshot
jpeg_filename %v-%Y%m%d%H%M%S-%q
movie_filename %v-%Y%m%d%H%M%S
timelapse_filename %Y%m%d-timelapse
webcam_port 8081
webcam_quality 50
webcam_motion off
webcam_maxrate 1
webcam_localhost on
webcam_limit 0
control_port 8080
control_localhost on
control_html_output on
track_type 0
track_auto off
track_motorx 0
track_motory 0
track_maxx 0
track_maxy 0
track_iomojo_id 0
track_step_angle_x 10
track_step_angle_y 10
track_move_wait 10
track_speed 255
track_stepsize 40
This test will be just like the one before; we simply want to start motion and check that it will run and capture images. This time, however, we want to use the config file and the Linux start commands because it allows us to emulate a power on of our Raspberry sPi. So go ahead and execute sudo /etc/init.d/motion start this should start motion. You should see your camera light come on and if you move about, you should start seeing image captures appear almost immediately in /tmp/motion (or wherever you pointed target_dir). You can also check that the process is running by typing the following to check for a running motion process:
$ ps –ef | grep motion
Still not working? Go back over the section on connecting your webcam, unplug it, plug it back in, and check for the output from dmesg. Validate that the output you see in dmesg matches what you get from udev in examining the device you have said is your webcam. Did the motion package install correctly? examine the output from apt-get to see that it did; if not, try installing again or try this:
$ apt-get --reinstall install motion
Does motion run when you execute it on the command line with motion –s? If not, examine the messages on the screen, which will help you understand what has gone wrong.
If all that failed, go over your motion configuration file. Did you accidentally mis-set one of the variables? Did you forget to set the value in /etc/default/motion to yes? Is the motion daemon running, but you can’t see images appear in your given output directory? If not, examine the file /var/log/messages, which is a repository of messages from daemons started by the system, including motion. The output that was onscreen before should now be in this file.
Alerting Yourself
Thus far, we have attached a webcam, configured the webcam, installed motion detection software and configured it to start automatically along with your Raspberry sPi. Now we have a fully fledged monitoring system that you can use to spy on your enemies and keep you notified about intruders entering your inner sanctum. Well, almost. You now need to create a system that will allow you to send messages to yourself so that you can be alerted when intruders enter.
To do this, we will be taking advantage of one of the oldest and most efficient messaging systems ever developed: e-mail. We won’t, however, be going as far as to set up our own mail server and domain; that’s a big task and well outside the scope of what we will be doing in this chapter. Instead, we will be aiming to set up a lightweight mail client to forward messages to a mail service in which it can then be sent on to you on whatever handy spy gadget you use to receive e-mail. Now that you understand the plan, let’s begin.
Installing SSMTP
The application we will be using to send our mail to the mail server is called SSMTP. SSMTP is a highly simplified mail transfer agent (MTA) that is used when a system administrator needs to be able to send mail from a server, but doesn’t need to be set up as a fully fledged mail domain. The advantage here should be obvious: a significantly less intensive setup process and much lower overhead—all of which should scream Raspberry Pi to you.
With all this in mind, let’s begin. Start by issuing the command to download and install the SSMTP application and install it:
$ sudo apt-get install ssmtp
Your output should look like mine:
$ sudo apt-get install ssmtp
Reading package lists... Done
Building dependency tree
Reading state information... Done
The following extra packages will be installed:
  libgnutls-openssl27
The following NEW packages will be installed:
  libgnutls-openssl27 ssmtp
0 upgraded, 2 newly installed, 0 to remove and 71 not upgraded.
Need to get 272 kB of archives.
After this operation, 279 kB of additional disk space will be used.
Do you want to continue [Y/n]?
Once we have installed SSMTP we need to configure it. The SSMTP configuration file is /etc/ssmtp/ssmtp.conf. Open it up with your favorite text editor and get started.
The first thing we need to configure is where the mail is destined to go. Most people who read this book will have some different and specific location they want their mail to go. Although all good spies want to be as efficient as possible, I can deal only with what’s in front of me, so we will be configuring this for the most generic and free option available to everyone: Gmail.
So we need to configure where the mail is to be sent; in SSMTP, this is governed by the mailhub value. This value is the DNS name of the mail server for the domain we will use to send outbound mail. This name is traditionally mail.<yourdomain>.<whatever>, but for us it will be smtp.gmail.com:587, which is Google’s SMTP server.
Having set the Gmail server, you may have noticed that we included a :587 on the end. The studious among you will recognize this as a port number. The even more studious would be aware that 587 is not the default port for SMTP (it is port 25). It is the port dedicated for Transport Layer Security (TLS) e-mail, (secure e-mail over SSL). This means we need to add another pair of options to ensure that we have encrypted communications:
UseTLS=YES
UseSTARTTLS=YES
The next option to configure is the hostname option, which is the hostname listed by the Raspberry sPi. Go ahead and list a hostname for the sPi if you have a domain. If not, just give it something like raspberry.spi . The next option should be FromLineOverride=yes, which allows us to set the “from” field on an e-mail if we so desire.
Finally, the last sets of options are related to authentication. There are three options you need to configure here. The first two are the most obvious: username and password. So go ahead and add [email protected] and AuthPass=password. The third, which is a little more circuitous, is the AuthMethod option, which is used to specify which authentication method will be used to allow users to register with the server. The method we will be using for Google is the LOGIN method. Although other mail servers may not require this to be specified, with Google we should set AuthMethod=LOGIN.
That’s it; your config should now look something like this:
root=
Mailhub=smtp.gmail.com:587
UseTLS=YES
UseSTARTTLS=YES
Hostname=raspberry.spi
FromLineOverride=yes
[email protected]
AuthPass=password
AuthMethod=LOGIN
![]() Note It should go without saying, but you should always have a secure root password.
Note It should go without saying, but you should always have a secure root password.
One final change to make is to secure this data so that nobody except those that we intend can read the file. This is incredibly important because you have put your precious GMail password in the file! The solution is to change permissions so that nobody but the intended users can read it. Execute the following:
$ sudo chmod 640 /etc/ssmtp/ssmtp.conf
This will change the file so that the only user who can access it is root, and the only users who can are members of the mail group.
Once SSMTP is configured, all you need to do is invoke it to send the e-mail and get it to send the captured. . . Wait. There’s something more we need; we need a way to invoke SSMTP so that we can tell it to send the file to our e-mail and alert us to the intruders. And we need a tool that can do all this from the command line. The best tool here is one called mutt.
Installing and Using mutt
The mutt tool is a text-based e-mail client with the fantastic motto of “All mail clients suck. This one just sucks less.” (Isn’t it obvious why we are using it?) The other benefit of mutt over other mail clients is that it is happy to send attachments from files on the filesystem—which is key to what we need to make the sPi send images of our intruders.
Now you know that it is mutt that we are installing, go ahead and install it by using the following:
$ sudo apt-get install mutt
Your output should look like this:
Reading package lists... Done
Building dependency tree
Reading state information... Done
The following extra packages will be installed:
  libgpgme11 libpth20 libtokyocabinet9
Suggested packages:
  gpgsm gnupg2 urlview mixmaster
The following NEW packages will be installed:
  libgpgme11 libpth20 libtokyocabinet9 mutt
0 upgraded, 4 newly installed, 0 to remove and 71 not upgraded.
Need to get 1,985 kB of archives.
After this operation, 7,181 kB of additional disk space will be used.
Did mutt install okay? Good. As I mentioned earlier, mutt is designed to be small, simple, and easy to use and configure—lofty goals. With that in mind, the setup process for mutt is incredibly simple: we just need to tell mutt how to use our MTA (which is SSMTP). To do this, we need to create a file that will live hidden in the Pi users’ home directory. The file is .muttrc, which will contain only one line:
set sendmail="/usr/sbin/ssmtp""
Instead of using a text editor we will use a “cheat” to do this. Run the following command:
$ echo "set sendmail="/usr/sbin/ssmtp"" > ∼/.muttrc
That’s it.
![]() Note The backslashes before the quotation marks are escapes.
Note The backslashes before the quotation marks are escapes.
You can go and look in the root user’s home directory for the file .muttrc and check the contents. Yep, it’s there and exactly as expected. The .muttrc file is a config file used by mutt to load important configuration options automatically on startup. Many different applications use hidden files that end in rc, so if you are wondering how an application is storing certain configuration options, have a look in your home directory for files starting with a period and ending in rc.
Testing the Alerting System
Now that we have installed and configured SSMTP and mutt, we need to test them in combination. The way to use mutt is, strangely enough, to run the mutt command. The syntax is rather simple, so send yourself an e-mail from the command line. Execute the following command:
$ echo "the quick brown fox jumps over the lazy dog" | sudo mutt –s "[INTRUDER ALERT] Test of intruder system" <your email>@gmail.com
I know it’s a long command, but don’t worry because I will explain it in a moment. Go ahead and check your e-mail; you should have one there from the user root just as shown in Figure 10-3!
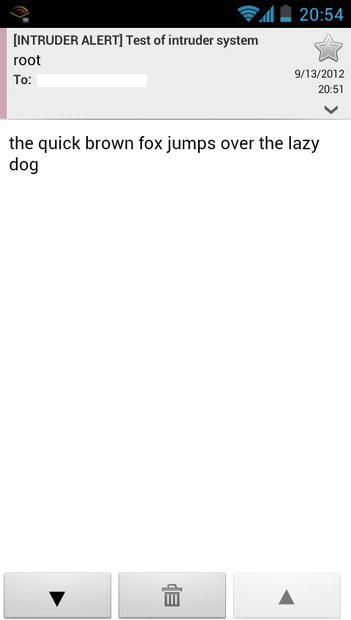
Figure 10-3. E-mail from the Rasperry sPi
Now I’ll explain the syntax and how we will use this to send alert messages from the sPi. The preceding message can be broken down into a few much smaller segments. The basic syntax that I use is this:
echo <mail content> | mutt –s <subject> <recipient>
You may be wondering about the use of echo. You need to generate the value that will be passed as output and then have the pipe direct it into mutt, rather than providing it as an argument.
![]() Note You can include whole sentences with spaces in a shell command by enclosing the whole thing in quotation marks. You can even escape quotes within a command to create quotes within quotes!
Note You can include whole sentences with spaces in a shell command by enclosing the whole thing in quotation marks. You can even escape quotes within a command to create quotes within quotes!
We need to also be able to send attachments with our e-mail. mutt has us covered here because it provides the capability to attach files to its outgoing e-mail. The reason why I elected to use mutt to create the Raspberry sPi is because it is not only easy to configure but also provides the capability to send attachments.
The syntax to send an attachment with the e-mail we just sent is as follows:
echo <mail content> | mutt –s <subject> −a <filename> −- <recipient>
Yes, it’s as easy as that! The –a signifies attachments, and the –- is used to separate attachments from recipients.
Did everything work as expected? If not, try configuring both SSMTP and mutt from scratch. When you send an e-mail, does it output an error regarding login details? If so, double-check your username and password. Is it an error regarding unsupported login type? If so check the TLS settings and the AuthMethod setting. Did you spell your mail server incorrectly? Is their trailing whitespace? That is spaces or tabs at the end of any of your entries. When you changed permissions did you move them too far so that now you can no longer read the file?
You may also encounter an error if you try and send an e-mail as the pi user, without sudo because the pi user is not a member of the mail group on your system. If you wish to allow the pi user or any other user for that matter, you need to add them using gpasswd, the syntax is this:
$ gpasswd –a <username> mail
Okay, so all sorted? You can capture the presence of intruders. You can alert yourself from the Raspberry sPi. You can send the captured images of your intruders to yourself from your sPi. So what’s left? Automating it all.
Bringing It All Together
So far we have done the following:
- Attached a webcam to the Raspberry sPi
- Installed and configured the monitor application to use the webcam
- Used the webcam and monitor application to function as a motion sensor and capture images
- Installed and configured SSMTP as an MTA
- Installed and configured mutt mail application to use SSMTP
- Sent e-mail from the command line to ourselves using SSMTP and mutt
The remaining problem is that we have done most of this with human intervention. We need a solution that enables the capture of images to automatically trigger an e-mail being set to us, with the image attached. Although I’m sure that someone has dreamed up a software solution to this problem, there is no reason why we can’t write a solution ourselves!
Understanding the Problem
The first step in any software design problem, no matter how small a job, is to understand what the exact needs of the software solution are. So let’s start by listing our goals:
- Capture of a new image should trigger the solution
- An e-mail should be sent with any new captured image(s)
- Should function automatically without needing to be started manually
Okay, that seems like the solution we need. But there are a few other things that having those two main requirements brings into play. These extra requirements are these:
- Only new images should be sent
- Only images captured by motion should be sent
- The application should always be running and not need to be manually started, just like motion
Okay, that seems a bit better; we are now pretty firm on what exactly our software solution should do. But what about how it should do it? Maybe we should be a little specific on how the application we are to write will achieve its goal.
Some things we should consider when developing the application include these:
- We should send the time that the image was captured
- We should check and send regularly, but given that e-mail has a delay, a semiregular check should be enough
Okay, now we’re cooking. Those are looking like some good requirements to remember when building our application. We were specific in what we wanted and about how we should achieve it. Now that we know exactly what we want in our application, we can move on to the next step.
The next step after working out what we want to achieve is to make some decisions about how it should be achieved. So, first decision: how should we write this? Well, much of what we want to achieve here is manipulation of shell commands. We want to list image files and then use those image files within another shell command to send us the e-mail alert. Additionally, you learned bash earlier in this book, so that makes it a perfect fit for what we want to develop.
Okay, we know what language we will be working in. Next, how will we start this one? I see two options here and both will inform which direction we take:
- One is to have the application executed from within the start script for motion because we want them to run together. This means that we can ensure that they are both running at the same time and that the script would need to be always running and then check periodically.
- The second option is to have the script automatically executed regularly. This means we wouldn’t need to start it and keep the script running permanently. It also means that if the worst happens and the script dies, we don’t need to deal with that and reboot it because it will be automatically started again. It does mean that we need to have something that will execute the script on a timer, but that can be handled by the cron daemon.
So, we have two options to decide from, but let’s put off that decision for a moment because there is another thing we need to look at first.
What will we do with the images? We have two options again:
- First is to delete each image after we send it. This is good because it means we can save on space as we clean up after ourselves.
- The second option is to keep track of all the images that we have and send only the new ones. This means keeping a running track of which images we have in stock so we can determine which ones to send out.
So, now that you understand the options, it is time to make decisions. I know that it’s hard to decide, so let me make it easier for you. Instead of four possible scripts, let’s narrow it down to two:
- A script that will be run from cron and will search for images, send them, and then remove them
- A script that will start with the motion daemon and will monitor all the files, keep a running count and then recognize when there is a new image.
Okay, now that we have two working designs, let’s head on to the next step.
“Wait; you have two solutions and you didn’t actually pick one. You giant flake.” I hear you say that and it’s true; I didn’t. Because we had two very different ways to achieve our one goal we felt it would be best to cover both, give you the options, and share some guidance. So, let’s start by looking at the commonalities between the two; first, they will both need to have a reference for the folder where motion’s captured files will be going. We could keep this in a variable and just edit it when we change the output folder, but that is a lot of effort to go to, changing two whole files. That’s not the Linux way. So let’s just load it from the motion config file and be done with it. It means that we need two variables: a variable that will contain the motion config file and the second that we will create dynamically to contain the file location. The variable that will contain the filename is simple enough with MOTIONCONF=/etc/motion/motion.conf.
![]() Note All the following is being done as the root user (you can sudo su to get a root shell) because it is the root user who will spawn motion.
Note All the following is being done as the root user (you can sudo su to get a root shell) because it is the root user who will spawn motion.
The next step is to pull the variable out, and the best way to do this is with a combination of two commands: one is grep, which will find any information in a file that contains a particular pattern, in this case any line that contains the line target_dir, but we also need to ensure that we avoid comments, so we need to grab lines that start with target_dir. This is achieved by simply adding one extra symbol so that grep can know that we are looking for a value that starts with our desired value. This gives us a command of grep "^target_dir" $MOTIONCONF. If you execute this command you will see the following result:
root @raspberrypi ∼ $ grep "^target_dir" $MOTIONCONF
target_dir /tmp/motion
Now the next problem with our command rears its head: we need to get rid of the target_dir portion so we only have the location we are after. To remove the first part, we need to use the awk command, which will split the given data at whitespace values by default. This is perfect and then we just need to print the second value that results. So building this on to our command, we get this:
root@raspberrypi ∼ $ grep "^target_dir" $MOTIONCONF | awk '{ print $2}'
/tmp/motion
Now all that’s left is to push the result into a variable, which is accomplished with the back-tick symbol, giving us a final result of this:
MOTIONDIR=' grep "^target_dir" $MOTIONCONF | awk '{ print $2}''
Now, one thing that you may not have considered: if this directory is not created, motion will create it when it captures its first image, but that can take hours. We need it now, so let’s go ahead and do a check to see whether it exists and if not, create it. The check to see whether a directory exists is if [ −d < directory name > ]. We also need to add a note to see if the directory doesn’t exist, so go ahead and add an exclamation point before the –d, which means not. Finally, mix this with a mkdir and you should have the following if statement:
if [ ! -d $MOTIONDIR ]; then
        mkdir $MOTIONDIR
fi
Along with making the directory, you need to ensure that it is owned by the correct user. The motion daemon is run by root, but this ownership is passed to motion, so you need to add a chown to this command, which gives this value:
if [ ! -d $MOTIONDIR ]; then
        mkdir $MOTIONDIR
        chown motion $MOTIONDIR
fi
Okay, so now we have the directory where the files will be found, and we need to write some code to check it and count the number of files. Normally, you would think “Sweet, let’s just use ls to list the files in the directory.” But this won’t help in the event that there are no files because ls will give us an error. To do this, we need to use the find command. To find all the .jpg files within only that directory, we need to add a pair of arguments to find the following:
- -maxdepth 1 says not to go within any subdirectories to search
- –type f to tell it to only search for files
I also wrapped the command in a pair of parentheses, which means that the file is meant to be treated as an array. This gives us this command:
LISTFILES=('find $MOTIONDIR –maxdepth 1 –type f')
Now, in case there are non-image files, we should also add in a grep to pull out only the .jpg files. A simple grep for anything ending in .jpg (using the $ operator) should suffice. This will give us the following:
LISTFILES=('find $MOTIONDIR –maxdepth 1 –type f | grep jpg$')
Now we need to get the count of files in our list using the wc -l command. This will list all the files in a directory and if we pipe that to wc with the -l argument, we get the number of files within a given folder. This gives us our next line:
NUMFILES=' find $MOTIONDIR -maxdepth 1 -type f | grep jpg$ | wc -l'
There is one final common piece of code that will be common to both scripts that we can work up now: the mutt mailer line that will send the image file and a message. The original one we sent was good, but I’ve modified it slightly here to include a variable name for the attachment that is the variable IMAGEFILE . I’ve also added a new –F /root/.muttrc option, which forces mutt to use the root muttrc file we created. The new mail line is this:
echo -e "Warning,
An intruder was detected at 'date'
Please see the image attached for details"| mutt –F /root/.muttrc –s "[INTURDER ALERT] Intruder Detected" -a $IMAGEFILE -- [email protected]
As you can see, it’s a bit of a mouthful. I’ve added some nice body text that will come out as follows:
Warning,
An intruder was detected at Sat Sep 15 22:50:32 EST 2012
Please see the image attached for details
You may be asking yourself how I got those newlines in there, and how I was able to get a very nice date and time output in the e-mail. The date and time come from the shell date command, which I have encased in back-ticks to give us the output. I’ve also added some s, which are references to newlines, but only when you give echo the –e argument to tell it to interpret special escape values. Now that we have a block of code to work from, let’s start with script number 1, the cron executed run once script.
To begin, let’s go over what we have so far; we can get the number of files in the correct working directory. The next step then is to check whether that number shows that there are indeed files to work with, which is to say > 0. This means we need the following if statement:
if [ $NUMFILES -gt 0 ]; then
With our if statement in place, we should now know whether there are any files we need to send urgently. Now we just need to iterate through the list and send each as an e-mail and then delete it. To iterate through anything, you need to use a loop; in this case, we will be using a for loop. This loop will split each image off from the list as its own variable, allowing us to take action on each one after another. The loop will look like the following, where IMAGEFILE is the current image from the list; this image changes to the next one in the list each time the for loop starts again. The for loop will finish when there are no more images to process from the list.
for IMAGEFILE in $LISTFILES
![]() Note Remember to chmod +x your script so it can be executed!
Note Remember to chmod +x your script so it can be executed!
Okay, that’s it. We have all our code blocks, so let’s assemble. The final script should look something like this:
#!/bin/bash
MOTIONCONF=/etc/motion/motion.conf
MOTIONDIR=' sudo grep "^target_dir" $MOTIONCONF | awk '{ print $2}''
if [ ! -d $MOTIONDIR ]; then
        mkdir $MOTIONDIR
        chown motion $MOTIONDIR
fi
LISTFILES=('find $MOTIONDIR -maxdepth 1 -type f | grep jpg$')
NUMFILES=' find $MOTIONDIR -maxdepth 1 -type f | grep jpg$ | wc -l'
if [ $NUMFILES -gt 0 ]; then
        for IMAGEFILE in $LISTFILES
        do
                echo -e "Warning,
An intruder was detected at 'date'
Please see the image attached for details"
                | mutt -s "[INTURDER ALERT] Intruder Detected"
                –F /root/.muttrc
                -a $IMAGEFILE -- <your email>
                rm $IMAGEFILE
        done
fi
Script 2
Because we have finished discussing script 1, let’s work on script 2. This one is slightly more complex. The first thing we need to do is add a counter that will tell us how many images we have dealt with already. Initially, we can set this to 0. So let’s initialize this variable with LASTCOUNT=$ NUMFILES. Next is to create a simple loop that will keep the application running forever; this is, in fact, the easiest kind of loop and is simply while true (for more on while loops, see Chapter 7).
Now within the loop we need to update LASTCOUNT and NUMFILES, so have those commands run again to update their values. We need to compare to see if we have had anything new added (i.e., that NUMFILES is greater than LASTCOUNT). If it is, we need to read off the latest files and send them. Normally, this sounds like the place for an if statement, but in this case we will use a while loop because we want to do things while LASTCOUNT is greater than NUMFILES, so our second inner while loop is this:
while [ $LASTCOUNT -lt $NUMFILES ]
Now we simply need to update; first we need to get each new image a filename. Thankfully they are found in order because the motion package names them sequentially. This means that we simply need to pull off the top X to make up the difference. This means we will need an iterator value so we can count each of the top X as we go. So create an ITERATOR set to 0 outside the second loop but inside the first, so we reset it every round.
Now that we have this iterator, we can use it with the LISTFILES to pull off each of the numbers. Because we are treating LISTFILES as an array, we just need to use the ITERATOR to access that array element. We need to wrap the whole array output within a pair of curly braces because this will perform the array dereferencing and give us the output value:
IMAGEFILE=${LISTFILES[$ITERATOR]}
Finally, we need to increment LASTCOUNT and ITERATOR so that they can count off each image as we process it. This is done with the following:
LASTCOUNT='expr $LASTCOUNT + 1' and ITERATOR='expr $ITERATOR + 1'
The expr function treats given values as mathematical expressions and returns their result, which is perfect when we want to increment a value by 1.
So, now we need to assemble each of these items of code. When put together, they should look like this:
#!/bin/bash
MOTIONCONF=/etc/motion/motion.conf
MOTIONDIR=' sudo grep "^target_dir" $MOTIONCONF | awk '{ print $2}''
if [ ! -d $MOTIONDIR ]; then
        mkdir $MOTIONDIR
        chown motion $MOTIONDIR
fi
LISTFILES='find $MOTIONDIR -maxdepth 1 -type f | grep jpg$'
NUMFILES='find $MOTIONDIR -maxdepth 1 -type f | grep jpg$ | wc -l'
LASTCOUNT=0
while true
do
        LISTFILES=('find $MOTIONDIR -maxdepth 1 -type f | grep jpg$')
        NUMFILES='find $MOTIONDIR -maxdepth 1 -type f | grep jpg$ | wc -l'
        ITERATOR=0
        while [ $LASTCOUNT -lt $NUMFILES ];
        do
                IMAGEFILE=${LISTFILES[$ITERATOR]}
                echo -e "Warning,
An intruder was detected at 'date'
Please see the image attached for details"
                | mutt –F /root/.muttrc
                -s "[INTURDER ALERT] Intruder Detected"
                -a $IMAGEFILE -- <your email> LASTCOUNT='expr $LASTCOUNT + 1' ITERATOR='expr $ITERATOR + 1' done sleep 1
done
So, let’s take this super script for a spin. Ensure that motion is up and running and execute your script.
![]() Note To cancel running the script, press Ctrl + c to stop execution. This is the only way to stop script 2.
Note To cancel running the script, press Ctrl + c to stop execution. This is the only way to stop script 2.
You shouldn’t expect to see any output, so just watch your e-mail inbox (see Figure 10-4).
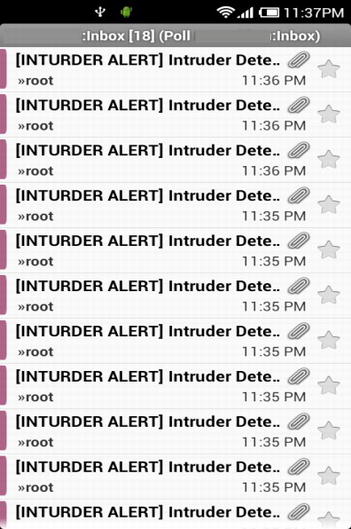
Figure 10-4. One full inbox!
As you can see, it works. In fact, it works rather well; I have 18 unread e-mails from the intruder detection system. Perfect! Now that we have tested that the script will function in sending us e-mails of new images from motion, we need to configure the script so that it will start automatically—the one final requirement that remains unmet. Looking back, we decided that we would start each of the two scripts in different ways: script 1 would be added to cron and script 2 would be added to the motion start script, so that it would run with motion!
For script 1, things are fairly simple. cron will automatically evaluate if it should run something once a minute, so all we need to do is have a cron job that will run at all times. So as root (since we want to run this as root), open up the cron table with crontab –e and enter the following:
* * * * * /root/script1.sh
That’s it; we have no added script 1 to start and run from a crontab entry every minute. So that every minute we will check to see if there are any files in /tmp/motion, send them to us and then delete them, which fulfills all our requirements.
The second script’s launch method requires modification to the launch script for motion /etc/init.d/motion, so go ahead and open that up to be edited as root. The basic format of any of these start scripts is to have a large case statement that processes the given action it is to perform be that start, stop, restart, or any other number of required cases. So look for the line start, which is the action we want to enhance. Within this, we can see that there are a number of nested checks and preliminaries; we want our script only to be started after motion, which is invoked by the start - stop - daemon command.
So go ahead and add a link to your script after that; then add a & on the end. The ampersand says “run this script and then let it go in the background.” If we don’t do this, the start script will assume that its next function is to wait for that script to end, which it won’t! Your final updated start section should look like this:
start)
    if check_daemon_enabled ; then
        if ! [ −d /var/run/motion ]; then
                mkdir /var/run/motion
        fi
        chown motion:motion /var/run/motion

        log_daemon_msg "Starting $DESC" "$NAME"
if start-stop-daemon --start --oknodo --exec $DAEMON -b --chuid motion ; then
             /root/script2.sh &
            log_end_msg 0
        else
            log_end_msg 1
            RET=1
        fi
    fi
    ;;
Once you’ve finished editing, go and restart your Pi; then log back in and execute a check to see if the script is running! It is? Fantastic, you now have a fully automated Raspberry sPi of your very own!
$ ps -ef | grep script
root      2058     1  0 11:23 pts/0    00:00:00 /bin/bash /home/pi/script2.sh
As I’m sure you’re aware by now, there are so many things that can go wrong when doing software development. So there is plenty of space for troubleshooting. and it makes my giving you advice about where to look a little difficult. That being said, there are a number of things you can do to make diagnosis easier.
There’s a reason why I started off scripting by writing out each little section of code and then adding it. This is a version of what’s called isolation testing, which involves doing as much as you can to isolate a particular section of code to execute it with controlled inputs and then evaluating the outputs to see that they work as you intend.
As you can imagine, doing this block by block means that you can test each little bit of an application as it grows.
The next thing is to take advantage of the echo command to output a working value or a location in the code. You can see what an application is working with and where within the code it is running, which lets you pick up on unexpected values and where your software is failing.
Finally, if all else fails, change the shell from #!/bin/bash to #!/bin/bash –x . Adding the –x will put your instance of bash into debug mode and it will output every variable, every manipulation, and every change it goes through. While there can be a lot of output this is the ideal way to see what’s going on within a troublesome application.
Where to Go from Here
Wow. We’ve come a long way from where we started. We have:
- Attached a webcam to our Raspberry sPi
- Installed and configured the monitor application to use the webcam
- Used the webcam and monitor application to function as a motion sensor and capture images
- Installed and configured ssmtp as an MTA
- Installed and configured mutt mail application to use SSMTP
- Send an e-mail from the command line to ourselves using SSMTP and mutt
- Written two scripts to automatically pick up any new image files and then e-mail them to ourselves using all of the above
This is quite an accomplishment, but what now? As spies, you all know how adaptability is the key to success. What we have gone through here should be a guide on how you can take advantage of software like motion, SSMTP and mutt. You should now also be familiar with using dmesg and how to locate newly loaded devices and integrate them into your system. Finally, you should see how you can use scripts written in bash to fill a gap in your application stack and solve complex problems. So what can you do from here?
- You can add a wireless adapter, so you don’t need to be cabled in, giving you a wireless Raspberry sPi that you can hide in the most innocuous of places.
- You can add a USB battery pack to remove the need for access to a power point.
- You can change which directory the files are stored in out of /tmp. That way, you can have your images persisted to disk, where you can review them at a later date.
- Or you can go full Bond. I’ve taken my inspiration further afield, modified the software to capture full video, and disabled the image capture. I changed the storage location to be away from /tmp and I’ve attached a USB battery pack. I then added a little tape to hold this all together and mounted the webcam inside a hat (see Figure 10-5).

Figure 10-5. Maybe I should have invested in a stetson!
Summary
You should be able to understand the output of dmesg and know how udev works. You should also be able to configure the motion application, SSMTP application, and mutt application. Finally, you should be able to send e-mail with different recipients, body text, subjects, and attachments.