
In order to start building an ArcGIS Runtime app, you will need the following IDEs and toolkits:
- Visual Studio 2015
- ArcGIS Runtime SDK for .NET 10.2.7
- MVVM Light
First things first, we will be using Visual Studio 2015. You can download an evaluation version or the community version of Visual Studio 2015 for free from Microsoft. Here are the instructions for the community version:
- Navigate to https://www.visualstudio.com/products/free-developer-offers-vs.aspx.
- Click on Download under Visual Studio Community. This step will download a small installation program called
vs_community_ENU.exe. - Run
vs_community_ENU.exe. - Click on I agree to the License Terms and Privacy Policy.
- Change the installation path if you want to, and decide whether you want to join the VS Experience Improvement Program.
- Click on Next.
- Click on the optional features. You can uncheck Microsoft Server data tools, Microsoft Web Developer Tools, and Silverlight Development Kit.
- Click on Install.
The installation will take several minutes to complete. With the community version, you will be prompted to create an account. Follow the instructions. You will also be asked to create a Visual Studio Online site, and optionally, whether you want to create a Team Foundation Server or Git site.
In this book, we will be using version 10.2.7. To create an ArcGIS Runtime app, you will need to perform the following steps:
- Navigate to the site https://developers.arcgis.com/net/.
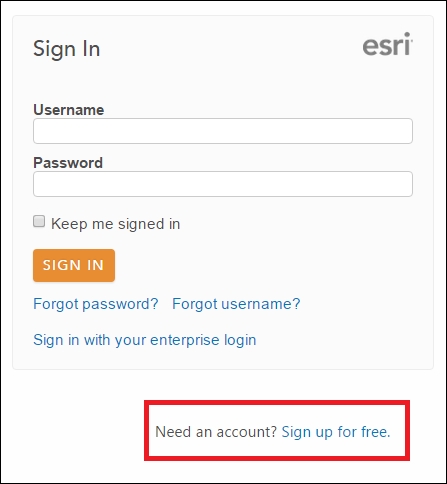
- Click on Sign In.
- Below the Sign In textbox, you will see a link named Sign up for free., as shown in the following screenshot.
- Fill in your name and e-mail address. An e-mail will be sent to your account. Follow the instructions in the e-mail.
- Once you've followed all of the instructions, you will now be able to download ArcGIS Runtime.
- Navigate back to https://developers.arcgis.com/net/, and click on the large Download SDK button:
- Once the download is complete, you can run the installation program. First, you need to tell it where to unzip to. In my case,
C:DevToolsArcGIS 10.2.7was chosen, as shown in this screenshot: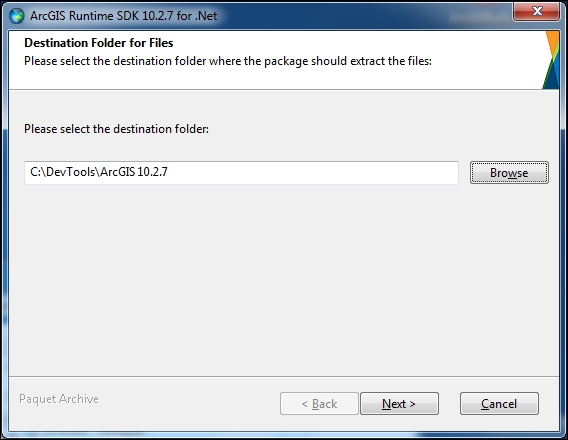
- Next, you will be taken to another screen once the extraction has finished. Click on Close. Make sure Launch the setup program is checked.
- On the Welcome screen, click on Next >. You will be taken to the License Agreement screen.
- Click on I accept the license agreement, and then click on Next >.
- You will then be taken to the Select Features screen, as shown in the following screenshot. Click on Change… to change the path if you wish. I've chosen
C:DevTools. Click on Next >: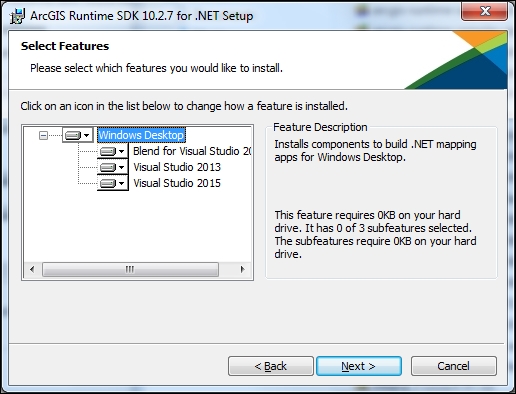
- Now you will be taken to the Ready to Install Program page. Click on Install. This step will take several minutes.
If version 10.2.7 is no longer available on Esri's site, you can use NuGet to install it from Visual Studio with the NuGet Package Manager Console, as shown here:
Install-Package Esri.ArcGISRuntime –Version 10.2.7.1234
For more details, refer to https://www.nuget.org/packages/Esri.ArcGISRuntime/.
Now that you have Visual Studio installed, you need to install MVVM Light. MVVM Light will be explained in the next chapter. Follow these steps:
- Close Visual Studio if you have it open.
- Navigate to https://mvvmlight.codeplex.com/ and click on the download tab.
- Download MVVM Light for VS 2015. This toolkit is a Visual Studio extension that will allow you to use MVVM light in Visual Studio. The extension of the file is
vsix. - Run it by double-clicking on it.
- Once you run the installer you will be prompted to install it. Click on Install.
- Click on Close when completed.
Throughout this book, we're going to build many apps to illustrate the concepts using step-by-step instructions. To aid you in performing these steps, this book comes with sample apps, which you can download from GitHub by following these steps:
- Navigate to https://github.com/rvinc66/ArcGISRuntimBook.
- Click on Download ZIP on the right-hand side of the page to download the source code.
- Unzip the file to your
C:drive. This step will create a directory namedArcGISRuntime-master. - Simply rename this directory
ArcGISRuntimeBook. - Inside the
ArcGISRuntimeBookfolder, you'll find a solution file (ArcGISRuntimeBook.sln).
This solution contains all the projects used in this book. Throughout the rest of this book, you'll find projects with chapter names, such as Chapter2, and Chapter2A. You can either follow the steps yourself to build your own projects or open a project that comes with these samples in the code you just downloaded. To run a particular sample, right-click on it and click on Set As Startup Project, and then run it.