As mentioned with the previous game in Chapter 4, Advanced Game Content Generation with a Fruit Chopper Game, explaining the mechanism of the gameplay loop, it will be better for you to work from scratch or understand the current logic you got with the book. With that said, let's breakdown the gameplay logic:
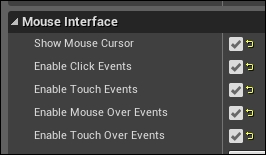
- madScientistController: Build a new blueprint of type Player Controller and set all of its Mouse Interface options to True, because as mentioned earlier in Chapter 2, Methods and Tools to Create Your Games, we will be using the mouse events to simulate touch events.
- madScientist: Build a new Character class blueprint and you will find that it has several components by default:
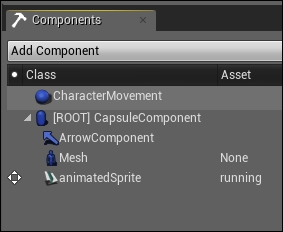
The components under the character class are as follows:
- CharacterMovement: This is the component responsible for all of the movement and physics of the character. Feel free to explore the vast number of variables inside this component, but the default values will work best for this example.
- CapsuleComponent: This is the Capsule collider that works with the movement component as the main body mass.
- Arrow Component: This is a simple component to define the direction the player is facing.
- Mesh: This is the component that should hold the player mesh. And as we don't have a 3D mesh for the player (the game is 2D), you can keep this mesh component as it is (empty) or you can delete it if you wish.
You will need to add a Paper Flipbook component and pick the running animation to be the default animation for it. So you get the player sprite displayed. You might need to scale it down to 0.4 as the sprite was made in HD resolution. Or you can scale up Capsule Component. Do as you like. Also, rotating it by 90 degrees on the Z-axis is a good way to have it facing in the right direction.
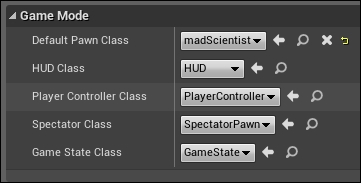
- runnerMode: Build a Game Mode class type and assign it to the level as usual to host the level mode. However, since we have a Character type class to control the player this time, you will be assigning it to the Default Pawn Class option, and keeping all of the other variables as before.
To make sure this one is working properly, you will need to insert a Player Start actor into the scene.
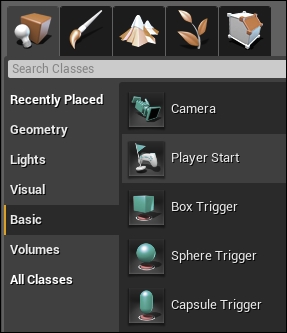
The way it works is that when the level starts, as long as Player Start is in the scene, it will spawn the player class (the Character class) that you used as the default pawn class inside the active game mode.
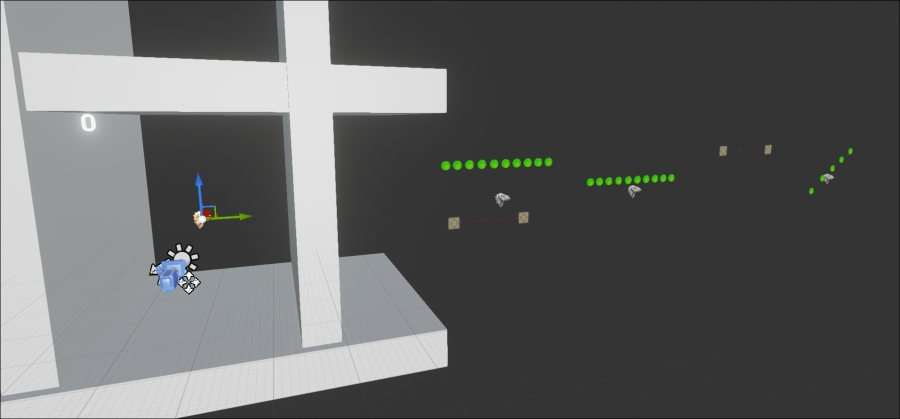
- levelLayout: This blueprint is very similar to the one you made in Chapter 3, Creating a Brick Breaking Game. So you will be adding a camera, four walls to block the level layout, a UI text to host the score, and several transform points (Billboard) to work as the parent for the collectables and laser beams (the level components). One thing you want to make sure is that the level is built on blocks; each block is a parent for several sprites. And all of those blocks are children of one giant transform called Blocks (the one we will move during the gameplay).
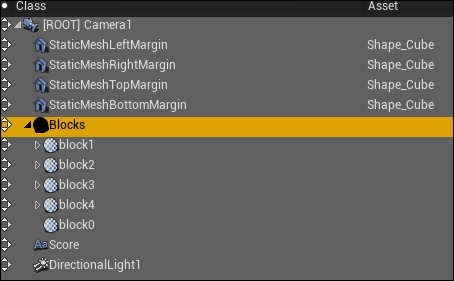
- Don't forget to add the collectable tag to all of the collectables, and the laser tag to all of the laser beams. Also, mark Collision Presets as OverlapAll for both of them (collectables and laser objects). I made only four blocks, but you can make as many blocks as you wish, and keep in mind that more blocks will give more variations to the game!