
Chapter 2
Sign Me Up!
In This Chapter
![]() Joining LinkedIn with or without an invitation
Joining LinkedIn with or without an invitation
![]() Registering and setting your preferences
Registering and setting your preferences
![]() Deciding how to use LinkedIn
Deciding how to use LinkedIn
![]() Connecting with people you already know on LinkedIn
Connecting with people you already know on LinkedIn
When LinkedIn first launched, it grew primarily through invitations — you joined only if someone who was already a member invited you and encouraged you to join. However, membership is now open to anyone 13 years or older (as long as the user hasn't previously been suspended or removed from LinkedIn, of course). You can have only one active account, but you can attach multiple e-mail addresses, past and present, to your account so that people can more easily find you.
You'll be presented with some configuration settings during the signup process that you might not know what to do with until you get more familiar with the system. Fortunately, you can customize all those settings later, but for now, I suggest some initial settings. In addition, based on your initial settings, LinkedIn recommends people to invite to your network. In Chapter 6, I discuss the ways you can grow your network more extensively, but this chapter touches on this initial recommendation process.
Joining LinkedIn
Many people join LinkedIn because a friend or colleague invited them. You can join just as easily without receiving an invitation, though. Everyone joins at the basic level, which is free. (You can opt for different levels of paid membership, as spelled out in Chapter 1.) Being able to start at the basic level makes the signup process quite straightforward. Most importantly, the basic level still gives users the ability to take advantage of the most powerful tools that LinkedIn offers.
Joining with an invitation
When a friend or colleague invites you to join, you receive an e-mail invitation. The e-mail clearly identifies the sender and usually has Invitation to connect on LinkedIn as its subject line. (There's a chance, though, that the sender came up with a custom header, but hopefully that message still has the word LinkedIn in the subject line.)
When you open the message, you see an invitation to join LinkedIn, like the message shown in Figure 2-1. There might be some extra text if the person inviting you personalized the message. You also see a button or link that takes you back to LinkedIn to create your account, such as the Confirm That You Know Joel button shown in Figure 2-1.
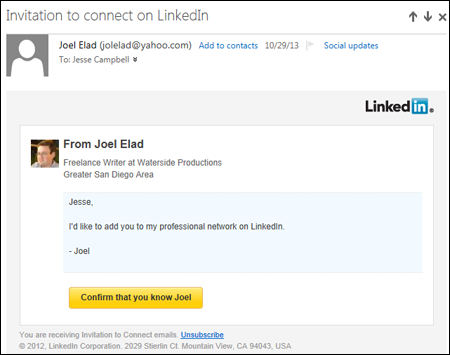
Figure 2-1: An invitation to connect on LinkedIn.
When you're ready to join LinkedIn with an invitation, just follow these steps:
- Click the button or link from your invitation e-mail.
You should see a new window open that goes to the LinkedIn Web site and asks to verify your name and e-mail address, as well as enter a password for your new LinkedIn account, as shown in Figure 2-2.
 If you want to be known on LinkedIn by another version of your name (say a nickname, maiden name, middle initial, or proper name), or if you want to use a different e-mail address from the one used for your invitation, you can change the details in those fields — First Name, Last Name, Email.
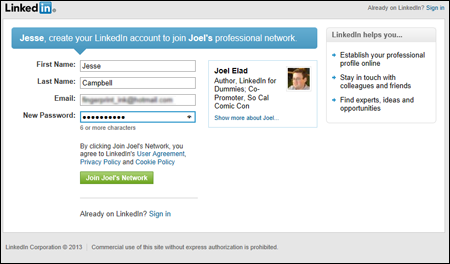
Figure 2-2: Confirm your name and create a password.
- Enter your correct first name and last name, and create a new password for your account. Then click the Join Name's Network button.
You'll be taken to the Create a LinkedIn Profile Like (the name of your inviter), as shown in Figure 2-3. At this point, LinkedIn wants to collect some basic information it will use to create your account.
Try to pick a password that no one else can guess. You should use a combination of letters and numbers, and avoid commonly used passwords like your name, the word “password,” a string of letters or numbers that are next to each other on the keyboard (for example, “qwerty”), or a password that you use on many other sites. - Complete the fields presented on the Create a LinkedIn Profile page to tell LinkedIn your current employment status, company name, job title, industry, country, and ZIP code.
In the first set of radio buttons, you can choose between three options to identify your current employment status:
- Employed
- Job Seeker
- A student
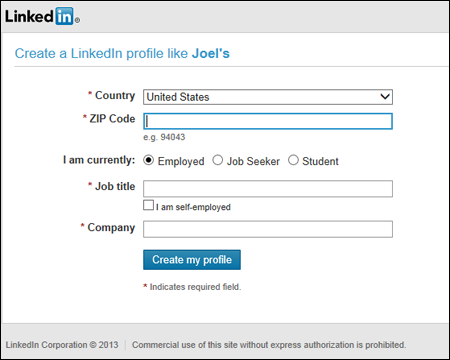
Figure 2-3: Start to give LinkedIn some basic information about yourself.
Confirm your country of residence by selecting your country from the drop-down list provided, and then enter your ZIP or postal code in the box provided.
Enter your Job Title, and the name of the Company where you are currently employed in the boxes provided. (This includes any self-employed folks out there.) Depending on your employment status, LinkedIn may reload the page with a new field, Industry. Use the drop-down list to identify which industry you feel you belong to, as shown in Figure 2-4. If you're not employed at the moment, LinkedIn will ask you for your most recent job title and company.
- Click the Create My Profile button to proceed.
LinkedIn offers to import your contacts from your e-mail program, as shown in Figure 2-5. LinkedIn walks you through the steps of importing your address book, offering you the chance to connect to existing members of LinkedIn. If you like, you can click the Skip This Step link and come back to this after you create your account.
 It might be tempting to start inviting friends and colleagues to connect with you right away, but you might want to work on your profile or think of a strategy first before flooding people's e-mail inboxes with invitations. You can always invite people to connect with you at any time.
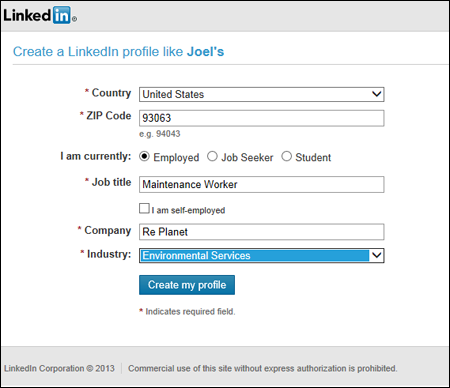
Figure 2-4: Pick the industry that best matches your job.
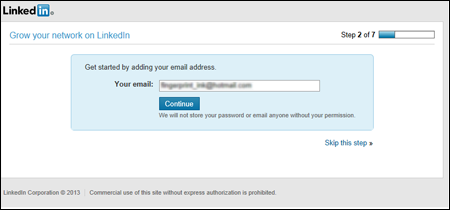
Figure 2-5: LinkedIn can help you identify who to add to your network.
- Decide who you want to connect with using your new LinkedIn account.
After you import your e-mail contacts, LinkedIn confirms your connection to the person who invited you, and asks whether you want to invite anybody else by looking at your e-mail contacts and showing you which contacts are already on LinkedIn that you can connect with, as shown in Figure 2-6. You can select the check boxes to Add Connections now or you can click Skip This Step and invite people later. (I discuss this process in Chapter 6.)
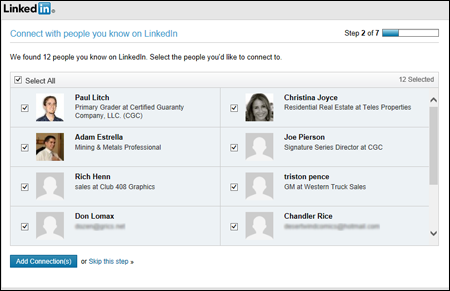
Figure 2-6: LinkedIn offers you a chance to make more connections.
- Click either the Add Connection(s) button or the Skip This Step link.
LinkedIn offers the ability to send e-mails to those contacts who are not yet on LinkedIn. It then recommends people you may know and suggests you download the mobile application. After that point, LinkedIn creates your account and takes you to your home page, as shown in Figure 2-7.
If you want to take a break to check your e-mail, you'll find a nice Welcome to LinkedIn! message there from LinkedIn Updates, assuring you that you're now a registered LinkedIn user. The e-mail (shown in Figure 2-8) includes connection links to people you may know on LinkedIn and lets you look at other people you may know so that you can connect with them as well.
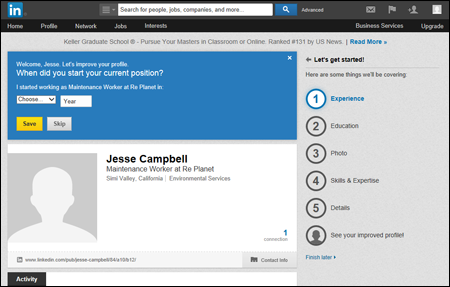
Figure 2-7: Your home page.
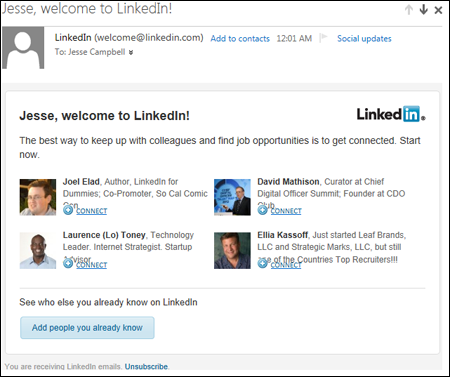
Figure 2-8: LinkedIn sends you a welcome e-mail.
Joining without an invitation
If you haven't gotten an invitation to join LinkedIn, don't let that turn you into a wallflower. You can join LinkedIn directly, without an invitation from an existing user.
Open your Web browser and go to www.linkedin.com. You see the initial LinkedIn home page, as shown in Figure 2-9. When you're ready to join LinkedIn, just follow these steps:
- In the Get Started section in the middle of the page, provide your first name, last name, e-mail address, and a password in the boxes provided, as shown in Figure 2-9.
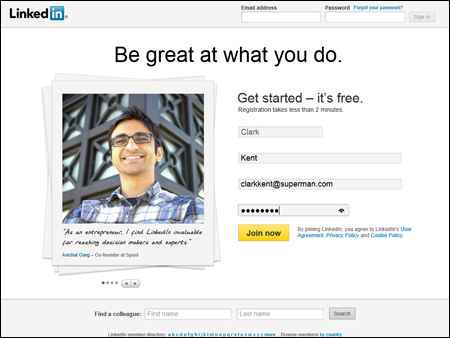
Figure 2-9: Join LinkedIn from its home page.
- Click the Join Now button.
You're taken to the next step, where LinkedIn starts to build your professional profile by asking about your current employment status and location, as shown in Figure 2-10.
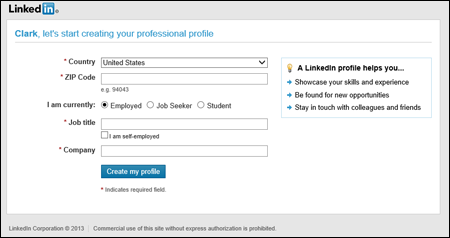
Figure 2-10: Tell LinkedIn a little about yourself to create your account.
- Complete the fields regarding your current employment status and location.
Specifically, you need to provide the following information:
- Country and ZIP code: LinkedIn won't display your ZIP code, but it does use it to assign a Region to your profile so others know the general area where you reside.
- I am currently: Indicate whether you're employed, a job seeker, or a student.
- Details about your status: Depending on your status, LinkedIn asks for a Company, Job Title, and Industry if you are employed, or asks for your most recent job title and company, if you're looking for work, as shown in Figure 2-11.
If you find it difficult to choose an industry that best describes your primary expertise, just choose one that's closest. You can always change the selection later. If you're employed but looking for another job, you should still pick the industry of your current profession. - Click the blue Create My Profile button to continue.
LinkedIn then offers to import your contacts from your e-mail program, as shown in Figure 2-12. LinkedIn walks you through the steps of importing your address book and offers you the chance to connect with existing members of LinkedIn. You can also do this after you create your account by clicking the Skip This Step link.
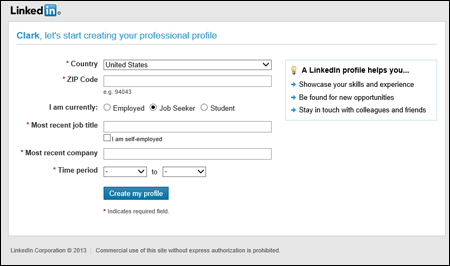
Figure 2-11: Depending on your work status, LinkedIn asks for different information.
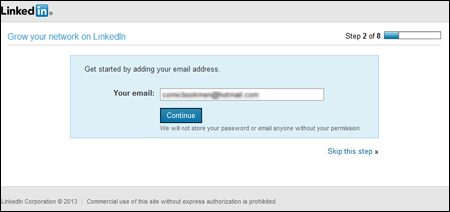
Figure 2-12: LinkedIn can help you identify who to add to your network.
- LinkedIn asks you to confirm the e-mail address for your account.
Depending on the e-mail account you used to register the account, LinkedIn may be able to log directly into that e-mail account and confirm your e-mail address. (For example, I can click the Confirm My Hotmail Account button illustrated in Figure 2-13 to confirm the sample account I'm creating.) Otherwise, LinkedIn e-mails you a confirmation, which you can choose to receive instead of using LinkedIn to log directly into your e-mail account.
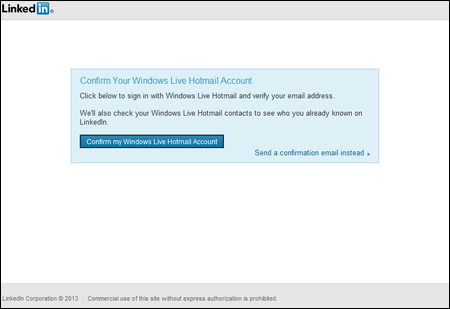
Figure 2-13: LinkedIn may be able to confirm your e-mail address directly with your e-mail provider.
If you choose (or have) to receive a confirmation e-mail, open your e-mail program and look for an e-mail from LinkedIn Email Confirmation with the subject line Please confirm your e-mail address. When you open that e-mail, you should see a request for confirmation, as shown in Figure 2-14. Either click the Confirm Your Email Address button or copy and paste the URL provided in the e-mail into your Web browser.
When you click the button, you're taken back to LinkedIn and it confirms your address, as shown in Figure 2-15. You may be asked to log in to your account, so simply provide your e-mail address and password when prompted.
You are asked to connect your e-mail account to look for new contacts, prompted to install the LinkedIn mobile application, and offered the chance to upgrade your account to a paid account. (I discuss paid accounts in Chapter 1.) You can always click Skip This Step to move along the account creation process and save those tasks for later.
 If you skip this step of confirming your e-mail with LinkedIn, you won't be able to invite any connections, apply for jobs on the LinkedIn job board, or take advantage of most other LinkedIn functions.
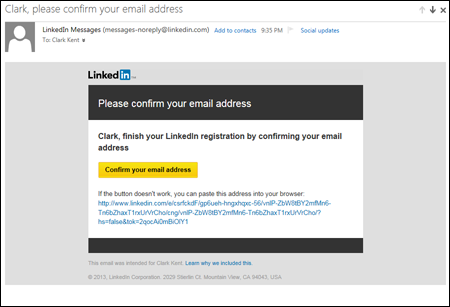
Figure 2-14: Confirm your e-mail address with LinkedIn.
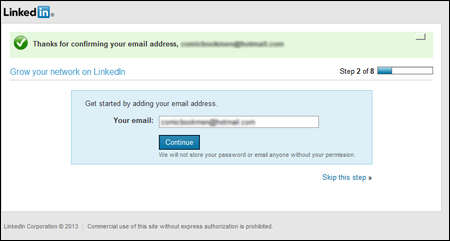
Figure 2-15: LinkedIn confirms your e-mail address.
- Your account is created, and you are now free to start building your network and updating your profile!
You are taken to your home page, as shown in Figure 2-16, where LinkedIn asks for information to help build your profile.
In the meantime, if you want to take a break to check your e-mail, you'll find a nice Welcome to LinkedIn! message there from LinkedIn Updates, assuring you that you're now a registered LinkedIn user. The e-mail encourages you to connect with people you may know and offers to take you back to the Web site to search for more people to add to your network.
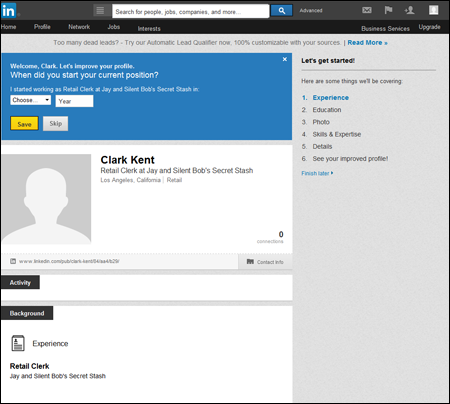
Figure 2-16: Welcome to LinkedIn!
Starting to Build Your Network
You're ready to look at how to build your network, with tools and forms provided by LinkedIn. Your first step is to decide who you want to invite to connect with you on LinkedIn.
Your profile is so important it gets its own chapter (Chapter 3 if you really must know). Be sure to completely fill out your profile before you start inviting people to connect. Having a complete profile makes it easier to find former colleagues and classmates. After all, if you invite someone to connect who you haven't spoken to recently, he'll probably take a quick look at your profile before responding. If he doesn't see a part of your professional history where he knows you, he will most likely ignore your invitation.
Your best bet now is to start using LinkedIn with some thought and planning. Here are some common pitfalls after signing up:
- You feel compelled to start inviting friends and colleagues to connect with you right away, before working on your profile or thinking of a strategy.
- You get nervous and decide not to invite anybody beyond one or two close friends or family members.
- You wonder about the value of LinkedIn and leave your account alone for a long period of time with no activity.
I've seen all three scenarios occur with various people who have joined LinkedIn, so don't feel bad if one of these is your natural reaction.
When you want to start using LinkedIn, begin by navigating to the home page and clicking Sign In. You are asked for your e-mail address and LinkedIn password, which you provided when you joined the site. After you are logged in, you can access any of the functions from the top navigation bar.
To start building your profile, hover your mouse over the Profile link in the top navigation bar and then click Edit Profile. You see your Edit Profile page, as shown in Figure 2-17. Simply click the links that look like pencils (those are Edit links) or click the Add links and follow the instructions to fill out your profile. I discuss this in greater detail in Chapter 3.
Next, start thinking about who you'd like to invite to join your network. LinkedIn provides some neat tools to help you identify, in your existing networks, people you know and trust well enough to feel confident about inviting them and expecting that they will accept.
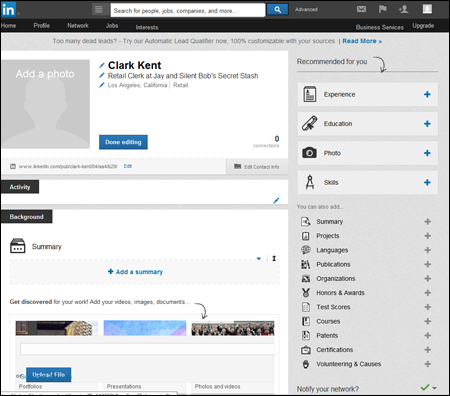
Figure 2-17: Start building your profile on LinkedIn.
The Add Connections section of LinkedIn, as shown in Figure 2-18, is always available by clicking the Network link from the top of any LinkedIn page, and then clicking the Add Connections link from the drop-down list that appears. The Add Connections section incorporates some basic options to identify and grow your network, which I cover in more depth in Chapter 6:
- Check the address book for your Web-based e-mail system, like Yahoo! Mail, Gmail, Hotmail, and AOL.
- Check your address book for contacts to invite with options for systems like Microsoft Outlook and Apple's Mail app by importing your desktop e-mail contacts with the link provided.
- Upload contact files from other applications.
- Invite people by their e-mail address. (By specifying people's individual e-mail addresses, you can decide who you want to invite without sending a blind invitation to everyone in your address book.)

Figure 2-18: Use this handy section to add connections to your network.
I cover these techniques in greater detail in Chapter 6. I definitely recommend that you first spend a little time thinking about who you want to invite. Then focus on getting your profile set up, and then invite people.