
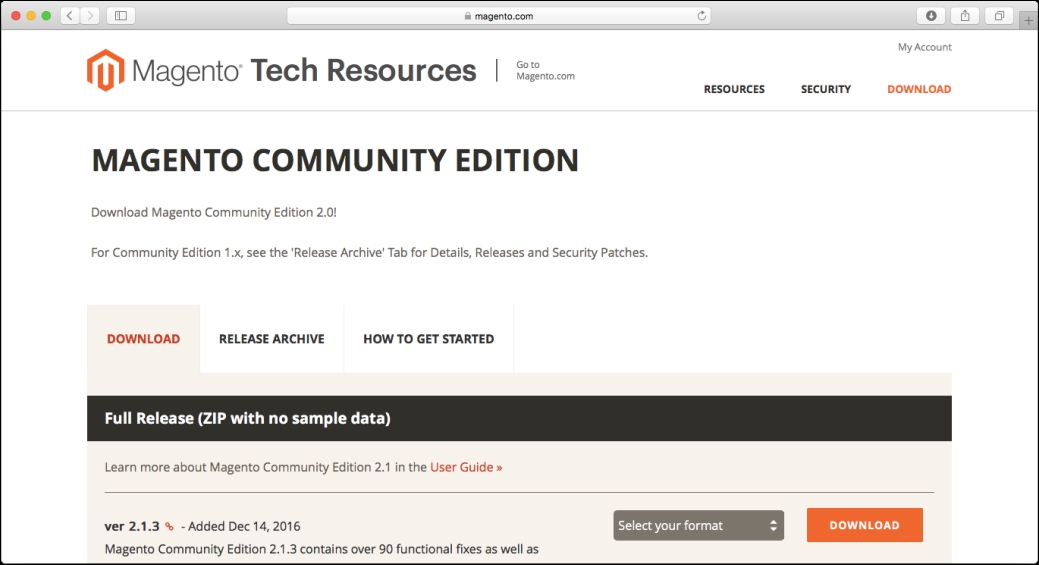
The first step is to get the latest version of the Magento code base. In order to do that, you should visit the Magento download page (https://magento.com/tech-resources/download) and choose the latest version of Magento:
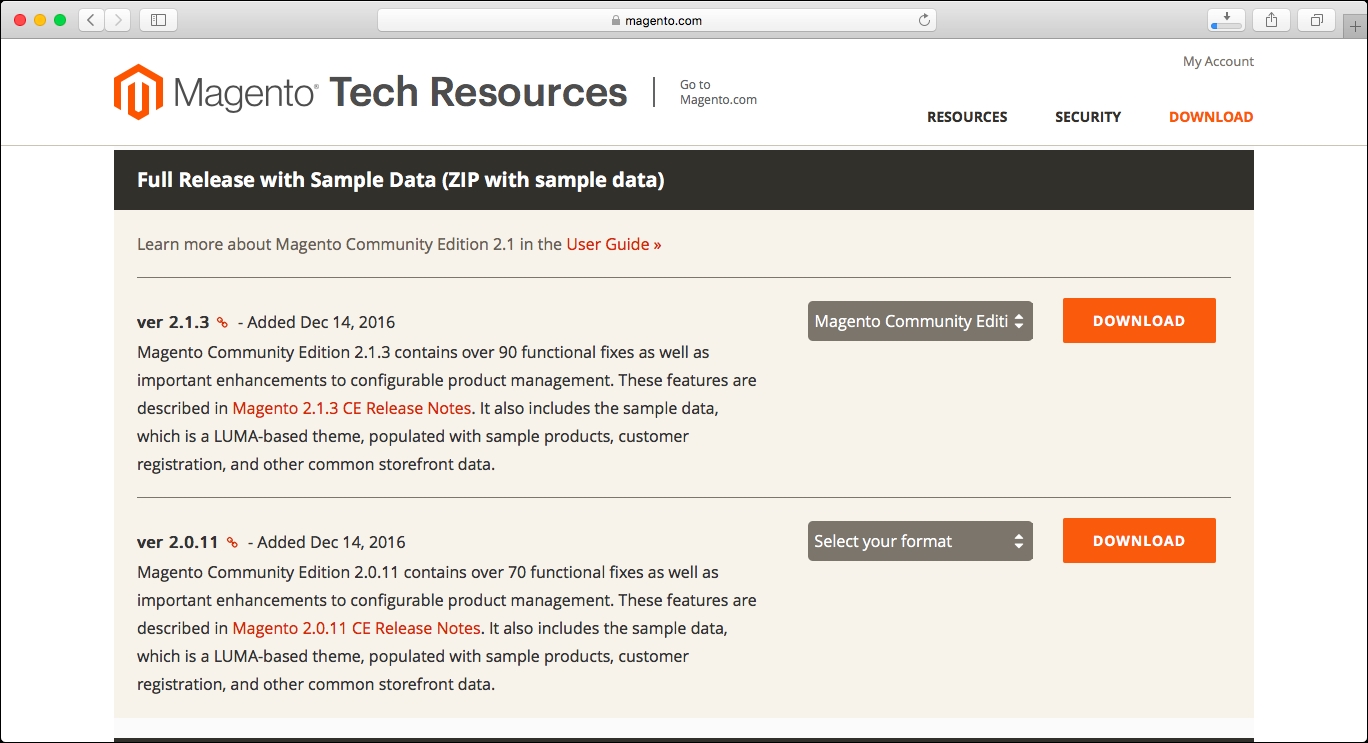
In order to have products, categories, and other useful information for our local Magento installation, we will choose the latest version from the Full Release with Sample Data (ZIP with sample data) section:
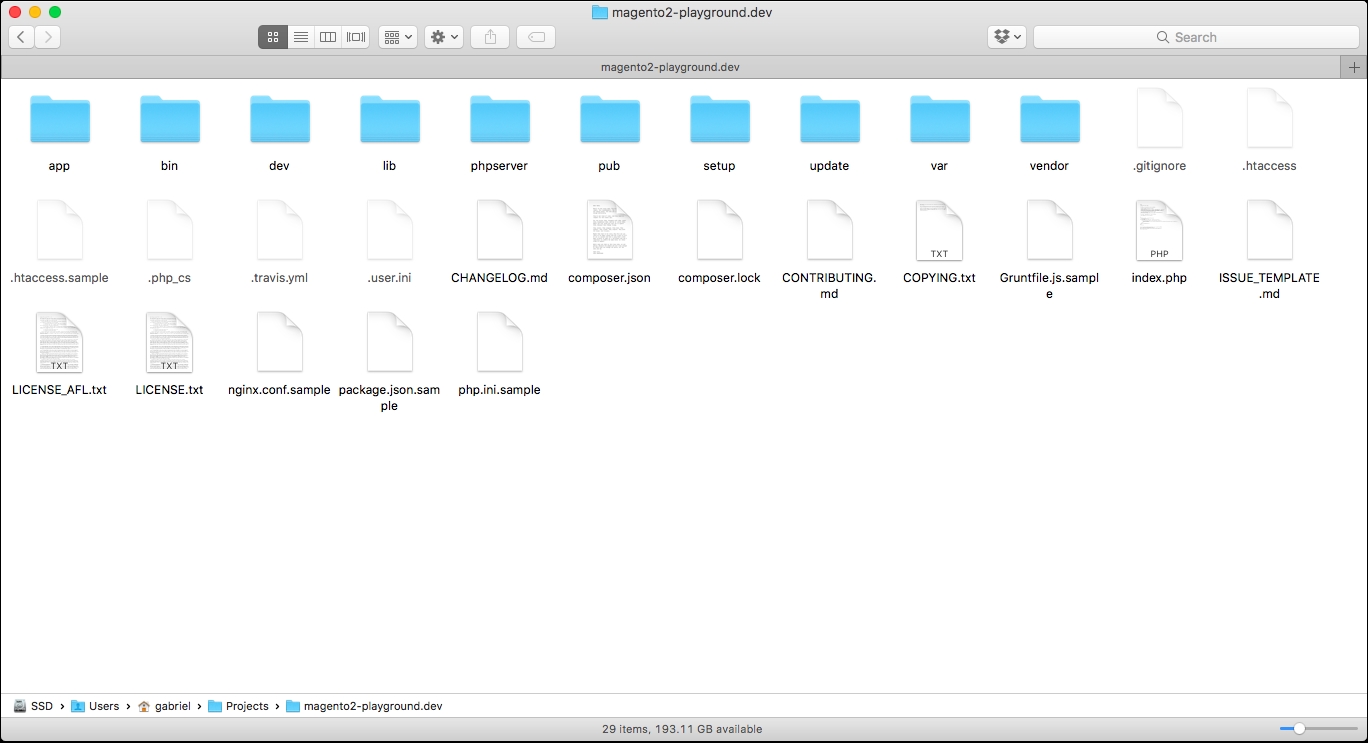
Once you download the file, you should uncompress it in the document root of your local machine.
After uncompressing the file, you should see a similar output to the following screenshot:
Now, we have the code base in place to move ahead with the installation.
There are two ways of installing Magento:
- Setup Wizard installation
- Command-line installation
The Setup Wizard is a simple installation process that is performed from the browser.
In order to install Magento using the Setup Wizard, you should follow these steps:
- Open your favorite web browser.
- Go to the
http://<host name>/setupSetup Wizard URL. The host name is the one that you assigned in your virtual host configuration for the local Magento 2 installation. For example, in this section we declaredmagento2-playground.devas the host name, so the URL for the Setup Wizard will behttp://magento2-playground.dev/setup. - Click on Agree and Setup Magento to proceed to the first step of the installation:
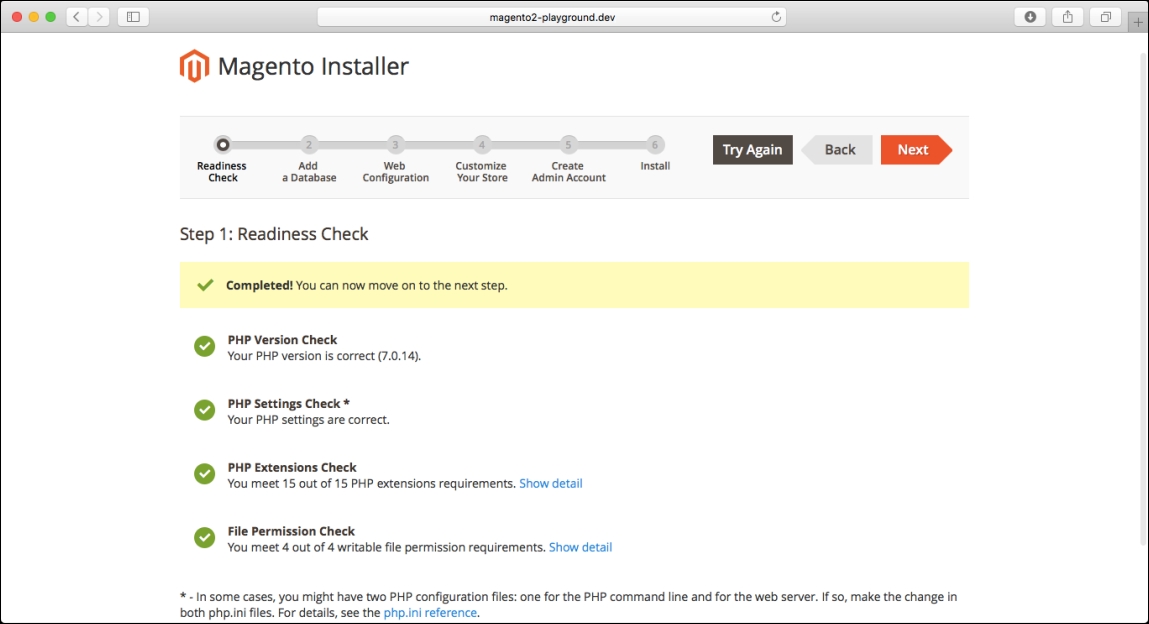
- Readiness Check: In this step, the Setup Wizard will check whether your local machine is ready for Magento 2, reviewing the following things:
- PHP version
- PHP settings
- Enabled PHP extensions
- File permissions
When the check is performed, you will receive confirmation to move to the next step:
- Add a Database:
In this step, you will specify the connection details for the empty database that you created for the Magento 2 installation:

- Web Configuration:
In this step, you should specify the virtual host that you created for the Magento 2 website (autocompleted by default), and you can define a custom URL for the admin as well as Advanced Options, such as HTTPS Options, Apache Rewrites, Encryption Key, and the Session Save configuration.

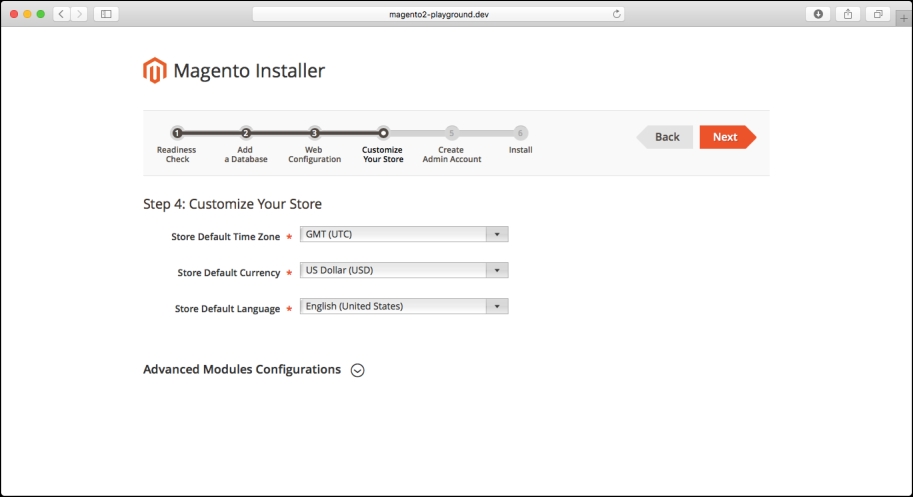
- Customize Your Store:
This step includes the time zone, currency, and language configuration, as well as the list of modules from Magento to enable/disable for the instance:
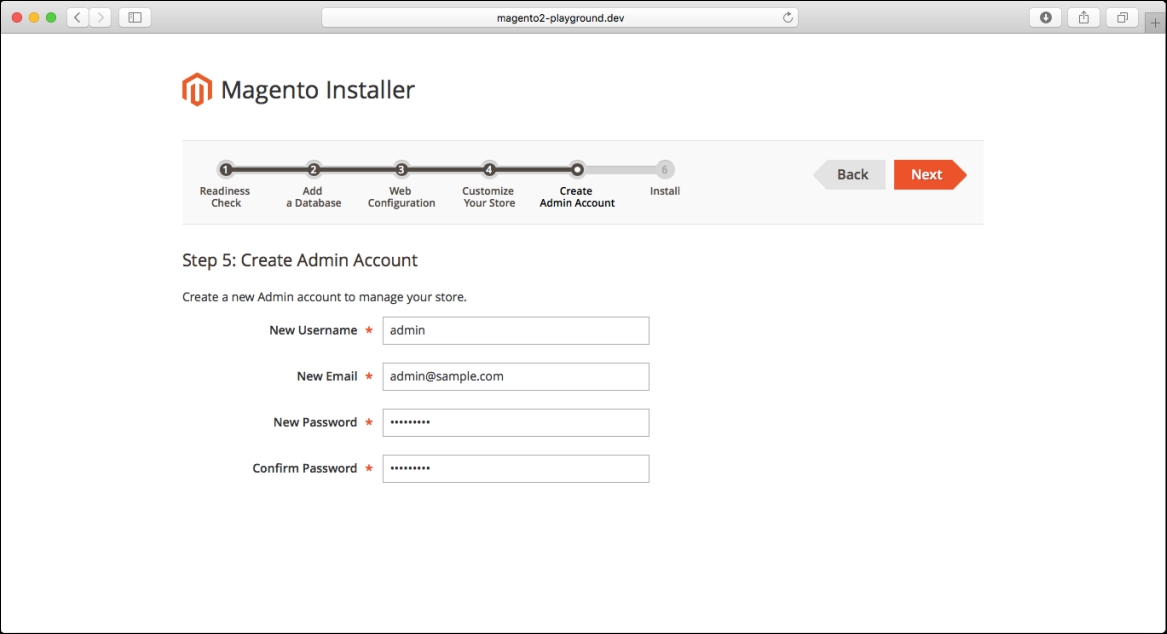
- Create Admin Account:
In this step, you can create the first user for the Magento Admin panel:
- Install:
This is the final step and you will find an Install Now button to proceed with the installation.
When you click on that button, Magento will proceed with the installation. You will be able to keep track of the installation by looking at the progress bar.
In addition to that, you can open the console log using the link below the progress bar to see the full report of the progress for the installation.
Since we are installing Magento with sample data, the Setup Wizard will take time to install all the products, categories, attributes, and so on.
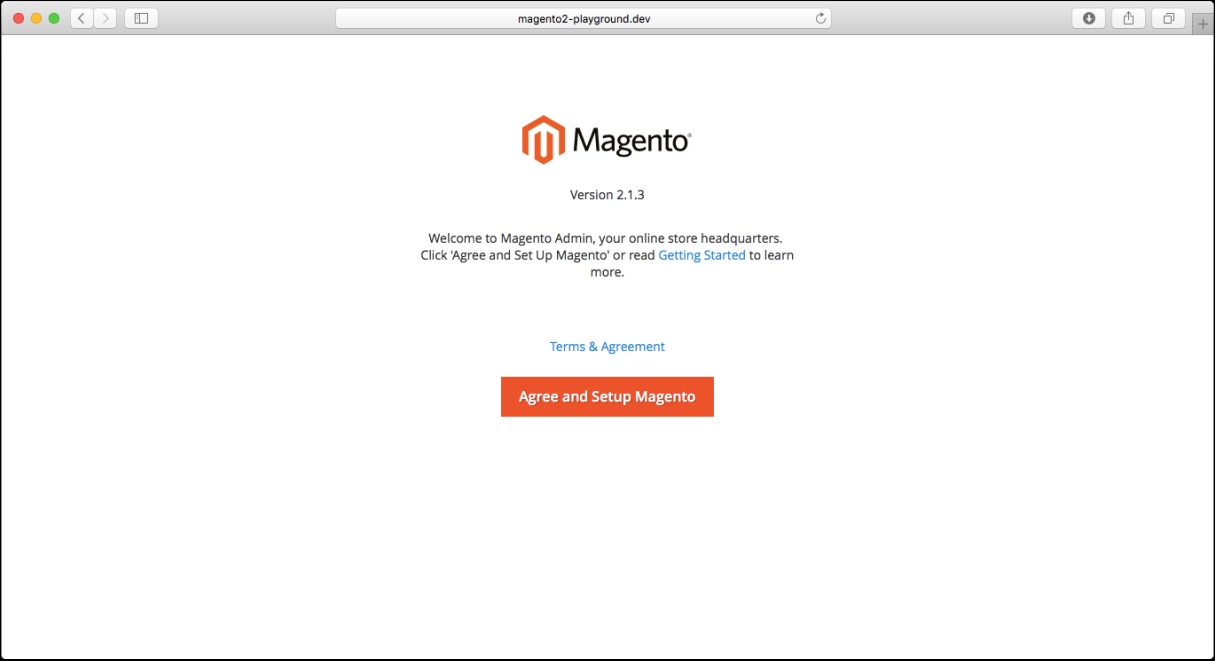
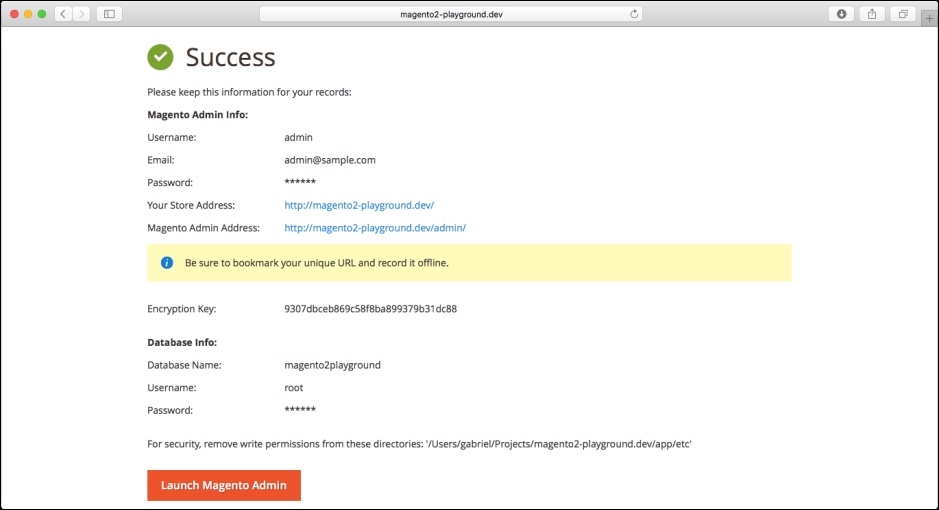
When the installation is finished, you should see the following success page in the Setup Wizard:
The command-line installation is the alternative method that Magento provides to install Magento 2 from the Terminal.
These are the steps to proceed with the installation:
- Open the Terminal and go to the directory of your local Magento installation.
- The command-line installation is done using the Magento 2 command-line tool. You can confirm that you are in the right directory by running
php bin/magento. You will see the output with a list of all the commands from the Magento 2 command-line tool: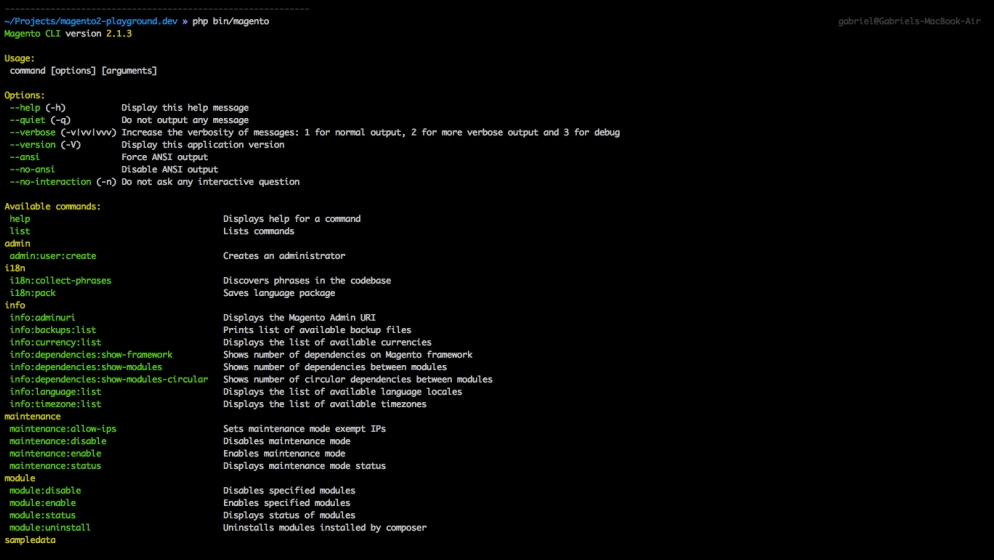
- The next step is running Composer in the project directory. If you don't have Composer installed in your local machine, you can follow the instructions on the official Composer website: https://getcomposer.org/.
Then, you should run the following command in the Terminal:
composer installIf everything goes well, you should see an output similar to the following:

- Finally, you should run
setup:installto install Magento with your local configuration.That said, this is a long command and you can customize it to match your local configuration. We will review each of the parameters in the command:php bin/magento setup:install --db-host=localhost --db-name=magento2playground --db-user=root --db-password=root --backend-frontname=admin --admin-user=admin --admin-password=ABC123xyz [email protected] --admin-firstname=Gabriel --admin-lastname=Guarino --base-url=http://magento2-playground.dev/ --language=en_US --currency=USD --use-rewrites=1 --use-secure=0 --use-secure-admin=0db-host: Host for your local database (localhost or 127.0.0.1)db-name: Name of the empty database for the Magento installationdb-user: MySQL usernamedb-password: MySQL passwordbackend-frontname: URL (frontname) for the Magento Admin paneladmin-user: Username for your first admin useradmin-password: Password for your first admin useradmin-email: E-mail for your first admin useradmin-firstname: First name for your first admin useradmin-lastname: Last name for your first admin userbase-url: Base URL for the local Magento installationlanguage: Language for the Magento installationcurrency: Currency for the Magento installationuse-rewrites: Enable/disable URL rewritesuse-secure: Enable/disable HTTPS on the frontenduse-secure-admin: Enable/disable HTTPS in the admin panel
After running the
setupcommand, you will see the following output confirming that the installation has been successfully completed:
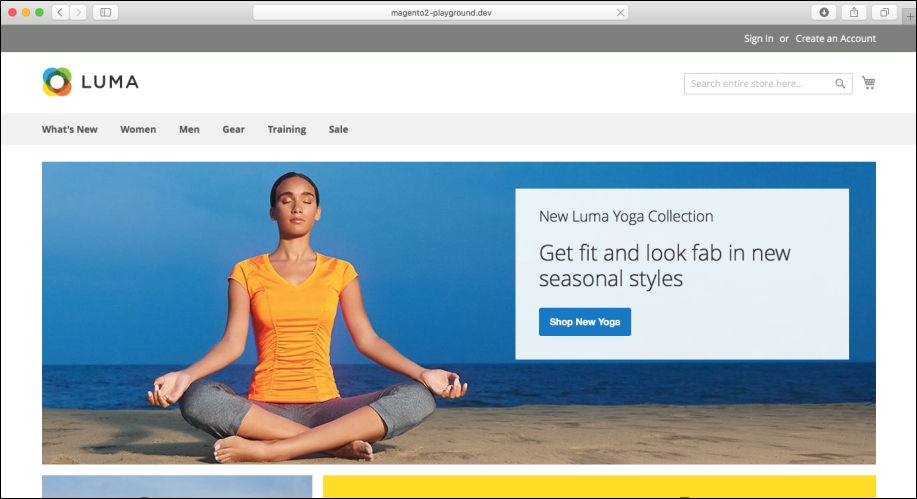
Now that you have installed Magento on your local machine, you can access Magento using the URL that you declared before.
The URL to access the frontend will be http://magento2-playground.dev/:
The URL to access the Admin Panel will be http://magento2-playground.dev/admin/:
