
In this chapter, we will go through the following concepts:
- Order management
- State and status
- Invoices, shipping, and credit memos
Magento offers a powerful yet simple way to manage the orders that are placed in your store. You can even place orders from the admin panel if a customer calls by phone and wants to buy products from your store.
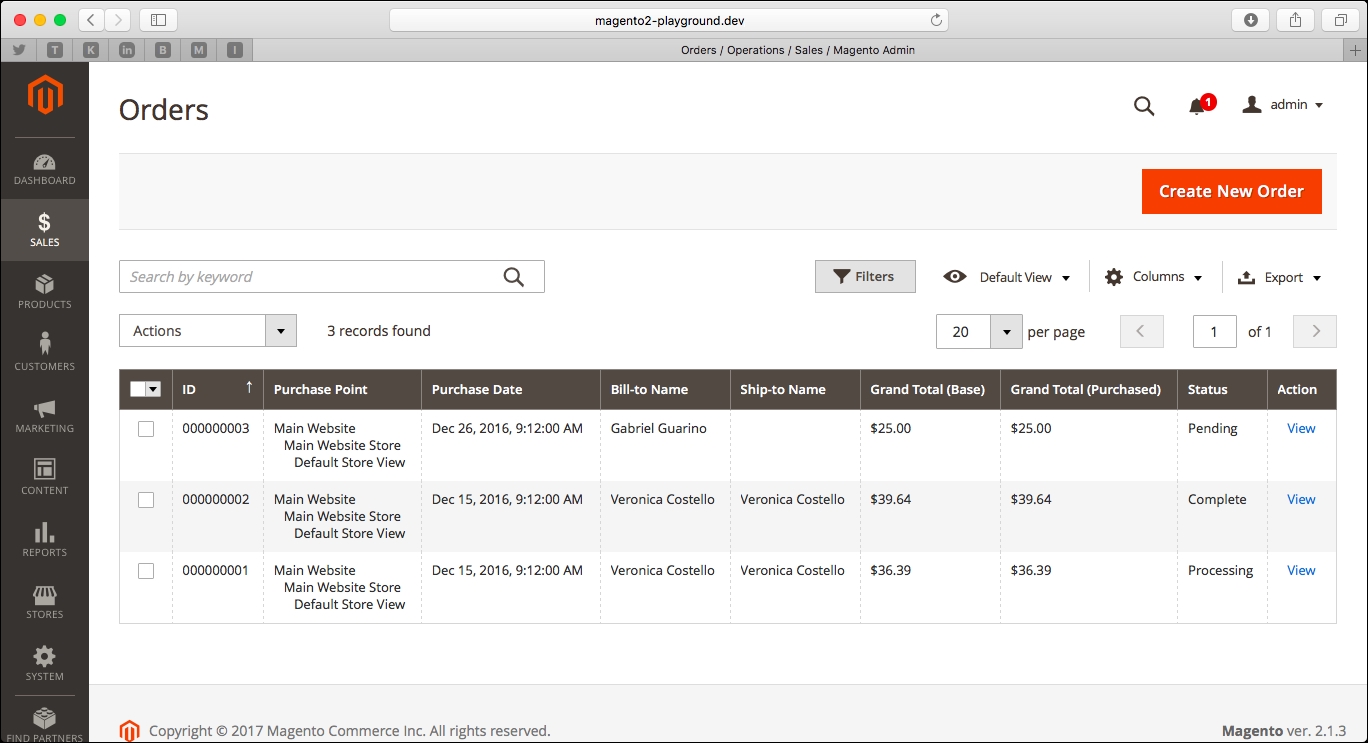
You can see and manage your orders from the SALES | Orders page in the admin panel:

A very important aspect of this page is that you can select really useful mass actions to manage your orders:
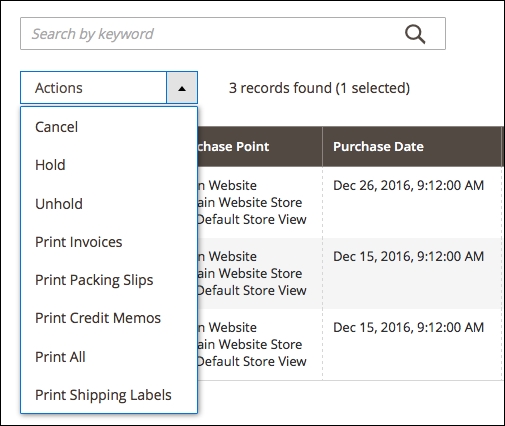
As you can see, you can put several orders on hold at the same time, print invoices for several orders, and so on. Besides this, the Orders grid allows you to continue using all the utilities from the Magento 2 admin panel grids, such as the following ones:
- Filters
- Selectable columns
- Export to CSV and XML
- Search by keyword
If you click on any order from the grid, you will be redirected to the order page:
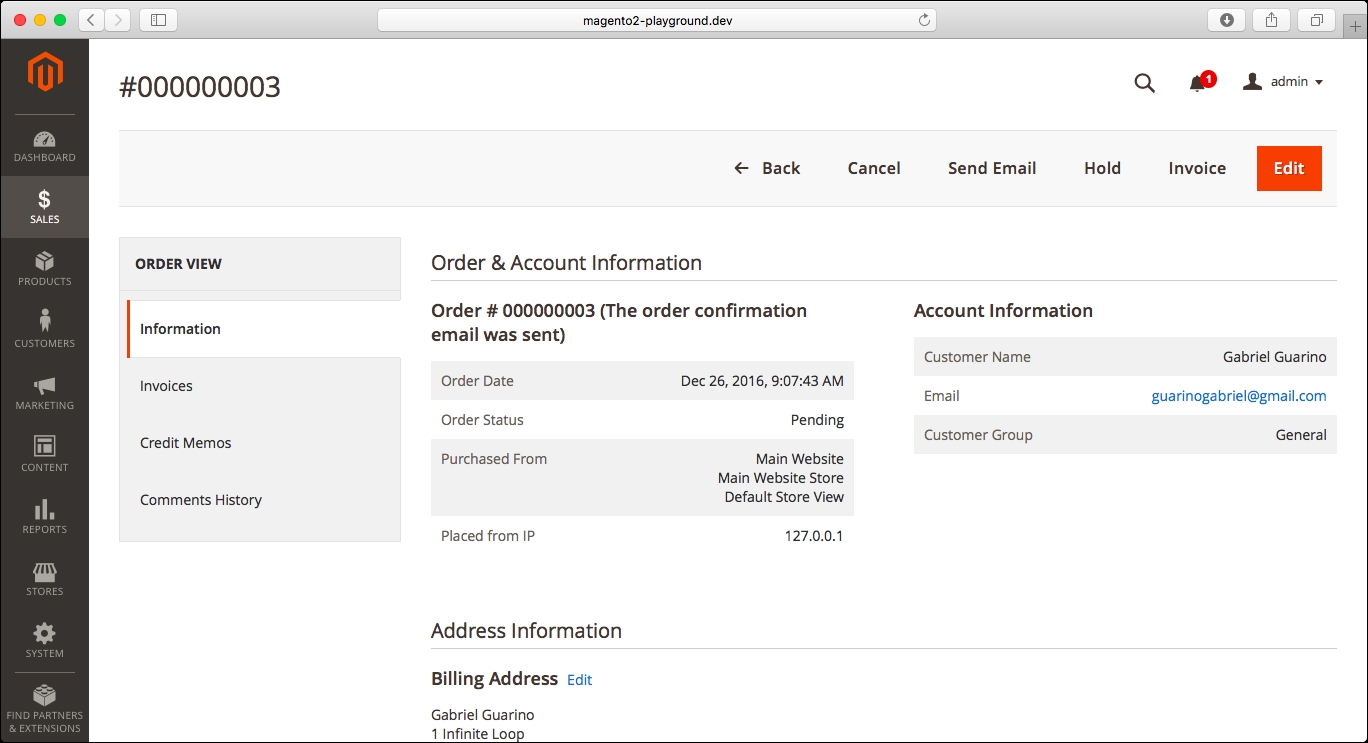
The first thing you will notice is that you have several actions for this order on the top-right corner of the screen:
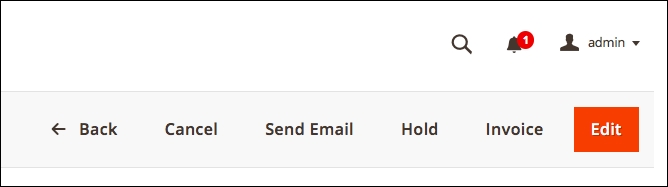
You can click on these buttons to quickly perform an action for these orders--from sending the order e-mail to the customer to putting the order on hold, creating an invoice, or even editing the order.
- Informationtab
Let's take a look at each of the sections from the Information tab:
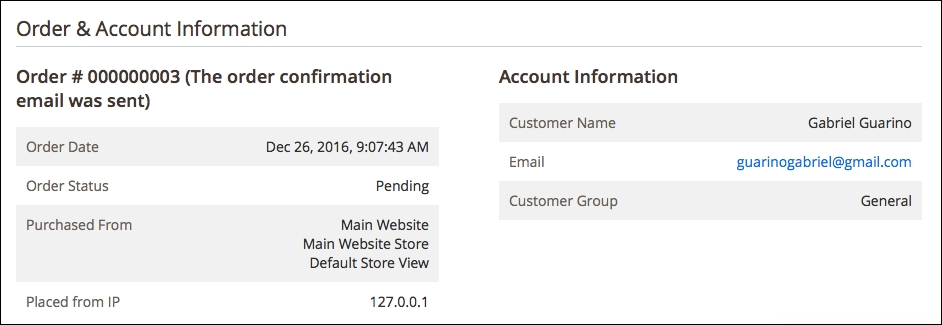
Here, you can see the basic information from the order. It's essential to know the store for this order (in the case of a multistore Magento website), the customer name, e-mail, and even the IP address in case of a suspicious order.
The next two sections are Address Information and Payment & Shipping Method:
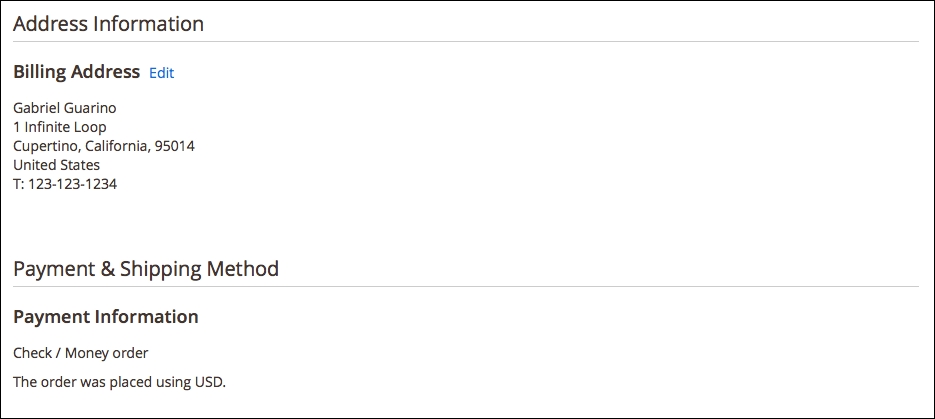
As you can see in the first section, you can edit the customer address (both shipping and billing) in case of any typo or mistake from the customer when the order was placed.
Finally, we have the Items Ordered and the Order Total sections:

In the Items Ordered section, you will find the list of items and the configuration chosen by the customer for each one of them (in the case of configurable products or products with custom options).
In the Order Total section, you will see the Notes for this Order and the Order Totals. A very important feature for order management in Magento is the ability to add comments to the orders to keep track of the history--from the moment the order was placed to the moment the order is delivered.
You can add as many comments as you need, and you can make those comments visible to the customer in the Customer Account page on the Storefront as well as notify the customer by e-mail. It's good to mention that Magento automatically adds comments in the order as well; for example, when the credit card payment is processed, you will be able to see the transaction amount as well as the transaction ID of the credit card.
Finally, in the Order Totals section, you can keep track of the Grand Total, the total amount paid, the total amount refunded, and the total amount due.
- Invoices tab
If you go to the Invoices tab, you will see a grid containing all the invoices that have been generated for this order. In the preceding example, you can see the grid with no invoices (we will generate an invoice later in this chapter):
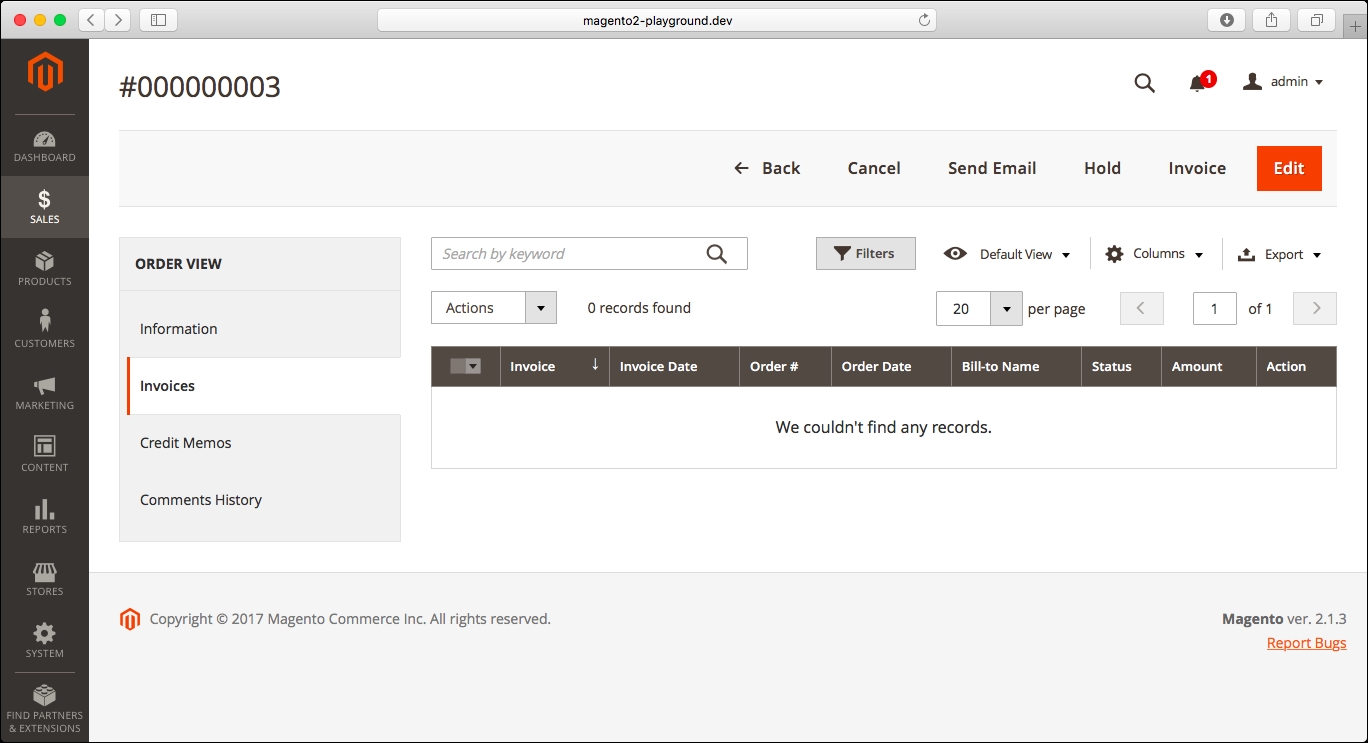
The only mass action available for this grid is PDF Invoices, which downloads a copy of each of the selected invoices in the PDF format.
- Credit memos tab
In this section, you can see the full list of credit memos that have been generated for this order:

Just like the Invoices tab, there is one mass action available on this grid to download the PDF for all the selected credit memos.
- Shipments tab
In this section, you can see the full list of shipments that have been generated for this order. One thing to note is that the tab wasn't available in the previous images. This is because the shipments tab is only available in physical orders, and the order that we have been reviewing so far was an order that contains just 1 downloadable product.

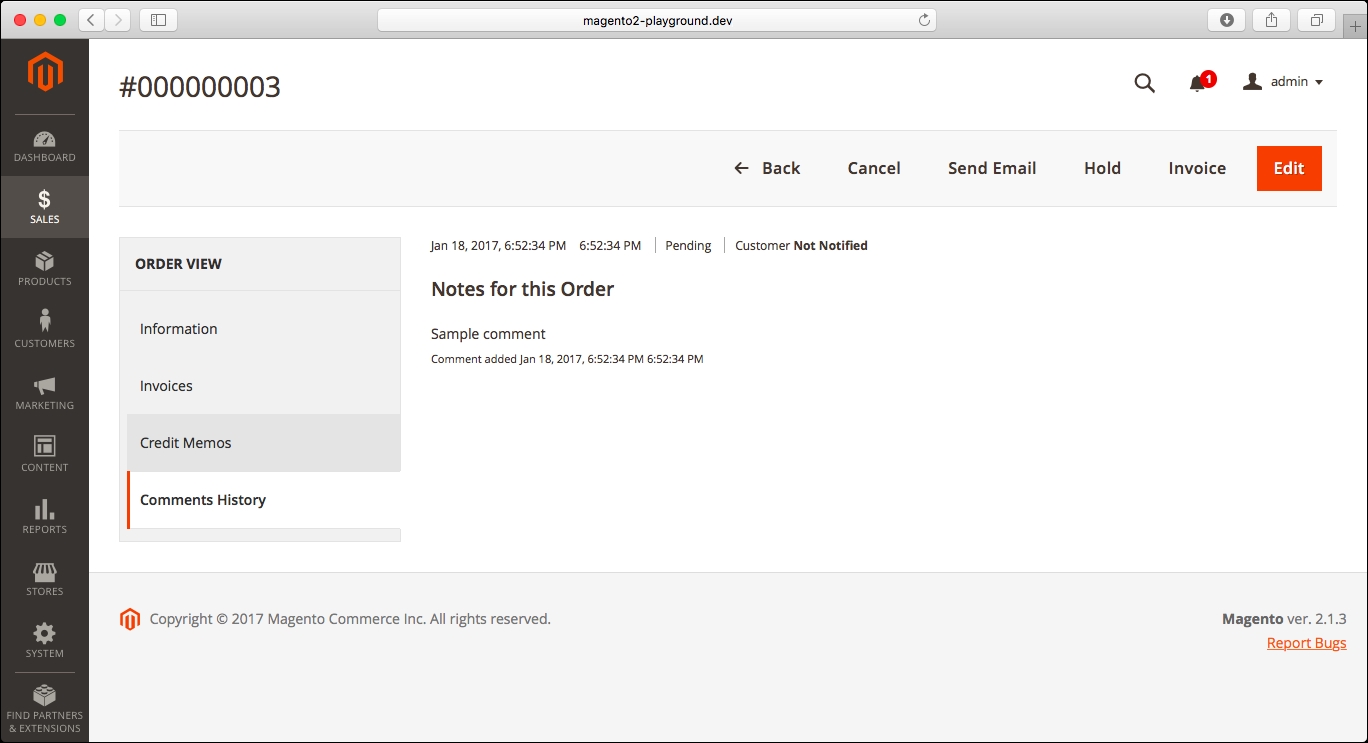
- Comments history tab
In addition to the Notes for this Order section in the Information tab, you can review the full list of comments on the order from the Comments History tab:
If you need to edit the customer order, you can do that by clicking on the Edit button in the top-right corner of the screen. However, if you click on that button, you will see the following message:

Even though the name of that action is Edit, the reality is that the current order will be canceled and you will be redirected to a form with the same information as that of the current order, but with the ability to edit that information before creating the order.
Editing the order would be necessary in case you needed to edit the items that the customer purchased, but it's not necessary to change the address information. If you click on the Edit button next to the Billing Address or Shipping Address, you will be redirected to the following form to edit those details:

As you can see in the message in the preceding screenshot, changing the shipping address is not going to alter the order total since the shipping, tax, and order amount are not recalculated.
This means that editing the address is useful when there is a typo in the street name, for example, but in the case of a completely different address, you should cancel the order and create a new one (basically, by pressing the Edit button) to get the updated shipping and tax rates.
Now, let's go back to the Orders grid. There you will see a button in the top-right corner of the screen to create a new order:
If you click on that button, you will be redirected to the following screen:

The first step in the process of creating a new order is selecting the customer. You can either select a customer from the list or create a new customer using the button that is in the top-right corner of the screen.
Once you have the customer, the next step is to add all the information related to the order on the following page:
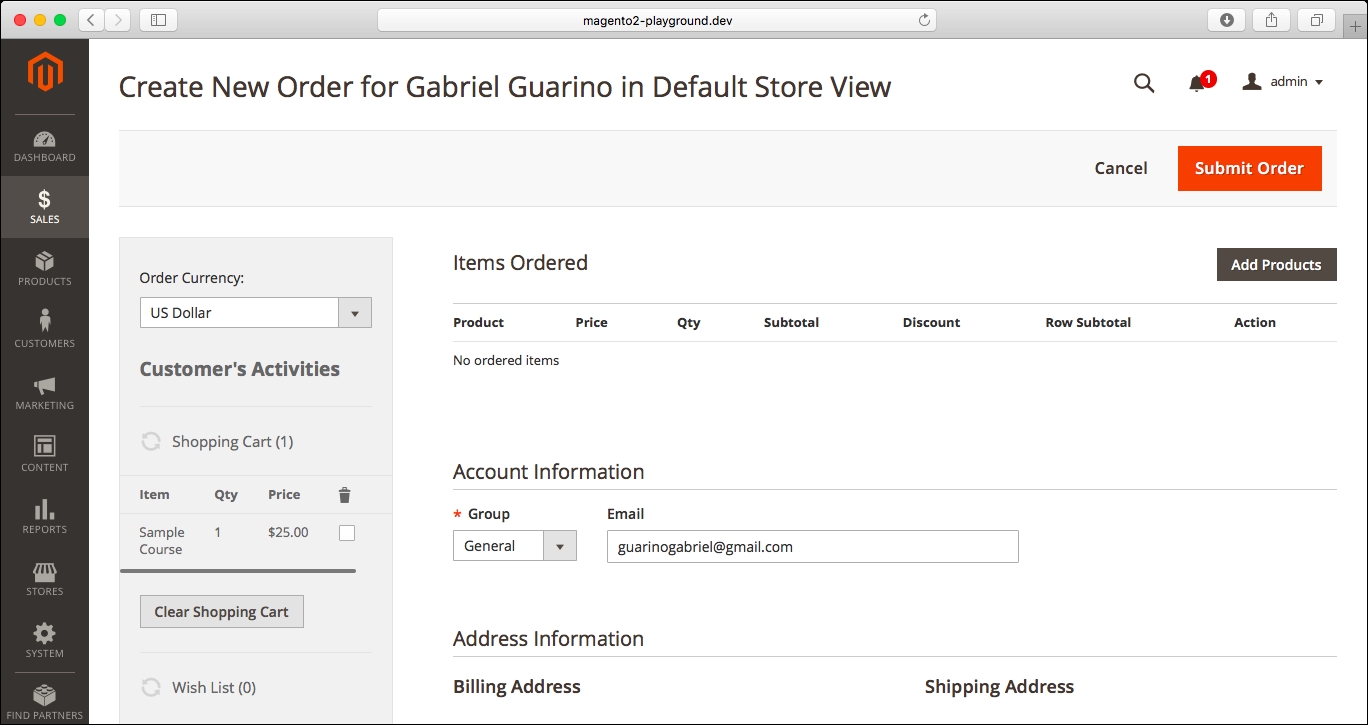
This is a very long form with a lot of options to configure the order.
The first thing to note is the sidebar on the left. You can select the currency for the order, and also, you can update the order based on the customer activity.
You will be able to see all the items that the customer has in the shopping cart on the Storefront, the list of items in the wishlist, the last ordered items, the products in the comparison list, the recently compared products, and the recently viewed products. This is a quick way of selecting the products for order, and it's based on the history of the customer's actions on the Storefront.
Now, let's start with the first section, Items Ordered.
If you click on the Add Products button on the right side of this section, the following grid will be displayed:
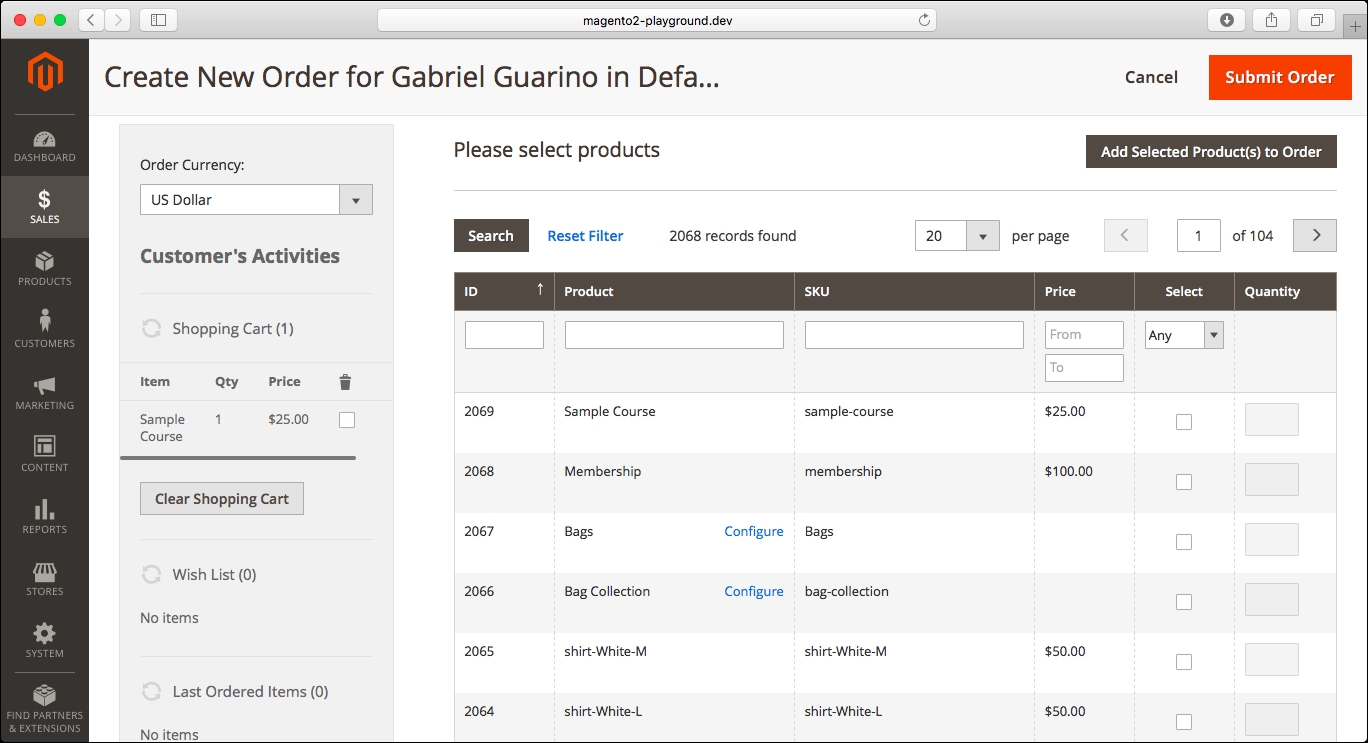
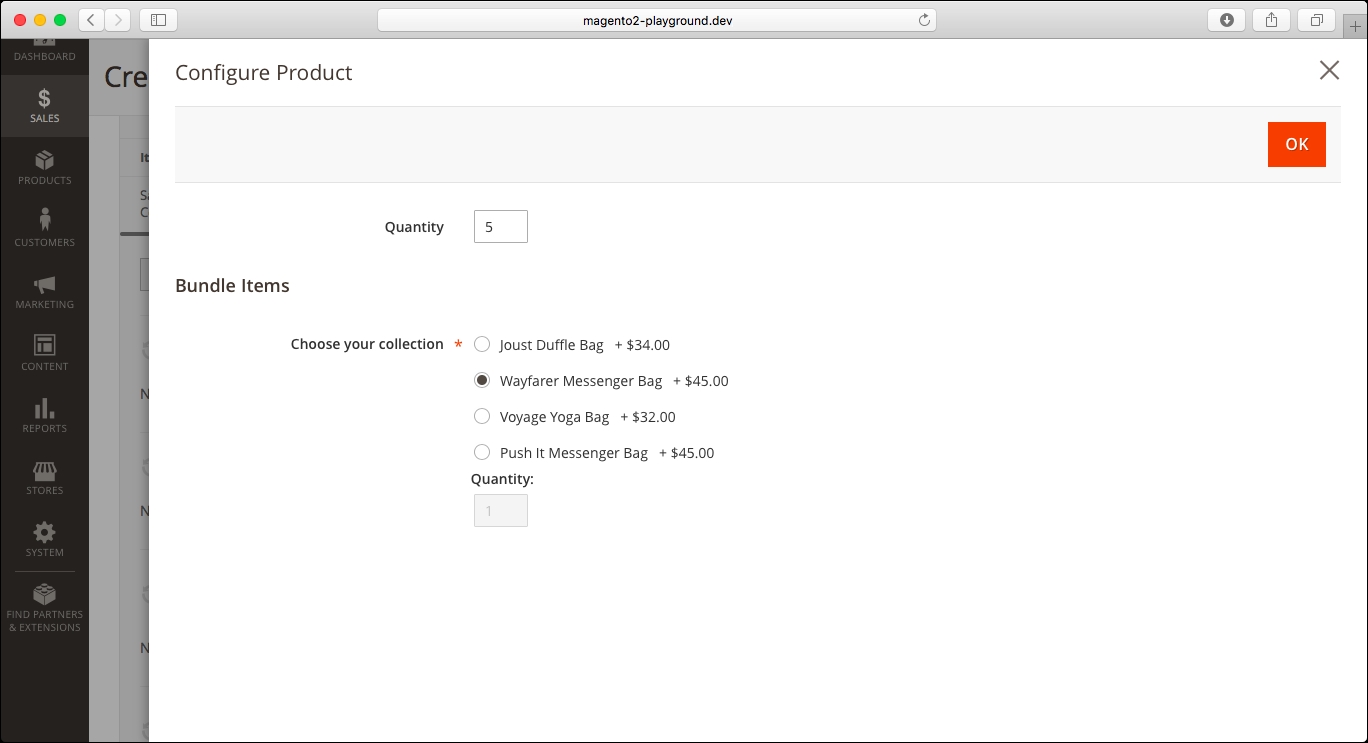
As you can see in the Product column, there is a Configure link available for bundle, grouped, and configurable products. If you click on that button, you will be able to configure those products for the customer in the following window:
Once you've selected all the products for the order, you can click on the Add Selected Product(s) to the Order button to update the Items Ordered grid:
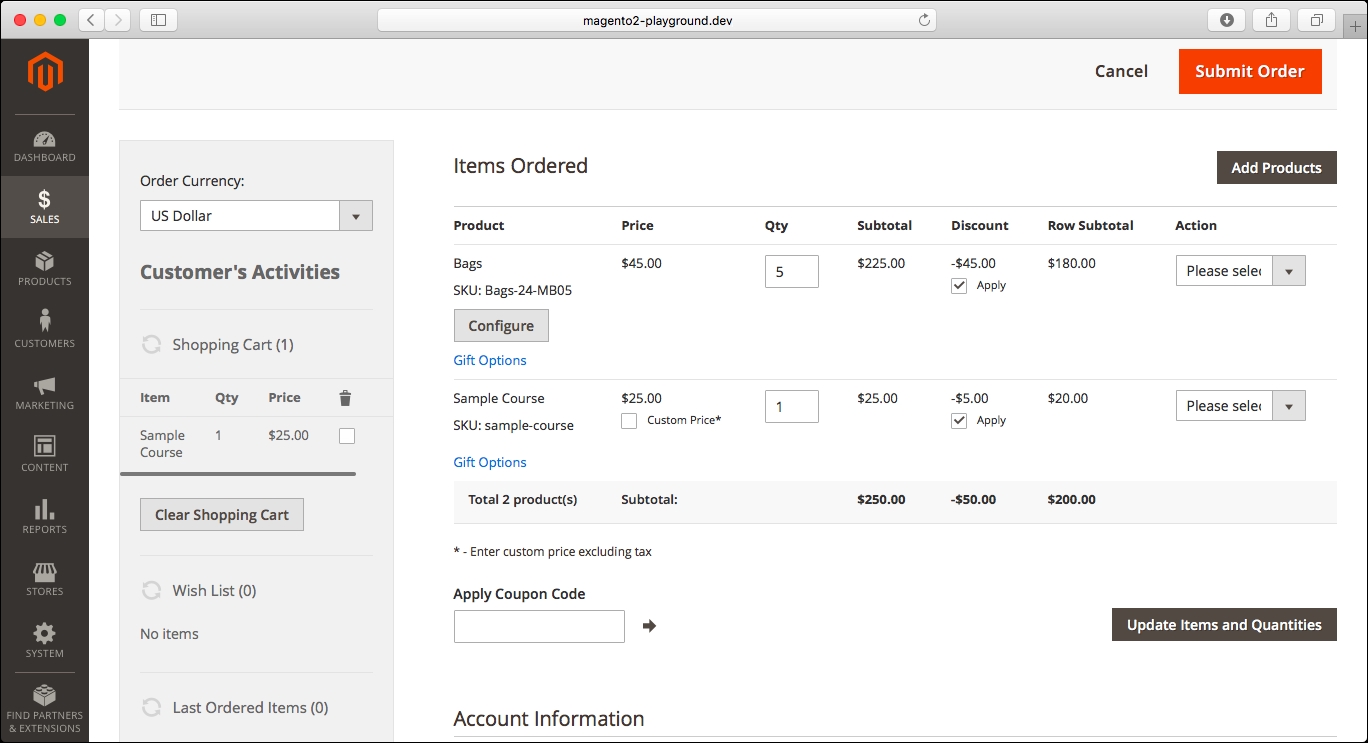
Finally, in the Items Ordered section, you can see the Apply Coupon Code field. Let's say, we received a call from the customer and we are placing the order from the admin panel; if the customer has a coupon code for a promotion in the store, you can add the coupon code in that field and the promotion will be applied.
Next, we have the Account Information and Address Information sections:
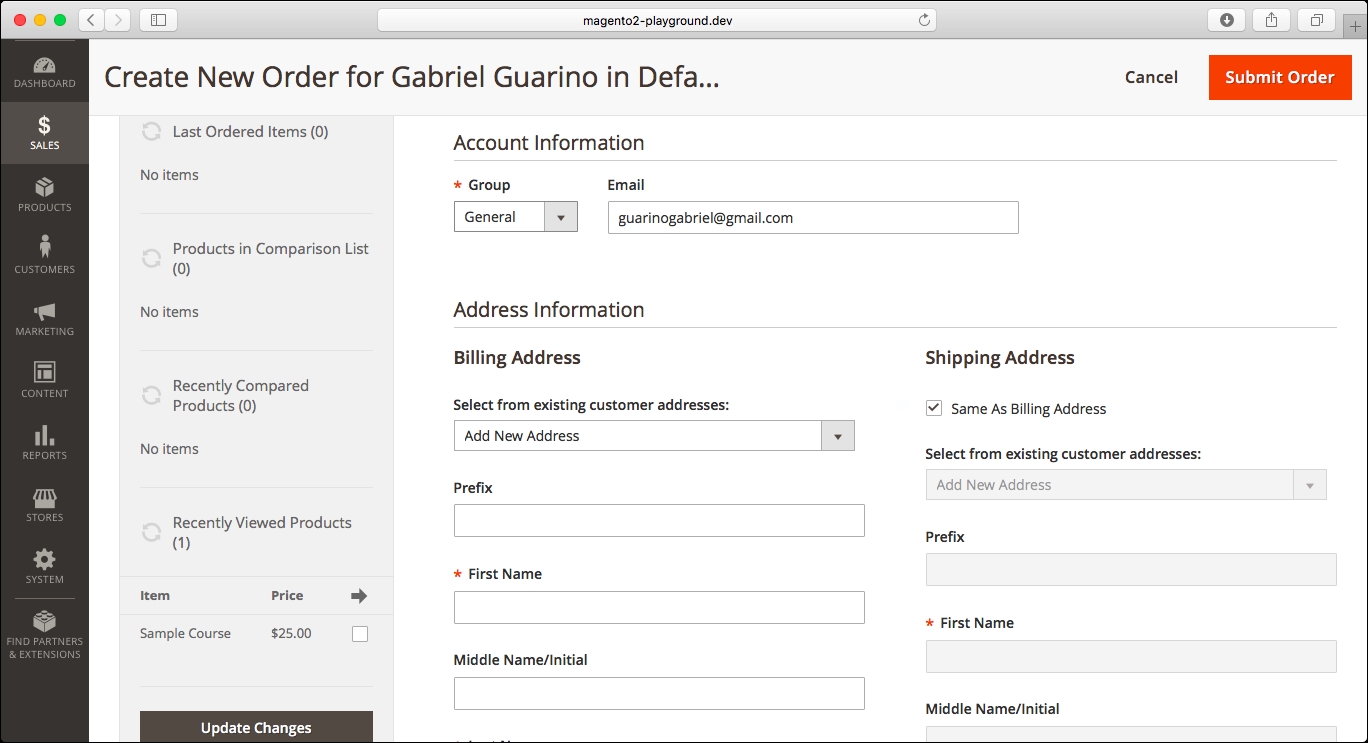
In the first section, you can change the customer group and the customer e-mail for the order. In the second section, you can select an existing address from the customer account, or add a new address in case you do not have any address available for the customer or you need a different address for the order. In addition to that, you can select Same As Billing Address to use the shipping address as the billing address (this option is marked by default in new orders).
Finally, we can see the Payment & Shipping Information and the Order Total sections:
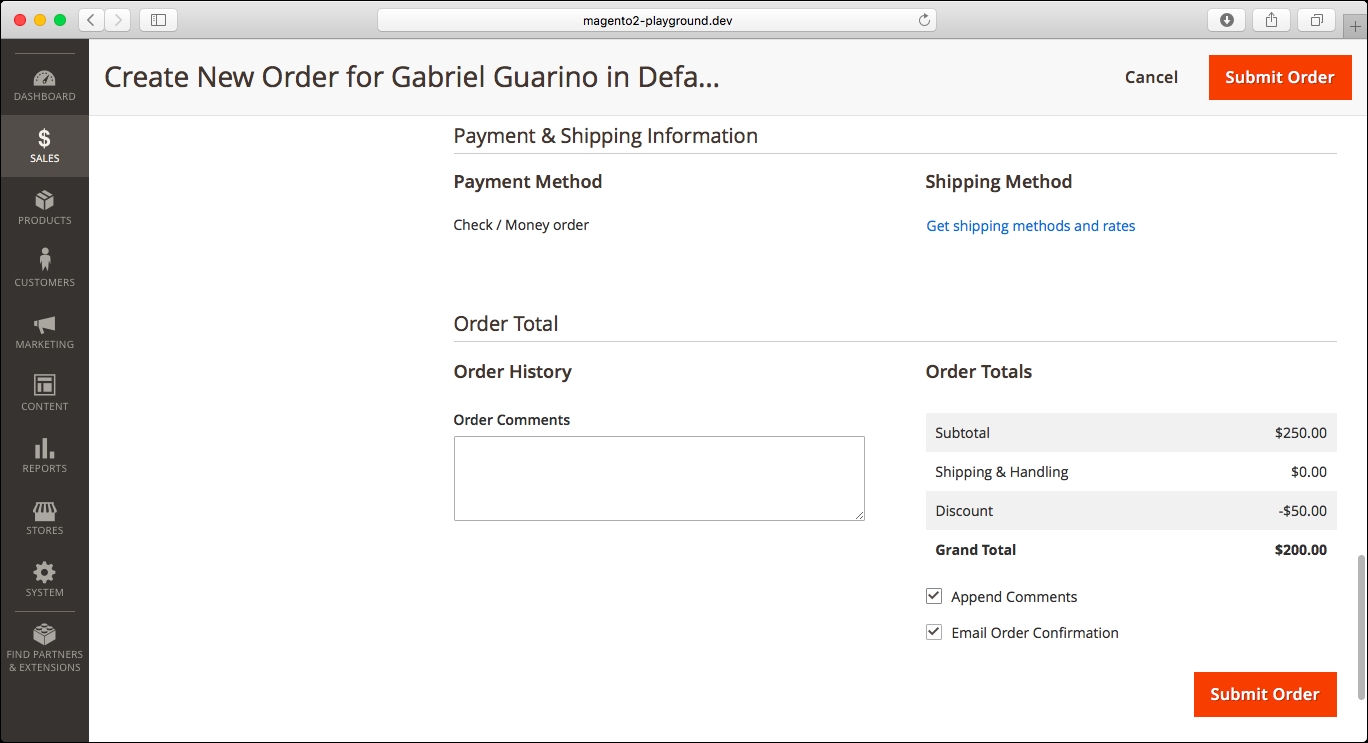
In the Payment & Shipping Information section, you can select the payment and shipping method for the order with the shipping rates calculated using the address that you'd specified in the previous section.
If you click on the Get shipping methods and rates link, the shipping rates will be calculated on the fly using the shipping address for the order, and you will be able to select the shipping method that the customer prefers.
Finally, in the Order Total section, you can add comments to the order as we saw earlier, review the order totals, and select whether you want to append the comments and send the order confirmation through e-mail to the customer.