
Chapter 12: Creating and Managing Teams
This chapter will demonstrate how teams in Microsoft Teams can be created, both from scratch and from an existing resource of a Microsoft 365 group. You will also learn how to apply privacy settings to your teams so that not everyone is able to view and join them. In addition, we will demonstrate how creating an organization-wide team is a useful method to communicate with all employees in your organization.
By learning the material in this chapter, you'll add team creation and management skills to your skillset, which will prove useful when taking the MS-700 exam.
In this chapter, we're going to cover the following main topics:
- Creating a team
- Creating a team from an existing M365 group
- Managing the privacy settings for a team
- Managing organization-wide teams
Technical requirements
In this chapter, you will mostly just need to have the ability to create teams in your organization. To create an org-wide team, you'll need to be a Global Administrator.
Creating a team
In this section, we're going to create a new Microsoft Teams team from scratch. There are three ways to create a new team:
- Via the Microsoft Teams client application or SharePoint Online site
- From the Microsoft Teams admin center
- Via PowerShell
Let's review each method, beginning with the client option.
Creating a new team from the Microsoft Teams client
As long as you haven't prevented the option as a global admin, users in your organization can create teams themselves using the Teams client. Users will find this option in the lower left-hand corner of the Teams client after selecting the Teams option from the left-hand-side navigation menu as shown in Figure 12.1:

Figure 12.1 – The Join or create a team option in Teams
Next, you would click Create team. From here, you have the option to create a new team from scratch or create one from a group or team. There are also several Teams templates to choose from to pre-load your team with relevant channels and apps. These templates currently include the following:

We'll select From scratch (as seen in Figure 12.2) to create a blank new team:
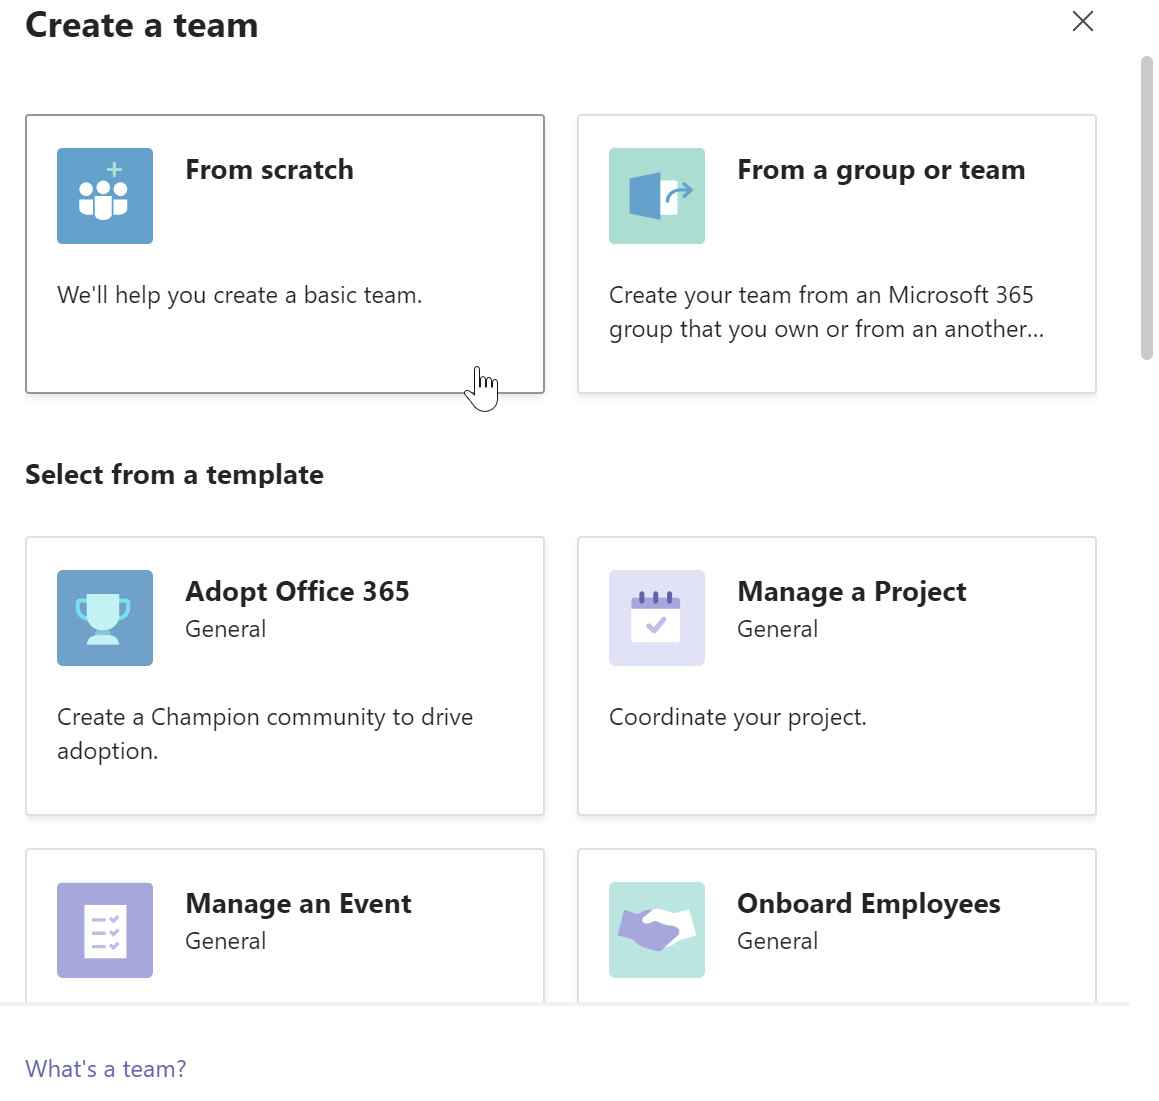
Figure 12.2 – Cursor hovering over the From scratch option in the Create a team dialog
Name and describe your new team, then click Create. You'll be prompted to add members (individuals, security groups, or distribution lists) to the team and can upgrade some to owners at this stage. You can also add members and owners later, as shown in Chapter 13, Managing Team Membership Settings. If you're not adding any members yet, click Skip.
You'll automatically be taken to your new team and its default General channel.
Tip
Keep in mind that once a team is created via the client or SharePoint Online, the creator is automatically the team owner of that team.
Next, let's review the steps for creating a team as a Teams Service Administrator or Global Administrator via the Microsoft Teams admin center..
Creating a new team from the Microsoft Teams admin center
A nice advantage of creating sites from the admin center or PowerShell is the ability to set the owner as someone other than the creator. This sub-section details the steps to take from the admin center.
From the Microsoft Teams admin center (https://admin.teams.microsoft.com), you can create a new team by selecting Teams > Manage teams from the left-hand menu. Once there, click Add.
A side panel floats in with fields for team name, description, owner, and privacy level, as shown in Figure 12.3:
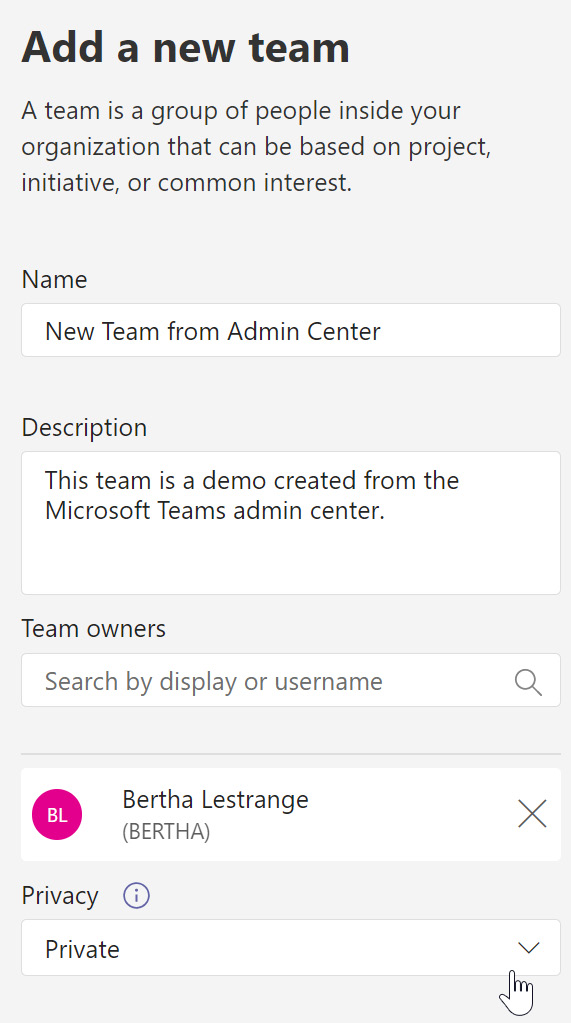
Figure 12.3 – New team configuration settings in the Microsoft Teams admin center
Once you've configured the new team fields as required, click Apply.
Important note
Once you've created a team, you can still change its name, privacy level, and even the O365 group name later, without using PowerShell. However, to change the O365 group email address, you'll need to use Exchange PowerShell.
Next, let's look at creating a team via PowerShell.
Creating a new team via PowerShell
Connecting to Microsoft Teams in PowerShell is as simple as importing the Teams PowerShell module (Install-Module MicrosoftTeams), then executing the Connect-MicrosoftTeams cmdlet. This will prompt you for credentials in a pop-up dialog. You can then use the New-Team cmdlet to create a new team. This would be excellent for incorporation into an automated request-and-provision process that helps you adhere to governance guidelines. For example, here's how you would create a team for the Help Desk using PowerShell:
New-Team -DisplayName "Help Desk" -Description "Team for internal collaboration amongst Help Desk agents." -Visibility "Private"
Pair this cmdlet with other parameters and cmdlets to really enhance the provisioning of new teams via PowerShell. For example, add -Owner, Add-TeamUser, and New-TeamChannel to add users and channels at creation time as well. For example, here's how we create the same team in the previous example but with a unique owner other than the person running the script, and adding two members and two channels:
$group = New-Team -MailNickname "HelpDesk" -displayname "Help Desk" -Description "Team for internal collaboration amongst Help Desk agents." -Visibility "Private" -Owner "[email protected]"
Add-TeamUser -GroupId $group.GroupId -User "[email protected]"
Add-TeamUser -GroupId $group.GroupId -User "[email protected]"
New-TeamChannel -GroupId $group.GroupId -DisplayName "Open Tickets"
New-TeamChannel -GroupId $group.GroupId -DisplayName "Everyday Resources"
In the next section, we'll create a group from an existing Microsoft 365 group.
Creating a team from an existing M365 group
Creating a new team from scratch creates a new Microsoft 365 group that helps power its membership from the backend. However, you may already have a Microsoft 365 group if you first had a SharePoint Online site, Planner plan, Stream channel, and so on that used a Microsoft 365 group. Rather than duplicating the groups and doubling your membership management, you can create a team using a pre-existing Microsoft 365 group.
One option for doing this is via a pre-existing SharePoint Online site. Users are presented with a banner message encouraging them to create a team for their site if the site was created in SharePoint (and not as a result of a team being created first). To create a team from a SharePoint Online site, look for this banner message in the lower left-hand corner of a SharePoint Online site that resembles what's shown in Figure 12.4:
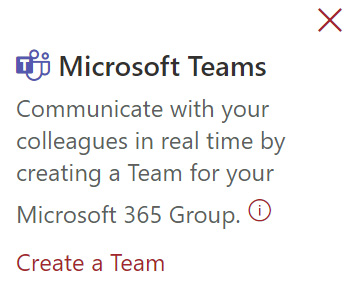
Figure 12.4 – The Microsoft Teams message for team creation on a SharePoint Online site
Because the banner doesn't always appear, and because if closed it won't reappear, the more reliable method is to again use the Microsoft Teams client. Instead of From scratch, you'll choose From a group or team in the first dialog.
This will present you with the option of either using an existing team or a Microsoft 365 group to create the new team as seen in Figure 12.5. If you choose Team, you'll see all of your teams and can choose one to base the new team on. If you choose Microsoft 365 group, you can select an M365 group that doesn't already have a team to base the new team on:
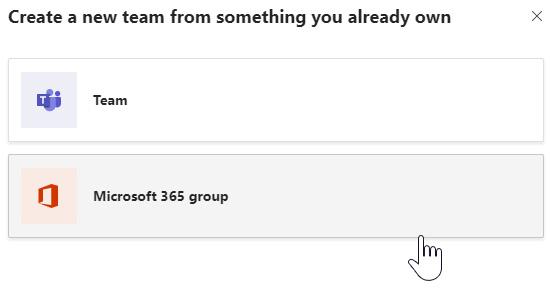
Figure 12.5 – Dialog when creating a team from an existing team or group
After you make a selection of Team or Microsoft 365 group and choose the existing asset on which to build the new team, you'll click Create.
Important note
Adding teams to an existing Microsoft 365 group is permanent and can't be undone.
In the next section, we'll manage the privacy settings for our team.
Managing the privacy settings for a team
There are three privacy levels to choose from for your teams. When you're creating a team, you select this as part of the process. You can see an example of this dialog in Figure 12.6. After you create a team, however, you're still able to modify this selection, thereby changing a team from private to public, or even org-wide if you haven't hit the organizational max yet.
To change privacy settings for a team, from within the Teams client, select the ellipsis (three dots) next to a team name and select Edit team. Once there, your screen will show the dialog seen in Figure 12.6:
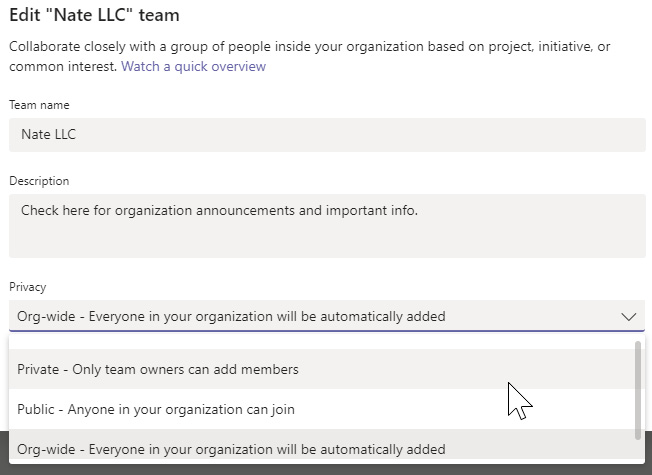
Figure 12.6 – Privacy setting selection options for a team currently set to Org-wide
Now select the Privacy dropdown.
You can choose one of the following:
- Private – Only team owners can add members
- Public – Anyone in your organization can join
- Org-wide – Everyone in your organization will be automatically added
Once you've changed your selection for the team, click Done.
When you choose Private, users can bypass join approval using a team code generated at Team settings > Team Code > Generate. Otherwise, when a user requests to join, team owners will get requests.
To prevent your private teams from appearing in Teams gallery search results, you can also change your team discoverability setting in Team settings > Team discoverability.
To change an existing team to Private and disable its discoverability, you can also run the following PowerShell. The first line gets a specific team, then everything following Set-Team sets that team's visibility to private and removes it from search and suggestions.
$team = Get-Team -DisplayName "Nate LLC"
Set-Team -GroupID $team.GroupID -Visibility Private -ShowInTeamsSearchAndSuggestions $false
Once executed, you'll see a confirmation of the action as shown in Figure 12.7:

Figure 12.7 – Completed PowerShell script showing privacy setting changes for a team
Now let's look at managing organization-wide teams.
Managing organization-wide teams
To create and configure organization-wide teams, you must be a Global Administrator. Your organization can have a maximum of 5 org-wide teams per tenant. Your organization can also have no more than 5,000 users to be able to create org-wide teams.
If you meet both of those pre-requisites (being a global administrator in an organization with 5,000 users or less), you can proceed with creating an org-wide team following the steps in the Creating a team section earlier in this chapter. The only difference will be selecting Org-wide after selecting From scratch. Org-wide will appear as an option as seen in Figure 12.8 only if you're a global administrator:
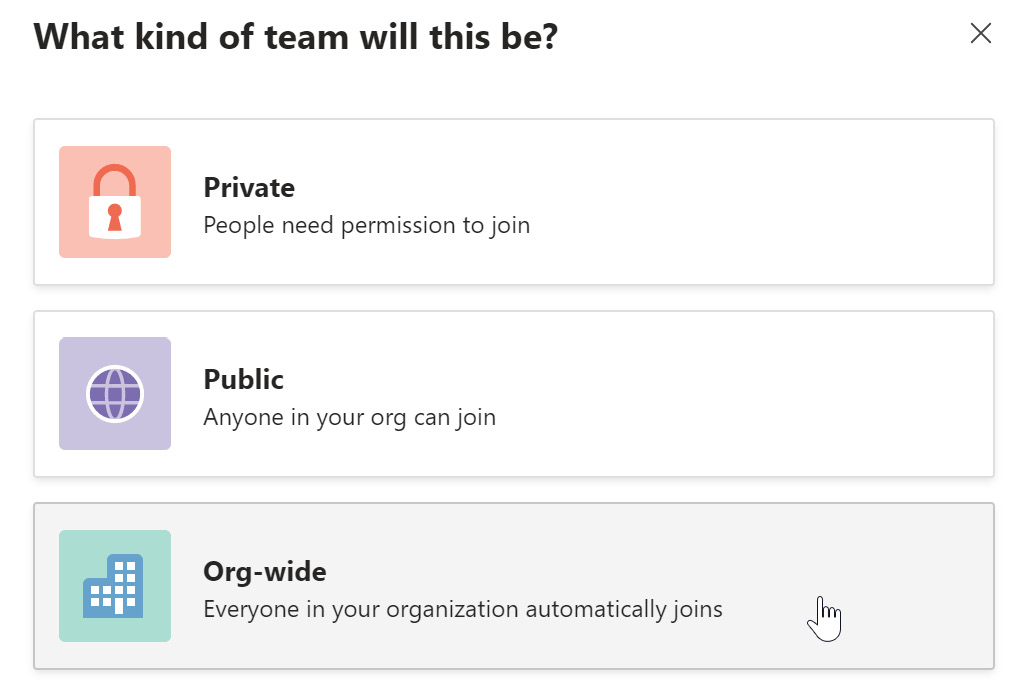
Figure 12.8 – The Org-wide option when creating a new team from scratch
You'll then be asked for a team name and description before clicking Create. As with other teams, your org-wide team will come pre-loaded with a General channel with Posts, Files, and Wiki tabs.
Team members in org-wide teams are automatically added and removed based on your Azure AD membership. So as new employees join the company, they'll automatically have access to the org-wide team(s) once licensed and in AD, and team owners are automatically set to your Teams administrators.
For the remainder of this book, we'll focus on the management of organization-wide teams.
Summary
In this chapter, we covered the creation of teams both from scratch as well as from existing O365 groups.
We then covered privacy settings for teams, seeing that we can change teams from their original privacy setting to Public, Private, or Org-wide.
Lastly, we reviewed the creation and management of organization-wide teams, keeping in mind that we are limited to 5 per tenant and only in organizations with 5,000 or fewer users.
In the next chapter, we'll cover team membership settings including dynamic security groups for membership, Azure AD access reviews, and membership management using PowerShell.
Questions
As we conclude, here is a list of questions for you to test your knowledge regarding this chapter's material. You will find the answers in the Assessments section of the Appendix:
- Currently, members of your team have to invite other members. What is the privacy level of your team?
a. Private
b. Public
c. Org-wide
d. Hidden
- You want anyone in your organization to be able to join your team without an invite, but not be automatically added. Which privacy level should you choose for your team?
a. Private
b. Public
c. Org-wide
d. Hidden
- Every member of your organization, as soon as they're entered into the system, needs access to a team used for organization announcements and resources. What sort of team privacy level should a team like this have?
a. Private
b. Public
c. Org-wide
d. Hidden
- What are the limits for org-wide teams?
a. <10,001 users and no more than 3 org-wide teams per tenant
b. <3,001 users and no more than 5 org-wide teams per tenant
c. <5,001 users and no more than 5 org-wide teams per tenant
d. <15,001 users and no more than 3 org-wide teams per tenant
- Which of the following is not true?
a. You can create a team from the Teams client.
b. You can create a team with PowerShell.
c. You can create a team from the Microsoft Teams admin center.
d. You can create a team from Outlook.
- Which of the following is true?
a. All team types can be made non-discoverable.
b. Any non-org-wide team can be made non-discoverable.
c. Any private team can be made non-discoverable.
d. All teams must be searchable, whether private or not.
- If you create a team based on an existing Microsoft 365 group but choose the wrong group, this action can be undone. True or false?
a. True
b. False
- You can change a team's privacy settings and discoverability via PowerShell. True or false?
a. True
b. False
- Public teams can be made private, and vice versa. True or false?
a. True
b. False
- Which of the following can you change without using PowerShell after creating a new team from scratch? Select all that apply.
a. O365 group name
b. O365 group email
c. Team name
d. Team privacy level
Further reading
Here are links to more information on some of the topics that we have covered in this chapter:
- Create a team from scratch: https://support.microsoft.com/en-us/office/create-a-team-from-scratch-174adf5f-846b-4780-b765-de1a0a737e2b
- Create your first teams and channels in Microsoft Teams: https://docs.microsoft.com/en-us/microsoftteams/get-started-with-teams-create-your-first-teams-and-channels
- Overview of teams and channels in Microsoft Teams: https://docs.microsoft.com/en-us/MicrosoftTeams/teams-channels-overview
- Create a team from an existing group: https://support.microsoft.com/en-us/office/create-a-team-from-an-existing-group-24ec428e-40d7-4a1a-ab87-29be7d145865
- Enhance existing Microsoft 365 groups with Microsoft Teams: https://docs.microsoft.com/en-us/MicrosoftTeams/enhance-office-365-groups
- Manage team settings and permissions in Teams: https://support.microsoft.com/en-us/office/manage-team-settings-and-permissions-in-teams-ce053b04-1b8e-4796-baa8-90dc427b3acc
- Create an org-wide team in Microsoft Teams: https://docs.microsoft.com/en-us/microsoftteams/create-an-org-wide-team
- Manage Microsoft Teams settings for your organization: https://docs.microsoft.com/en-us/microsoftteams/enable-features-office-365