
Chapter 6: Managing Endpoint Devices in Microsoft Teams
In this chapter, we will show you how to manage devices to use Microsoft Teams. This will include deploying the Teams client to devices such as Windows, virtual desktops, macOS, and mobile devices. You will also learn how to manage the settings that are deployed to these devices by setting up configuration profiles. Finally, we will examine the subject of Teams Rooms and explain the principles of configuring Teams Rooms devices and collaboration bars.
After reading this chapter, you will understand the different endpoint devices that can be configured with Microsoft Teams and the settings and controls that can be applied to them.
In this chapter, we're going to cover the following main topics:
- Deploying Teams clients to devices
- Managing device settings
- Managing configuration profiles
- Setting up Microsoft Teams Rooms
Technical requirements
In this chapter, you will need to have access to the Microsoft Teams admin center, which you can reach at https://admin.teams.microsoft.com. You will need to be either a Global Administrator, a Teams Service Administrator, or a Teams Communications Administrator in order to carry out the steps covered in this chapter.
Deploying Teams clients to devices
In this section, we will examine how Microsoft Teams may be installed or deployed across many devices and platforms, including Windows, virtual desktops, macOS, and mobile devices.
Important note
The technologies that we will be discussing in this section, such as Microsoft Endpoint Configuration Manager, Group Policy, and Virtualized Desktop Infrastructure, are beyond the scope of this book. These technologies will be described only at a very high level to provide you with a basic awareness of how these technologies relate to Microsoft Teams.
First, we will look at the methods available to install or deploy Microsoft Teams to Windows devices.
Windows
Microsoft Teams may be deployed to your Windows devices using several methods. The simplest method is to use self-service. Microsoft Teams has been included in Microsoft 365 apps for some time now, so when a user installs Microsoft 365 to their Windows computer, Microsoft Teams will be part of that installation.
To install Microsoft Teams for Windows, please note the following minimum requirements:
- .NET Framework 4.5 or above
- Windows 8.1 or above
- Windows Server 2012 R2 or above
- Recommended minimum of 3 GB of disk space available for each user profile
To install Microsoft Teams as part of the Microsoft 365 apps installation, your users will need to have a valid license for Microsoft 365, which includes Microsoft Teams. The user may carry out the installation by completing the following steps:
- Log in to the Microsoft 365 portal at https://portal.office.com/account and choose My account. Then select Office apps & devices | Install Office as shown in Figure 6.1:
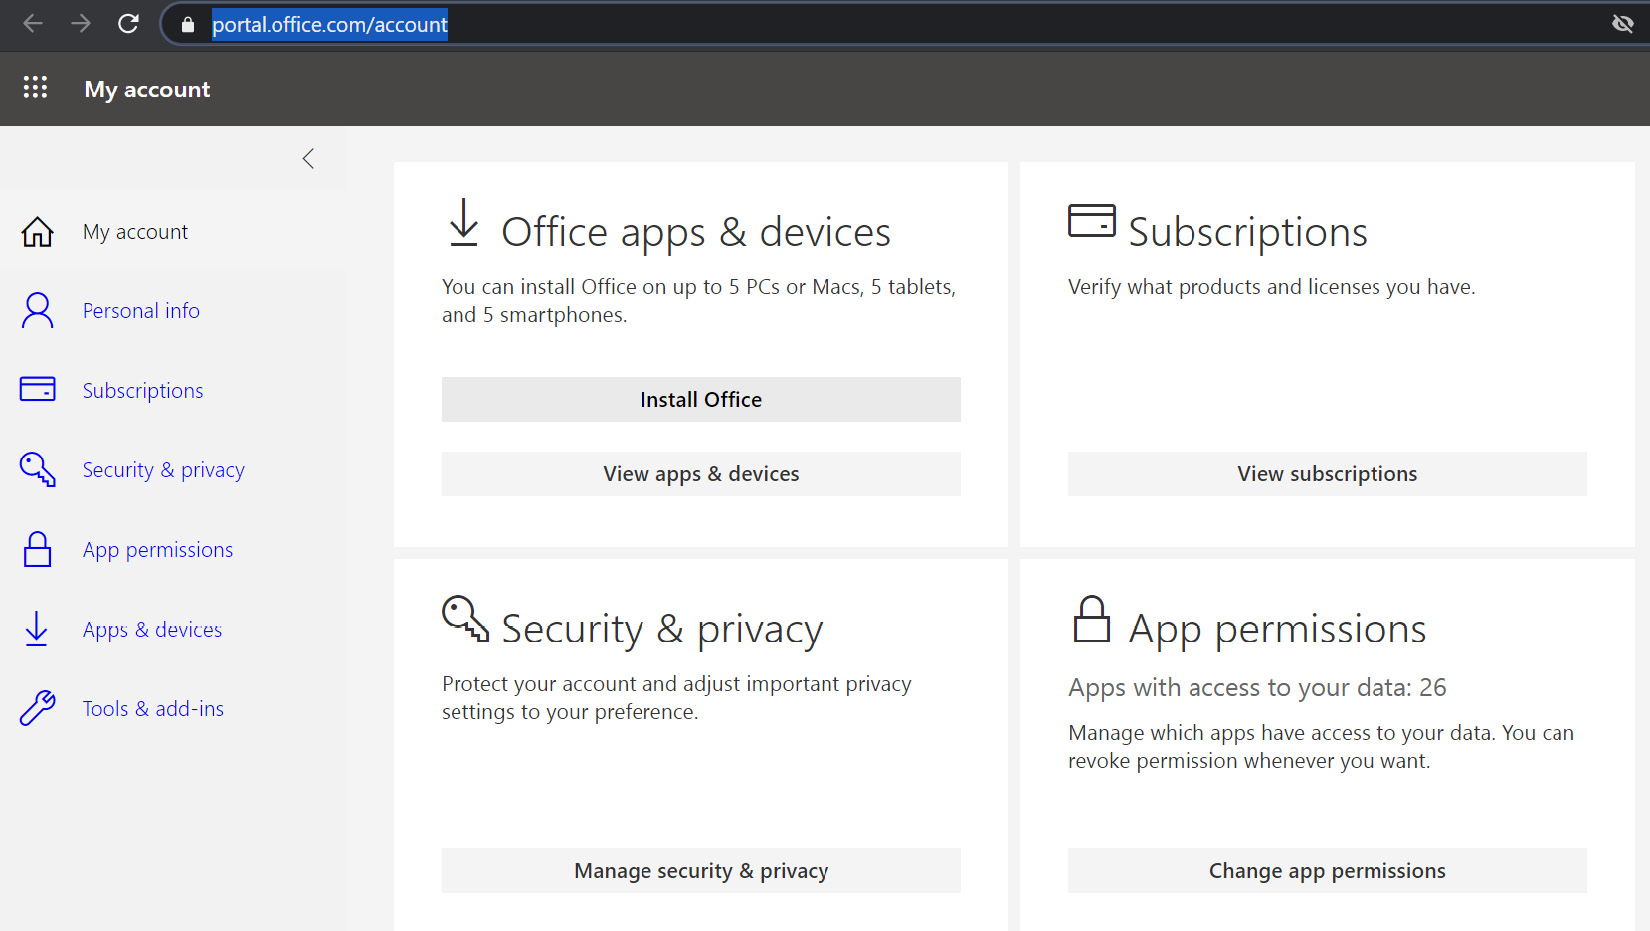
Figure 6.1 – A user installs Microsoft 365 apps including Microsoft Teams
- You will be prompted to open the setup file and complete the installation of Office as shown in Figure 6.2:
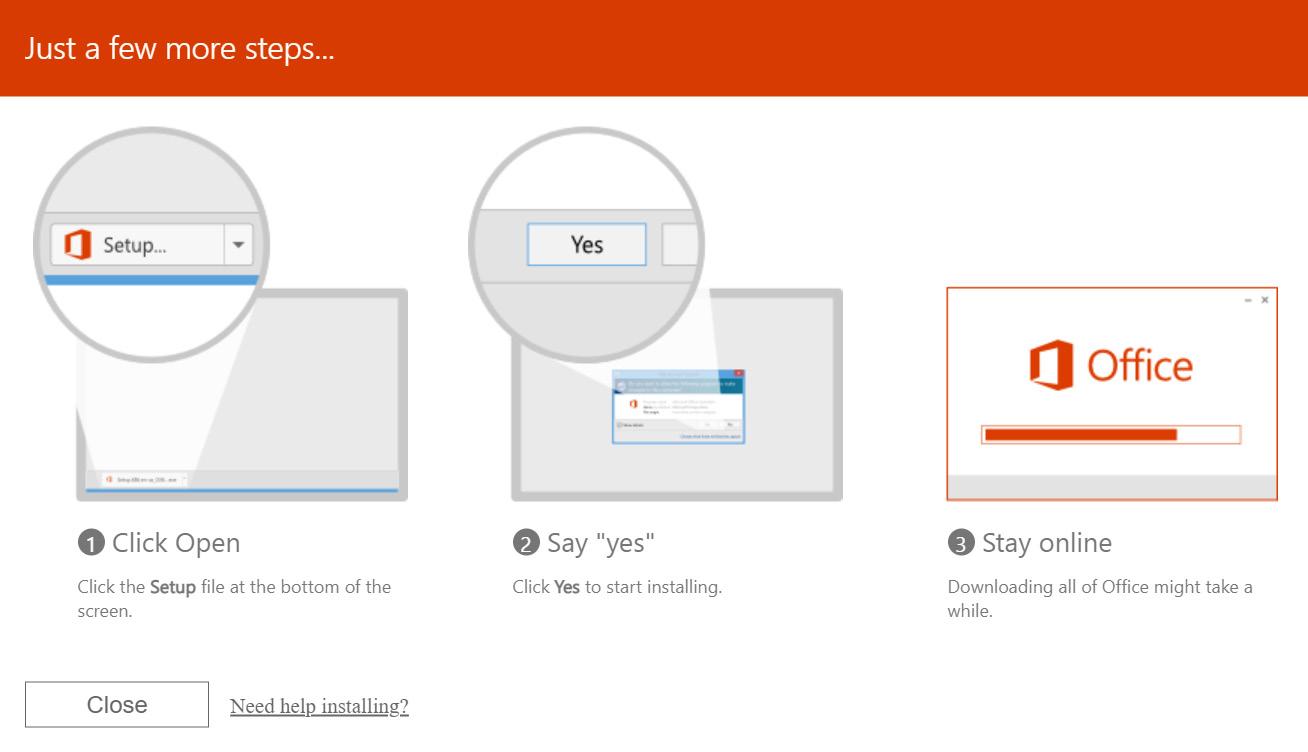
Figure 6.2 – Installing Office
However, for many organizations, it is often more effective to deploy Microsoft Teams by using a method such as Microsoft Endpoint Configuration Manager or Group Policy. To facilitate this, Microsoft has provided some MSI files, which can be used for bulk deployment scenarios. In this situation, users will not be required to install Microsoft Teams themselves.
The MSI files are available in either 32-bit, 64-bit, or ARM64, and there are versions for Commercial, Federal Government – GCC, Federal Government – GCC High, and Federal Government – DoD.
When you identify which MSI file you need, the steps required to deploy Microsoft Teams are as follows:
- Download your preferred MSI package.
- Use the prepopulated MSI defaults if possible.
- Deploy using your chosen method, such as Microsoft Endpoint Configuration Manager or Group Policy.
Once executed, the MSI package will copy an installation package to the Program Files folder of the Windows device. When the user logs into their computer, the installer will be triggered, and the Microsoft Teams application will be installed on that device. The application is installed in the AppData folder for the user. Should Teams already be detected in this folder, the installation process will be skipped as it is not necessary.
You can also deploy Microsoft Teams to Windows devices in your environment by using the Office Deployment Tool. This tool allows you to include or exclude Microsoft Teams from an Office installation package that you download and configure. The following example shows Microsoft Teams being excluded from an Office XML installation file:
<Configuration>
<Add OfficeClientEdition="64" Channel="Current">
<Product ID="O365ProPlusRetail">
<Language ID="en-us" />
<ExcludeApp ID="Teams" />
</Product>
<Product ID="VisioProRetail">
<Language ID="en-us" />
</Product>
<Product ID="ProjectProRetail">
<Language ID="en-us" />
</Product>
<Product ID="LanguagePack">
<Language ID="de-de" />
</Product>
</Add>
</Configuration>
Important note
Further reading on the Office Deployment Tool can be found at the end of this chapter.
It is also possible for users to download and install the Microsoft Teams app from the Microsoft Teams web client by clicking on their username at the top right of the screen and selecting Download the desktop app.
Next, we will look at virtual desktops.
Virtual desktops
Microsoft Teams is also supported within Virtual Desktop Infrastructure (VDI) environments, where desktop operating systems are hosted at a central source. The following VDI platforms support Microsoft Teams:

In the preceding environments, Microsoft Teams supports chat, collaboration, calling, and meetings.
It is possible to configure virtualized environments for multiple configuration modes, which include the following:
- Dedicated
- Shared
- Persistent (users' changes are saved when the user logs off)
- Non-persistent (users' changes are not saved when the user logs off)
It should be noted that some advanced features of Microsoft Teams may not work in VDI environments.
Microsoft Teams used in VDI environments will require the following components:
- A virtualization broker (such as Azure)
- A virtual desktop machine
- A thin client endpoint
- The Microsoft Teams desktop app
Microsoft recommends the following as the minimum configuration:

To deploy the Microsoft Teams application to a VM, you must download the MSI package and install it on the VM by running one of the following commands:
- For a per-user installation, run the following command to install the Microsoft Teams app to the users, AppData folder. Note that a per-user installation will not work on a non-persistent setup:
msiexec /i <MSI path> /l*v <logfilename> ALLUSERS=1
- For a per-machine installation, run the following command to install the Microsoft Teams app to the Program Files (x86) folder. However, it should be noted that client updates will not occur using this method. In this instance, the client must be uninstalled and reinstalled with the newer version:
msiexec /i <MSI path> /l*v <logfilename> ALLUSER=1 ALLUSERS=1
Next, we will look at macOS.
macOS
Microsoft Teams for macOS is installed by using a PKG installation file, which can be downloaded from Microsoft. Administrative access will be required to complete the installation, which will be placed in the /Applications folder.
The installation of Microsoft Teams to macOS devices is machine-wide as opposed to user-wide.
The application can be installed on a per-machine basis, or by a broader deployment approach such as Jamf Pro.
Now, let's look at mobile devices.
Mobile devices
The Microsoft Teams app may be downloaded from the Apple iOS and Google Play for Android app stores and installed on devices by users.
The currently supported platforms are as follows:
- iOS – Limited to the two most recent versions of the iOS app
- Android – Limited to the last four major versions of the Android app
Important note
The mobile client for Microsoft Teams may also be deployed using Intune app protection policies. Further reading on this option may be found at the end of the chapter.
In this section, we have explained how the Microsoft Teams app can be downloaded and installed or deployed to devices and platforms in your organization such as Windows, VDI, macOS, and mobile devices.
Next, we will show you how to manage your device settings from the Microsoft Teams admin center.
Managing device settings
Any devices that are used with Microsoft Teams may be managed from the Microsoft Teams admin center. It is possible to carry out device-related tasks such as updating, restarting, and monitoring devices.
To carry out these tasks, you must be either a Global Administrator, a Teams Service Administrator, or a Teams Device Administrator.
When assigned one of these roles, you may manage the following devices:
- IP phones – Including desk phones and conference phones.
- Teams Rooms – Including consoles, microphones, and cameras.
- Collaboration bars – These are Android base units with the Microsoft Teams app, which can be connected to TVs and screens.
- Teams displays – All-in-one business communication devices designed for Microsoft Teams.
To manage devices in the Microsoft Teams admin center, we need to complete the following steps:
- Log in to the Microsoft Teams admin center at https://admin.teams.microsoft.com and navigate to Devices on the left hand-side menu as shown in Figure 6.3:

Figure 6.3 – Devices in the Microsoft Teams admin center
- When selecting IP phones, you can filter phones by their categories, which include individual User phones, Common area phones, and Conference phones. You may edit the device settings, assign configuration, manage device tags, and add or edit Configuration profiles as shown in Figure 6.4:
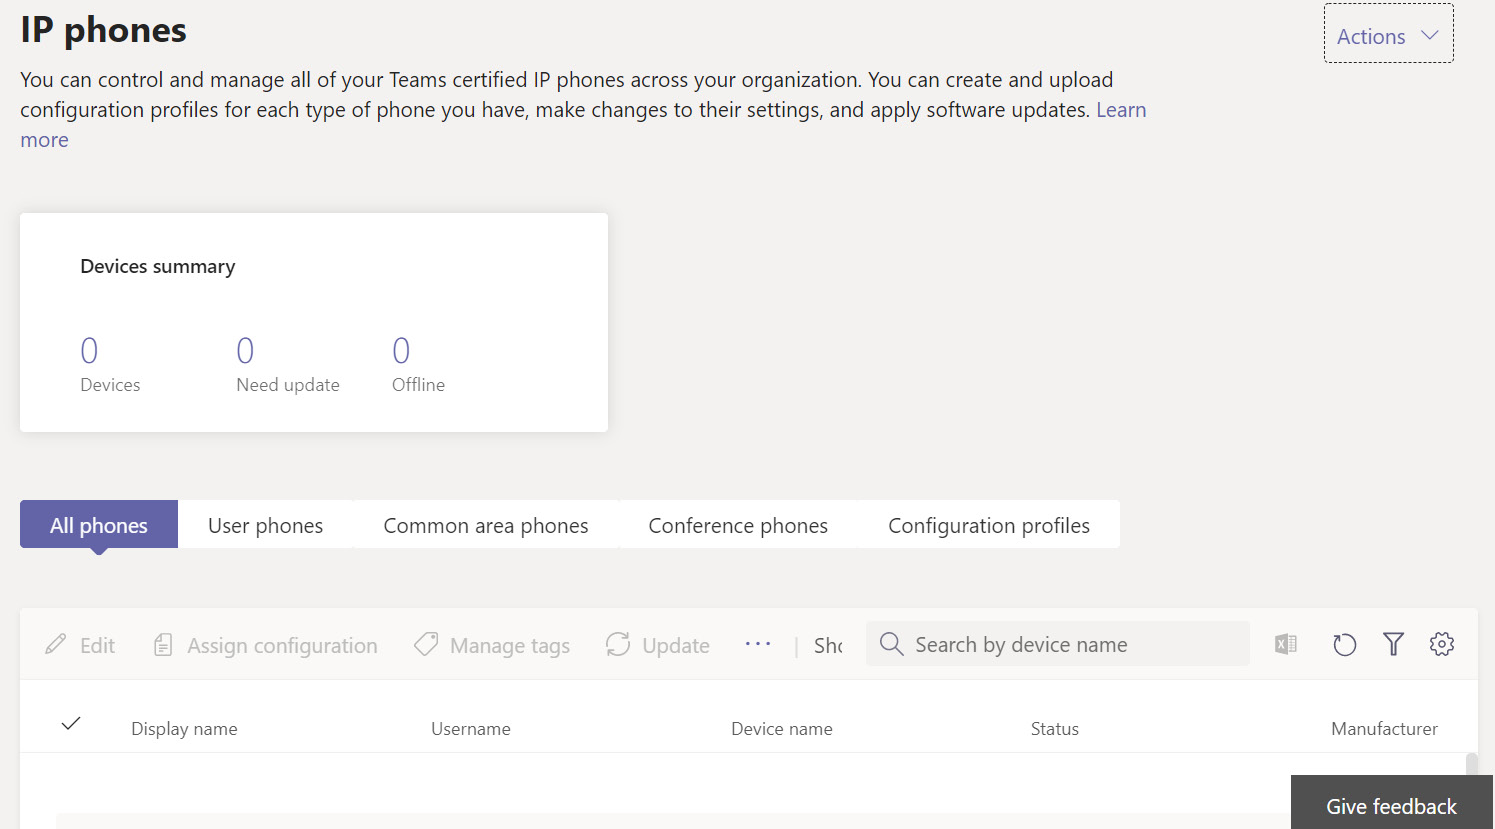
Figure 6.4 – IP phones in the Microsoft Teams admin center
- Similarly, the Teams Rooms section will show you any Rooms devices:
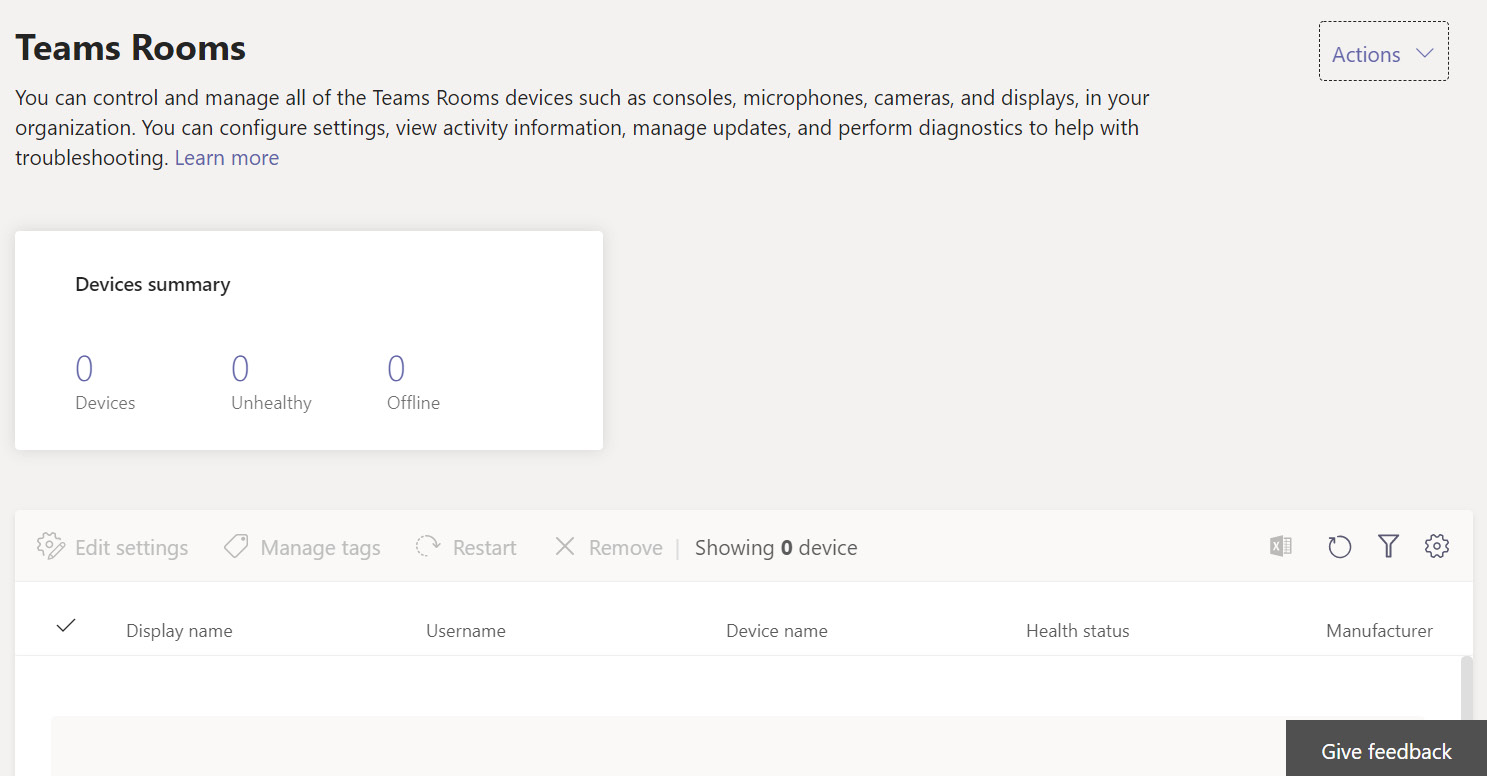
Figure 6.5 – Teams Rooms in the Microsoft Teams admin center
- Next, we can see the Collaboration bars section, with similar configuration options:

Figure 6.6 – Collaboration bars in the Microsoft Teams admin center
- And finally, we can view the Teams displays section:

Figure 6.7 – Teams displays in the Microsoft Teams admin center
Let's take a closer look at the functions you may carry out in relation to these devices, starting with Teams Rooms devices.
Managing Teams Rooms devices
The following table lists the functions that are available to administrators in the Microsoft Teams admin center in relation to Teams Room devices:

Next, let's examine more closely the settings available for managing phones, collaboration bars, and Teams displays.
Managing Teams phones, collaboration bars, and Teams displays
The following table lists the functions that are available to administrators in the Microsoft Teams admin center in relation to Teams phones, collaboration bars, and Teams displays:

In this section, we have shown you how you can manage Teams devices from the Microsoft Teams admin center, including IP phones, Teams Rooms, Collaboration Bars, and Teams displays.
Next, we will show you how to manage configuration profiles.
Managing configuration profiles
Configuration profiles are used to manage settings for Teams phones, collaboration bars, and Teams displays. These profiles may be configured to include settings you wish to add or remove from a device or several devices.
To create a configuration profile, we need to complete the following steps:
- Log in to the Microsoft Teams admin center at https://admin.teams.microsoft.com and navigate to Devices on the left-hand-side menu as shown in Figure 6.8:
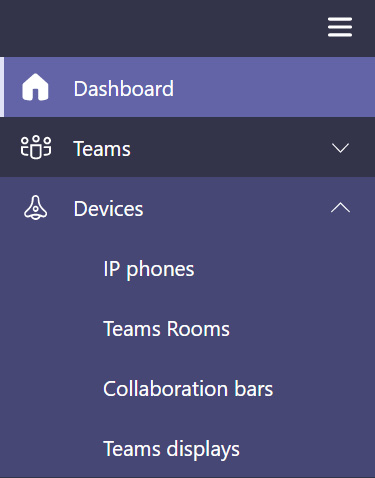
Figure 6.8 – Devices in the Microsoft Teams admin center
- Choose either IP phones, Collaboration bars, or Teams displays (configuration profiles may not be applied to Teams Rooms). In this example, we will choose IP phones and select the Configuration profiles tab as shown in Figure 6.9:

Figure 6.9 – Configuration profiles tab in the IP phones section of the Microsoft Teams admin center
- Click + Add, and then enter a name and description for your configuration profile, as shown in Figure 6.10:

Figure 6.10 – Set the name and description for the configuration profile
- Scroll down to the General section of the new configuration profile settings and complete the required settings shown in Figure 6.11:

Figure 6.11 – Complete the general settings for the new configuration profile
- Scroll to the Device settings section and complete the settings as required, as shown in Figure 6.12:
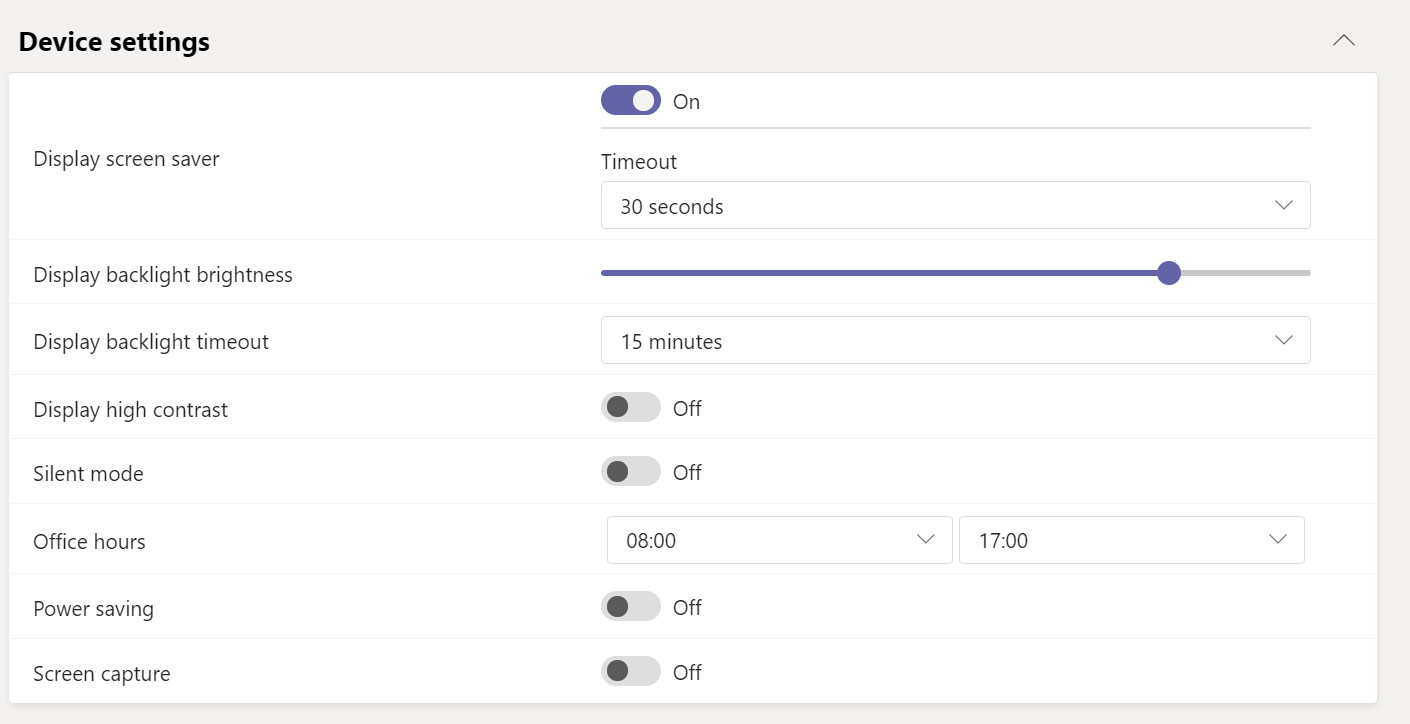
Figure 6.12 – Complete the device settings for the new configuration profile
- Scroll down to the Network settings section and complete the required settings as shown in Figure 6.13:
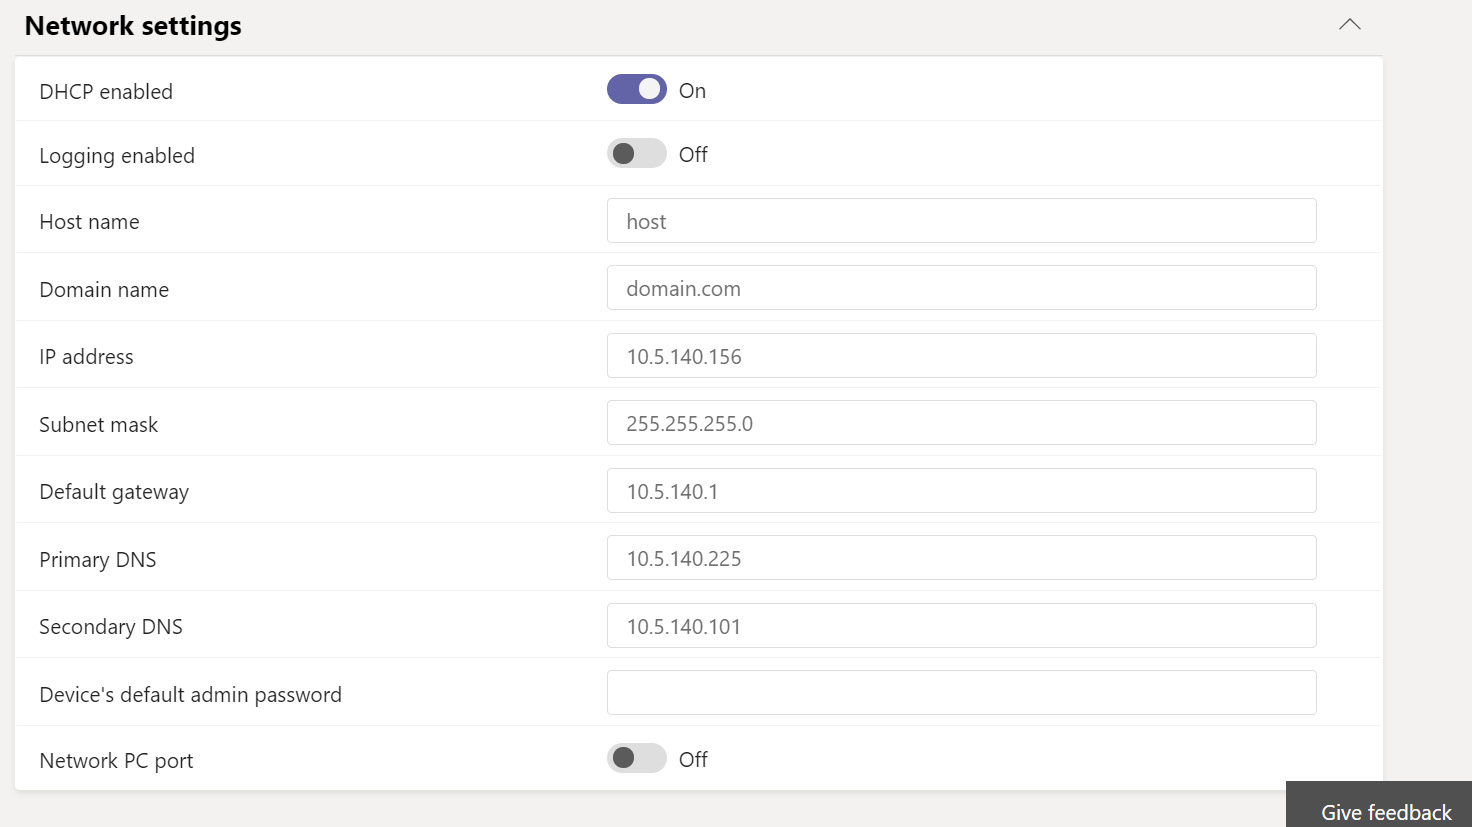
Figure 6.13 – Complete the network settings for the new configuration profile
- When you have completed all the required settings, click on Save:

Figure 6.14 – Save the new configuration profile
- The new configuration profile is now visible. Click to select the profile and choose Assign to device as shown in Figure 6.15:

Figure 6.15 – Assign the new configuration profile to a device
- Search for the devices that you wish to apply the new configuration profile to, and then click Apply as shown in Figure 6.16:
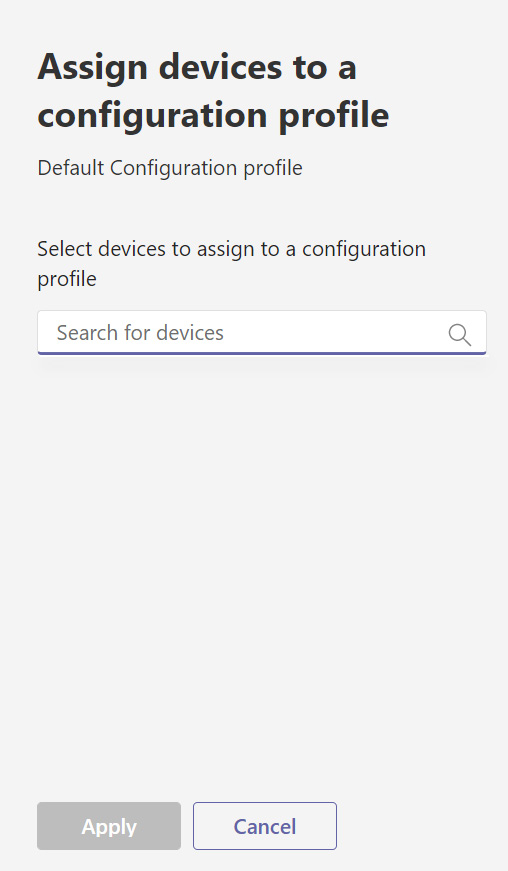
Figure 6.16 – Apply the new configuration profile to your chosen devices
In this section, we explained how configuration profiles are groups of device settings that may be quickly and easily applied to your Teams devices from the Microsoft Teams admin center.
In the final section of this chapter, we will show you how to set up Microsoft Teams Rooms.
Setting up Microsoft Teams Rooms
With Microsoft Teams Rooms, you can use HD video and audio, and share content in meetings on supported devices in your organization's meeting and conference rooms. The Microsoft Teams Rooms software is run on device hardware that can be provided by a number of different vendors and that runs Windows. It is also possible to mix devices for separate functions, such as one device for the camera and another for Microsoft Teams Rooms itself.
There are many Microsoft Teams Rooms devices available for purchase, but before we talk about these devices, we need to configure accounts for Microsoft Teams Rooms to use.
The accounts that you create for Microsoft Teams Rooms will need to be set up in line with the following available deployment options:
- Online deployment: Where your organization is entirely based in Microsoft 365
- On-premises deployment: Where you have on-premises Active Directory, Exchange servers, and Skype for Business servers
- Hybrid deployment: Where you have a mixture of on-premises and cloud services
A device account must be set up for every Microsoft Teams Rooms device that you configure. This account is used to host the calendar for the device and to manage connectivity. The result of this is that your users can schedule a meeting on the device.
Important note
It is Microsoft's recommendation to create device accounts for your Microsoft Teams Rooms at least 2 to 3 weeks before you plan to install the actual device.
You should also be aware of the license requirements for using Microsoft Teams Rooms and common area phones. Further reading is included at the end of the chapter.
The following table shows the minimum requirements for the configuration of a device account:

The simplest method to create these accounts is by using Windows PowerShell, and Microsoft provides a script for this.
In the example that follows, we will explain the process of deploying a Microsoft Teams room with Microsoft 365. To do this, you will need to be aware of the following requirements:
- Skype for Business Online (Plan 2) or a higher plan that allows dial-in conferencing.
- An audio conferencing and phone system license if dial-in features are required.
- An audio conferencing license if dial-out features are required.
- Tenant users will require Exchange mailboxes.
To add a device account, we need to complete the following steps:
- Connect to Exchange Online PowerShell as an administrator by completing the following commands:
$Cred=GET-CREDENTIAL
$s = NEW-PSSESSION -ConfigurationName Microsoft.Exchange -ConnectionUri https://ps.outlook.com/powershell -Credential $Cred -Authentication Basic -AllowRedirection
$importresults=import-pssession $s
- Now we need to create a new room mailbox and add an account to it, which will allow it to authenticate. To create a room mailbox, we need to run the following command, which will set up a new room mailbox called Conference-01:
New-Mailbox -Name "Conference-01" -Alias Conference1 -Room -EnableRoomMailboxAccount $true -MicrosoftOnlineServicesID [email protected] -RoomMailboxPassword (ConvertTo-SecureString -String 'Password' -AsPlainText -Force)
The mailbox account is now created. Next, we will show how you can configure your Microsoft Teams Rooms console device.
Configuring a Microsoft Teams Rooms console device
Now that we have a device account ready, we can configure a Microsoft Teams Rooms console device. You will need to meet the hardware and software requirements that are laid out in this Microsoft guidance: https://docs.microsoft.com/en-us/MicrosoftTeams/rooms/requirements.
Once you have fulfilled these requirements, you can start to configure your Microsoft Teams Rooms device by completing the following steps, which include the optional step to create USB media. Most Microsoft Teams Rooms devices now come pre-deployed with the required software:
- Prepare the installation media. You will need to use a USB storage device with nothing else on it and with a minimum of 32 GB capacity.
- Download the media script from https://go.microsoft.com/fwlink/?linkid=867842.
- The script is named CreateSrsMedia.ps1 and must be run from Windows PowerShell as an administrator.
- Running the script will download an MSI installer package for Microsoft Teams Rooms.
- Next, you need to establish the build of Windows that will be required, download it and any required supporting elements, and place these on the installation media.
- Plug the USB media into the Microsoft Teams Rooms device. Boot to the setup and follow the manufacturer's instructions.
- Select and apply your desired language.
- Windows will now install and the console will trigger its native setup upon restart.
Once you have the preceding steps completed, you can complete further steps to complete the setup of the device depending on the type of device and your environment. For example, you may need to use the Configure Domain option to set the settings to connect to your Skype for Business Server if applicable. You may also configure microphone and speaker settings at this point.
In this section, we have explained the principles of Microsoft Teams Room devices. These are certified devices that can be used to book meeting and conference rooms when an appropriate device account is set up and associated with a compatible device.
Summary
In this chapter, we explained how to install or deploy Microsoft Teams client apps to your devices, including Windows, VDI, macOS, and mobile devices. We also showed you how to configure settings for Teams devices such as IP phones, Teams Rooms, collaboration bars, and Teams displays from the Microsoft Teams admin center. You also learned how configuration profiles may be used to apply a collection of settings to the devices listed in the Microsoft Teams admin center. Finally, we introduced you to Microsoft Teams Rooms devices and explained the prerequisites and steps to configure them within your environment.
In the next chapter, we will introduce you to the principles of monitoring Microsoft Teams. We will show you how to view and interpret Teams-related usage reports in both the Microsoft Teams admin center and the Microsoft 365 admin center, and set up per-user call quality optimization with the call analytics feature. In addition, we will demonstrate how to access and understand the Call Quality Dashboard, and finally, how to use Power BI to detect call quality issues.
Practice questions
- Which of the following devices may not be used with configuration profiles?
a. Teams displays
b. Teams Rooms
c. Collaboration bars
d. IP phones
- How many recent versions of the iOS Teams app are supported?
a. 5
b. 6
c. 4
d. 2
- True or false: It is possible to deploy the Microsoft Teams app to mobile devices via the use of Intune app protection policies?
a. True
b. False
- Which of the following is not one of the minimum requirements for installing the Microsoft Teams app on Windows devices?
a. NET Framework 4.5 or above
b. Windows 8.1 or above
c. Windows Server 2012 R2 or above
d. Recommended minimum of 2 GB of disk space available for each user profile
- How many recent versions of the Android Teams app are supported?
a. 2
c. 4
d. 5
e. 6
- Which of the following is not one of the available setting headings for configuration profiles for an IP phone in the Microsoft Teams admin center?
a. General
b. Device settings
c. More settings
d. Network settings
- True or false: Microsoft Teams can be deployed to VDI environments?
a. True
b. False
- Which of the following is not a description in the Microsoft Teams admin center for the types of available IP phones?
a. User phones
b. Common area phones
c. Shared phones
d. Conference phones
- True or false: Teams Rooms devices may be configured within hybrid environments?
a. True
b. False
- In a VDI environment, the Teams app should be deployed in which mode?
a. Machine
b. User
Further reading
- Deploy Microsoft Teams with Microsoft 365 Apps: https://docs.microsoft.com/en-us/deployoffice/teams-install
- Microsoft Teams operations guide: https://docs.microsoft.com/en-us/microsoftteams/upgrade-operate-my-service
- Microsoft Teams for Virtualized Desktop Infrastructure: https://docs.microsoft.com/en-us/microsoftteams/teams-for-vdi
- Install Microsoft Teams using Microsoft Endpoint Configuration Manager: https://docs.microsoft.com/en-us/microsoftteams/msi-deployment
- Manage your devices in Microsoft Teams: https://docs.microsoft.com/en-us/microsoftteams/devices/device-management
- Microsoft Teams Rooms deployment overview: https://docs.microsoft.com/en-us/MicrosoftTeams/rooms/rooms-deploy
- Configure a Microsoft Teams Rooms console: https://docs.microsoft.com/en-us/MicrosoftTeams/rooms/console
- Microsoft Teams Rooms requirements: https://docs.microsoft.com/en-us/MicrosoftTeams/rooms/requirements
- Get clients for Microsoft Teams: https://docs.microsoft.com/en-us/microsoftteams/get-clients
- Configure accounts for Microsoft Teams Rooms: https://docs.microsoft.com/en-us/MicrosoftTeams/rooms/rooms-configure-accounts
- Configure a Microsoft Teams Rooms console: https://docs.microsoft.com/en-us/MicrosoftTeams/rooms/console
- Configure Microsoft Teams Rooms for Microsoft 365: https://docs.microsoft.com/en-us/microsoftteams/rooms/with-office-365
- Microsoft Endpoint Configuration Manager: https://docs.microsoft.com/en-us/mem/configmgr/
- Windows Virtual Desktop: https://azure.microsoft.com/en-gb/services/virtual-desktop/
- Group Policy: https://docs.microsoft.com/en-us/troubleshoot/windows-server/group-policy/use-group-policy-to-install-software
- Microsoft Office Deployment tool: https://docs.microsoft.com/en-us/deployoffice/overview-office-deployment-tool
- Deploy Teams to mobile devices using Intune app protection policies: https://docs.microsoft.com/en-us/mem/intune/apps/manage-microsoft-teams
- Licensing for Microsoft Teams Rooms: https://docs.microsoft.com/en-us/microsoftteams/rooms/rooms-licensing
- Licensing for common area phones: https://docs.microsoft.com/en-us/microsoftteams/set-up-common-area-phones