
Chapter 4: Configuring Guest Access in Microsoft Teams
In this chapter, we will examine the options for configuring guest access for users outside of your organization in Microsoft Teams. You will learn how to access the Microsoft Teams admin center to control and set the permissions for guest users and how to configure the meeting, messaging, and calling experience for these guest users.
Then, we will show you how to remove guests from Microsoft Teams, and how access reviews can be used to review existing guest access to the teams in your environment.
Finally, we will demonstrate how guest access settings may be controlled from the Azure Active Directory (AD) portal.
In this chapter, we're going to cover the following main topics:
- Configuring guest users and permissions for Microsoft Teams
- Configuring meeting, messaging, and calling options for guests in Microsoft Teams
- Removing guests from teams, and reviewing guest access to teams with Azure AD access reviews
- Configuring guest access from the Azure AD portal
Technical requirements
In this chapter, you will need to have access to the Microsoft Teams admin center, which you can reach at https://admin.teams.microsoft.com. You will also require access to the Microsoft 365 admin center at https://admin.microsoft.com and the SharePoint admin center, which can be reached via the Microsoft 365 admin center.
You will need to be a global administrator to complete some of the tasks in this chapter, but a Teams service administrator role will suffice for some of the other tasks that are included.
In order to carry out Azure AD access reviews, you will also require an Azure AD Premium P2 subscription.
Configuring guest users and permissions for Microsoft Teams
With Microsoft Teams, your core users are the people within your organization who have a licensed Microsoft 365 account. However, it is also possible to grant access to people who are not members of your organization, and who do not have access to your Microsoft 365 tenant from a school or work account. Typical examples of this would be partner organizations, suppliers, vendors, and customers.
To grant such access to Teams, we need to set up guest user access. An invited guest user can be provided with access to your Microsoft Teams environment in order to participate in chats, access documents in channels, and even use the applications that you have made available within Teams. Although this feature is not automatically enabled at the time of writing, Microsoft have announced that they plan to enable guest access for all Microsoft 365 tenants in the near future.
In order for a guest to be granted access, they must meet the following criteria:
- Have an Azure AD account on their own Microsoft 365 tenant
- Have a consumer email account, such as an Outlook or Gmail account
The level of access granted to guest users and the features they are able to consume are determined by the settings configured by the Teams administrators.
Important note
Guest user access to Teams does have some limitations compared to the full user experience. A full list of the capabilities of guest users may be found in the Further reading section at the end of this chapter.
Let's look at how we can set up guest access for Microsoft Teams.
Setting up guest access
To fully set up guest access for Microsoft Teams, there are a number of settings within Microsoft 365 that you are going to need to configure. These include configurations for Azure AD, Microsoft 365 Groups, SharePoint Online, and the Teams admin center. We will now go through each of these, starting with Azure AD.
Azure AD
Azure AD is the highest level of governance for sharing within Microsoft 365. You will need to check and configure the following settings to enable guest access:
- Log in to the Azure portal at https://portal.azure.com and navigate to Azure AD. Then click on External Identities, as shown in Figure 4.1:

Figure 4.1 – External Identities
- Next, click on External collaboration settings, as shown in Figure 4.2:
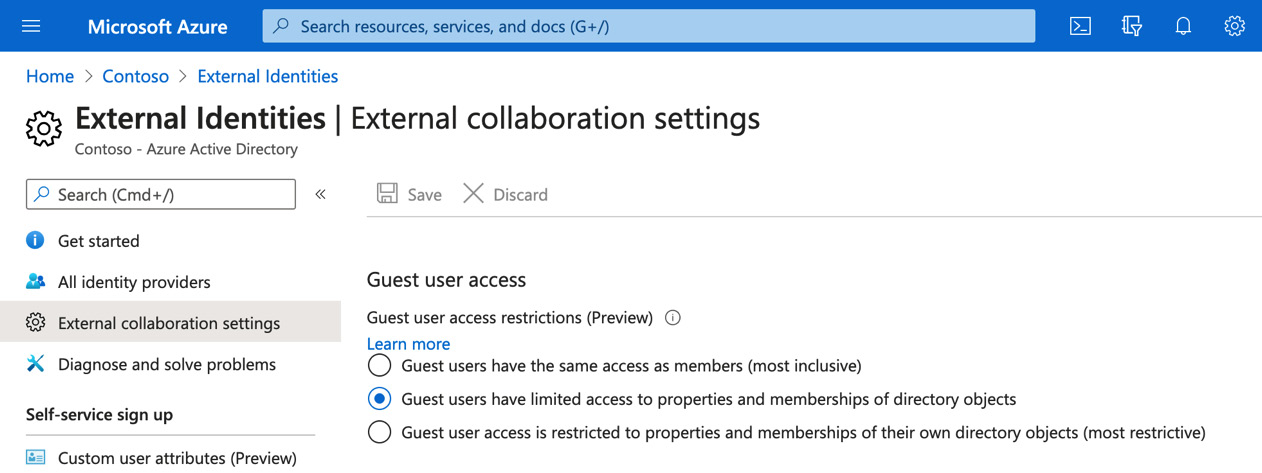
Figure 4.2 – External collaboration settings
- From the right navigation pane, scroll down to Guest invite settings and ensure that both the Admins and users in the guest inviter role can invite and Members can invite options are set to Yes. If this requires you to change the present configuration, click Save. This is shown in Figure 4.3:
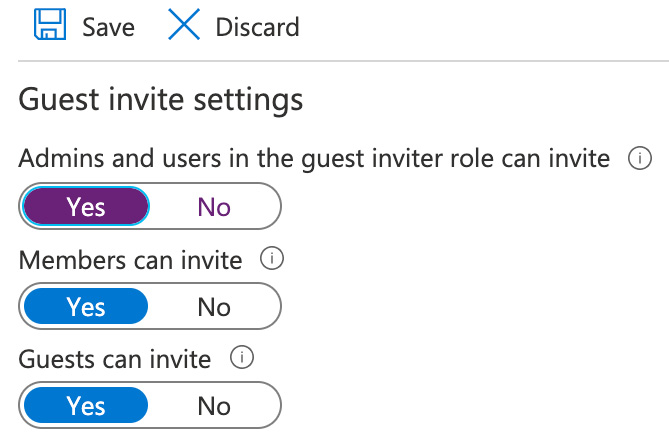
Figure 4.3 – Guest invite settings in the Azure portal
- Scroll down further and check the Collaboration restrictions to ensure that any domains you wish to allow guest access from are not being blocked:
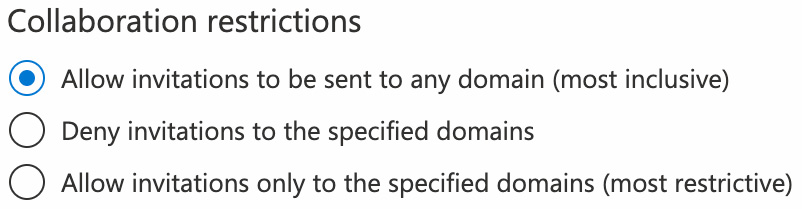
Figure 4.4 – Collaboration restrictions settings
Now that you understand how to check the Azure AD settings for guest access, let's look at Microsoft 365 groups.
Microsoft 365 groups
Teams are connected to Microsoft 365 group memberships. The guest settings for Microsoft 365 groups must also be enabled in order for team guest access to be available. This can be configured by going through the following steps:
- Go to the Microsoft 365 admin center at https://admin.microsoft.com, navigate to Settings | Org settings | Services, and select Microsoft 365 Groups. This is shown in Figure 4.5:
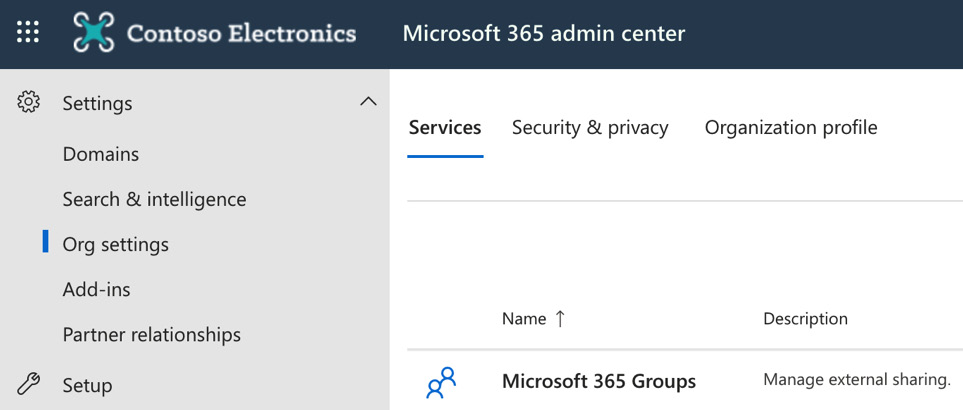
Figure 4.5 – Microsoft 365 group settings in the admin center
- Ensure that the Let group owners add people outside your organization to Microsoft 365 Groups as guests option is selected, as shown in Figure 4.6:
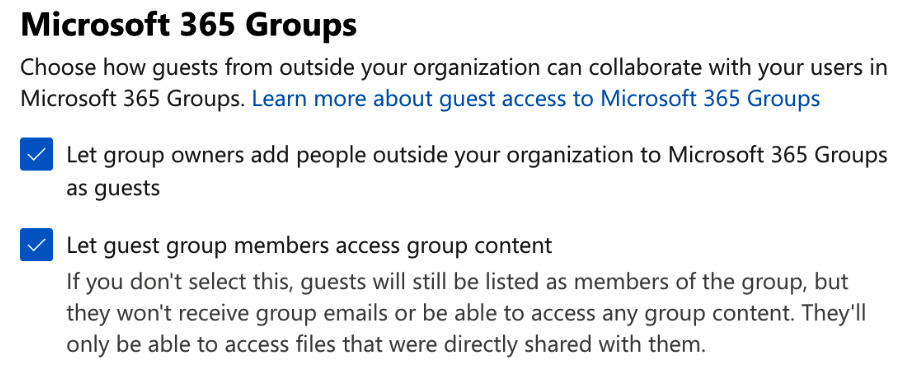
Figure 4.6 – Microsoft 365 group settings
Next, we will need to check the SharePoint Online settings.
SharePoint Online
Files and folders in Teams are actually stored within SharePoint Online. Therefore, in order for any guests that you invite to your organization to access files and folders within Teams, you will need to enable the SharePoint organization-level sharing settings. This can be done by going through the following steps:
- Go to the Microsoft 365 admin center at https://admin.microsoft.com and navigate to Admin centers | SharePoint:
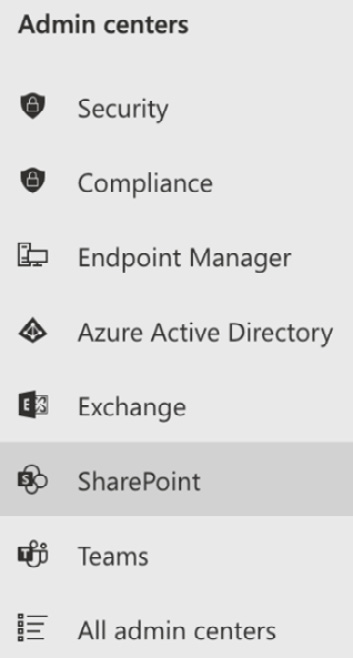
Figure 4.7 – Navigating to the SharePoint admin center
- Under Policies | Sharing, check whether External sharing is set to one of the more permissive settings, such as Anyone, New and existing guests, or Existing guests. This is shown in Figure 4.8:
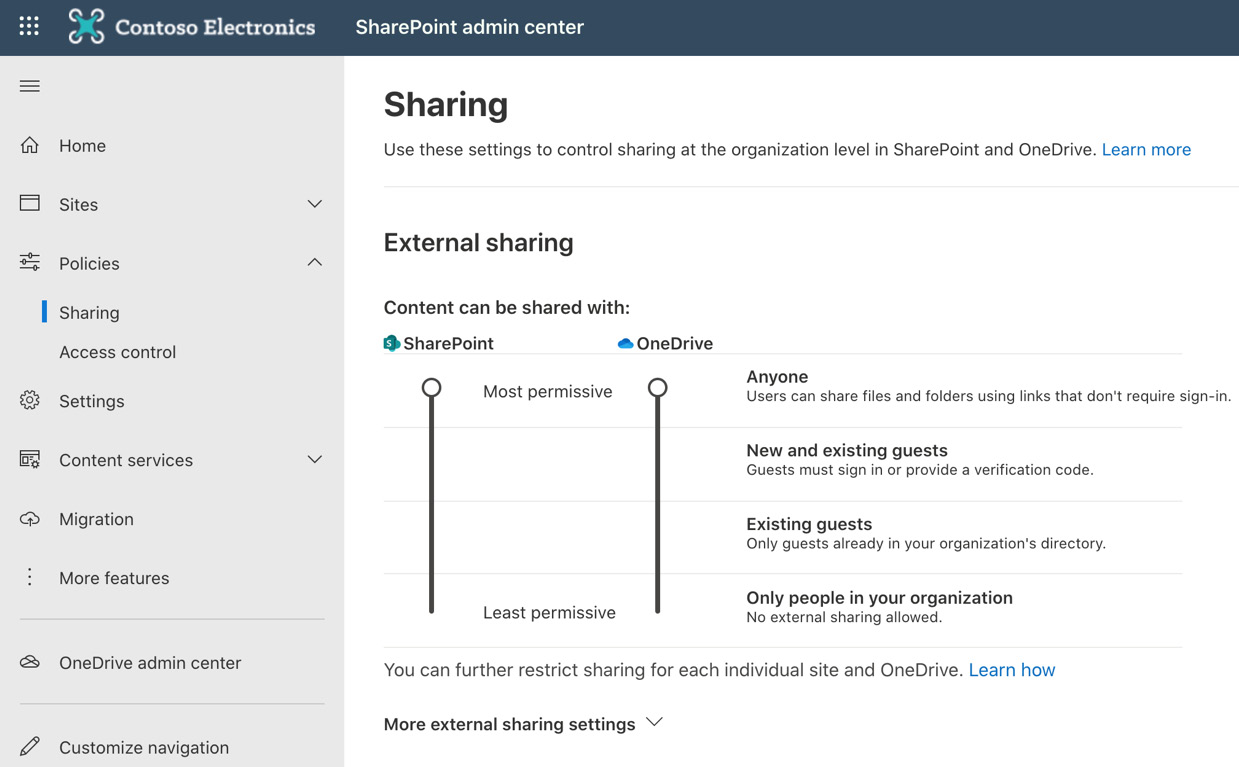
Figure 4.8 – SharePoint External sharing controls
- By scrolling further down the Sharing page, you will see some options related to File and folder links, as shown in Figure 4.9:

Figure 4.9 – SharePoint file and folder links settings
The Specific people option is most appropriate if you anticipate the need to share files and folders on a regular basis.
Important note
The sharing settings described here are set for SharePoint at organization level. Sharing settings may also be set at site level, and it is important to check these settings for the SharePoint sites that contain any files and folders for the teams you have created.
Finally, we need to look at the actual Teams guest access settings.
Teams
Guest access must also be configured within the Teams admin center. By default, guest access is turned off and therefore must be explicitly enabled should you wish to invite guest users into Teams. However, as mentioned earlier in the chapter, Microsoft are planning to change this so that guest access is enabled by default. You can configure this by going through the following steps:
- Log in to the Teams admin center at https://admin.teams.microsoft.com and navigate to Org-wide settings | Guest access. This is shown in Figure 4.10:
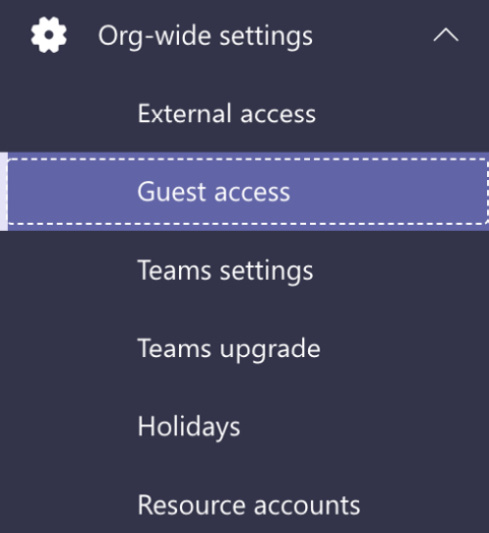
Figure 4.10 – Teams Guest access
- Move the slider next to the Allow guest access in Teams option to the On position, as shown in Figure 4.11:

Figure 4.11 – Allow guest access in Teams
- Enabling guest access will show you some further options that you can configure for the Calling, Meeting, and Messaging settings for guest users. We will discuss these in further detail in the Configuring meeting, messaging, and calling options for guests in Microsoft Teams section of this chapter. To finish enabling guest access in Teams, click Save:

Figure 4.12 – Save the guest user settings
So, now that we have guest access configured, how are guests invited to a team, and how do they gain access? Let's take a look.
Adding a guest to a team
Guests may be added to teams either by the team owner or a Microsoft 365 administrator. This is achieved by going through the following steps:
- Open Microsoft Teams and select the team that you wish to invite a guest user to. In the following example, we will add an external guest to the Retail team, as shown in Figure 4.13:
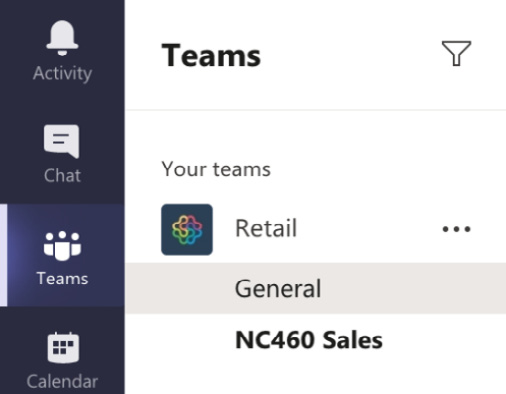
Figure 4.13 – Retail team shown in Teams
- Click the ellipsis next to the team name and then select Add member:
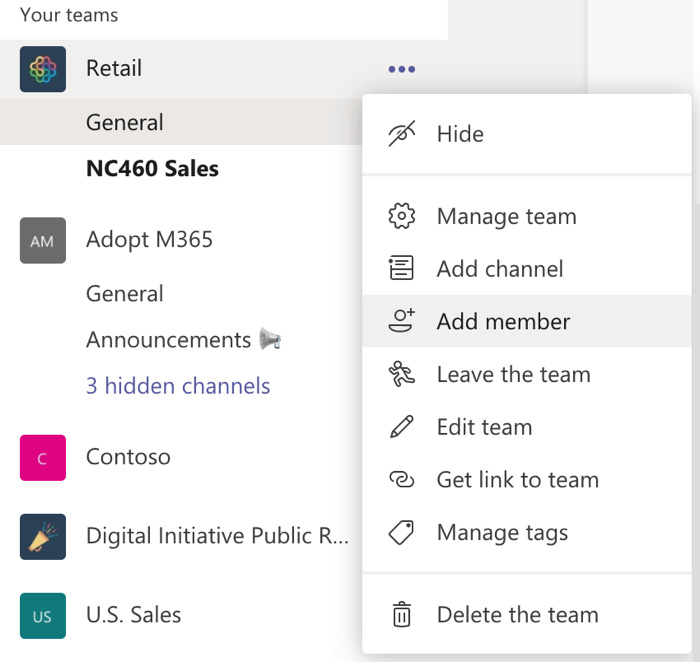
Figure 4.14 – Add member
- In this example, we will add a Gmail account, as shown in Figure 4.15:
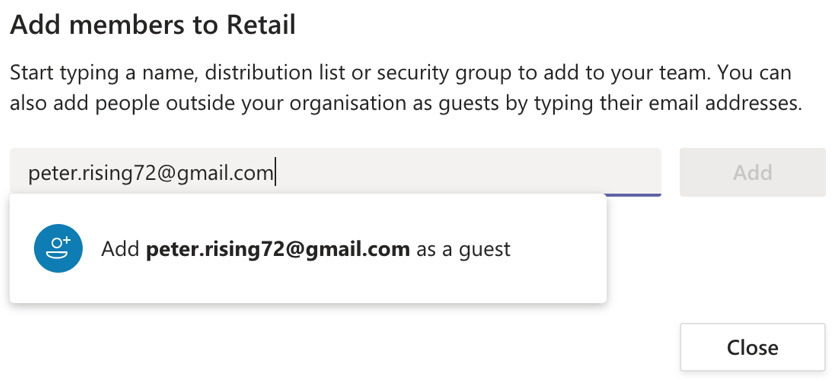
Figure 4.15 – Add a guest to a team
- Once added, click Close:
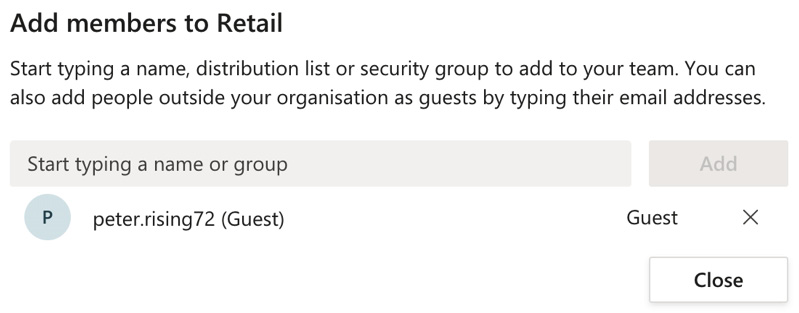
Figure 4.16 – Add a guest to a team
- The invitation will be received by the invited guest, as shown in Figure 4.17:
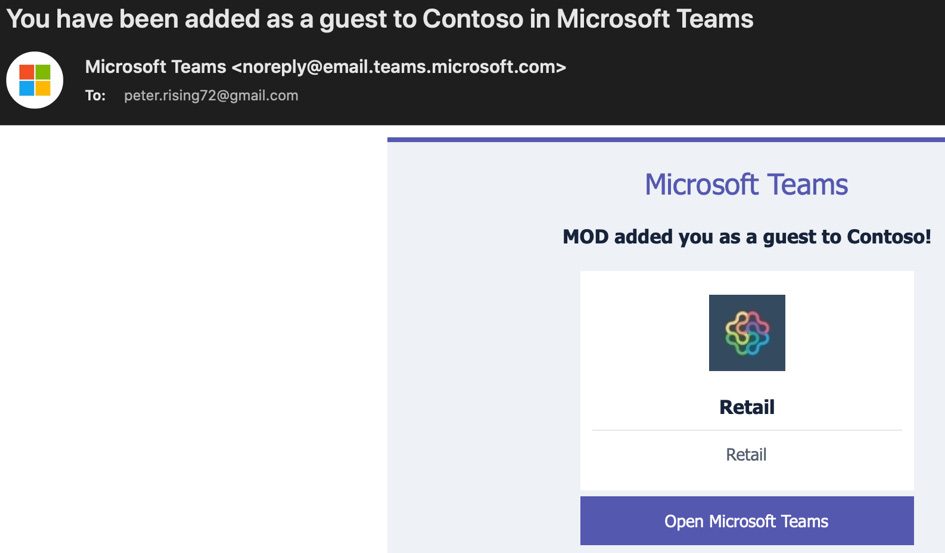
Figure 4.17 – Invitation received by the guest
- If the guest user's account is not already set up as a Microsoft school or work account when they click on Open Microsoft Teams in the email invitation, then they will be guided through the necessary steps to automatically create one; otherwise, they will be prompted to log in, as shown in Figure 4.18:

Figure 4.18 – Logging in to Teams as a guest
- After entering their credentials and clicking Next, the guest user will be prompted to review and accept permissions, as shown in Figure 4.19:

Figure 4.19 – Review and accept the guest permissions
- Upon clicking Accept, the guest user will be shown the message You're joining Teams as a guest, as shown in Figure 4.20:

Figure 4.20 – Joining teams as a guest
- Clicking Next to complete the invitation will take the guest user into Teams and grant them immediate access to the team they were invited to:
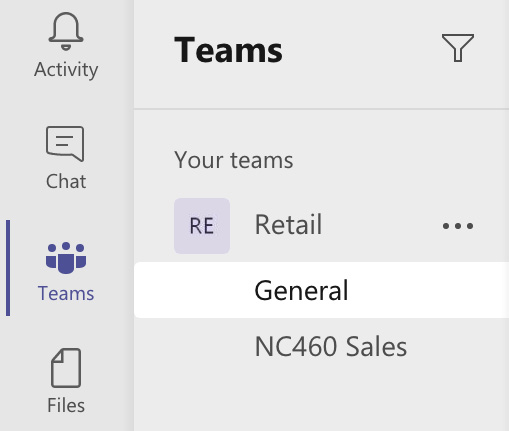
Figure 4.21 – The guest user can now access the team
- When the team owner checks the members and guests within the team, the guest user will now be shown as a guest, as shown in Figure 4.22:

Figure 4.22 – Viewing the members and guests in a team
In this section, we have shown you the four key areas within Microsoft 365 where you can enable and configure guest user access so that people from outside of your organization can be invited into your Microsoft Teams environment. You also learned how guest users are invited to the team, and the steps they need to go through to accept the invitation and gain access to the team.
Next, we will look at how to configure the meeting, messaging, and calling options for the guest users that we have set up in Microsoft Teams.
Configuring the meeting, messaging, and calling options for guests in Microsoft Teams
In the previous section, we showed you how to enable guest access within the Microsoft Teams admin center. Once guest access has been enabled, it provides some settings that can be configured for guest users in relation to the calling, meeting, and messaging settings. These settings may be configured by going through the following steps:
- Log in to the Teams admin center and navigate to Org-wide settings | Guest access. This is shown in Figure 4.23:
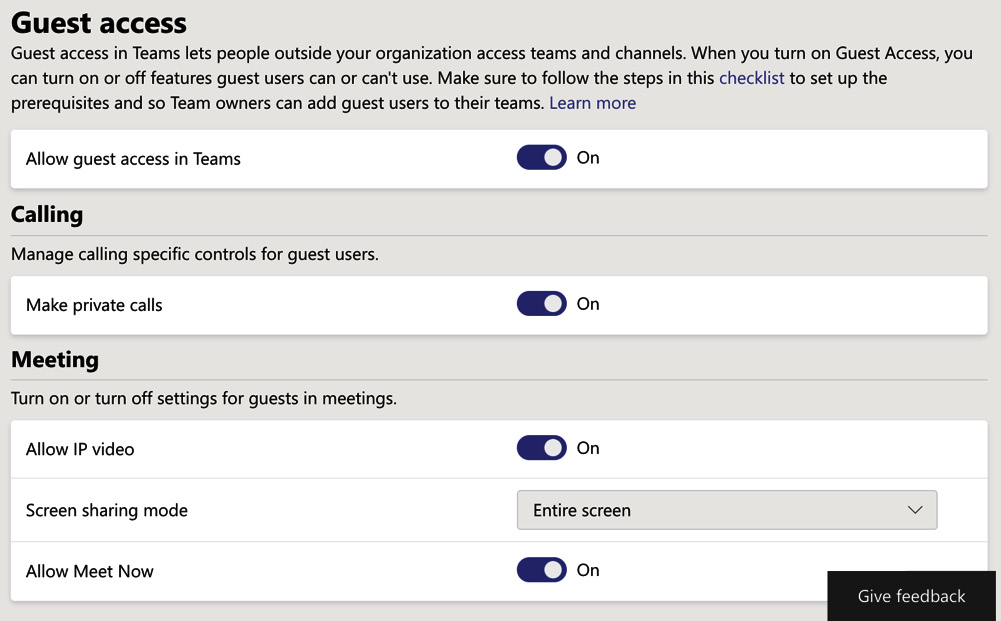
Figure 4.23 – Guest access settings in the Teams admin center
- The first section you will see here is the Calling options. This contains one setting that enables or disables the guest users' ability to make private calls:
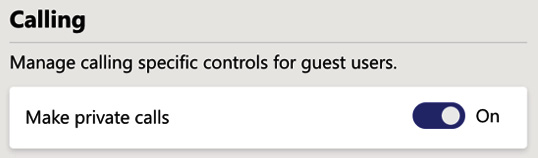
Figure 4.24 – Guest calling options
- The next section contains the guest Meeting options. Here, you can set the guest users' abilities to access meeting features within Teams, such as IP video and screen-sharing settings, as shown in Figure 4.25:
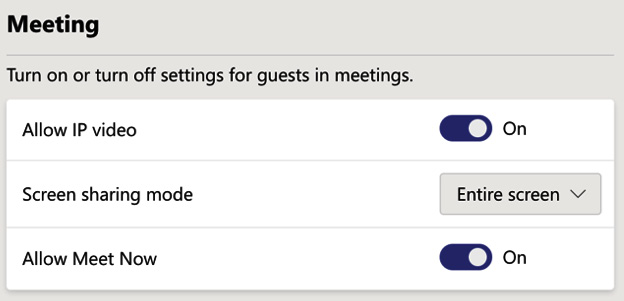
Figure 4.25 – Guest meeting options
- The final section contains the guest Messaging options. Here, you can set the guest users' abilities to use settings within chats or channel conversations. These include settings such as being able to edit or delete sent messages or use chat. These options are shown in Figure 4.26:
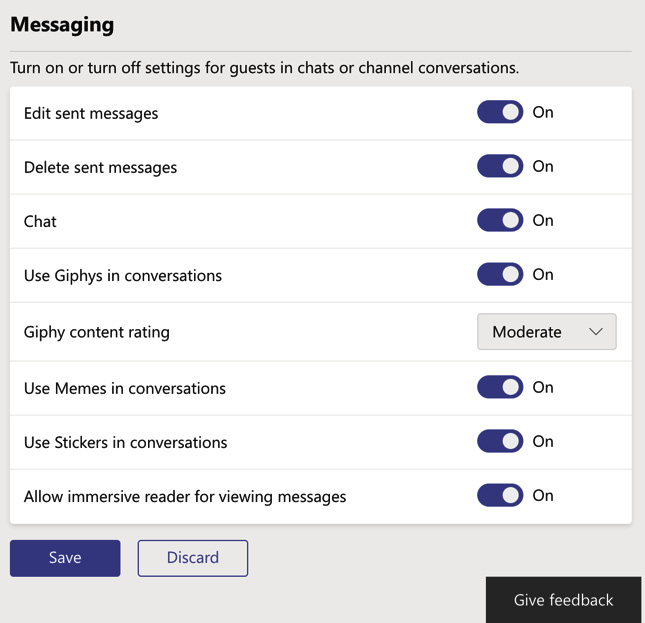
Figure 4.26 – Guest messaging options
- Should you wish to make any changes to these organization-wide guest access settings, you must click on Save to apply these changes.
It is also possible to configure guest user permissions at the individual team level. This can be done by going through the following steps:
- Select the team whose guest permissions you wish to set, click the ellipsis, and then select Manage team, as shown in Figure 4.27:
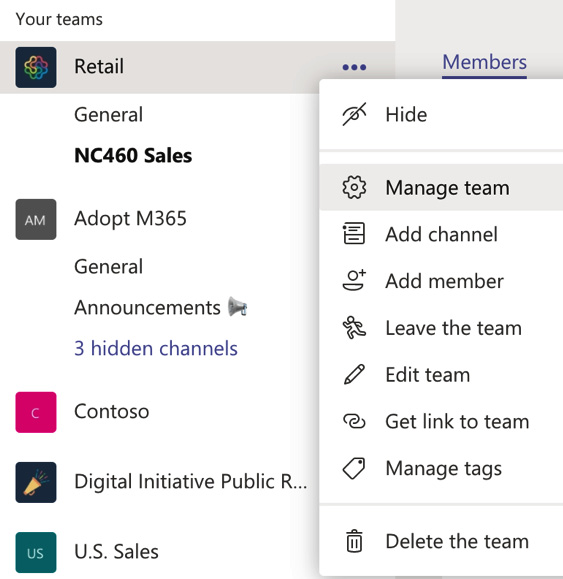
Figure 4.27 – Manage team settings
- Click on the Settings menu and then expand Guest permissions, as shown in Figure 4.28:
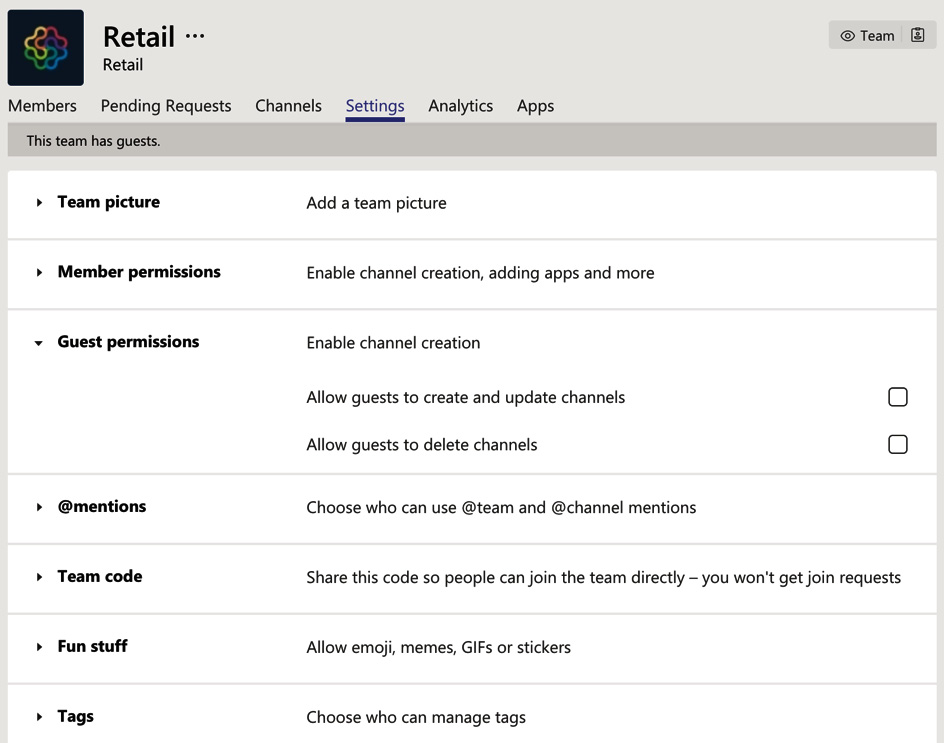
Figure 4.28 – Guest permissions within a team
The permissions that can be set here relate to the guests' ability to create, update, and delete channels within the team.
So, to recap what we have learned in this chapter so far, we have showed you how to enable guest user access for Microsoft Teams and how to configure guest permissions at both the organization and the individual team level. Next, we will demonstrate how to remove guests from Teams, and how Azure AD access reviews can be used to review existing guest access.
Removing guests from Teams and reviewing guest access to Teams with Azure AD access reviews
When you allow guest users to access your Azure AD organization and Microsoft Teams, it is important to regularly review who has access and assess and determine whether that access can or should be removed or whether it will be allowed to continue.
This can be achieved either by manually removing a guest user or by using Azure AD access reviews. In this section, we will examine both methods.
Removing a guest from a team
When you wish to remove a guest user from a team, you will need to complete the following steps:
- From Microsoft Teams, a team owner can select the team, click the ellipsis, select Manage Team, and then select the Members tab:
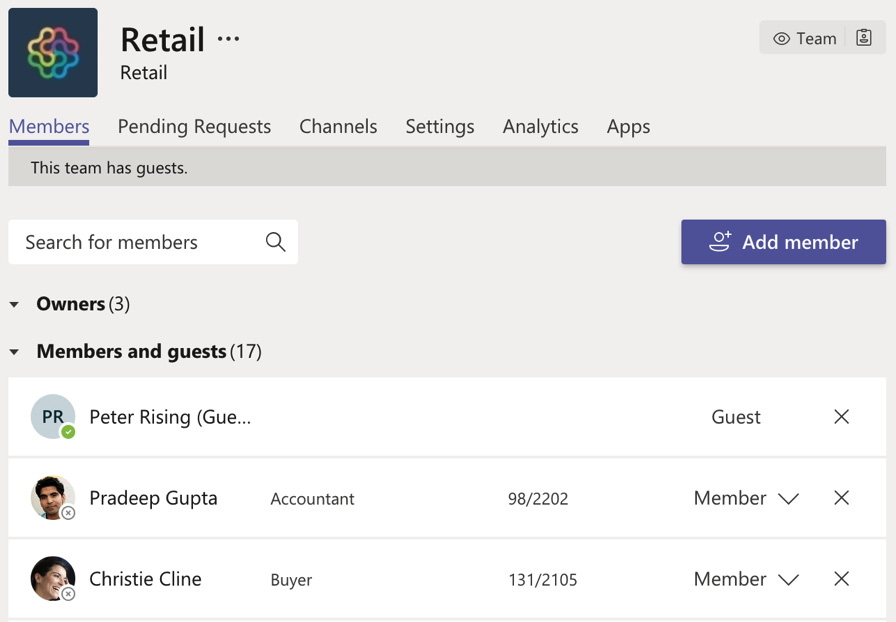
Figure 4.29 – Remove a guest from a team
- Find the guest member in the Members and Guests section and click on the X next to the guest user. This will immediately remove the guest user from the team—there is no confirmation button.
Important note
When you remove a guest user from a team, this does not remove the guest user entirely from Azure AD. This must be done from the Azure portal by going through the following steps:
- Log in to the Azure portal at https://portal.azure.com.
- Navigate to Azure AD | Users.
- Select the guest from the list, select the Delete User option, and click OK.
Now let's look at access reviews in Azure AD.
Using Azure AD access reviews to review guest access to Azure AD and Microsoft Teams
Azure AD access reviews provide Microsoft 365 administrators with the ability to ensure that users and guest users have the appropriate level of access. In this section, we will show you how to start an access review to assess and manage guest user access.
Important note
To use access reviews, you must have an Azure AD Premium P2 subscription.
In order to create an access review, you will need to go through the following steps:
- Log in to the Azure portal at https://portal.azure.com and navigate to Azure AD | Identity Governance or Azure AD | External Identities:
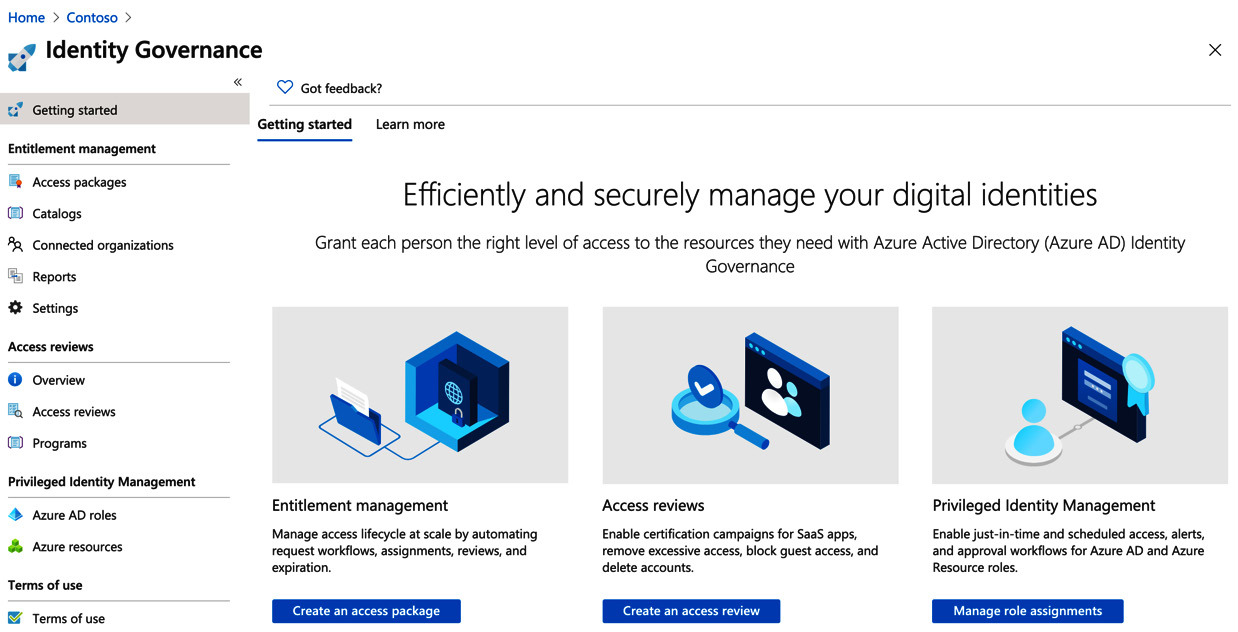
Figure 4.30 – Identity Governance in the Azure portal
- Under the Access reviews section, click on Access reviews. You will see the options shown in Figure 4.31:

Figure 4.31 – Access reviews settings
- Click on + New access review. This will show the Create an access review options. The first section of these options is shown in Figure 4.32. In this example, we have provided a name and description for the access review. We have also set the frequency to run One time (other options available from the drop-down menu range from weekly to annually). Under Users to review, we will select the Members of a group option. It is also possible to select the Assigned to an Application option. Finally, under the Scope options, we will select Guest users only:
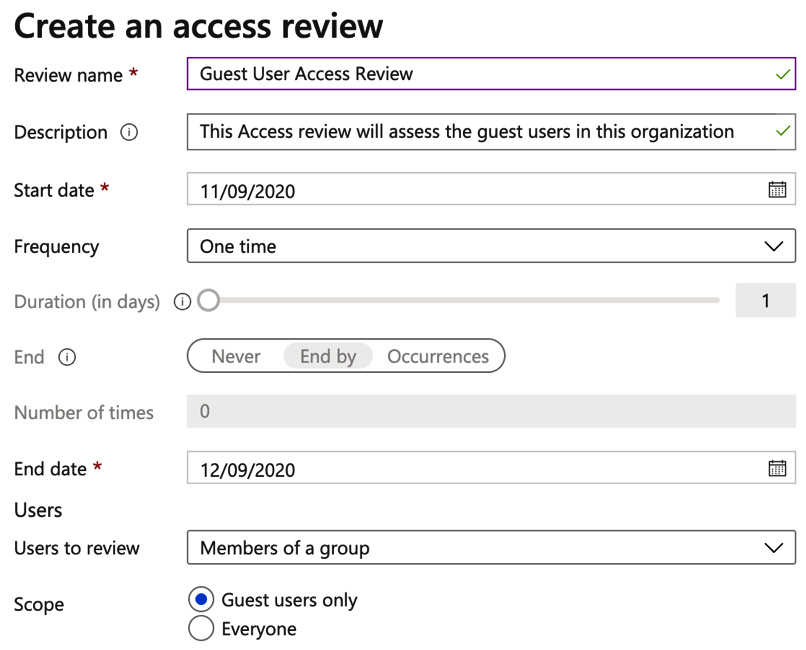
Figure 4.32 – Access review options
- Scrolling down, we have some further options to select for our access review. We need to select the group. In this example, we will select the Microsoft 365 group called Retail. This group contains the members and guest members of the retail team shown earlier in this chapter. Under Reviewers, we may also choose who is going to carry out this access review. We can choose between Group owners, Selected users, or Members (self):

Figure 4.33 – Access review options
- For this example, we will choose the Members (self) option. The effect of this will be that each guest that accepted an invitation will receive an email from Azure AD that contains a link to the access review so that they may complete it themselves. Finally, you may choose some options that will take effect when the access review is completed, along with some advanced options. These are shown in Figure 4.34:
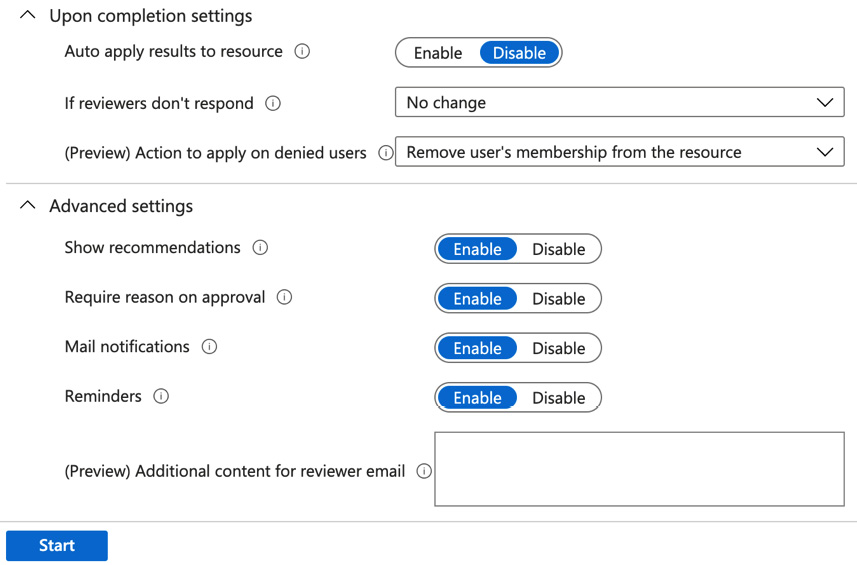
Figure 4.34 – Completion and advanced settings
- Click on Start to begin the access review. The access review will now appear in the list and will have an Initializing status, as shown in Figure 4.35:
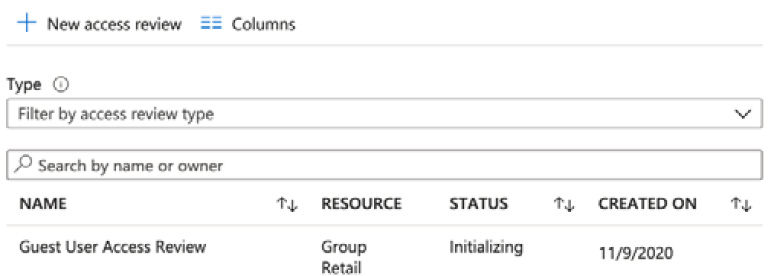
Figure 4.35 – New access review created
- Now, any guest users within the retail group will receive an email asking them to review access, as shown in Figure 4.36:
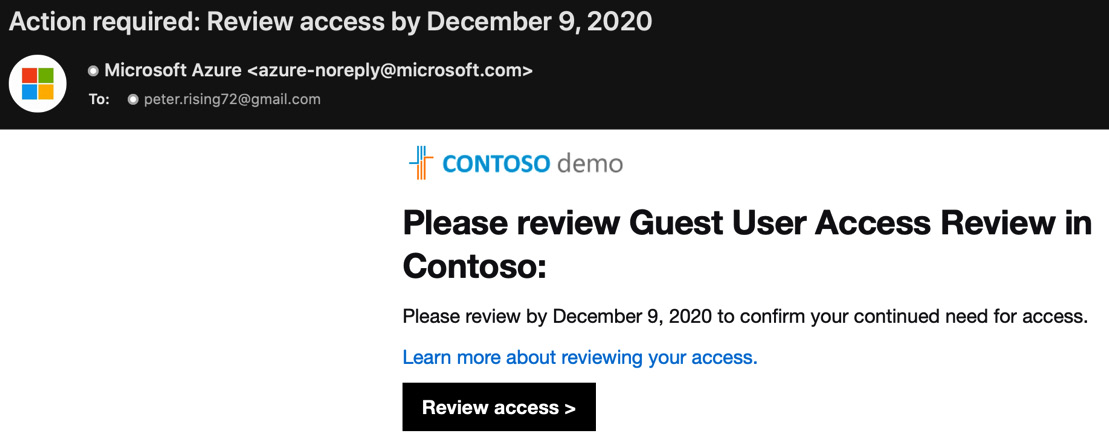
Figure 4.36 – Access review email received by guest user
- Upon opening the review, the guest user is then asked if they still need access to the retail group, as shown in Figure 4.37:
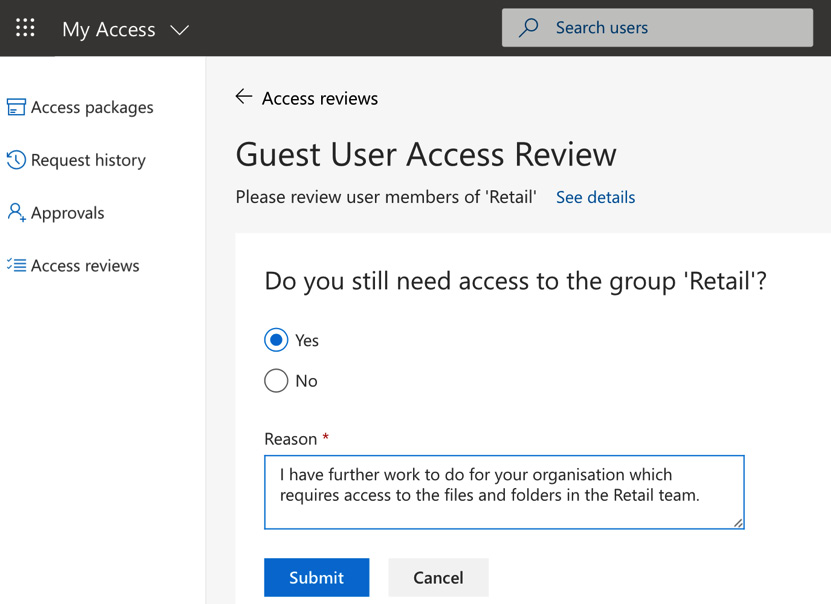
Figure 4.37 – Guest user completes the access review
- Upon clicking Submit, the access review progress is shown in Figure 4.38:
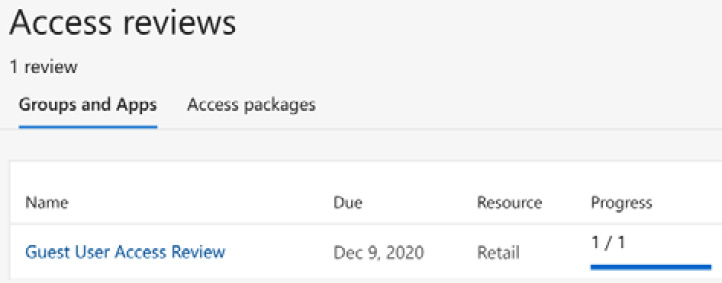
Figure 4.38 – Access review completed by guest user
- Once completed, the Azure AD administrator who set up the access review can check the results in the Identity Governance section of the Azure portal, as shown in Figure 4.39:

Figure 4.39 – Completed access review checked by the Azure AD administrator
In this section, you learned how to remove guest users from a team. We also demonstrated how Azure AD access reviews can be used to assess the guest users in your organization and determine whether they need to retain access to Microsoft 365 groups. Once the reviews have been completed, recommended actions may be applied.
Next, we will look at how to configure guest access from the Azure AD portal.
Configuring guest access from the Azure AD portal
Earlier in this chapter, we showed you how to configure the external-collaboration settings for guest user access from within the Azure portal. We also showed you how to invite a guest user directly from Microsoft Teams. Creating a guest user from Teams will also create a guest user object directly within Azure AD. However, it is also possible to invite users directly from the Azure portal. This provides tenant-, directory-, and application-level control of the guest experience as opposed to just at the Microsoft Teams level. In this section, we will show you how to invite guest users from the Azure portal by going through the following steps:
- Log in to the Azure portal at https://portal.azure.com and navigate to Azure AD | Manage | Users. You will see the list of Azure AD users, as shown in Figure 4.40:
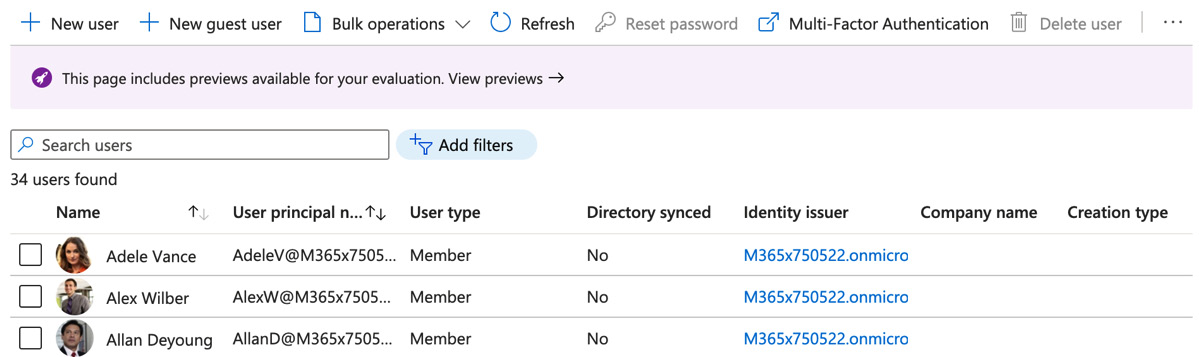
Figure 4.40 – Azure AD users
- Select the + New guest user option. The Invite user option will automatically be chosen for you, as shown in Figure 4.41:

Figure 4.41 – Invite user
- Scroll down and fill in the details of the guest user that you would like to invite. You can choose to include a personal message with the invitation:
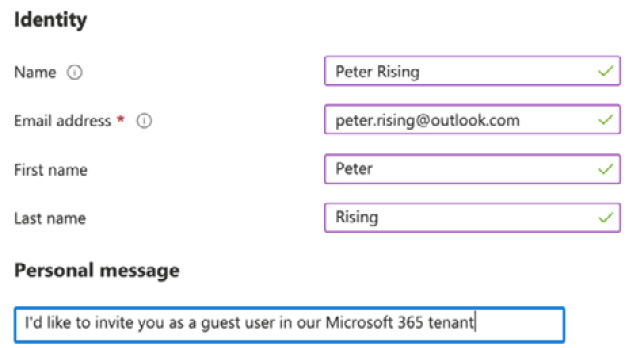
Figure 4.42 – Guest user invitation with personal message
- Scroll down again and select the groups that you would like to invite the guest user to join. In this example, we will invite the guest user to join the same retail group that we used earlier in this chapter, which will provide the new guest with access to the retail team within Microsoft Teams. In this section, we can also set some sign-in options and a usage location, and optionally include some job information:
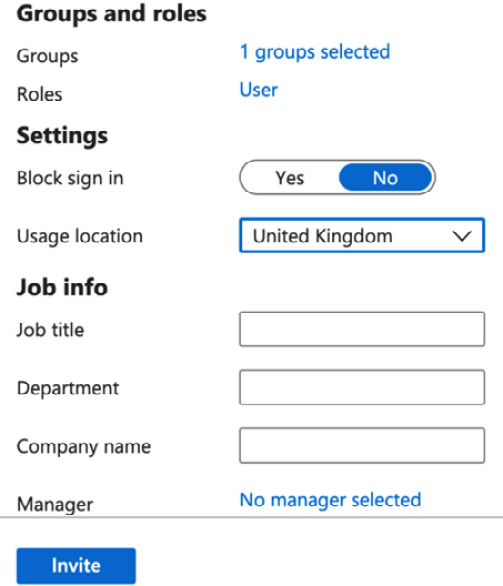
Figure 4.43 – Completing the guest user invitation
- When clicking on Invite, the invitation is immediately emailed to the user, as shown in Figure 4.44:
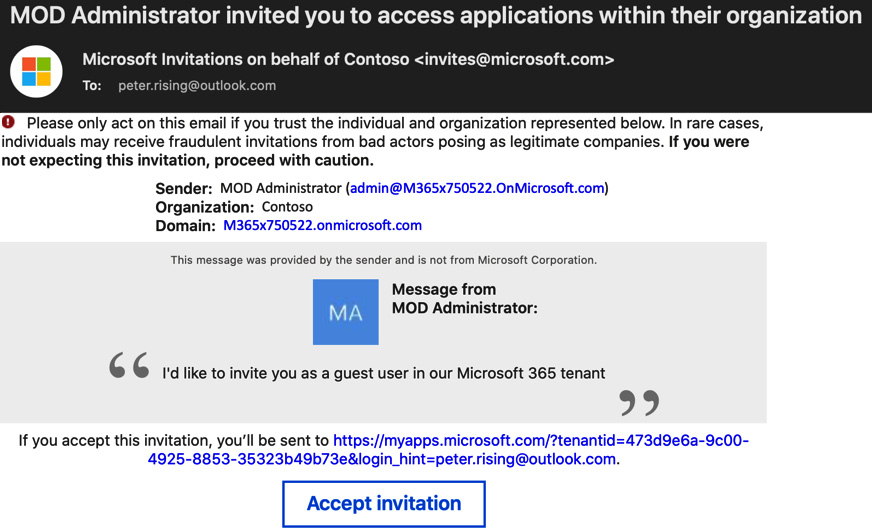
Figure 4.44 – Guest access invitation received by the user
- When the invited user clicks on Accept invitation, they are prompted to review and accept permissions, as shown in Figure 4.45:
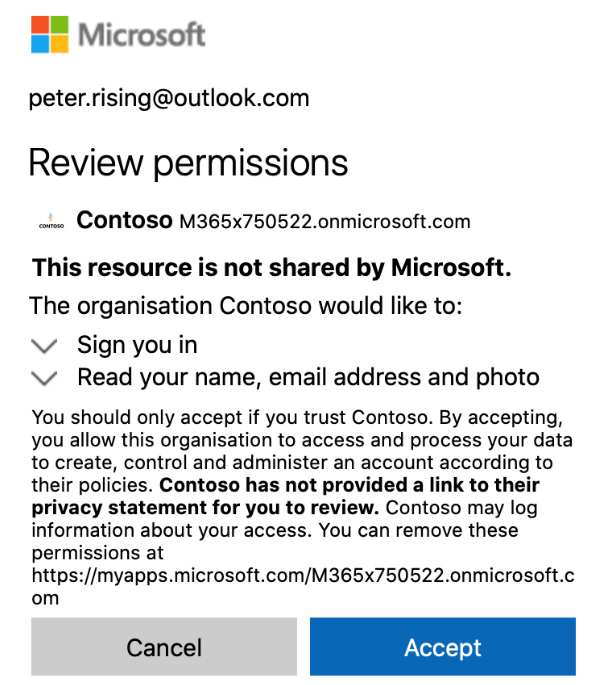
Figure 4.45 – Accepting the guest user invitation
- The user will then be taken to the My Apps page, as shown in Figure 4.46:
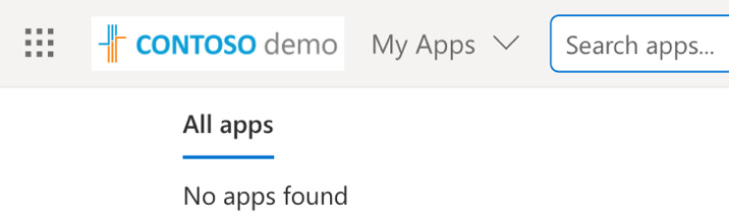
Figure 4.46 – New guest user logged in to the My Apps page
- If the new guest user logs in to the Teams app or opens Teams in a browser via https://teams.microsoft.com, they will also be able to connect to the organization and access the retail team. First, they will need to choose the organization that invited them, as shown in Figure 4.47:
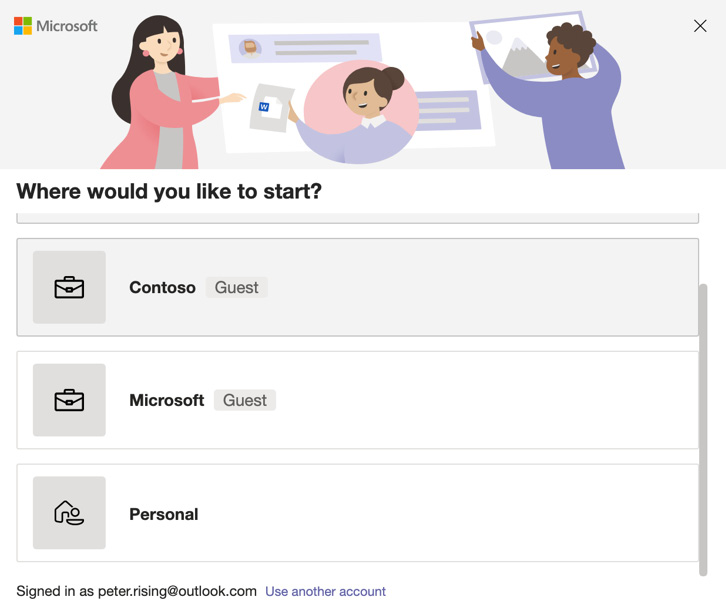
Figure 4.47 – Choosing which Teams organization to connect to
- Then, once they are logged into Teams, the retail team will be available, as shown in Figure 4.48:

Figure 4.48 – Guest user signed in to Teams
As you can see, this process is very similar to how we invited a guest user via Teams earlier in the chapter.
In this section, we showed you how to invite a guest user into your Microsoft 365 organization using the Azure portal. We demonstrated how to send the invitation, which included group settings, and then how to accept the invitation as the invited user and access Microsoft 365 services, including Microsoft Teams.
Summary
In this chapter, we introduced you to the principles of configuring guest user access within Microsoft Teams. You learned that there are a number of different areas within Microsoft 365 that you need to configure guest user access for in when providing guest user access to Microsoft Teams. These included the Azure AD portal, Microsoft 365 group settings, the SharePoint admin center, and the Microsoft Teams admin center.
In addition, we showed you how to configure the permissions for guest users in Teams from both an organizational level and from a Teams level. We also looked at how to remove guest users from Microsoft Teams and how to use Azure AD access reviews to assess the access requirements of your guest users.
Finally, we demonstrated how to invite users into your Microsoft 365 organization directly from the Azure portal, add them to a Microsoft 365 group with a team attached to it, and then accept the invitation and gain access to the team.
In the next chapter, we will examine the principles of security and compliance within Microsoft Teams. You will learn about the different Teams admin roles that are available and what they do. You will also gain an understanding of the compliance features for Teams, such as retention and sensitivity policies, and we will also show you how to set up security- and compliance-related alerting for Microsoft Teams. Additionally, we will introduce you to information barrier policies, which can be used to separate groups of Teams users so that they cannot communicate directly. Lastly, we will examine some of the available security reporting features for Microsoft Teams.
Questions
As we conclude this chapter, here is a list of questions for you to test your knowledge regarding this chapter's material. You will find the answers in the Assessments section of the Appendix:
- Which of the following cannot be used to set guest user access relating to Microsoft teams?
a. Microsoft 365 group settings
b. Security group settings
c. The Teams admin center
d. The Azure portal
- When configuring SharePoint external-sharing policies, which of the following is not one of the available options?
a. Specific people
b. Specific guests
c. Only people in your organization
d. Anyone with the link
- True or false: Guest users who you invite into your organization must use an existing Microsoft 365 account or a personal email account, such as an Outlook or Gmail account—which can be enabled as a Microsoft organizational account—or a one-time passcode (OTP) for guest access.
a. True
b. False
- Which of following would you use to access existing guest user access permissions?
a. Azure AD identity protection
b. Azure AD access reviews
c. Azure AD privileged identity management
e. Azure AD conditional access
- True or false: To use Azure AD access reviews, you must have an Azure AD Premium P1 license.
a. True
b. False
- Where in the Teams admin center would you go to configure guest access settings?
a. Org-wide settings | Guest permissions
b. Org-wide settings | Guest user access
c. Org-wide settings | Guest access
d. Org-wide settings | External access
- Which of the following is not one of the available options for configuring guest access from the Teams admin center?
a. Meeting
b. Calling
c. Collaboration
d. Messaging
- True or false: When a guest is removed from a team, their guest account is also removed from Azure AD.
a. True
b. False
- Where in the Azure portal could you go to configure access reviews (choose two options)?
a. External Identities | Access reviews
b. Administrative Units | Access reviews
c. Identity Governance | Access reviews
d. User Settings | Access reviews
- True or false: Access reviews can be completed by members of the group that is being reviewed.
a. True
b. False
Further reading
Here are some links to more information on some of the topics that we have covered in this chapter:
- Guest access in Microsoft Teams: https://docs.microsoft.com/en-us/microsoftteams/guest-access
- Comparison of team member and guest capabilities: https://docs.microsoft.com/en-us/microsoftteams/guest-experience#comparison-of-team-member-and-guest-capabilities
- Collaborate with guests in a team: https://docs.microsoft.com/en-us/microsoft-365/solutions/collaborate-as-team?view=o365-worldwide
- Turning guest access to Microsoft Teams on or off: https://docs.microsoft.com/en-us/microsoftteams/set-up-guests
- Remove someone from a team: https://support.microsoft.com/en-us/office/remove-someone-from-a-team-91610d8b-c182-4cab-8f31-1ed8d3d316ee?ui=en-us&rs=en-us&ad=us
- Manage guest access with Azure AD access reviews: https://docs.microsoft.com/en-us/azure/active-directory/governance/manage-guest-access-with-access-reviews
- Add guest users to your directory in the Azure portal: https://docs.microsoft.com/en-us/azure/active-directory/external-identities/b2b-quickstart-add-guest-users-portal
- Add a guest user with PowerShell: https://docs.microsoft.com/en-us/azure/active-directory/external-identities/b2b-quickstart-invite-powershell