
Chapter 3: Planning and Implementing Governance and Life Cycle Settings in Microsoft Teams
In this chapter, we will introduce you to the governance and life cycle settings that are available to you as a Microsoft Teams administrator. You will learn how to use templates for setting up Teams and how to create policies for the setup of Microsoft 365 groups. We will also show you how to apply classification settings, expiration policies, and naming policies to Microsoft 365 groups for Microsoft Teams.
In this chapter, we're going to cover the following main topics:
- Using templates to create teams
- Setting up policies to manage the creation of Microsoft 365 groups
- Configuring classifications, expiration policies, and naming policies for Microsoft 365 groups and Microsoft Teams
- Archiving, restoring, and deleting a team
Technical requirements
In this chapter, you will need to have access to the Microsoft Teams admin center, which you can reach at https://admin.teams.microsoft.com. You will need to be either a global administrator or a Teams service administrator in order to carry out the steps covered in this chapter.
You will also need to be able to access Windows PowerShell in order to configure settings for who in your organization can create Microsoft 365 groups.
Using templates to create teams
Creating a team is quick and easy and can be done by users from within Microsoft Teams itself, or by administrators from the Teams admin center. When you create a team, however, it provides you with some very basic team settings and the single General channel, and you will have some work to do to customize the team for your needs.
This is where Teams templates come in. If you have a set of channels, apps, and settings that you would like to be immediately available when you create a new team, templates can provide this. A template for a team can include all the structure definitions relating to your business requirements. In this section, we will show you how to use the pre-built templates included in Teams, and how to create your own templates.
Teams pre-built templates
There are several pre-built Teams templates now available in Microsoft Teams. You can create a new team from one of these templates by completing the following steps:
- Open the Microsoft Teams app on your computer, or from your browser, and navigate to https://teams.microsoft.com. The Teams experience is consistent across devices and browsers as shown in Figure 3.1:
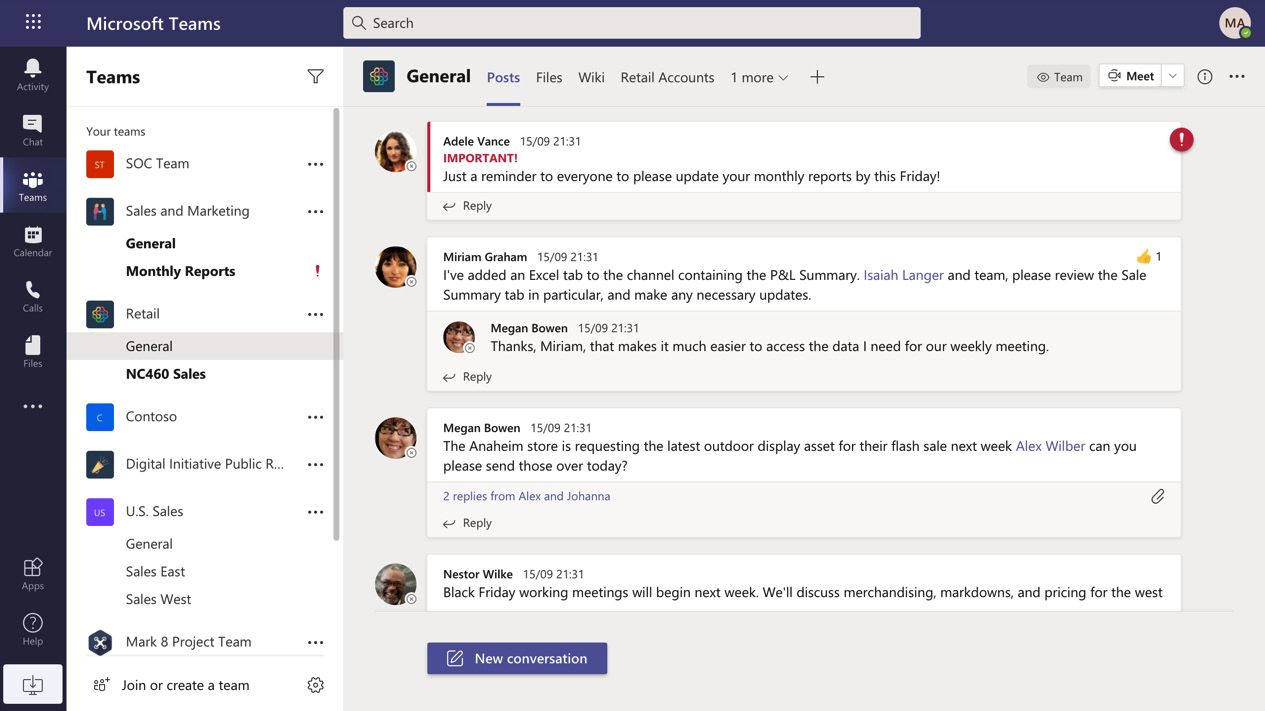
Figure 3.1 – Teams client experience
- Click on Join or create a team:

Figure 3.2 – Join or create a team
- Click on Create team:
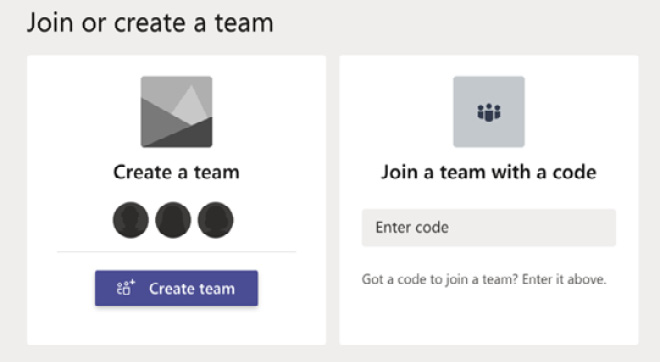
Figure 3.3 – Create team
- In the Select from a template section, you will see several templates that you can choose from to build your team, as shown in Figure 3.4:

Figure 3.4 – Select from a template
- For this example, we will choose the Adopt Office 365 template:

Figure 3.5 – Choosing a template
- Next, we have the option to choose between a Private or Public team. Here, we will choose Public:

Figure 3.6 – Choose what kind of team this will be
- Next, we need to give the team a name and description. We will call this team Digital transformation:
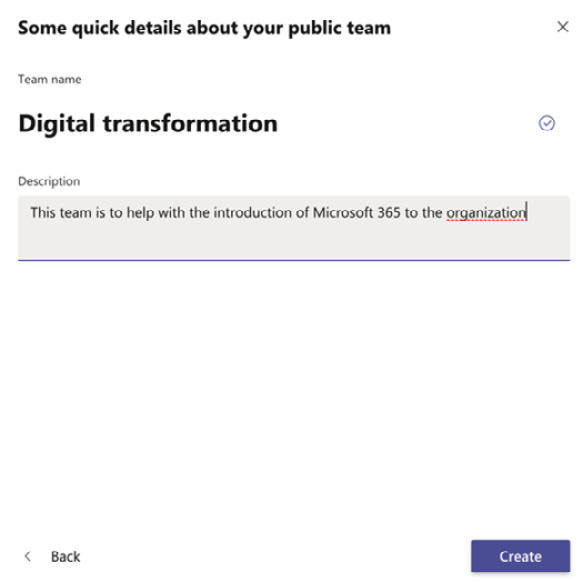
Figure 3.7 – Give the team a name and description
- Click Create and the team will be provisioned as shown in Figure 3.8. This step can take some time to complete and you can click Close and skip to the next step if you prefer:

Figure 3.8 – Creating the team
- Next, you may add some members to your new team. In this example, we will choose to Skip this step:
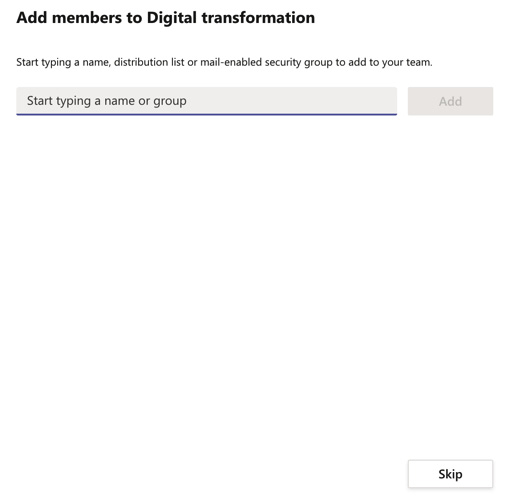
Figure 3.9 – Adding members to the team
- The team is created, and as you can see in Figure 3.10, it is provisioned with four extra channels to the standard General channel:
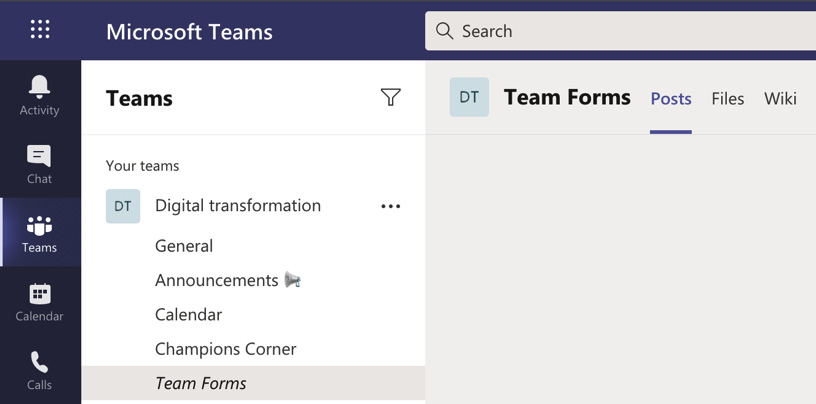
Figure 3.10 – New team created from a template with pre-built channels
Administrators may view the available Teams templates from the Teams admin center at https://admin.teams.microsoft.com and by navigating to Teams | Team templates:

Figure 3.11 – View Teams templates in the Teams admin center
The pre-built templates are shown in Figure 3.12:
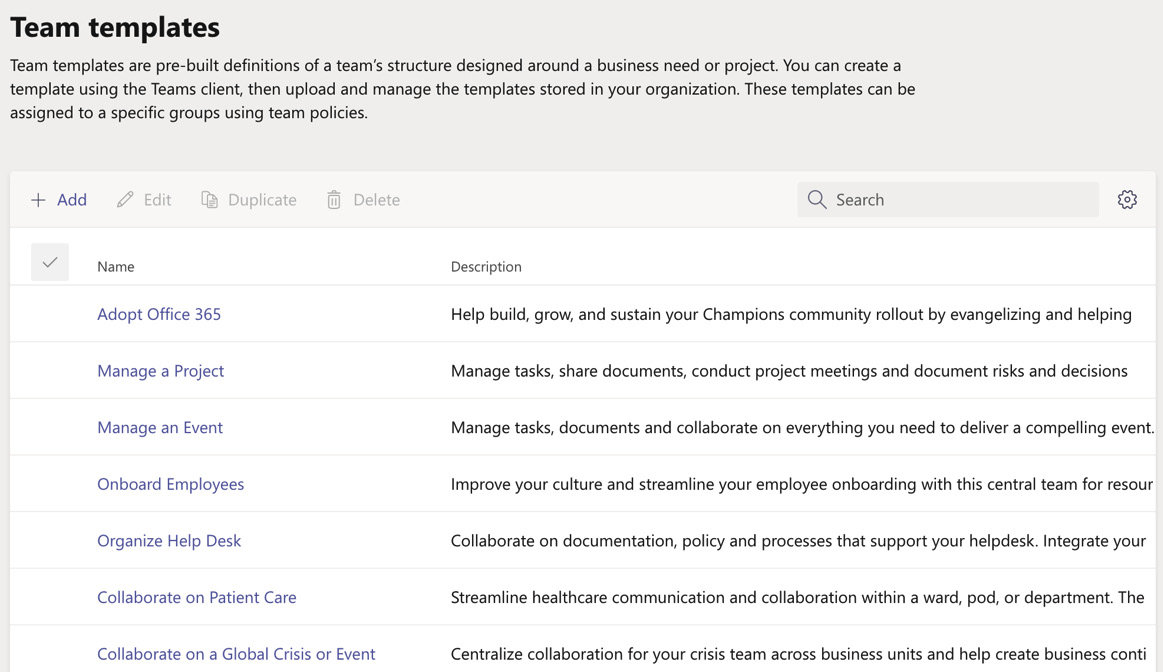
Figure 3.12 – Pre-built templates in the Teams admin center
Important note
The pre-built templates may not be edited. However, you can use the Duplicate option to copy the template settings to your own custom template.
Next, let's look at how to create your own custom templates.
Creating a custom template for a team
In addition to using the pre-built templates, it is also possible to create custom templates. This can be done from the Teams admin center and comprises the following steps:
- Go to the Teams admin center and navigate to Teams | Team templates:

Figure 3.13 – Add a team template
- Click on + Add and you will see the options for creating a new template as shown in Figure 3.14. You may choose to Create a brand new template, Use an existing team as a template, or Start with an existing template:
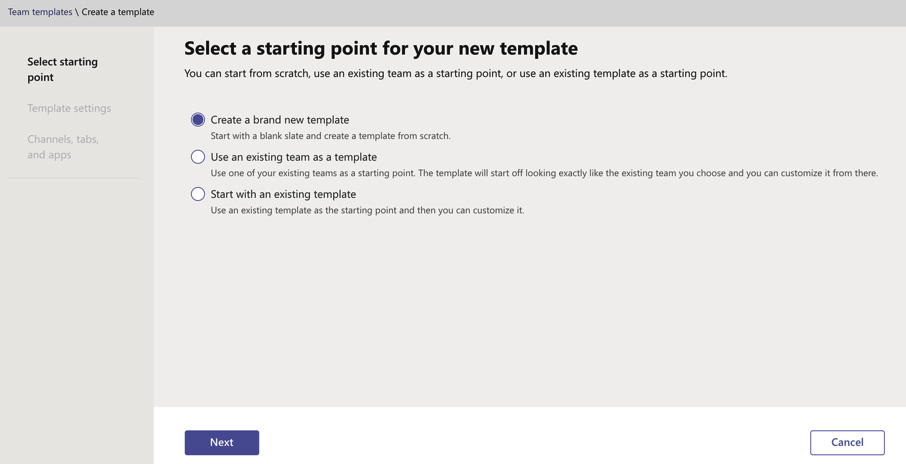
Figure 3.14 – Select a starting point for your new template
- For this example, we will select Create a brand new template. Click Next. In the next step, we need to enter our template name, a long and a short description, and a locale (such as English (United States)). This is shown in Figure 3.15. Click Next:

Figure 3.15 – Enter the name, descriptions, and locale for your template
- Next, we need to add our required Channels and Apps for our new template. Under Channels, click + Add:

Figure 3.16 – Configure Channels and Apps
- Enter a name and description for your channel. You may also choose whether you want the channel to be Shown by default, or whether it is a hidden channel. From this section, you may also optionally choose to include a tab to Add an app for this template. In Figure 3.17, we have added the Evernote app:

Figure 3.17 – Add a channel to the template
- Click on Apply:
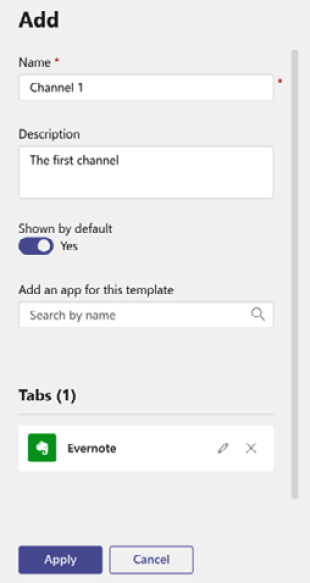
Figure 3.18 – Configuring channel and tab settings
- Figure 3.19 shows our new channel added to the template. In addition, the tab we added for Evernote is shown under the Apps section. This app could also have been explicitly added to the template by adding it from the Apps section. Click on Submit to create your template:

Figure 3.19 – New channel ready for creation
- The new template is shown in Figure 3.20 in the list of templates:
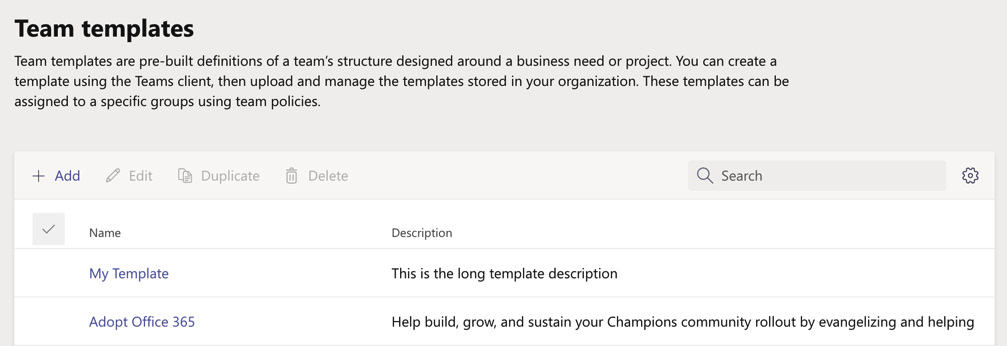
Figure 3.20 – New template shown in the list of Teams templates
Now let's look at some of the current Teams template capabilities.
Teams template capabilities
Microsoft has advised that more features will be added to templates over time, but at the time of writing, the following features and settings are available and may be configured with Teams templates:
- Name
- Description
- Adding apps
- Adding tabs
The following features are currently not available:
- Setting team membership
- Setting the team picture
- Configuring the channel settings
- Setting up connectors
Important note
Teams templates are currently limited to 15 channels per template, 20 tabs per channel in a template, and 50 apps per template.
Next, we will show you how to manage the creation of Microsoft 365 groups using policies.
Setting up policies to manage the creation of Microsoft 365 groups
One of the challenges faced by Microsoft Teams administrators is the fact that all users have the ability by default to create Microsoft 365 groups. Microsoft 365 groups are used and associated with many things within Microsoft 365, and among these is the fact that when a Team is created from scratch, a Microsoft 365 group is also created.
This can lead to challenges such as teams being created without expiration policies and then forgotten and discarded. As a result, administrators have the challenge of cleaning up surplus or orphaned teams and Microsoft 365 groups.
One way to address this challenge is to limit who in your organization can create Microsoft 365 groups. This is achieved by using Windows PowerShell and by completing the following steps.
Important note
In order to implement the following process, the administrator who configures the group creation settings, and any members of the security group that we will be creating, must be assigned an Azure AD Premium license.
The first step is to create a security group that contains any users that you wish to have permission to create Microsoft 365 groups:
- Go to the Azure portal at https://portal.azure.com and navigate to Azure Active Directory | Groups:
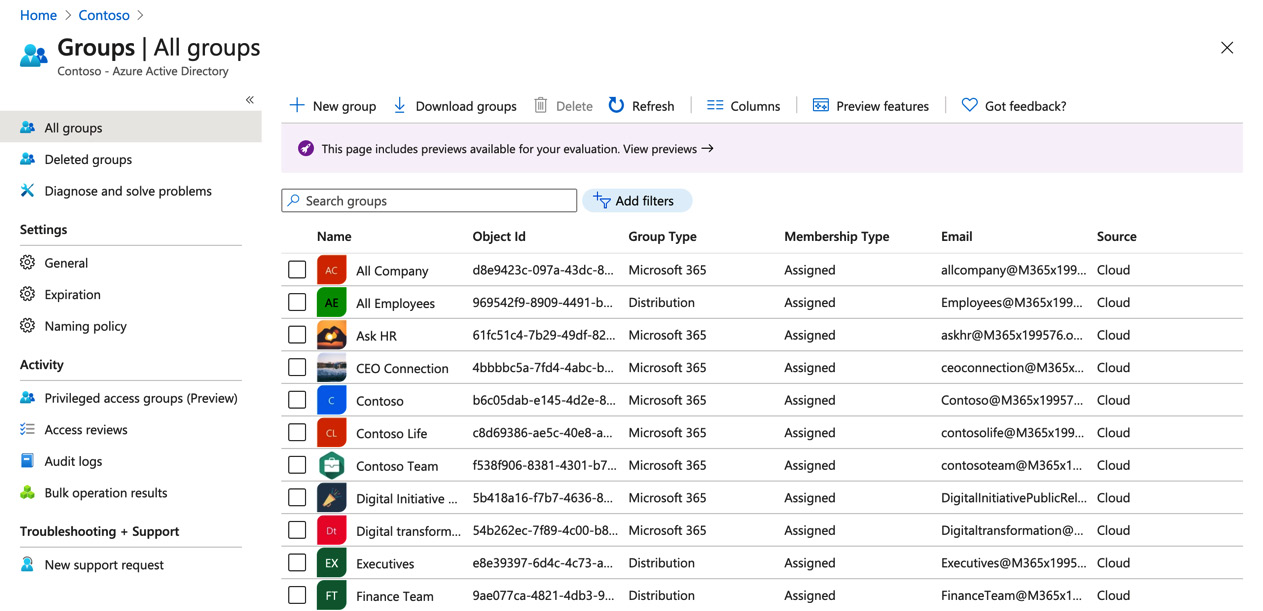
Figure 3.21 – Azure Active Directory Groups page
- Click on + New group. Complete the new group settings to add the required members who will be able to create Microsoft 365 groups. Click Create to finish setting up the new group:
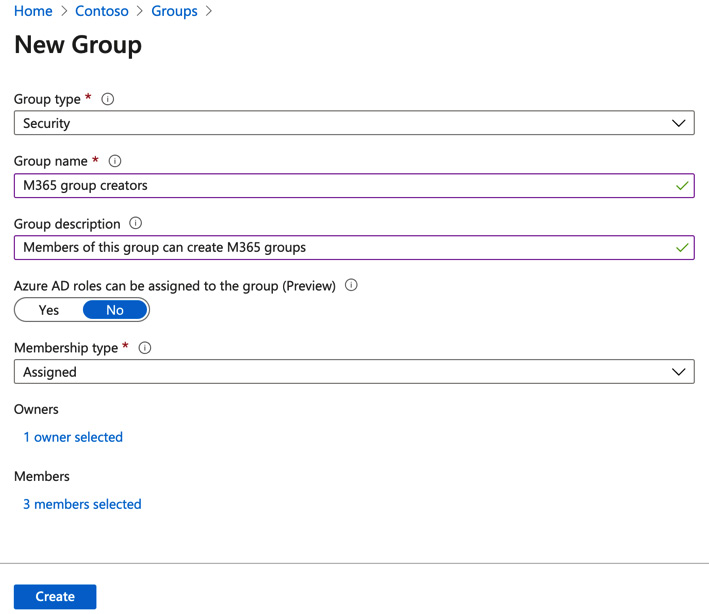
Figure 3.22 – New security group
- Next, connect to PowerShell as an administrator, run the following command, and type Y for yes:
Install-module azureadpreview
Below is the output of the preceding command:

Figure 3.23 – Installing the AzureADPreview PowerShell module
- Next, enter the following command to connect to Azure AD:
$AzureADCred = Get-Credential
- Enter your Microsoft 365 administrator login name and password, and once connected, run the following command to connect the PowerShell session to Azure AD:
Connect-AzureAD -Credential $AzureAdcred
The results of the preceding commands are shown in Figure 3.24:

Figure 3.24 – Connecting to Azure AD PowerShell
- Next, we need to run the following script to restrict M365 group creation:
$GroupName = "M365 group creators"
$AllowGroupCreation = "False"
Connect-AzureAD
$settingsObjectID = (Get-AzureADDirectorySetting | Where-object -Property Displayname -Value "Group.Unified" -EQ).id
if(!$settingsObjectID)
{
$template = Get-AzureADDirectorySettingTemplate | Where-object {$_.displayname -eq "group.unified"}
$settingsCopy = $template.CreateDirectorySetting()
New-AzureADDirectorySetting -DirectorySetting $settingsCopy
$settingsObjectID = (Get-AzureADDirectorySetting | Where-object -Property Displayname -Value "Group.Unified" -EQ).id
}
$settingsCopy = Get-AzureADDirectorySetting -Id $settingsObjectID
$settingsCopy["EnableGroupCreation"] = $AllowGroupCreation
if($GroupName)
{
$settingsCopy["GroupCreationAllowedGroupId"] = (Get-AzureADGroup -SearchString $GroupName).objectid
}else {
$settingsCopy["GroupCreationAllowedGroupId"] = $GroupName
}
Set-AzureADDirectorySetting -Id $settingsObjectID -DirectorySetting $settingsCopy
(Get-AzureADDirectorySetting -Id $settingsObjectID).Values
The preceding script sets the target security group name and then ensures that only members of this group may create Microsoft 365 groups.
Important note
Note that the $GroupName parameter at the start of the preceding PowerShell command must match the name of the security group shown in Figure 3.24 – which is M365 group creators in this example.
The output of the preceding script is shown in Figure 3.25, which illustrates the M365 group creators security group being set as the only group that has permissions to create Microsoft 365 groups:

Figure 3.25 – PowerShell script to set the security group
- Note that the final line of the PowerShell output shown in Figure 3.25 shows EnableGroupCreation set to False. This means that only members of the security group we have created will be able to create Microsoft 365 groups.
- Figure 3.26 shows a user logged into Teams who is not a member of the M365 group creators security group. You will note that the option to Create team is not visible:

Figure 3.26 – User not in the security group cannot create a team
Important note
The preceding steps will not prevent users who have privileged roles such as global administrator from creating Microsoft 365 groups.
Next, we will show you the process of setting up classifications, expiration policies, and naming policies using Microsoft 365 groups.
Configuring classifications, expiration policies, and naming policies for Microsoft 365 groups and Microsoft Teams
In this section, you will learn about the classification feature, expiration policies, and naming policies, and how these three features may be configured using Microsoft 365 groups that are associated with Microsoft Teams. We will start with the group classification feature.
Configuring group classification
The group classification feature enables users who can create Microsoft 365 groups to create visual descriptions (much like labels) that can provide descriptive information about the group.
Important note
Microsoft now recommends using sensitivity labels in conjunction with Microsoft 365 groups in preference over group classification. However, as the exam outline has not been changed to reflect this at the time of writing, we will focus on the classification feature in this section. Links to sensitivity labeling in relation to Microsoft 365 will be included in the Further reading section at the end of the chapter.
Group classifications can be created using Windows PowerShell. Examples of classification settings are the following:
- Normal
- Confidential
- Highly Confidential
An example of how this could work is shown as follows with the creation of a classification list. You will need to be connected to Azure AD in PowerShell as shown previously in the chapter:
$setting["ClassificationList"] = "Normal, Confidential, Highly Confidential"
Now that we have our classification list created, we need to apply some descriptions to those list items. This is achieved as follows:
$setting["ClassificationDescriptions"] = "Normal: General, Confidential: Internal only, Highly Confidential: Executive access only"
Now that you have your list of classifications and their associated descriptions, you may set a classification to a chosen new or existing Microsoft 365 group as shown in the following examples:
Set-UnifiedGroup [email protected] -Classification Normal
Or use the following:
New-UnifiedGroup [email protected] -Classification Confidential -AccessType Private
Next, we will examine expiration policies.
Configuring expiration policies
Expiration policies are a means of managing the life cycle of your Microsoft 365 groups to ensure that they are deleted when they are no longer used or required. To configure an expiration policy, we need to complete the following steps:
- Go to the Azure portal at https://portal.azure.com and navigate to Azure Active Directory | Groups:
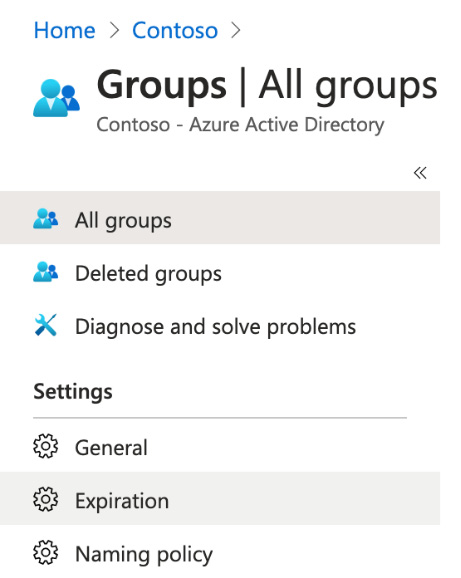
Figure 3.27 – Azure AD Groups in the Azure portal
- Under Settings, select Expiration, as shown in Figure 3.27.

Figure 3.28 – Groups Expiration settings
- Complete the settings shown in Figure 3.28 for Group lifetime (this can be set to 180 days, 365 days, or a custom setting of 30 days or more), Email contact for groups with no owners, and Enable expiration for these Microsoft 365 groups (can be set to All, Selected, or None). Click Save to confirm your settings.
When expiration settings have been applied to a Microsoft 365 group, the following conditions will apply:
- If a group is still active when the expiration date approaches, the group will be automatically renewed.
- When a group is not auto-renewed, the group owners are alerted via email to renew the group.
- All groups that are not renewed will be deleted.
- When a Microsoft 365 group is deleted, it can be recovered within 30 days of its deletion.
You should consider configuring an expiration policy for your Microsoft 365 groups as it will help to prevent stale or orphaned groups within Azure AD.
Now, let's look at naming policies for Microsoft 365 groups.
Configuring a naming policy
A group naming policy is a means of applying a naming convention for Microsoft 365 groups when they are created. This can be highly useful for administrators to identify the function of a group and provides the ability to create and manage a blocked word list for group names or aliases.
To create a group naming policy, we need to complete the following steps:
- Go to the Azure portal at https://portal.azure.com and navigate to Azure Active Directory | Groups:

Figure 3.29 – Configuring a group naming policy
- Under Settings, select Naming policy as shown in Figure 3.29.
- Choose the Group naming policy tab as shown in Figure 3.30. We have two options here to set a prefix or a suffix to our group names. Or, we can add both:
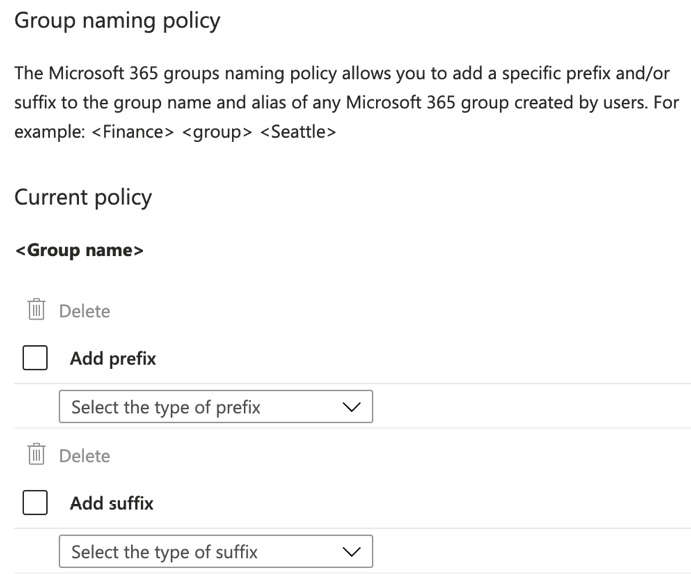
Figure 3.30 – Configuring a group naming policy
- Using the example of a prefix, you will see that you may choose either an Attribute or String value:

Figure 3.31 – Set up a prefix using an attribute or string value
- Figure 3.32 uses the example of a suffix and shows a String value of Contoso, which is the name of the organization. We have also chosen an Attribute value of Office:

Figure 3.32 – String and Attribute values applied to a suffix
- Figure 3.33 shows the available Attribute values that may be chosen:
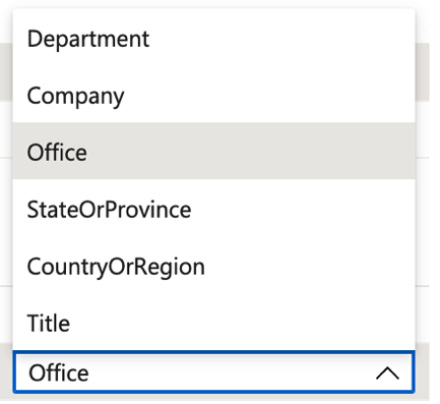
Figure 3.33 – Available attribute values
- The effect of the suffix settings that we have chosen is that when a user goes to create a team, the suffix values will be appended to the end of the team name. Figure 3.34 shows a user named Adele Vance created a team called Operations. The string suffix value of Contoso is appended to the team name, followed by the attribute value, which is acquired from the Office field within the user's account:
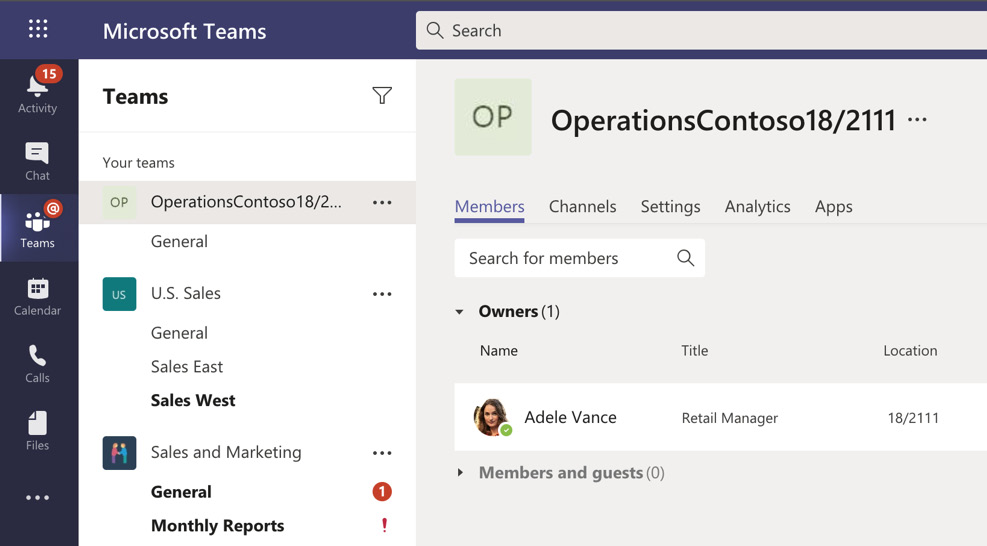
Figure 3.34 – Team created with a suffix applied
- Figure 3.35 shows the Office field setting within the contact information settings for the user Adele Vance.
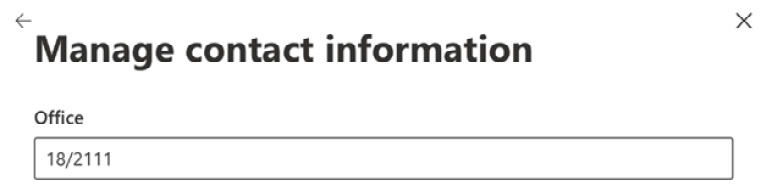
Figure 3.35 – Office field setting
Important note
If Microsoft teams or groups are set up by users who have privileged roles such as a global administrator, the group naming policy will not be applied.
In this section, we described how to use Microsoft 365 groups to configure classification features, expiration policies, and naming policies.
Next, we will go through the process of archiving, restoring, or deleting a team.
Archiving, restoring, and deleting a team
The teams that you have in your Microsoft 365 environment may not be needed indefinitely. In this situation, there are several things you can do to ensure that stale or unused teams are removed and that only currently used teams remain active.
In this section, we will show you the options that you have to archive, restore, or fully delete teams.
Archiving a team
If there are any teams in your Microsoft 365 environment that are no longer in active use, but there may be a future requirement to access them, then you have the option to archive that team. Once you archive a team, any files and conversations within it are changed to read-only.
To archive a team, we need to complete the following steps:
- Open Microsoft Teams and choose Teams from the left menu:
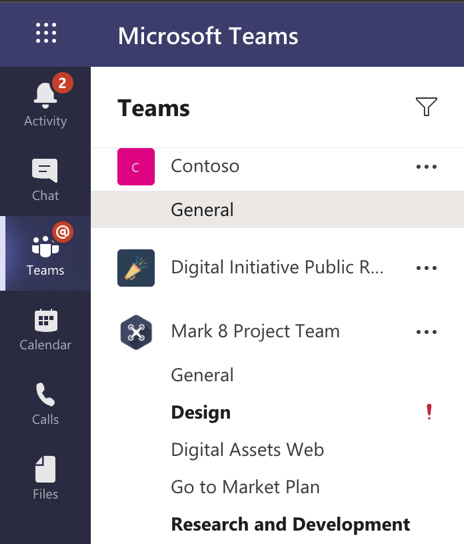
Figure 3.36 – Open the Teams app
- At the bottom of the list of teams, next to Join or create a team, click on the cogwheel symbol:

Figure 3.37 – Select the cogwheel
- A list of all teams is presented, as shown in Figure 3.38:
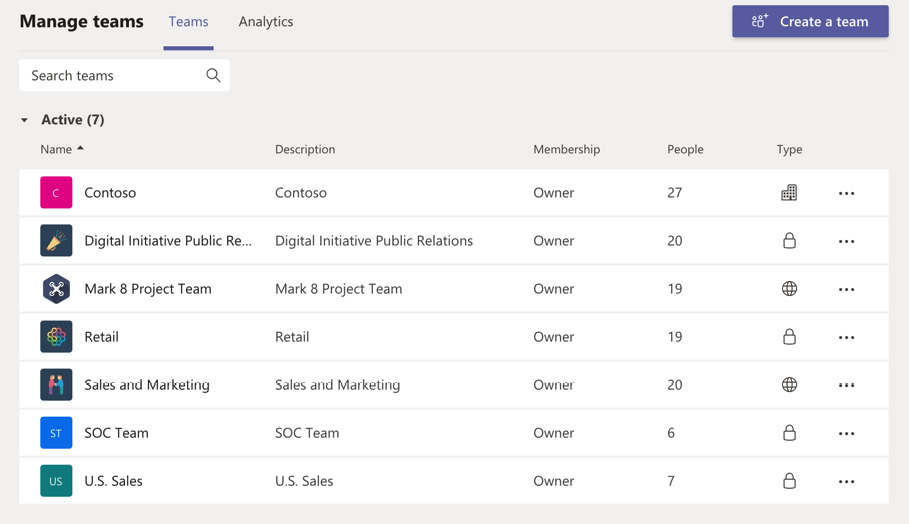
Figure 3.38 – Manage teams
- Choose the team that you wish to archive and click the ellipsis. Then choose Archive team. You must be a Teams service administrator or higher in order to archive a team:
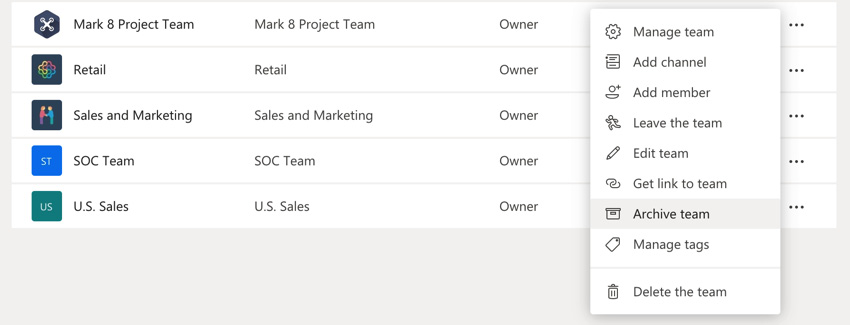
Figure 3.39 – Archive a team
- When prompted, check the Make the SharePoint site read-only for team members box and click on Archive:

Figure 3.40 – Archive a team
- The team is moved from the Active section to the Archived section. When the team is archived, you may open it from here to view conversations but you will not be able to start any new conversations:
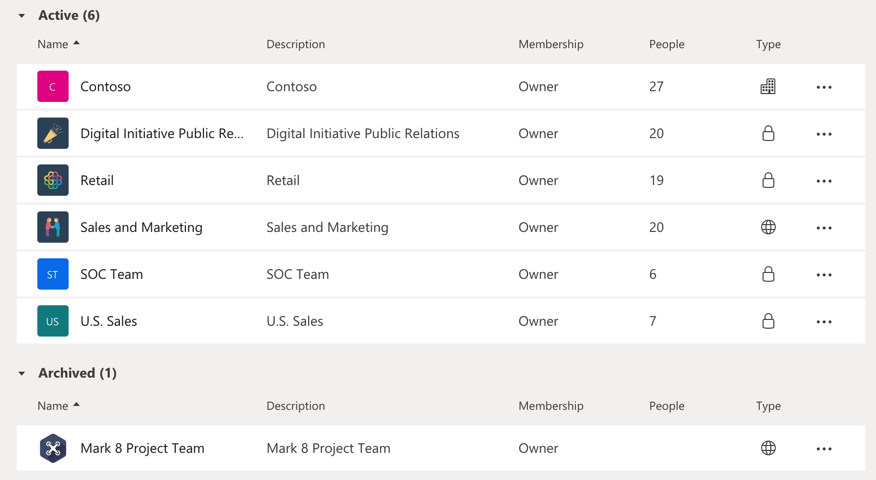
Figure 3.41 – The team is successfully archived
Next, we will show you how to restore an archived team.
Restoring a team
The steps to restore an archived team are equally simple:
- From the Archived section of the Manage teams area, click the ellipsis next to the team you wish to restore, and click on Restore team:
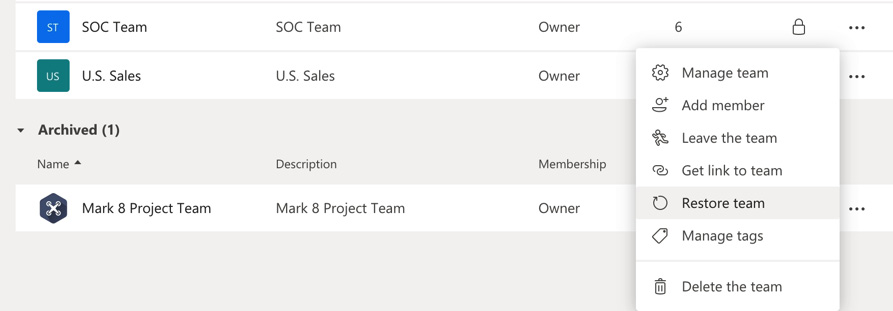
Figure 3.42 – Restoring a team
- The team will be moved from the Archived section back to the Active section.
Archiving is a simple way of moving unused teams out of the active teams list and then restoring them should they become needed again.
Important note
It is also possible to archive teams from the Microsoft Teams admin center, in the Teams | Manage Teams section.
Next, we will show you how to delete a team.
Deleting a team
While archiving a team is easily reversed, deleting a team is a more permanent action. When a team is deleted, the mailbox and calendar for the team are removed from Exchange and the associated SharePoint site will be deleted, as will any OneNote notebooks, Planner plans, Power BI, or Stream content.
When a team is deleted, administrators or team owners can recover it within a 30-day period.
To delete a team, take the following steps:
- From the same Manage teams section of the Teams app, under Active teams, click the ellipsis next to the team you wish to fully delete, and select Delete the team:
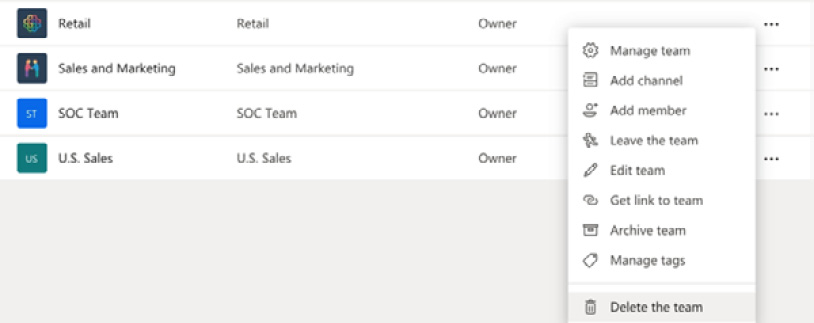
Figure 3.43 – Deleting a team
- Check the box next to I understand that everything will be deleted and click on Delete team:

Figure 3.44 – Deleting a team
The team will now be completely deleted.
Summary
In this chapter, we introduced you to the principles of creating teams using the built-in Teams templates that are available. We also showed you how to create your own Teams templates from the Teams admin center. You also learned how to set up a policy to control who in your organization can create Microsoft 365 groups.
In addition, we showed you how Microsoft 365 groups can be used to set classification features, expiration policies, and naming policies, and finally, you learned how to archive, restore, and completely delete teams from within the Teams app.
In the next chapter, we will examine the options for configuring guest access for users outside of your organization in Microsoft Teams. You will learn how to access the Teams admin center to control and set the permissions for guest users, and how to configure the meeting, messaging, and calling experience for those guest users. Then, we will show you how to remove guests from Microsoft Teams, and how access reviews can be used to review the existing guest access to the teams in your environment. Finally, we will demonstrate how guest access settings may be controlled from the Azure AD portal.
Practice questions
As we conclude, here is a list of questions for you to test your knowledge regarding this chapter's material. You will find the answers in the Assessments section of the Appendix:
- Which of the following are possible prefix and suffix settings for a group naming policy (choose two)?
a. Attribute
b. Vector
c. String
d. Vertices
- True or false – when a team is archived, it cannot be restored.
a. True
b. False
- Which of the following is not a setting option for a group expiration policy?
a. 365 days
b. 730 days
c. 180 days
e. Custom
- True or false – global administrators are not bound by the Teams naming policy.
a. True
b. False
- Where in the Azure portal would you go to configure an expiration policy?
a. Azure Active Directory | Properties
b. Azure Active Directory | Users
c. Azure Active Directory | Groups
d. Azure Active Directory | User settings
- When a Team is deleted, how long does an administrator or team owner have to restore it before it cannot be recovered?
a. 14 days
b. 25 days
c. 30 days
d. 50 days
- True or false – to control who in your organization can create Microsoft 365 groups, you do not need to create a security group.
a. True
b. False
- Which of the following statements about pre-built Teams templates is incorrect?
a. Pre-built Teams templates may not be edited.
b. Pre-built Teams templates may be duplicated.
c. Pre-built Teams templates may be edited.
d. Pre-built Teams templates can include channels and apps.
- True or false – when a team is created from scratch, a Microsoft 365 group is always created.
a. True
b. False
- True or false – Teams templates may be created from the Teams admin center.
a. True
b. False
Further reading
Here are links to more information on some of the topics that we have covered in this chapter:
- Get started with Teams templates in the Teams admin center: https://docs.microsoft.com/en-us/microsoftteams/get-started-with-teams-templates-in-the-admin-console
- Get started with Teams templates using Microsoft Graph: https://docs.microsoft.com/en-us/microsoftteams/get-started-with-teams-templates
- Manage who can create Microsoft 365 groups: https://docs.microsoft.com/en-us/microsoft-365/solutions/manage-creation-of-groups?view=o365-worldwide
- Configure the expiration policy for Microsoft 365 groups: https://docs.microsoft.com/en-us/azure/active-directory/enterprise-users/groups-life cycle
- Configure classifications for Microsoft 365 groups https://docs.microsoft.com/en-us/microsoft-365/enterprise/manage-microsoft-365-groups-with-powershell?view=o365-worldwide#create-classifications-for-microsoft-365-groups-in-your-organization
- Configure sensitivity labeling for Microsoft 365 groups, SharePoint sites, and Teams: https://docs.microsoft.com/en-us/microsoft-365/compliance/sensitivity-labels-teams-groups-sites?view=o365-worldwide
- Microsoft 365 groups naming policy: https://docs.microsoft.com/en-us/microsoft-365/solutions/groups-naming-policy?view=o365-worldwide
- Microsoft 365 groups expiration policy: https://docs.microsoft.com/en-us/microsoft-365/solutions/microsoft-365-groups-expiration-policy?view=o365-worldwide
- Archive or restore a team: https://support.microsoft.com/en-us/office/archive-or-restore-a-team-dc161cfd-b328-440f-974b-5da5bd98b5a7?ui=en-us&rs=en-us&ad=us
- Delete a team: https://support.microsoft.com/en-us/office/delete-a-team-c386f91b-f7e6-400b-aac7-8025f74f8b41?ui=en-us&rs=en-us&ad=us
Configuring classifications, expiration policies, and naming policies for Microsoft 365 groups and Microsoft Teams
Configuring classifications, expiration policies, and naming policies for Microsoft 365 groups and Microsoft Teams
Configuring classifications, expiration policies, and naming policies for Microsoft 365 groups and Microsoft Teams
Configuring classifications, expiration policies, and naming policies for Microsoft 365 groups and Microsoft Teams