We want to take full advantage of modern technologies. First of all, we must install the latest tools and begin working on configurations. Later, we will be able to use our existing knowledge to create different kinds of RIAs for SharePoint 2010, using Silverlight 4—the newest kid-on-the-block from Microsoft.
Note
Silverlight 4 is backward-compatible with its previous version, Silverlight 3. Therefore, when an example uses a feature found only in Silverlight 4, you will find a note explaining this situation. Most of the examples work for both Silverlight versions. However, we will also take advantage of some of the new features found in Silverlight 4.
The only requirements underpinning the development and integration of RIAs into SharePoint 2010 sites are understanding the basics of the C# programming language, ASP.NET, XAML code, and the Visual Studio IDE. We will cover any other requirements in our journey through the creation of many different kinds of RIAs to run in a SharePoint 2010 site. First, we must download and install various Silverlight development tools. We need Visual C# 2010 Professional, Premium, or Ultimate installed, in order to successfully complete the installations explained in the following section. Visual C# 2010 allows us to choose the desired Silverlight version (for example, version 3 or version 4). The following sections will show Visual Studio 2010 Ultimate screenshots. If you use other versions, some elements that appear in the screenshots could be different but the steps are all valid for the aforementioned versions.
Follow these steps to prepare the development environment:
- Download the following files:
Application's name
Download link
File name
Description
Silverlight 4 Tools for Visual Studio 2010
Silverlight4_Tools.exeWe must install Silverlight 4 Tools in order to create Silverlight 4 applications in the Visual Studio 2010 IDE, using XAML and C#. It will co-exist with previous Silverlight SDKs (Software Development Kits). This new version of Silverlight Tools also includes the WCF RIA Services package.
Silverlight 4 Offline Documentation (in CHM format)
Silverlight_Documentation.EXEWe must download and run this file to decompress its content, because we will need access to Silverlight 4 official documentation in due course.
Expression Blend for .NET 4
Blend_Trial_en.exeThis tool will enable us to create content that targets Silverlight 4 and to create rapid prototypes with the SketchFlow tool.
Silverlight Toolkit (Updated for Silverlight 4 compatibility)
Silverlight_4_Toolkit_April_2010.msiIt is convenient to download the latest stable release. This toolkit provides a nice collection of Silverlight controls, components, and utilities made available outside the normal Silverlight release cycle. It will be really helpful to use these controls to provide even more attractive user interfaces. Besides, it includes more Silverlight themes.
- Run the installers in the same order in which they appear in the above table and follow the steps to complete the installation wizards.
- Once the installations have successfully finished, run Visual Studio 2010 or Visual Web Developer 2010 (or later).
- Select File | New | Project... or press Ctrl+Shift+N. Select Visual C# | Silverlight under Installed Templates in the New Project dialog box. You will see many Silverlight templates, including Silverlight Business Application and WCF RIA Services Class Library, as shown in the following screenshot:

Silverlight Toolkit is a Microsoft project offering many rich controls, components, and utilities that can help us to enhance our Silverlight UI (User Interface). As we want to create a very attractive UI for SharePoint, it is convenient to get familiar with its features. Follows these steps to see the controls in action and to change the values for many of their properties.
- Select Start | All Programs | Microsoft Silverlight 4 Toolkit April 2010 | Toolkit Samples and your default web browser will display a web page with a Silverlight application displaying a list of the controls organized in ten categories as follows:
- Controls
- Data
- DataForm
- Data Input
- DataVisualization
- Input
- Layout
- Navigation
- Theming
- Toolkit
- Click on a control name under the desired category and the right panel will display the control with different values assigned for its properties, creating diverse instances of the control. For example, the following screenshot shows many instances of the
Ratingcontrol under the Input category.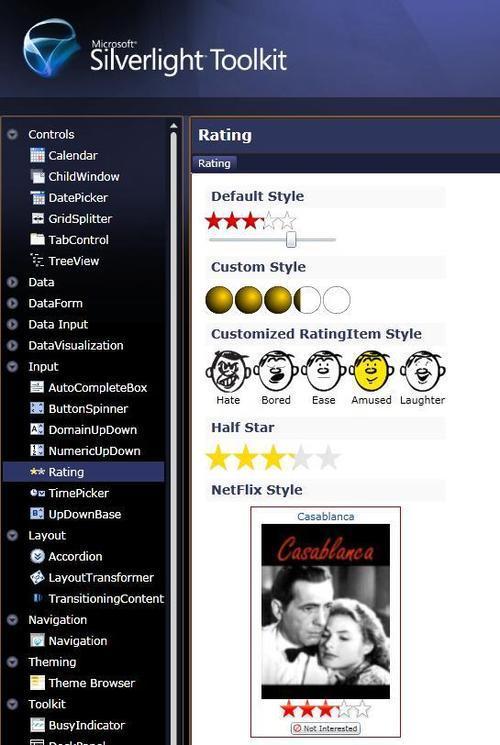
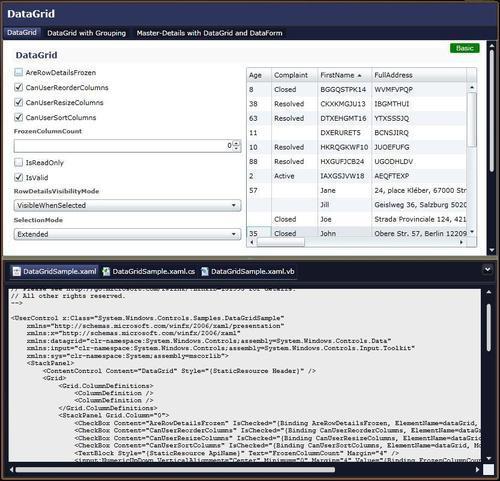
- Click on the buttons shown at the bottom of the Web page and you will be able to see both the XAML and the C# code used to create the sample for the control. For example, the following screenshot shows the XAML code for the
DataGridcontrol example,DataGridSample.xaml. You can also click onDataGridSample.xaml.csand check the C# part. This control appears under the Data category.
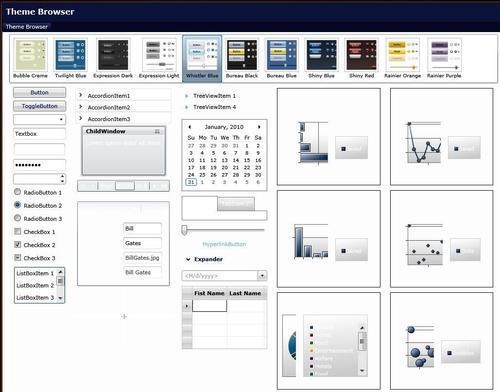
Silverlight Toolkit also includes 11 themes that allow us to change and improve the overall look-and-feel for our Silverlight UI. They are:
- Bubble Creme
- Bureau Black
- Bureau Blue
- Expression Dark
- Expression Light
- Rainier Purple
- Rainier Orange
- Shiny Blue
- Shiny Red
- Twilight Blue
- Whistler Blue
Click on Theme Browser under the Theming category and you will be able to select one of the themes shown in the previous list to preview the look-and-feel of many controls. The following screenshot shows the preview for the Whistler Blue theme: