CHAPTER 8
Groove Tools and Techniques
The expression “getting into the groove” of a piece of music often refers to a feeling that’s derived from the underlying foundation of music: rhythm. With the introduction and maturation of MIDI and digital audio, new and wondrous tools have made their way into the mainstream of music production. These tools (Figure 8.1) can help us to use technology to forge, fold, mutilate and create compositions that make direct use of rhythm and other building blocks of music through the use of looping technology. Of course, the cyclic nature of loops can be repeat-repeat-repetitive in nature, but new toys and technology and compositional techniques for looping can inject added flexibility, control and real-time processing into a project in wondrously expressive ways.
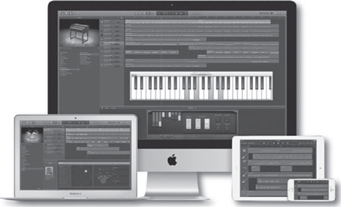
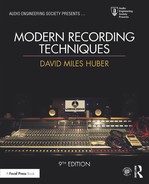
FIGURE 8.1
Probably the most widely used groove tool on the planet—GarageBandTM for the Mac and iDevices.
In this chapter we’ll be touching on many of the approaches and software packages that have evolved (and continue to evolve) into what is one of the fastest and most accessible facets of personal music production. It’s literally impossible to hit on all of the finer operational points of these systems; for that, I’ll rely on your motivation and ingenuity to:
■ Download many of the software demos and apps that are readily available
■ Delve into their manuals and working tutorials the Mac and iDevices.
■ Begin to create your own grooves and songs that can then be integrated into your music or those of collaborators
If you do these three things, you’ll be shocked and astounded as to how much you’ll learn, and these experiences will directly translate into skills that’ll widen your production horizons and possibly change your music.
THE BASICS
The basic idea behind groove-based tools rests with tempo matching, the idea that various rhythms, grooves, pads and any other imaginable sounds of various tempos, lengths and often musical keys, can be artfully manipulated and crafted together into a single, working song.
Because groove-based tools often deal with rhythms and cyclic-based measures that are pulled from various musical sources, the technical factors that need to be managed are:
■ Sync
■ Tempo and length
■ Time and pitch change techniques
The aspect of sync relates to the fact that the various loops in a groove project will need to sync up with each other (or with multiple lengths and timings of each other). It almost goes without saying that multiple loops which are successively or simultaneously triggered must have a synchronous timing relationship to one another—otherwise, it’ll all end up being a jumbled mess of sound.
The next relationship relates to the aspect of tempo. Just as sync is imperative, it’s also necessary for the files to be adjusted in length (time stretching), so that they precisely match the currently selected tempo (or a relative multiple of the session’s tempo).
A final aspect in groove production is associated with time and pitch change techniques. This is the process of altering a sound file (often which is rhythmically repetitive and short in length) to match the current session tempo and to synchronously align them within the software by using variable sample- and pitch-shifting techniques. Using these basic digital signal processing (DSP) tools, it’s possible to alter a sound file’s duration (varying the length of a program by raising or lowering its playback sample rate) and/or to alter its relative pitch (either up or down). In this way, loops can be matched up or music ally combined by using any of following time and pitch change combinations:
■ Time change: A program’s length can be altered without affecting its pitch.
■ Pitch change: A program’s length can remain the same while pitch is shifted either up or down.
■ Both: Both a program’s pitch and length can be altered using resampling techniques.
By setting the loop program to a master tempo (or a tempo at that point in the song), an audio segment or file can be imported, examined as to its sample rate or length and then recalculated to a new relative tempo that matches the current session tempo. Voilà! We now have a defined segment of audio that matches the tempo of all of the other segments in a project, allowing it to play and interact in relative sync with the other defined segments and/or loop files. (Note: more in-depth reading on pitch and time changing can be found in Chapter 15.)
Along the same line, these pitch-changing techniques can be applied to change the relative pitch of the loop so that it matches (or best fits into) the musical key of the session. This final key to the musical jigsaw puzzle allows us to mix and match sounds or loops of various musical keys in ways that otherwise would never fit together, allowing new and interesting combination of sounds, textures and rhythms to be created.
Pitch Shift Algorithms
It’s also important to note that time-shifting processes are created according to a specific program algorithm. This means that the sound is shaped according to a set of basic mathematic/programming calculations. More often than not, the music program will let you choose between a set of algorithms, according to the type of sound that’s being processed (Figure 8.2). For example, a basic drum loop might sound really good when a “beats” detection algorithm is chosen, while a long, slow pad might sound totally unnatural with the same settings. In short, it’s always a good idea to be aware of the various time shift options that are available to you and to take the time to make processing choices that best match the music or selected segment at hand. Additionally, these algorithms will also vary from one program to program. For example, the “pad” (a long, continuous series of chords) setting on one looping program might sound entirely different from that of another DAW or program—just something to be aware (and possibly take advantage) of.

FIGURE 8.2
Different DAWs will offer various pitch shift algorithms that have their own sonic characteristics. (a) Ableton Live. (Courtesy of Ableton AG, www.ableton.com) (b) Cubase/Nuendo. (Courtesy of Steinberg Media Technologies GmbH, a division of Yamaha Corporation, www.steinberg.net)
WARPING
In addition to basic pitch- and time-shifting, most looping tools make use of a tempo and sound processing technique, called warping. This process uses various time-shift tools to match the timing elements of a sound file by detecting and entering hitpoint markers (Figure 8.3) into the sound file. These markers are most often automatically detected at percussive transient points, in a way that makes it easier for the time and pitch shifting process to best match the specific file to the session tempo (most often by adjusting the transient timings, so they fall directly on the beat and its subdivisions).
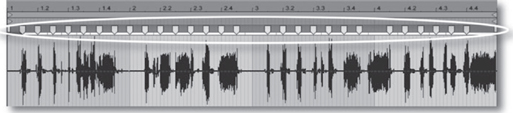
FIGURE 8.3
Hitpoint markers can be used to show and manipulate events and percussive transients in a sound file. (Courtesy of Ableton AG, www.ableton.com)
In addition to helping the loops better match the session tempo, warp hitpoint markers can also be manually moved and manipulated to change the basic “feel” of a loop. For example, various hitpoints can be moved ahead or back in time give the loop an entirely new feel or swing. In short, take the time to experiment and learn about how you can shape and create new sounds by using warp and hitpoint technology, as there are countless online videos on this subject that are both insightful and fun.
Beat Slicing
In addition to warp’s use of pitch- and time-stretch techniques, another method, called beat slicing, makes use of an entirely different process to match the length and timings of a sound file segment to the session tempo. Rather than changing the speed and pitch of a sound file, the beat slicing process actually breaks an audio file into a number of small segments by detecting the transient events within the loop and then automatically placing the new slices at their appropriate (and easily adjustable) tempo points, according to automatic or user-definable sensitivity and detection controls. The process then simply changes the length and timing elements of a segment by simply adding or subtracting time between these slices.
The most universally used format for beat slicing is the REX file (Figure 8.4), which was originated by Propellerhead. These files can be found in countless sample libraries as pre-formatted beat slice loops that can simply be loaded into most of the currently-available DAWs (although you may need to install Propellerhead’s free Rex Shared Library in order to import and work with these loops). If you would like to edit and create your own loops from your own sound files, Propellerhead’s ReCycle program can be used.
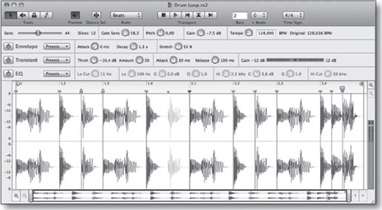
FIGURE 8.4
ReCycle Groove Editing Software. (Courtesy of Propellerhead Software, www.propellerheads.se)
In short, REX files don’t change the pitch, length or sound quality of the loop, in order to match the current DAW’s session tempo. Instead, these transient-detected hit-point slices are compressed or spread out in time to match the current tempo. When the tempo is increased, the slices are pulled together in time and simply overlap. When the tempo is slowed, the slices are spread out in time. Too slow of a tempo will actually cause audible gaps to fall between the cracks. In order to reduce this effect, a “stretch” algorithm can be used that doesn’t actually time-stretch the loop file, but instead uses a small sustain section within the loop, reverses it and adds it to the end of the file, essentially smoothing out the gaps with quite acceptable results. From all of this, it’s easy to understand why the beat-slicing process often works best on percussive sounds which have silence between the individual hitpoints.
Audio to MIDI
Another ingenious way to allow your loops to change to match the session tempo, key or alter in almost any other way is to convert the audio loop into a MIDI segment. This can be done using an audio-to-MIDI tool that can be found in many DAWs. Just as all time stretch algorithms are not created equal and can often sound quite different from one program to the next; audio-to-MIDI algorithms can yield drastically different results. Likewise, each software package will often offer different algorithms for different types of audio material (i.e., for converting harmony, melody, drum or sustained pad passages, as seen in Figure 8.5).

FIGURE 8.5
Certain DAWs are able to convert an audio track to a MIDI track. (Courtesy of Ableton AG, www.ableton.com)
Once you get into the process of converting audio to MIDI, you’ll quickly begin to notice that it can be a very hit-or-miss process. You might get totally lucky on your first try and the musical line will translate perfectly into a MIDI file that can be altered in pitch, time, sound (or almost any other imaginable parameter)—or—you might find that it will need to be edited (notes corrected, added, removed, quantized, etc.) in order for it to be acceptable for the project. With patience, however, the ability to alter a wimpy bass line into a powerful growler that perfectly fits your needs is an awesome and ever-changing tool.
As with so many other things we’ve discussed, the sky (and your imagination) is the limit when it comes to the tricks and techniques that can be used to match the tempos and various time-/pitch-shift elements between loops, MIDI and sound file segments. I strongly urge you to take the time to read the manuals and watch videos about the various loop and DAW software packages to learn more about the actual terms and procedures and then put them into practice. If you take the time, I guarantee that your production skills and your outlook on these tools will greatly expand.
For the remainder of this chapter, we’ll be looking at several of the more popular groove tools and toys. This is by no means a complete listing, and I recommend that you keep reading the various trade magazines, websites, and other resources, for new and exciting technologies that regularly come onto the market.
GROOVE HARDWARE
Since the “groove” is so important to the foundation of modern dance and music production in general, groove-related hardware (Figure 8.6) has been around for a long time and continues to be used by musicians and producers alike. These instruments (and they truly are instruments) range in form and function from being strictly drum and percussion in nature (like the vintage Roland TR-808), to newer groove keyboards that are both rhythmic and melodic in nature, to the European models that dive deep into the dance culture (my personal favorites). These devices not only offer up a wide range of press-’n’-play sounds and sequences, but can be user programmed to fit the requirements of a special composition.
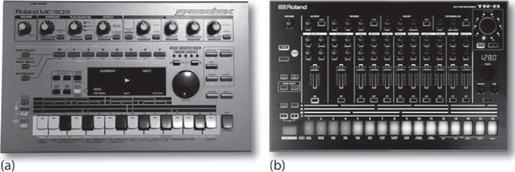
FIGURE 8.6
Groove hardware synths. (a) Older Roland MC-303 Groovebox. (b) Roland TR-8 Rhythm Performer. (Courtesy of Roland Corporation, www.roland.com)
One of the best ways to get into the timing ballpark between your DAW, external groove or other MIDI hardware devices, is through the use of MIDI timing messages (MIDI Clock). In short, you can select your DAW to output MIDI timing clock data, while slaving your external groove or MIDI hardware to this clock (look in your manual for external MIDI clock). In this way, when the DAW begins playback, MIDI timing messages will instruct the hardware to begin playing at the proper time and tempo—definitely a useful feature.
For those who don’t want to deal with an external MIDI hardware clock, there is another option. With the advent of powerful time- and pitch-shift processing within most DAWs, the sounds from these hardware devices can be pulled into a session without too much trouble. For example, a single groove loop (or multiple loops) could be recorded into a DAW (at a bpm that’s fairly close to the session’s tempo), edited and then imported into the session, at which time the loop could be easily stretched into the proper time sync, allowing it to be looped in sync with the song. Just remember, necessity is the mother of invention—patience and creativity are probably your most important tools in the looping process.
GROOVE SOFTWARE
Software is often the place where grooves come to life. This can take many forms, including looping capabilities that are (to varying degrees) available within most DAWs, plug-in instruments and various iOS applications. The possibilities are practically limitless, allowing combinations and manipulation of beats, patterns, sequences and pads in ways that can be addicting, fun and will help get the groove moving in your latest music track.
Looping Your DAW
Most digital audio workstations offer various features that make it possible to incorporate self-produced and/or imported loops grooves into a session. This can be as simple as making an edit cut on the beat at the beginning and end of a 4-, 8- or 16-bar segment and then repeating the newly-created loop multiple times. Alternatively, a sample library loop can also be imported into a session, where it can be repeated and manipulated in order to fit the song. If the imported loop is at a different length and tempo than the song’s session, most DAWs can use time/pitch-shifting techniques to shift the loop length, so that it matches the session’s current tempo. Said another way, if a session has been set to a tempo of 115 bpm, and if a 100 bpm loop is imported at a specific measure, by simply calling up the DAW’s snap-to-grid and automatic time-stretch functions, the segment can be time-stretched until it fits snuggly into the session’s native tempo (Figure 8.7). Once done, the loop can be manually looped and manipulated to your heart’s content.
As was mentioned, different DAWs and editing systems will have differing ways of tackling a time-stretch situation, with varying degrees of ease and accuracy. It’s often a good idea to listen to the various stretch algorithms (beat, pad, vocal, etc.) and manually audition each option, so as to get the best possible sound. Just remember, there are usually no hard and fast rules. With planning, ingenuity and your manual’s help, you’ll be surprised at the number of ways that a looping problem can be turned into an interesting sonic and learning opportunity. When a studio DAW is used in conjunction with groove loop toys, MIDI hardware and various instrument plug-ins, each of these tools can work together to play an important role in the never-ending creative process of producing modern music.

FIGURE 8.7
Most production workstations allow a loop or sound file to be resized to fit into the session’s tempo.
Loop-based Audio Software
Loop-based audio systems are groove-driven DAWs, music programs or plug-ins that are designed to let you drag and drop pre-recorded or user-created loops and audio tracks into a graphic production interface. At their basic level, these programs differ conceptually from their traditional DAW counterpart in that the pitch- and time-shift architecture is so variable and dynamic that, even after the basic rhythmic, percussive and melodic grooves have been created their tempo, track patterns, pitch, session key, etc., can be quickly and easily changed at any time. With the help of custom, royalty-free loops (available from many manufacturer and third-party companies), users can quickly and easily experiment with setting up grooves, backing tracks and creating a sonic ambience by simply dragging the loops into the program’s main sound file view, where they can be arranged, edited, processed, saved and exported.
One of the most interesting aspects of the loop-based editor is its ability to match the tempo of a specially programmed loop to the tempo of the current session. Amazingly enough, this process isn’t that difficult to perform, because the program extracts the length, native tempo and pitch information from the imported files and, using the previously-mentioned digital time- and pitch-change techniques, adjusts the loop to fit the native time and pitch parameters of the current session. This means that loops of various tempos and musical keys can be automatically adjusted in length and pitch so as to fit in time with previously existing loops—just drag, drop and go!
Of course, the graphic user interfaces (GUIs) between looping software editors and tools can differ greatly. Some layouts use a track-based system that lets you enter or drag a preprogrammed loop file into a track and then drag it to the right in a way that repeats the loop. Again, it’s worth stressing that DAW editors will often include such looping functions that can be either basic in nature (requiring manual editing and/or sound file processing) or advanced (having any number of automated loop functions). Other loop programs make use of visual objects that can be triggered and combined into a real-time mix by clicking on an icon or track-based grid.
By far, one of the most popular groove/looping programs is Live from Ableton (Figure 8.8). Live is an interactive loop-based program that’s capable of recalculating the time, pitch and tempo structure of a sound file or easily defined segment, and then entering that loop into the session at a defined global tempo. This means that a segment of any length or tempo that’s been pulled into the session grid will be recalculated to the master tempo and can be combined, mixed and processed in perfect sync with all other loops in the project session.

FIGURE 8.8
Ableton Live performance audio workstation: (a) Arrangement View; (b) Session View. (Courtesy of Ableton AG, www.ableton.com)
In Live’s Arrangement View, as in all traditional sequencing programs, everything happens along a fixed song timeline, allowing the loops or tracks to be manipulated in a standard timeline. The program’s Session View, however, breaks this traditional paradigm by allowing media files to be mapped onto a grid as buttons (called clips). Any clip can be played at any time and in any order in a random fashion that lends itself to interactive performance both in the studio and on-stage. Functionally, each vertical column, or “track”, can play only one clip at a time. Any number of “clips”, which are laid out in horizontal rows, can be played in a loop fashion by clicking on its launch button. By clicking on a “scene” launch at the screen’s right, every clip in that row will simultaneously begin playback. Of course, Live is additionally capable of fully incorporating MIDI into a project or live interactive performance, along with a wide range of editing tools, effects and software instruments (both within the program and giving access to external plug-in instruments and effects).
Another popular groove and production-related tool is Reason from the folks at Propellerheads. Reason differs from most sound file-based looping programs in that it’s an overall music production environment which includes a MIDI sequencer (Figure 8.9a), as well as a wide range of software instrument modules (Figure 8.9b) that can be played, mixed and integrated into a comprehensive music production environment that can be controlled from any external keyboard or MIDI controller. Reason also includes a large number of signal processors that can be applied to any instrument or instrument group, under full automation control.
Try This: Having Fun with a Loop-Based Editor
1. Go to www.acidplanet.com and download their free version of ACID Xpress; or
2. Go to www.ableton.com and download their trial version of Ableton Live.
3. Download a free set of ACID 8pack set of loops from www.acidplanet.com (under “free downloads” select “free 8pack loops” and download a few of your favorites), or simply use the included loops within the Abelton demo.
4. Load the individual loops.
5. Read the program’s manual and/or begin to experiment with the loops.
6. Mess around with the tempo and musical keys.
7. Copy and duplicate the various loop tracks to your heart’s content until you’ve made a really fun song!
8. Import some of your own samples and incorporate them into the song.
9. Save and export the session to play for your friends!
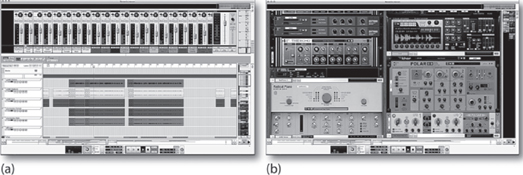
FIGURE 8.9
Reason Music Production Software: (a) sequencer and mixer window; (b) instrument and effects music production environment. (Courtesy of Propellerhead Software, www.propellerheads.se)
In essence, Reason is a combination of modeled representations of vintage analog synthesis gear, mixed with the latest of digital synthesis and sampling technology (Figure 8.10). Combine these with a modular approach to signal and effects processing, add a generous amount of internal and remote mix and controller management (via external MIDI controllers), top this off with a quirky yet powerful sequencer, and you have an integrated software package that is powerful and convenient.

FIGURE 8.10
Examples of Reason’s software instruments: (a) SubTractor polyphonic synth module; (b) NN-XT sampler module. (Courtesy of Propellerhead Software, www.propellerheads.se)
Once you’ve finished the outline of a track, the obvious idea is to create new instrument tracks that can be combined in a traditional multitrack building-block approach, until a song begins to form. Additional sounds, loops and patches are widely available for sale or for free as “refills” that can be added to your collection to greatly expand the software’s palette.
Feel free to download the demo and take it for a spin. You’ll also want to check out the Reason Basics video clips. Due to its all-in-one production nature, this program might take a while to master, but the journey just might open you up to a whole new world of production possibilities.
REWIRE
In Chapter 7, we learned that ReWire is a special protocol that was developed by Propellerhead Software and Steinberg, which allows audio to be streamed between two simultaneously running computer applications. Unlike a plug-in, where a task-specific application is inserted into a compatible host program, ReWire allows the audio and timing elements of a supporting program to be seamlessly integrated into another host program that also supports ReWire. For example, DAWs such as Cubase/Nuendo and Pro Tools support ReWire, allowing production environment programs such as Ableton Live and Reason to be directly “wired” in software into the production inner-workings of a DAW session. This allows audio to be routed through the DAW’s virtual mixer or I/O, while making it possible for the timing elements of the client application to be synchronously controlled by the host DAW. This capability allows for greatly expanded instrument and production options within a studio or on-stage environment.
If you feel up to the task, download a few program demos, consult the involved program manuals, and try it out for yourself. The most important rule to remember when using ReWire is that the host program should always be opened first and then the client (the secondary program that’s being ReWired into the DAW). When shutting down, the client program should always be closed first.
GROOVE AND LOOP-BASED PLUG-INS
It’s a sure bet that for every hardware looping tool, there are far more software plug-in groove tools and synths (Figure 8.11) that can be inserted into your DAW. These amazing software wonders often make life easier by:
■ Automatically following the session tempo or tempo map
■ Allowing I/O routing to plug directly into the DAW (without the need for ReWiring)
■ Making use of the DAW’s automation and external controller capabilities
■ Allowing individual or combined groove loops to be easily imported as audio into a session
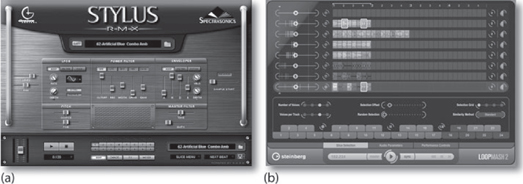
FIGURE 8.11
Groove-based Plug-ins: (a) Stylus RMX real-time groove module. (Courtesy of Spectrasonics, www.spectrasonics.net); (b) Steinberg’s LoopMash2 Groove plug-in. (Courtesy of Steinberg Media Technologies GmbH, a division of Yamaha Corporation, www.steinberg.net)
These software instruments come with a wide range of sounds (and/or added “sound packs”) that can often be edited and effected using an on-screen user interface, and can often be directly controlled from an external MIDI controller.
DRUM AND DRUM LOOP PLUG-INS
Virtual software drum machines are also part of the present-day landscape and can be used in a stand-alone, plugged-in or rewired production environment. These plug-ins (Figure 8.12) are capable of injecting a wide range of groove and sonic spice options into a digital audio and/or MIDI project at the session’s current tempo, allowing accompaniment patterns that can range from being simple and non-varying over time, to individually complex instrument parts that can be meticulously programmed into a session or performed on the fly. In addition, most of these tools include multiple signal paths that let you route individual or grouped voices to a specific mixer or DAW input. This makes it possible for isolated voices to be individually mixed, panned or processed (using equalization, effects, etc.) in a session in new and interesting ways.
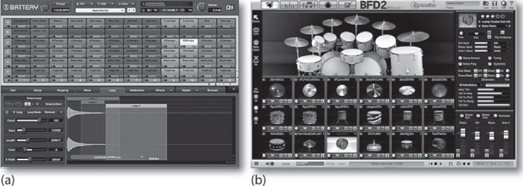
FIGURE 8.12
Virtual software drum machines: (a) Battery 3 virtual drum and loop module. (Courtesy of Native Instruments GmbH, www.nativeinstruments.com); (b) BFD2 acoustic drum library module. (Courtesy of FXpansion, www.fxpansion.com)
PULLING LOOPS INTO A DAW SESSION
When dealing with loops in modern-day production, one concept that needs to be discussed are the various ways that grooves and loops can be managed within a DAW session—such as:
■ It’s certainly possible to ReWire a supported client program in conjunction with the host program. This, however, will often require special setup, making sure that the programs are opened in the right order and that each are opened with the right session files. You also should be aware that these applications might use up valuable computer program and memory resources.
■ You might have a groove/loop plug-in inserted into a DAW session (a far more automated process, that will always open directly within the session).
■ One of the better ways for freeing up resources and for creating an actual file that can be processed and backed up, is to export the groove/loop as a sound file track. This can be done in several ways (although with forethought, you might come up with a new way that works best for you):
1. The instrument track can be soloed and exported to an audio track in a contiguous fashion from the beginning “00:00:00:00” of the session to the end of the instrument’s performance.
2. In the case of a repetitive loop, a defined segment (often of a precise length of 4, 8, or more bars that occurs on the metric boundaries) can be selected for export as a sound file loop. Once exported, it can be dropped into the session and then looped, processed and easily manipulated in any number of straightforward ways.
3. In the case of an instrument or groove tool that has multiple parts or voices, each part can be soloed and exported to its own looping track. This will give you a far greater degree of control over variations, effects and any number of DAW parameters than otherwise would be possible during production and mixdown.
4. If you export a plug-in, loop tool, etc., it’s always a good idea to save it within the session (and probably disable it, so that it doesn’t take up resources), or to take a screenshot of the settings and place it in a “docs” or “pics” folder within the session (should you wish to manually recall it at a later time).
5. It also goes without saying that you’ll want to properly document your export, just as you would with any recorded track. You might include the instrument type/name that was used directly within the sound file name or within the track’s note area … along with any other identifying information. The confused brain (not to mention lost time and frustration that you might save if a change is needed or a problem arises at a later time) will almost certainly be your own.
■ Obviously, the best approach to exporting loops and creating a loop library is to devise a system that makes sense to you and then stick with that personal organizational system.
GROOVE CONTROLLERS
An increasing number of groove-based software/controller systems (Figure 8.13) are appearing on the market that control or work as stand-alone and/or plug-in based groove software systems. These controllers offer both hardware control over the various software parameters and direct performance playing surfaces (often mimicking basic drum machine pad control surfaces). Although some of these controllers are dedicated to playing and manipulating drum kits and percussion sounds, others allow for sample file data to be entered and edited in the system within a virtually unlimited performance environment.

FIGURE 8.13
Groove-based software/controller systems: (a) Maschine groove hardware/software production system. (Courtesy of Native Instruments GmbH, www.nativeinstruments.com); (b) Spark Drum Machine. (Courtesy of Arturia, www.arturia.com)
In addition to using the hardware surface to directly control the system’s groove software (and possibly other software offered by that company), many of these controllers can be used as a controller for other third-party software plug-ins. For example, a hardware controller might be able to directly control sampler plug-ins, synths and other drum machine plug-ins. Often, this will take ingenuity and a willingness to wade your way through the vast number of software integration options.
DJ Software
In addition to music production software, there are a growing number of software players, loopers, groovers, effects and digital devices that are available on the market for the twenty-first century digital DJ. These hardware/software devices make it possible for digital grooves to be created from a laptop, iPad, controller, specially fitted turntable or digital turntable (jog/scratch CD player). Using such hardware-/software-based systems, it’s possible to sync, scratch and perform with vinyl and/or digital media with an unprecedented amount of live performance and wireless interactivity that can be used on the floor, onstage or in the studio (Figure 8.14).

FIGURE 8.14
Digital DJ Software: (a) Traktor portable laptop DJ rig. (Courtesy of Native Instruments GmbH, www.native-instruments.com); (b) Serato DJ. (Courtesy of Serato Audio Research, www.serato.com)
OBTAINING LOOP FILES FROM THE GREAT DIGITAL WELLSPRING
In this day and age, there’s absolutely no shortage of pre-programmed loops that can be directly imported into a number of DAWs and groove editors. Some sound files might need to be manually edited, shaped or programmed to work with your DAW system, while others can be directly and straightforwardly entered into any loop-based program. Either way, these files can be easily obtained from any number of sources, such as:
■ CDs, DVDs or downloads that are included for free with newly purchased software
■ The Web (both free and for purchase)
■ Commercial media
■ Files within websites, promotions and CDs that are loaded as royalty-free demo content
■ Rolling your own (creating your own loops can add a satisfying and personal touch to your project)
It’s important to note that at any point during the creation of a composition, audio and MIDI tracks (such as vocals or played instruments) can be performed into a looped session in order to give the performance a fluid, alternative and interesting feel. It’s even possible to record a live instrument into a session with a defined tempo and then edit these tracks into loops that can be dropped into the current and future sessions to add a live performance touch.
As with most music technologies, the field of looping and laying tracks into a groove continues to advance and evolve at an amazing rate. It’s almost a sure bet that your current system will support looping, in one way or another. Take time to read the manuals, gather up some loops that fit your style and particular interests and start working them into a session. It might take you some time to master the art of looping or, then again, you might be a natural Zen master. Either way, the journey will help your production style grow and always lots of fun!