1. Unboxing and Setting Up Your New Chromebook

In this chapter, you discover what you need to do to start using your new Chromebook.
→ Turning On Your Chromebook—For the Very First Time
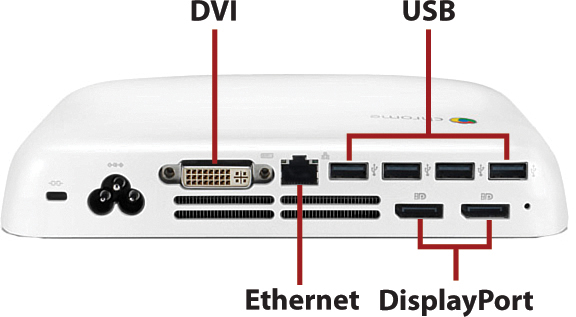
→ Connecting a Chromebook to Your Living Room TV
→ Creating a New Google Account
Setting up a new Windows or Mac computer can be a daunting process. There are all sorts of questions to answer and configurations to make. It’s typically a process that takes a half hour or more, and no one likes doing it.
Setting up a new Chromebook is different. The unboxing and setup process typically takes less than 15 minutes, and there’s really not much to it. Read on to learn what you need to do.
Unboxing Your Chromebook
A typical third-generation Chromebook is a simple affair. Even the box itself is simple, small and lightweight, and, believe it or not, easy to open.
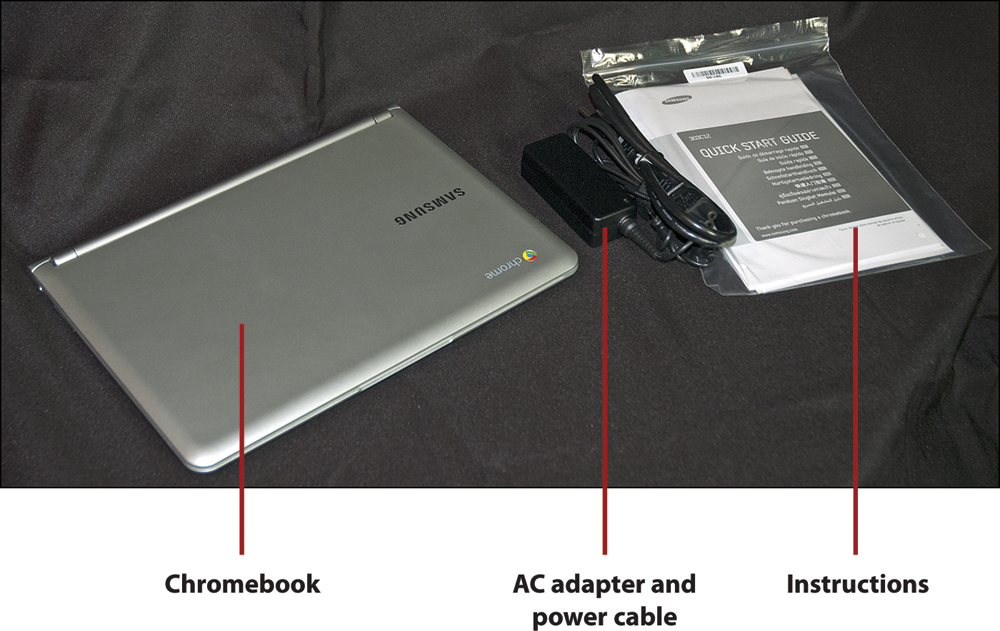
What do you find when you open the box? Well, every manufacturer does it differently, but here’s what Samsung packs inside its Chromebook box:
• The Chromebook itself, wrapped for protection
• AC adapter and power cable
• Instruction manual and quick start guide
That’s it. Obviously, there are no software or operating system disks because all of that is handled over the Internet. (And, as an added bonus, a Chromebook does not come with trial software versions or “crapware” pre-installed; you get a clean desktop on first boot up.)
Turning on Your Chromebook—For the Very First Time
Google claims that it takes less than a minute to set up a new Chromebook. The actual setup time is a bit longer than that, but only because the Chromebook goes online to download the latest version of the Chrome OS. That pushes the setup time to 10 to 15 minutes, depending on the speed of your Internet connection. Still, it’s a relatively fast and painless process.
Out of the box, it’s likely that your Chromebook’s battery is not fully charged. For that reason, you need to plug it into an external power source during initial setup and then leave your Chromebook plugged in for several hours to charge the battery.
Setting Up a Chromebook
Before you use your new Chromebook, you need to unbox it, plug it in, and set it up.
Google Account
Setup is easiest if you have a working Google Account before you start working with your new Chromebook. Although you can create a new Google Account during the setup process, it goes a lot faster if you can just enter your Google Account username and password. You can create a (free) Google Account from any web browser on any computer; just go to accounts.google.com/NewAccount and follow the onscreen instructions.
1. Remove the Chromebook from its box.
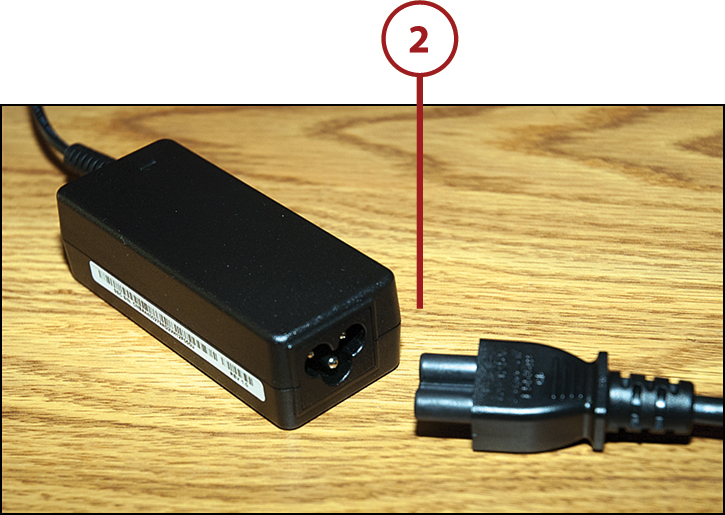
2. Connect the AC adapter to the power cable.
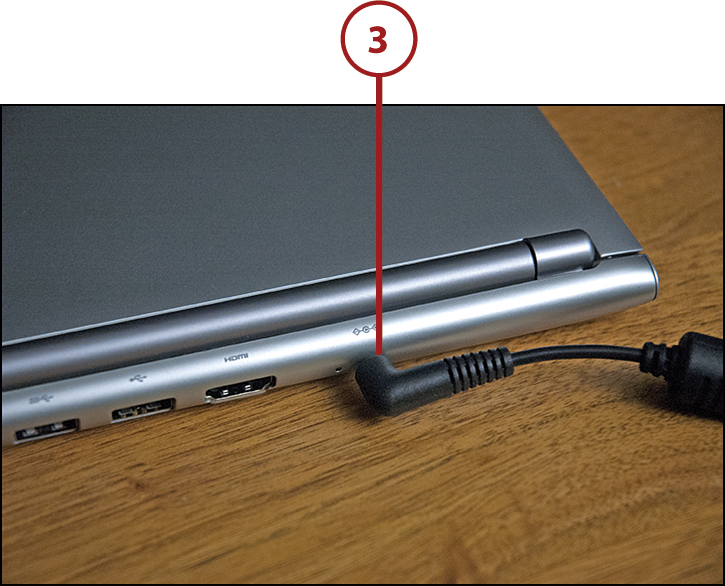
3. Connect the AC adapter to the power connector on the back of the Chromebook.
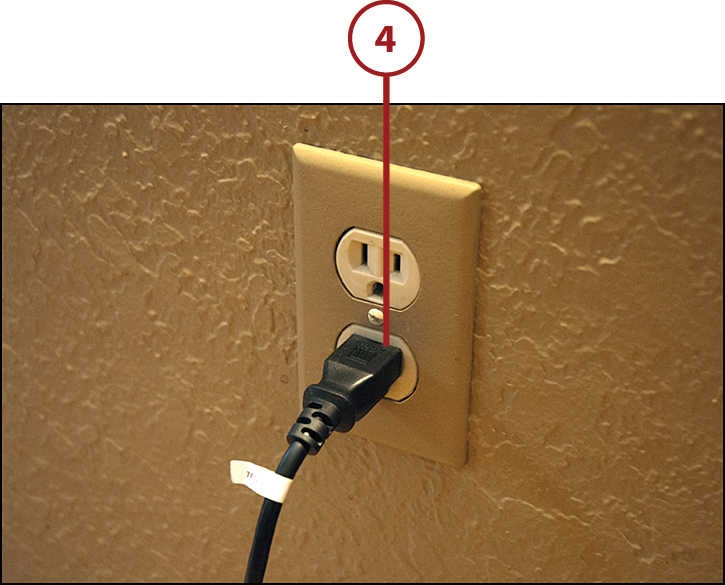
4. Plug the power cable into a working power outlet.

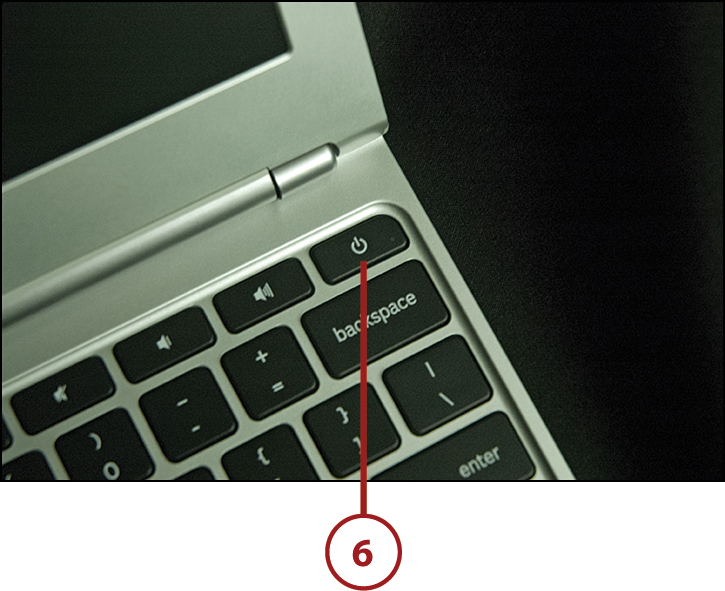
6. Press the Power button.
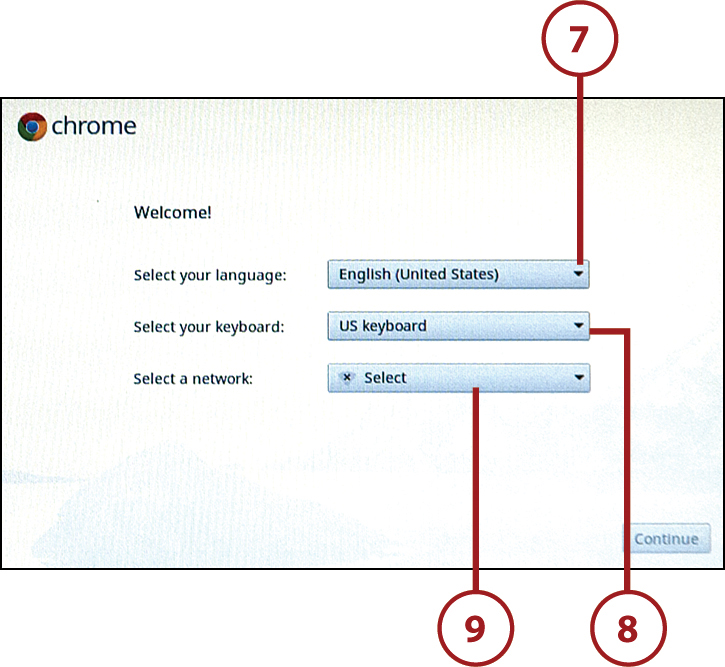
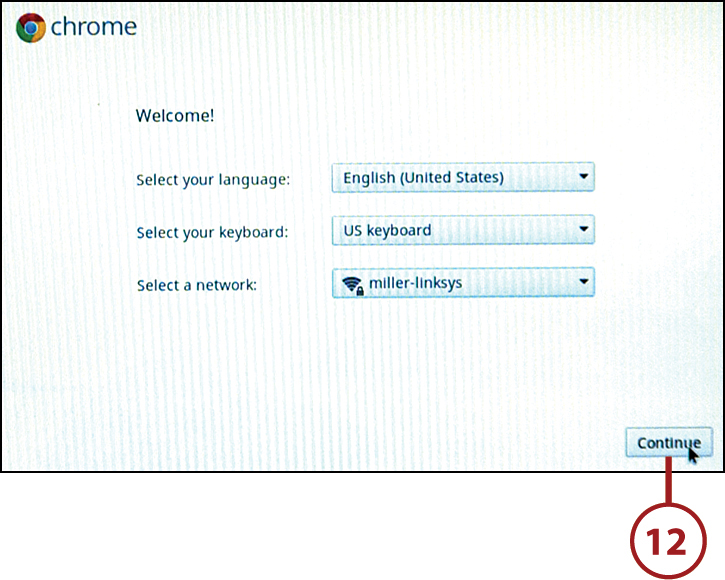
7. When the Welcome window appears, select your language from the list.
8. Select your keyboard from the list (typically US Keyboard).
9. Select your (wireless) network from the list.
Wireless Connections
Read more about managing Wi-Fi and 3G connections in Chapter 5, “Working Wirelessly.”
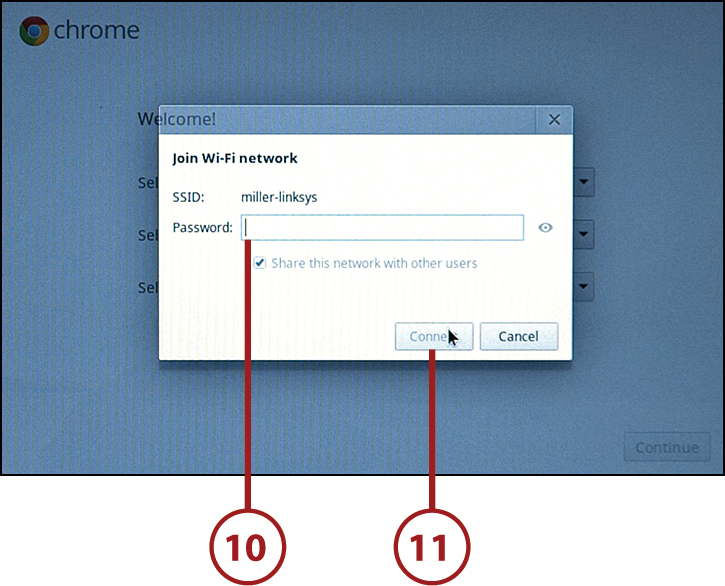
10. Enter your network password in the Join Wi-Fi Network window.
Secure Networks
Most home wireless networks are secure networks, which means you need to supply the appropriate password to access the network. In contrast, many public wireless networks are open networks, which means there is no password necessary to gain access.
11. Click the Connect button to return to the Welcome window.
12. Click the Continue button.
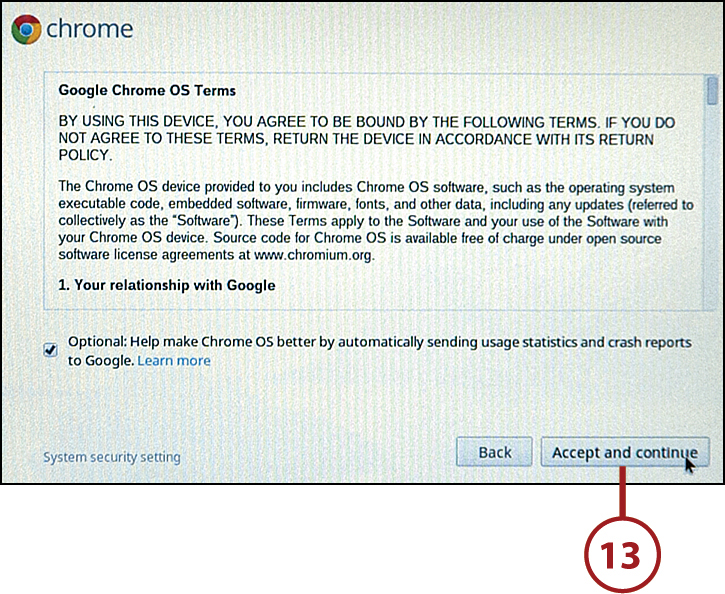
13. Read the Chrome OS Terms and then click the Accept and Continue button.
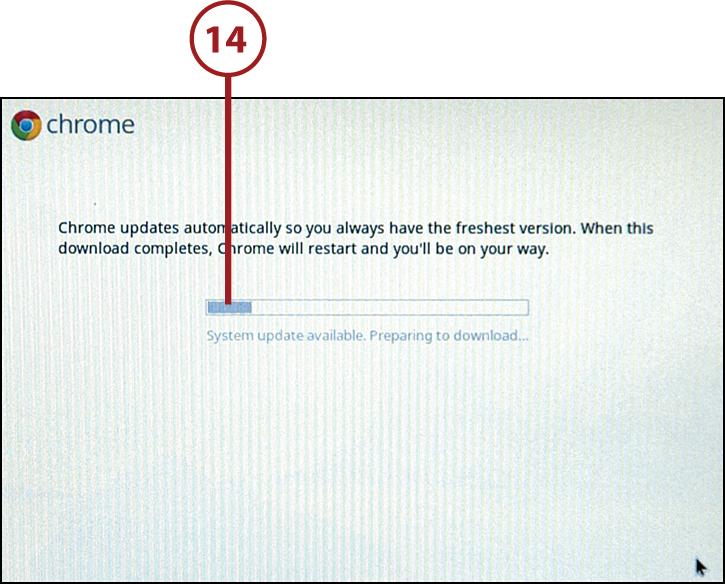
14. Chrome checks for operating system updates. This might take several minutes. When the update is complete, your Chromebook restarts. After restarting, your Chromebook displays the Sign In window.
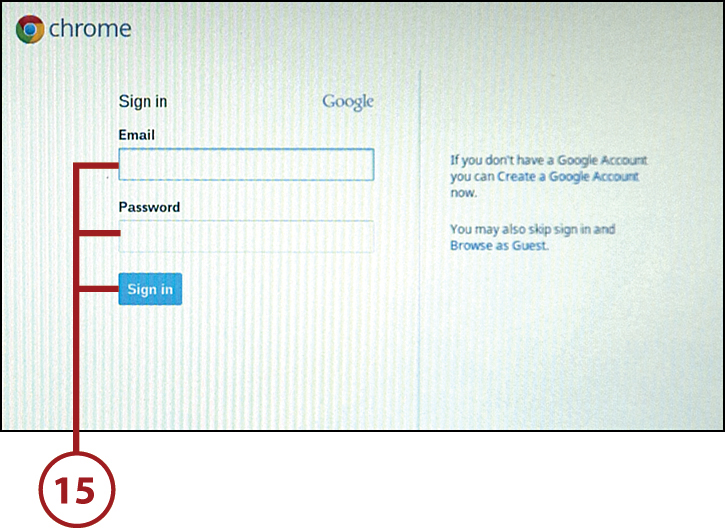
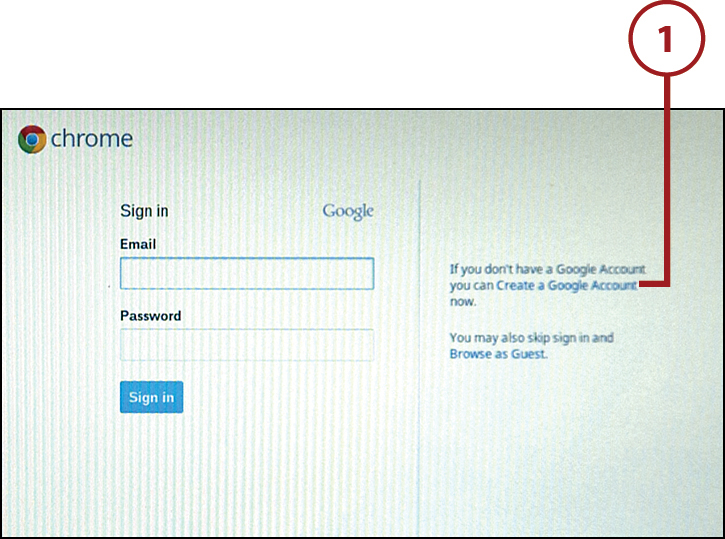
15. If you already have a Google Account, enter your email address and password and then click the Sign in button. If you do not yet have a Google Account, click the Create a Google Account Now link and follow the onscreen instructions. To use your computer as a guest without signing in, click the Skip Sign-In and Browse as Guest link.
16. Choose a picture to display for your account on the sign-in screen and then click OK. Google Chrome launches and displays the Welcome to Your Chromebook window.
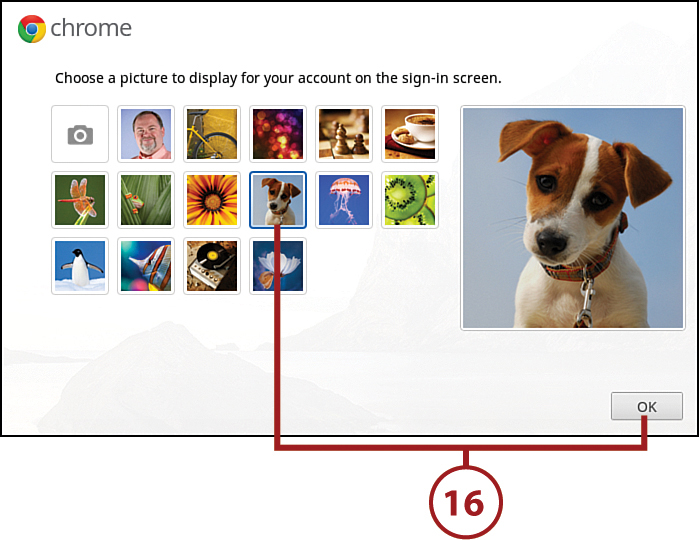
Change Your Picture
You can change your account picture at any later date. Find out how in Chapter 4, “Managing Multiple Users.”
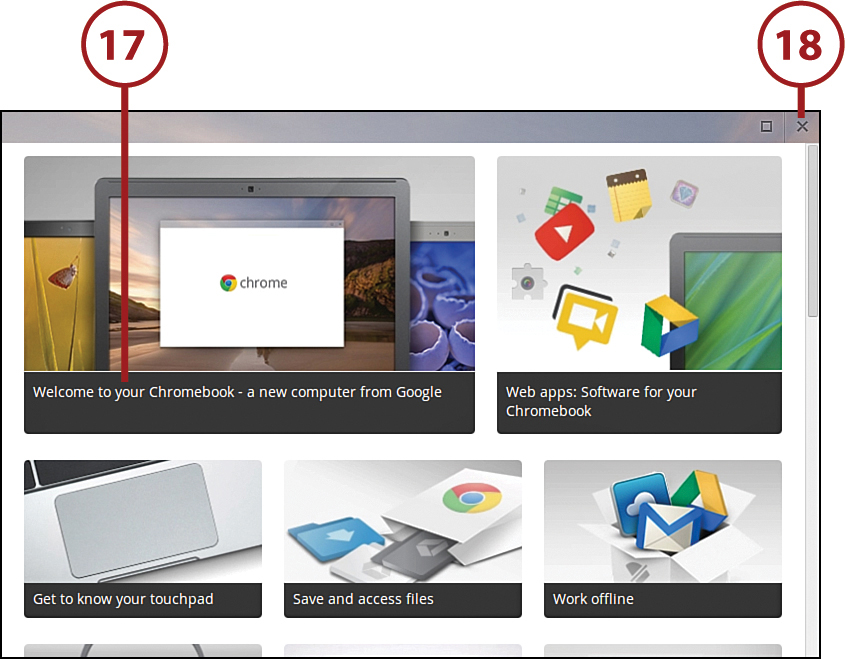
17. Click the options in the window to learn how to use your Chromebook’s touchpad, save and access files, and use other Chrome OS functions.
18. Click the X at the top-right corner to close the window.
You only need to set up your Chromebook once. After you’ve completed this initial setup, you go directly to the login screen each time you start up.
Creating a New Google Account
You must have a Google Account to use your Chromebook. Your Google Account serves as your user account in Chrome OS.
Guest Account
Although you can use a Chromebook with a guest account, this type of access has limited functionality. Read more about guest accounts in Chapter 4.
Creating a Google Account
A Google Account is completely free; it’s necessary not just for using your Chromebook, but also for accessing any Google application, such as Gmail or Google Docs. It’s easiest to create your Google Account before you first set up your Chromebook, although you can also create a new account during the Chromebook setup process.
1. Turn on your Chromebook, proceed to the sign-in screen, and click the Create a Google Account Now link. The Chrome browser connects to the Web and displays the Create a New Google Account page.
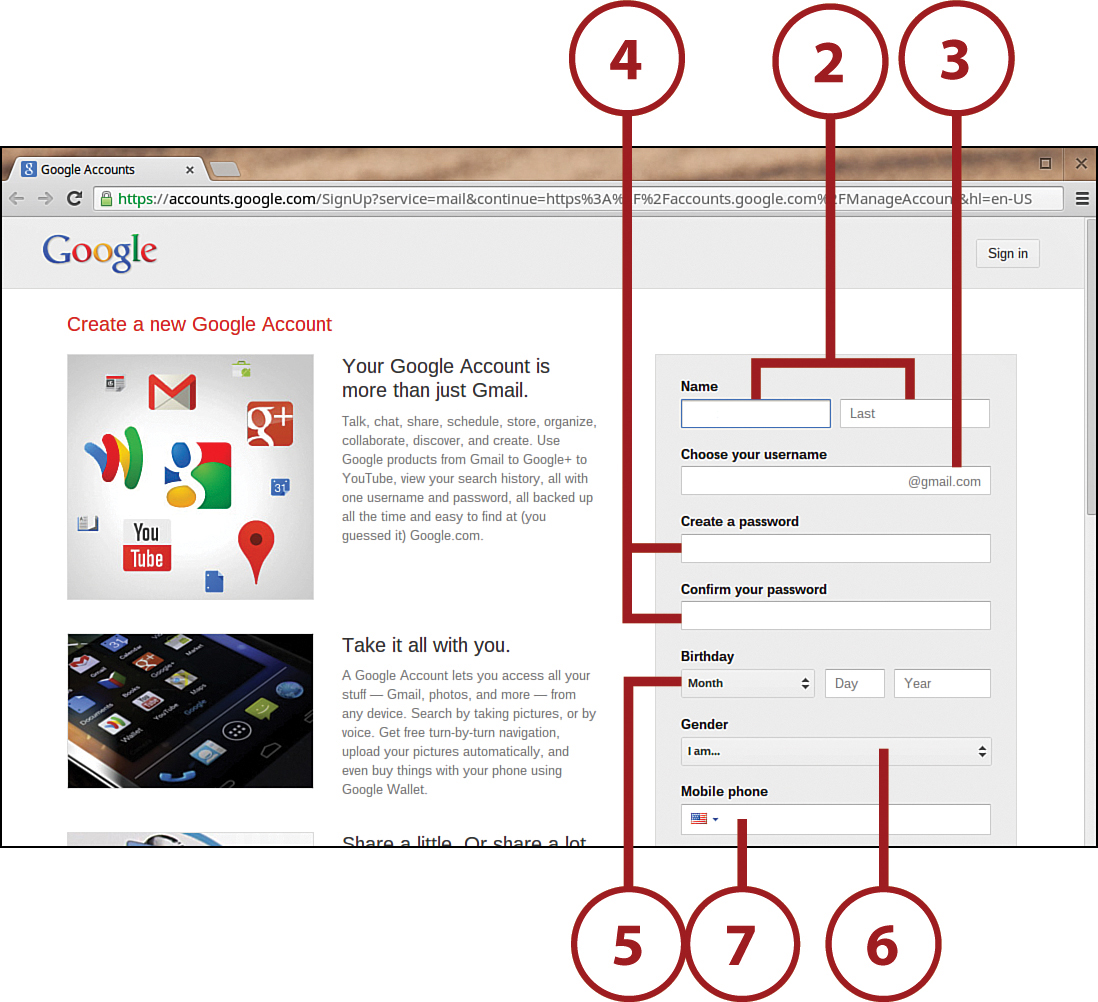
2. Enter your first and last name into the Name boxes.
3. Enter the name you’d like to use as a login into the Choose Your Username box.
Availability
If someone else is already using your chosen username, Google prompts you to try another name.
4. Enter your desired password (minimum of eight characters) into the Create a Password box and then re-enter it into the Confirm Your Password box.
5. Use the Birthday controls to enter the month, day, and year you were born.
6. Pull down the Gender list and select Female, Male, or Other.
7. Enter your mobile phone number into the Mobile Phone box.
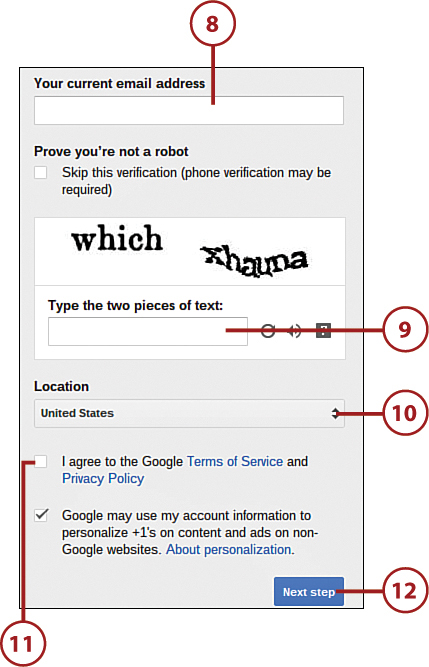
8. Enter an existing email address into the Your Current Email Address box.
9. Enter the verification text into the Type the Two Pieces of Text box.
10. Pull down the Location list and select your current country.
11. Check to agree to Google’s terms of service.
12. Click the Next Step button.
13. Add a profile photo if you want. (This is optional.) To add your photo, click the Add Profile Photo button and select the photo to use. Otherwise, click the Next Step button.
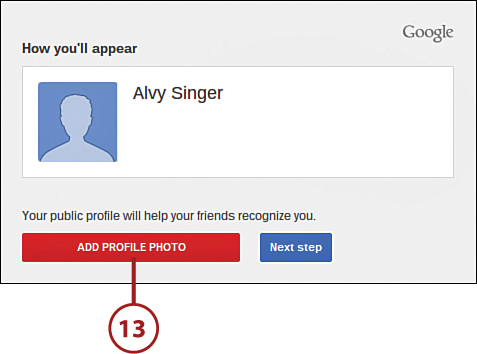
14. You’ve now created your account, and Google displays your new Gmail address. Click the Continue to Gmail button to set up your Gmail account, or close the window to proceed with the rest of your setup.
