4. Managing Multiple Users

In this chapter, you find out how to create multiple users for your Chromebook, how to switch from user to user, and how to use Chromebook’s Guest account
A Chromebook is only a piece of hardware; all your personal settings, information, and data are stored on the Web. As such, you can log into any Chromebook machine with your Google Account, and it will look and feel just like your own Chromebook. And it’s easy enough for other users to log into your Chromebook, as well, and make it their own.
How easy is it to add new users to a Chromebook? Pretty easy, as you’ll soon discover.
Adding Users to Your Chromebook
When you first started up your Chromebook, you were prompted to enter your Google Account name and password. This account becomes your default user account on your Chromebook. You can, however, add other users to your Chromebook—that is, let other people with Google Accounts use this particular Chromebook.
Add a User
You can let any number of users log onto your Chromebook, as long as they all have Google Accounts.
1. Click anywhere in the status area to display the Settings panel.
2. Click Sign Out.

3. From the login screen, click + Add User. The Sign In screen displays.

4. Enter the new user’s Gmail address into the Email field.
5. Enter the user’s Gmail password into the Password field.
6. Click the Sign In button.

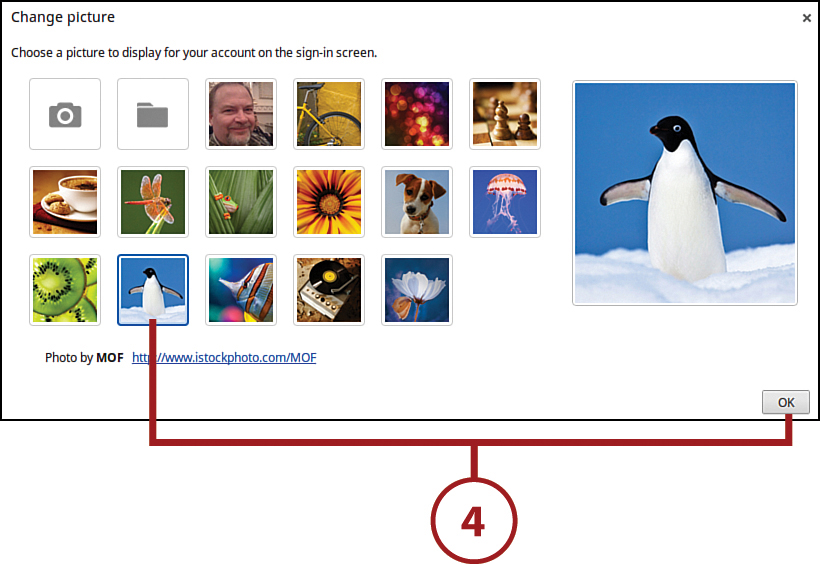
7. Select a picture for the new account and then click the OK button.

Chrome displays the Welcome to Your Chromebook window. Close this window to begin using Chrome as normal. The next time you open your Chromebook, this account will be one of the options on the login screen.
Editing User Information
Don’t like the picture you’ve chosen for your Chromebook user account? It’s easy enough to change—along with other information in your Google Account.
Change Your Profile Picture
Google Chrome lets you choose from a selection of built-in icons for your user account picture, upload an existing picture, or shoot a new picture using your webcam.
1. Click anywhere in the status area to display the Settings panel.
2. Click Settings to open the Settings page.

3. Scroll to the Users section and click the thumbnail image. The Change Picture panel displays. Use step 4, 5, or 6 as appropriate.

4. To use one of the built-in icons, click the image you want to use for your picture and then click OK.
5. To take a picture with your Chromebook’s webcam and use it for your account picture, click the Camera icon. When the live image from your webcam appears, smile into the camera and click the green camera button. If you like the picture that results, click the OK button. (If you don’t like what you see, click the Trash icon and take another picture.)

6. To upload a stored picture for your account picture, click the Folder icon. When the Select a File to Open panel appears, navigate to and select the file you want to upload and then click the Open button.

Edit Your Profile
Your Chromebook account is tied to your Google Account, in that they both use the same username (email address) and password. As a result, you can log into your account from any Chromebook.
Your Google Account is used by all Google services and applications, and includes your personal account profile. If this is a new Google Account, you need to create a new profile. You can also edit your profile at any time.
1. Open a new Chrome window and go to www.google.com.

2. Click your account name or picture in the top-right corner of the page and select View Profile. Your profile page displays.

3. Click the Edit Profile button. This makes everything in your profile editable.
4. Click the section of your profile you want to edit; this opens a panel for editing.
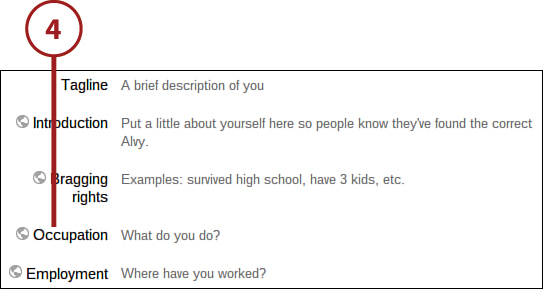
5. Enter the appropriate information for that section.
6. Click the Save button when you’re done entering information for that section.

7. Move to the next section you want to edit and repeat steps 4 through 6. When you’re done editing your profile, click the Done Editing button at the top of the page.

A single Google Account provides your own personal access to all of Google’s various sites and services. That includes personalized search results from Google’s search engine (www.google.com), email service from Gmail (mail.google.com), online calendars on Google Calendar (www.google.com/calendar/), and your own account on Google+ (plus.google.com), Google’s social network.
Switching Users
If you’ve created multiple user accounts for your Chromebook, it’s easy to switch from one user account to another—without shutting down your machine.
Switch User Accounts
To switch users, you need to sign out from one account on your Chromebook and sign into another.
1. Click anywhere in the status area to display the Settings panel.
2. Click Sign Out.

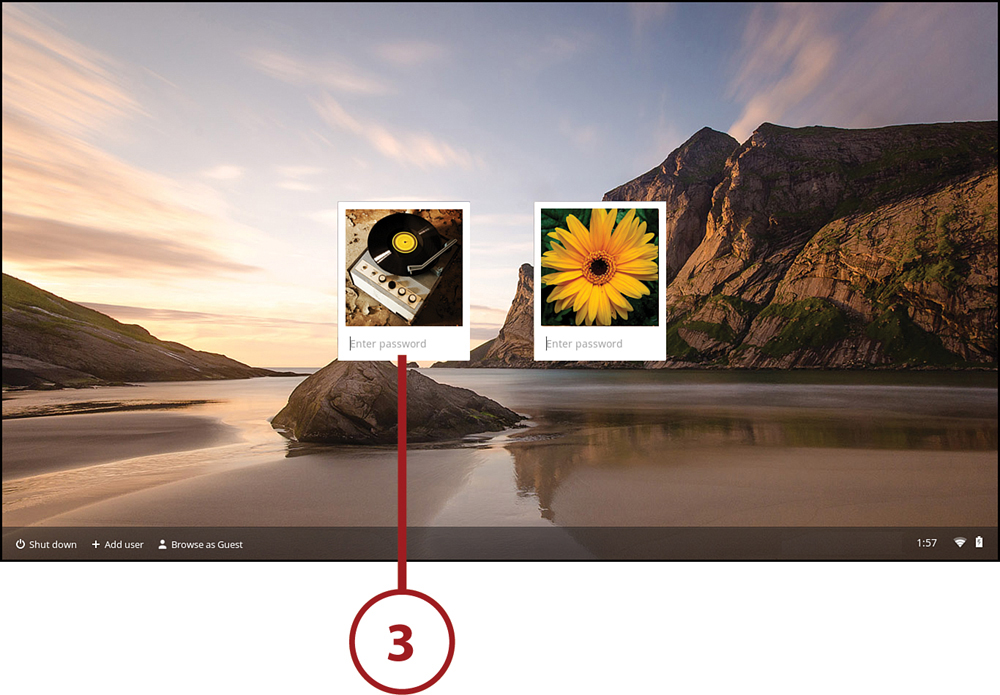
3. Your Chromebook displays the login screen. Select the user account to log into, enter the password, and press Enter.
Log in as a Guest User
Any person can log into your Chromebook as a Guest user. A Guest user has limited use of the Chromebook; he or she can browse the Web, but not save or access files on your machine. In addition, a Guest user’s browsing and search history are not saved.
1. Click anywhere in the status area to display the Settings panel.
2. Click Sign Out.

3. Your Chromebook now displays the log in screen. Click Browse as Guest.
