5. Working Wirelessly

In this chapter, you find out how to connect to and manage wireless networks for your Chromebook.
Chrome OS is a web-based operating system; to fully use your Chromebook, you must be connected to the Internet. All Chromebooks include built-in Wi-Fi wireless connectivity, so you can connect to the Internet over any nearby Wi-Fi network.
Some Chromebooks also include 3G capability, so you can connect via a mobile data service when no Wi-Fi is available. And, despite the Chromebook being primarily a portable device, it’s also possible to connect a Chromebook to a wired network to access the Internet. Which option you use depends on your own specific circumstances.
Connecting to a Wi-Fi Network
Most users will connect their Chromebooks to the Internet via some sort of Wi-Fi wireless connection. Wi-Fi is Chrome’s default connection method, as most homes and offices are set up with Wi-Fi connectivity; there are also numerous public Wi-Fi hotspots available at coffee houses, hotels, restaurants, and the like.
The current generation of Chromebooks can connect to 802.11 a/b/g/n Wi-Fi networks, using any of the following wireless security schemes: WEP, WPA-PSK, and WPA-Enterprise. At present, Chrome OS does not support networks that require security certificates.
Viewing Network Status
The Network icon in the status area at the bottom right of the Chrome desktop indicates the status of your Wi-Fi connection, as detailed in the following table.
Wi-Fi Status Icons

Enabling Wi-Fi on Your Chromebook
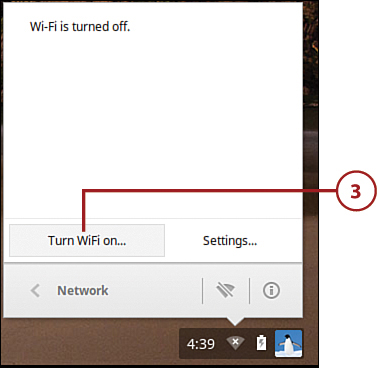
Wi-Fi connectivity is enabled by default on most Chromebooks. If necessary, however, you can enable Wi-Fi manually.
1. Click anywhere in the status area to display the Settings panel.
2. Click No Network; the settings panel changes.

Disabling Wi-Fi
If Wi-Fi is enabled, you can disable Wi-Fi by opening the Settings panel and clicking the Wi-Fi icon.
Connecting to an Open Wi-Fi Network
When Wi-Fi is enabled on your Chromebook, connecting to a Wi-Fi network is as easy as selecting the network from a list. Many Wi-Fi networks, especially public ones, are “open,” meaning that anyone can connect without supplying a password.
1. Click anywhere in the status area to display the Status panel.
2. Click No Network.

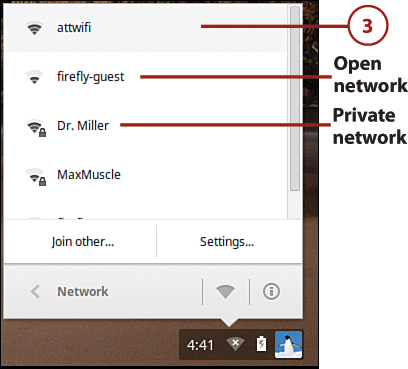
3. Chrome displays a list of nearby available wireless networks. Open networks are marked with a regular wireless icon; private networks (those that require passwords to access) have a lock next to the icon. Click the open network to which you want to connect.
The network name displays with the word “Connecting” next to it. When “Connecting” disappears, you’re connected.
Connecting to a Secure Wi-Fi Network
Many Wi-Fi networks, especially home and business networks, are secure, meaning they require a password for access. You need to supply this password to connect to a secure network.
1. Click anywhere in the status area to display the Status panel.
2. Click No Network.

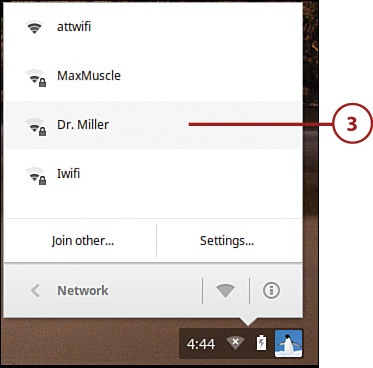
3. Chrome displays a list of nearby available wireless networks. Secure networks (those that require a password for access) are marked with a “locked” icon. Click the network to which you want to connect.
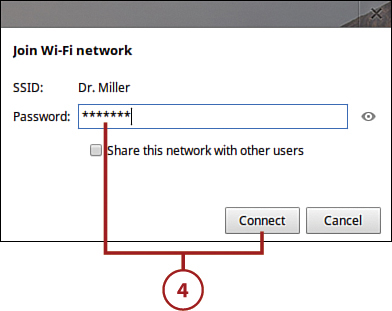
4. Enter the password for the network in the Join Wi-Fi Network dialog box and then click the Connect button.
Connecting to an Ethernet Network
In some instances, you get better performance by making a wired connection to your network instead of a wireless one. An Ethernet connection is both faster and more stable than a Wi-Fi connection; it’s also more secure because it’s virtually immune to outside hacking.
Because the Chromebook is designed to be a wireless device, however, connecting via Ethernet is a secondary option. In fact, the most popular model (the Samsung Chromebook) doesn’t even have an Ethernet port. That doesn’t mean that you can’t connect a Samsung Chromebook via Ethernet; you just have to know how.
Connecting via Ethernet
If you have an Acer, HP, or Lenovo Chromebook, connecting to your network via Ethernet is as easy as connecting a cable.
1. Connect one end of an Ethernet cable to an Ethernet port on your Chromebook.
2. Connect the other end of the Ethernet cable into your network router.
The Network icon in the status area changes to an Ethernet icon and indicates the status of your connection.
Connecting via Ethernet (Samsung Chromebook)
To connect a Samsung Chromebook to a network via Ethernet, you need to purchase a USB Ethernet adapter. This low-cost adapter lets you connect an Ethernet cable to your Chromebook, via an open USB port.
1. Plug the USB Ethernet adapter into one of your Chromebook’s USB ports.
2. Connect one end of an Ethernet cable to the adapter.
3. Connect the other end of the Ethernet cable into your network router.
The Network icon changes to an Ethernet icon and indicates the status of your connection.
Managing Network Connections
If you connect to the Internet in different locations, chances are you connect through a variety of different wireless networks. Managing your available wireless networks, then, is important.
Automatically Connecting to a Network
If you have a favorite wireless network at a given location where multiple networks may be available, you can configure your Chromebook to automatically connect to your network of choice.
1. Make sure you’re connected to the network in question and then click anywhere in the status area to display the Settings panel.
2. Click Connected To. The panel changes.

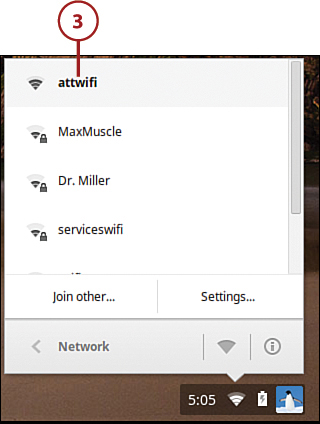
3. Click the currently connected network to display a panel for the currently connected network.
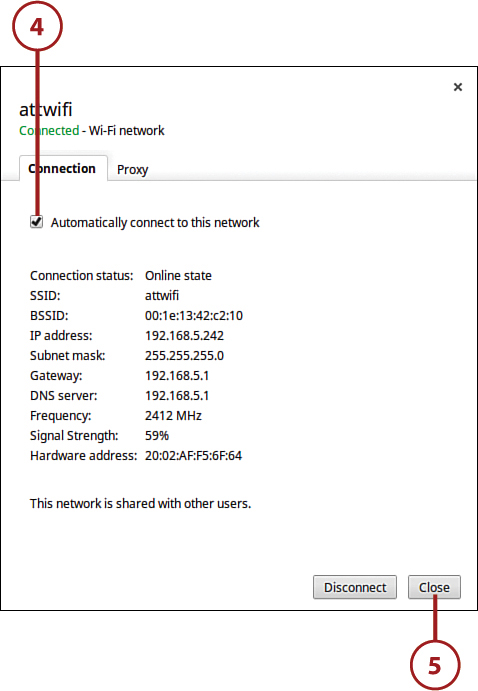
4. Check the Automatically Connect to This Network option.
5. Click the Close button.
Forgetting a Network
Chrome automatically saves details about each and every network you connect to. If there is a network to which it’s unlikely you’ll ever connect again, you can clear the details for that network—in effect, you’re telling Chrome to forget that network.
1. Click anywhere in the status area to display the Settings panel.
2. Click Settings. The Settings page displays.

3. Go to the Internet Connection section, click the Wi-Fi Network menu, and select Preferred Networks.

4. Click the X next to the network you want to forget.
5. Click OK.

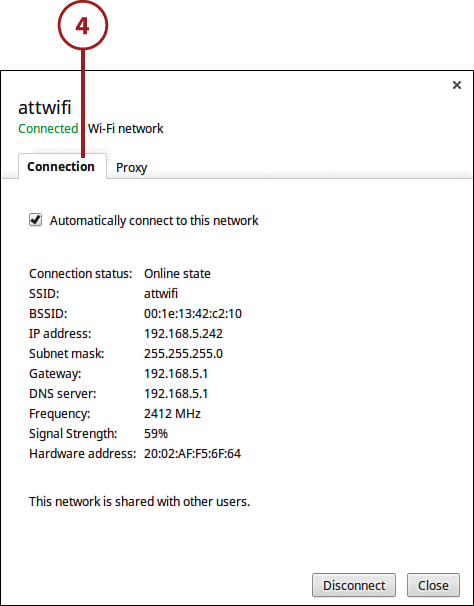
Viewing Network Details
In some circumstances, you might be asked to provide information about the wireless network to which you’re connected. Chrome OS can display those details.
1. Make sure you’re connected to the network in question and then click anywhere in the status area to display the Settings panel.
2. Click Connected To. The panel changes.

3. Click the currently connected network to display a panel for the network.

4. Click the Connection tab to see all information about this network.