In this chapter, you explore functionality provided by some of the applications that are installed on the iPhoto touch out-of-the-box. The topics include the following:
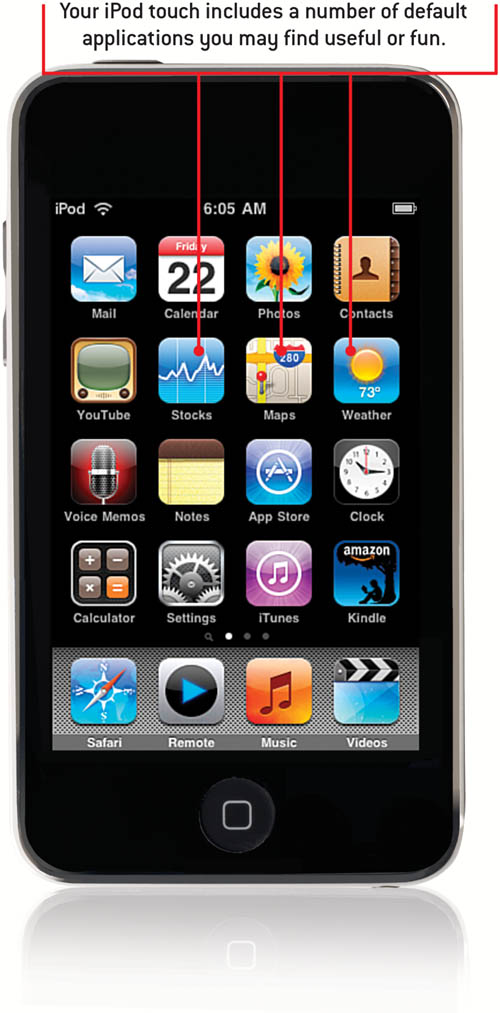
</feature>You’ve seen that your iPod touch is packed with amazing functionality. However, so far we’ve scratched only the surface of what the iPod touch can do. In this chapter, you discover functionality provided by some of the applications that are installed on your iPod touch by default. (In the next chapter, you see that these preinstalled applications are just a drop in the bucket compared to the applications you can download from the App Store.) These applications perform a variety of tasks from useful to fun. (Several of these applications require that you are connected to the Internet; see Chapter 2, “Connecting to the Internet, Bluetooth Devices, and iPods/iPhones,” for help with that task.)
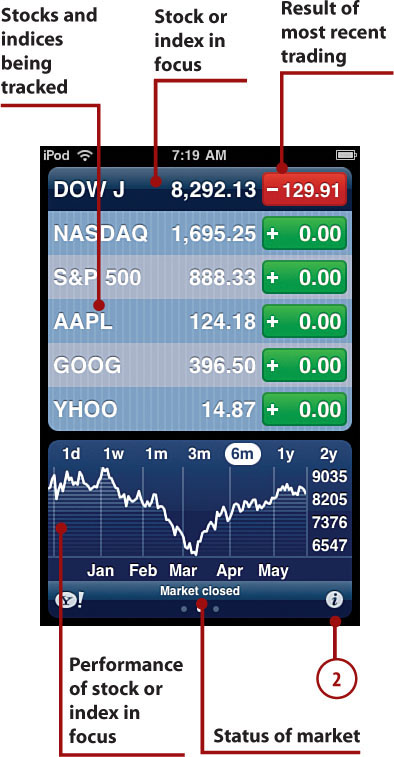
The iPod touch’s Stocks application can help you monitor stocks or market indices in which you are interested. First, set up the stocks or indices you want to track. Second, track those stocks or indices.
You can add any stock or market index to the Stocks application; all you need to know is the stock’s ticker symbol, which you can easily find on the web.
Move to the Home screen and tap Stocks.
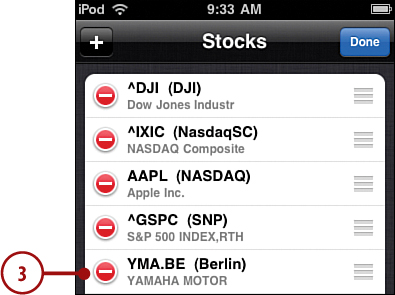
Tap the Info button. The Stocks screen appears; on this screen, you configure the stocks you want to track and the information you want to see.
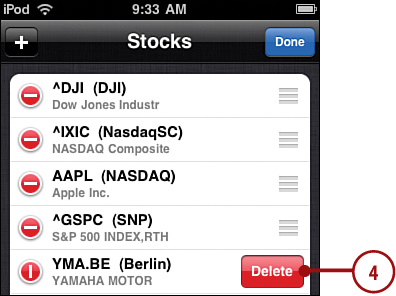
To remove a stock or index from the list, tap its Unlock button. The Delete button appears.
Tap Delete. The stock or index is removed from the application.
To change the order in which stocks or indices appear, drag them up or down the list by their list buttons.
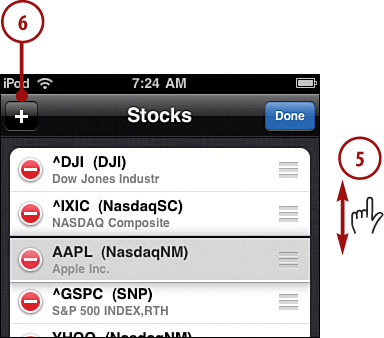
To add a stock or index, tap the Add button.
Enter the company name or stock’s or index’s symbol or as much as you know of any of this information. As you type, the application attempts to find items that match your search.
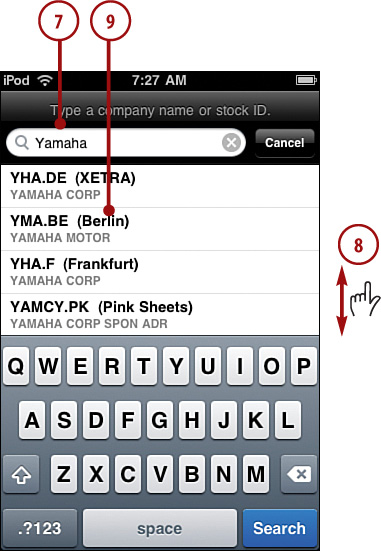
Scroll the list of results.
Tap a stock or index you want to add to the application. You return to the Stocks screen, and the stock you tapped is added to the list.
Repeat steps 3 through 9 to remove or add stocks and organize the list until the Stocks screen shows the stocks and indices you want to track in the order in which you want them to appear.
Tap % if you want changes to stock values to display as a percentage; tap Price if you want changes to stock values to display as a dollar amount; or tap Mkt Cap if you want to see values by their market capitalization.
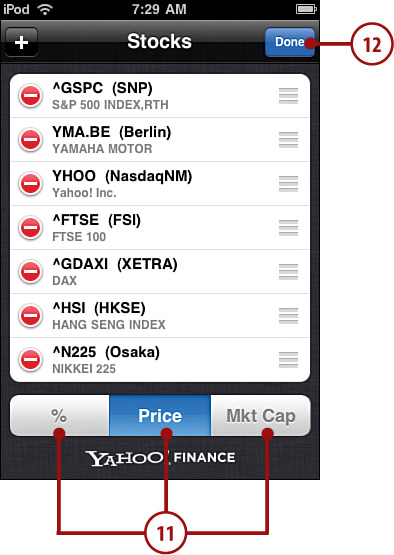
Tap Done. You return to the Stocks application and see the stocks and indices you have configured in the upper part of the screen.
With the Stocks application customized to your stock and index interests, you can quickly see how your favorites are performing.
Open the Stocks application.
Browse the screen to see the entire list of stocks and indices.
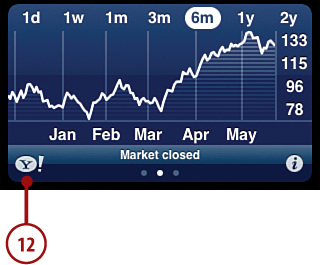
Tap the stock or index in which you are interested. The performance graph at the bottom of the screen is updated to show the performance of what you selected.
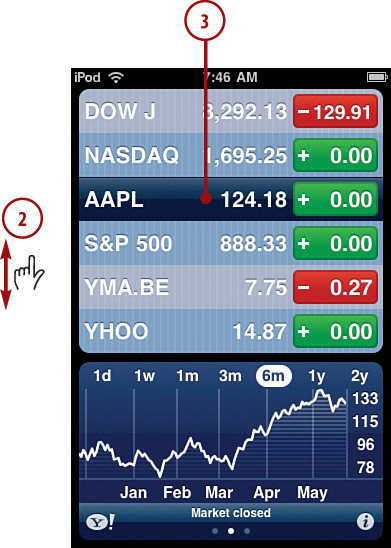
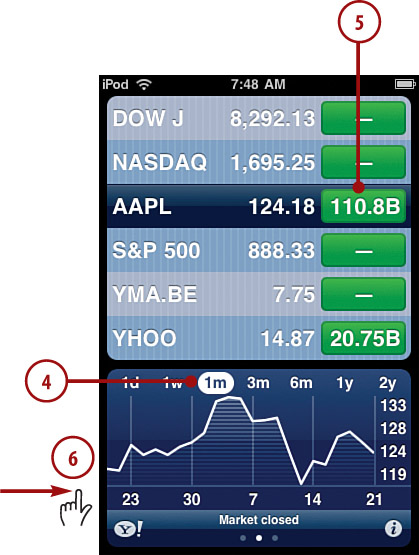
Tap the timeframe in which you’re interested, from 1 day to 2 years. The graph refreshes to cover the period you selected.
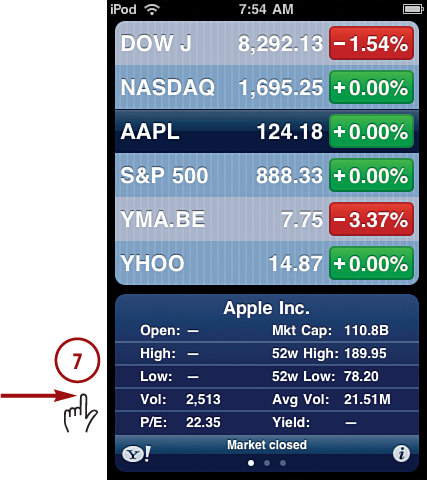
Tap the change indicators to move from percentage to price to market capitalization.
Drag across the graph to the right. You see details about the select item.
Drag across the graph to the right again. You see news articles and videos.
Browse the articles and videos.
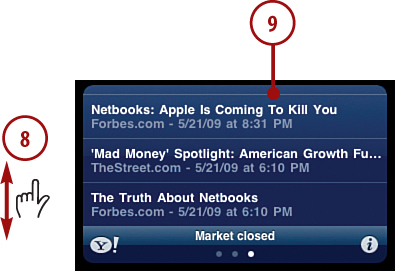
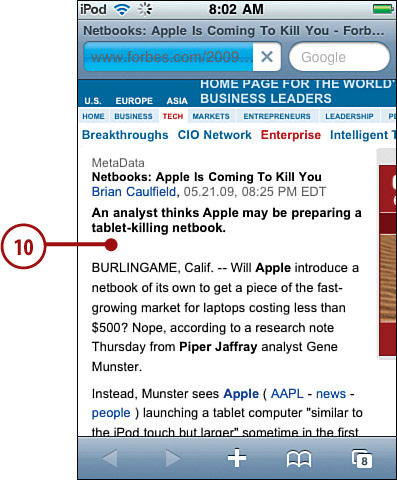
To read an article or watch a video, tap it. You move to the web via Safari.
Read the article or watch the video.
Press the Home button and then tap the Stocks button to return to the Stocks application.
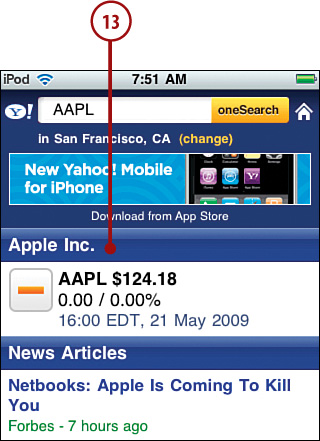
Tap the Yahoo! button. Safari opens and moves to a Yahoo! page for the selected item.
Use the webpage to read about the item.
Press the Home button and then tap the Stocks button to return to the Stocks application.
The Maps application just might be one of the most useful iPod touch applications, especially if you are directionally challenged like I am. Using the Maps application, you can find the location of addresses using Google Maps. You can also get directions from one address to another, and maps are linked to your contacts, so you can quickly show the location of any address in your contacts on a map and then get directions.
A number of ways exist to find locations on the map, such as by searching or by using a contact’s address. After you find a location, you can use that location for different purposes, such as to create directions.
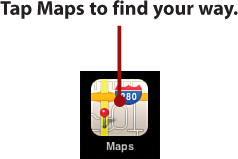
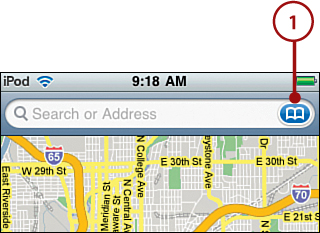
To open the Maps application, tap the Maps button on the Home screen. The application appears, and you can start finding your way.
You can search for locations in many ways. Your search can be very specific, such as an address, or your search can be more general, such as a search for gas stations or restaurants.
Tap Search.
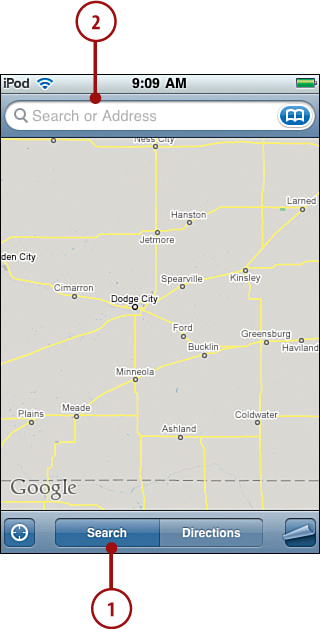
Tap in the Search bar.
Type your search. You can enter an address, city, category, or just about anything else. The more specific your search term, the more likely it is that you’ll find the location. But general searches can be helpful, such as a search for gas stations.
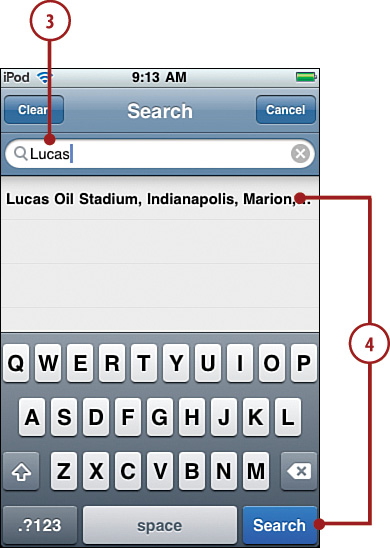
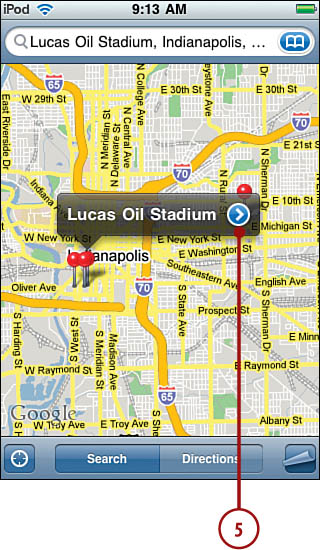
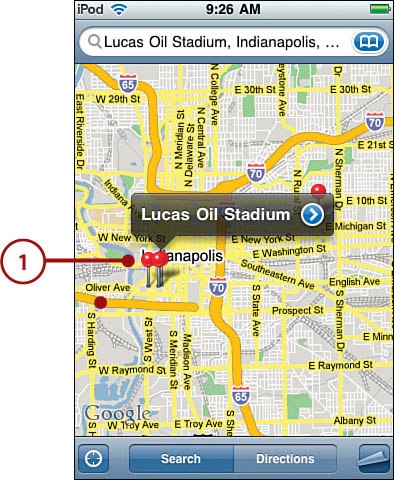
If you see a location on the list you want to see, tap it, otherwise, tap Search. The map appears, and the locations that meet your search criteria are marked with push pins; the location that an iPod touch thinks is most likely to be the one you are looking for has the Info bar above it.
To see information about a location, tap the arrow in its Info bar.
Bookmarks enable you to save locations and return to them easily. (See the “Working with Maps” task later in this chapter to learn how to set bookmarks.) Recents is a list of locations that you’ve worked with recently. You can also use a contact’s address from your Contacts list to move to a specific location on the map.
Open the Search screen and tap the Lists button in the Search bar.
Tap Bookmarks, Recents, or Contacts. The screen related to what you tapped appears. The rest of these steps show the Recents screen. When you tap Bookmarks, you see a list of your bookmarks; tap one to show it on the map. When you tap Contacts, use the All Contacts screen to find and select the address you want to show.
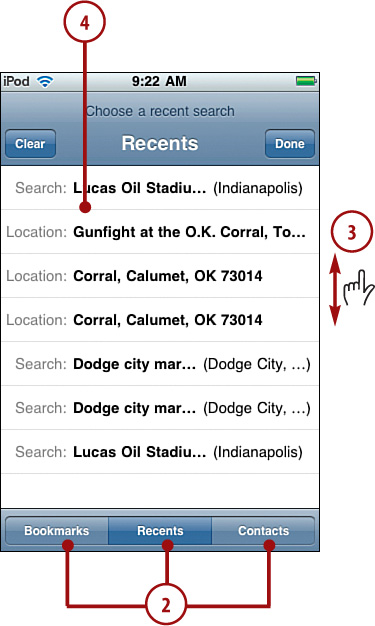
Browse up or down the list to see all the recent locations available to you.
Tap the location you want to see on the map. You move back to the map, and the bookmarked location is shown.
Use the information in the next task in this chapter to find out more information about the location and to change the map’s view.
After you find locations on a map, you can work with them for a variety of purposes.
Using the techniques (such as searching for a location) explained in the previous sections, find locations in which you are interested.
To zoom in on a location, double-tap the map near the location or unpinch the map.
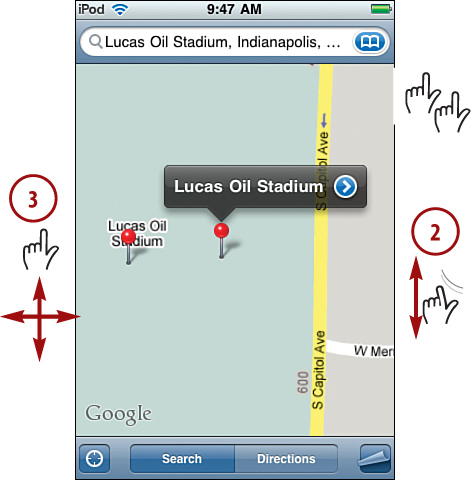
To scroll the map, drag your finger up or down and left or right.
Zoom out by pinching your fingers together on the screen.
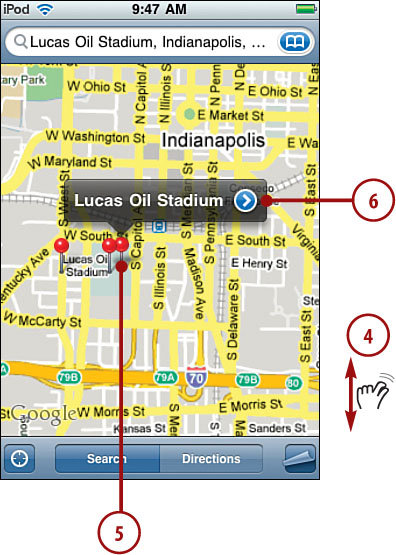
Tap a location’s pushpin. You see the name of the location.
Tap the More Info arrow. The Info screen appears.
If the location has a URL, tap it to move to the location’s webpage.
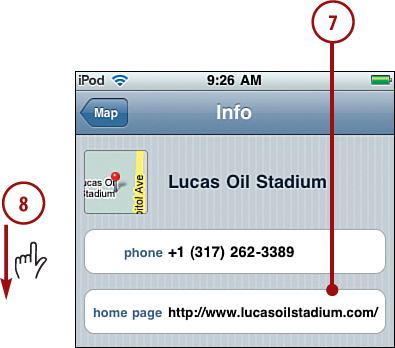
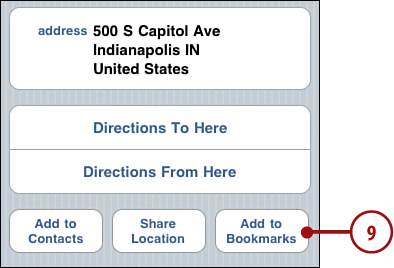
Scroll down the screen.
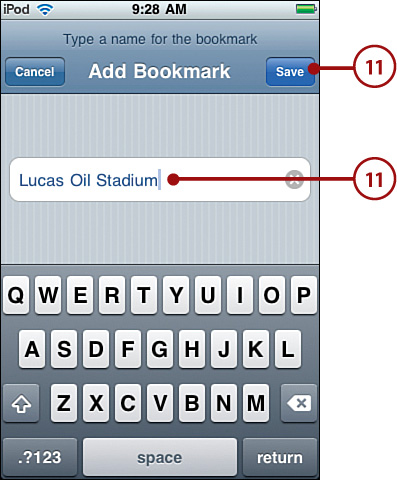
To set a bookmark for the location, tap Add to Bookmarks.
Tap Save. The location is added to your bookmarks, and you return to the Info screen.
To add the address on the map to an existing contact or to create a new contact with the address, tap Add to Contacts. Use the resulting tools to configure contact information (see Chapter 8, “Managing Contacts”).
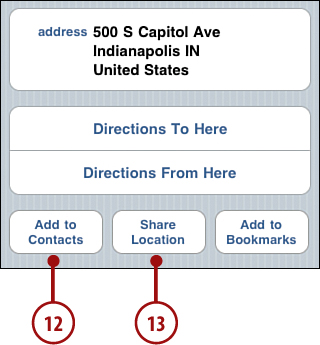
To send a link to the location to someone else, tap Share Location and complete and send an email.
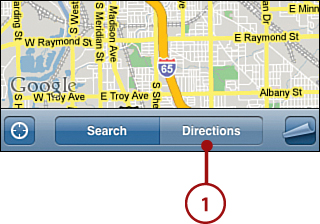
The Maps application can generate driving directions between two locations along with an estimate of how long the trip will take.
Tap the Directions button. The Start and End boxes appear.
Find the start location by searching for it or by using the Lists button to select it from a list. For example, you can use a bookmark, recent item, or contact information to set a location along with searching for a location.
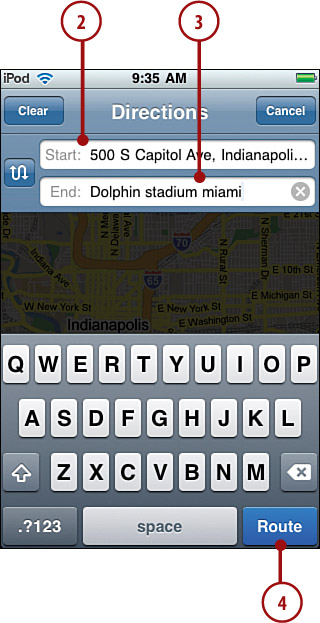
Find the end location by searching for it or by using the Lists button to select it from a list.
Tap Route. A path from the start location to the end location is generated and appears on the map in a purple line. The start point is shown as a green pushpin, while the end point is a red pushpin. The default route is for driving a car.
Tap Transit to see a route using public transportation.
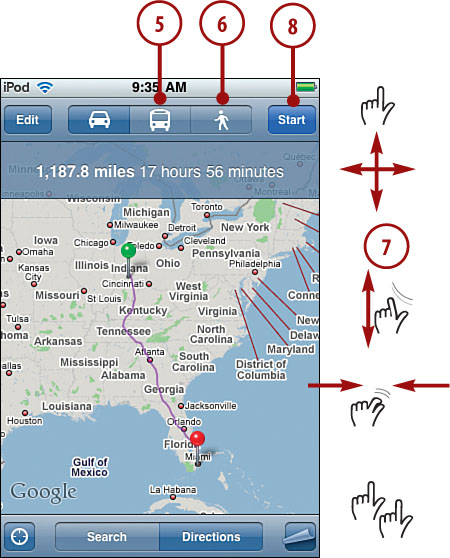
Tap Walking to see walking directions.
Zoom or scroll the map as needed to view the entire route.
When you’re ready to start moving along the route, tap Start. You see the first leg of the route. Instructions and information about the leg appear at the top of the screen.
Follow your location along the first leg of the route. As you approach the next segment of the route, you see a circle on the route.

After you’ve made the change to get onto the next segment of the route, tap the Forward button to move to the next segment on the map.
To move to a previous segment, tap the Back button.
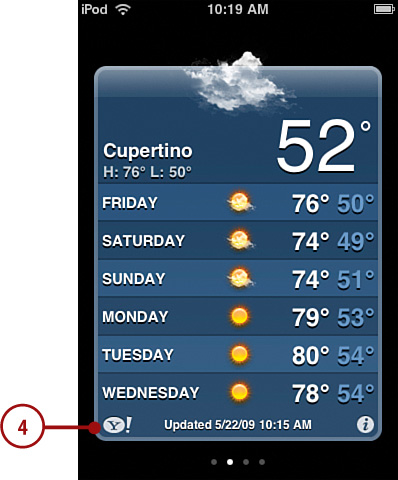
The Weather application is a handy way to get information about weather in specific locations quickly and easily.
Configure the Weather application with the areas you are interested in.
Move the Home screen and tap Weather.
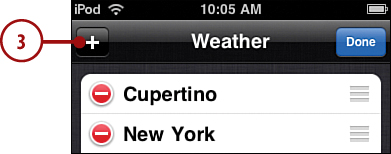
Tap the Info button. The Weather screen appears. On this list, you see all the locations that the application currently shows.

To add a location, tap the Add button. The Add Location screen appears.
Enter a city’s name or zip code using the keyboard. Cities that match your search are shown.
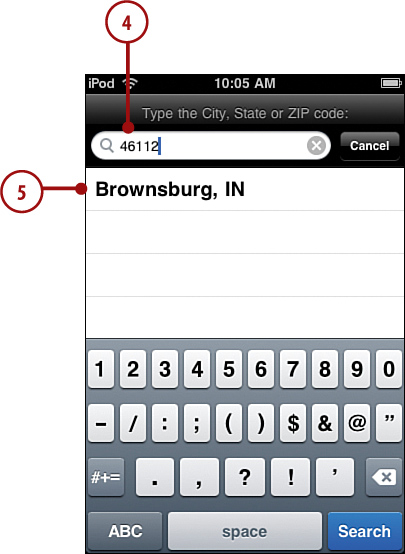
To add a city to the application, tap it. You move back to the Weather screen, and the city you added is listed.
To delete a city, tap the Unlock button. The Delete button appears.

Tap Delete.
Perform steps 3 through 8 until the list contains all the cities about which you want weather information.
Drag cities up or down the list by their List buttons to change the order in which their screens appear.

To have temperatures displayed in degrees Fahrenheit tap °F.
To have temperatures displayed in degree Celsius, tap °C.
Tap Done.
With an iPod touch, getting weather information is simple.
Move to the Home screen and tap Weather. You see weather for the last city you viewed.
To see weather for the next location, drag to the left or right.

To jump to a specific location, tap its button. You have to know where the location is on the list; for example, if a city is third on the list, tap the third button.
To move to a website about a location, view its weather and tap the Yahoo! button. The web browser opens, and you move to the Yahoo! page for that city that provides more detailed weather information, event information, and so on.