
In this chapter, you learn how to keep an iPod touch in top shape and to know what to do should problems happen. Topics include the following:
</feature>You probably noticed that this is a short chapter, and there is a good reason for that: An iPod touch works very well, and you are unlikely to have problems with it, especially if you keep iTunes and the iPod touch’s software current. When problems do occur, you can usually solve them with a few simple steps. If that fails, there’s lots of help available for you on the Internet.
Some basic maintenance tasks keep an iPod touch in top working condition. Even better, you can do most of these tasks with just a couple of mouse clicks because you can configure iTunes to do most of the work for you.
As you’ve learned in this book, iTunes is a vital partner for your iPod touch. You should keep iTunes current to ensure that you have the latest bug fixes, new features, and so on. Fortunately, you can configure iTunes to maintain itself.
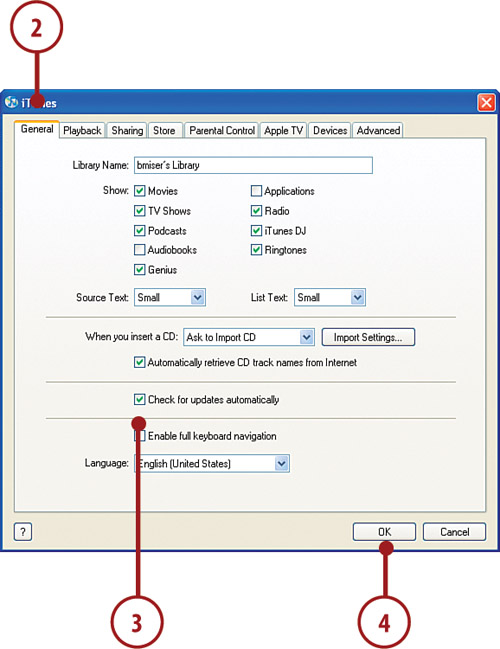
You can easily update iTunes on a Windows PC, but it’s even better to have iTunes update itself automatically.
You can easily update iTunes on a Mac, but it’s even better to have iTunes update itself automatically:
Open the System Preferences application.
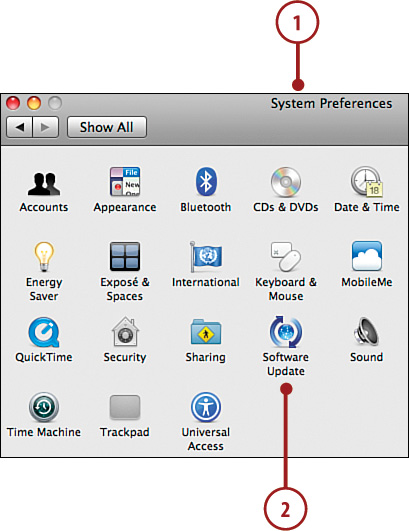
Click Software Update.
Check the Check for updates check box.
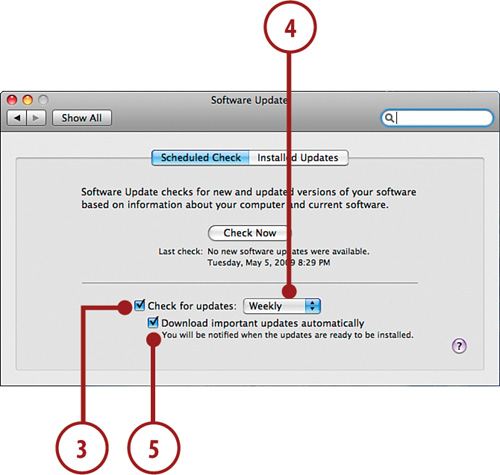
Choose the frequency that iTunes checks for updates on the pop-up menu, such as Weekly.
Check the Download important updates automatically check box. The Mac checks for updates for iTunes, along with all the other Apple software on your Mac according to the timeframe you selected. When it identifies an update, it downloads the update automatically and prompts you to install it or prompts you to download and install it, depending on the kind of update it is.
One of iTunes’ functions is to maintain an iPod touch’s software, which is one of the reasons you should keep iTunes current. Periodically, iTunes checks for updates to the iPod touch operating system software. When iTunes finds an update, it installs it for you. The next time you connect your iPod touch to your computer, you are prompted to install the update. You can allow the update when you are prompted about it and follow the onscreen instructions to install it, or you can update your iPod’s software manually by performing the following steps.
Connect your iPod touch to your computer.
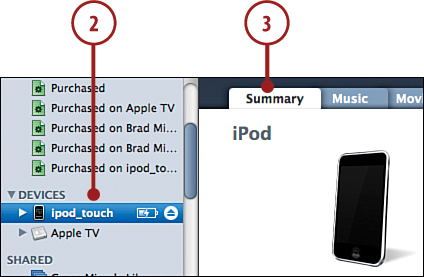
Select your iPod touch on the Source list.
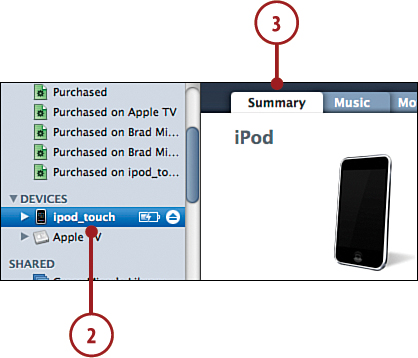
Click the Summary tab. You see the current version of the iPod touch’s software at the top of the pane.
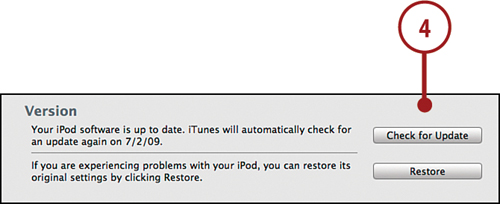
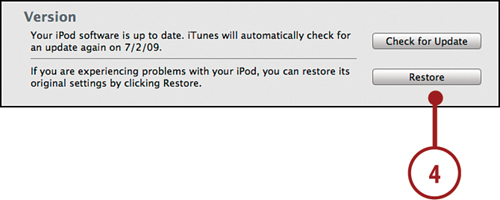
If a newer version of the iPod touch software is available, click Update or click Check for Update to manually check for an update. (If you manually check for an update and you’re using the current version of the iPod touch’s software, you see a dialog telling you so, and you can skip the rest of these steps. If you aren’t using the current version, the button becomes Update.)
Read information about the update and follow the onscreen instructions to download and install it onto an iPod touch.
Agree to the license agreement. iTunes begins to download and install the update on the iPod touch.
When the software has been downloaded and installed, the iPod touch is automatically restarted. As the process proceeds, you see various status messages in iTunes. Eventually, the iPod touch disappears from iTunes, is restarted, and becomes available in iTunes again, and you see that your software is current.
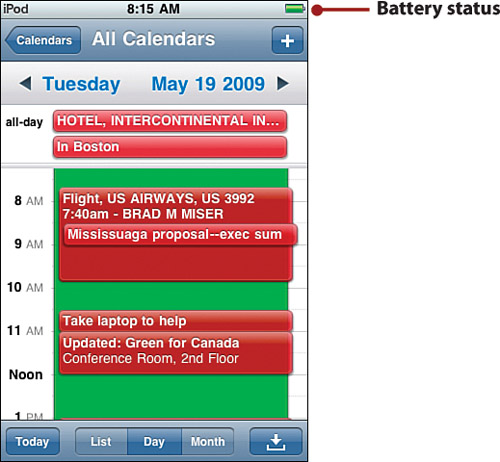
Obviously, an iPod touch with a dead battery isn’t good for very much. As you use an iPod touch, you should keep an eye on its battery status. As long as the battery status is green, you’re okay. As an iPod touch gets low on power, the battery on the status icon becomes empty and eventually turns red. Two separate warnings will alert you when the battery lowers to 20% and then again at 10%. If you keep going from there, the iPod touch runs out of power and shuts down. Of course, it gives you plenty of warning through onscreen messages before this happens.
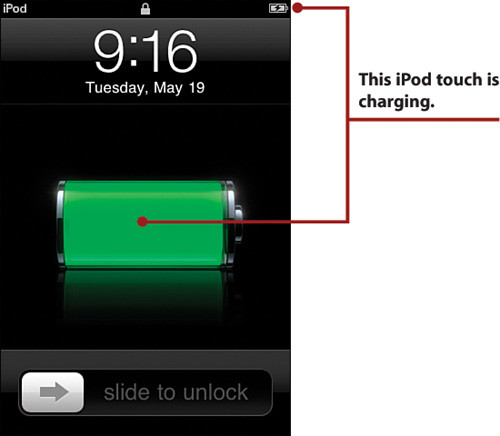
The obvious way to avoid running out of power is to keep your iPod touch charged. The good news is that all you have to do is to connect the iPod touch to your computer, and its battery charges. While this is occurring, you see the charging icon in the upper-right corner of the screen, and if you wake an iPod touch up, a large battery icon showing the relative state of the battery appears on its screen. When charging is complete, the battery status icon replaces the charging icon in the upper-right corner of the screen, the large battery icon disappears, and you see an iPod touch’s wallpaper if it’s locked, or you see whatever screen you happen to be using if it isn’t locked.
You can also connect an iPod touch to an external charger if your computer isn’t handy.
In addition to keeping your iPod touch’s battery charged, consider the following recommendations to maximize the amount of time you can use it between charges:
Put your iPod touch to sleep when you aren’t using it by pressing the Sleep/Lock button.
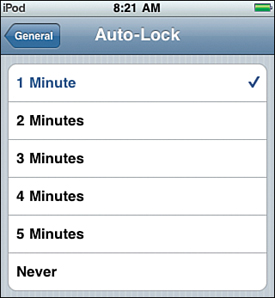
Set Auto-Lock to a small interval, such as 1 Minute. When an iPod touch locks, it goes to sleep immediately, which puts it in low-power mode. (Settings, General, Auto-Lock)
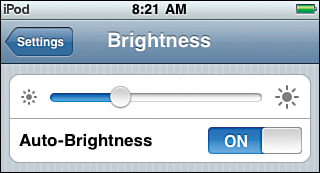
Set the brightness of the screen to a low but comfortable level and leave Auto-Brightness turned on. (Settings, Brightness)
Disable features you don’t use, especially those that communicate with other devices. Specific suggestions follow.
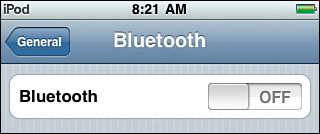
If you don’t use Bluetooth devices, make sure Bluetooth is turned off. (Settings, General, Bluetooth OFF)

If you don’t need email to be pushed to any email accounts, disable email push. (Settings; Mail, Contacts, Calendars; Fetch New Data; Push OFF)
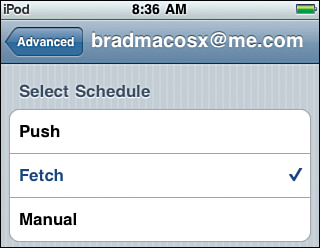
If you do need email pushed to some accounts, disable push for the accounts you don’t need email pushed to by setting them to Fetch. (Settings; Mail, Contacts, Calendars; Fetch New Data; Advanced; email account; Fetch)
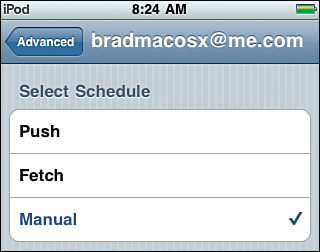
Set email to be manually fetched instead of automatically fetched. (Settings; Mail, Contacts, Calendars; Fetch New Data; Advanced; email account; Manual)

Inactivate email accounts you don’t need to use at all. (Settings; Mail, Contacts, Calendars; email account; Account OFF)
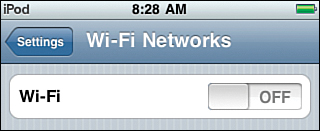
When you don’t need to connect to the Internet or other iPod touches/iPhones, turn Wi-Fi off. (Settings, Wi-Fi, Wi-Fi OFF)
The iPod touch’s onscreen controls are amazing. But because you use them by tapping and dragging your fingers on the screen, the screen gets smudged. You can clean the screen using the cloth included with an iPod touch by rubbing it carefully. You should never spray any cleaners directly onto an iPod touch’s screen. However, you can apply a slight amount of glass cleaner to a very soft cloth and gently wipe an iPod touch’s screen to clean it. In most cases though, you can get the screen clean with the provided cloth.
Even a device as reliable as your iPod touch can sometimes run into problems. Fortunately, the solutions to most problems you encounter are simple. If a simple solution doesn’t work, there is a great deal of detailed help available from Apple, and there’s even more available from the community of iPod touch users.
The problems that you can address with the simple steps described in this section vary and range from such issues as the iPod touch hanging (won’t respond to commands) to not being visible in iTunes when connected to your computer (can’t be synced). No matter which problem you experience, try the following steps to solve them.
If an iPod touch starts acting up, restart it.
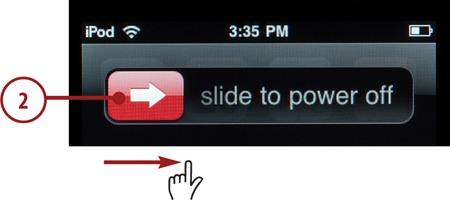
Press and hold the Sleep/Lock button until the red slider appears on the screen.
Drag the red slider to the right. The iPod touch powers down.
Press and the hold Sleep/Lock button until you see the Apple logo on the screen. The iPod touch restarts. When the Home screen appears, try using the iPod touch again. If the problem is solved, you’re done.
If restarting an iPod touch or the computer doesn’t help, try resetting an iPod touch using the following escalation of steps.
If you are using an application and it freezes, press and hold the Home button down for at least six seconds. The application quits, and you return to the Home screen.
Restart the iPod touch using the previous steps. If the problem goes away, you’re done. If not, continue to the next step.
If you can’t restart the iPod touch normally, press and hold down both the Home button and the Sleep/Lock buttons for at least ten seconds. You should see the Power Off slider; if you do, shut down and then restart the iPod touch. If you don’t see the slider, the iPod touch should turn itself off and then restart; you can release the buttons when you see the Apple logo on the screen. If the problem goes away, you’re done. If not, continue.
If you can use an iPod touch’s controls, proceed with the following steps. If you can’t use any of its controls, you need to restore the iPod touch, which is explained in the next section.
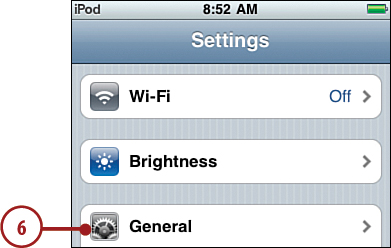
On the Home screen, tap Settings.

Tap General.
Scroll down until you see the Reset command.
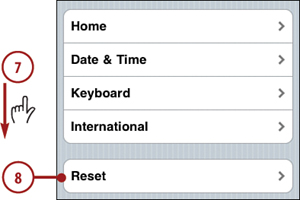
Tap Reset.
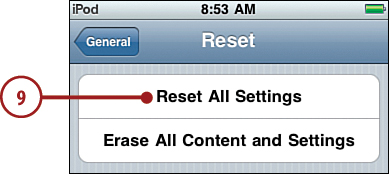
Tap Reset All Settings.
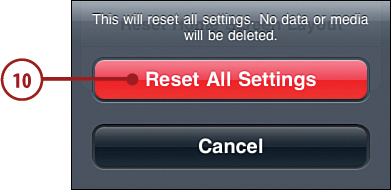
Tap Reset All Settings at the prompt. All settings on the iPod touch reset to their defaults, and the iPod touch restarts. If the problem goes away, you’re done—except for reconfiguring your settings, of course. If not, continue.
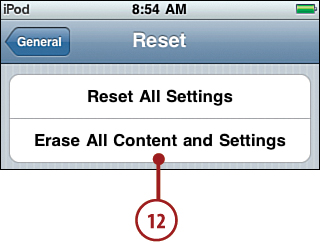
Repeat steps 5 through 8 to move back to the Reset screen.
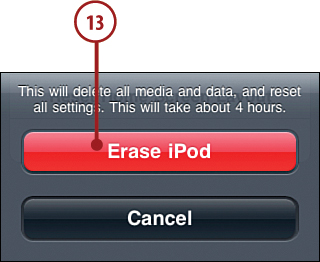
Tap Erase All Content and Settings. When you do this, you lose all the content on your iPod touch. Make sure that you have that content elsewhere before you erase an iPod touch. If the content is in your iTunes Library, you’re fine. But if you’ve added information that you have not synced to iTunes, such as contacts, directly onto the iPod touch, you lose that information when you erase it.
Tap Erase iPod at the prompt. The iPod touch is erased, and it should return to like-new condition. You have to sync it again, reconfigure its settings, and so on. If the problem recurs, you must restore the iPod touch.
The most severe action you can take on your iPod touch is to restore it. When this happens, the iPod touch is erased, so you lose all its contents, and its current software is overwritten with the latest version. If you have added information to your iPod touch since it was last backed up (when you last connected it to the computer), that information is lost when you restore your iPod touch—so be careful before doing this. If none of the other steps corrected the problem, restoring the iPod touch should.
Connect the iPod touch to your computer.
Select the iPod touch on the Source list.
Click the Summary tab.
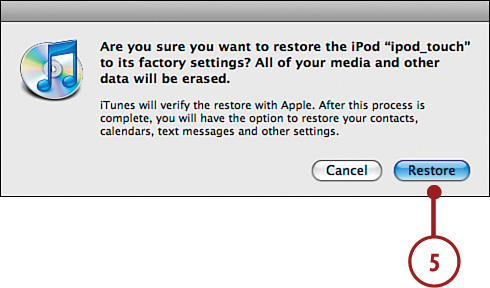
Click Restore. Remember that you lose everything on your iPod touch when you restore it, so make sure that you have all its data stored elsewhere, such as in your iTunes Library, before you do this.
Click Restore in the dialog.
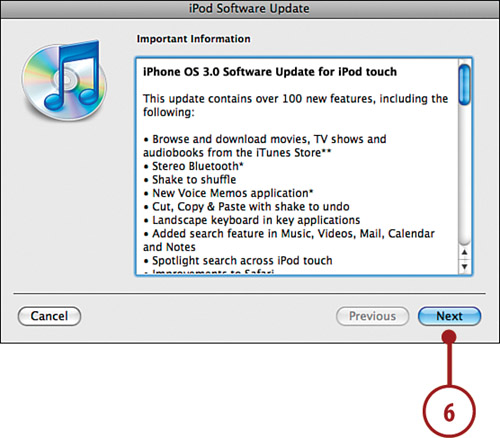
Read the information about the current version of the iPod touch’s software and click Next.
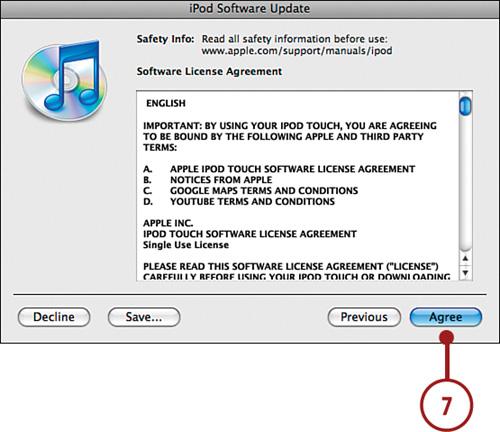
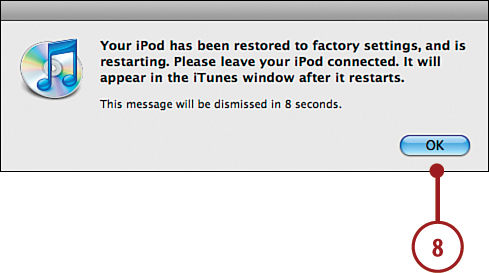
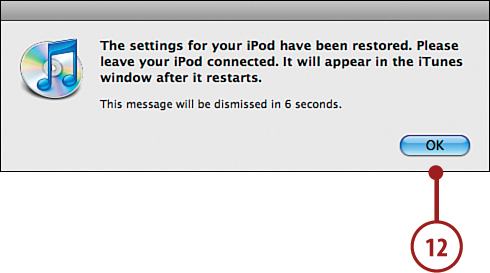
Click Agree. The current version of the iPod touch’s software is downloaded to your computer, and iTunes re-installs it on your iPod touch. You see several progress indicators along the way. The iPod touch will be restarted and iTunes begins re-installing its software. When the process is complete, you see a message explaining what has happened.
Click OK. The iPod touch is restarted, and you see the Set Up Your iPod screen.
Click the Restore from the backup of radio button.
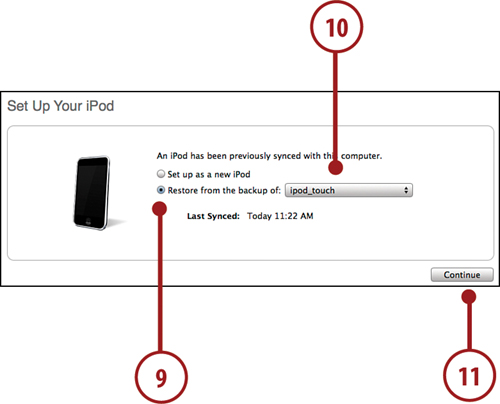
On the pop-up menu, choose your iPod touch’s name.
Click Continue. iTunes restores the iPod touch from the backup.
Click OK in the completion dialog. The iPod touch is synced according to the settings stored in the backup. When the sync process is complete, the iPod touch should be back in working condition with all your content restored to it. If you have a lot of content, this process can take a while since the sync is done starting with the iPod touch’s memory being “empty.”

If iTunes continues to be unable to see your iPod touch and it appears to be working normally, reinstall iTunes on your computer. (This is much more likely on a Windows PC than on a Mac.) See the Chapter 1, “Getting Started with Your iPod touch,” for instructions on downloading and installing iTunes on your computer.
If none of the previous steps solved the problem, you can get help in a number of ways:
Apple’s website. Go to www.apple.com/support/. On this page, you can access all kinds of information about iPod touches, iTunes, and other Apple products. You can browse for help, and you can search for answers to specific problems. Many of the resulting articles have detailed, step-by-step instructions to help you solve problems as well as links to more information.
Web searches. One of the most useful ways to get help is to do a web search for the specific problem you’re having. Just open your favorite search tool, such as Google, and search for the problem. You are likely to find many resources to help you, including websites, forums, and such. If you encounter a problem, it’s likely someone else has, too, and have probably put the solution on the web.
Me. You’re welcome to send email to me for problems you’re having with your iPod touch. My address is [email protected]. I’ll do my best to help you as quickly I can.