You can use the Songs tool to easily find specific songs.
On the Home screen, tap the Music button.
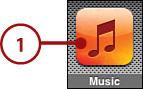
Tap Songs. You see a screen showing all of the songs on the iPod touch, organized alphabetically. Under each song, you see the artist and album from which the song comes.
Drag your finger up and down the list to browse all available songs. (If you browse to the top of the screen, you see the Search tool with which you can search for specific songs. See “Searching for Music” later in this chapter.)
To jump to a specific song, tap the letter along the right side of the screen for the song’s name; to jump to a song whose name starts with a number, tap the # sign at the bottom of the alphabetical index.
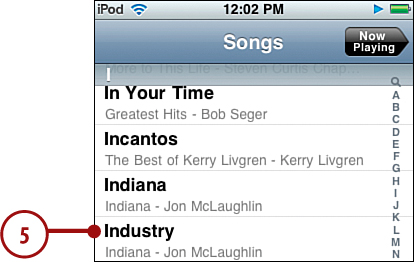
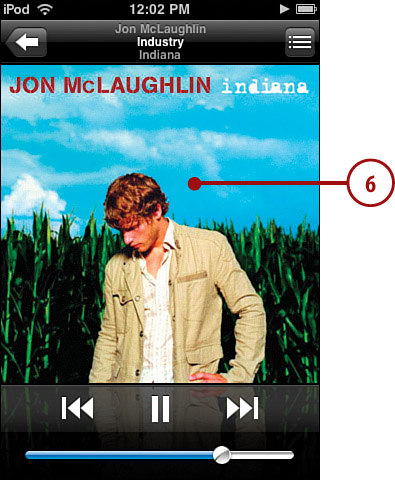
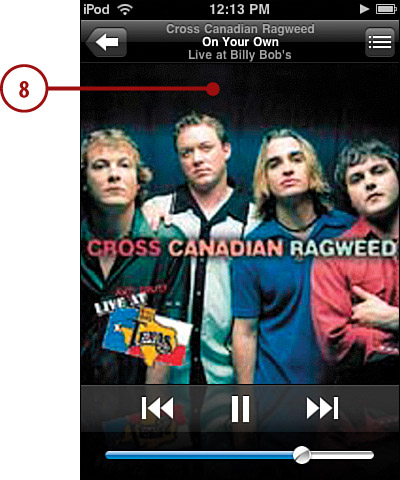
Tap the song you want to play. The song begins to play, and the Now Playing screen appears.
Use the Now Playing screen to control the music (covered in detail in the “Playing Music” task later in this section).
Like the other categories, you can use Albums to find music quickly and easily.
On the Home screen, tap the Music button.
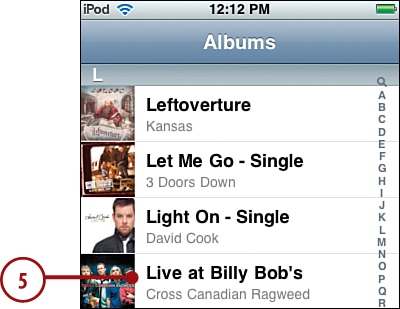
Tap Albums. You see a screen showing all of the albums on the iPod touch, organized alphabetically by album title. (The iPod touch ignores “the” in titles.) Under each album, you see the artist for that album.

Browse all available albums. (If you browse to the top of the screen, you see the Search tool with which you can search for specific albums. See “Searching for Music” later in this chapter.)
To jump to a specific album, tap the letter along the right side of the screen for the album’s name; to jump to an album whose name starts with a number, tap the # symbol at the bottom of the alphabetical index.
Tap the album you want to explore. You move to the album’s screen on which you see all of the songs it contains.
Browse the songs on the album.
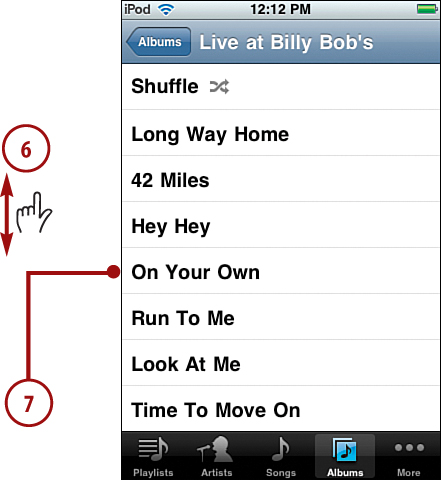
Tap the song you want to play. The song begins to play, and the Now Playing screen appears.
Use the Now Playing screen to control the music (covered in detail in the “Playing Music” task later in this section).
You can build a special playlist on iPod touch by selecting songs to include in your custom playlist. This is called the On-The-Go playlist because, well, you build it while you are on the go.
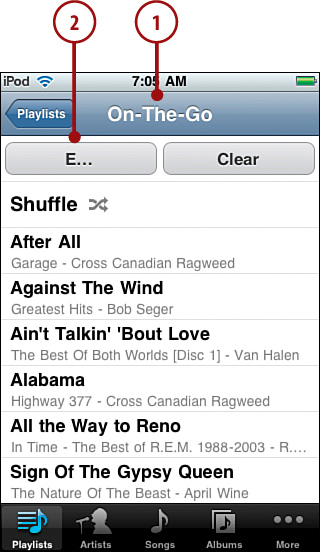
Move to the Playlists screen.
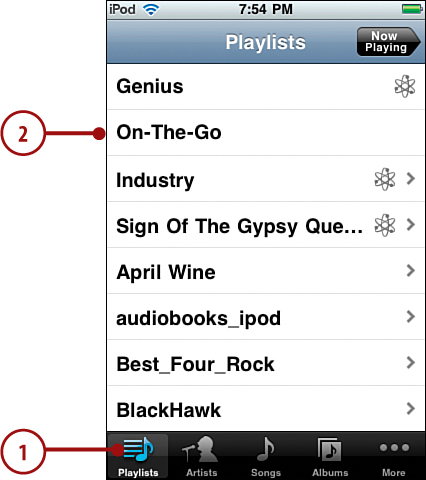
Tap On-The-Go. The Songs screen appears.
Browse all the songs on iPod touch or scroll to the top of the screen and search for songs.
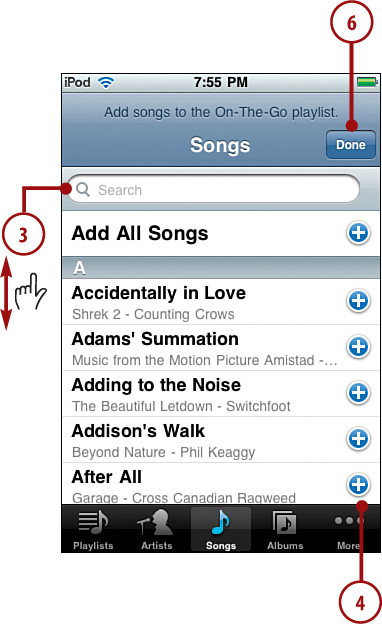
To add a song to the playlist, tap the song or the Add button. After you add a song, it is grayed out to show it’s already part of the playlist. You can add the same song to the playlist only one time.
Repeat steps 3 and 4 until you’ve added all the songs that you want the playlist to contain.
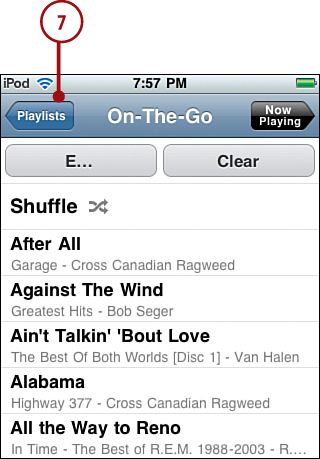
Tap Done. You move to the On-The-Go playlist screen and see the songs it contains.
Play the On-The-Go playlist just like playlists you’ve moved from the iTunes Library.
Move to the Playlists screen as described in the previous task and tap the On-The-Go playlist option. You see the On-The-Go playlist screen.
Tap Edit. The screen changes to Edit mode.
To add songs, tap the Add button; this works just like when you added songs to the playlist originally. (See the previous section for details.)
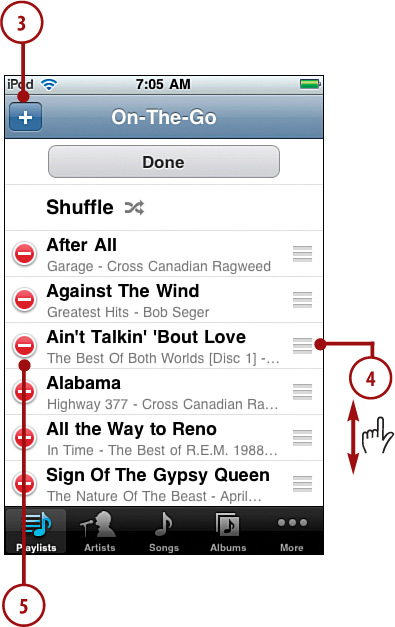
To change the order in which songs play, tap the List button and drag a song to its new position on the playlist.
To remove songs, tap the Unlock button. The Delete button appears.
Tap Delete. The song is removed from the playlist.
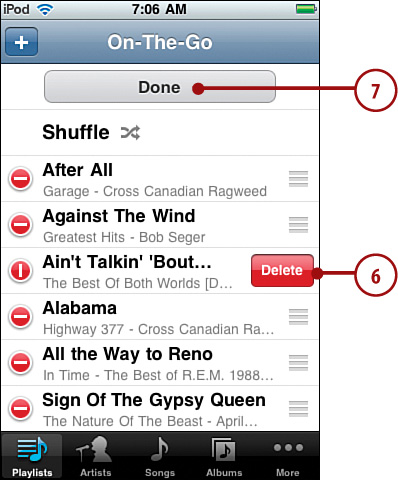
When you’re finished making changes, tap Done. You move back to the On-The-Go playlist screen.
Gather the configuration information for your email account, such as its type, your email address, your username, your password, incoming mail server, and outgoing mail server.
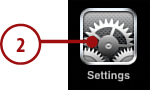
On an iPod touch’s Home screen, tap Settings.
Scroll down the screen.
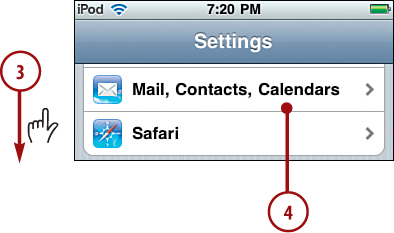
Tap Mail, Contacts, Calendars. The Mail, Contacts, Calendars screen appears.
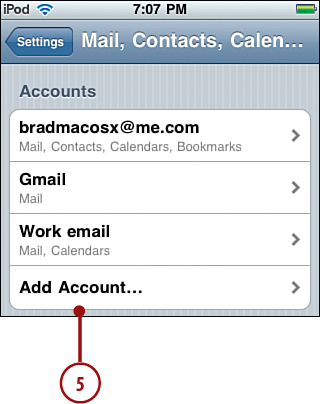
Tap Add Account. You see the Add Account screen.
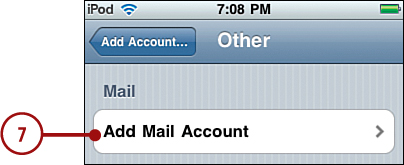
Tap Other. You see the Other screen.

Tap Add Mail Account.
Enter your name.
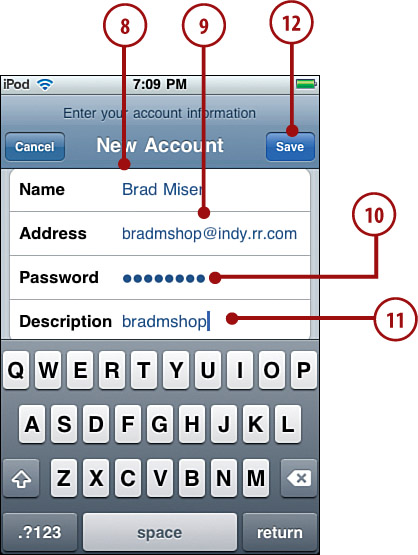
Enter your email address.
Enter your email account password.
Change the default description, which is your email address, if you want to. This description appears on various lists of accounts.
Tap Save. Your account information is verified.
If you see an information screen about your account, tap Next; if you don’t see such a screen, go to the next step.
Tap POP for a POP account or IMAP for an IMAP account. The rest of these steps are for a POP account, but configuring an IMAP account is similar.
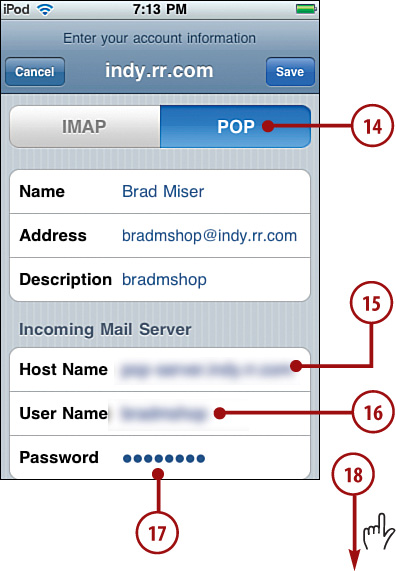
In the Incoming Mail Server section, enter the hostname if the default name isn’t correct.
Enter your email account’s username if the default username isn’t right.
Enter your email account’s password; this should be the same password you entered in step 10 so you can skip this step in most cases.
Scroll down the screen.
Enter the hostname for the outgoing mail server.
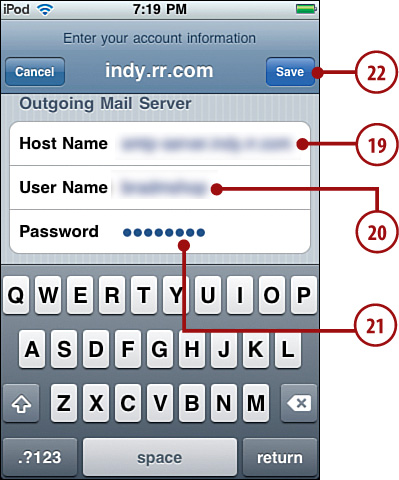
Enter the username for the outgoing mail server; in most cases, this is the same username as in step 16. If your outgoing mail doesn’t require this information or if it doesn’t use SSL, skip to step 22.
Enter the password for the outgoing mail server; most of the time, this is the same password as in step 10.
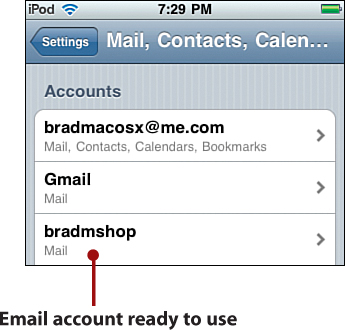
Tap Save. The account information is verified. If the account is configured correctly, you see the account’s information on the Mail, Contacts, Calendars screen and can skip to step 27. If not, review the information you entered in the previous steps and correct any that isn’t accurate until the account checks out as being configured correctly.
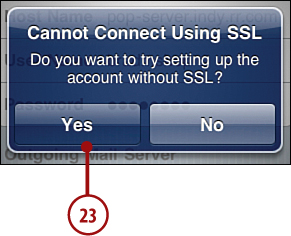
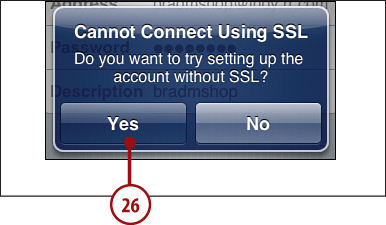
Tap Yes to clear the prompt. If the process works, you see the account’s information on the Mail, Contacts, Calendars screen and can skip to step 27. If the process fails again and you see a warning about the account not supporting authentication, tap OK to clear the prompt and continue to the next step.
Delete the hostname and username you entered in steps 20 and 21.
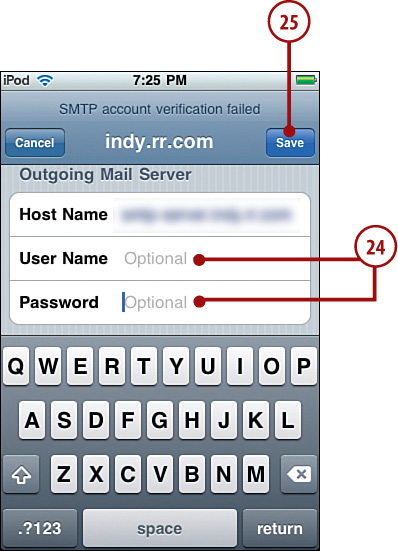
Tap Save. The account information is checked again. If the configuration is correct, you see the account’s information on the Mail, Contacts, Calendars screen and can skip to step 27.
If you see the SSL prompt again, tap Yes. You see the account’s information on the Mail, Contacts, Calendars screen.
If you want to perform advanced configuration of the account, refer to “Performing Advanced Configuration of Email Accounts on an iPod touch” later in this chapter.
Your iPod touch can help you track time for events, such as how fast you run, including lap times.
On the Home screen, tap Clock. The Clock screen appears.
Tap Stopwatch. The Stopwatch screen appears.
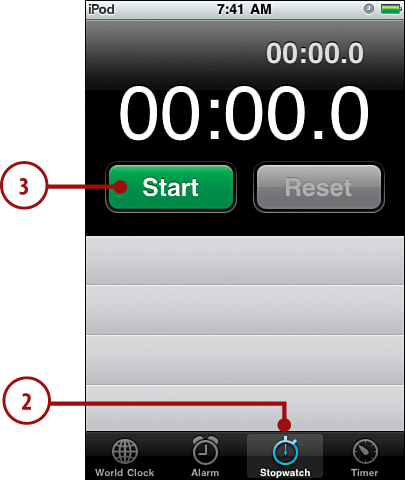
Tap Start. The stopwatch starts.
To set a lap time, tap Lap. The lap time appears on the list below the stopwatch.
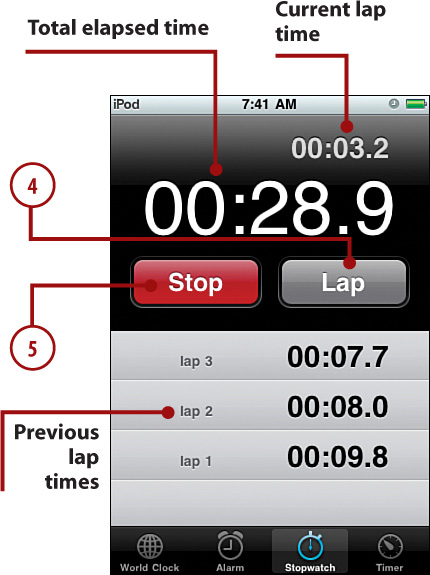
To stop the time, tap Stop. The time stops.
Browse the lap times you’ve captured.
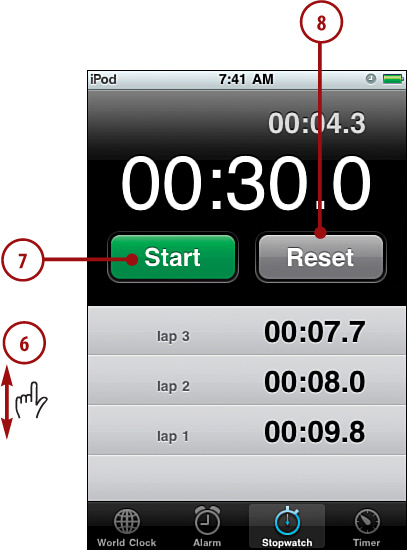
To restart the stopwatch, tap Start.
To start a new stopwatch session, tap Reset. The current time is set to 00:00.0, and all lap times are removed.
The Timer counts down for a specific period of time and then notifies you when that amount of time has passed.
On the Home screen, tap Clock. The Clock screen appears.
Tap Timer. The Timer screen appears.
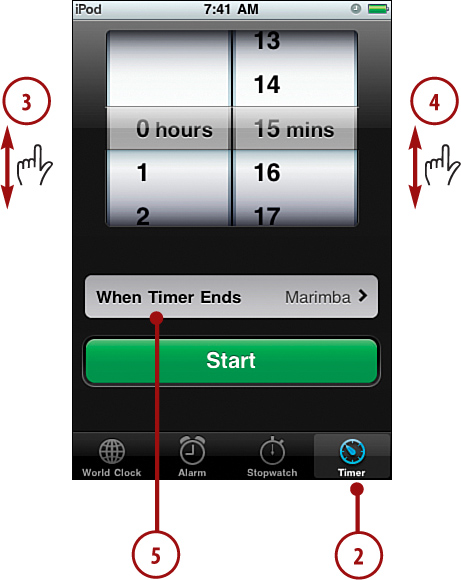
Drag the hour wheel up or down until the center bar shows the hour you want to set on the timer; you can select a timer up to 23 hours.
Drag the minute wheel up or down until the center bar shows the minute you want to set on the timer.
Tap When Timer Ends. The When Timer Ends screen appears.
Browse the action and sounds available. At the top of the screen, you see the Sleep iPod command, which shuts down iPod actions when the timer expires. Under that, you see the iPod touch’s standard sounds.
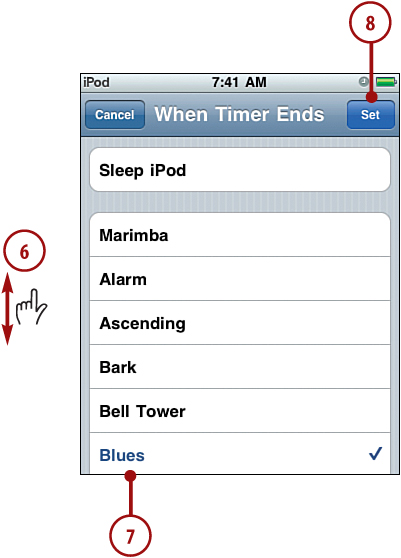
Tap the action or sound you want to associate with the timer. What you select is marked with a check mark. Any sound you select plays.
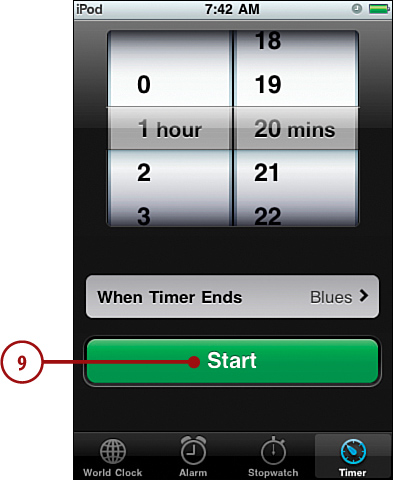
Tap Set. You return to the Timer screen, which shows the sound or action you selected.
Tap Start. The countdown begins. When the countdown ends, an onscreen message appears, and the sound you selected plays, or the iPod functions go to sleep if you selected that action.
To change the sound or action while the timer is counting down, tap When Timer Ends and use steps 6 through 8 to choose a different sound or action.
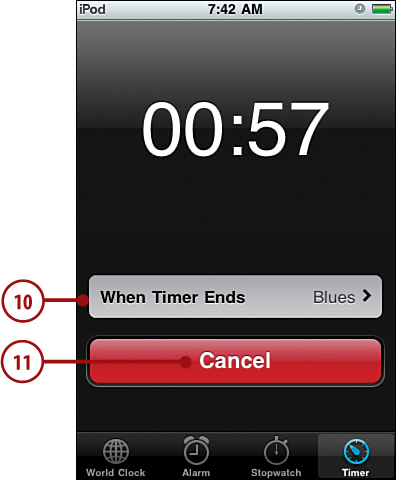
To stop the timer, tap Cancel. The timer stops, but your most recent settings remain.
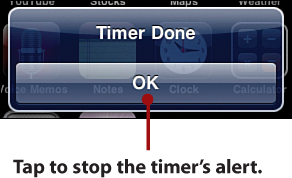
When a timer gets to 0, you see an onscreen message and hear the sound associated with the timer. (If the timer has the Sleep iPod action, you don’t hear or see anything, but any music or video playing stops.)
The beauty of YouTube videos is definitely in the eye of the beholder, but some of them are quite hilarious, and many are very shocking or just downright obscene. But if you want to see a video of something, it’s probably on YouTube.
Similar to viewing video content through the Videos application, watching YouTube videos is a two-step process. First, find the video you want to view; there are several ways to do this. Second, play the video and use the YouTube controls to control it.
In this section, you learn about some of the more useful ways to find YouTube videos that you might want to watch.
You can search for videos to watch by performing the following steps.
On the Home screen, tap YouTube.
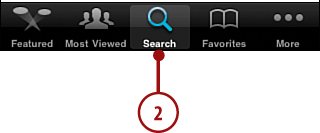
Tap Search.
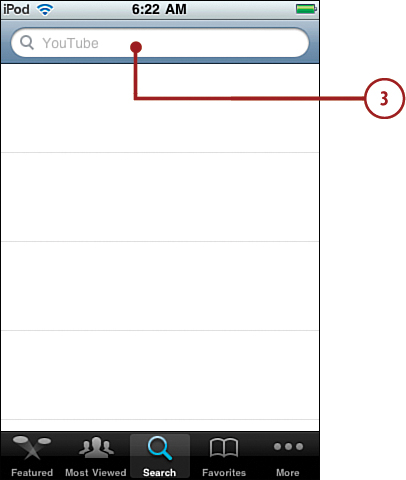
Tap in the Search bar.
Enter the topic for which you want to search. As you type, the iPod touch tries to complete the term for you. If it presents a term you want to use, tap it.
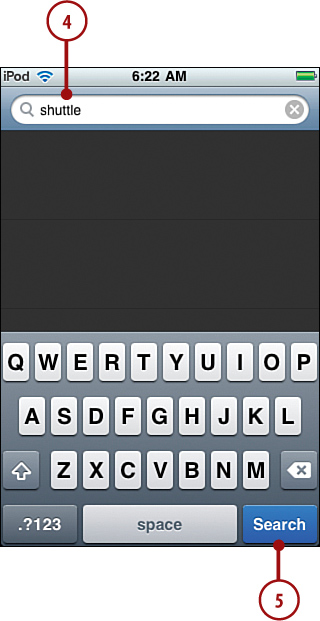
Tap Search. The application searches for videos that meet your topic search and presents them to you on the results screen. You see a thumbnail view along with the clip’s name, rating, number of views, length, and source.
Scroll the screen to browse the videos in the found set. When you browse to the bottom of the list, tap Load More to load more videos.

When you find a video you want to view, tap it. The video loads and starts to play.
Rotate the iPod touch to view videos in landscape mode.

Use the YouTube video controls to control the video (see the “Viewing YouTube Videos” task later in this section for details). When the video finishes, the video’s screen appears.
Featured videos are those that are being promoted by YouTube. It’s not clear what criteria is used for a video to be featured, but these can be a good way to find interesting videos to watch.
On the Home screen, tap YouTube.

Tap Featured.
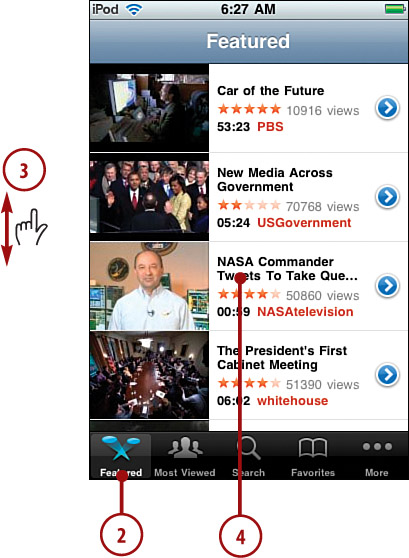
Browse the screen to see the videos in the featured category. When you browse to the bottom of the list, tap Load 25 More to load more videos.
When you find a video you want to view, tap it. The video loads and starts to play.
Use the YouTube video controls to control the video (see the “Viewing YouTube Videos” task later in this section for details).
The number of times a YouTube video is watched is tracked. You can see which videos are the most watched and then view those that are interesting to you:
On the Home screen, tap YouTube.
Tap Most Viewed.
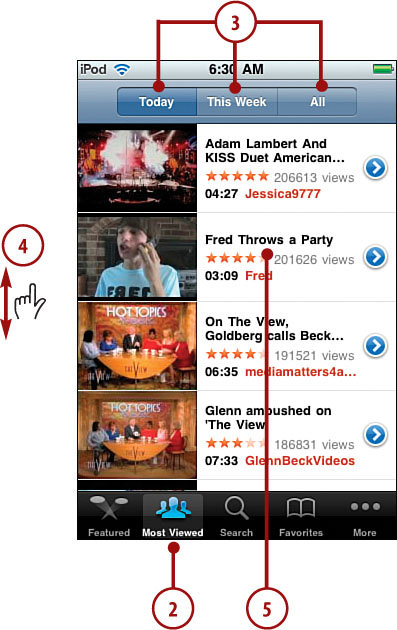
To see the videos that have been viewed the most, tap All; to see those viewed most today or this week, tap the corresponding button. The videos that match your criterion are shown.
Browse the videos. (When you browse to the bottom of the list, tap Load More to load more videos.)
When you find a video you want to view, tap it. The video loads and starts to play.
Use the YouTube video controls to control the video (see the “Viewing YouTube Videos” task later in this section for details).
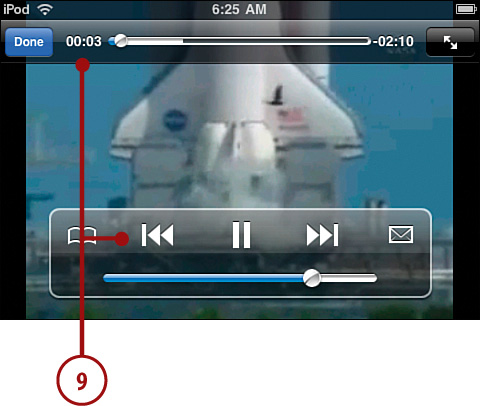
No matter how you find YouTube videos, you use the same controls to watch and work with those videos.
Find and start the video you want to view.
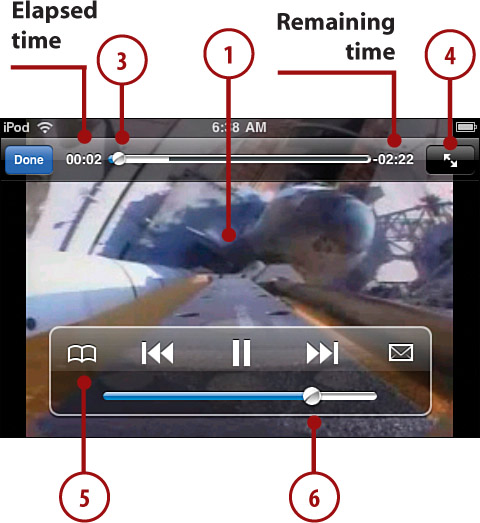
If you don’t see the video controls, tap the video. The video controls appear.
Drag the playhead to the right to move ahead in the video or to the left to move back in the video.
Tap Scale to scale the video to fill the screen or to restore the video to its original proportions.
Tap the Bookmark button to save a bookmark for the video.
Drag the slider to the left to decrease volume or to the right to increase it.
Tap Rewind to move to the start of the video or tap and hold the button to rewind it.
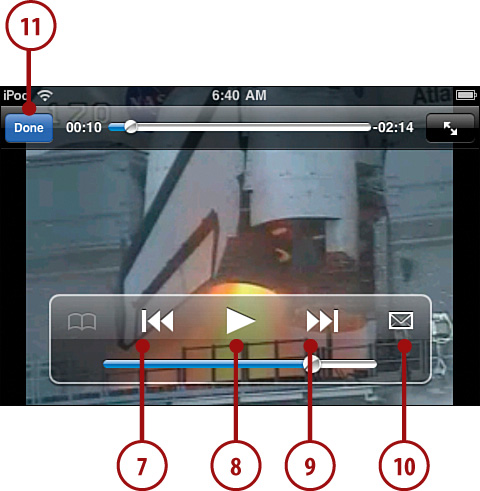
Tap Pause to pause the video or Play to start it again.
Tap and hold Fast Forward to fast forward the video.
Tap the Share button to share the video. (An email message with a link to the video is created; complete and send the email to share the video.)
To stop the video before it finishes, tap Done. The More Info screen appears; this appears when a video finishes playing on its own, too.
Read more information about the video.
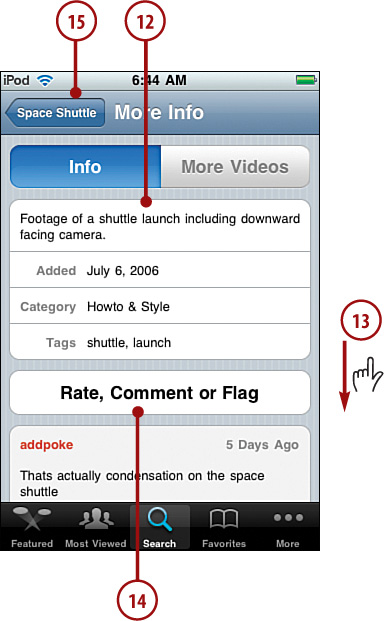
Scroll down the screen to see comments about the video.
Tap Rate, Comment or Flag to perform any of those actions.
Tap the return button, which is labeled with the name of the video you watched. You see the video’s screen.
Tap Add to Favorites to save a bookmark to the video. (This button doesn’t appear if you’ve already saved a bookmark.)
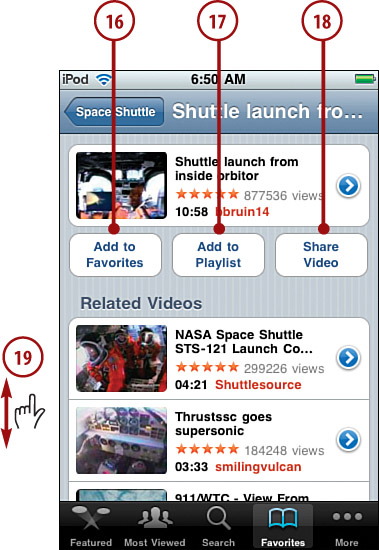
Tap Add to Playlist to add the video to your YouTube playlist.
Tap Share Video to share the video.
Scroll down the screen to see videos related to the one you watched; watch one of these videos by tapping it.