
B
NetBeans Installations
NetBeans IDE Installations
The NetBeans team has done an excellent job of making installation simple and quick. Official NetBeans installers are available for all of the major operating systems including Solaris, Windows, Mac OS X, and Linux. As NetBeans is written in Java, the only prerequisite is the JDK (Java Development Kit) for Java development and the JRE (Java Runtime Environment) for Ruby, C++, and PHP development. Some JDK bundles from Oracle include NetBeans. Multiple versions of NetBeans can be installed on the same computer.
The NetBeans certification exam targets NetBeans 6.1; however, user interface continuity has been maintained throughout the 6.x release cycle. Choosing to use a more current release of NetBeans, such as 6.8, will not hinder exam preparation. NetBeans 6.8 contains many new enhancements and bug fixes.
If you are still interested in using NetBeans 6.1 for your exam preparation, finding the download page for both NetBeans 6.1 and JDK 5 can be an expedition. To download NetBeans 6.1, select Archive from the download page (http://netbeans.org/downloads), and specify NetBeans version 6.1 with the build type Release. For Java SE 5.0 (http://java.sun.com/javase/downloads) click Previous Releases, and pick JDK 1.5 Update 22.
NetBeans 6.8 still supports JDK 1.5, but future versions will require JDK 1.6 or greater. NetBeans does not impose any JDK/JRE requirements on your project. Although NetBeans 6.8 requires JDK 1.5 or greater, your project can use older versions. Consult Chapter 1 for a more detailed discussion on configuring projects with different JDK versions.
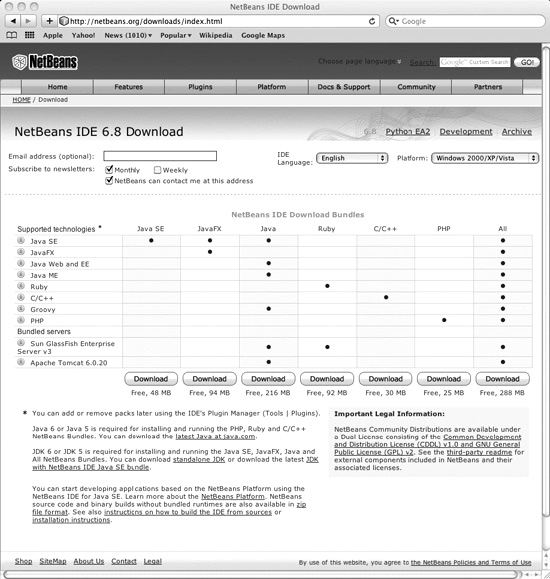
The current download page appears in Figure B-1 (http://netbeans.org/downloads). This figure has seven installers from which to choose. As the download page reveals, NetBeans is much more than a Java IDE. NetBeans supports a variety of additional development languages and frameworks including C/C++, Ruby, PHP, and Groovy. For the purposes of the test, the Java or All installer should be downloaded. The Java SE installer does not include the Java EE features such as editor support for JSP/Facelets files. Selecting the Java installer package does not preclude using C++/Ruby support in the future. Use the Plugin Manager to activate these features via Tools | Plugins. Consult Chapter 1 for a detailed discussion on installing and activating features.
Installing and running NetBeans will require administrative permissions on Mac OS X and Windows, but root access is not needed on Linux. Root access is compulsory if NetBeans is to be installed in a central location and shared among multiple users. After installation, NetBeans does not require write permissions to the installation directory. All files and settings specific to an individual user are stored locally in the user’s home directory (this can be configured). The location of a shared directory will vary by operating system and IT environment.
Although the installation steps are roughly the same, each platform-specific installer is different. Official NetBeans installers are available for the following platforms:
![]() Microsoft Windows (2000/XP/Vista/7)
Microsoft Windows (2000/XP/Vista/7)
![]() Solaris/OpenSolaris
Solaris/OpenSolaris
![]() Mac OS X
Mac OS X
![]() Linux
Linux
![]() OS Independent Zip
OS Independent Zip
Current installers can be downloaded from www.netbeans.org. The following sections document the installation procedure for each platform.
Microsoft Windows
NetBeans for Windows is distributed as a standard Windows installer for Windows 2000, XP, Vista, and Windows 7. While the installer does not require Java to run, a JDK must be preinstalled on the computer for NetBeans. The installer will attempt to auto-detect installed JDKs. For NetBeans 6.8 the current JDK 1.6 should be downloaded and installed from Sun’s Java website (java.sun.com). NetBeans 6.8 will also run on JDK 1.5. Oracle provides JDK/NetBeans bundles on the java.sun.com website, although these bundles often include a slightly older point release of NetBeans.
If the goal is to install NetBeans 6.1, the version used on the exam, some additional work may be required. The NetBeans 6.1 installer will not launch unless JDK 1.5 is installed. JDK 5 has been officially discontinued—End of Service Life on November 3, 2009. This means that no more patches/fixes will be forthcoming. Downloading Java 5 requires filling out a form and receiving a download link via e-mail.
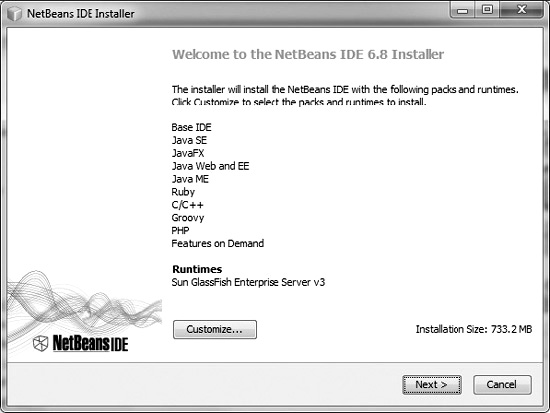
After downloading NetBeans and launching the installer, the welcome screen in Figure B-2 is displayed. The list of packs and runtimes displayed will vary depending upon the installer downloaded. Note that the installer will also detect components already installed. The default amount of disk space to be consumed by the installer is displayed at the bottom of the screen.
FIGURE B-2 Windows installer welcome
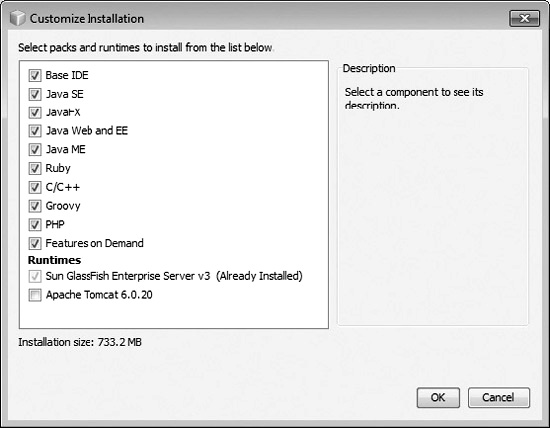
Clicking the Customize button displays the dialog box shown in Figure B-3. The features that will be installed can be selected or deselected. Tomcat 6 is deselected by default.
FIGURE B-3 Windows installer customization
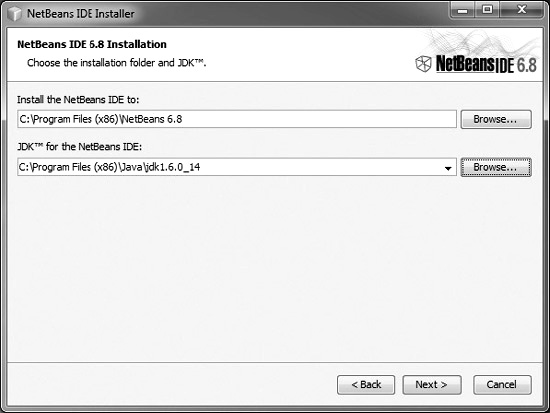
The next step in the installation, after accepting the license, is to choose an installation directory and also the JDK, as shown in Figure B-4. The default location for NetBeans 6.8 is under Program Files. The installer will attempt to auto-detect the JDK to be used. Depending upon the environment, it might be necessary to select a different JDK.
FIGURE B-4 Windows installer installation location
The installer will create a group under the Start menu/Application menu to facilitate launching NetBeans.
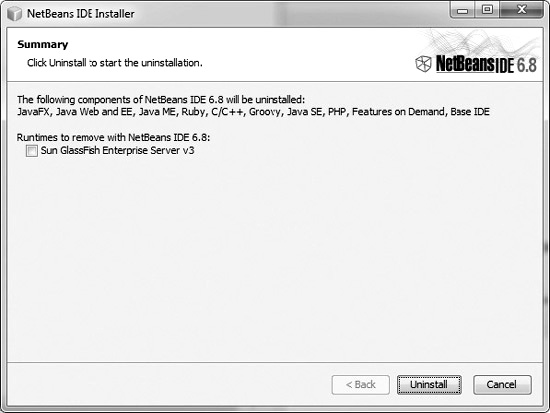
Uninstalling NetBeans requires going through Add/Remove Programs (XP) or Uninstall A Program (Windows 7). The uninstaller, shown in Figure B-5, can optionally remove GlassFish.
FIGURE B-5 Windows uninstaller
OpenSolaris
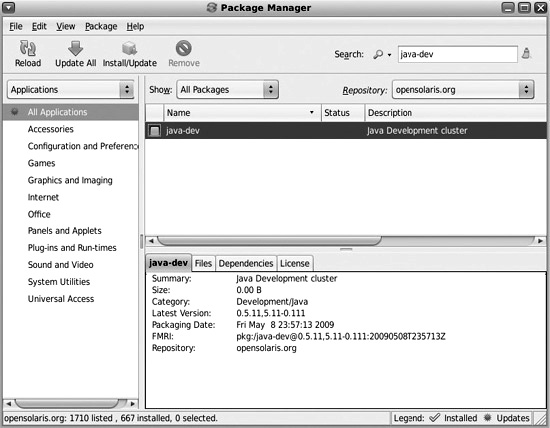
OpenSolaris is the open-source branch of the Solaris operating system from Oracle. You have at least two options for installing NetBeans on OpenSolaris: download and install from www.netbeans.org, or via the Package Manager. The Package Manager, shown in Figure B-6, can be accessed via System | Administration | Package Manager. Installing the java-dev or SUNWj6dev package in the Package Manager is the easier route, because the JDK is installed at the same time. The JDK is also installed by selecting the netbeans package. The benefit of installing java-dev is that you also get GlassFish and MySQL. Sun Studio Express is also included. With the java-dev package, the version of NetBeans installed may not be the most recent version available from the NetBeans website.
FIGURE B-6 OpenSolaris Package Manager
If NetBeans is being installed from the website, the JDK must be installed first. This can be done easily by installing the java-dev package via the Package Manager.
The java-dev package also includes a version of NetBeans. After the JDK is installed, run the installer from the command line using sh netbeans-6.8-mlsolaris-x86.sh.
The installation process is almost the same as with Windows. The panels in the Solaris installer match Figure B-2, Figure B-3, and Figure B-4. The only difference is the installation location, which is /export/home/<user>/netbeans-6.8 (user’s home directory).
NetBeans and the JDK are removed by launching the Package Manager and clicking Remove with the NetBeans/JDK package selected. The Package Manager will go through and remove all installed executables.
Mac OS X
Apple bundles the JRE and JDK with the Mac OS X operating system, meaning that there is no separate download or setup for the JDK. Apple licenses Java from Sun Microsystems and provides their own implementation customized for the Macintosh platform. To run NetBeans 6.8, you need either Mac OS 10.4 (Leopard) or Mac OS 10.5 (Snow Leopard). Consult Apple Technical Note TN2110 (developer.apple.com) for an up-to-date matrix of Java-to–Mac OS X versions.
The NetBeans installer for Mac OS X is distributed on a DMG (disk image) file. When downloading the disk image via Safari, the disk image is automatically mounted and the installer is auto-launched. If the installer does not auto-launch, double-click the mpkg file.
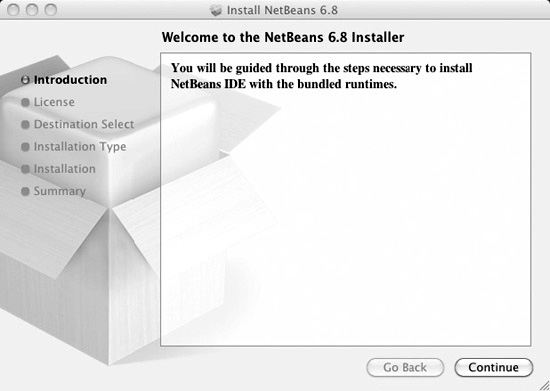
The first screen in the installation process, shown in Figure B-7, confirms the version that you are installing. Clicking the Continue button brings up the second screen, a standard license that must be accepted.
FIGURE B-7 Mac OS X installer, Step 1
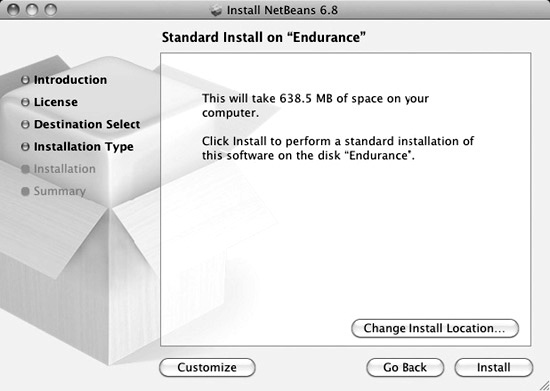
On the third step of the installer, shown in Figure B-8, the installation location and features can be customized. By default, the installer will place NetBeans under /Application/NetBeans. Installing in this location will require administrative permissions. Installing under /Applications will make NetBeans available to all users on the computer.
FIGURE B-8 Mac OS X installer, Step 3
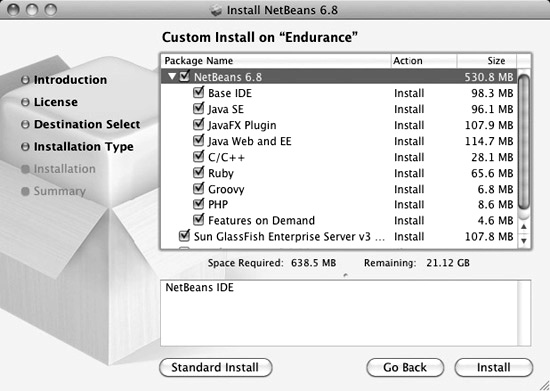
Electing to customize displays the panel shown in Figure B-9. Each feature to be installed or updated is listed along with the amount of disk space required. By default, both NetBeans and GlassFish will be installed for the All bundle. Tomcat 6 is skipped. GlassFish is installed into /Applications/NetBeans/glassfish<version>. After installation, the NetBeans icon can be dragged onto the Dock to simplify launching.
FIGURE B-9 Mac OS X customizations
Uninstalling NetBeans is as simple as dragging the NetBeans application icon from /Applications/NetBeans to the trash. If your goal is to completely remove all vestiges of NetBeans, the following hidden directories must be deleted from each user’s home directory:
![]() .nbprofiler NetBeans Profiler settings
.nbprofiler NetBeans Profiler settings
![]() .netbeans User directory
.netbeans User directory
![]() .netbeans-derby Derby database
.netbeans-derby Derby database
![]() .netbeans-registration Registration settings
.netbeans-registration Registration settings
Linux
The NetBeans team provides a generic installer for Linux distributions such as Red Hat, Ubuntu, Debian, and Slackware. This installer requires a valid JDK to have been installed previously. NetBeans 6.8 requires Java 2 SE 5.0 with JDK 1.5 or Java SE 6 with JDK 1.6. The installer does not need the JAVA_HOME environment variable configured; it will scan the system looking for a JDK.
The installer is invoked by executing sh netbeans-6.8.ml-linux.sh from the command line. The installer is the same as the Windows installer, with only minor differences in the default paths. NetBeans is installed in the current user’s home directory by default.
Uninstalling NetBeans is as simple as deleting the NetBeans directory and deleting the following directories for each NetBeans user:
![]() .nbprofiler NetBeans Profiler settings
.nbprofiler NetBeans Profiler settings
![]() .netbeans User directory
.netbeans User directory
![]() .netbeans-derby Derby database
.netbeans-derby Derby database
![]() .netbeans-registration Registration settings
.netbeans-registration Registration settings
OS Independent Zip
The OS Independent Zip is a ZIP file containing NetBeans minus GlassFish and Tomcat. It does not include any installation scripts; hence, there is no automated checking of the environment for a valid JDK. The ZIP distribution can be used in environments where installers are prohibited or where the developer wants more control over the IDE’s setup. For instance, the NetBeans ZIP could be expanded on a shared drive and used by Linux and Windows alike. The bin directory contains a shell script, netbeans, and a Windows executable, netbeans.exe, both of which will launch the IDE. The contents of the ZIP file can be placed anywhere on the system.