
Chapter 9: Custom Forms, Records, and Fields
An Enterprise Resource Planning (ERP) system would be unusable without the ability to customize screens, allowing people to add fields they need for their business and to remove all of the natively offered things they won't use. Every NetSuite client will have at least a few, if not a lot, of reasons to customize their NetSuite instance, and that usually starts with the records, forms, fields, and other related features. Learn how to use these always-available custom fields, records, and forms to tweak the account to fulfill your client's requirements.
In this chapter, you will learn how to implement a client's foundational elements, including the following:
- What is SuiteBuilder and when should you use it?
- Customizing the Entry and Transaction forms
- Using custom record types to store additional non-standard data
- Defining custom fields
- Changing management for all your custom objects
You will be working with the account's administrators and the Subject-Matter Experts (SMEs) for each department in the business to configure the forms and records they will use within NetSuite for both native and custom data types.
By the end of this chapter, you should have gained the skills to walk a client through the initial setup of their account, including setting up the main forms they'll use every day, plus the basics of the custom records and fields they need to make the account specific to their needs. To do well in this chapter, you should know the basics of getting around in NetSuite and know how to adjust the system's out-of-the-box screens with custom features.
What is SuiteBuilder and when should you use it?
When we think about NetSuite, one of the first things that should come to mind is how flexible and configurable it is for any ERP-related use case. Most of that configuration is accomplished via the SuiteBuilder parts of the system.
SuiteBuilder isn't a screen you go to though; you won't find it in the menus (in NetSuite, called Centers) across the top of the screen. Instead, you'll find the various SuiteBuilder features under the Setup and Customization menus, allowing you to re-work all of the native record screens NetSuite offers and more. When you need to change the order of fields on a screen or add a new field to one, you'll use the SuiteBuilder features to accomplish this. In older ERP systems, you might have to hire a professional to make changes like this, but in NetSuite, any user with some training (and the right permissions) can go in and make modifications to screens and records (and more) to suit the business's needs. As the business changes, the system can be updated to match – again, without any coding or other technical experience necessary.
Here's a list of all of the features that fall under the SuiteBuilder umbrella and when you might want to customize them. We'll cover the most important topics in greater detail in the rest of this chapter:
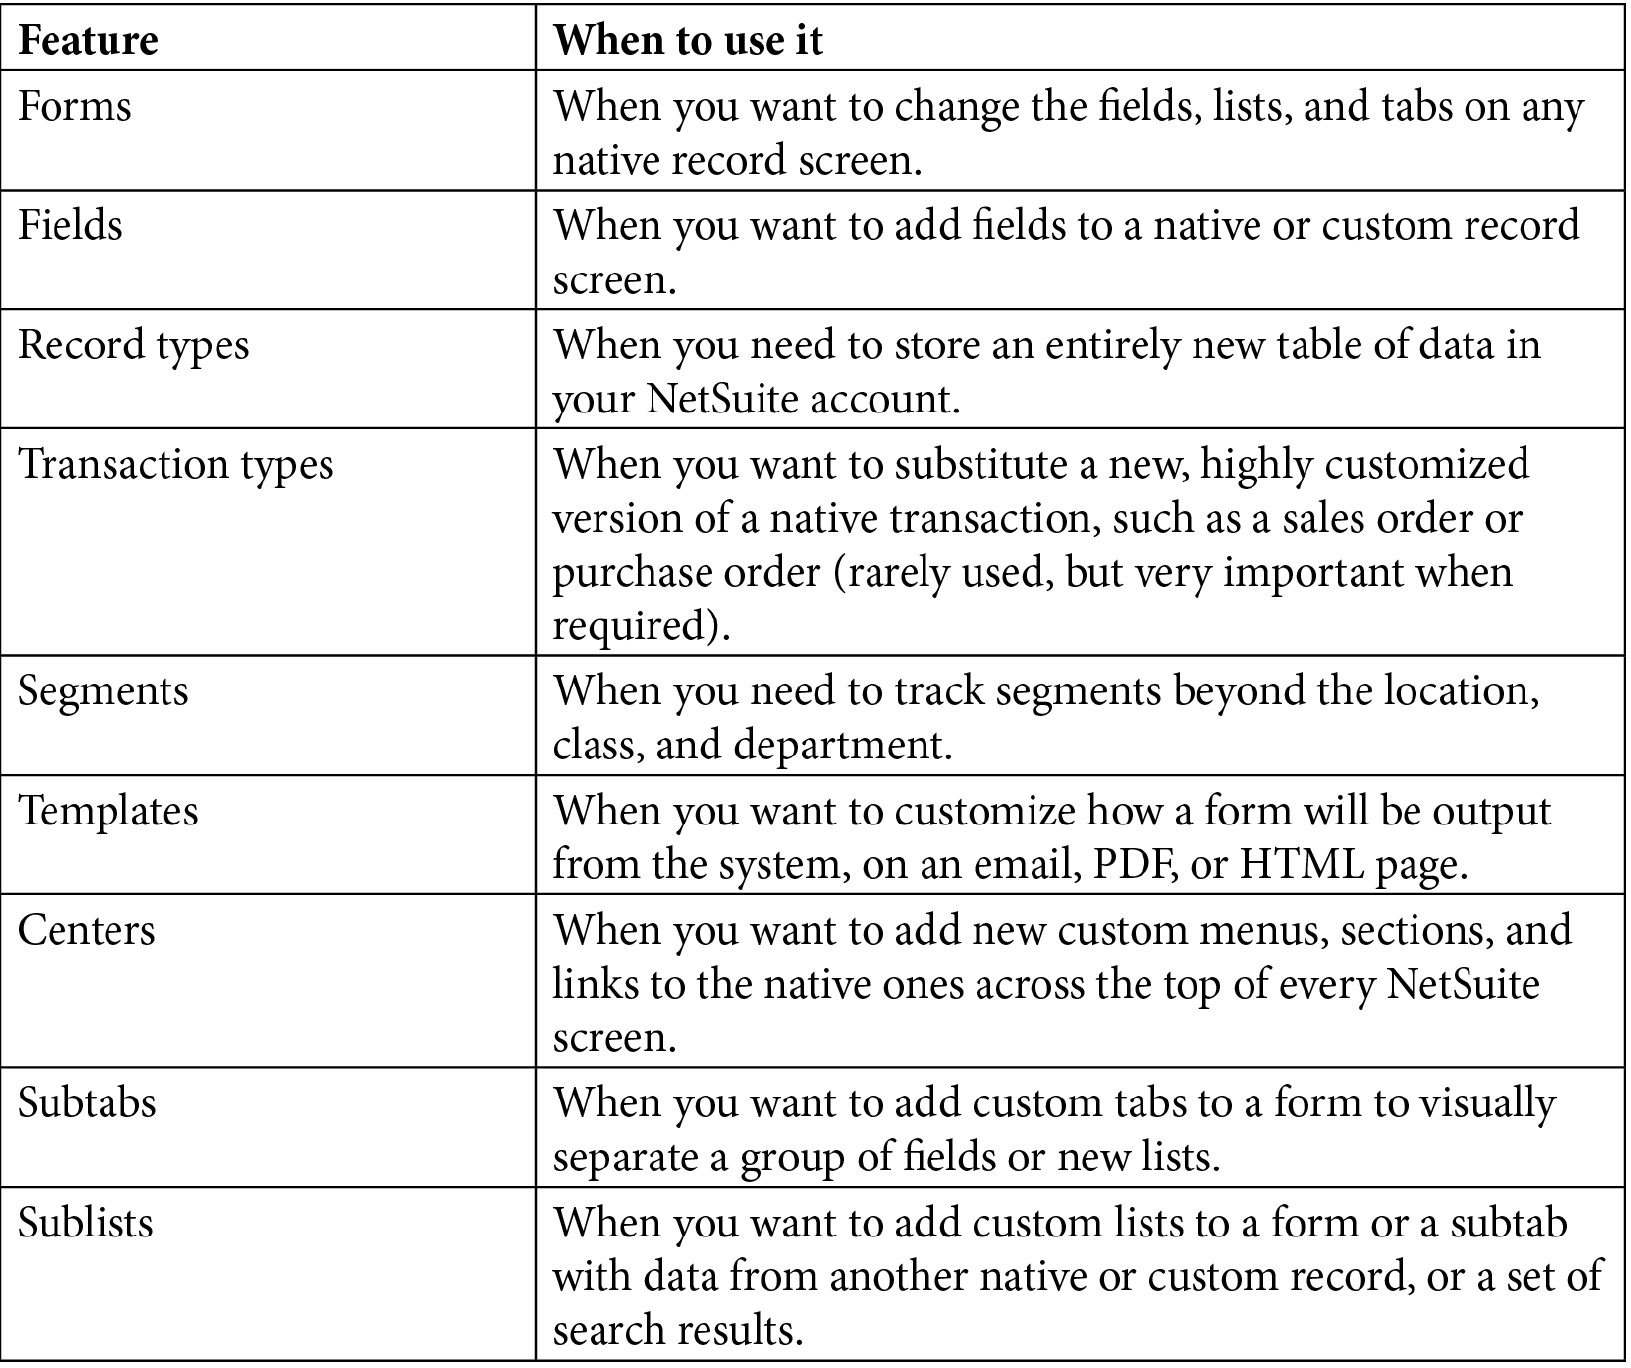
Table 9.1 – List of SuiteBuilder features in NetSuite
Depending on your client's requirements, you may not need to customize all of these features for every implementation, but knowing how to do this, and how your changes can affect the user's experience working with the system, is a very important skill for a NetSuite consultant or administrator. Another important aspect of this is knowing how and when you can undo your changes. For instance, if you enable a feature such as Advanced Inventory and then customize your forms to use that feature's new fields, you need to know what will happen to your forms if you decide to disable the feature again sometime later.
Important Note
As you start to customize the features within a client's account, always remember that you might need to undo a change or customization at some point (if the client changes their mind, for instance). Keep track somehow of the changes you make and be prepared to remove something or deactivate/disable it if the need arises. Also, know what other changes you might need to make each time you have to do that, too.
Let's dig into these features, starting from the top (forms) and working our way down (to records, fields, and more).
Customizing the entry and transaction forms
When we visit a screen that is used to display any one record in the system, such as Customers or Invoices, we're looking at a form. NetSuite uses that term to refer to the customizable aspects of a screen. So, for instance, when we look at an inventory item, we see the screen arranged in a certain way, with groups of fields in sections, and with subtabs holding more fields and lists of sub-records too. We see sections labeled as Primary Information and Classification and here we see subtabs for Purchasing information versus Sales/Pricing information, and many more.
Most of these visual features are customizable via a form. NetSuite stores many forms for each record and allows us to choose which users see which forms by default. NetSuite also keeps separate forms for each item type and each entity, transaction, and so on. We could work with just the standard forms that come with the system out of the box, but in almost every case, we create a custom version of the standard form and incorporate changes into that (we cannot ever change the standard forms; they're meant to stay there, as delivered, for reference if we need that). We usually work to define a set of custom forms for every entity and transaction feature the client will use in their account, with the name of the form having their initials. So, if the business is named ABC Corp, the form's names might all start with ABC -.
There are many reasons to customize the forms for a client, but they all boil down to the main ideas explained in the following sections.
Removing fields the users don't need to see or won't use
As you work to make the client's NetSuite account suit their business needs, it will always be beneficial to the users if you can remove fields from the screen. For instance, if they never have a customer-originated PO # on their sales, then remove that Purchase ORDER # field from their Sales Order form. Do this for as many fields as possible, with the goal being to clean up the screen and make it as simple as possible for the users.
Does your client need every one of these fields?
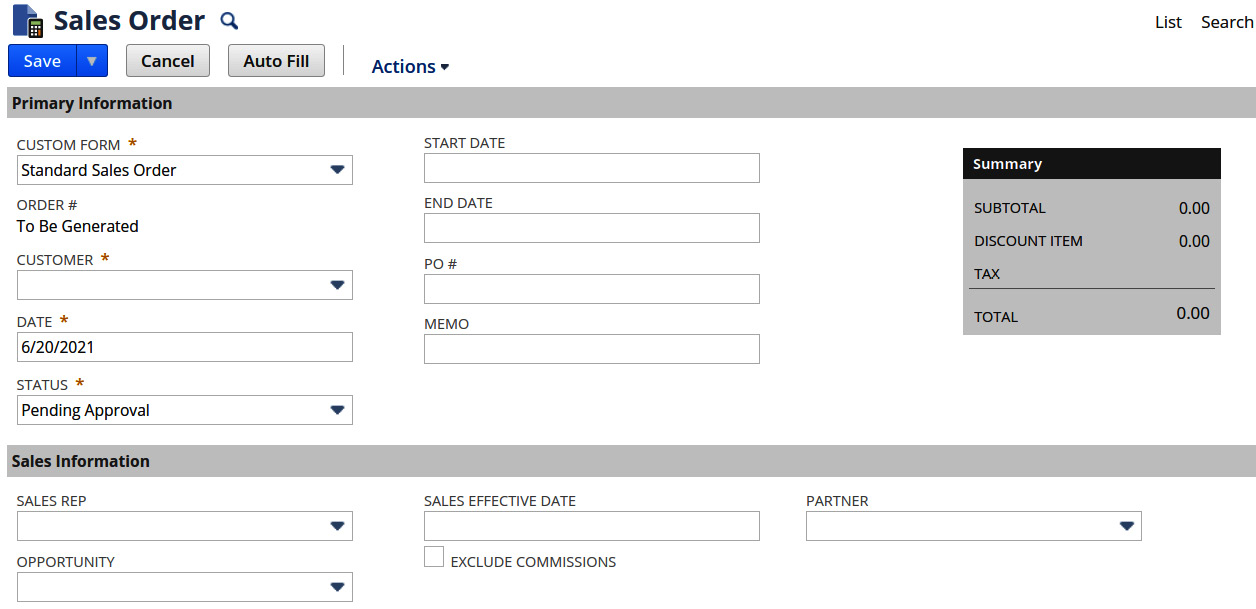
Figure 9.1 – The default Sales Order screen
Take the time to go through the fields on each form they will use and look for opportunities to remove fields wherever it makes sense.
Adding fields the users need that were not included out of the box
By the same logic, if the users need to track something that NetSuite does not include in its default screen for something such as customers or vendors, you can add a new custom field and place that on the form just where you want it to appear. We'll talk more about handling custom fields in the next section, but always talk to your clients about how each of these custom fields' values will be populated. It's fine if the answer is manually, by the person filling in the form, but if the client prefers the field to get a value automatically, you'll need a plan for making that happen. You can do that with workflows or scripts, or via other methods. As an overview, we'll cover those things in Chapter 18, Managing Gaps and Creating Custom Automations, or you can search the Help screens for these topics to learn more.
Rearranging the fields and lists on the form
The system does allow us a lot of flexibility in how the forms are put together, so if you add new fields to the form, you can move them to any section or subtab you need. Grouping a set of related fields together either within a section (a field grouping) or on a new subtab can keep the fields together visually, and that also generally helps the users remember how to find those fields when they need to populate them.
Every form has the Main section, and then you can add sections to every subtab and field group within those. Just try to restrain yourself and your client, with the aim being simplicity and ease of use. Without someone always pushing for these things, I've seen forms that became unusable in terms of very high complexity and lack of organization. It's OK to add things to forms as you think of them, as long as you make it someone's job (typically not long before going live) where we re-visit every form and clean them up, move things into sensible groups/sections, and remove fields or lists that are no longer needed.
Along with these visual field settings, forms in NetSuite also allow us to customize other aspects of their use. We will study these in the following sections.
Enabling related features and settings
NetSuite allows us to make some basic choices for every form we customize. These settings will vary from one form type to the next. For instance, for items, you can decide whether the form should be used for popups; for transactions, you can decide whether to allow the use of the ALLOW ADD MULTIPLE buttons.
This is what the header fields of a custom form for an item looks like in NetSuite:
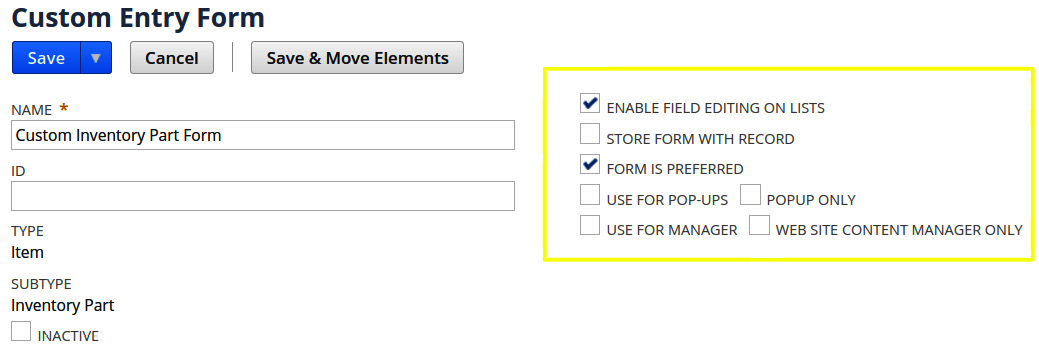
Figure 9.2 – The Custom Entry Form screen for an item in NetSuite
And this is what the top of the screen looks like when creating a custom opportunity form:
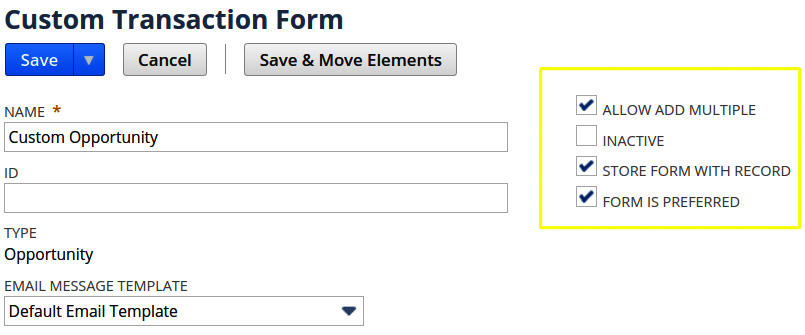
Figure 9.3 – The Custom Transaction Form screen for an opportunity in NetSuite
Note the differences between these two figures. While every form has a name and an ID, items have checkboxes for popups, since items can appear within pop-up windows, but transactions do not. Item forms also can be set up specifically for managers and for use within a web store too.
Storing the form with the record
This is really useful when you have multiple forms for any record and you want to make sure that all users will see the same set of fields and lists, and so on, that the user who created the record saw. With this setting enabled, we can ensure this, even when the other users are assigned to a different default form.
Actions
NetSuite allows us to add and remove actions available on a form. For instance, if you want to restrict most users from being able to print a customer record, you can remove that action from the form they're assigned to. You can also add new, custom actions to a form via a script, but we generally use this only in rare cases (see Chapter 18, Managing Gaps and Creating Custom Automations, where we'll cover this in greater detail).
Roles
This is one of those powerful features of the system, which you can totally abuse and can then confuse people very quickly if you're not careful. It's great that you can have as many forms as you need per record and assign different forms to different groups of users via their roles, but always keep this down to just a couple of options. If you find yourself setting up more than a handful of forms for one record, just know that people will get confused quickly, saying things such as "Why does Mary see the Categorization fields when she looks at records but I don't?". As stated earlier, use restraint and consider other options before setting up anything too complex.
In this section, we learned how the various features of forms in NetSuite can be used to truly change the user's experience when working with records. We can remove fields, add lists, and so much more. Experienced NetSuite consultants use all of these things to show users how adaptable NetSuite can be to their company's needs.
Next, let's see what you can do when you need to store a whole new type of data in the system, with custom record types.
Using custom record types to store additional non-standard data
I've had many reasons to create custom records in the past. For instance, a client wants to keep track of warranties on a certain range of products they sell but NetSuite doesn't have a warranty record type. We can create a new type, consisting of fields and forms and subtabs, and assign it specific permissions by role very quickly, all via the NetSuite point-and-click interface.
We can define just the fields we need on that record as well, of course. Using the warranty example again, we might add fields for a customer such as an item, a serial number, and possibly a link to a sale, and a few dates we need to keep track of. If there can be multiple items linked to one warranty, we might want to use the very handy Record is parent feature, to link one field on the parent record type to a field on a related child record type. With this, the users can create one of the parent records, representing the warranty, and then as many of the child records as they need, representing the items covered under that warranty. NetSuite handles the joining or relating of those tables for us automatically, which makes using that data in things such as searches and reports later easy.
As you create custom record types for your clients, always think about how many rows of data each record type will store over time. If the record type might have millions of records after some time (such as a year or two), then it's important to talk that over with the client. NetSuite doesn't charge extra for more rows of data in these tables, but the system's performance can suffer if there are frequently times when users need to search and filter or report on those results. If you allow a record type to end up with 20 million records and users need to export most of that list regularly, they will not be happy with how long that task takes. You need to take the time to understand the volume and scalability of each of these record types you set up and make sure the client has a plan for managing that data in the long term. For instance, in some cases, we can set up simple automation to delete any record that is more than 12 months old, or something like that, to keep these lists from growing without any restrictions.
Custom records are powerful and make the difference for many clients who need to store data that NetSuite didn't anticipate. Over time, I'm sure you'll find many ways to use them to meet client requirements. Keep the maintenance of all that additional data in mind as you develop them.
Defining custom fields
Many businesses will start a NetSuite implementation with the idea that you must help them make the system look just like their current ERP application. Doing that is not generally a good idea, since NetSuite works very differently from most older ERP systems, but we can still accommodate the most important of the client's requests with features such as custom fields. We can add new custom fields either to most native records or to our custom record types. NetSuite offers a range of field types, from plain text (in various lengths) to lists, numbers, dates, passwords, and more. Review the Help page called Field Type Descriptions for Custom Fields to see the full list, and keep most of these in your head at all times so you'll know how you can solve any problem that comes your way. For instance, if a client says they want to add a Standard Discount field to the sales order, know whether they should use a decimal number or a percentage field. If they want to add a field for Customer Service Comments to each Customer screen, know the difference between Free-Form Text, Text Area, Long Text, and Rich Text field types, so you can help them choose the right option for their needs.
However, there will also be times when you have more than one way to capture some data, and NetSuite offers more than one good option. Here are a few examples and suggestions for how to resolve any uncertainty.
Checkbox versus list
Your client says they want to add a field called Manager Approved to a form, and they want it to be a list with Yes and No values. However, we generally recommend they use a checkbox in these cases since the list fields always have a blank default value, and it's never clear what blank means in a field like this. A checkbox, on the other hand, is either selected or it is not.
Single-select list versus multiple-select lists
Once, a client of mine wanted to add a field to their item forms called Allowed States, because some of their items could only be sold in some states. We talked over the options and settled on multiple-select fields for this purpose. They had initially asked whether this should be a sublist of custom records so they could update the list whenever they needed. They thought they might start to sell these items in Canada, in addition to the US, for instance. We showed them how they can update the values in multiple-select lists, and how it takes up a lot less space on the screen than a sublist with a set of row data.
For visual reference, here is a typical sublist, with multiple fields on each row of data:
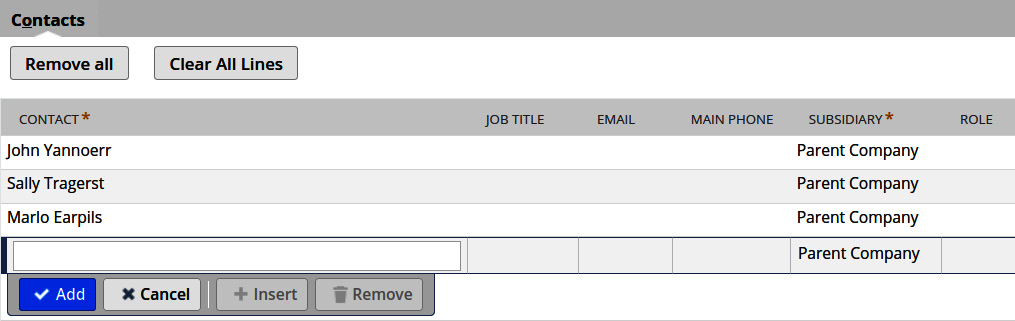
Figure 9.4 – The default Contacts sublist on sales orders
And here is a multi-select field, with just one value per row:
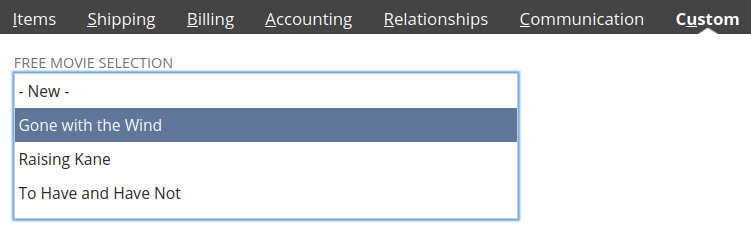
Figure 9.5 – An example of a custom multi-select list field
You can see that the multi-select is preferable, as long as we just want to keep track of that list of selected values.
Image versus inline HTML
Image fields are OK – they make it simple to add an image to any record such as an employee. But they're not very flexible. We usually recommend using an inline HTML field instead, since they can include an <img> tag as well, and then you can re-size the images to a standard size, position, and so on. It's not too hard to set up a default value in these fields that keeps most users from having to worry about those technical details as well.
As we discussed in the SuiteBuilder section earlier in this chapter, it's easy to add a lot of custom things to an account, but it's harder to manage it all and keep it easy for users to navigate these screens and access the fields/lists when they need to. This is where a solid change management plan really helps.
Change management for all of your custom objects
If I could go back in time and counsel my clients on one thing they should do differently in their implementations, it would be to do a better job of managing (and limiting) the changes they make in their account. NetSuite's amazing flexibility is great up to a point, but you know you've overdone things when users start to complain that they can never find the fields they need to set values in, or when nobody knows what a set of fields on a screen is used for, if they are used at all.
It's for these reasons and more that developing a solid, workable change management plan is such an important part of every NetSuite implementation. This process can be very simple or much more formal and complicated, depending on what the business wants and needs. I have worked with clients who were small enough that we just wrote up a single Microsoft Word document, describing all the custom configuration and automation we created for them, and then they just referred back to that whenever they had a question about what was happening in their account, or whether they could change something safely.
But many companies are large enough, and have many more users in many separate functions, that trying to keep a document like that up to date and accurate would never work. These businesses need something more robust, and they need to be able to keep it up to date as things change (which they always do). With a client like this, we usually recommend creating a custom record type in the production account for each of the following topics mentioned ahead.
Requirements or use cases
It's important to start every enhancement users want in the system with a description of the change and a statement of the business need explaining why it needs to be made. The business owners from the related department will typically have things working pretty much as they need when the company goes live on the system, but there are almost always things they want to tweak. Those change requests and new features they're looking for should be documented as requirements or use cases. For instance, if the Customer Service Representatives (CSRs) wish they had a field for tracking the customer's secondary email address on Cases, that is an enhancement request and so has requirements or a use case.
Issues or defects
When NetSuite features are understood to work a certain way but don't, we have an issue to be tracked until all involved parties agree it is resolved. We use a record type with a relevant list of fields on it to keep track of these and to be able to report at any time on their current status, who owns the next action, and when they're expected to be resolved.
System change
When we know we want to change how a field is defined in the account, or we're going to remove a field from a set of forms, it's a good idea to record that change in its own, separate record type. We can also then define a process around managing these changes so that, when the change needs to happen in the live production account, for instance, we both will be able to record every change we make, and we'll also have a place to review later on if issues should arise.
It doesn't make sense to enforce the use of all these records early on in an implementation project since there are so many changes being made every day. However, as you get very close to going live, using records like these becomes critical – especially in larger, more complex jobs. Work with your client to get a sense of how much of a formal process they want/can support and define these records to meet their needs. I will also tell a client about a process I think is more formal than they really need, just to have the idea out there, and to know we can go in that direction should things get out of hand with the simpler, more straightforward approach we start with.
Keeping track of changes as they occur can be very difficult, and it gets more difficult as you add more and more members to either your own team or the client's list of implementation people. But the benefits of maintaining this information over time will far outweigh that extra work. The alternative, where it's difficult to know why any one feature or setting in the account is configured a certain way, or whether it's even used at all, can lead to a lot of problems. Know this upfront and work to avoid that kind of drama by routinely using the ideas outlined in this section.
Summary
In this chapter, you should have learned more about customizing your clients' NetSuite accounts using forms, records, fields, and more. Forms hold the set of fields, lists, subtabs, and sublists together, in the arrangement that works best for the users. Custom record types add to the list of records NetSuite ships with, allowing us to store new types of data particular to the business using each account. Fields give us a place to store additional data on the native and custom records in the system, in a wide range of formats. Your job is to add these things to each client's account in just the right measure to allow them to run their business effectively and efficiently.
Always keep in mind that your goal is to make NetSuite as simple to use for the users as you possibly can, while still meeting all of their data and business requirements. Use the form design tools and Centers and Dashboards features we'll learn about in the next chapter, to streamline the day-to-day operations of all of the user groups at the company. This makes for happy users, which makes for satisfied managers when the project is done.
Self-assessment
Take a moment now to think back over this chapter's contents and test your own understanding of the topics covered. Think about how you would apply these challenges in your work:
- Your client lets you know that they need to be able to define custom kits, each of which is its own collection of items, sometimes sold together and sometimes sold separately, and the contents of these kits vary all the time. Assuming the native kit-type items won't meet their needs, which SuiteBuilder features can you use to help meet this need?
- A software company wants to be able to record sales orders for both contract-based sales and non-contract sale items. The fields on the two types of orders will be very different and they don't want users completing non-contract sales to have to deal with a lot of contract fields. How can we use forms in NetSuite to aid with this?
- A client wants to require some customers to provide a PIN (short for personal identity number) unique to their products on their orders. It's a 4-digit number they assign to the customer when they're registered, and they need to provide it to a customer service representative when they place an order. The PIN must be stored on the order, but it cannot be visible to any user. However, it does need to be accessible from a SuiteScript for validation. How can we meet all of these requirements in a NetSuite account?