CHAPTER 7
Working with Live View and Video
Nikon has been improving its Live View/Video feature with every camera it releases, and with the introduction of the D3100 and D7000 it made some pretty radical changes. Live View is now standard on every camera in Nikon's current lineup, adding convenience to the picture-taking process and also easing the transition for those stepping up from compact cameras.
A main change is that Nikon added full-resolution 1080p HD video while the early cameras recorded at 720p. Probably the biggest feature is the addition of full-time autofocus, the first of its kind in HD dSLRs (with the exception of the D3100).
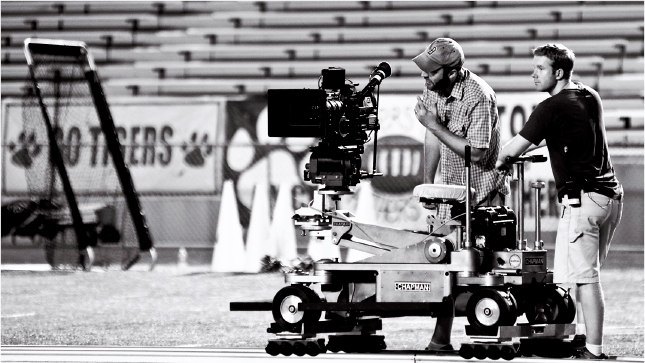
Many filmmakers are turning to dSLR cameras because of their portability and wide selection of lenses.
Live View
Using Live View allows you to view a live feed of what is being projected onto the sensor from the lens. As you may already know, the image from the lens is projected to the viewfinder via a mirror that is in front of the sensor. A semitransparent area in the mirror acts as a beam splitter, and is used by the camera for its normal phase-detection AF (autofocus). For Live View to work, the mirror must be flipped up, making phase-detection AF unusable; the camera uses contrast detection directly from the sensor to determine focus instead. This makes focusing with Live View a bit slower than focusing normally. In addition, when you're shooting still photographs, the mirror must flip down and back up, which takes extra time. For this reason, Live View is not the best option to use when shooting moving subjects or things like sports events, where timing is the key element in capturing an image successfully.
That being said, Live View can come in handy when you are shooting in a studio setting, especially when using a tripod. You can move the focus area anywhere in the frame because Live View isn't limited to the standard the 39 AF points. Live View can also be handy when grabbing snapshots of everyday scenes.
![]() Keep in mind that when using Live View handheld, you are holding the camera at arm's length and this increases the risk of blurry images due to camera shake. Keep your elbows close to your sides for added stability.
Keep in mind that when using Live View handheld, you are holding the camera at arm's length and this increases the risk of blurry images due to camera shake. Keep your elbows close to your sides for added stability.
Focus modes
The D7000 has a few different focus modes in Live View or Video mode. They operate similarly to the focus modes you use when shooting stills using the viewfinder.
Single-servo AF (AF-S)
Single-servo AF (AF-S) is equivalent to Single AF (AF-S) when you're shooting stills. Use the Multi-selector to move to focus point to your subject, and half-press the Shutter Release button to focus. The shutter won't release until the camera detects that the scene is in focus. Pressing the Record button starts the recording, but the focus will be locked on the initial subject.
This setting is best for stationary subjects like portraits, still lifes, products, and landscapes.
For video you need to be sure that your subject isn't moving at all, especially if you're using a wide aperture for a shallow depth of field. Even the slightest change in distance can cause the subject to go out of focus.
Full-time-servo AF (AF-F)
Full-time-servo AF (AF-F) was introduced with the D3100 and D7000 cameras. This focus mode allows the camera to focus continuously while in Live View or when shooting video (similar to AF-C, or Continuous AF). Even though the camera is focusing continuously to shoot a still frame, the AF is engaged and refocuses before releasing the shutter. I find that this mode works best when shooting video.
Full-time-servo AF operates in conjunction with the AF-area modes, which are covered in the next section.
AF-area modes
To make the Live View focusing quicker and easier, Nikon has given you a few different options for AF-area modes. These modes noticeably speed up the process of focusing when compared with previous cameras. You can change the settings in the Shooting menu by choosing AF-area mode ![]() Live View.
Live View.
![]() The AF-area mode cannot be changed while recording video.
The AF-area mode cannot be changed while recording video.
- Face-priority AF. Use this mode for shooting portraits or snapshots of the family. You can choose the focus point, but the camera uses face recognition to focus on the face rather than on something in the foreground or background. This can really be an asset when you're shooting in a busy environment, such as when there's a lot of distracting elements in the background. When the camera detects a face in the frame, a double yellow border is displayed around the AF area. If more than one face is detected (the camera can read up to 35 faces), the camera chooses the closest face as the focus point.
- Wide-area AF. This makes the area where the camera determines focus from about 4X the size of the Normal-area AF mode. This is good when you don't need to be very critical about the point of focus in your image. For example, when shooting a far-off landscape, you really only need to focus on the horizon line. This is a good general mode for everyday use. You can move the AF area anywhere within the image frame.
- Normal-area AF. This mode has a smaller AF point and is used when you need to achieve focus on a very specific area within the frame. This is the preferred mode to use when shooting with a tripod. It's the mode I use when shooting macros, still lifes, and similar subjects. I also use this mode when shooting portraits, instead of Face-priority, so I can control the AF area.
- Subject-tracking AF. This is a pretty cool feature, especially when used in conjunction with video. Use the Multi-selector to position the AF area over the top of the main subject of the image. Press the OK button to start the tracking. The AF area follows the subject as it moves around within the frame. Be aware, however, that this feature works best with slow to moderately fast-paced subjects that stand out from the background. When using this mode with a very fast-moving subject, the camera tends to lose the subject and lock on something of similar color and brightness within the frame. This mode also decreases in effectiveness in lower light. To disable subject tracking, simply press the OK button. This resets the AF area to the center. To reactivate subject tracking, press the OK button again.
 When you half-press the Shutter Release button to focus for taking a still shot, subject tracking is disabled. Releasing the button reactivates tracking.
Video
About two years ago, Nikon introduced the world's first dSLR with HD video capability, the D90. Since then Nikon has been adding features to the Video mode with every new camera. The D7000 is currently one of only two Nikon cameras that offers true 1080p HD video and full-time AF when you're actually recording video.
Before going any further, one thing must be made clear: The D7000 is not a video camera. It's a still camera that just happens to record video by using the feed from the Live View feature. The D7000 is one of Nikon's newest dSLR cameras, and it's an excellent example of that. It has a 16-megapixel sensor, low noise at high ISO settings, and a fast continuous shutter speed — everything you could want from a dSLR. Why am I bringing this up? Because some people aren't happy with the current video performance in dSLR cameras. These evaluations are being based on comparisons to dedicated video cameras. This is an unfair comparison. You wouldn't compare a still image taken from a video camera to a high-res still image from the D7000. It's like comparing apples to oranges.
HD dSLR videography has been taking off, not just for still photographers, but for serious filmmakers as well. Many TV shows and feature films have been made using HD dSLR cameras because dSLR cameras like the D7000 have advantages that far outweigh any perceived drawbacks when compared with a dedicated video camera. A few of the major advantages that dSLR cameras have over HD video cameras include
- Price. dSLR cameras are much cheaper than a midto pro-level HD video camera.
- Image quality. The D7000's APS-C-sized sensor also allows the camera to record video with less noise at high sensitivities than most video cameras can.
- Interchangeable lenses. You can use almost every Nikon lens ever made on the D7000. While some HD video cameras take Nikon lenses, you need an expensive adapter, and you lose some resolution and the ability to get a very shallow depth of field.
- Depth of field. You can get a much more shallow depth of field than video when using a lens with a fast aperture, such as a 50mm f/1.4. Most video cameras have sensors that are much smaller than the sensor of the D7000, which gives them a much deeper depth of field. A shallow depth of field gives videos a much more professional cinematic look.
About video
Before getting into the basics of the D7000's Video mode, it's best to do a little exploration into the realm of video. Video capture functions much differently from still-photo capture. Of course, all photography is capturing light by using a sensor (or film), a lens, and a lightproof box (your camera). Video is just digitally capturing still images at a high frame rate and playing them back sequentially.
The D7000 can shoot video in three resolutions that can be set in the Shooting menu under the Movie settings option or in the Info display. You can choose a small video size of 640 × 424 pixels, which is shot using a 3:2 aspect ratio. This is the same ratio at which still images are recorded. This resolution is very small and best suited for filming small clips that will be sent through e-mail or posted on the Internet without using too much bandwidth. Note that this setting is not HD. The best setting to use is the 1080p/24fps HD setting, which is a 16:9, or cinematic, ratio. This setting gives you the most resolution and can easily be watched on large HDTVs with exceptional image quality. For smaller HD videos, you can record at 720p, which offers more than enough resolution for all practical purposes.
Progressive versus interlaced
If you're familiar with HD, you've probably heard the terms progressive and interlaced. Your D7000 has an HDMI (High-Definition Multimedia Interface) output setting (found in the Setup menu) that lets you choose between progressive and interlaced resolutions. So, what's the difference? Interlaced video scans every other line that makes up the picture, though the picture appears as if it is being displayed all at once. Progressive scanning progressively displays single lines of the image. As with interlaced technology, all of this happens too fast for the human eye to detect the separate changes, and so everything appears to happen all at once.
Frame rate
You may have noticed another number in subscript (24, 25, 30) at the end of the resolution number (1080 or 720). This subscript number is the frame rate, or the number of frames recorded every second, and is expressed using the term frames per second (fps).
Most video cameras capture video at 30 or 60 fps. A rate of 30 fps is generally considered the best for smooth-looking video that doesn't appear jerky. Shooting at 24 fps is the minimum rate to fool the human eye into seeing seamless motion. This also gives videos a quality that's similar to cinema.
The Nikon D7000 shoots full 1080p HD video at 24 fps, giving you a cinematic feel from the start. You can select different frame rates when shooting at 720p. You can choose to record at 24, 25, or 30 fps. This can be set in the Shooting menu under the Movie settings option or in the Info display menu. Select 24 fps for the cinematic look, or 30 fps for a smoother look. The 25-fps option is for videos that will be played back on PAL devices (the analog TV encoding system used in Europe).
Shutter
When you shoot video with your D7000, the camera isn't using the mechanical shutter that it uses when making still exposures. The Video mode uses what's known as an electronic shutter. This electronic shutter isn't an actual physical shutter but is a feature of the sensor that tells the sensor when to activate to become sensitive to the light striking it. The D7000 has a CMOS sensor that uses a rolling shutter.
A rolling shutter operates by exposing each row of pixels progressively (similar to HDTV reception discussed earlier) from top to bottom. In effect, it rolls the exposure down the sensor row by row. Unfortunately, this rolling shutter has a few unwanted artifacts that are inherent in its operation. These artifacts are usually most noticeable when the camera is making quick panning movements or the subject is moving from one side of the frame to the other. There are three types of artifacts common to the rolling shutter:
- Skew. This is the most common artifact. Skew causes objects in the video to appear as if they're leaning (or skewed). This artifact only appears when the camera is quickly panned or the subject is moving extremely fast. It is caused by the image being progressively scanned. As just discussed, the rolling shutter exposes each single frame from the top down. When the camera is moved sideways while the frame is being exposed, the top of the subject is exposed on one side of the frame, and the bottom of the subject is on the other side of the frame. This can also be seen when a subject moves very quickly across the frame.
- Jello. This video problem is closely related to skew and occurs when the camera is panned quickly back and forth. First, the video skews to one side and then the other, causing it to look like it's made of Jell-O, as if the subject is wobbly. This is the most common problem you will encounter when shooting video with the D7000. It's a symptom of the rolling shutter. The sidebar in this section provides some ideas to help minimize the effect.
- Partial exposure. This is caused by a brief flash of light, typically from a camera flash. As the shutter rolls down the frame, it's exposing for the ambient light. The brief flash duration causes part of the frame to be overexposed. You can expect to experience it at weddings or events where people are taking pictures with flash. If it's a major problem, steer clear of people doing flash photography.
There's a very easy way to deal with the jello effect: Don't do fast pans or whip pans. It's that simple. If you know something is going to look bad, avoid it. Think like a filmmaker; use slow, preplanned camera movements. This small tip will make your videos look more professional. Another easy way to minimize the effect is to use something like a steadicam to stabilize the camera.
![]() Older fluorescent lights with low-frequency ballasts can cause video with a rolling shutter to flicker. Try changing the settings in the Flicker reduction option in the Setup menu if you run into this problem.
Older fluorescent lights with low-frequency ballasts can cause video with a rolling shutter to flicker. Try changing the settings in the Flicker reduction option in the Setup menu if you run into this problem.
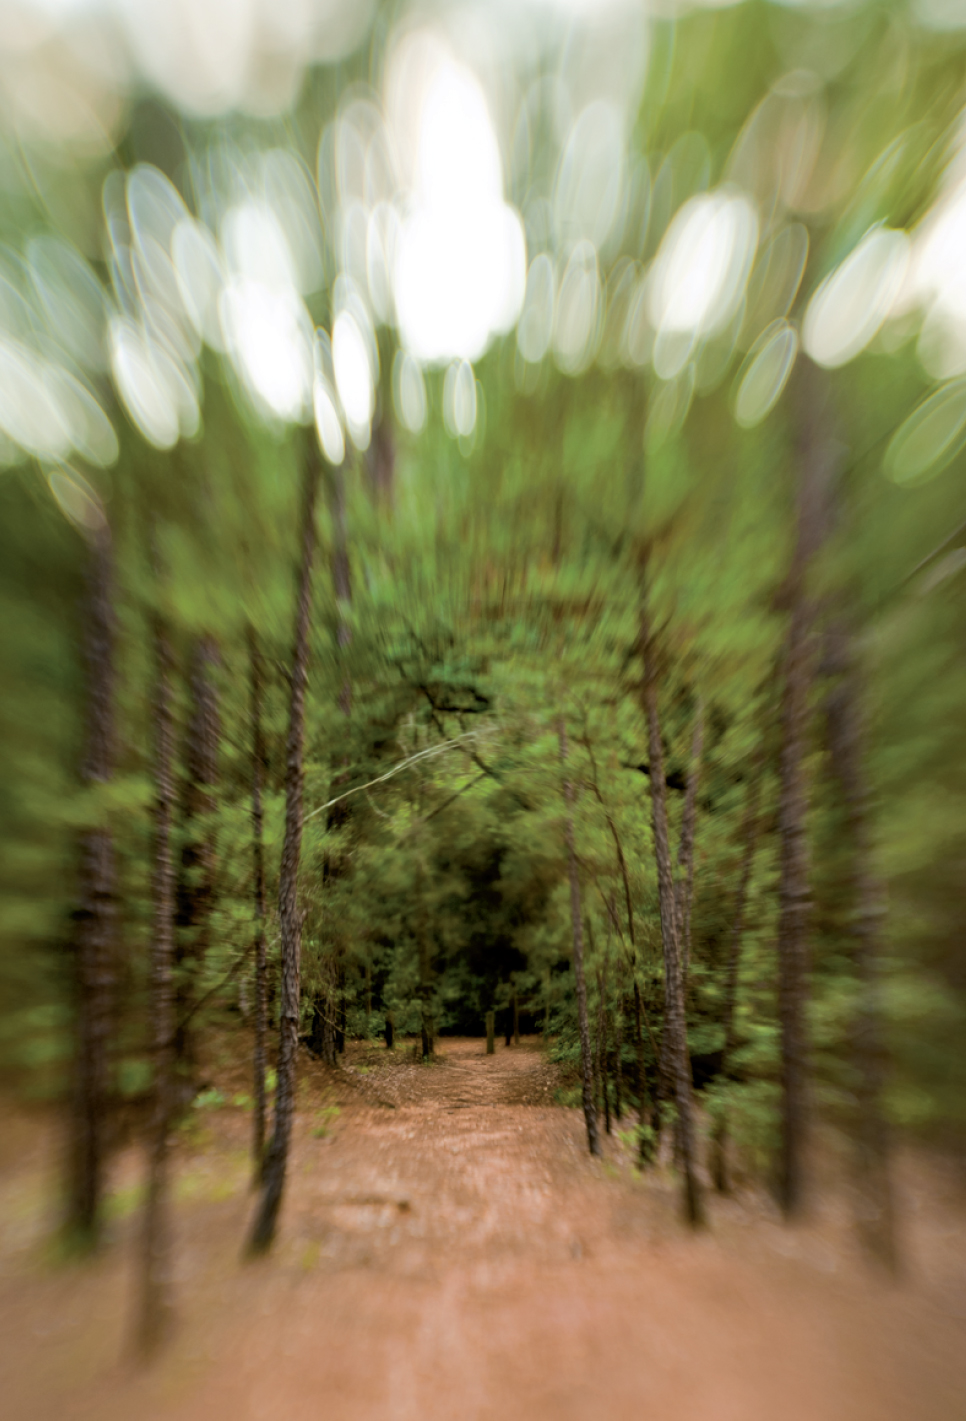
7.1 This still photo taken from video shows the effect of skew on an image.
Setting up for video
Using the video feature is quite simple. Simply pull the Live View switch on the back of the camera to activate Live View, and then press the Record button to start recording. However, there are some important things to consider before you start recording:
- Quality. The Quality setting determines what size your videos are. Sizes and their uses are covered earlier in this chapter. You set the Quality by going to the Shooting menu, selecting the Movie settings option, selecting Quality, and then pressing OK. You have five choices: 1920 × 1080; 24fps (16:9), 1280 × 720; 24fps (16:9), 1280 × 720; 25fps (16:9), 1280 × 720; 30fps (16:9), or 640 × 424 (3:2).
- Sound. This option is also found under the Movie settings option under Microphone. You can either record sound using the D7000's built-in microphone or an external microphone. You can adjust the microphone sensitivity to suit the environment. You can turn the sound recording off.
- Picture Control. Just like with your still images, the D7000 applies Picture Control settings to your movie. You can also create and use Custom Picture Controls that fit your specific application. For example, I created a Custom Picture Control called Raging Bull that uses the Monochrome Picture Control with added contrast and the yellow filter option. This gives me a black-and-white scene that's reminiscent of the Martin Scorsese film of the same name. Before you start recording your video, decide which Picture Control you want to use for your movie.
 Adding too much sharpening to a Picture Control can cause haloing in your movies.
 - Shooting mode. Selecting a Shooting mode is one of the most important parts of shooting video. This is how you select your lens aperture. The mode you select determines the aperture that you shoot with for the entire clip. This is important for controlling depth of field. The scene modes apply the same settings that they use for still photography, but they can be unpredictable.
If you use Programmed Auto (P), you are taking a major risk with your aperture setting. Shutter Priority (S) is only used for shooting stills so this mode operates in much the same fashion as P when shooting video. That leaves you with the two most useful Shooting modes: Aperture Priority (A) and Manual (M). When shooting A the shutter speed is completely controlled by the camera. The shutter speed that's displayed on the screen is for shooting stills in Live View and has no impact upon the movie. Manual operates in much the same fashion as A unless Manual Movie settings is turned on in the Shooting menu under Movie settings.
Recording
After you figure out all your settings and before you press the Record button, you want to get your shot in focus. You can do this by pressing the Shutter Release button halfway, as you normally would. When the AF point on the LCD is green, you're focused and ready to go. If you're using the AF-F full-time autofocus be sure that the image is in focus before pressing the Record button.
![]() Be aware that video clips are limited to 10 minutes in length to avoid overheating and damaging the sensor. You may notice that your videos may appear noisier near the end of clips due to thermally generated noise.
Be aware that video clips are limited to 10 minutes in length to avoid overheating and damaging the sensor. You may notice that your videos may appear noisier near the end of clips due to thermally generated noise.
One of the biggest improvements that Nikon has made to the video in dSLR cameras other than the upping the resolution to 1080p is the addition of the Manual movie settings (in the Shooting menu under Movie settings). Instead of being completely automatic like the previous cameras (D90, D300s, D5000, D3100) the D7000 allows you to select shutter speed and ISO manually. This allows you greater control over the outcome of your videos.
To start, turn on the Manual movie settings option and set the camera to Manual exposure mode (any other mode reverts the camera back to the fully auto settings).
When selecting the shutter speed for video you can only choose a shutter speed from 1/30 second up to 1/8000 second. The rule for shutter speeds is that you should double the frame rate (this is called the 180-degree shutter rule), so when shooting at 1080p 24fps you should be using a shutter speed of 1/48. Of course this speed isn't an option, so use the closest one, which is 1/50. The speed gives video a cinematic look; the shutter speed blurs moving subjects just enough to look natural. If you use a shutter speed slower than that, your video will look “smeary” due to the extreme motion blur in each still frame (remember that video is just still frames linked together).
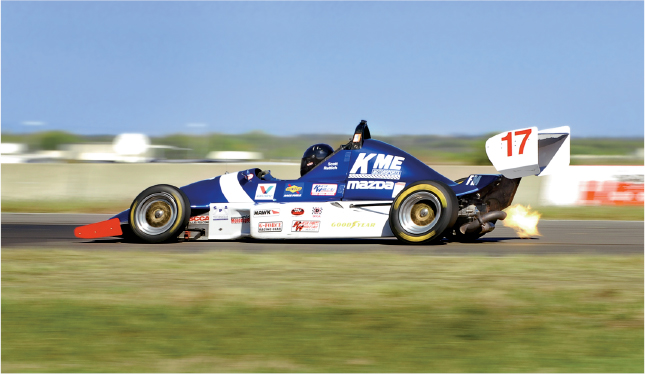
Choosing a fast shutter speed is also an option, but faster shutter speeds are generally chosen only for the effect that they create. Fast shutter speeds can cause the video to appear slightly jerky because, just as when shooting a still, the action is frozen and as the subject moves through the frame there is no motion blur to make it look more natural to the eyes. Movies such as Saving Private Ryan and Gladiator use this effect in the action scenes.
When you shoot in extremely bright light outdoors, it's generally wise to use a Neutral Density (ND) filter. ND filters cut out the amount of light that reaches your camera without adding any colors or effects. This will help you stick to the 180-degree shutter rule and avoid the strange-looking fast shutter speed effect. If you're serious about making great video I highly recommend using the Manual movie settings.
Sound
One thing to be aware of when recording video is that you're not only recording images — you are also recording sound. The microphone is on the camera and noises, including those the camera makes when adjustments are made, will be picked up.
It may not sound loud at the time, but it will be extremely loud in your footage. The best bet is to get your settings right before you begin filming to avoid this, or to turn the sound setting to off.
Although the full-time AF seems like a great feature, there is one huge caveat: Nikon's Silent Wave Motor is not silent. The focusing mechanism of the lens is clearly picked up by the on-camera mic and is very evident during playback. If you plan on using the on-camera mic, I recommend using AF-F sparingly. As I mentioned before, think like a filmmaker. Plan out your shots and know where the focus will be and set it before you start recording.
![]() Buying an accessory microphone is highly recommended if you plan on getting serious with your videos and recording a lot of sound. The difference between the on-camera mic and a good accessory mic is like night and day.
Buying an accessory microphone is highly recommended if you plan on getting serious with your videos and recording a lot of sound. The difference between the on-camera mic and a good accessory mic is like night and day.
If you're really computer savvy and you have the proper video editing software, you can record sound using a separate sound recorder and sync the sound and video later using software such as Final Cut Pro or Adobe Premiere.
Playback
Playing back your videos is super easy. Press the Play button on the back of the camera and scroll through the videos and stills as normal. When the video is displayed on the LCD screen, simply press the OK button to start playback. Press the Multi-selector up to stop, down to pause, and left or right to rewind or fast-forward. Use the Zoom-in and Zoom-out buttons to raise or lower the volume.
Connecting your camera to an HD or standard TV displays what is on the LCD on the TV and the options are the same.