
Chapter 13
Honing Your Skills
IN THIS CHAPTER
![]() Photographing events
Photographing events
![]() Shooting landscapes
Shooting landscapes
![]() Photographing portraits
Photographing portraits
![]() Photographing sports
Photographing sports
![]() Photographing wildlife
Photographing wildlife
![]() Doing macro photography
Doing macro photography
If you’ve read every chapter of this book in order, you know the Nikon D780 like the back of your hand. Or maybe you fast-forwarded to this chapter for specific information about your favorite type of photography. Regardless, your D780 is ideally suited for just about every genre of photography that exists.
But shooting different genres requires different skill sets and different camera settings. As a professional photographer, I’ve shot many different genres of photography over the years. In this chapter, I share some of my knowledge and show you what settings to use and how to photograph many scenarios.
Shooting Special Events: Birthdays, Weddings, and More
Photographing special events like birthdays, weddings, and social gatherings can be fun and profitable. Events can also be stressful, especially when the event is a once-in-a-lifetime occurrence, like a wedding. Photographs from special events can be formal (the bride and the groom at the alter) or casual (candid photographs of family and friends during and after the event).
 When you photograph a special event, make sure that photography is permitted. Contact the organizer of the event. Doing so may grant you special access to areas not normally available to event guests.
When you photograph an event, you capture the traditional photos requested by the person who asked or hired you to photograph the event. But that doesn’t mean your photos have to be rigid. Create the traditional images first, and then branch out to capture candid photos of event participants and guests. If you’re creating pictures for yourself, the rules go right out the window. Shoot the images that will help you remember the event in years to come and inject a bit of your personal style.
Before photographing an event, search the web for the type of event you’re photographing, and look at lots of images or get some ideas from a magazine.
Setting the camera
When you photograph an event, you take a time-honored series of pictures. Whenever people are your subject, you need to control depth of field, so use aperture-priority auto (A) mode. When you need to zoom in tight on the action, use a large aperture, which gives you a shallow depth of field and draws the viewer’s attention to the subject. When you photograph a group of people, use an aperture of f/5.6 or f/8.0 to capture a larger depth of field, which gives you a photo that has everyone in the picture in focus.
A wide-angle lens is useful when you need to create images that show the magnitude of a large outdoor event. A zoom lens with a focal range from wide-angle to midrange telephoto makes it possible for you to quickly zoom in or out as needed.
A single auto-focus point lets you pinpoint the person you want to make the center of attention. Using AF-A (autofocus automatic) enables the camera to quickly and accurately focus on stationary subjects or moving subjects. This option makes it possible for the camera to continuously focus on the bride and groom as they walk down the aisle, or to focus on a speaker who is stationary at the dais.
An ISO range of 100 to 800 allows you to photograph a bright outdoor event (ISO 100) or a wedding in a dimly lit church (ISO 800).
If you’re photographing a large group of people, arrange them in rows. Ask the tallest people to stand at the back of the group, and then create rows of shorter people. If young children are part of the group, place them in front of the adults. If you feel creative, shoot from a low vantage point and have a couple of members of the group kneel or lie on the ground.
Photographing the event
If you’re photographing an event for a person, talk with him well before the event and ask him which shots are important to him. Do the same if you’re photographing a once-in-a-lifetime event like a wedding. When photographing a wedding, chat with the couple well in advance of the ceremony and ask them which shots are important to them and which relatives need to be in the photos. When you need to move frequently to capture the required images, make sure everyone associated with the event knows so they won’t be startled when you move quickly to capture an image.
Arrive early at the venue where the event is being held and get your gear ready. When you’re cleaning your lenses, look for an ideal vantage point from which to photograph the procession. (You can better prepare yourself if you know what’s going to happen. Attend the rehearsal if at all possible.)
If you’re photographing the event with additional photographers, coordinate tasks and priorities. If you’re photographing an event like a wedding with multiple photographers, each photographer should be responsible for a key player (the bride, the groom, and the parents), and one photographer should be responsible for capturing candid photos and images of the entire group.
 Photograph the key moments in the event. If you’re photographing an event with speakers, capture images of the handshake of the moderator and the keynote speaker. If you’re photographing a wedding, zoom in to capture a single shot of the groom and his mother walking down the aisle, and another shot of the bride and her father walking down the aisle. Get a photograph of the couple’s first kiss and the wedding party celebrating.
Figure 13-1 shows a photograph of the happy couple relaxing just before the reception.

FIGURE 13-1: Photograph key moments of the event.
When photographing a wedding, after the event is over, photograph the wedding procession as they leave. You have to be quick on your feet and get to the end of the aisle right after you photograph the couple’s first kiss. The bride and groom are the first to leave, and they get a lot of attention from the guests attending the ceremony. Don’t forget to photograph the other members of the wedding party, too.
If you’re photographing an event with multiple photographers, have one of the photographers create some time-lapse movies of the event. I show you how to create time-lapse movies with your D780 in Chapter 12.
You can augment lighting with fill flash. This is useful when photographing subjects that are backlit. For more information about flash photography, see Chapter 11.
Photographing the Landscape
No matter where you live, you can find lovely landscapes, maybe within a few miles of your home. Landscape photography done right is stunning. It captures the mystery and grandeur of the place where you took the picture. When you photograph a landscape, your vantage point and the way you compose the photograph go a long way toward creating an image that’s a work of art and not just a snapshot. You want to draw viewers into the picture so that they take more than just a casual glance.
When you photograph a landscape, you photograph the big picture — a wide sweeping brushstroke that captures the beauty of the area. So, you want every subtle detail to be in focus, which means you want a huge depth of field (see Figure 13-2). In addition to a large depth of field , composition also plays a key role when you photograph a landscape.
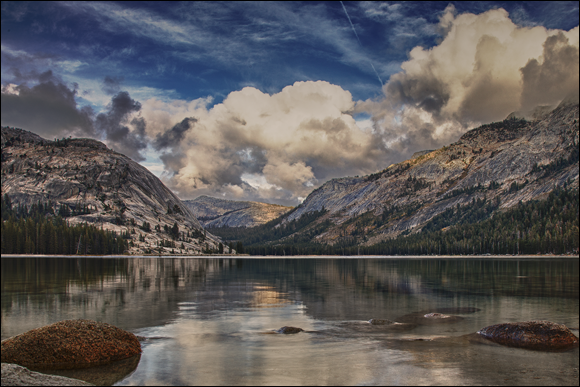
FIGURE 13-2: Photographing a landscape.
Setting the camera
When you photograph a beautiful landscape, you want to see every detail, which is why you use aperture-priority auto (A) mode and a small aperture to ensure a large depth of field. A wide-angle lens lets you capture the majesty of the landscape in your photograph, and a low ISO gives you a noise-free image. However, if you’re photographing landscapes on overcast days, you may have to increase the ISO to maintain a shutter speed of 1/30 second. If you don’t want to increase the ISO setting, use image stabilization (if your lens has this feature) or mount your camera on a tripod.
Turning your lens on the landscape
Being a great landscape photographer requires practice and a bit of study. Shoot landscapes whenever you have the chance and study the work of master landscape photographers, such as Ansel Adams, Clyde Butcher, David Muench, and David’s son Marc Muench. Studying the work of the masters can help give you an eye for landscape photography and, after much practice, develop your own unique style. Search the web for these photographers to see samples of their eye-popping work.
You can photograph a landscape whenever you see one that strikes your fancy. However, whether you’re photographing landscapes on vacation or at home, try to set aside a block of time in which to photograph landscapes. Travel to your favorite area, or spice things up and travel to a place you’ve never visited before. Then embark on your quest to capture the perfect photograph of the area you’re in.
When you find an area that you want to photograph, find the ideal vantage point. Don’t place the horizon line in the middle of the picture. Place the horizon line in the upper third of the image when the most important part of the landscape you’re photographing dominates the bottom of the scene, such as when you’re photographing sand dunes in the desert. Place the horizon line in the lower third of the image when the most important part of the landscape dominates the upper part of the scene you’re photographing, such as when you’re photographing a mountain range, or a landscape with billowing clouds.
When you find an interesting element in the landscape, such as a photogenic rock or dead branch, move close to the object, zoom in, and then move around it until you see an interesting composition in your viewfinder (see Figure 13-3).
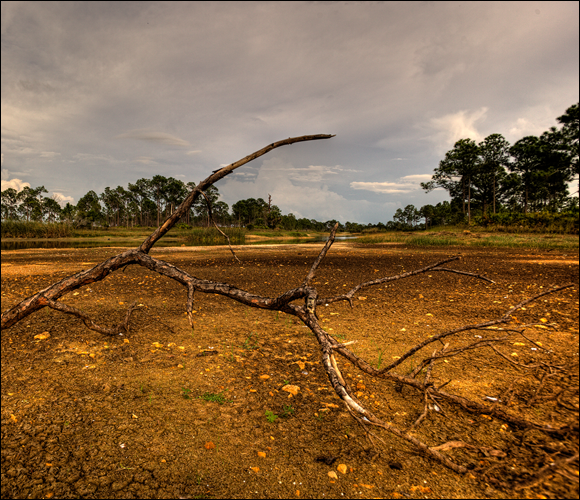
FIGURE 13-3: Use an interesting landscape element to create an interesting picture.
Many landscape photographers have tunnel vision and look straight ahead. Notice what’s both above and below you. You may find an interesting photograph hiding there.
Before taking your picture, take a good look at the area you’ve framed in the viewfinder to make sure there isn’t any litter, such as empty soda cans or candy wrappers that can ruin an otherwise great image.
The best time to take photographs of beautiful landscapes is early in the morning, just after the sun rises, or late in the afternoon, when the light is pleasing. The first hour and the last hour of daylight are known as the golden hours, times when you have great light for photographing landscapes, because the light accentuates forms such as rocks and trees, and the shadows cast by these objects are pleasing.
Barren landscapes can be saved with dramatic clouds. If you live near a place that’s beautiful but stark, visit it when there are some moody clouds or thunderheads in the distance. Make this the focal point of your photograph by placing the horizon line in the lower part of the image.
Photograph waterfalls using a shutter speed of 1/15 second or less with the camera on a tripod. This setting gives the water a silky-smooth look. If you’re shooting a waterfall in bright conditions, set the camera to the lowest ISO possible. If the shutter speed is still too fast, use a neutral density (ND) filter to reduce the amount of light reaching the sensor. ND filters are available from your favorite camera retailer. ND filters come in varying strengths. However, you can purchase a variable neutral density filter that has a dial you rotate to vary the strength of the filter.
When using a tripod to create a photograph, make sure you disable image stabilization, which may induce movement due to the fact that the lens is trying to compensate for movement that isn’t there.
When hiking to photograph the landscape, stop frequently and look at where you’ve been. You may discover the raw material for a great photograph. Look down as well. You may see interesting details like fallen leaves that can be used to create interesting images.
Creating Portraits
Most adults spend a lot of time earning money to support their lifestyle. Some people love what they do, but other people think their 9-to-5 routine is torture. If you have a friend who fits in the former category and needs a picture of herself for business cards or passports, grab your camera and use the settings in this section.
Setting the camera
When you create a portrait for someone, you want to make him the center of attention, so you photograph the scene in aperture-priority auto (A) mode and use a large aperture (a small f/stop number) to create a shallow depth of field that draws the viewer’s attention to your subject. The suggested ISO of 100 is perfect for shooting in a bright room or outside. If you photograph the person in overcast conditions, use an ISO of 400. The medium telephoto focal length suggested renders a pleasing portrait without distorting your subject’s features. Use image stabilization if available because the slightest operator movement results in a photo that’s less than tack sharp.
Creating a portrait
You photograph the typical formal portrait against a solid-colored background, although some professional photographers use a painted muslin background. You can get good results if you photograph your subject against a solid-colored wall. Just make sure your subject is a few feet in front of the wall; otherwise, any texture in the wall will be captured with the image and will distract the viewer’s attention.
Turn off any unnecessary lights. Overhead lights are fine. If you’re photographing a subject in his office, and you turn on the light on your subject’s desk, you run the risk of throwing the camera white balance off and adding hotspots to your subject’s face.
Position your subject a few feet in front of your backdrop, and tell her how you want her to pose. Posing is beyond the scope of this book. But a good generic pose involves having your subject turn her head to one side and tilt her chin up (see Figure 13-4).
When you compose the picture, use natural elements to draw the viewer into the picture. In Figure 13-4, the subject’s right shoulder draws the viewer into the image. Her left eye is on a rule-of-thirds power point. (See Chapter 15 for some tips on composing your images.)

FIGURE 13-4: Tell your subject how you want her to pose.
If you’re photographing a model or an aspiring actress, use some props to draw the viewer into the image.
When focusing on your subject, place the autofocus point over the subject’s eye, or use the camera’s face and eye detection. This ensures that the eyes — the windows to your subject’s soul — are in sharp focus.
After you take the picture, review it on your tilting monitor. Make sure the image is properly exposed and your subject looks relaxed. In a typical portrait session, you have to take several pictures before the subject relaxes and you get some good images.
Capturing Sporting Events
Photography is a wonderful pastime. You can use your camera to capture memories of the things that interest you. If you’re a sports fan, you can photograph your favorite sport. You can photograph individual athletes, but sports have more to them than just the athletes. Whether your favorite sport is football or auto racing, each one has its own rituals. And every sport includes a supporting cast. When you photograph a sporting event, you photograph each chapter of the event, from the pre-games festivities to the opening kickoff to the winning touchdown. Your creative mind, your knowledge of the sport, and the settings in this section give you all the tools you need to tell a story. Begin at the beginning, before the athletes flex their muscles or the drivers start their engines.
Setting the camera
This section gives you a couple of different shooting scenarios. When you’re photographing the pre-event festivities, shoot in aperture-priority auto (A) mode. When your goal is to photograph an athlete preparing for the event, you want a shallow depth of field, so use a large aperture (a small f/stop number). When you want to photograph the crowd, or a group of athletes practicing, use a small aperture (a large f/stop number) to ensure a large depth of field. When your goal is to stop action, shoot in shutter-priority auto (S) mode at a speed fast enough to freeze the action. For an athlete, you can freeze motion with a shutter speed as slow as 1/125 second. To stop a racecar dead in its tracks, you need a fast shutter speed of 1/2,000 second. To capture the beauty of a speeding race car with a motion blur, you pan the camera and shoot with a shutter speed of 1/125 second. The focal length you use varies depending on how close you can get to the action. If you’re photographing a large crowd before the event, use a wide-angle focal length of 28mm to 35mm. If you’re photographing individual athletes, zoom in.
Capturing the event
When you photograph a sporting event, you have to be in the moment. Before the event starts, you can capture interesting pictures of the crowd, the athletes performing their pre-event rituals, and the athletes warming up. When the event starts, you can capture the frenetic action. When the event is well and truly underway, keep alert for any interesting situations that may arise and, of course, any team player who scores. If you’re photographing a car race, be sure to include pictures of pit stops and other associated activities such as a driver change during an endurance race. And you probably want a picture or two of the winning driver spraying the champagne.
Arrive at the event early and take pictures of anything that piques your curiosity. Remember to change settings based on what you’re photographing.
Photograph the pre-event activities, such as the introduction of the players, athletes going through pre-event rituals, the coach meeting with her team on the sidelines, or pictures of the drivers getting ready. You can get creative with your composition when you photograph the pre-race events. Don’t be afraid to turn the camera diagonally or venture to an interesting vantage point. Let your inner child run amuck and capture some unusual pictures.
The action can get a little crazy when an event begins. Each team is trying to gain an advantage over the other. If you’re photographing a race, drivers may battle fiercely to achieve the lead by the first corner. You never know what may happen. Stay alert for any possibility. Hold the camera and be ready to compose an image when you anticipate something interesting about to happen. Be proactive: Have the camera to your eye a split second before the crucial moment.
The middle of any event is a great time for photographers. If you’re photographing an event such as a basketball or football game, you can get some shots of substitutions. You can also photograph the fans to capture their reactions to a winning score and so on. If you’re photographing an auto race, the cars are now a little battle weary, with tire marks, racer’s tape, and other chinks in their armor (see Figure 13-5).
Be on your toes, especially if the score is close. In the final minutes or final laps, it’s do or die. Athletes give their all to win the event, which gives you opportunities for some great pictures.
Take photographs of the winning team celebrating and capture the glum looks of the losers. Take photographs of any awards ceremonies. Tell the complete story of the event.
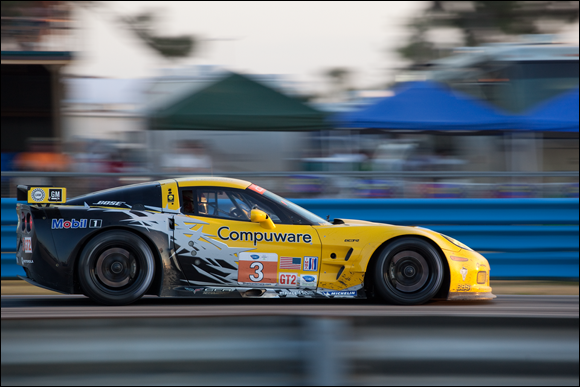
FIGURE 13-5: Photograph the middle of the event when the participants are a little battle weary.
Photographing Nature and Wildlife
If you live near a state park or wilderness area, you can capture some wonderful photographs of animals such as deer, raccoons, and otters in their natural surroundings.
You can easily spook these kinds of wild animals because they’re relatively low in the food chain. They have a natural fear of humans, which means you have to be somewhat stealthy to photograph them. Patience is a virtue. If you’re patient and don’t do anything startling, you can capture great images of animals such as deer.
If you live near a state park, go there often to find out which areas of the park you’re likely to find your subjects and to get to know the habits of the animals who live there, including their feeding habits. After you know the habits of the animals you want to photograph and get familiar with the lay of the land, you can capture some wonderful wildlife images by using the following settings.
Setting the camera
The goal of this type of photography is to capture a photograph of an animal in the wild. You use aperture-priority auto (A) mode for this type of photography to control depth of field. The animal is the subject of your picture, so you use a large aperture to create a shallow depth of field and draw your viewer’s attention to your subject. Use a smaller aperture when photographing a group of animals. AF-C (continuous autofocus) enables the camera to update focus while the animal moves. You also use the CL (continuous low speed) or CH (continuous high speed) release mode to capture a sequence of images of the animal as it moves through the area. The focal length you use depends on how close you can safely approach the animal. Use image stabilization if you have to shoot at a slow shutter speed.
The slowest shutter speed you should use when handholding your camera is the inverse of the focal length. For example, if you’re using a 50mm FX lens on your D780, the slowest shutter speed you should use when holding the camera by hand is 1/60 second.
Capturing compelling images of nature and wildlife
When you’re taking pictures of animals in their natural habitat, you have to stay out of the open so that you don’t frighten the animal. I also recommend wearing clothing that helps you blend in with the surroundings.
 The one exception to this suggestion is if you photograph in an area where hunting is permitted. Do not try to photograph wildlife in an area where hunting is permitted during hunting season.
Go to a place where you’ve previously sighted the species you want to photograph, hide behind some natural cover, and wait. Photograph during the early morning or late afternoon when the light is better and animals are out foraging for food.
When you see an animal, zoom in until the animal fills the frame, and then zoom out slightly. When you see an animal you want to photograph, and need to get closer, don’t make eye contact with the animal. Walk slightly to the side of the shortest distance to the animal. Change course once or twice, and when you get close enough, compose the image and take the picture. Your goal is to make the animal think it’s not in danger.
Position the autofocus point over the animal’s eye. Zoom in tight on the animal to capture an intimate portrait and compose the image according to the rule of thirds. This kind of photo is as close as you’ll get to shooting a portrait of a wild animal (see Figure 13-6).

FIGURE 13-6: Zoom in close for an intimate animal portrait.
Shooting Macro Photography
If you have lush flowers or small critters in your yard or live near a botanical garden, you have a rich resource for wonderful close-up photographs. You can take a nice photograph of a flowerbed or create something really special by photographing a flower up close and personal. A close-up of a flower or a small animal like a lizard reveals the beautiful architecture of the flower, or the symmetry and unique appendages of the animal.
When you see a compelling photograph of a flower, you can almost smell that flower. To create a great macro photograph of flowers, you need great-looking flowers, the right light, and a good eye for composition. Add the settings and techniques discussed in this section, and you’re well on your way to creating great photographs of flowers or other small things.
Setting the camera
When you photograph a close-up of a flower, small animal, or insect, you take the picture almost like you’re shooting a portrait of a person. In both cases, you carefully compose the image and choose the proper camera settings to get a great photograph. When you shoot in aperture-priority auto (A) mode and use a large aperture (a small f/stop number), you get a shallow depth of field that draws the viewer’s attention to the subject. With a single autofocus point, you can lock focus on any part of the subject so that you draw attention to the stamen, a flower petal, or an insect on the flower. A low ISO gives you a crisp image that has little or no digital noise. A focal length of 90mm or longer lets you get close to your subject. However, you can get your best results if you have a macro lens. If your lens has image stabilization, enable the feature. When you capture close-ups of any subject, the slightest bit of operator movement can result in an image that doesn’t look sharp.
Many lenses come equipped with a macro mode, which lets you get really close to your subject and still keep it in focus. If you don’t have a macro lens, consider buying one if you enjoy photographing close-ups of objects such as flowers. You can also buy an extension tube for close-up photography.
Don’t use image stabilization if you mount your camera on a tripod.
Taking the picture
You get your best images if you photograph your subject in flattering light. Harsh overhead light is not flattering. If you’re faced with those conditions, use a small diffuser to soften the light. You can photograph flowers indoors or outdoors. If you photograph flowers outdoors, take your photos early in the morning or late in the afternoon because that’s when the light is most flattering. The same rule applies when photographing small insects or animals. Also, cloudy overcast conditions offer soft, diffuse lighting that can be great for this type of photograph.
When photographing flowers, photograph a light-colored flower against a dark background and photograph a dark-colored flower against a light background.
If you’re shooting indoors, try placing the subject near a window that’s not receiving direct sunlight so that you can get soft, diffuse light, which is perfect for photographing small objects such as flowers.
If you’re taking a picture of the entire object, make sure you leave a bit of breathing room around the subject.
Use your flash to add a kiss of light to the image. This extra light warms the image and adds light to the shadows. If your camera has flash exposure compensation, use it to determine how much light the flash adds to the image.
If you want to create a photograph of a flower dappled with pearls of dew, but the flower doesn’t have any dew on it, carry a small spray bottle with you and mist the flower prior to photographing it. But don’t mist flowers in the heat of the day, when the afternoon sun can quickly heat the water and hurt the flower.
You can create a very intimate flower portrait if you zoom in tight and capture fine details of the flower (see Figure 13-7). When you zoom in this closely, make sure you compose the scene in your viewfinder to create an aesthetically pleasing picture.

FIGURE 13-7: Zoom in tight to capture fine details of a flower.