
29
Creating Your Own Custom Angular Services
Angular provides a lot of functionality in its built-in services, but it also allows you to implement your own custom services to provide specific functionality. You should implement a custom service any time you need to provide task-based functionality to an application.
When implementing custom services, you need to think about each service as being a chunk of reusable code that performs one or more related tasks. Then you can design and group them together into libraries that can easily be consumed by several different Angular applications.
This chapter introduces Angular custom services. It provides several examples of custom Angular services to provide you with a clearer understanding of how to design and build your own.
Integrating Custom Services into Angular Applications
As you begin implementing Angular services for your applications, you will find that some will be very simple and others will be very complex. The complexity of the service typically reflects the complexity of the underlying data and the functionality it provides. The purpose of this section is to provide you with some basic examples of different types of custom services to illustrate how they can be implemented and used. Table 29.1 lists some uses for services.
Table 29.1 Use Cases for Custom Services
Service |
Description |
|
Provides dummy data that can be used to test HTTP-based services while the back end is unavailable |
|
Returns data variables that need to remain constant, such as the mathematical value of pi |
|
Returns data variables that can be changed, with the changed value being saved to the service for other services to use |
Should be used within a custom service to create an interface with the back-end data |
|
|
Takes in a form of data to be transformed, runs the transformation, and returns the transformed value (for example, a square service that takes in a number and returns the square) |
|
Any type of service that can be used by multiple components at once while the data is automatically updated for all components any time it changes |
Adding an Angular Service to an Application
This section goes over how to create and implement a custom service in an application. When you create services, they have to be made injectable in order to be used throughout the application. The following example shows the syntax for creating an injectable service:
import { Injectable } from '@angular/core';
@Injectable()
export class CustomService { }
Once you’ve created an injectable service, it needs to be imported and provided to any Angular component that needs access to it. The following is the syntax for importing a custom service, along with the custom service being injected via the providers array in the component decorator metadata:
import { CustomService } from './path_to_service';

@Component({
  selector: 'app-root',
  template: '',
  providers: [ CustomService ]
})
The final step in making a custom service usable is to create an instance of that service to be used throughout the component. You do this in the constructor of the component, as shown in the following example:
constructor(
  private myService: CustomService
){}
When these steps are complete, the custom service and any of its methods are made available to the component through the instance myService.
The following sections provide examples that illustrate various ways of implementing custom services.
Implementing a Simple Application that Uses a Constant Data Service
This example shows how to build a constant data service. The purpose of this example is to create a simple service that returns a constant data variable.
Listing 29.1 shows the pi service, which returns the value of pi. Lines 1 and 3 import and implement Injectable to make the service available to be used externally. Line 4 creates the PiService class, which holds the definition for the service. Lines 5 through 7 define the getPi method, which returns the value of pi.
Listing 29.1 pi.service.ts: Creating a Service that Returns the Value of Pi
01 import { Injectable } from '@angular/core';
02
03 @Injectable()
04 export class PiService {
05   getPi(){
06     return Math.PI;
07   }
08 }
Listing 29.2 implements an Angular component that imports and implements PiService. Lines 2 and 7 show PiService being imported and then provided to make it available to use throughout the component. Line 12 shows PiService being instantiated as the variable PiService. Lines 14 through 16 show the ngOnInit method, which calls the getPi method from PiService and assigns it to the variable pi.
Listing 29.2 app.component.ts: An Angular Component that Gets the Value of Pi from PiService
01 import { Component, OnInit } from '@angular/core';
02 import { PiService } from './pi.service';
03
04 @Component({
05   selector: 'app-root',
06   templateUrl: './app.component.html',
07   providers: [ PiService ]
08 })
09 export class AppComponent implements OnInit {
10   pi: number;
11   constructor(
12     private PiService: PiService
13   ){}
14   ngOnInit(){
15     this.pi = this.PiService.getPi();
16   }
17 }
Listing 29.3 shows an Angular template that displays the value of pi to five places.
Listing 29.3 app.component.html: An Angular Template That Displays the Value of Pi to Five Places
01 <h1>
02   Welcome. this app returns the value of pi
03 </h1>
04 <p> the value of pi is: {{pi | number:'1.1-5'}}</p>
Figure 29.1 shows the output of this example in a web browser.
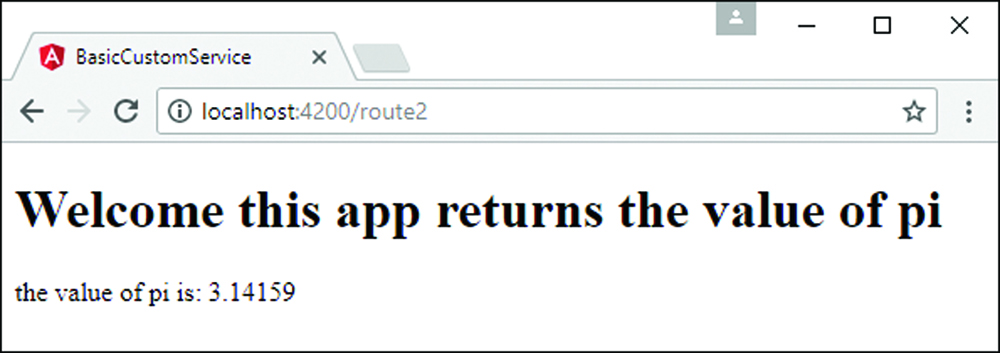
Figure 29.1 An HTML page that shows the Angular component displaying the value of pi obtained from a constant service
Implementing a Data Transform Service
This example shows how to build a simple data transform service that takes in data variables, calculates the area of a shape, and returns the area for the shape.
Listing 29.4 shows a custom service named AreaCalcService, which has several methods named after various shapes. Each of these methods takes in variables that are then used to generate the areas of the shapes they are named after. Lines 1 and 3 import and implement Injectable to make the service available to be used externally.
Listing 29.4 area-calc.service.ts: An Angular Service with Methods that Calculate the Areas of Shapes
01 import { Injectable } from '@angular/core';
02
03 @Injectable()
04 export class AreaCalcService {
05   circle(radius:number): number {
06     return Math.PI * radius * radius;
07   }
08   square(base:number): number {
09     return base * base;
10   }
11   rectangle(base:number, height): number {
12     return base * height;
13   }
14   triangle(base:number, height): number {
15     return (base*height)/2;
16   }
17   trapezoid(base1:number,
18             base2:number,
19             height:number): number {
20     return ((base1+base2)/2)*height;
21   }
22 }
Listing 29.5 shows an Angular component that gets areas of shapes from AreaCalcService, based on the values received from the user. Lines 2 and 8 import AreaCalcService and add it to the providers to make it available to the component. Line 21 creates an instance of AreaCalcService as areaCalc to be used with the component methods.
Lines 23 through 25 define the doCircle method, which implements the circle method on areaCalc to get the area of a circle.
Lines 26 through 28 define the doSquare method, which implements the square method on areaCalc to get the area of a square.
Lines 29 through 31 define the doRectangle method, which implements the rectangle method on areaCalc to get the area of a rectangle.
Lines 32 through 34 define the doTriangle method, which implements the triangle method on areaCalc to get the area of a triangle.
Lines 35 through 39 define the doTrapezoid method, which implements the trapezoid method on areaCalc to get the area of a trapezoid.
Listing 29.5 app.component.ts: An Angular Component that Gets Areas of Shapes from AreaCalcService Based on Values Received from the User
01 import { Component } from '@angular/core';
02 import { AreaCalcService } from './area-calc.service';
03
04 @Component({
05   selector: 'app-root',
06   templateUrl: './app.component.html',
07   styleUrls: ['./app.component.css'],
08   providers: [ AreaCalcService ]
09 })
10 export class AppComponent {
11   circleRadius: number = 0;
12   squareBase: number = 0;
13   rectangleBase: number = 0;
14   rectangleHeight: number = 0;
15   triangleBase: number = 0;
16   triangleHeight: number = 0;
17   trapezoidBase1: number = 0;
18   trapezoidBase2: number = 0;
19   trapezoidHeight: number = 0;
20
21   constructor(private areaCalc: AreaCalcService){ }
22
23   doCircle(){
24     return this.areaCalc.circle(this.circleRadius);
25   }
26   doSquare(){
27     return this.areaCalc.square(this.squareBase);
28   }
29   doRectangle(){
30     return this.areaCalc.rectangle(this.rectangleBase, this.rectangleHeight);
31   }
32   doTriangle(){
33     return this.areaCalc.triangle(this.triangleBase, this.triangleHeight);
34   }
35   doTrapezoid(){
36     return this.areaCalc.trapezoid(this.trapezoidBase1,
37                                    this.trapezoidBase2,
38                                    this.trapezoidHeight);
39   }
40 }
Listing 29.6 shows an Angular template file that creates form fields to input data required to calculate the areas of various shapes. When the data is input, the area is immediately calculated and displayed to the user.
Listing 29.6 app.component.html: An Angular Template that Provides a User Interface to Create Form Fields to Receive the Areas of Shapes
01 <label>Circle Radius:</label>
02 <input type="text" [(ngModel)]="circleRadius"/>
03 <span>Area: {{this.doCircle()}}</span>
04 <hr>
05
06 <label>Square Side:</label>
07 <input type="text" [(ngModel)]="squareBase" />
08 <span>Area: {{this.doSquare()}}</span>
09 <hr>
10
11 <label>Rectangle Base:</label>
12 <input type="text" [(ngModel)]="rectangleBase" /> <br>
13 <label>Rectangle Height:</label>
14 <input type="text" [(ngModel)]="rectangleHeight" />
15 <span>Area: {{this.doRectangle()}}</span>
16 <hr>
17
18 <label>Triangle Base:</label>
19 <input type="text"
20   [(ngModel)]="triangleBase" /> <br>
21 <label>Triangle Height:</label>
22 <input type="text" [(ngModel)]="triangleHeight" />
23 <span>Area: {{this.doTriangle()}}</span>
24 <hr>
25
26 <label>Trapezoid Base1:</label>
27 <input type="text"  [(ngModel)]="trapezoidBase1" /><br>
28 <label>Trapezoid Base2:</label>
29 <input type="text"  [(ngModel)]="trapezoidBase2" /><br>
30 <label>Trapezoid Height:</label>
31 <input type="text"  [(ngModel)]="trapezoidHeight" />
32 <span>Area: {{this.doTrapezoid()}}</span>
Listing 29.7 shows a CSS file that styles the application, separating the individual forms for each shape.
Listing 29.7 app.component.html: A CSS File that Styles the Application
01 label{
02     color: blue;
03     font: bold 20px times new roman;
04     width: 200px;
05     display: inline-block;
06     text-align: right;
07 }
08 input{
09     width: 40px;
10     text-align: right;
11 }
12 span{
13     font: bold 20px courier new;
14     padding-left: 10px;
15 }
Figure 29.2 shows the resulting Angular application web page. As values are added to the component, the areas are automatically calculated by the custom service.
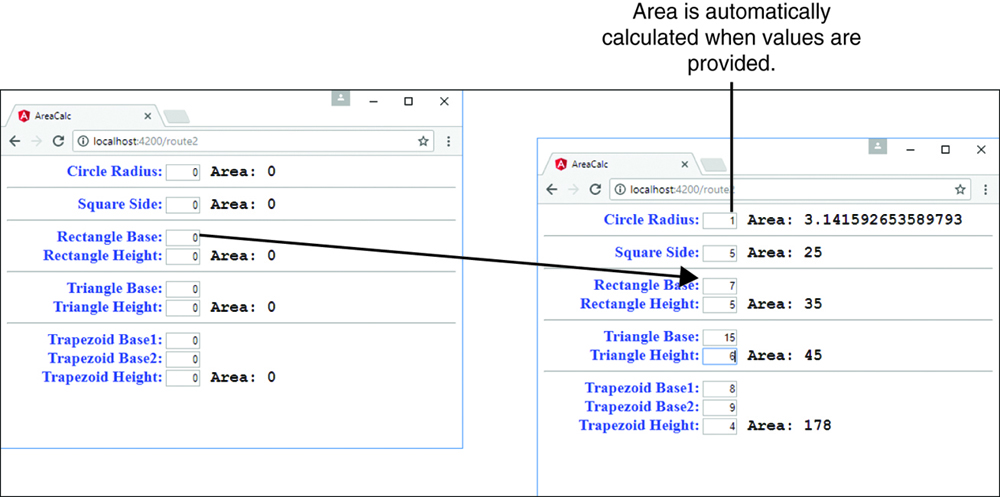
Figure 29.2 An Angular application that uses a custom service to automatically calculate the areas of different shapes
Implementing a Variable Data Service
This example shows how to build a variable data service that creates an image changer that at random times randomly selects an image from a list and sends it to the component to be displayed.
Listing 29.8 shows a custom service named RandomImageService that selects an image URL from a list and emits that URL at a random interval. Line 2 shows Observable being imported from rxjs/observable. Lines 33 through 37 show the constructor that initializes the observable imageChange and calls the method changeLoop, passing in the observer object. Lines 38 through 51 define the changeLoop method, which takes in the observable response object observer. A setTimeout function is called with a random time before it completes. Then a random image is selected from the images array. The image URL, title, and width are then emitted, and changeLoop recursively calls itself. Lines 52 through 54 define the getRandom function, which takes in two parameters, min and max, and gets a random number between those values.
Listing 29.8 random-image.service.ts: An Angular Service that Returns an Observable that Contains a Random Image
01 import { Injectable, OnInit } from '@angular/core';
02 import { Observable } from 'rxjs/observable';
03
04 @Injectable()
05 export class RandomImageService {
06   imageChange: Observable<any>;
07   private images = [
08     {
09       url: '../../assets/images/arch.jpg',
10       title: "Delicate Arch"
11     },
12     {
13       url: '../../assets/images/lake.jpg',
14       title: "Silver Lake"
15     },
16     {
17       url: '../../assets/images/cliff.jpg',
18       title: "Desert Cliff"
19     },
20     {
21       url: '../../assets/images/bison.jpg',
22       title: "Bison"
23     },
24     {
25       url: '../../assets/images/flower.jpg',
26       title: "Flower"
27     },
28     {
29       url: '../../assets/images/volcano.jpg',
30       title: "Volcano"
31     },
32   ];
33   constructor() {
34     this.imageChange = new Observable(observer => {
35         this.changeLoop(observer);
36       });
37   }
38   changeLoop(observer){
39     setTimeout(() => {
40       let imgIndex = this.getRandom(0,6);
41       let image = this.images[imgIndex];
42       observer.next(
43         {
44           url: image.url,
45           title: image.title,
46           width: this.getRandom(200,400)
47         }
48       );
49       this.changeLoop(observer);
50     }, this.getRandom(100,1000));
51   }
52   getRandom(min, max) {
53     return Math.floor(Math.random() * (max - min)) + min;
54   }
55   getRandomImage(): Observable<any> {
56     return this.imageChange;
57   }
58 }
Listing 29.9 shows an Angular component that gets a random image from RandomImageService, displays it in the main view, and adds it into the imageHistory array. Lines 4 and 10 show RandomImageService being imported and provided to the component. Line 18 instantiates the RandomImageService as the variable randomImages. Lines 20 through 24 create a default initial imageInfo object to hold a place until data can be received from RandomImageService. Lines 27 through 34 show the ngOnInit method, which calls the getRandomImage method on the randomImages service instance and assigns it to the observable randomImage. imageInfo is then assigned the value of anything emitted from the observable. imageHistory also adds the value of anything emitted from the observable.
Listing 29.9 app.component.ts: An Angular Component that Gets a Random Image from RandomImageService and Displays That Image
01 import { Component, OnInit } from '@angular/core';
02 import { Observable } from 'rxjs/observable';
03 import { Subscription } from 'rxjs/Subscription';
04 import { RandomImageService } from './random-image.service';
05
06 @Component({
07   selector: 'app-root',
08   templateUrl: './app.component.html',
09   styleUrls: ['./app.component.css'],
10   providers: [ RandomImageService ]
11 })
12 export class AppComponent {
13   title = 'app';
14   randomImage: Observable<any>;
15   imageInfo: any;
16   imageHistory: any[];
17   constructor(
18     private randomImages: RandomImageService
19   ){
20      this.imageInfo = {
21       url: '',
22       title: 'Loading . . .',
23       width: 400
24     };
25     this.imageHistory = [];
26   }
27   ngOnInit(){
28     this.randomImage = this.randomImages.getRandomImage();
29     this.randomImage.subscribe(
30       imageData => {
31         this.imageInfo = imageData;
32         this.imageHistory.push(imageData);
33       });
34   }
35 }
Listing 29.10 shows an Angular template that displays a random image in the main view. ngFor is used to display each image within the image history array.
Listing 29.10 app.component.html: An Angular Template that Displays Images Emitted from RandomImageService
01 <div>
02   <img src="{{imageInfo.url}}"
03         width="{{imageInfo.width}}">
04   <p>{{imageInfo.title}}</p>
05 </div>
06 <hr>
07 <h3>Random Image History</h3>
08 <span *ngFor = "let image of imageHistory">
09   <img src="{{image.url}}" height="50px">
10 </span>
Listing 29.11 shows a CSS file that styles the application with a border for the main image and text.
Listing 29.11 app.component.css: A CSS File that Styles the Application Separating the Main View from the Smaller Pictures
01 div {
02     position: inline-block;
03     width: fit-content;
04     border: 3px solid black;
05 }
06 p {
07     font: bold 25px 'Times New Roman';
08     padding: 5px;
09     text-align: center;
10 }
Figure 29.3 shows the running example. The main image URL and size are randomly changed by the service. A rolling history of the randomly displayed images is shown at the bottom.
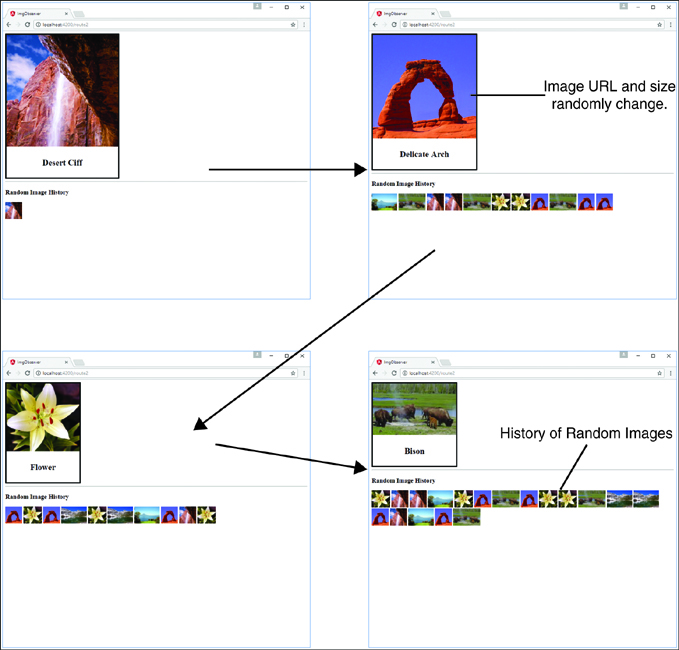
Figure 29.3 Implementing a variable data service that updates a component with random changes to image size and URL
Implementing a Service that Returns a Promise
This example shows how to build a service that creates and returns a promise.
Listing 29.12 shows a custom service named PromiseService, which creates an asynchronous timer that alerts the user after a particular number of seconds. Lines 6 through 13 define the method createTimedAlert, which takes in the parameter seconds and returns a promise. Lines 8 through 10 create a resolve function, which runs only after the promise completes. This function creates an alert that tells the user how long it took to run the alert.
Listing 29.12 promise.service.ts: An Angular Service that Provides a Timer-Based Alert
01 Import { Injectable } from '@angular/core';
02
03 @Injectable()
04 export class PromiseService {
05
06   createTimedAlert(seconds: number): Promise<any>{
07     return new Promise((resolve, reject) =>{
08       resolve(setTimeout(function(){
09           alert('this alert took ' + seconds + ' seconds to load');
10         }, (seconds * 1000))
11       );
12     })
13   }
Listing 29.13 shows an Angular component that uses PromiseService to create an asynchronous request that can be resolved at a later time. Lines 2 and 7 show PromiseService being imported and then added to the providers array so it is available to the component. Line 12 creates an instance of PromiseService called alert. Lines 15 through 17 define the createAlert method, which invokes the createTimedAlert method on alert and passes in the seconds variable.
Listing 29.13 app.component.ts: An Angular Component that Uses the PromiseService Service
01 import { Component } from '@angular/core';
02 import { PromiseService } from './promise.service';
03
04 @Component({
05   selector: 'app-root',
06   templateUrl: './app.component.html',
07   providers: [PromiseService]
08 })
09 export class AppComponent {
10   seconds: number = 0;
11   constructor(
12     private alert: PromiseService
13   ){}
14
15   createAlert(){
16     this.alert.createTimedAlert(this.seconds);
17   }
18 }
Listing 29.14 shows an Angular template that has an input the user can use to type the amount of time in seconds. The template has a button that invokes the function createAlert.
Listing 29.14 app.component.htm: A Template that Displays a Button to Start the Asynchronous Alert Request
01 <h3>set the time in seconds to create an alert</h3>
02 <input [(ngModel)]="seconds">
03 <button (click)="createAlert()">go</button>
Figure 29.4 shows the asynchronous alert being displayed by the service after the time has elapsed.
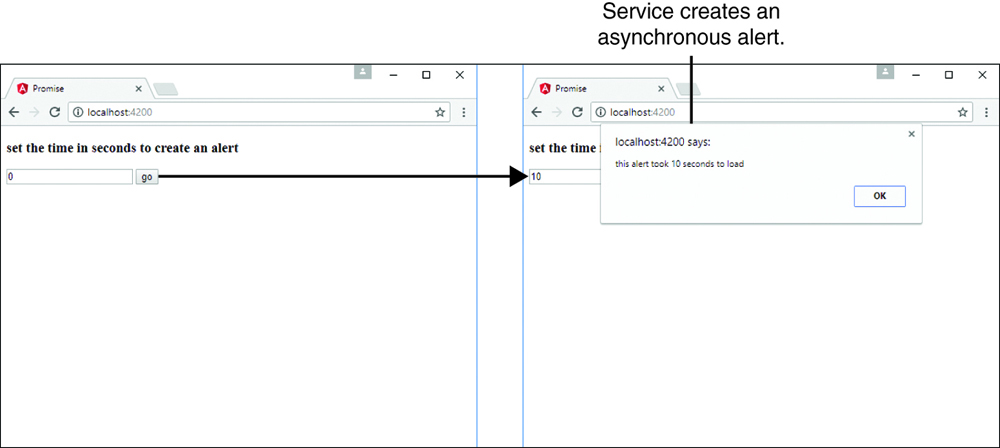
Figure 29.4 Using an Angular service to provide asynchronous alerts
Implementing a Shared Service
This example shows how to build a service that is shared between two components. There will only be one instance of this service, which means that when one component changes the data, the other component will see that data change as well.
Listing 29.15 shows a custom service named SharedService, which creates an observable of an array of characters. This observable is editable, which makes it useful for reducing characters’ health. When the values are changed, the observable emits that change to all components that are subscribed to the observable.
Lines15 through 52 define the characters array, which contains the values name, race, alignment, and health. Lines 55 through 60 define the constructor method, which creates the observable charObservable. The observer object is saved to the service variable observer. Then the observer emits the characters array. Lines 62 through 64 define the getCharacters method, which returns the charObservable.
Lines 66 through 79 define the hitCharacter method, which takes two parameters: character and damage. The method then searches for the index of character within the characters array. If the character exists in the array, the method subtracts damage from that character’s health. Then if the health is less than or equal to 0, the method removes the character from the array. Finally, the method emits the updated characters array.
Listing 29.15 shared.service.ts: An Angular Service that Will Be Shared Between Components
01 import { Injectable } from '@angular/core';
02
03 import { Observable }     from 'rxjs/Observable';
04 import 'rxjs';
05
06 export class character {
07   name: string;
08   race: string;
09   alignment: string;
10   health: number;
11 }
12
13 @Injectable()
14 export class SharedService{
15 characters: character[] = [
16       {
17         name: 'Aragon',
18         race: 'human',
19         alignment: 'good',
20         health: 100
21       },
22       {
23         name: 'Legolas',
24         race: 'elf',
25         alignment: 'good',
26         health: 100
27       },
28       {
29         name: 'Gimli',
30         race: 'Dwarf',
31         alignment: 'good',
32         health: 100
33       },
34       {
35         name: 'Witch King',
36         race: 'Wraith',
37         alignment: 'bad',
38         health: 100
39       },
40       {
41         name: 'Lurtz',
42         race: 'Uruk-hai',
43         alignment: 'bad',
44         health: 100
45       },
46       {
47         name: 'Sarumon',
48         race: 'Wizard',
49         alignment: 'bad',
50         health: 100
51       },
52     ];
53   charObservable: Observable<character[]>;
54   observer;
55   constructor(){
56     this.charObservable = new Observable(observer => {
57       this.observer = observer;
58       this.observer.next(this.characters);
59     })
60   }
61
62   getCharacters(): Observable<character[]>{
63     return this.charObservable;
64   }
65
66   hitCharacter(character, damage){
67
68     var index = this.characters.indexOf(character, 0);
69       if(index > -1){
70         this.characters[index].health -= damage;
71         if(this.characters[index].health <= 0){
72            this.characters.splice(index, 1);
73         }
74     }
75     this.observer.next(this.characters);
76   }
77 }
Listing 29.16 shows an Angular component that creates a single instance of SharedService that can be passed down to child components. Because each child receives the same instance of the service, all child components that inject the SharedService and subscribe to its observable will be updated anytime the data changes. Lines 2 and 7 import and provide SharedService for use within the component. Line 11 assigns SharedService to the variable shared to be used within the HTML.
Listing 29.16 app.component.ts: An Angular Component that Distributes SharedService
01 import { Component } from '@angular/core';
02 import { SharedService } from './shared.service';
03
04 @Component({
05   selector: 'app-root',
06   templateUrl: './app.component.html',
07   providers: [ SharedService ]
08 })
09 export class AppComponent {
10   constructor(
11      public shared: SharedService
12   ){}
13 }
Listing 29.17 shows an Angular template that displays two sections: one for good guys and one for bad guys. Line 2 shows the Good Guys component, which takes in an input shared and is passed the shared observable from app.component to good-guys.component. Line 5 shows the Bad Guys component, which takes in an input shared and is passed the shared observable from app.component to badguys.component.
Listing 29.17 app.component.html: An Angular Template File that Distributes SharedService to Two Components
01 <h2>Good Guys</h2>
02 <app-good-guys [shared]="shared"></app-good-guys>
03   <hr>
04 <h2>Bad Guys</h2>
05 <app-badguys [shared]="shared"></app-badguys>
Listing 29.18 shows the Angular component good-guys.component. Line 9 shows the input shared that gets the SharedService observable from app.component. Lines 14 through 16 show getCharacters being subscribed to on the shared service; this sets the variable characters to the emitted value from the observable returned from the method. Lines 18 through 20 define the hitCharacter method, which takes two parameters: character and damage. This method calls the hitCharacter method on the shared service and passes in character and damage as parameters.
Listing 29.18 good-guys.component.ts: An Angular Component that Watches and Displays a Shared Observable
01 import { Component, OnInit, Input } from '@angular/core';
02
03 @Component({
04   selector: 'app-good-guys',
05   templateUrl: './good-guys.component.html',
06   styleUrls: ['./good-guys.component.css']
07 })
08 export class GoodGuysComponent implements OnInit {
09   @Input('shared') shared;
10   characters: Array<any>;
11   constructor(){}
12
13   ngOnInit(){
14     this.shared.getCharacters().subscribe(
15       characters => this.characters = characters
16     );
17   }
18   hitCharacter(character, damage){
19     this.shared.hitCharacter(character, damage)
20   }
21 }
Listing 29.19 shows an Angular template that displays a list of characters. Lines 3 through 5 display the character’s name, race, and health. Lines 6 through 8 show that characters with the alignment 'bad' have a button that invokes the hitCharacter method which takes in the character object and the number 25 as parameters.
Listing 29.19 good-guys.component.html: An Angular Template that Displays a List of Characters
01 <div *ngFor="let character of characters">
02   <div class="character">
03         <b>Name:</b> {{character.name}}<br>
04         <b>Race:</b> {{character.race}}<br>
05         <b>Health:</b> {{character.health}}
06     <span *ngIf="character.alignment == 'bad'">
07       <button (click)="hitCharacter(character, 25)">hit</button>
08     </span>
09   </div>
10 </div>
Listing 29.20 shows a CSS file that adds borders to each character to help distinguish the characters as separate entities.
Listing 29.20 good-guys.component.css: A CSS File that Visually Separates Characters into Their Own Cards
01 b{
02   font-weight: bold;
03 }
04 div {
05   display: inline-block;
06   margin: 10px;
07   padding: 5px;
08 }
09 .character {
10   border: 2px solid steelblue;
11 }
Listing 29.21 shows the Angular component badguys.component. Line 10 shows the input shared that gets the SharedService observable from app.component. Lines 15 through 17 show getCharacters being subscribed to on the shared service; this sets the variable characters to the emitted value from the observable returned from the method. Lines 19 through 21 define the hitCharacter method, which takes two parameters: character and damage. This method calls the hitCharacter method on the shared service to pass in character and damage as parameters.
Listing 29.21 badguys.component.ts: An Angular Component that Watches and Displays a Shared Observable
01 import { Component, OnInit, Input } from '@angular/core';
02
03 @Component({
04   selector: 'app-badguys',
05   templateUrl: './badguys.component.html',
06   styleUrls: ['./badguys.component.css']
07 })
08
09 export class BadguysComponent implements OnInit {
10   @Input('shared') shared;
11   characters: Array<any>;
12   constructor(){ }
13
14   ngOnInit(){
15    this.shared.getCharacters().subscribe(
16       characters => this.characters = characters
17     );
18   }
19   hitCharacter(character, damage){
20     this.shared.hitCharacter(character, damage);
21   }
22 }
Listing 29.22 shows an Angular template that displays a list of characters. Lines 3 through 5 display the character’s name, race, and health. Lines 6 through 8 show that characters with the alignment 'good' also have a button that invokes the hitCharacter method which takes in the character object and 25 as parameters.
Listing 29.22 badguys.component.html: An Angular Template that Displays a List of Characters
01 <div *ngFor="let character of characters">
02   <div class="character">
03     <b>Name:</b> {{character.name}}<br>
04     <b>Race:</b> {{character.race}}<br>
05     <b>Health:</b> {{character.health}}
06     <span *ngIf="character.alignment == 'good'">
07       <button (click)="hitCharacter(character, 25)">hit</button>
08     </span>
09   </div>
10 </div>
Listing 29.23 shows a CSS file that adds borders to each character to help distinguish the characters as separate entities.
Listing 29.23 badguys.component.css: A CSS File that Visually Separates Characters into Their Own Cards
01 b{
02   font-weight: bold;
03 }
04 div {
05   display: inline-block;
06   margin: 10px;
07   padding: 5px;
08 }
09 .character {
10   border: 2px solid steelblue;
11 }
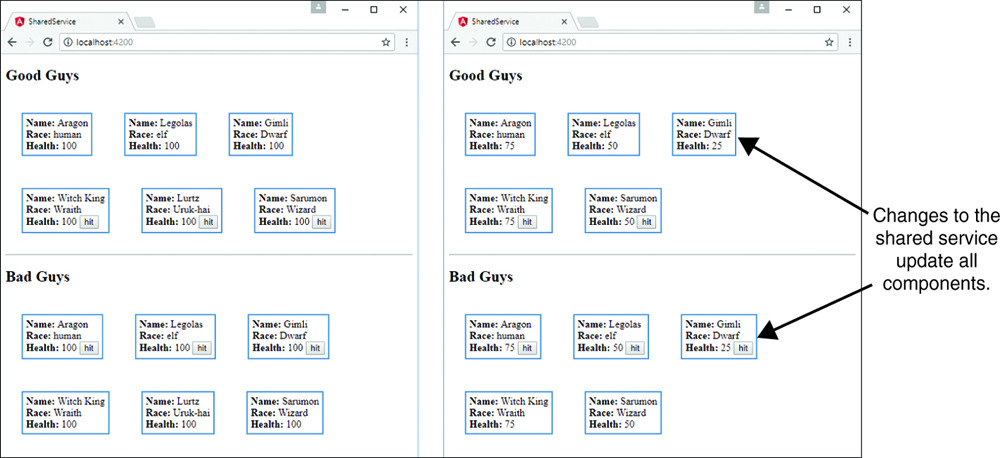
Figure 29.5 shows the application that connects a Good Guys component with a Bad Guys component. Clicking the hit button updates the shared service, which is observed by both components.
Summary
Angular custom services provide functionality that can be injected into other Angular services and components. Services allow you to organize your code into functional modules that can be used to create libraries of functionality available to Angular applications.
This chapter focuses on tools that enable you to implement your own custom Angular services for providing task-based functionality to applications. This chapter provides examples of implementing each of various types of custom Angular services.