
17 Implementing Authentication with PHP and MySQL
IN THIS CHAPTER, WE DISCUSS HOW TO IMPLEMENT various PHP and MySQL techniques for authenticating users.
Key topics covered in this chapter include
![]() Using basic authentication in PHP
Using basic authentication in PHP
![]() Using Apache’s
Using Apache’s .htaccess basic authentication
![]() Using
Using mod_auth_mysql authentication
![]() Creating your own custom authentication
Creating your own custom authentication
Identifying Visitors
The Web is a fairly anonymous medium, but it is often useful to know who is visiting your site. Fortunately for visitors’ privacy, you can find out very little about them without their assistance. With a little work, servers can find out quite a lot about the computers and networks that connect to them, however. A web browser usually identifies itself, telling the server what browser, browser version, and operating system a user is running. You can often determine what resolution and color depth visitors’ screens are set to and how large their web browser windows are by using JavaScript.
Each computer connected to the Internet has a unique IP address. From a visitor’s IP address, you might be able to deduce a little about her. You can find out who owns an IP and sometimes make a reasonable guess as to a visitor’s geographic location. Some addresses are more useful than others. Generally, people with permanent Internet connections have a permanent address. Customers dialing into an ISP usually get only the temporary use of one of the ISP’s addresses. The next time you see that address, it might be used by a different computer, and the next time you see that visitor, she will likely be using a different IP address. IP addresses are not as useful for identifying people as they might at first glance seem.
Fortunately for web users, none of the information that their browsers give out identifies them. If you want to know a visitor’s name or other details, you will have to ask her.
Many websites provide compelling reasons to get users to provide their details. The New York Times newspaper (http://www.nytimes.com) provides its content free, but only to people willing to provide details such as name, sex, and total household income. Nerd news and discussion site Slashdot (http://www.slashdot.org) allows registered users to participate in discussions under a nickname and customize the interface they see. Most e-commerce sites record their customers’ details when they make their first order. This means that a customer is not required to type her details every time.
Having asked for and received information from your visitor, you need a way to associate the information with the same user the next time she visits. If you are willing to make the assumption that only one person visits your site from a particular account on a particular machine and that each visitor uses only one machine, you could store a cookie on the user’s machine to identify the user.
This arrangement is certainly not true for all users. Many people share a computer, and many people use more than one computer. At least some of the time, you need to ask a visitor who she is again. In addition to asking who a user is, you also need to ask her to provide some level of proof that she is who she claims to be.
As discussed in Chapter 15, “E-commerce Security Issues,” asking a user to prove her identity is called authentication. The usual method of authentication used on websites is asking visitors to provide a unique login name and a password. Authentication is usually used to allow or disallow access to particular pages or resources, but can be optional, or used for other purposes such as personalization.
Implementing Access Control
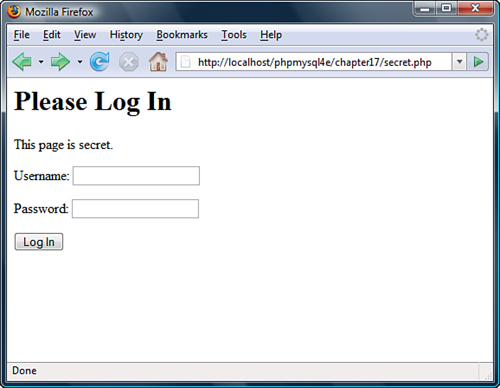
Simple access control is not difficult to implement. The code shown in Listing 17.1 delivers one of three possible outputs. If the file is loaded without parameters, it will display an HTML form requesting a username and password. This type of form is shown in Figure 17.1.
Figure 17.1 This HTML form requests that visitors enter a username and password for access.
If the parameters are present but not correct, it will display an error message. A sample error message is shown in Figure 17.2.
Figure 17.2 When users enter incorrect details, you need to give them an error message. On a real site, you might want to give a somewhat friendlier message.

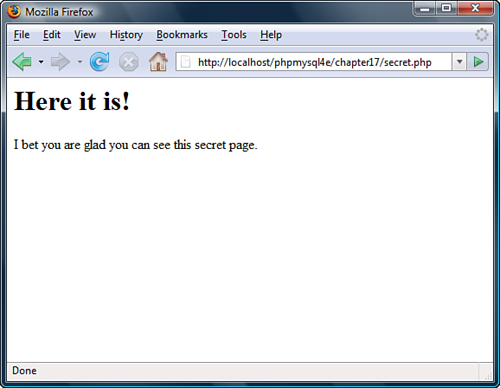
If these parameters are present and correct, it will display the secret content. The sample test content is shown in Figure 17.3.
Figure 17.3 When provided with correct details, the script displays content.
The code to create the functionality shown in Figures 17.1, 17.2, and 17.3 is shown in Listing 17.1.
Listing 17.1 secret.php—PHP and HTML to Provide a Simple Authentication Mechanism
<?php
//create short names for variables
$name = $_POST['name'];
$password = $_POST['password'];
if ((!isset($name)) || (!isset($password))) {
//Visitor needs to enter a name and password
?>
<h1>Please Log In</h1>
<p>This page is secret.</p>
<form method="post" action="secret.php">
<p>Username: <input type="text" name="name"></p>
<p>Password: <input type="password" name="password"></p>
<p><input type="submit" name="submit" value="Log In"></p>
</form>
<?php
} else if(($name=="user") && ($password=="pass")) {
// visitor’s name and password combination are correct
echo "<h1>Here it is!</h1>
<p>I bet you are glad you can see this secret page.</p>";
} else {
// visitor’s name and password combination are not correct
echo "<h1>Go Away!</h1>
<p>You are not authorized to use this resource.</p>";
}
?>
The code from Listing 17.1 provides a simple authentication mechanism to allow authorized users to see a page, but it has some significant problems:
![]() Has one username and password hard-coded into the script
Has one username and password hard-coded into the script
![]() Stores the password as plain text
Stores the password as plain text
![]() Protects only one page
Protects only one page
![]() Transmits the password as plain text
Transmits the password as plain text
These issues can all be addressed with varying degrees of effort and success.
Storing Passwords
There are many better places to store usernames and passwords than inside the script. Inside the script, modifying the data is difficult. It is possible, but a bad idea, to write a script to modify itself. Doing so would mean having a script on your server that is executed on your server but that can be written or modified by others. Storing the data in another file on the server lets you more easily write a program to add and remove users and to alter passwords.
Inside a script or another data file, you are limited to the number of users you can have without seriously affecting the speed of the script. If you are considering storing and searching through a large number of items in a file, you should consider using a database instead, as previously discussed. As a rule of thumb, if you want to store and search through a list of more than 100 items, they should be in a database rather than a flat file.
Using a database to store usernames and passwords would not make the script much more complex but would allow you to authenticate many different users quickly. It would also allow you to easily write a script to add new users, delete users, and allow users to change their passwords.
A script to authenticate visitors to a page against a database is shown in Listing 17.2.
Listing 17.2 secretdb.php—Using MySQL to Improve the Simple Authentication Mechanism
<?php
$name = $_POST['name'];
$password = $_POST['password'];
if ((!isset($name)) || (!isset($password))) {
//Visitor needs to enter a name and password
?>
<h1>Please Log In</h1>
<p>This page is secret.</p>
<form method="post" action="secretdb.php">
<p>Username: <input type="text" name="name"></p>
<p>Password: <input type="password" name="password"></p>
<p><input type="submit" name="submit" value="Log In"></p>
</form>
<?php
} else {
// connect to mysql
$mysql = mysqli_connect("localhost", "webauth", "webauth");
if(!$mysql) {
echo "Cannot connect to database.";
exit;
}
// select the appropriate database
$selected = mysqli_select_db($mysql, "auth");
if(!$selected) {
echo "Cannot select database.";
exit;
}
// query the database to see if there is a record which matches
$query = "select count(*) from authorized_users where
name = ' " .$name."' and
password = ' " .$password . " ' ";
$result = mysqli_query($mysql, $query);
if(!$result) {
echo "Cannot run query.";
exit;
}
$row = mysqli_fetch_row($result);
$count = $row[0];
if ($count > 0) {
// visitor’s name and password combination are correct
echo "<h1>Here it is!</h1>
<p>I bet you are glad you can see this secret page.</p>";
} else {
// visitor’s name and password combination are not correct
echo "<h1>Go Away!</h1>
<p>You are not authorized to use this resource.</p>";
}
}
?>
You can create the database used here by connecting to MySQL as the MySQL root user and running the contents of Listing 17.3.
Listing 17.3 createauthdb.sql—These MySQL Queries Create the auth Database, the auth Table, and Two Sample Users
create database auth;
use auth;
create table authorized_users (name varchar(20), password varchar(40),
primary key (name)
);
insert into authorized_users values ('username',
'password'),
insert into authorized_users values ('testuser',
sha1('password'));
grant select on auth.*
to 'webauth'
identified by 'webauth';
flush privileges;
Encrypting Passwords
Regardless of whether you store your data in a database or a file, storing the passwords as plain text is an unnecessary risk. A one-way hashing algorithm can provide better security with very little extra effort.
PHP provides a number of one-way hash functions. The oldest and least secure is the Unix Crypt algorithm, provided by the function crypt(). The Message Digest 5 (MD5) algorithm, implemented in the function md5(), is stronger.
Stronger yet is the Secure Hash Algorithm 1 (SHA-1.) The PHP function sha1() provides a strong, one-way cryptographic hash function. The prototype for this function is
string sha1 ( string str [, bool raw_output])
Given the string str, the function will return a pseudo-random 40-character string. If you set raw_output to be true, you will instead get a 20-character string of binary data. For example, given the string "password", sha1() returns "5baa61e4c9b93f3f0682250b6cf8331b7ee68fd8". This string cannot be decrypted and turned back into "password" even by its creator, so it might not seem very useful at first glance. The property that makes sha1() useful is that the output is deterministic. Given the same string, sha1() will return the same result every time it is run.
Rather than having PHP code like
if (($name == 'username') &&
($password == 'password')) {
//OK passwords match
}
you can have code like
if (($name == 'username') &&
(sha1($password )== '5baa61e4c9b93f3f0682250b6cf8331b7ee68fd8')) {
//OK passwords match}
You do not need to know what the password looked like before you used sha1() on it. You need to know only if the password typed in is the same as the one that was originally run through sha1().
As already mentioned, hard-coding acceptable usernames and passwords into a script is a bad idea. You should use a separate file or a database to store them.
If you are using a MySQL database to store your authentication data, you could either use the PHP function sha1() or the MySQL function SHA1(). MySQL provides an even wider range of hashing algorithms than PHP, but they are all intended for the same purpose.
To use SHA1(), you could rewrite the SQL query in Listing 17.2 as
select count(*) from authorized_users where
name = ' " .$name."' and
password = sha1(' " .$password."')
This query counts the number of rows in the table named authorized_users that have a name value equal to the contents of $name and a pass value equal to the output given by SHA1() applied to the contents of $password. Assuming that you force people to have unique usernames, the result of this query is either 0 or 1.
Keep in mind that the hash functions generally return data of a fixed size. In the case of SHA1, it is 40 characters when represented as a string. Make sure that your database column is this width.
Looking back at Listing 17.3, you can see that we created one user ('username') with an unencrypted password and another user with an encrypted one ('testuser') to illustrate the two possible approaches.
Protecting Multiple Pages
Making a script like the ones in Listings 17.1 and 17.2 protect more than one page is a little harder. Because HTTP is stateless, there is no automatic link or association between subsequent requests from the same person. This makes it harder to have data, such as authentication information that a user has entered, carry across from page to page.
The easiest way to protect multiple pages is to use the access control mechanisms provided by your web server. We look at these mechanisms shortly.
To create this functionality yourself, you could include parts of the script shown in Listing 17.1 in every page that you want to protect. Using auto_prepend_file and auto_append_file, you can automatically prepend and append the code required to every file in particular directories. The use of these directives was discussed in Chapter 5, “Reusing Code and Writing Functions.”
If you use this approach, what happens when your visitors go to multiple pages within your site? Requiring them to re-enter their names and passwords for every page they want to view would not be acceptable.
You could append the details the users entered to every hyperlink on the page. Because they might have spaces or other characters that are not allowed in URLs, you should use the function urlencode() to safely encode these characters.
This approach still has a few problems, though. Because the data would be included in web pages sent to the users and the URLs they visit, the protected pages they visit will be visible to anybody who uses the same computer and steps back through cached pages or looks at the browser’s history list. Because you are sending the password back and forth to the browser with every page requested or delivered, this sensitive information is being transmitted more often than necessary.
There are two good ways to tackle these problems: HTTP basic authentication and sessions. Basic authentication overcomes the caching problem, but the browser still sends the password to the server with every request. Session control overcomes both of these problems. We look at HTTP basic authentication now and examine session control in Chapter 23, “Using Session Control in PHP,” and in more detail in Chapter 27, “Building User Authentication and Personalization.”
Using Basic Authentication
Fortunately, authenticating users is a common task, so authentication facilities are built into HTTP. Scripts or web servers can request authentication from a web browser. The web browser is then responsible for displaying a dialog box or similar device to obtain required information from the user.
Although the web server requests new authentication details for every user request, the web browser does not need to request the user’s details for every page. The browser generally stores these details for as long as the user has a browser window open and automatically resends them to the web server as required without user interaction.
This feature of HTTP is called basic authentication. You can trigger basic authentication using PHP or using mechanisms built into your web server. We look first at the PHP method and then the Apache method.
Basic authentication transmits a user’s name and password in plain text, so it is not very secure. HTTP 1.1 contains a more secure method known as digest authentication, which uses a hashing algorithm (usually MD5) to disguise the details of the transaction. Digest authentication is supported by many web servers and most current-version web browsers. However, there are many older browsers still in use that do not support digest authentication, and a version of digest authentication included in some versions of Microsoft Internet Explorer and Internet Information Server that is not compatible with non-Microsoft products.
In addition to being poorly supported by a not-significant number of web browsers, digest authentication is still not very secure. Both basic and digest authentication provide a low level of security. Neither gives the user any assurance that he is dealing with the machine he intended to access. Both might permit a cracker to replay the same request to the server. Because basic authentication transmits the user’s password as plain text, it allows any cracker capable of capturing packets to impersonate the user for making any request.
Basic authentication provides a (low) level of security similar to that commonly used to connect to machines via Telnet or FTP, transmitting passwords in plaintext. Digest authentication is somewhat more secure, encrypting passwords before transmitting them.
When you combine basic authentication with SSL and digital certificates, all parts of a web transaction can be protected by strong security. If you want strong security, you should read Chapter 18, “Implementing Secure Transactions with PHP and MySQL.” However, for many situations, a fast, but relatively insecure, method such as basic authentication is appropriate.
Basic authentication protects a named realm and requires users to provide a valid username and password. Realms are named so that more than one realm can be on the same server. Different files or directories on the same server can be part of different realms, each protected by a different set of names and passwords. Named realms also let you group multiple directories on the one host or virtual host as a realm and protect them all with one password.
Using Basic Authentication in PHP
PHP scripts are generally cross-platform, but using basic authentication relies on environment variables set by the server. For an HTTP authentication script to run on Apache using PHP as an Apache module or on IIS using PHP as an ISAPI module, it needs to detect the server type and behave slightly differently. The script in Listing 17.4 will run on both servers.
Listing 17.4 http.php—PHP Can Trigger HTTP Basic Authentication
<?php
// if we are using IIS, we need to set
// $_SERVER['PHP_AUTH_USER'] and
// $_SERVER['PHP_AUTH_PW']
if ((substr($_SERVER['SERVER_SOFTWARE'], 0, 9) == 'Microsoft') &&
(!isset($_SERVER['PHP_AUTH_USER'])) &&
(!isset($_SERVER['PHP_AUTH_PW'])) &&
(substr($_SERVER['HTTP_AUTHORIZATION'], 0, 6) == 'Basic ')
) {
list($_SERVER['PHP_AUTH_USER'], $_SERVER['PHP_AUTH_PW']) =
explode(':', base64_decode(substr($_SERVER['HTTP_AUTHORIZATION'], 6)));
}
// Replace this if statement with a database query or similar
if (($_SERVER['PHP_AUTH_USER'] != 'user') ||
($_SERVER['PHP_AUTH_PW'] != 'pass')) {
// visitor has not yet given details, or their
// name and password combination are not correct
header('WWW-Authenticate: Basic realm="Realm-Name"'),
if (substr($_SERVER['SERVER_SOFTWARE'], 0, 9) == 'Microsoft') {
header('Status: 401 Unauthorized'),
} else {
header('HTTP/1.0 401 Unauthorized'),
}
echo "<h1>Go Away!</h1>
<p>You are not authorized to view this resource.</p>";
} else {
// visitor has provided correct details
echo "<h1>Here it is!</h1>
<p>I bet you are glad you can see this secret page.</p>";
}
?>
The code in Listing 17.4 acts similarly to the previous listings in this chapter. If the user has not yet provided authentication information, it will be requested. If she has provided incorrect information, she is given a rejection message. If she provides a matching name-password pair, she is presented with the contents of the page.
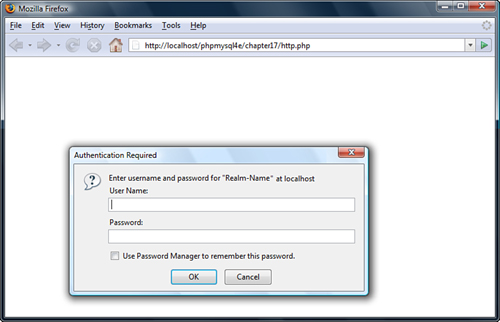
In this case, the user will see an interface somewhat different from the previous listings. This script does not provide an HTML form for login information. The user’s browser presents her with a dialog box. Some people see this as an improvement; others would prefer to have complete control over the visual aspects of the interface. A sample dialog box, in this instance provided from Firefox, is shown in Figure 17.4.
Because the authentication is being assisted by features built into the browser, the browser chooses to exercise some discretion in how failed authorization attempts are handled. Internet Explorer lets the user try to authenticate three times before displaying the rejection page. Firefox lets the user try an unlimited number of times, popping up a dialog box to ask, “Authorization failed. Retry?” between attempts. Firefox displays the rejection page only if the user clicks Cancel.
As with the code given in Listings 17.1 and 17.2, you could include this code in pages you wanted to protect or automatically prepend it to every file in a directory.
Figure 17.4 The user’s browser is responsible for the appearance of the dialog box when using HTTP authentication.
Using Basic Authentication with Apache’s .htaccess Files
You can achieve similar results to the script in Listing 17.4 without writing a PHP script.
The Apache web server contains a number of different authentication modules that can be used to decide the validity of data entered by a user. The easiest to use is mod_auth, which compares name-password pairs to lines in a text file on the server.
To get the same output as the preceding script, you need to create two separate HTML files: one for the content and one for the rejection page. We skipped some HTML elements in the previous examples but really should include <html> and <body> tags when generating HTML.
Listing 17.5, named content.html, contains the content that authorized users see. Listing 17.6, called rejection.html, contains the rejection page. Having a page to show in case of errors is optional, but it is a nice, professional touch if you put something useful on it. Given that this page will be shown when a user attempts to enter a protected area but is rejected, useful content might include instructions on how to register for a password, or how to get a password reset and emailed if it has been forgotten.
Listing 17.5 content.html—Sample Content
<html><body>
<h1>Here it is!</h1>
<p>I bet you are glad you can see this secret page.</p>
</body></html>
Listing 17.6 rejection.html—Sample 401 Error Page
<html><body>
<h1>Go Away!</h1>
<p>You are not authorized to view this resource.</p>
</body></html>
There is nothing new in these files. The interesting file for this example is Listing 17.7. This file needs to be called .htaccess and will control accesses to files and any subdirectories in its directory.
Listing 17.7 .htaccess—An .htaccess File Can Set Many Apache Configuration Settings, Including Activating Authentication
ErrorDocument 401 /chapter17/rejection.html
AuthUserFile /home/book/.htpass
AuthGroupFile /dev/null
AuthName "Realm-Name"
AuthType Basic
require valid-user
Listing 17.7 is an .htaccess file to turn on basic authentication in a directory. Many settings can be made in an .htaccess file, but the six lines in this example all relate to authentication.
The first line
ErrorDocument 401 /chapter17/rejection.html
tells Apache what document to display for visitors who fail to authenticate (HTTP error number 401). You can use other ErrorDocument directives to provide your own pages for other HTTP errors such as 404. The syntax is
ErrorDocument error_number URL
For a page to handle error 401, it is important that the URL given is publicly available. It would not be very useful in providing a customized error page to tell people that their authorization failed if the page is locked in a directory in which they need to successfully authenticate to see.
The line
AuthUserFile /home/book/.htpass
tells Apache where to find the file that contains authorized users’ passwords. This file is often named .htpass, but you can give it any name you prefer. It is not important what you call this file, but it is important where you store it. It should not be stored within the web tree—somewhere that people can download it via the web server. The sample .htpass file is shown in Listing 17.8.
As well as specifying individual users who are authorized, it is possible to specify that only authorized users who fall into specific groups may access resources. We chose not to, so the line
AuthGroupFile /dev/null
sets the AuthGroupFile to point to /dev/null, a special file on Unix systems that is guaranteed to be null.
Like the PHP example, to use HTTP authentication, you need to name the realm as follows:
AuthName "Realm-Name"
You can choose any realm name you prefer, but bear in mind that the name will be shown to your visitors. To make it obvious that the name in the example should be changed, we named ours "Realm-Name".
Because a number of different authentication methods are supported, you need to specify which authentication method you are using. Here, you use Basic authentication, as specified by this directive:
AuthType Basic
You also need to specify who is allowed access. You could specify particular users, particular groups, or as we have done, simply allow any authenticated user access. The line
require valid-user
specifies that any valid user is to be allowed access.
Listing 17.8 .htpass—The Password File Stores Usernames and Each User’s Encrypted Password
user1:0nRp9M80GS7zM
user2:nC13sOTOhp.ow
user3:yjQMCPWjXFTzU
user4:LOmlMEi/hAme2
Each line in the .htpass file contains a username, a colon, and that user’s encrypted password.
The exact contents of your .htpass file will vary. To create it, you use a small program called htpasswd that comes in the Apache distribution.
The htpasswd program is used in one of the following ways:
htpasswd [-cmdps] passwordfile username
or
htpasswd -b[cmdps] passwordfile username password
The only switch that you need to use is -c. Using -c tells htpasswd to create the file. You must use this for the first user you add. Be careful not to use it for other users because, if the file exists, htpasswd will delete it and create a new one.
The optional m, d, p, or s switches can be used if you want to specify which encryption algorithm (including no encryption) you would like to use.
The b switch tells the program to expect the password as a parameter rather than prompt for it. This feature is useful if you want to call htpasswd noninteractively as part of a batch process, but you should not use it if you are calling htpasswd from the command line.
The following commands created the file shown in Listing 17.8:
htpasswd -bc /home/book/.htpass user1 pass1
htpasswd -b /home/book/.htpass user2 pass2
htpasswd -b /home/book/.htpass user4 pass3
htpasswd -b /home/book/.htpass user4 pass4
Note that htpasswd may not be in your path: If it is not, you may need to supply the full path to it. On many systems, you will find it in the /usr/local/apache/bin directory.
This sort of authentication is easy to set up, but there are a few problems with using an .htaccess file this way.
Users and passwords are stored in a text file. Each time a browser requests a file that is protected by the .htaccess file, the server must parse the .htaccess file and then parse the password file, attempting to match the username and password. Instead of using an .htaccess file, you could specify the same things in your httpd.conf file—the main configuration file for the web server. An .htaccess file is parsed every time a file is requested. The httpd.conf file is parsed only when the server is initially started. This approach is faster, but means that if you want to make changes, you need to stop and restart the server.
Regardless of where you store the server directives, the password file still needs to be searched for every request. This means that, like other techniques we have looked at that use a flat file, this would not be appropriate for hundreds or thousands of users.
Using mod_auth_mysql Authentication
As already mentioned, mod_auth is easy to set up with Apache and is effective. Because it stores users in a text file, it is not really practical for busy sites with large numbers of users.
Fortunately, you can have most of the ease of mod_auth, combined with the speed of a database, by using mod_auth_mysql. This module works in much the same way as mod_auth, but because it uses a MySQL database instead of a text file, it can search large user lists quickly.
To use it, you need to compile and install the module on your system or ask your system administrator to install it.
Installing mod_auth_mysql
To use mod_auth_mysql, you need to set up Apache and MySQL according to the instructions in Appendix A, “Installing PHP and MySQL,” but add a few extra steps. You can find reasonable instructions in the files README and USAGE, which are in the distribution, but they refer to previous versions’ behavior in some places. Here is a summary:
1. Obtain the distribution archive for the module. It is on the CD-ROM that came with this book, but you can always get the latest version from http://sourceforge.net/projects/modauthmysql.
2. Unzip and untar the source code.
3. Change to the mod_auth_mysql directory, run make, and then make install. You may need to change the install locations for MySQL in the make file (MakeFile).
4. Add this line to httpd.conf to dynamically load the module into Apache:
LoadModule mysql_auth_module libexec/mod_auth_mysql.so
5. Create a database and table in MySQL to contain authentication information. It does not need to be a separate database or table; you can use an existing table such as the auth database from the example earlier in this chapter.
6. Add a line to your httpd.conf file to give mod_auth_mysql the parameters it needs to connect to MySQL. The directive will look like
Auth_MySQL_Info hostname user password
The easiest way to check whether your compilation worked is to see whether Apache will start. To start Apache type
/usr/local/apache/bin/apachectl startssl
If it starts with the Auth_MySQL_Info directive in the httpd.conf file, mod_auth_mysql was successfully added.
Using mod_auth_mysql
After you have successfully installed the mod_auth_mysql module, using it is no harder than using mod_auth. Listing 17.9 shows a sample .htaccess file that will authenticate users with encrypted passwords stored in the database created earlier in this chapter.
Listing 17.9 .htaccess—This .htaccess File Authenticates Users Against a MySQL Database
ErrorDocument 401 /chapter17/rejection.html
AuthName "Realm Name"
AuthType Basic
Auth_MySQL_DB auth
Auth_MySQL_Encryption_Types MySQL
Auth_MySQL_Password_Table authorized_users
Auth_MySQL_Username_Field name
Auth_MySQL_Password_Field password
require valid-user
You can see that much of Listing 17.9 is the same as Listing 17.7. You still specify an error document to display in the case of error 401 (when authentication fails). You again specify basic authentication and give a realm name. As in Listing 17.7, you allow any valid, authenticated user access.
Because we are using mod_auth_mysql and did not want to use all the default settings, we used some directives to specify how this should work. Auth_MySQL_DB, Auth_MySQL_Password_Table, Auth_MySQL_Username_Field, and Auth_MySQL_Password_Field specify the name of the database, the table, the username field, and the password field, respectively.
We included the directive Auth_MySQL_Encryption_Types to specify that we want to use MySQL password encryption. Acceptable values are Plaintext, Crypt_DES, or MySQL. Crypt_DES is the default and uses standard Unix DES-encrypted passwords.
From the user perspective, this mod_auth_mysql example will work in exactly the same way as the mod_auth example. She will be presented with a dialog box by her web browser. If she successfully authenticates, she will be shown the content. If she fails, she will be given the error page.
For many websites, mod_auth_mysql is ideal. It is fast and relatively easy to implement, and it allows you to use any convenient mechanism to add database entries for new users. For more flexibility and the ability to apply fine-grained control to parts of pages, you might want to implement your own authentication using PHP and MySQL.
Creating Your Own Custom Authentication
In this chapter, you looked at creating your own authentication methods including some flaws and compromises and using built-in authentication methods, which are less flexible than writing your own code. Later in the book, after you learn about session control, you will be able to write your own custom authentication with fewer compromises than in this chapter.
In Chapter 23, we develop a simple user authentication system that avoids some of the problems we faced here by using sessions to track variables between pages.
In Chapter 27, we apply this approach to a real-world project and see how it can be used to implement a fine-grained authentication system.
Further Reading
The details of HTTP authentication are specified by RFC 2617, which is available at http://www.rfc-editor.org/rfc/rfc2617.txt
The documentation for mod_auth, which controls basic authentication in Apache, can be found at http://httpd.apache.org/docs/2.0/mod/mod_auth.html.
The documentation for mod_auth_mysql is inside the download archive. It is a tiny download, so even if you just want to find out more about it, downloading the archive to look at the readme file is not silly.
Next
The next chapter explains how to safeguard data at all stages of processing from input, through transmission, and in storage. It includes the use of SSL, digital certificates, and encryption.