
23 Using Session Control in PHP
IN THIS CHAPTER, WE DISCUSS THE SESSION control functionality in PHP.
Key topics covered in this chapter include
What Is Session Control?
You might have heard people say that “HTTP is a stateless protocol.” This means that the protocol has no built-in way of maintaining state between two transactions. When a user requests one page, followed by another, HTTP does not provide a way for you to tell that both requests came from the same user.
The idea of session control is to be able to track a user during a single session on a website. If you can do this, you can easily support logging in a user and showing content according to her authorization level or personal preferences. You can track the user’s behavior, and you can implement shopping carts.
Since version 4, PHP has included native session control functions. The approach to session control has changed slightly with the introduction of the superglobal variables; the $_SESSION superglobal is now available for use.
Understanding Basic Session Functionality
Sessions in PHP are driven by a unique session ID, a cryptographically random number. This session ID is generated by PHP and stored on the client side for the lifetime of a session. It can be either stored on a user’s computer in a cookie or passed along through URLs.
The session ID acts as a key that allows you to register particular variables as so-called session variables. The contents of these variables are stored at the server. The session ID is the only information visible at the client side. If, at the time of a particular connection to your site, the session ID is visible either through a cookie or the URL, you can access the session variables stored on the server for that session. By default, the session variables are stored in flat files on the server. (You can change this to use a database if you are willing to write your own functions; you’ll learn more on this topic in the section “Configuring Session Control.”)
You have probably used websites that store a session ID in the URL. If your URL contains a string of random-looking data, it is likely to be some form of session control.
Cookies are a different solution to the problem of preserving state across a number of transactions while still having a clean-looking URL.
What Is a Cookie?
A cookie is a small piece of information that scripts can store on a client-side machine. You can set a cookie on a user’s machine by sending an HTTP header containing data in the following format:
Set-Cookie: NAME=VALUE; [expires=DATE;] [path=PATH;]
[domain=DOMAIN_NAME;] [secure]
This creates a cookie called NAME with the value VALUE. The other parameters are all optional. The expires field sets a date beyond which the cookie is no longer relevant. (Note that if no expiry date is set, the cookie is effectively permanent unless you or the user manually delete it.) Together, the path and domain can be used to specify the URL or URLs for which the cookie is relevant. The secure keyword means that the cookie will not be sent over a plain HTTP connection.
When a browser connects to an URL, it first searches the cookies stored locally. If any of them are relevant to the URL being connected to, they will be transmitted back to the server.
Setting Cookies from PHP
You can manually set cookies in PHP using the setcookie() function. It has the following prototype:
bool setcookie (string name [, string value [, int expire [, string path
[, string domain [, int secure]]]]])
The parameters correspond exactly to the ones in the Set-Cookie header mentioned previously.
If you set a cookie as
setcookie ('mycookie', 'value'),
when the user visits the next page in your site (or reloads the current page), you will have access to the cookie via $_COOKIE['mycookie'].
You can delete a cookie by calling setcookie() again with the same cookie name and an expiry time in the past. You can also set a cookie manually via the header() function and the cookie syntax given previously. One tip is that cookie headers must be sent before any other headers; otherwise, they will not work. (This is a cookie limitation rather than a PHP limitation.)
Using Cookies with Sessions
Cookies have some associated problems: Some browsers do not accept cookies, and some users might have disabled cookies in their browsers. This is one of the reasons PHP sessions use a dual cookie/URL method. (We discuss this method shortly.)
When you are using PHP sessions, you do not have to manually set cookies. The session functions take care of this task for you.
You can use the function session_get_cookie_params() to see the contents of the cookie set by session control. It returns an array containing the elements lifetime, path, domain, and secure.
You can also use
session_set_cookie_params($lifetime, $path, $domain [, $secure]);
to set the session cookie parameters.
If you want to read more about cookies, you can consult the cookie specification on Netscape’s site: http://wp.netscape.com/newsref/std/cookie_spec.html (You can ignore the fact that this document calls itself a “preliminary specification”; it’s been that way since 1995 and is as close to a standard as a document could be without actually being called a standard!)
Storing the Session ID
PHP uses cookies by default with sessions. If possible, a cookie will be set to store the session ID.
The other method it can use is adding the session ID to the URL. You can set this to happen automatically if you set the session.use_trans_sid directive in the php.ini file. It is off by default. You should use caution when turning this directive on as it increases your site’s security risks. If this is set to on, a user can email the URL that contains the session ID to another person, the URL could be stored in a publically accessible computer, or it may be available in the history or bookmarks of a browser on a publically accessible computer.
Alternatively, you can manually embed the session ID in links so that it is passed along. The session ID is stored in the constant SID. To pass it along manually, you add it to the end of a link similar to a GET parameter:
<A HREF="link.php?<?php echo strip_tags(SID); ?>">
(The strip_tags() function is used here to avoid cross-site scripting attacks.)
Compiling with --enable-trans-sid is generally easier, however.
Implementing Simple Sessions
The basic steps of using sessions are
1. Starting a session
2. Registering session variables
3. Using session variables
4. Deregistering variables and destroying the session
Note that these steps don’t necessarily all happen in the same script, and some of them happen in multiple scripts. Let’s examine each of these steps in turn.
Starting a Session
Before you can use session functionality, you need to actually begin a session. There are two ways you can do this.
The first, and simplest, is to begin a script with a call to the session_start() function:
session_start();
This function checks to see whether there is already a current session. If not, it will essentially create one, providing access to the superglobal $_SESSION array. If a session already exists, session_start() loads the registered session variables so that you can use them.
It’s essential to call session_start() at the start of all your scripts that use sessions. If this function is not called, anything stored in the session will not be available to this script.
The second way you can begin a session is to set PHP to start one automatically when someone comes to your site. You can do this by using the session.auto_start option in your php.ini file; we look at this approach when we discuss configuration. This method has one big disadvantage: With auto_start enabled, you cannot use objects as session variables. This is because the class definition for that object must be loaded before starting the session to create the objects in the session.
Registering Session Variables
The way you register session variables has recently changed in PHP. Session variables have been stored in the superglobal array $_SESSION since PHP 4.1. To create a session variable, you simply set an element in this array, as follows:
$_SESSION['myvar'] = 5;
The session variable you have just created will be tracked until the session ends or until you manually unset it. The session may also naturally expire based on the session.gc_maxlifetime setting in the php.ini file. This setting determines the amount of time (in seconds) that a session will last before it is ended by the garbage collector.
Using Session Variables
To bring session variables into scope so that they can be used, you must first start a session calling session_start(). You can then access the variable via the $_SESSION superglobal array—for example, as $_SESSION['myvar'].
When you are using an object as a session variable, it is important that you include the class definition before calling session_start() to reload the session variables. This way, PHP knows how to reconstruct the session object.
On the other hand, you need to be careful when checking whether session variables have been set (via, say, isset() or empty()). Remember that variables can be set by the user via GET or POST. You can check a variable to see whether it is a registered session variable by checking in $_SESSION.
You can check this directly using the following, for example:
if (isset($_SESSION['myvar'])) …
Unsetting Variables and Destroying the Session
When you are finished with a session variable, you can unset it. You can do this directly by unsetting the appropriate element of the $_SESSION array, as in this example:
unset($_SESSION['myvar']);
Note that the use of session_unregister() and session_unset() is no longer required and is not recommended. These functions were used prior to the introduction of $_SESSION.
You should not try to unset the whole $_SESSION array because doing so will effectively disable sessions. To unset all the session variables at once, use
$_SESSION = array();
When you are finished with a session, you should first unset all the variables and then call
session_destroy();
to clean up the session ID.
Creating a Simple Session Example
Some of this discussion might seem abstract, so let’s look at an example. Here, you’ll implement a set of three pages.
On the first page, start a session and create the variable $_SESSION['sess_var']. The code to do this is shown in Listing 23.1.
Listing 23.1 page1.php—Starting a Session and Creating a Session Variable
<?php
session_start();
$_SESSION['sess_var'] = "Hello world!";
echo 'The content of $_SESSION['sess_var'] is '
.$_SESSION['sess_var'].'<br />';
?>
<a href="page2.php">Next page</a>
This script creates the variable and sets its value. The output of this script is shown in Figure 23.1.
Figure 23.1 Initial value of the session variable shown by page1.php.

The final value of the variable on the page is the one that will be available on subsequent pages. At the end of the script, the session variable is serialized, or frozen, until it is reloaded via the next call to session_start().
You can therefore begin the next script by calling session_start(). This script is shown in Listing 23.2.
Listing 23.2 page2.php—Accessing a Session Variable and Unsetting It
<?php
session_start();
echo 'The content of $_SESSION['sess_var'] is '
.$_SESSION['sess_var'].'<br />';
unset($_SESSION['sess_var']);
?>
<a href="page3.php">Next page</a>
After you call session_start(), the variable $_SESSION ['sess_var'] is available with its previously stored value, as you can see in Figure 23.2.
Figure 23.2 The value of the session variable is passed along via the session ID to page2.php.
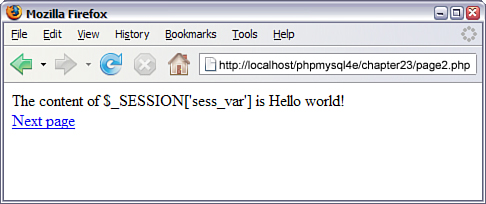
After you have used the variable, you unset it. The session still exists, but the variable $_SESSION['sess_var'] no longer exists.
Finally, you pass along to page3.php, the final script in the example. The code for this script is shown in Listing 23.3.
Listing 23.3 page3.php—Ending the Session
<?php
session_start();
echo 'The content of $_SESSION['sess_var'] is '
.$_SESSION['sess_var'].'<br />';
session_destroy();
?>
As you can see in Figure 23.3, you no longer have access to the persistent value of $_SESSION['sess_var'].
Figure 23.3 The session variable is no longer available.

With some PHP versions prior to 4.3, you might encounter a bug when trying to unset elements of $HTTP_SESSION_VARS or $_SESSION. If you find that you are unable to unset elements (that is, they stay set), you can revert to using session_unregister() to clear these variables.
You finish by calling session_destroy() to dispose of the session ID.
Configuring Session Control
There is a set of configuration options for sessions that you can set in your php.ini file. Some of the more useful options, and a description of each, are shown in Table 23.1.
Table 23.1 Session Configuration Options

Implementing Authentication with Session Control
Finally, we look at a more substantial example using session control.
Possibly the most common use of session control is to keep track of users after they have been authenticated via a login mechanism. In this example, you combine authentication from a MySQL database with use of sessions to provide this functionality. This functionality forms the basis of the project in Chapter 27, “Building User Authentication and Personalization,” and will be reused in the other projects. You will reuse the authentication database you set up in Chapter 17, “Implementing Authentication with PHP and MySQL.” You can check Listing 17.3 in that chapter for details of the database.
The example consists of three simple scripts. The first, authmain.php, provides a login form and authentication for members of the website. The second, members_only.php, displays information only to members who have logged in successfully. The third, logout.php, logs out a member.
To understand how this example works, look at Figure 23.4, which shows the initial page displayed by authmain.php.
Figure 23.4 Because the user has not yet logged in, show her a login page.

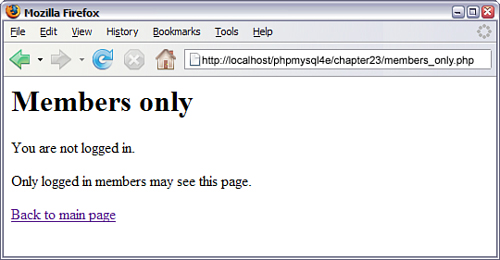
This page gives the user a place to log in. If she attempts to access the Members section without logging in first, she will get the message shown in Figure 23.5.
Figure 23.5 Users who haven’t logged in can’t see the site content; they will be shown this message instead.
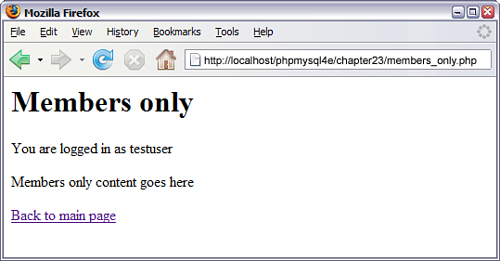
If the user logs in first (with username: testuser and password: password, as set up in Chapter 16), however, and then attempts to see the Members page, she will get the output shown in Figure 23.6.
First, let’s look at the code for this application. Most of the code is in authmain.php, shown in Listing 23.4. Then we’ll go through it bit by bit.
Figure 23.6 After the user has logged in, she can access the Members’ areas.
Listing 23.4 authmain.php—The Main Part of the Authentication Application
<?php
session_start();
if (isset($_POST['userid']) && isset($_POST['password']))
{
// if the user has just tried to log in
$userid = $_POST['userid'];
$password = $_POST['password'];
$db_conn = new mysqli('localhost', 'webauth', 'webauth', 'auth'),
if (mysqli_connect_errno()) {
echo 'Connection to database failed:'.mysqli_connect_error();
exit();
}
$query = 'select * from authorized_users '
."where name='$userid' "
." and password=sha1('$password')";
$result = $db_conn->query($query);
if ($result->num_rows)
{
// if they are in the database register the user id
$_SESSION['valid_user'] = $userid;
}
$db_conn->close();
}
?>
<html>
<body>
<h1>Home page</h1>
<?
if (isset($_SESSION['valid_user']))
{
echo 'You are logged in as: '.$_SESSION['valid_user'].' <br />';
echo '<a href="logout.php">Log out</a><br />';
}
else
{
if (isset($userid))
{
// if they’ve tried and failed to log in
echo 'Could not log you in.<br />';
}
else
{
// they have not tried to log in yet or have logged out
echo 'You are not logged in.<br />';
}
// provide form to log in
echo '<form method="post" action="authmain.php">';
echo '<table>';
echo '<tr><td>Userid:</td>';
echo '<td><input type="text" name="userid"></td></tr>';
echo '<tr><td>Password:</td>';
echo '<td><input type="password" name="password"></td></tr>';
echo '<tr><td colspan="2" align="center">';
echo '<input type="submit" value="Log in"></td></tr>';
echo '</table></form>';
}
?>
<br />
<a href="members_only.php">Members section</a>
</body>
</html>
Some reasonably complicated logic is included in this script because it displays the login form, is also the action of the form, and contains HTML for a successful and failed login attempt.
The script’s activities revolve around the valid_user session variable. The basic idea is that if someone logs in successfully, you will register a session variable called $_SESSION['valid_user'] that contains her userid.
The first thing you do in the script is call session_start(). This call loads in the session variable valid_user if it has been created.
In the first pass through the script, none of the if conditions apply, so the user falls through to the end of the script, where you tell her that she is not logged in and provide her with a form to do so:
echo '<form method="post" action="authmain.php">';
echo '<table>';
echo '<tr><td>Userid:</td>';
echo '<td><input type="text" name="userid"></td></tr>';
echo '<tr><td>Password:</td>';
echo '<td><input type="password" name="password"></td></tr>';
echo '<tr><td colspan="2" align="center">';
echo '<input type="submit" value="Log in"></td></tr>';
echo '</table></form>';
When the user clicks the submit button on the form, this script is reinvoked, and you start again from the top. This time, you will have a userid and password to authenticate, stored as $_POST['userid'] and $_POST['password']. If these variables are set, you go into the authentication block:
if (isset($_POST['userid']) && isset($_POST['password']))
{
// if the user has just tried to log in
$userid = $_POST['userid'];
$password = $_POST['password'];
$db_conn = new mysqli('localhost', 'webauth', 'webauth', 'auth'),
if (mysqli_connect_errno()) {
echo 'Connection to database failed:'.mysqli_connect_error();
exit();
}
$query = 'select * from authorized_users '
."where name='$userid' "
." and password=sha1('$password')";
$result = $db_conn->query($query);
You connect to a MySQL database and check the userid and password. If they are a matching pair in the database, you create the variable $_SESSION['valid_user'], which contains the userid for this particular user, so you know who is logged in further down the track:
if ($result->num_rows >0 )
{
// if they are in the database register the user id
$_SESSION['valid_user'] = $userid;
}
$db_conn->close();
}
Because you now know who the user is, you don’t need to show her the login form again. Instead, you can tell her you know who she is and give her the option to log out:
if (isset($_SESSION['valid_user']))
{
echo 'You are logged in as: '.$_SESSION['valid_user'].' <br />';
echo '<a href="logout.php">Log out</a><br />';
}
If you tried to log her in and failed for some reason, you’ll have a userid but not a $_SESSION['valid_user'] variable, so you can give her an error message:
if (isset($userid))
{
// if they’ve tried and failed to log in
echo 'Could not log you in.<br />';
}
That’s it for the main script. Now, let’s look at the Members page. The code for this script is shown in Listing 23.5.
Listing 23.5 members_only.php—The Code for the Members’ Section of the Website Checks for Valid Users
<?php
session_start();
echo '<h1>Members only</h1>';
// check session variable
if (isset($_SESSION['valid_user']))
{
echo '<p>You are logged in as '.$_SESSION['valid_user'].'</p>';
echo '<p>Members only content goes here</p>';
}
else
{
echo '<p>You are not logged in.</p>';
echo '<p>Only logged in members may see this page.</p>';
}
echo '<a href="authmain.php">Back to main page</a>';
?>
This code simply starts a session and checks whether the current session contains a registered user by checking whether the value of $_SESSION['valid_user'] is set. If the user is logged in, you show her the members’ content; otherwise, you tell her that she is not authorized.
Finally, the logout.php script signs a user out of the system. The code for this script is shown in Listing 23.6.
Listing 23.6 logout.php—This Script Deregisters the Session Variable and Destroys the Session
<?php
session_start();
// store to test if they *were* logged in
$old_user = $_SESSION['valid_user'];
unset($_SESSION['valid_user']);
session_destroy();
?>
<html>
<body>
<h1>Log out</h1>
<?php
if (!empty($old_user))
{
echo 'Logged out.<br />';
}
else
{
// if they weren’t logged in but came to this page somehow
echo 'You were not logged in, and so have not been logged out.<br />';
}
?>
<a href="authmain.php">Back to main page</a>
</body>
</html>
This code is simple, but you need to do a little fancy footwork. You start a session, store the user’s old username, unset the valid_user variable, and destroy the session. You then give the user a message that will be different if she was logged out or was not logged in to begin with.
This simple set of scripts forms the basis for a lot of the work we’ll do in later chapters.
Further Reading
You can read more about cookies at http://wp.netscape.com/newsref/std/cookie_spec.html.
Next
We’re almost finished with this part of the book. Before we move on to the projects, we briefly discuss some of the useful odds and ends of PHP that we haven’t covered elsewhere.