18. Example—User Registration
Writing the Configuration Scripts 566
Logging In and Logging Out 589
The second example in the book—a user registration system—has already been touched upon in several other chapters, as the registration, login, and logout processes make for good examples of many concepts. But this chapter will place all of those ideas within the same context, using a consistent programming approach.
Users will be able to register, log in, log out, and change their password. This chapter includes three features not shown elsewhere: the ability to reset a password, should it be forgotten; the requirement that users activate their account before they can log in; and support for different user levels, allowing you to control the available content according to the type of user logged in.
As in the preceding chapter, the focus here will be on the public side of things, but along the way you’ll see recommendations as to how this application could easily be expanded or modified, including how to add administrative features.
Creating the Templates
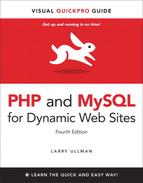
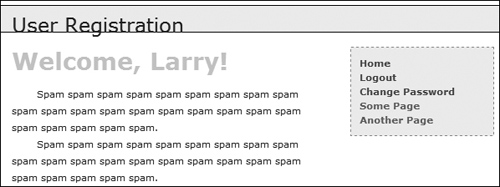
The application in this chapter will use a new template design ![]() . This template makes extensive use of Cascading Style Sheets (CSS), creating a clean look without the need for images. It has tested well on all current browsers and will appear as unformatted text on browsers that don’t support CSS2. The layout for this site is derived from one freely provided by BlueRobot (www.bluerobot.com).
. This template makes extensive use of Cascading Style Sheets (CSS), creating a clean look without the need for images. It has tested well on all current browsers and will appear as unformatted text on browsers that don’t support CSS2. The layout for this site is derived from one freely provided by BlueRobot (www.bluerobot.com).
![]() The basic appearance of this Web application.
The basic appearance of this Web application.
Creating this chapter’s example begins with two template files: header.html and footer.html. As in the Chapter 12, “Cookies and Sessions,” examples, the footer file will display certain links depending upon whether or not the user is logged in, determined by checking for the existence of a session variable. Taking this concept one step further, additional links will be displayed if the logged-in user is also an administrator (a session value will indicate such).
The header file will begin sessions and output buffering, while the footer file will terminate output buffering. Output buffering hasn’t been formally covered in the book, but it’s introduced sufficiently in the sidebar.
To make header.html
1. Begin a new document in your text editor or IDE, to be named header.html (Script 18.1):
<?php # Script 18.1 - header.html
Script 18.1. The header file begins the HTML, starts the session, and turns on output buffering.
1 <?php # Script 18.1 - header.html
2 // This page begins the HTML header for
the site.
3
4 // Start output buffering:
5 ob_start( );
6
7 // Initialize a session:
8 session_start( );
9
10 // Check for a $page_title value:
11 if (!isset($page_title)) {
12 $page_title = 'User Registration';
13 }
14 ?>
15 <!DOCTYPE html PUBLIC "-//W3C//DTD XHTML
1.0 Transitional//EN"
16 "http://www.w3.org/TR/xhtml1/DTD/
xhtml1-transitional.dtd">
17 <html xmlns="http://www.w3.org/1999/
xhtml" xml:lang="en" lang="en">
18 <head>
19 <meta http-equiv="content-type"
content="text/html; charset=utf-8" />
20 <title><?php echo $page_title; ?></
title>
21 <style type="text/css"
media="screen">@import "includes/
layout.css";</style>
22 </head>
23 <body>
24 <div id="Header">User Registration</div>
25 <div id="Content">
26 <!-- End of Header -->
2. Begin output buffering and start a session:
ob_start( );
session_start( );
This Web site will use output buffering, eliminating any error messages that could occur when using HTTP headers, redirecting the user, or sending cookies. Every page will make use of sessions as well. It’s safe to place the session_start( ) call after ob_start( ), since nothing has been sent to the Web browser yet.
Since every public page will use both output buffering and sessions, placing these lines in the header.html file saves the hassle of placing them in every single page. Secondarily, if you later want to change the session settings (for example), you only need to edit this one file.
3. Check for a $page_title variable and close the PHP section:
if (!isset($page_title)) {
$page_title = 'User Registration';
}
?>
As in the other times this book has used a template system, the page’s title—which appears at the top of the browser window—will be set on a page-by-page basis. This conditional checks if the $page_title variable has a value and, if it doesn’t, sets it to a default string. This is a nice, but optional, check to include in the header.
<!DOCTYPE html PUBLIC "-//W3C//DTD XHTML 1.0 Transitional//EN"
"http://www.w3.org/TR/xhtml1/DTD/xhtml1-transitional.dtd">
<html xmlns="http://www.w3.org/1999/xhtml" xml:lang="en" lang="en">
<head>
<meta http-equiv="content-type" content="text/html; charset=utf-8" />
<title><?php echo $page_title; ?></title>
<style type="text/css" media="screen">@import "includes/layout.css";</style>
</head>
The PHP $page_title variable is printed out between the title tags here. Then, the CSS document is included. It will be called layout.css and stored in a folder called includes. You can find the CSS file in the downloadable code found at the book’s supporting Web site (www.LarryUllman.com).
5. Begin the HTML body:
<body>
<div id="Header">User Registration</div>
<div id="Content">
The body creates the banner across the top of the page and then starts the content part of the Web page (up until Welcome! in ![]() ).
).
6. Save the file as header.html.
Script 18.2. The footer file concludes the HTML, displaying links based upon the user status (logged in or not, administrator or not), and flushes the output to the Web browser.
1 <!-- Start of Footer -->
2 </div><!-- Content -->
3
4 <div id="Menu">
5 <a href="index.php" title="Home
Page">Home</a><br />
6 <?php # Script 18.2 - footer.html
7 // This page completes the HTML
template.
8
9 // Display links based upon the login
status:
10 if (isset($_SESSION['user_id'])) {
11
12 echo '<a href="logout.php"
title="Logout">Logout</a><br />
13 <a href="change_password.php"
title="Change Your Password">Change
Password</a><br />
14 ';
15
16 // Add links if the user is an
administrator:
17 if ($_SESSION['user_level'] == 1) {
18 echo '<a href="view_users.php"
title="View All Users">View
Users</a><br />
19 <a href="#">Some Admin Page</a><br
/>
20 ';
21 }
22
23 } else { // Not logged in.
24 echo '<a href="register.
php" title="Register for the
Site">Register</a><br />
25 <a href="login.php"
title="Login">Login</a><br />
26 <a href="forgot_password.php"
title="Password Retrieval">Retrieve
Password</a><br />
27 ';
28 }
29 ?>
30 <a href="#">Some Page</a><br />
31 <a href="#">Another Page</a><br />
32 </div><!-- Menu -->
33
34 </body>
35 </html>
36 <?php // Flush the buffered output.
37 ob_end_flush( );
38 ?>paste code here
To make footer.html
1. Begin a new document in your text editor or IDE, to be named footer.html (Script 18.2):
</div>
<div id="Menu">
<a href="index.php" title="Home Page">Home</a><br />
<?php # Script 18.2 - footer.html
2. If the user is logged in, show logout and change password links:
if (isset($_SESSION['user_id'])) {
echo '<a href="logout.php" title="Logout">Logout</a><br />
<a href="change_password.php" title="Change Your Password">Change Password</a><br />
';
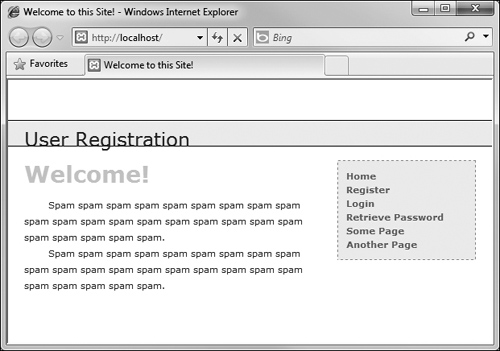
If the user is logged in (which means that $_SESSION['user_id'] is set), the user will see links to log out and to change their password ![]() .
.
![]() The user will see these navigation links while she or he is logged in.
The user will see these navigation links while she or he is logged in.
3. If the user is also an administrator, show some other links:
if ($_SESSION['user_level'] == 1) {
echo '<a href="view_users.php" title="View All Users">View Users</a><br />
<a href="#">Some Admin Page</a><br />
';
}
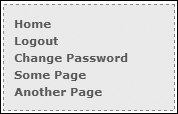
If the logged-in user also happens to be an administrator, then she or he should see some extra links ![]() . To test for this, check the user’s access level, which will also be stored in a session. A level value of 1 will indicate that the user is an administrator (non-administrators will have a level of 0).
. To test for this, check the user’s access level, which will also be stored in a session. A level value of 1 will indicate that the user is an administrator (non-administrators will have a level of 0).
![]() A logged-in administrator will see extra links (compare with
A logged-in administrator will see extra links (compare with ![]() ).
).
4. Show the links for non-logged-in users and complete the PHP block:
} else { // Not logged in.
echo '<a href="register.php" title="Register for the Site">Register</a><br />
<a href="login.php" title="Login">Login</a><br />
<a href="forgot_password.php" title="Password Retrieval">Retrieve Password</a><br />
';
}
?>
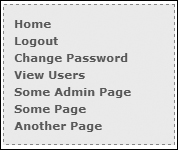
If the user isn’t logged in, they will see links to register, log in, and reset a forgotten password ![]() .
.
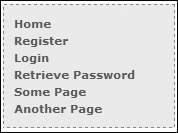
![]() The user will see these links if she or he is not logged in.
The user will see these links if she or he is not logged in.
5. Complete the HTML:
<a href="#">Some Page</a><br />
<a href="#">Another Page</a><br />
</div>
</body>
</html>
Two dummy links are included for other pages you could add.
6. Flush the buffer:
<?php
ob_end_flush( );
?>
The footer file will send the accumulated buffer to the Web browser, completing the output buffering begun in the header script (again, see the sidebar).
7. Save the file as footer.html and place it, along with header.html and layout.css (from the book’s supporting Web site), in your Web directory, putting all three in an includes folder ![]() .
.
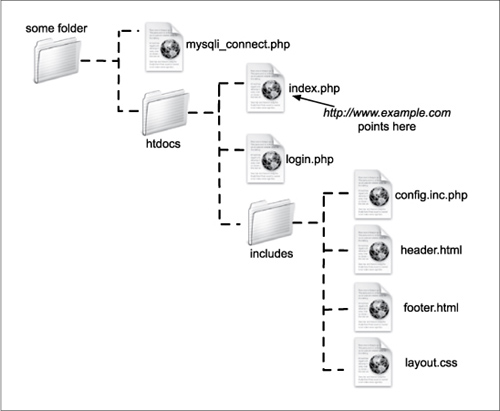
![]() The directory structure of the site on the Web server, assuming
The directory structure of the site on the Web server, assuming htdocs is the document root (where www.example.com points).
If this site has any page that does not make use of the header file but does need to work with sessions, that script must call session_start( ) on its own. If you fail to do so, that page won’t be able to access the session data.
In more recent versions of PHP, output buffering is enabled by default. The buffer size—the maximum number of bytes stored in memory—is 4,096, but this can be changed in PHP’s configuration file.
The ob_get_contents( ) function will return the current buffer so that it may be assigned to a variable, should the need arise.
The ob_flush( ) function will send the current contents of the buffer to the Web browser and then discard them, allowing a new buffer to be started. This function allows your scripts to maintain more moderate buffer sizes. Conversely, ob_end_flush( ) turns off output buffering after sending the buffer to the Web browser.
The ob_clean( ) function deletes the current contents of the buffer without stopping the buffer process.
PHP will automatically run ob_end_flush( ) at the conclusion of a script if it is not otherwise done.
Writing the Configuration Scripts
This Web site will make use of two configuration-type scripts. One, config.inc.php, will really be the most important script in the entire application. It will
• Have comments about the site as a whole
• Define constants
• Establish site settings
• Dictate how errors are handled
• Define any necessary functions
Because it does all this, the configuration script will be included by every other page in the application.
The second configuration-type script, mysqli_connect.php, will store all of the database-related information. It will be included only by those pages that need to interact with the database.
Making a configuration file
The configuration file is going to serve many important purposes. It’ll be like a cross between the site’s owner’s manual and its preferences file. The first purpose of this file will be to document the site overall: who created it, when, why, for whom, etc., etc. The version in the book will omit all that, but you should put it in your script. The second role will be to define all sorts of constants and settings that the various pages will use.
Third, the configuration file will establish the error-management policy for the site. The technique involved—creating your own error-handling function—was covered in Chapter 8, “Error Handling and Debugging.” As in that chapter, during the development stages, every error will be reported in the most detailed way ![]() .
.
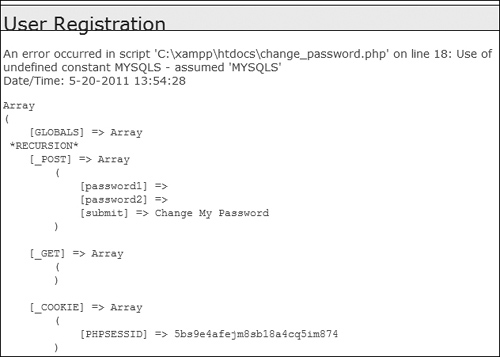
![]() During the development stages of the Web site, all errors should be as obvious and as informative as possible.
During the development stages of the Web site, all errors should be as obvious and as informative as possible.
Script 18.3. This configuration script dictates how errors are handled, defines site-wide settings and constants, and could (but doesn’t) declare any necessary functions.
1 <?php # Script 18.3 - config.inc.php
2 /* This script:
3 * - define constants and settings
4 * - dictates how errors are handled
5 * - defines useful functions
6 */
7
8 // Document who created this site, when,
why, etc.
9
10
11 // ********************************** //
12 // ************ SETTINGS ************ //
13
14 // Flag variable for site status:
15 define('LIVE', FALSE);
16
17 // Admin contact address:
18 define('EMAIL', 'InsertRealAddressHere'),
19
20 // Site URL (base for all redirections):
21 define ('BASE_URL', 'http://www.example.
com/'),
22
23 // Location of the MySQL connection
script:
24 define ('MYSQL', '/path/to/mysqli_connect.
php'),
25
26 // Adjust the time zone for PHP 5.1 and
greater:
27 date_default_timezone_set ('US/Eastern'),
28
29 // ************ SETTINGS ************ //
30 // ********************************** //
31
32
33 // **************************************
**** //
34 // ************ ERROR MANAGEMENT
************ //
35
36 // Create the error handler:
37 function my_error_handler ($e_number,
$e_message, $e_file, $e_line, $e_vars) {
38
39 // Build the error message:
40 $message = "An error occurred in
script '$e_file' on line $e_line:
$e_message
";
41
42 // Add the date and time:
43 $message .= "Date/Time: " . date('n-
j-Y H:i:s') . "
";
44
45 if (!LIVE) { // Development (print the
error).
46
47 // Show the error message:
48 echo '<div class="error">' .
nl2br($message);
49
50 // Add the variables and a
backtrace:
51 echo '<pre>' . print_r ($e_vars, 1)
. "
";
52 debug_print_backtrace( );
53 echo '</pre></div>';
54
55 } else { // Don't show the error:
56
57 // Send an email to the admin:
58 $body = $message . "
" . print_r
($e_vars, 1);
59 mail(EMAIL, 'Site Error!', $body,
'From: [email protected]'),
60
61 // Only print an error message if
the error isn't a notice:
62 if ($e_number != E_NOTICE) {
63 echo '<div class="error">A
system error occurred.
We apologize for the
inconvenience.</div><br />';
64 }
65 } // End of !LIVE IF.
66
67 } // End of my_error_handler( )
definition.
68
69 // Use my error handler:
70 set_error_handler ('my_error_handler'),
71
72 // ************ ERROR MANAGEMENT
************ //
73 // **************************************
**** //
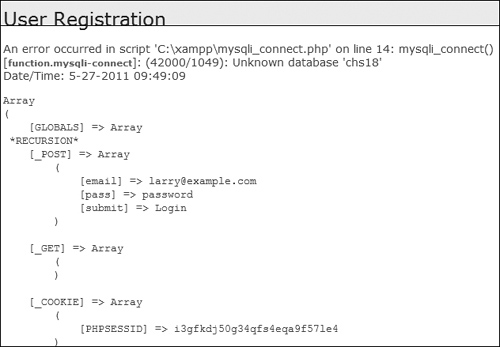
Along with the specific error message, all of the existing variables will be shown, as will the current date and time. The error reporting will be formatted so that it fits within the site’s template. During the production, or live, stage of the site, errors will be handled more gracefully ![]() . At that time, the detailed error messages will not be printed in the Web browser, but instead sent to an email address.
. At that time, the detailed error messages will not be printed in the Web browser, but instead sent to an email address.
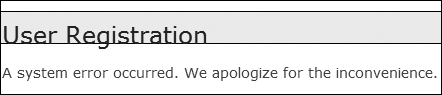
![]() If errors occur when the site is live, the user will only see a message like this (but a detailed error message will be emailed to the administrator).
If errors occur when the site is live, the user will only see a message like this (but a detailed error message will be emailed to the administrator).
Finally, this script could define any functions that might be used multiple times in the site. This site won’t have any, but that would be another logical use of such a file.
To write the configuration file
1. Begin a new PHP document in your text editor or IDE, to be named config.inc.php (Script 18.3):
<?php # Script 18.3 - config.inc.php
2. Establish two constants for error reporting:
define('LIVE', FALSE);
define('EMAIL', 'InsertRealAddress Here'),
The LIVE constant will be used as it was in Chapter 8. If it is FALSE, detailed error messages are sent to the Web browser ![]() . Once the site goes live, this constant should be set to TRUE so that detailed error messages are never revealed to the Web user
. Once the site goes live, this constant should be set to TRUE so that detailed error messages are never revealed to the Web user ![]() . The
. The EMAIL constant is where the error messages will be sent when the site is live. You would obviously use your own email address for this value.
3. Establish two constants for site-wide settings:
define ('BASE_URL', 'http://www.example.com/'),
define ('MYSQL', '/path/to/mysqli_connect.php'),
These two constants are defined just to make it easier to do certain things in the other scripts. The first, BASE_URL, refers to the root domain (http://www.example.com/), with an ending slash. If developing on your own computer, this might be http://localhost/ or http://localhost/ch18/. When a script redirects the browser, the code can simply be something like
header('Location: ' . BASE_URL . 'page.php'),
The second constant, MYSQL, is an absolute path to the MySQL connection script (to be written next). By setting this as an absolute path, any file can include the connection script by referring to this constant:
require (MYSQL);
Change both of these values to correspond to your environment. When using XAMPP on Windows, for example, the proper value for the MYSQL constant may be C:\xamppmysqli_connect.php.
If you move the site from one server or domain to another, just change these two constants and the application will still work.
4. Establish any other site-wide settings:
date_default_timezone_set ('US/Eastern'),
As mentioned in Chapter 11, “Web Application Development,” any use of a PHP date or time function (as of PHP 5.1) requires that the time zone be set. Change this value to match your time zone (see the PHP manual for the list of zones).
5. Begin defining the error-handling function:
function my_error_handler ($e_number, $e_message, $e_file, $e_line, $e_vars) {
$message = "An error occurred in script '$e_file' on line $e_line: $e_message
";
The function definition will be very similar to the one explained in Chapter 8. The function expects to receive five arguments: the error number, the error message, the script in which the error occurred, the line number on which PHP thinks the error occurred, and an array of variables that existed at the time of the error. Then the function begins defining the $message variable, starting with the information provided to this function.
6. Add the current date and time:
$message .= "Date/Time: " . date('n-j-Y H:i:s') . " ";
To make the error reporting more useful, it will include the current date and time in the message. A newline character terminates the string to make the resulting display more legible.
7. If the site is not live, show the error message in detail:
if (!LIVE) {
echo '<div class="error">' . nl2br($message);
echo '<pre>' . print_r ($e_vars, 1) . "
";
debug_print_backtrace( );
echo '</pre></div>';
As mentioned earlier, if the site isn’t live, the entire error message is printed, for any type of error. The message is placed within <div class="error">, which will format the message per the rules defined in the site’s CSS file. The first part of the error message is the string already defined, with the added touch of converting newlines to HTML break tags. Then, within preformatted tags, all of the variables that exist at the time of the error are shown, along with a backtrace (a history of function calls and such). See Chapter 8 for more of an explanation on any of this.
8. If the site is live, email the details to the administrator and print a generic message for the visitor:
} else { // Don't show the error:
$body = $message . "
" . print_r ($e_vars, 1);
mail(EMAIL, 'Site Error!', $body, 'From: [email protected]'),
if ($e_number != E_NOTICE) {
echo '<div class="error">A system error occurred. We apologize for the inconvenience.</div><br />';
}
} // End of !LIVE IF.
If the site is live, the detailed message should be sent in an email and the Web user should only see a generic message. To take this one step further, the generic message will not be printed if the error is of a specific type: E_NOTICE. Such errors occur for things like referring to a variable that does not exist, which may or may not be a problem. To avoid potentially inundating the user with error messages, only print the error message if $e_number is not equal to E_NOTICE, which is a constant defined in PHP (see the PHP manual).
9. Complete the function definition and tell PHP to use your error handler:
}
set_error_handler ('my_error_handler'),
You have to use the set_error_handler( ) function to tell PHP to use your own function for errors.
10. Save the file as config.inc.php, and place it in your Web directory, within the includes folder.
Note that in keeping with many other examples in this book, as this script will be included by other PHP scripts, it omits the terminating PHP tag.
Making the database script
The second configuration-type script will be mysqli_connect.php, the database connection file used multiple times in the book already. Its purpose is to connect to MySQL, select the database, and establish the character set in use. If a problem occurs, this script will make use of the error-handling tools established in config.inc.php. To do so, this script will call the trigger_error( ) function when appropriate. The trigger_error( ) function lets you tell PHP that an error occurred. Of course PHP will handle that error using the my_error_handler( ) function, as established in the configuration script.
Script 18.4. This script connects to the ch18 database. If it can’t, then the error handler will be triggered, passing it the MySQL connection error.
1 <?php # Script 18.4 - mysqli_connect.php
2 // This file contains the database
access information.
3 // This file also establishes a
connection to MySQL
4 // and selects the database.
5
6 // Set the database access information
as constants:
7 DEFINE ('DB_USER', 'username'),
8 DEFINE ('DB_PASSWORD', 'password'),
9 DEFINE ('DB_HOST', 'localhost'),
10 DEFINE ('DB_NAME', 'ch18'),
11
12 // Make the connection:
13 $dbc = @mysqli_connect (DB_HOST, DB_
USER, DB_PASSWORD, DB_NAME);
14
15 // If no connection could be made,
trigger an error:
16 if (!$dbc) {
17 trigger_error ('Could not connect to
MySQL: ' . mysqli_connect_error( ) );
18 } else { // Otherwise, set the encoding:
19 mysqli_set_charset($dbc, 'utf8'),
20 }
To connect to the database
1. Begin a new PHP document in your text editor or IDE, to be named mysqli_connect.php (Script 18.4):
<?php # Script 18.4 - mysqli_connect.php
2. Set the database access information:
DEFINE ('DB_USER', 'username'),
DEFINE ('DB_PASSWORD', 'password'),
DEFINE ('DB_HOST', 'localhost'),
DEFINE ('DB_NAME', 'ch18'),
As always, change these values to those that will work for your MySQL installation.
3. Attempt to connect to MySQL and select the database:
$dbc = @mysqli_connect (DB_HOST, DB_USER, DB_PASSWORD, DB_NAME);
In previous scripts, if this function didn’t return the proper result, the die( ) function was called, terminating the execution of the script. Since this site will be using a custom error-handling function instead, I’ll rewrite the connection process.
Any errors raised by this function call will be suppressed (thanks to the @) and handled using the code in the next step.
4. Handle any errors if the database connection was not made:
if (!$dbc) {
trigger_error ('Could not connect to MySQL: ' . mysqli_connect_error( ) );
If the script could not connect to the database, the error message should be sent to the my_error_handler( ) function. By doing so, the error will be handled according to the currently set management technique (live stage versus development). Instead of calling my_error_handler( ) directly, use trigger_error( ), whose first argument is the error message ![]() .
.
![]() A database connection error occurring during the development of the site.
A database connection error occurring during the development of the site.
5. Establish the encoding:
} else {
mysqli_set_charset($dbc, 'utf8'),
}
If a database connection could be made, the encoding used to communicate with the database is then established. See Chapter 9, “Using PHP with MySQL,” for details.
6. Save the file as mysqli_connect.php, and place it in the directory above the Web document root.
This script, as an includable file, also omits the terminating PHP tag. As with other examples in this book, ideally the file should not be within the Web directory, but wherever you put it, make sure the value of the MYSQL constant (in config.inc.php) matches.
7. Create the database ![]() .
.
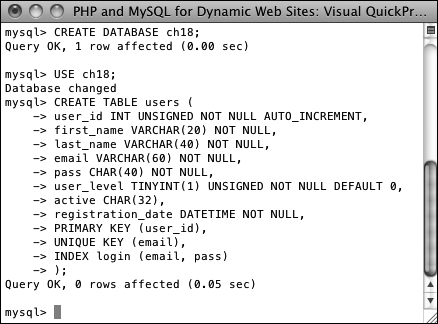
![]() Creating the database for this chapter.
Creating the database for this chapter.
See the sidebar “Database Scheme” for a discussion of the database and the command required to make the one table. If you cannot create your own database, just add the table to whatever database you have access to. Also make sure that you edit the mysqli_connect.php file so that it uses the proper username/password/hostname combination to connect to this database.
On the one hand, it might make sense to place the contents of both configuration files in one script for ease of reference. Unfortunately, doing so would add unnecessary overhead (namely, connecting to and selecting the database) to scripts that don’t require a database connection (e.g., index.php).
In general, define common functions in the configuration file or a separate functions file. One exception would be any function that requires a database connection. If you know that a function will only be used on pages that also connect to MySQL, then defining that function within the mysqli_connect.php script is only logical.
Creating the Home Page
The home page for the site, called index.php, will be a model for the other pages on the public side. It will require the configuration file (for error management) and the header and footer files to create the HTML design. This page will also welcome the user by name, assuming the user is logged in ![]() .
.
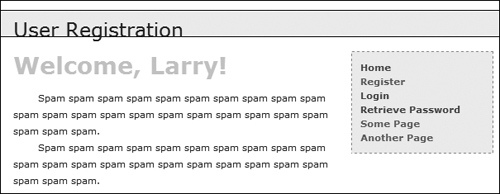
![]() If the user is logged in, the index page will greet them by name.
If the user is logged in, the index page will greet them by name.
To write index.php
1. Begin a new PHP document in your text editor or IDE, to be named index.php (Script 18.5):
<?php # Script 18.5 - index.php
2. Include the configuration file, set the page title, and include the HTML header:
require ('includes/config.inc.php'),
$page_title = 'Welcome to this Site!';
include ('includes/header.html'),
The script includes the configuration file first so that everything that happens afterward will be handled using the error-management processes established therein. Then the header.html file is included, which will start output buffering, begin the session, and create the initial part of the HTML layout.
Script 18.5. The script for the site’s home page, which will greet a logged-in user by name.
1 <?php # Script 18.5 - index.php
2 // This is the main page for the site.
3
4 // Include the configuration file:
5 require ('includes/config.inc.php'),
6
7 // Set the page title and include the
HTML header:
8 $page_title = 'Welcome to this Site!';
9 include ('includes/header.html'),
10
11 // Welcome the user (by name if they are
logged in):
12 echo '<h1>Welcome';
13 if (isset($_SESSION['first_name'])) {
14 echo ", {$_SESSION['first_name']}";
15 }
16 echo '!</h1>';
17 ?>
18 <p>Spam spam spam spam spam spam
19 spam spam spam spam spam spam
20 spam spam spam spam spam spam
21 spam spam spam spam spam spam.</p>
22 <p>Spam spam spam spam spam spam
23 spam spam spam spam spam spam
24 spam spam spam spam spam spam
25 spam spam spam spam spam spam.</p>
26
27 <?php include ('includes/footer.html'),
?>
3. Greet the user and complete the PHP code:
echo '<h1>Welcome';
if (isset($_SESSION['first_name']))
{
echo ",
{$_SESSION['first_name']}";
}
echo '!</h1>';
?>
The Welcome message will be printed to all users. If a $_SESSION['first_name'] variable is set, the user’s first name will also be printed. So the end result will be either just Welcome! ![]() or Welcome, <Your Name>!
or Welcome, <Your Name>! ![]() .
.
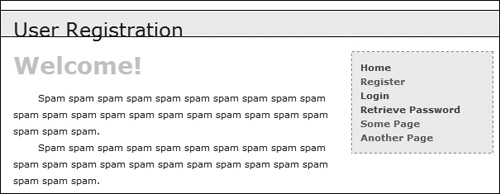
![]() If the user is not logged in, this is the home page they will see.
If the user is not logged in, this is the home page they will see.
4. Create the content for the page:
<p>Spam spam...</p>
You might want to consider putting something more useful on the home page of a real site. Just a suggestion....
5. Include the HTML footer:
<?php include ('includes/footer.html'), ?>
The footer file will complete the HTML layout (primarily the menu bar on the right side of the page) and conclude the output buffering.
6. Save the file as index.php, place it in your Web directory, and test it in a Web browser.
Registration
The registration script was first started in Chapter 9. It has since been improved upon in many ways. This version of register.php will do the following:
• Both display and handle the form
• Validate the submitted data using regular expressions and the Filter extension
• Redisplay the form with the values remembered if a problem occurs (the form will be sticky)
• Process the submitted data using the mysqli_real_escape_string( ) function for security
• Ensure a unique email address
• Send an email containing an activation link (users will have to activate their account prior to logging in—see the “Activation Process” sidebar)
To write register.php
1. Begin a new PHP document in your text editor or IDE, to be named register.php (Script 18.6):
<?php # Script 18.6 - register.php
2. Include the configuration file and the HTML header:
require ('includes/config.inc.php'),
$page_title = 'Register';
include ('includes/header.html'),
Script 18.6. The registration script uses regular expressions for security and a sticky form for user convenience. It sends an email to the user upon a successful registration.
1 <?php # Script 18.6 - register.php
2 // This is the registration page for the
site.
3 require ('includes/config.inc.php'),
4 $page_title = 'Register';
5 include ('includes/header.html'),
6
7 if ($_SERVER['REQUEST_METHOD'] == 'POST')
{ // Handle the form.
8
9 // Need the database connection:
10 require (MYSQL);
11
12 // Trim all the incoming data:
13 $trimmed = array_map('trim', $_POST);
14
15 // Assume invalid values:
16 $fn = $ln = $e = $p = FALSE;
17
18 // Check for a first name:
19 if (preg_match ('/^[A-Z '.-]{2,20}$/i',
$trimmed['first_name'])) {
20 $fn = mysqli_real_escape_string
($dbc, $trimmed['first_name']);
21 } else {
22 echo '<p class="error">Please enter
your first name!</p>';
23 }
24
25 // Check for a last name:
26 if (preg_match ('/^[A-Z '.-]{2,40}$/i',
$trimmed['last_name'])) {
27 $ln = mysqli_real_escape_string
($dbc, $trimmed['last_name']);
28 } else {
29 echo '<p class="error">Please enter
your last name!</p>';
30 }
31
32 // Check for an email address:
33 if (filter_var($trimmed['email'],
FILTER_VALIDATE_EMAIL)) {
34 $e = mysqli_real_escape_string
($dbc, $trimmed['email']);
35 } else {
36 echo '<p class="error">Please enter
a valid email address!</p>';
37 }
38
39 // Check for a password and match against the confirmed password:
40 if (preg_match ('/^w{4,20}$/', $trimmed['password1']) ) {
41 if ($trimmed['password1'] == $trimmed['password2']) {
42 $p = mysqli_real_escape_string ($dbc, $trimmed['password1']);
43 } else {
44 echo '<p class="error">Your password did not match the confirmed password!</p>';
45 }
46 } else {
47 echo '<p class="error">Please enter a valid password!</p>';
48 }
49
50 if ($fn && $ln && $e && $p) { // If everything's OK...
51
52 // Make sure the email address is available:
53 $q = "SELECT user_id FROM users WHERE email='$e'";
54 $r = mysqli_query ($dbc, $q) or trigger_error("Query: $q
<br />MySQL Error: " .
mysqli_error($dbc));
55
56 if (mysqli_num_rows($r) == 0) { // Available.
57
58 // Create the activation code:
59 $a = md5(uniqid(rand( ), true));
60
61 // Add the user to the database:
62 $q = "INSERT INTO users (email, pass, first_name, last_name, active, registration_
date) VALUES ('$e', SHA1('$p'), '$fn', '$ln', '$a', NOW( ) )";
63 $r = mysqli_query ($dbc, $q) or trigger_error("Query: $q
<br />MySQL Error: " .
mysqli_error($dbc));
64
65 if (mysqli_affected_rows($dbc) == 1) { // If it ran OK.
66
67 // Send the email:
68 $body = "Thank you for registering at <whatever site>. To activate your account,
please click on this link:
";
69 $body .= BASE_URL . 'activate.php?x=' . urlencode($e) . "&y=$a";
70 mail($trimmed['email'], 'Registration Confirmation', $body, 'From: admin@sitename.
com'),
71
72 // Finish the page:
73 echo '<h3>Thank you for registering! A confirmation email has been sent to
your address. Please click on the link in that email in order to activate your
account.</h3>';
74 include ('includes/footer.html'), // Include the HTML footer.
75 exit( ); // Stop the page.
76
77 } else { // If it did not run OK.
78 echo '<p class="error">You could not be registered due to a system error. We
apologize for any inconvenience.</p>';
79 }
80
81 } else { // The email address is not available.
82 echo '<p class="error">That email address has already been registered. If you have
forgotten your password, use the link at right to have your password sent to you.
</p>';
83 }
84
85 } else { // If one of the data tests failed.
86 echo '<p class="error">Please try again.</p>';
87 }
88
89 mysqli_close($dbc);
90
91 } // End of the main Submit conditional.
92 ?>
93
94 <h1>Register</h1>
95 <form action="register.php" method="post">
96 <fieldset>
97
98 <p><b>First Name:</b> <input type="text" name="first_name" size="20" maxlength="20"
value="<?php if (isset($trimmed['first_name'])) echo $trimmed['first_name']; ?>" /></p>
99
100 <p><b>Last Name:</b> <input type="text" name="last_name" size="20" maxlength="40" value="<?php
if (isset($trimmed['last_name'])) echo $trimmed['last_name']; ?>" /></p>
101
102 <p><b>Email Address:</b> <input type="text" name="email" size="30" maxlength="60" value="<?php
if (isset($trimmed['email'])) echo $trimmed['email']; ?>" /> </p>
103
104 <p><b>Password:</b> <input type="password" name="password1" size="20" maxlength="20"
value="<?php if (isset($trimmed['password1'])) echo $trimmed['password1']; ?>" /> <small>Use
only letters, numbers, and the underscore. Must be between 4 and 20 characters long.
</small></p>
105
106 <p><b>Confirm Password:</b> <input type="password" name="password2" size="20" maxlength="20"
value="<?php if (isset($trimmed['password2'])) echo $trimmed['password2']; ?>" /></p>
107 </fieldset>
108
109 <div align="center"><input type="submit" name="submit" value="Register" /></div>
110
111 </form>
112
113 <?php include ('includes/footer.html'), ?>
3. Create the conditional that checks for the form submission and then include the database connection script:
if ($_SERVER['REQUEST_METHOD'] == 'POST') {
require (MYSQL);
As the full path to the mysqli_connect.php script is defined as a constant in the configuration file, the constant can be used as the argument to require( ). The benefit to this approach is that any file stored anywhere in the site, even within a subdirectory, can use this same code to successfully include the connection script.
4. Trim the incoming data and establish some flag variables:
$trimmed = array_map('trim', $_POST);
$fn = $ln = $e = $p = FALSE;
The first line runs every element in $_POST through the trim( ) function, assigning the returned result to the new $trimmed array. The explanation for this line can be found in Chapter 13, “Security Methods,” when array_map( ) was used with data to be sent in an email. In short, the trim( ) function will be applied to every value in $_POST, saving the hassle of applying trim( ) to each individually.
The second line initializes four variables as FALSE. This one line is just a shortcut in lieu of
$fn = FALSE;
$ln = FALSE;
$e = FALSE;
$p = FALSE;
5. Validate the first and last names:
if (preg_match ('/^[A-Z '.-]{2,20} $/i', $trimmed['first_name'])) {
$fn = mysqli_real_escape_string ($dbc, $trimmed['first_name']);
} else {
echo '<p class="error">Please enter your first name!</p>';
}
if (preg_match ('/^[A-Z '.-] {2,40}$/i', $trimmed['last_name'])) {
$ln = mysqli_real_escape_string ($dbc, $trimmed['last_name']);
} else {
echo '<p class="error">Please enter your last name!</p>';
}
Much of the form will be validated using regular expressions, covered in Chapter 14, “Perl-Compatible Regular Expressions.” For the first name value, the assumption is that it will contain only letters, a period (as in an initial), an apostrophe, a space, and the dash. Further, the value should be within the range of 2 to 20 characters long. To guarantee that the value contains only these characters, the caret and the dollar sign are used to match both the beginning and end of the string. While using Perl-Compatible Regular Expressions, the entire pattern must be placed within delimiters (the forward slashes).
If this condition is met, the $fn variable is assigned the value of the mysqli_real_escape_string( ) version of the submitted value; otherwise, $fn will still be FALSE and an error message is printed ![]() .
.
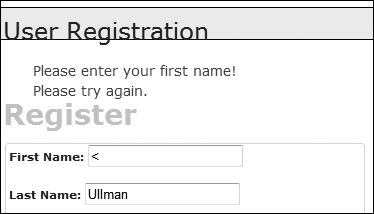
![]() If the first name value does not pass the regular expression test, an error message is printed.
If the first name value does not pass the regular expression test, an error message is printed.
The same process is used to validate the last name, although that regular expression allows for a longer length. Both patterns are also case-insensitive, thanks to the i modifier.
6. Validate the email address ![]() :
:
if (filter_var($trimmed['email'], FILTER_VALIDATE_EMAIL)) {
$e = mysqli_real_escape_string ($dbc, $trimmed['email']);
} else {
echo '<p class="error">Please enter a valid email address! </p>';
}
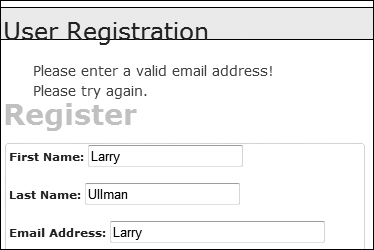
![]() The submitted email address must be of the proper format.
The submitted email address must be of the proper format.
An email address can easily be validated using the Filter extension, discussed in Chapter 13. If your version of PHP does not support the Filter extension, you’ll need to use a regular expression here instead (the pattern for an email address was described in Chapter 14).
7. Validate the passwords:
if (preg_match ('/^w{4,20}$/', $trimmed['password1']) ) {
if ($trimmed['password1'] == $trimmed['password2']) {
$p = mysqli_real_escape_string ($dbc, $trimmed ['password1']);
} else {
echo '<p class="error">Your password did not match the confirmed password!</p>';
}
} else {
echo '<p class="error">Please enter a valid password!</p>';
}
The password must be between 4 and 20 characters long and contain only letters, numbers, and the underscore ![]() . That exact combination is represented by
. That exact combination is represented by w in Perl-Compatible Regular Expressions. Furthermore, the first password (password1) must match the confirmed password (password2) ![]() .
.
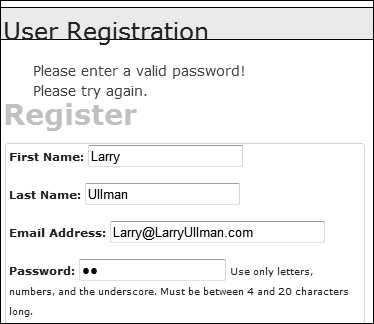
![]() The passwords are checked for the proper format, length, and...
The passwords are checked for the proper format, length, and...
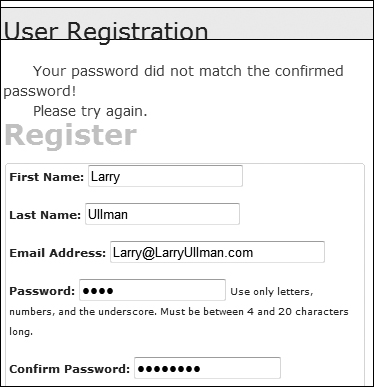
![]() ...that the password value matches the confirmed password value.
...that the password value matches the confirmed password value.
8. If every test was passed, check for a unique email address:
if ($fn && $ln && $e && $p) {
$q = "SELECT user_id FROM users WHERE email='$e'";
$r = mysqli_query ($dbc, $q) or trigger_error("Query: $q
n<br />MySQL Error: " . mysqli_error($dbc));
If the form passed every test, this conditional will be TRUE. Then the script must search the database to see if the submitted email address is currently being used, since that column’s value must be unique across each record. As with the MySQL connection script, if a query doesn’t run, call the trigger_error( ) function to invoke the self-defined error reporting function. The specific error message will include both the query being run and the MySQL error ![]() , so that the problem can easily be debugged.
, so that the problem can easily be debugged.
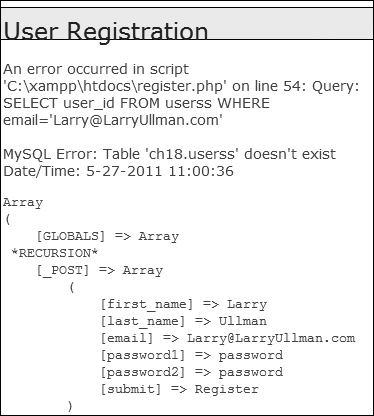
![]() If a MySQL query error occurs, it should be easier to debug thanks to this informative error message.
If a MySQL query error occurs, it should be easier to debug thanks to this informative error message.
9. If the email address is unused, register the user:
if (mysqli_num_rows($r) == 0) {
$a = md5(uniqid(rand( ), true));
$q = "INSERT INTO users (email, pass, first_name, last_name, active, registration_date) VALUES ('$e', SHA1('$p'), '$fn', '$ln', '$a', NOW( ) )";
$r = mysqli_query ($dbc, $q) or trigger_error("Query: $q
<br />MySQL Error: " . mysqli_error($dbc));
The query itself is rather simple, but it does require the creation of a unique activation code. Generating that requires the rand( ), uniqid( ), and md5( ) functions. Of these, uniqid( ) is the most important; it creates a unique identifier. It’s fed the rand( ) function to help generate a more random value. Finally, the returned result is hashed using md5( ), which creates a string exactly 32 characters long (a hash is a mathematically calculated representation of a piece of data). You do not need to fully comprehend these three functions, just note that the result will be a unique 32-character string.
As for the query itself, it should be familiar enough to you. Most of the values come from variables in the PHP script, after applying trim( ) and mysqli_real_escape_string( ) to them. The MySQL SHA1( ) function is used to encrypt the password and NOW( ) is used to set the registration date as the current moment. Because the user_level column has a default value of 0 (i.e., not an administrator), that column does not have to be provided a value in this query. Presumably the site’s main administrator would edit a user’s record to give him or her administrative power after the user has registered.
10. Send an email if the query worked:
if (mysqli_affected_rows($dbc) == 1) {
$body = "Thank you for registering at <whatever site>. To activate your account, please click on this link:
";
$body .= BASE_URL . 'activate.php?x=' . urlencode($e) . "&y=$a";
mail($trimmed['email'], 'Registration Confirmation', $body, 'From: [email protected]'),
With this registration process, the important thing is that the confirmation mail gets sent to the user, because they will not be able to log in until after they’ve activated their account. This email should contain a link to the activation page, activate.php. The link to that page starts with BASE_URL, which is defined in config.inc.php. The link also passes two values along in the URL. The first, generically called x, will be the user’s email address, encoded so that it’s safe to have in a URL. The second, y, is the activation code. The URL, then, will be something like http://www.example.com/activate.php?x=email%40example.com&y=901e09ef25bf6e3ef95c93088450b008.
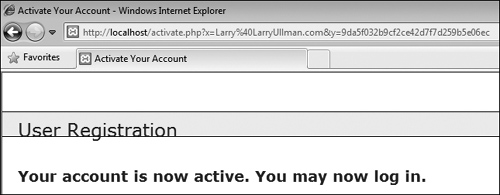
11. Tell the user what to expect and complete the page:
echo '<h3>Thank you for registering! A confirmation email has been sent to your address. Please click on the link in that email in order to activate your account.</h3>';
include ('includes/footer.html'),
exit( );
A thank-you message is printed out upon successful registration, along with the activation instructions ![]() . Then the footer is included and the page is terminated.
. Then the footer is included and the page is terminated.
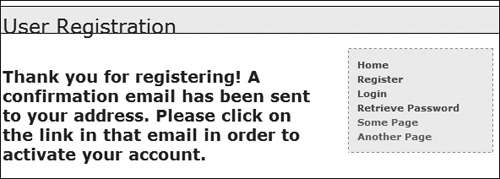
![]() The resulting page after a user has successfully registered.
The resulting page after a user has successfully registered.
12. Print errors if the query failed:
} else { // If it did not run OK.
echo '<p class="error">You could not be registered due to a system error. We apologize
for any inconvenience.</p>';
}
If the query failed for some reason, meaning that mysqli_affected_rows( ) did not return 1, an error message is printed to the browser. Because of the security methods implemented in this script, the live version of the site should never have a problem at this juncture.
13. Complete the conditionals and the PHP code:
} else {
echo '<p class="error">That email address has already been registered. If you have forgotten your password, use the link at right to have your password sent to you. </p>';
}
} else {
echo '<p class="error">Please try again.</p>';
}
mysqli_close($dbc);
}
?>
The first else is executed if a person attempts to register with an email address that has already been used ![]() . The second
. The second else applies when the submitted data fails one of the validation routines (see ![]() through
through ![]() ).
).
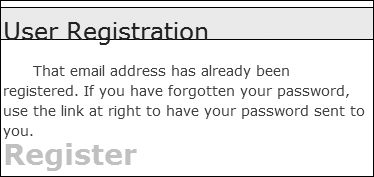
![]() If an email address has already been registered, the user is told as much.
If an email address has already been registered, the user is told as much.
<h1>Register</h1>
<form action="register.php" method="post">
<fieldset>
<p><b>First Name:</b> <input type="text" name="first_name" size="20" maxlength="20" value="<?php if (isset ($trimmed['first_name'])) echo $trimmed['first_name']; ?>" /></p>

![]() The registration form as it looks when the user first arrives.
The registration form as it looks when the user first arrives.
The HTML form has text inputs for all of the values. Each input has a name and a maximum length that match the corresponding column definition in the users table. The form will be sticky, using the trimmed values.
15. Add inputs for the last name and email address:
<p><b>Last Name:</b> <input type="text" name="last_name" size="20" maxlength="40" value="<?php if (isset($trimmed['last_name'])) echo $trimmed['last_name']; ?>" /></p>
<p><b>Email Address:</b> <input type="text" name="email" size= "30" maxlength="60" value="<?php if (isset($trimmed['email'])) echo $trimmed['email']; ?>" /> </p>
16. Add inputs for the password and the confirmation of the password:
<p><b>Password:</b> <input type="password" name="password1" size="20" maxlength="20" value="<?php if (isset($trimmed['password1'])) echo $trimmed['password1']; ?>" /> <small>Use only letters, numbers, and the underscore. Must be between 4 and 20 characters long.</small></p>
<p><b>Confirm Password:</b> <input type="password" name="password2" size="20" maxlength="20" value="<?php if (isset($trimmed['password2'])) echo $trimmed['password2']; ?>" /></p>
When using regular expressions to limit what data can be provided, including that data’s length, it’s best to indicate those requirements to the user in the form itself. By doing so, the site won’t report an error to the user for doing something the user didn’t know she or he couldn’t do.
17. Complete the HTML form:
</fieldset>
<div align="center"><input type="submit" name="submit" value="Register" /></div>
</form>
18. Include the HTML footer:
<?php include ('includes/footer.html'), ?>
19. Save the file as register.php, place it in your Web directory, and test it in your Web browser.
Because every column in the users table cannot be NULL (except for active), each input must be correctly filled out. If a table has an optional field, you should still confirm that it is of the right type if submitted, but not require it.
Except for encrypted fields (such as the password), the maximum length of the form inputs and regular expressions should correspond to the maximum length of the column in the database.
Activating an Account
As described in the “Activation Process” sidebar earlier in the chapter, each user will have to activate her or his account prior to being able to log in. Upon successfully registering, the user will receive an email containing a link to activate.php ![]() . This link also passes two values to this page: the user’s registered email address and a unique activation code. To complete the registration process—to activate the account, the user will need to click that link, taking her or him to the
. This link also passes two values to this page: the user’s registered email address and a unique activation code. To complete the registration process—to activate the account, the user will need to click that link, taking her or him to the activate.php script on the Web site.
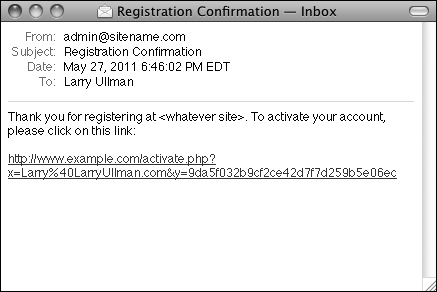
![]() The registration confirmation email.
The registration confirmation email.
The activate.php script needs to first confirm that those two values were received in the URL. Then, if the received two values match those stored in the database, the activation code will be removed from the record, indicating an active account.
To create the activation page
1. Begin a new PHP script in your text editor or IDE, to be named activate.php (Script 18.7):
<?php # Script 18.7 - activate.php
require ('includes/config.inc.php'),
$page_title = 'Activate Your Account';
include ('includes/header.html'),
2. Validate the values that should be received by the page:
if (isset($_GET['x'], $_GET['y'])
&& filter_var($trimmed['email'], FILTER_VALIDATE_EMAIL)
&& (strlen($_GET['y']) == 32 )
) {
Script 18.7. To activate an account, the user must come to this page, passing it her or his email address and activation code (all part of the link sent in an email upon registering).
1 <?php # Script 18.7 - activate.php
2 // This page activates the user's
account.
3 require ('includes/config.inc.php'),
4 $page_title = 'Activate Your Account';
5 include ('includes/header.html'),
6
7 // If $x and $y don't exist or aren't of
the proper format, redirect the user:
8 if (isset($_GET['x'], $_GET['y'])
9 && filter_var($_GET['x'],
FILTER_VALIDATE_EMAIL)
10 && (strlen($_GET['y']) == 32 )
11 ) {
12
13 // Update the database...
14 require (MYSQL);
15 $q = "UPDATE users SET active=NULL
WHERE (email='" . mysqli_real_
escape_string($dbc, $_GET['x']) . "'
AND active='" . mysqli_real_escape_
string($dbc, $_GET['y']) . "') LIMIT
1";
16 $r = mysqli_query ($dbc, $q) or
trigger_error("Query: $q
<br />MySQL
Error: " . mysqli_error($dbc));
17
18 // Print a customized message:
19 if (mysqli_affected_rows($dbc) == 1) {
20 echo "<h3>Your account is now
active. You may now log in.</h3>";
21 } else {
22 echo '<p class="error">Your account
could not be activated. Please
re-check the link or contact the
system administrator.</p>';
23 }
24
25 mysqli_close($dbc);
26
27 } else { // Redirect.
28
29 $url = BASE_URL . 'index.php'; //
Define the URL.
30 ob_end_clean( ); // Delete the buffer.
31 header("Location: $url");
32 exit( ); // Quit the script.
33
34 } // End of main IF-ELSE.
35
36 include ('includes/footer.html'),
37 ?>
As already mentioned, when the user clicks the link in the registration confirmation email, two values will be passed to this page: the email address and the activation code. Both values must be present and validated, before attempting to use them in a query activating the user’s account.
The first step is to ensure that both values are set. Since the isset( ) function can simultaneously check for the presence of multiple variables, the first part of the validation condition is isset($_GET['x'], $_GET['y']).
Second, $_GET['x'] must be in the format of a valid email address. The same code as in the registration script can be used for that purpose (either the Filter extension or a regular expression).
Third, for y (the activation code), the last clause in the conditional checks that this string’s length (how many characters are in it) is exactly 32. The md5( ) function, which created the activation code, always returns a string 32 characters long.
3. Attempt to activate the user’s account:
require (MYSQL);
$q = "UPDATE users SET active=NULL WHERE (email='" . mysqli_real_escape_string($dbc, $_GET['x']) . "' AND active='" . mysqli_real_escape_string($dbc, $_GET['y']) . "') LIMIT 1";
$r = mysqli_query ($dbc, $q) or trigger_error("Query: $q
<br />MySQL Error: " . mysqli_error($dbc));
If all three conditions (in Step 2) are TRUE, an UPDATE query is run. This query removes the activation code from the user’s record by setting the active column to NULL. Before using the values in the query, both are run through mysqli_real_escape_string( ) for extra security.
4. Report upon the success of the query:
if (mysqli_affected_rows($dbc) == 1) {
echo "<h3>Your account is now active. You may now log in.</h3>";
} else {
echo '<p class="error">Your account could not be activated. Please re-check the link or contact the system administrator.</p>';
}
If one row was affected by the query, then the user’s account is now active and a message says as much ![]() . If no rows are affected, the user is notified of the problem
. If no rows are affected, the user is notified of the problem ![]() . This would most likely happen if someone tried to fake the x and y values or if there’s a problem in following the link from the email to the Web browser.
. This would most likely happen if someone tried to fake the x and y values or if there’s a problem in following the link from the email to the Web browser.
![]() If the database could be updated using the provided email address and activation code, the user is notified that their account is now active.
If the database could be updated using the provided email address and activation code, the user is notified that their account is now active.

![]() If an account is not activated by the query, the user is told of the problem.
If an account is not activated by the query, the user is told of the problem.
5. Complete the main conditional:
mysqli_close($dbc);
} else { // Redirect.
$url = BASE_URL . 'index.php';
ob_end_clean( );
header("Location: $url");
exit( );
} // End of main IF-ELSE.
The else clause takes effect if $_GET['x'] and $_GET['y'] are not of the proper value and length. In such a case, the user is just redirected to the index page. The ob_end_clean( ) line here deletes the buffer (whatever was to be sent to the Web browser up to this point, stored in memory), as it won’t be used.
6. Complete the page:
include ('includes/footer.html'),
?>
7. Save the file as activate.php, place it in your Web directory, and test it by clicking the link in the registration email.
If you wanted to be a little more forgiving, you could have this page print an error message if the correct values are not received, rather than redirect them to the index page (as if they were attempting to hack the site).
I specifically use the vague x and y as the names in the URL for security purposes. While someone may figure out that the one is an email address and the other is a code, it’s sometimes best not to be explicit about such things.
An alternative method, which I used in the second edition of this book, was to place the activation code and the user’s ID (from the database) in the link. That also works, but from a security perspective, it’s really best that users never see, or are even aware of, a user ID that’s otherwise not meant to be public.
Script 18.8. The login page will redirect the user to the home page after registering the user ID, first name, and access level in a session.
1 <?php # Script 18.8 - login.php
2 // This is the login page for the site.
3 require ('includes/config.inc.php'),
4 $page_title = 'Login';
5 include ('includes/header.html'),
6
7 if ($_SERVER['REQUEST_METHOD'] == 'POST')
{
8 require (MYSQL);
9
10 // Validate the email address:
11 if (!empty($_POST['email'])) {
12 $e = mysqli_real_escape_string
($dbc, $_POST['email']);
13 } else {
14 $e = FALSE;
15 echo '<p class="error">You forgot
to enter your email address!</p>';
16 }
17
18 // Validate the password:
19 if (!empty($_POST['pass'])) {
20 $p = mysqli_real_escape_string
($dbc, $_POST['pass']);
21 } else {
22 $p = FALSE;
23 echo '<p class="error">You forgot
to enter your password!</p>';
24 }
25
26 if ($e && $p) { // If everything's OK.
27
28 // Query the database:
29 $q = "SELECT user_id, first_name,
user_level FROM users WHERE
(email='$e' AND pass=SHA1('$p')) AND
active IS NULL";
30 $r = mysqli_query ($dbc, $q)
or trigger_error("Query: $q
n<br />MySQL Error: " .
mysqli_error($dbc));
31
32 if (@mysqli_num_rows($r) == 1) {
// A match was made.
33
34 // Register the values:
35 $_SESSION = mysqli_fetch_array
($r, MYSQLI_ASSOC);
36 mysqli_free_result($r);
37 mysqli_close($dbc);
38
39 // Redirect the user:
40 $url = BASE_URL . 'index.php';
// Define the URL.
41 ob_end_clean( ); // Delete the
buffer.
42 header("Location: $url");
43 exit( ); // Quit the script.
44
45 } else { // No match was made.
46 echo '<p class="error">Either
the email address and password
entered do not match those
on file or you have not yet
activated your account.</p>';
47 }
48
49 } else { // If everything wasn't OK.
50 echo '<p class="error">Please try
again.</p>';
51 }
52
53 mysqli_close($dbc);
54
55 } // End of SUBMIT conditional.
56 ?>
57
58 <h1>Login</h1>
59 <p>Your browser must allow cookies in
order to log in.</p>
60 <form action="login.php" method="post">
61 <fieldset>
62 <p><b>Email Address:</b> <input
type="text" name="email" size="20"
maxlength="60" /></p>
63 <p><b>Password:</b> <input
type="password" name="pass" size="20"
maxlength="20" /></p>
64 <div align="center"><input
type="submit" name="submit"
value="Login" /></div>
65 </fieldset>
66 </form>
67
68 <?php include ('includes/footer.html'),
?>
Logging In and Logging Out
Chapter 12 created many versions of login.php and logout.php scripts, using variations on cookies and sessions. Here both scripts will be created once again, this time adhering to the same practices as the rest of this chapter’s Web application. The login query itself is slightly different in this example in that it must also check that the active column has a NULL value, which is the indication that the user has activated his or her account.
To write login.php
1. Begin a new PHP document in your text editor or IDE, to be named login.php (Script 18.8):
<?php # Script 18.8 - login.php
require ('includes/config.inc.php'),
$page_title = 'Login';
include ('includes/header.html'),
2. Check if the form has been submitted and require the database connection:
if ($_SERVER['REQUEST_METHOD'] == 'POST') {
require (MYSQL);
3. Validate the submitted data:
if (!empty($_POST['email'])) {
$e = mysqli_real_escape_string ($dbc, $_POST['email']);
} else {
$e = FALSE;
echo '<p class="error">You forgot to enter your email address!</p>';
}
if (!empty($_POST['pass'])) {
$p = mysqli_real_escape_string ($dbc, $_POST['pass']);
} else {
$p = FALSE;
echo '<p class="error">You forgot to enter your password!</p>';
}
There are two ways of thinking about the validation. On the one hand, you could use regular expressions and the Filter extension, copying the same code from register.php, to validate these values. On the other hand, the true test of the values will be whether the login query returns a record or not, so one could arguably skip more stringent PHP validation. This script uses the latter thinking.
If the user does not enter any values into the form, error messages will be printed ![]() .
.
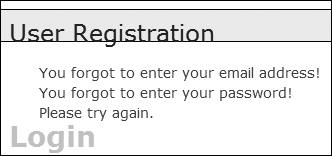
![]() The login form checks only if values were entered, without using regular expressions.
The login form checks only if values were entered, without using regular expressions.
4. If both validation routines were passed, retrieve the user information:
if ($e && $p) {
$q = "SELECT user_id, first_name, user_level FROM users WHERE (email='$e' AND pass=SHA1 ('$p')) AND active IS NULL";
$r = mysqli_query ($dbc, $q) or trigger_error("Query: $q
<br />MySQL Error: " . mysqli_error($dbc));
The query will attempt to retrieve the user ID, first name, and user level for the record whose email address and password match those submitted. The MySQL query uses the SHA1( ) function on the pass column, as the password is encrypted using that function in during the registration process. The query also checks that the active column has a NULL value, meaning that the user has successfully accessed the activate.php page.
If you know an account has been activated but you still can’t log in using the proper values, it’s likely because your active column was erroneously defined as NOT NULL.
5. If a match was made in the database, log the user in:
if (@mysqli_num_rows($r) == 1) {
$_SESSION = mysqli_fetch_array ($r, MYSQLI_ASSOC);
mysqli_free_result($r);
mysqli_close($dbc);
The login process consists of storing the retrieved values in the session (which was already started in header.html) and then redirecting the user to the home page. Because the query will return an array with three elements—one indexed at user_id, one at first_name, and the third at user_level, all three can be fetched right into $_SESSION, resulting in $_SESSION['user_id'], $_SESSION['first_name'], and $_SESSION['user_level']. If $_SESSION had other values in it already, you would not want to take this shortcut, as you’d wipe out those other elements.
6. Redirect the user:
$url = BASE_URL . 'index.php'; ob_end_clean( );
header("Location: $url");
exit( );
The ob_end_clean( ) function will delete the existing buffer (the output buffering is also begun in header.html), since it will not be used.
7. Complete the conditionals and close the database connection:
} else {
echo '<p class="error">Either the email address and password entered do not match those on file or you have not yet activated your account.</p>';
}
} else {
echo '<p class="error">Please try again.</p>';
}
mysqli_close($dbc);
} // End of SUBMIT conditional.
?>
The error message ![]() indicates that the login process could fail for two possible reasons. One is that the submitted email address and password do not match those on file. The other reason is that the user has not yet activated their account.
indicates that the login process could fail for two possible reasons. One is that the submitted email address and password do not match those on file. The other reason is that the user has not yet activated their account.
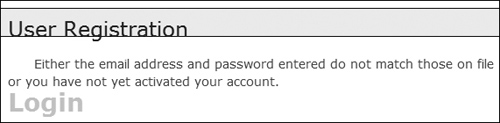
![]() An error message is displayed if the login query does not return a single record.
An error message is displayed if the login query does not return a single record.
8. Display the HTML login form ![]() :
:
<h1>Login</h1>
<p>Your browser must allow cookies in order to log in.</p>
<form action="login.php"
method="post">
<fieldset>
<p><b>Email Address:</b> <input
type="text" name="email" size="20"
maxlength="60" /></p>
<p><b>Password:</b> <input
type="password" name="pass"
size="20" maxlength="20" /></p>
<div align="center"><input
type="submit" name="submit"
value="Login" /></div>
</fieldset>
</form>
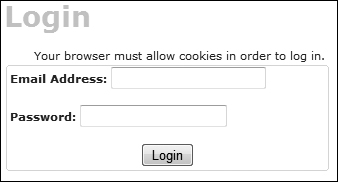
![]() The login form.
The login form.
The login form, like the registration form, will submit the data back to itself. This one is not sticky, though, but you could add that functionality.
Notice that the page includes a message informing the user that cookies must be enabled to use the site (if a user does not allow cookies, she or he will never get access to the logged-in user pages).
9. Include the HTML footer:
<?php include ('includes/footer.
html'), ?>
10. Save the file as login.php, place it in your Web directory, and test it in your Web browser ![]() .
.
![]() Upon successfully logging in, the user will be redirected to the home page, where they will be greeted by name.
Upon successfully logging in, the user will be redirected to the home page, where they will be greeted by name.
To write logout.php
1. Begin a new PHP document in your text editor or IDE, to be named logout.php (Script 18.9):
<?php # Script 18.9 - logout.php
require ('includes/config.inc.php'),
$page_title = 'Logout';
include ('includes/header.html'),
Script 18.9. The logout page destroys all of the session information, including the cookie.
1 <?php # Script 18.9 - logout.php
2 // This is the logout page for the site.
3 require ('includes/config.inc.php'),
4 $page_title = 'Logout';
5 include ('includes/header.html'),
6
7 // If no first_name session variable
exists, redirect the user:
8 if (!isset($_SESSION['first_name'])) {
9
10 $url = BASE_URL . 'index.php'; //
Define the URL.
11 ob_end_clean( ); // Delete the buffer.
12 header("Location: $url");
13 exit( ); // Quit the script.
14
15 } else { // Log out the user.
16
17 $_SESSION = array( ); // Destroy the
variables.
18 session_destroy( ); // Destroy the
session itself.
19 setcookie (session_name( ), '',
time( )-3600); // Destroy the cookie.
20
21 }
22
23 // Print a customized message:
24 echo '<h3>You are now logged out.</h3>';
25
26 include ('includes/footer.html'),
27 ?>
2. Redirect the user if she or he is not logged in:
if (!isset($_SESSION['first_name'])) {
$url = BASE_URL . 'index.php';
ob_end_clean( ); header("Location: $url");
exit( );
If the user is not currently logged in (determined by checking for a $_SESSION['first_name'] variable), the user will be redirected to the home page (because there’s no point in trying to log the user out).
3. Log out the user if they are currently logged in:
} else { // Log out the user.
$_SESSION = array( );
session_destroy( );
setcookie (session_name( ), '', time( )-3600);
}
To log the user out, the session values will be reset, the session data will be destroyed on the server, and the session cookie will be deleted. These lines of code were first used and described in Chapter 12. The cookie name will be the value returned by the session_name( ) function. If you decide to change the session name later, this code will still be accurate.
4. Print a logged-out message and complete the PHP page:
echo '<h3>You are now logged
out.</h3>';
include ('includes/footer.html'),
?>
5. Save the file as logout.php, place it in your Web directory, and test it in your Web browser ![]() (on the previous page).
(on the previous page).

![]() The results of successfully logging out.
The results of successfully logging out.
Password Management
The final aspect of the public side of this site is the management of passwords. There are two processes to consider: resetting a forgotten password and changing an existing one.
Resetting a password
It inevitably happens that people forget their login passwords for Web sites, so having a contingency plan for these occasions is important. One option would be to have the user email the administrator when this occurs, but administering a site is difficult enough without that extra hassle. Instead, this site will have a script whose purpose is to reset a forgotten password.
Because the passwords stored in the database are encrypted using MySQL’s SHA1( ) function, there’s no way to retrieve an unencrypted version (the database actually stores a hashed version of the password, not an encrypted version). The alternative is to create a new, random password and change the existing password to this value. Rather than just display the new password in the Web browser (that would be terribly insecure), the new password will be emailed to the address with which the user registered.
To write forgot_password.php
1. Begin a new PHP document in your text editor or IDE, to be named forgot_password.php (Script 18.10):
<?php # Script 18.10 - forgot_password.php
require ('includes/config.inc.php'),
$page_title = 'Forgot Your Password';
include ('includes/header.html'),
2. Check if the form has been submitted, include the database connection, and create a flag variable:
if ($_SERVER['REQUEST_METHOD'] == 'POST') {
require (MYSQL);
$uid = FALSE;
This form will take an email address input and change the password for that record. To do that, the script first needs to retrieve the user ID value that matches the submitted email address. To begin that process, a flag variable is assigned a FALSE value as an assumption of no valid user ID.
3. Validate the submitted email address:
if (!empty($_POST['email'])) {
$q = 'SELECT user_id FROM users WHERE email="'. mysqli_real_escape_string ($dbc, $_POST['email']) . '"';
$r = mysqli_query ($dbc, $q) or trigger_error("Query: $q
<br />MySQL Error: " . mysqli_error($dbc));
This is a simple validation for a submitted email address (without using a regular expression or the Filter extension). If the submitted value is not empty, an attempt is made to retrieve the user ID for that email address in the database. You could, of course, add more stringent validation if you’d prefer.
Script 18.10. The forgot_password.php script allows users to reset their password without administrative assistance.
1 <?php # Script 18.10 - forgot_password.
php
2 // This page allows a user to reset
their password, if forgotten.
3 require ('includes/config.inc.php'),
4 $page_title = 'Forgot Your Password';
5 include ('includes/header.html'),
6
7 if ($_SERVER['REQUEST_METHOD'] == 'POST') {
8 require (MYSQL);
9
10 // Assume nothing:
11 $uid = FALSE;
12
13 // Validate the email address...
14 if (!empty($_POST['email'])) {
15
16 // Check for the existence of that
email address...
17 $q = 'SELECT user_id FROM
users WHERE email="'. mysqli_
real_escape_string ($dbc, $_
POST['email']) . '"';
18 $r = mysqli_query ($dbc, $q)
or trigger_error("Query: $q
n<br />MySQL Error: " .
mysqli_error($dbc));
19
20 if (mysqli_num_rows($r) == 1) { //
Retrieve the user ID:
21 list($uid) = mysqli_fetch_array
($r, MYSQLI_NUM);
22 } else { // No database match
made.
23 echo '<p class="error">The
submitted email address does
not match those on file!</p>';
24 }
25
26 } else { // No email!
27 echo '<p class="error">You forgot
to enter your email address!</p>';
28 } // End of empty($_POST['email']) IF.
29
30 if ($uid) { // If everything's OK.
31
32 // Create a new, random password:
33 $p = substr ( md5(uniqid(rand( ),
true)), 3, 10);
34
35 // Update the database:
36 $q = "UPDATE users SET pass=SHA1
('$p') WHERE user_id=$uid LIMIT 1";
37 $r = mysqli_query ($dbc, $q) or
trigger_error("Query: $q
n<br />MySQL Error: " .
mysqli_error($dbc));
38
39 if (mysqli_affected_rows($dbc) ==
1) { // If it ran OK.
40
41 // Send an email:
42 $body = "Your password to
log into <whatever site> has
been temporarily changed
to '$p'. Please log in using
this password and this email
address. Then you may change
your password to something
more familiar.";
43 mail ($_POST['email'], 'Your
temporary password.', $body,
'From: [email protected]'),
44
45 // Print a message and wrap up:
46 echo '<h3>Your password has
been changed. You will receive
the new, temporary password at
the email address with which
you registered. Once you have
logged in with this password,
you may change it by clicking
on the "Change Password"
link.</h3>';
47 mysqli_close($dbc);
48 include ('includes/footer.html'),
49 exit( ); // Stop the script.
50
51 } else { // If it did not run OK.
52 echo '<p class="error">Your
password could not be
changed due to a system
error. We apologize for any
inconvenience.</p>';
53 }
54
55 } else { // Failed the validation
test.
56 echo '<p class="error">Please try
again.</p>';
57 }
58
59 mysqli_close($dbc);
60
61 } // End of the main Submit conditional.
62 ?>
63
64 <h1>Reset Your Password</h1>
65 <p>Enter your email address below and
your password will be reset.</p>
66 <form action="forgot_password.php"
method="post">
67 <fieldset>
68 <p><b>Email Address:</b> <input
type="text" name="email" size="20"
maxlength="60" value="<?php if
(isset($_POST['email'])) echo $_
POST['email']; ?>" /></p>
69 </fieldset>
70 <div align="center"><input
type="submit" name="submit"
value="Reset My Password" /></div>
71 </form>
72
73 <?php include ('includes/footer.html'),
?>
4. Retrieve the selected user ID:
if (mysqli_num_rows($r) == 1) {
list($uid) = mysqli_fetch_array ($r, MYSQLI_NUM);
} else { // No database match made.
echo '<p class="error">The submitted email address does not match those on file!</p>';
}
If the query returns one row, it’ll be fetched and assigned to $uid (short for user ID). This value will be needed to update the database with the new password, and it’ll also be used as a flag variable.
The list( ) function has not been formally discussed in the book, but you may have run across it. It’s a shortcut function that allows you to assign array elements to other variables. Since mysqli_fetch_array( ) will always return an array, even if it’s an array of just one element, using list( ) can save having to write:
$row = mysqli_fetch_array($r,
MYSQLI_NUM);
$uid = $row[0];
If no matching record could be found for the submitted email address, an error message is displayed ![]() .
.

![]() If the user entered an email address that is not found in the database, an error message is shown.
If the user entered an email address that is not found in the database, an error message is shown.
5. Report upon no submitted email address:
} else { // No email!
echo '<p class="error">You forgot to enter your email address!</p>';
} // End of empty($_POST['email']) IF.
If no email address was provided, that is also reported ![]() .
.
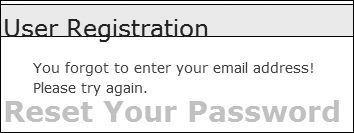
![]() Failure to provide an email address also results in an error.
Failure to provide an email address also results in an error.
6. Create a new, random password:
if ($uid) {
$p = substr ( md5(uniqid(rand( ), true)), 3, 10);
Creating a new, random password will make use of four PHP functions. The first is uniqid( ), which will return a unique identifier. It is fed the arguments rand( ) and true, which makes the returned string more random. This returned value is then sent through the md5( ) function, which calculates the MD5 hash of a string. At this stage, a hashed version of the unique ID is returned, which ends up being a string 32 characters long. This part of the code is similar to that used to create the activation code in activate.php (Script 18.7).
From this string, the password is created by pulling out ten characters starting with the third one, using the substr( ) function. All in all, this code will return a very random and meaningless ten-character string (containing both letters and numbers) to be used as the temporary password.
Note that the creation of a new, random password is only necessary if $uid has a TRUE value by this point.
7. Update the password in the database:
$q = "UPDATE users SET pass=SHA1('$p') WHERE user_id=$uid LIMIT 1";
$r = mysqli_query ($dbc, $q) or trigger_error("Query: $q
<br
/>MySQL Error: " . mysqli_error($dbc));
if (mysqli_affected_rows($dbc) == 1) {
Using the user ID (the primary key for the table) that was retrieved earlier, the password for this particular user is updated to the SHA1( ) version of $p, the random password.
8. Email the password to the user:
$body = "Your password to log into <whatever site> has been temporarily changed to '$p'. Please log in using this password and this email address. Then you may change your password to something more familiar.";
mail ($_POST['email'], 'Your temporary password.', $body, 'From: [email protected]'),
Next, the user needs to be emailed the new password so that she or he may log in ![]() . It’s safe to use
. It’s safe to use $_POST['email'] in the mail( ) code, because to get to this point, $_POST['email'] must match an address already stored in the database. That address would have already been validated via the Filter extension (or a regular expression), in the registration script.
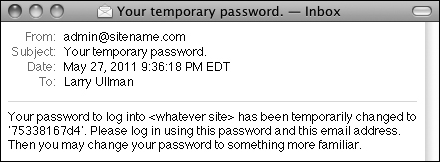
![]() The email message received after resetting a password.
The email message received after resetting a password.
echo '<h3>Your password has been changed. You will receive the new, temporary password at the email address with which you registered. Once you have logged in with this password, you may change it by clicking on the "Change Password" link.</h3>';
mysqli_close($dbc);
include ('includes/footer.html'),
exit( );
Next, a message is printed and the page is completed so as not to show the form again ![]() .
.

![]() The resulting page after successfully resetting a password.
The resulting page after successfully resetting a password.
10. Complete the conditionals and the PHP code:
} else {
echo '<p class="error">Your password could not be changed due to a system error. We apologize for any inconvenience.</p>';
}
} else {
echo '<p class="error">Please try again.</p>';
}
mysqli_close($dbc);
} // End of the main Submit conditional.
?>
The first else clause applies only if the UPDATE query did not work, which hopefully shouldn’t happen on a live site. The second else applies if the user didn’t submit an email address or if the submitted email address didn’t match any in the database.
11. Make the HTML form ![]() :
:
<h1>Reset Your Password</h1>
<p>Enter your email address below and your password will be reset.</p>
<form action="forgot_password.php" method="post">
<fieldset>
<p><b>Email Address:</b> <input type="text" name="email" size="20" maxlength="60" value="<?php if (isset($_POST['email'])) echo $_POST['email']; ?>" /></p>
</fieldset>
<div align="center"><input type="submit" name="submit" value="Reset My Password" /></div>
</form>
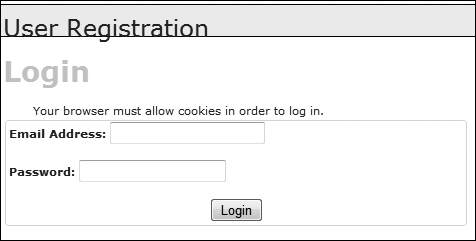
![]() The simple form for resetting a password.
The simple form for resetting a password.
The form takes only one input, the email address. If there is a problem when the form has been submitted, the submitted email address value will be shown again (i.e., the form is sticky).
Script 18.11. With this page, users can change an existing password (if they are logged in).
1 <?php # Script 18.11 - change_password.php
2 // This page allows a logged-in user to
change their password.
3 require ('includes/config.inc.php'),
4 $page_title = 'Change Your Password';
5 include ('includes/header.html'),
6
7 // If no first_name session variable
exists, redirect the user:
8 if (!isset($_SESSION['user_id'])) {
9
10 $url = BASE_URL . 'index.php'; //
Define the URL.
11 ob_end_clean( ); // Delete the buffer.
12 header("Location: $url");
13 exit( ); // Quit the script.
14
15 }
16
17 if ($_SERVER['REQUEST_METHOD'] == 'POST') {
18 require (MYSQL);
19
20 // Check for a new password and match
against the confirmed password:
21 $p = FALSE;
22 if (preg_match ('/^(w){4,20}$/', $_
POST['password1']) ) {
23 if ($_POST['password1'] == $_
POST['password2']) {
24 $p = mysqli_real_escape_string
($dbc, $_POST['password1']);
25 } else {
26 echo '<p class="error">Your
password did not match the
confirmed password!</p>';
27 }
28 } else {
29 echo '<p class="error">Please enter
a valid password!</p>';
30 }
31
32 if ($p) { // If everything's OK.
33
34 // Make the query:
35 $q = "UPDATE users SET
pass=SHA1('$p') WHERE user_id={$_
SESSION['user_id']} LIMIT 1";
36 $r = mysqli_query ($dbc, $q)
or trigger_error("Query: $q
n<br />MySQL Error: " .
mysqli_error($dbc));
37 if (mysqli_affected_rows($dbc) ==
1) { // If it ran OK.
38
39 // Send an email, if desired.
40 echo '<h3>Your password has
been changed.</h3>';
41 mysqli_close($dbc); // Close
the database connection.
42 include ('includes/footer.
html'), // Include the HTML
footer.
43 exit( );
44
45 } else { // If it did not run OK.
46
47 echo '<p class="error">Your
password was not changed.
Make sure your new password
is different than the current
password. Contact the system
administrator if you think an
error occurred.</p>';
48
49 }
50
51 } else { // Failed the validation
test.
52 echo '<p class="error">Please try
again.</p>';
53 }
54
55 mysqli_close($dbc); // Close the
database connection.
56
57 } // End of the main Submit conditional.
58 ?>
59
60 <h1>Change Your Password</h1>
61 <form action="change_password.php"
method="post">
62 <fieldset>
63 <p><b>New Password:</b> <input
type="password" name="password1"
size="20" maxlength="20" /> <small>Use
only letters, numbers, and the
underscore. Must be between 4 and 20
characters long.</small></p>
64 <p><b>Confirm New Password:</b> <input
type="password" name="password2"
size="20" maxlength="20" /></p>
65 </fieldset>
66 <div align="center"><input
type="submit" name="submit"
value="Change My Password" /></div>
67 </form>
68
69 <?php include ('includes/footer.html'),
?>
12. Include the HTML footer:
<?php include ('includes/footer.html'), ?>
13. Save the file as forgot_password.php, place it in your Web directory, and test it in your Web browser.
14. Check your email to see the resulting message after a successful password reset ![]() .
.
Changing a password
The change_password.php script was initially written in Chapter 9 (called just password.php), as an example of an UDPATE query. The one developed here will be very similar in functionality but will differ in that only users who are logged in will be able to access it. Therefore, the form will only need to accept the new password and a confirmation of it (the user’s existing password and email address will have already been confirmed by the login page).
To write change_password.php
1. Begin a new PHP document in your text editor or IDE, to be named change_password.php (Script 18.11):
<?php # Script 18.11 - change_password.php
require ('includes/config.inc.php'),
$page_title = 'Change Your Password';
include ('includes/header.html'),
2. Redirect the user if she or he is not logged in:
if (!isset($_SESSION['user_id'])) {
$url = BASE_URL . 'index.php';
ob_end_clean( );
header("Location: $url");
exit( );
}
The assumption is that this page is only to be accessed by logged-in users. To enforce this idea, the script checks for the existence of the $_SESSION['user_id'] variable (which would be required by the UPDATE query). If this variable is not set, then the user will be redirected.
3. Check if the form has been submitted and include the MySQL connection:
if ($_SERVER['REQUEST_METHOD'] == 'POST') {
require (MYSQL);
The key to understanding how this script performs is remembering that there are three possible scenarios: the user is not logged in (and therefore redirected), the user is logged in and viewing the form, and the user is logged in and has submitted the form.
The user will only get to this point in the script if she or he is logged in. Otherwise, the user would have been redirected by now. So the script just needs to determine if the form has been submitted or not.
4. Validate the submitted password:
$p = FALSE;
if (preg_match ('/^(w){4,20}$/', $_POST['password1']) ) {
if ($_POST['password1'] == $_POST['password2']) {
$p = mysqli_real_escape_![]() string ($dbc,
string ($dbc,
$_POST['password1']);
} else {
echo '<p class="error">Your password did not match the confirmed password!</p>';
}
} else {
echo '<p class="error">Please enter a valid password!</p>';
}
The new password should be validated using the same tests as those in the registration process. Error messages will be displayed if problems are found ![]() .
.
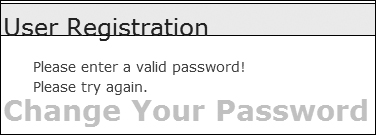
![]() As in the registration process, the user’s new password must pass the validation routines; otherwise, they will see error messages.
As in the registration process, the user’s new password must pass the validation routines; otherwise, they will see error messages.
5. Update the password in the database:
if ($p) {
$q = "UPDATE users SET pass=SHA1('$p') WHERE user_id={$_SESSION['user_id']} LIMIT 1";
$r = mysqli_query ($dbc, $q) or trigger_error("Query: $q
<br />MySQL Error: " .
mysqli_error($dbc));
Using the user’s ID—stored in the session when the user logged in—the password field can be updated in the database. The LIMIT 1 clause isn’t strictly necessary but adds extra insurance.
6. If the query worked, complete the page:
if (mysqli_affected_rows($dbc) == 1) {
echo '<h3>Your password has been changed.</h3>';
mysqli_close($dbc);
include ('includes/footer.html'), exit( );
If the update worked, a confirmation message is printed to the Web browser ![]() .
.
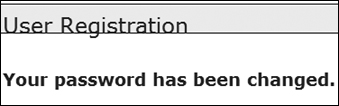
![]() The script has successfully changed the user’s password.
The script has successfully changed the user’s password.
7. Complete the conditionals and the PHP code:
} else {
echo '<p class="error">Your password was not changed. Make sure your new password is different than the current password. Contact the system administrator if you think an error occurred.</p>';
}
} else {
echo '<p class="error">Please try again.</p>';
}
mysqli_close($dbc);
} // End of the main Submit conditional.
?>
The first else clause applies if the mysqli_affected_rows( ) function did not return a value of 1. This could occur for two reasons. The first is that a query or database error happened. Hopefully, that’s not likely on a live site, after you’ve already worked out all the bugs. The second reason is that the user tried to “change” their password but entered the same password again. In that case, the UPDATE query wouldn’t affect any rows because the password column in the database wouldn’t be changed. A message implying such is printed.
8. Create the HTML form ![]() :
:
<h1>Change Your Password</h1>
<form action="change_password. php" method="post">
<fieldset>
<p><b>New Password:</b> <input type="password" name="password1" size="20" maxlength="20" /> <small>Use only letters, numbers, and the underscore. Must be between 4 and 20 characters long.</small></p>
<p><b>Confirm New Password:</b> <input type="password" name="password2" size="20" maxlength="20" /></p>
</fieldset>
<div align="center"><input type="submit" name="submit" value="Change My Password"/></div>
</form>
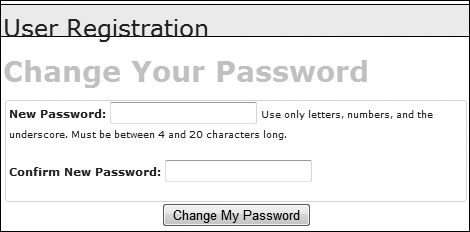
![]() The Change Your Password form.
The Change Your Password form.
This form takes two inputs: the new password and a confirmation of it. A description of the proper format is given as well. Because the form is so simple it’s not sticky, but that’s a feature you could add.
9. Complete the HTML page:
<?php include ('includes/footer.html'), ?>
10. Save the file as change_password.php, place it in your Web directory, and test it in your Web browser.
Once this script has been completed, users can reset their password with the previous script and then log in using the temporary, random password. After logging in, users can change their password back to something more memorable with this page.
Because the site’s authentication does not rely upon the user’s password from page to page (in other words, the password is not checked on each subsequent page after logging in), changing a password will not require the user to log back in.
Review and Pursue
If you have any problems with the review questions or the pursue prompts, turn to the book’s supporting forum (www.LarryUllman.com/forums/).
Note: Most of these questions and some of the prompts rehash information covered in earlier chapters, in order to reinforce some of the most important points.
Review
• What is output buffering? What are the benefits of using it?
• Why shouldn’t detailed error information be displayed on live sites?
• Why must the active column in the users table allow for NULL values? What is the result if active is defined as NOT NULL?
• What are the three steps in terminating a session?
• What does the session_name( ) function do?
• What are the differences between truly encrypting data and creating a hash representation of some data?
Pursue
• Check out the PHP manual’s pages for output buffering (or output control).
• Check out the PHP manual’s pages for the rand( ), uniqid( ), and md5( ) functions.
• Check out the PHP manual’s page for the trigger_error( ) function.
• Apply the same validation techniques to login.php as used in register.php.
• Make the login form sticky.
• Add a last_login DATETIME field to the users table and update its value when a user logs in. Use this information to indicate to the user how long it has been since the last time she or he accessed the site.
• If you’ve added the last_login field, use it to print a message on the home page as to how many users have logged in in the past, say, hour or day.
• Validate the submitted email address in forgot_password.php using the Filter extension or a regular expression.
• Check out the PHP manual’s page for the list( ) function.
• Create view_users.php and edit_user.php scripts as recommended in the final sidebar. Restrict access to these scripts to administrators (those users whose access level is 1).