
CHAPTER 16
CUSTOMIZING THE DESIGNS INCLUDED IN THIS BOOK
There are 260 templates included with this book, which contain both pure CSS and table-based XHTML Web designs, email signatures, e-newsletters, and Photoshop designs, which do not have code written for them. All the files are constructed in similar fashions, respectively, which makes understanding and customizing them a fairly consistent process. This chapter not only explains how to customize such templates, but it also provides basic Photoshop tips that can be used to customize the templates quickly.
STEPS TO CUSTOMIZING A TEMPLATE
There are six basic steps to customizing a template. The basic process involves customizing and saving a Photoshop file, which outputs PNG, GIF, and JPG files that are then displayed, along with any text, by preprogrammed XHTML (HTML), Cascading Style Sheets, and possibly JavaScript files. Following are the six steps:
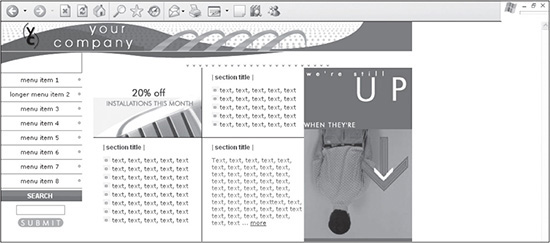
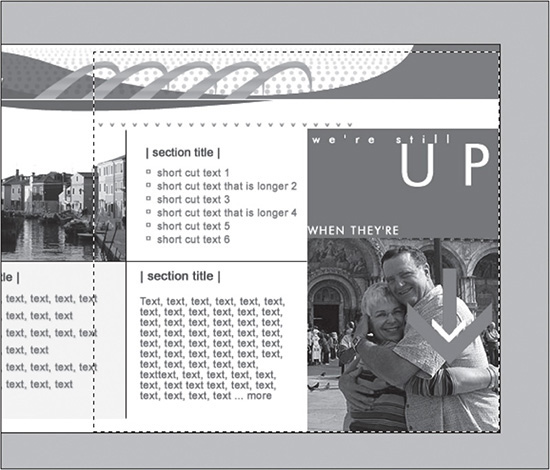
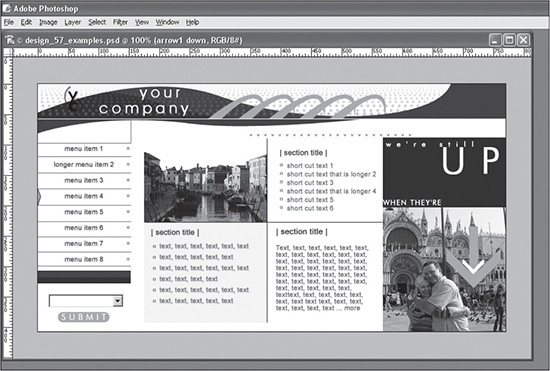
1. Open the main Photoshop file. The design used for this chapter is design 57 (see Figure 16.1).
2. Customize the images and colors in the Photoshop file(s).
3. Optimize and save the necessary images that will be used by precoded XHTML, CSS, and possibly JavaScript files.
4. Open XHTML, CSS, or JavaScript files with an HTML editor.
5. Customize the text and any other code.
6. Test the design.
Figure 16.1
The design that is customized in this chapter.
© 2014 Cengage Learning.
Step 1: Open the Main Photoshop File
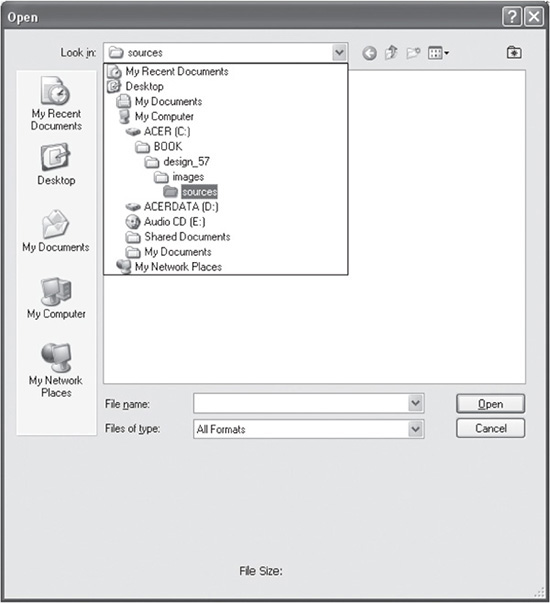
After copying the online files and pasting them into a directory, the designer needs to locate and open the main design file (design_57.psd) in Photoshop (see Figure 16.2).
Figure 16.2
The location of the files after being saved to the hard drive.
© 2014 Cengage Learning.
How Files Look on a Hard Drive
Figure 16.2 represents one example of how the files would look on a hard drive after being downloaded. This is all relative to the individual’s system.
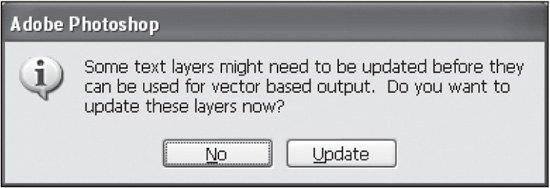
Updating Photoshop Files
The templates included with this book are saved in Photoshop version 6 or higher. Adobe has continually changed how its software handles text, and the newer versions are no exception. When opening a file in a more recent version, Photoshop will ask if the reader wants to update the file (see Figure 16.3). Selecting Update will cause the vector-based text to have its positioning slightly readjusted.
Figure 16.3
Photoshop dialog box asking if a file should have text updated.
© 2014 Cengage Learning.
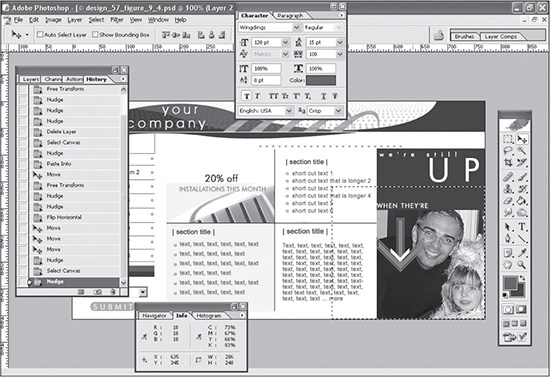
Step 2: Customize Images and Colors
Making and saving changes in Photoshop will change all the images in a design and many of the colors as well (see Figure 16.4). Colors that are not changed when saving a Photoshop file can be changed in the XHTML or CSS files.
Step 3: Optimize and Save Necessary Images
Once changes have been made to the Photoshop file, the designer will need to save the file so that the necessary PNG, GIF, and JPG images are saved from the sliced Photoshop file. Following are the steps to do so:
1. Select the Save For Web option from Photoshop’s File menu (see Figure 16.5).
Figure 16.4
Design in Photoshop with customized colors and photos.
© 2014 Cengage Learning.
Figure 16.5
Design being optimized with Photoshop’s Save For Web function.
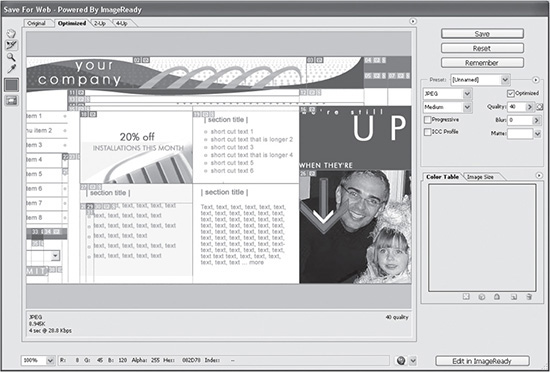
© 2014 Cengage Learning.
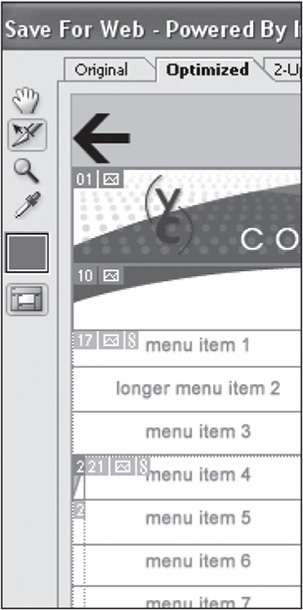
2. Click on the Slice Select tool from the menu on the left (see Figure 16.6).
Figure 16.6
Slice Select tool in the Save For Web window.
© 2014 Cengage Learning.
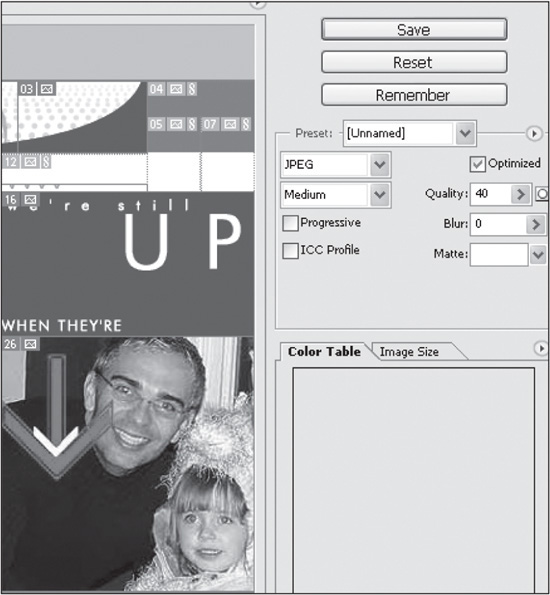
3. Select a slice to be optimized and select the compression on the right side of the window (see Figure 16.7).
Figure 16.7
The slice that has its file type and compression assigned in the Save For Web window.
© 2014 Cengage Learning.
Changing File Extension in Code
If the designer changes the type of image a slice is saved as, such as GIF to JPG, the file extension must be changed in the CSS or XHTML template as well. For example, if photo_middle_right is changed from a JPG file to a GIF file, all references to photo_middle_right.jpg in the template must be changed to photo_middle_right.gif.
4. Ensure that all changed slices of the template are still compressed to the best level possible.
5. Select Save in the top-right area of the Save For Web window.
6. Select Replace in the Replace Files window.
Photoshop Replaces All Files in Images Subdirectory
Once a user clicks on Replace, Photoshop will save all slices as either PNGs, GIFs, or JPGs from the file and place them in an Images subdirectory below where the design_57.html file is saved.
Step 4: Open an XHTML (HTML), CSS, or JavaScript File
All three file types can be opened in any HTML editor. In Figure 16.8, the sample file is opened in Adobe’s ColdFusion Studio. This software is pretty much extinct in Web development; however, any quality software will be somewhat similar in style. It also shows that the designer does not need the latest and greatest software for such development. A reader, in fact, could even use basic text editing software, such as Notepad, which is included with Microsoft operating systems.
Step 5: Customize Text and Code
Once a template file has been opened in an HTML editor, it can be easily modified and saved however the designer may choose. Following are suggestions for customizing such files:
![]() Always save a backup to revert to or pull original pieces of code from, if necessary.
Always save a backup to revert to or pull original pieces of code from, if necessary.
![]() Check pages in a browser frequently (refer to step 6).
Check pages in a browser frequently (refer to step 6).
Figure 16.8
A file opened in Adobe’s ColdFusion Studio HTML editing software.
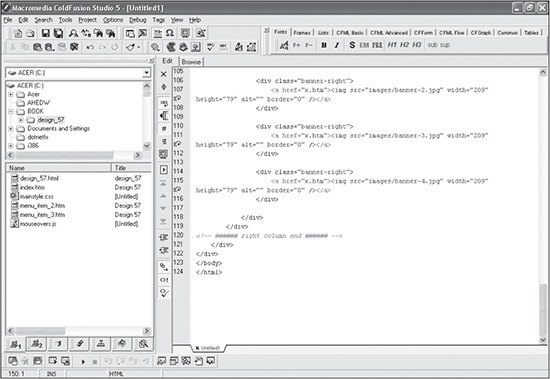
© Adobe® Systems Incorporated.
![]() Switch the CSS or
Switch the CSS or border value to 1 where the code is being customized. This allows the designer to understand better how the design is constructed.
![]() Ensure that the location and image name for each menu item is consistent when working with XHTML templates that use mouseovers in the menu (see Listing 16.1). No two menu items can have the same location and image names.
Ensure that the location and image name for each menu item is consistent when working with XHTML templates that use mouseovers in the menu (see Listing 16.1). No two menu items can have the same location and image names.
Listing 16.1 Unique JavaScript Names for Mouseover Code
<tr>
<td valign="top"><img src="images/bullet_menu_off.gif" width="18"
height="20" alt="" border="0" name="menu_item_1"></td>
<td class="white2"><a href="index.htm" style="text-decoration:
none; color: #ffffff" onmouseover="document.menu_item_1.src=
bullet_menu_on.src;"

onmouseout="document.menu_item_1.src=bullet_menu_off.src"><b>menu
item 1</b></a></td>
</tr>
This suggestion is only applicable to the table-based XHTML templates included with the book.
Step 6: Test the Design
As soon as a designer makes a change to a template, it should be opened in a browser or, better yet, in various browsers, depending on how thoroughly the designer wants to test the code. Then, as changes are made to the template from the HTML editor, the designer should refresh the browser(s) continually to ensure that the changes were made correctly. To open a design in IE, for example, the designer follows six steps:
1. Click the browser’s File menu.
2. Click Open.
3. Click Browse.
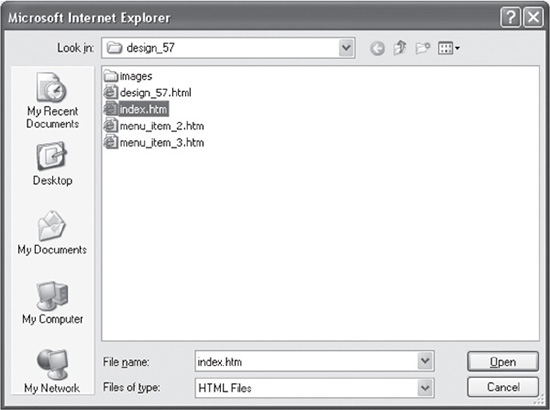
4. Click on index.htm, which is the homepage for the design in Figure 16.9.
Figure 16.9
A locally saved index.htm file to be opened in IE 6.
© 2014 Cengage Learning.
5. Click Open to open the file in a browser.
6. Click OK to confirm opening the file.
PHOTOSHOP TUTORIALS
This section includes tutorials on basic techniques a designer or developer will usually need to know in order to customize a design. They include replacing photos, resizing photos, changing colors, and undoing or redoing actions.
Replacing Photos
Not all designs can have photos simply replaced in the code. With many mortised designs, the process of replacing a photo first begins with the Photoshop file, using masks. Following are instructions on replacing a photo in a Photoshop template, using the original photo as a mask.
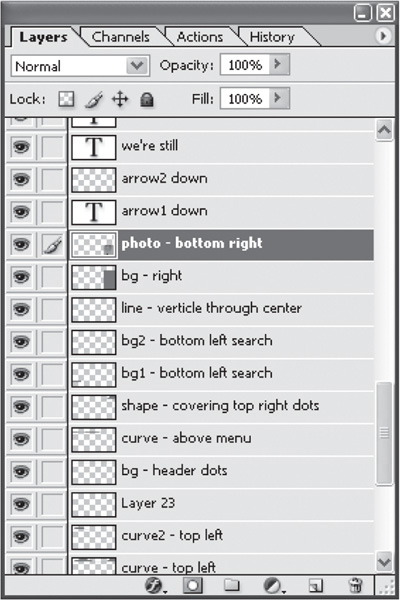
1. Make sure that the Layers panel is visible (see Figure 16.10).
Figure 16.10
The Layers panel in Photoshop where different layers may be selected.
© Adobe® Systems Incorporated.
2. Click on the Window menu in the top menu bar.
3. Click on the Layers option (see Figure 16.11).
Figure 16.11
The Layers panel can be accessed from the Window menu.
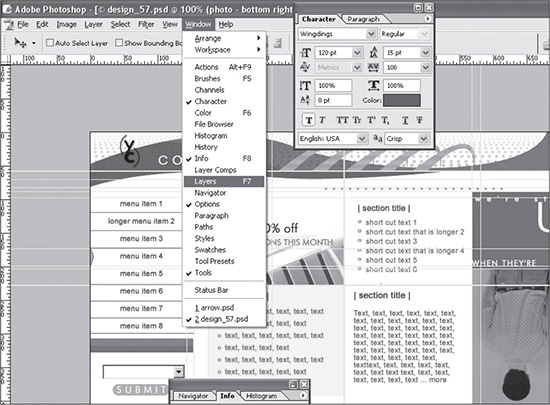
© 2014 Cengage Learning.
4. Make sure that the Layers tab is selected in the panel. If it is not, click on it (refer to Figure 16.11).
5. Open the image to be inserted into the existing image.
6. Select the entire image (Ctrl-A for Windows; Cmd-A for Macintosh) and then copy that image (Ctrl-C for Windows or Cmd-C for Macintosh; see Figure 16.12).
Figure 16.12
The image selected that will be used in the design.
© 2014 Cengage Learning.
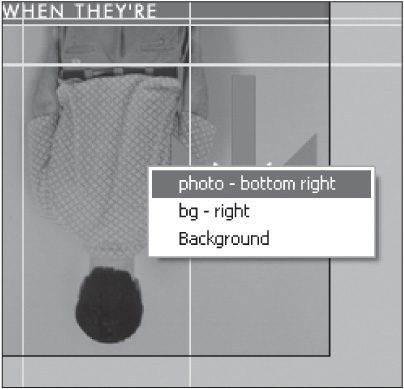
7. Select the layer of the photo in the design (in this example, it is the upside-down photo of the man) that is going to be replaced.
Right-Clicking Image to Find Layer Name
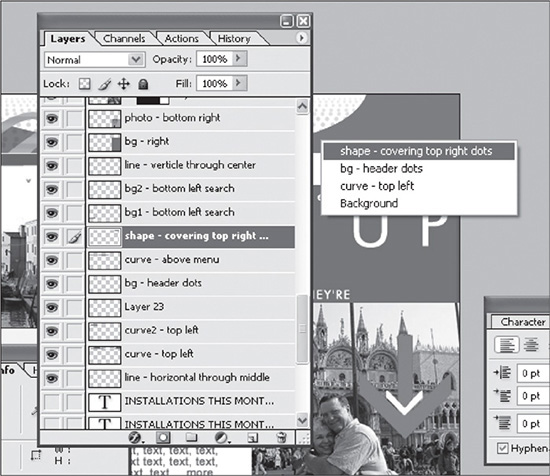
Windows users can right-click the photo to be replaced and then select the layer’s name, which will send the user directly to that layer (see Figure 16.13). The user may have more than one option to select, so if they are not already named, it might be necessary to click on the various layers until the correct one is selected.
Figure 16.13
Possible layers to select if the user right-clicks on an image.
© 2014 Cengage Learning.
8. Click on the layer in the Layers panel. Once this layer has been selected, the content on the layer will be available for editing.
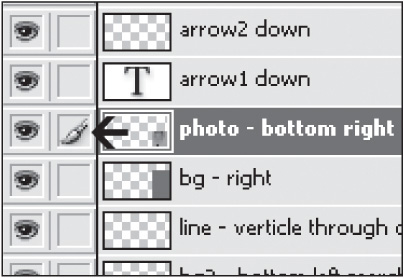
Making Layers Visible and Invisible
A layer can be made visible or invisible by clicking the eye icon on and off, located to the left of the layer name (see Figure 16.14). Toggling the eye on and off is a good way to test if the correct layer has been selected.
Figure 16.14
Toggling the eye icon on a layer will turn it off and on in the Photoshop file.
© 2014 Cengage Learning.
9. Activate the layer’s image by selecting the entire layer area (Ctrl-A for Windows; Cmd-A for Macintosh) and move the layer up one pixel (one click) and down one pixel by using the up and down arrow keys (see Figure 16.15).
Figure 16.15
The image that will be used as a mask must first be selected.
© 2014 Cengage Learning.
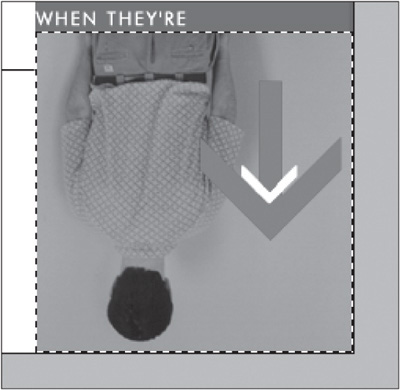
Using Marching Ants to Detect a Mask
The image is selected when the marching ants (moving dotted lines) are marching around that specific image or at least the part of the image that is viewable within the borders of the Photoshop file. Prior to moving the image up and down one pixel, ants will be marching around the border of the entire Photoshop file. If the marching ants are displayed in a square or rectangular shape that is larger than the image (see Figure 16.16), then the image is already set as a mask. If this occurs, the user must turn off the photo by turning off the eye for its layer and restarting this tutorial at step 3, this time selecting the correct layer (the square image that contains the actual photo).
Figure 16.16
How the marching ants would appear if the image were already saved as a mask.

© 2014 Cengage Learning.
10. Insert the image already copied in step 6 (see Figure 16.12) by pressing Shift-Ctrl-V for Windows or Shift-Cmd-V for Macintosh. The image will then be placed inside the existing image (see Figure 16.17).
Figure 16.17
The design after both the selected image and the one in the center have been added into their respective masks.
© 2014 Cengage Learning.
Resizing Photos
Following are instructions for resizing a photo in Photoshop. Although this tutorial explains how to resize a photo in a mask, the same process occurs when resizing any photo or image on any layer.
1. Make sure that the Layers panel is visible (refer to Figure 16.10).
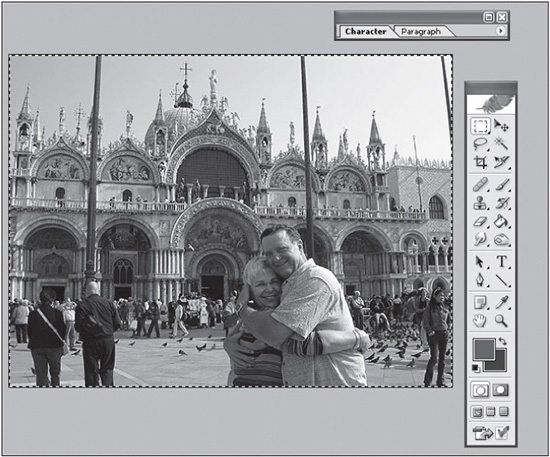
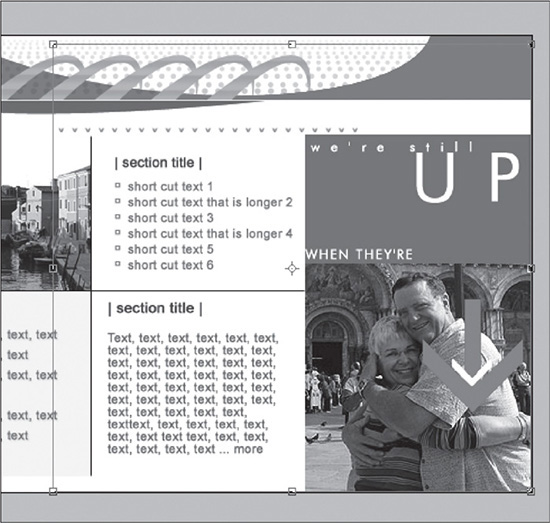
2. Select the layer of the photo in the design (in this example, it is the couple hugging) that is going to be resized (refer to Figure 16.13).
3. Click on the layer in the Layers panel. Once this layer has been selected, the content will be available for editing.
4. Activate the layer’s image by selecting the entire layer area (Ctrl-A for Windows; Cmd-A for Macintosh) and move the layer up one pixel (one click) and down one pixel by using the up and down arrow keys (see Figure 16.18).
Figure 16.18
The photo after it has been activated in the window.
© 2014 Cengage Learning.
Marching Ants Remain Inside Photoshop File
The image in Figure 16.18 extends below and to the right of the design. The marching ants, however, will remain inside the Photoshop file.
5. Activate the outer frame of the image by pressing Ctrl-T for Windows or Cmd-T for Macintosh. Once the outer frame is active, small square handles in the corners will appear (see Figure 16.19).
Figure 16.19
Small handles will appear when the image is ready to be resized.
© 2014 Cengage Learning.
6. Resize the image by clicking and dragging any of the corners on the frame that turn the mouse into an up or down arrow.
Maintaining Proportions When Resizing
Often, the image will need to be resized proportionately. Holding the Shift key and the handles simultaneously while dragging will ensure that the image’s proportions remain the same.
7. During the resizing process, the image can also be moved. To do so, select the Move tool in the toolbar and click and drag the image rather than the handles (see Figure 16.20).
Figure 16.20
The Move tool included in the menu bar.
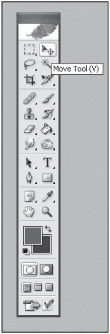
© 2014 Cengage Learning.
8. Deactivate the marching ants by pressing Ctrl-D for Windows or Cmd-D for Macintosh after the image has been resized and located correctly (see Figure 16.21). The border and corners will then disappear.
Figure 16.21
The photo after it has been resized and moved.
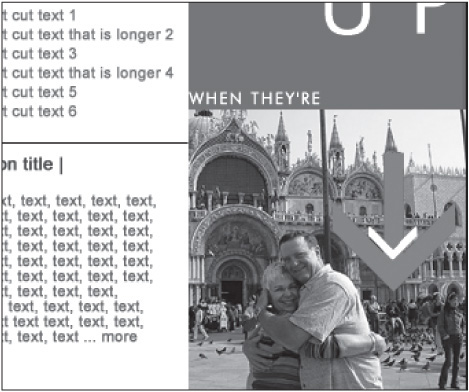
© 2014 Cengage Learning.
Changing Colors
Changing the colors of a design often begins with the Photoshop file because the colors are saved as images, rather than browser-generated colors. Following are instructions on changing colors of solid objects in a Photoshop template:
1. Make sure that the Layers panel is visible.
2. Select the layer of the photo in the design (in this example, it is the couple hugging) that is going to be changed.
3. Click on the layer in the Layers panel. Once this layer has been selected, content on the layer will be available for editing.
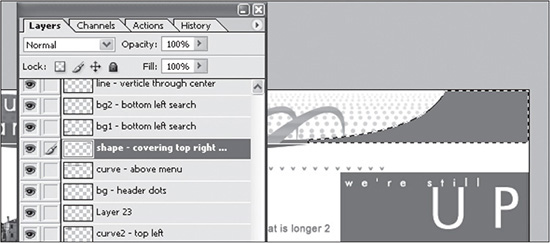
4. Select the layer of the photo in the design (in this example, the top-right corner) that is going to be changed (see Figure 16.22).
Figure 16.22
The layer, which represents the top-right curve of the design, to be recolored.
© 2014 Cengage Learning.
5. Click on the layer in the Layers panel. After this layer has been selected, the content on the layer will be available for editing.
6. Activate the layer’s image by selecting the entire layer area (Ctrl-A for Windows; Cmd-A for Macintosh) and move the layer up one pixel (one click) and down one pixel by using the up and down arrow keys (see Figure 16.23).
Figure 16.23
The image that will be re-colored after it has been activated.
© 2014 Cengage Learning.
7. Click the Color Picker in the toolbar to open the Color Picker dialog box and select a replacement (see Figure 16.24).
Figure 16.24
The Color Picker dialog box.
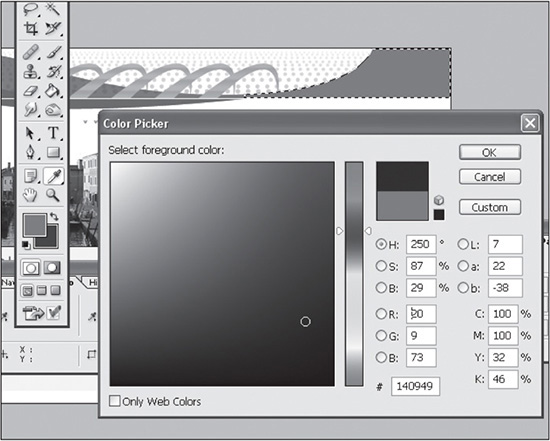
© 2014 Cengage Learning.
8. Click OK to close the Color Picker dialog after the replacement color has been selected.
9. Select Fill from the Edit menu (see Figure 16.25).
Figure 16.25
The Fill option in the Edit menu.
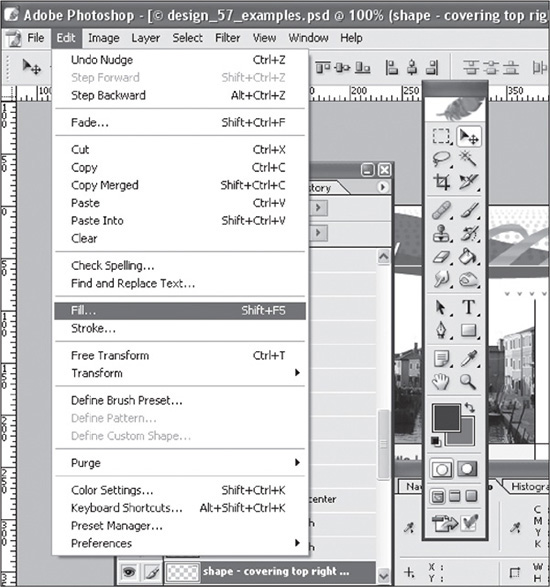
© 2014 Cengage Learning.
10. Click OK to confirm the fill (see Figure 16.26).
Figure 16.26
The Fill dialog box and the various possibilities the Use drop-down menu offers.
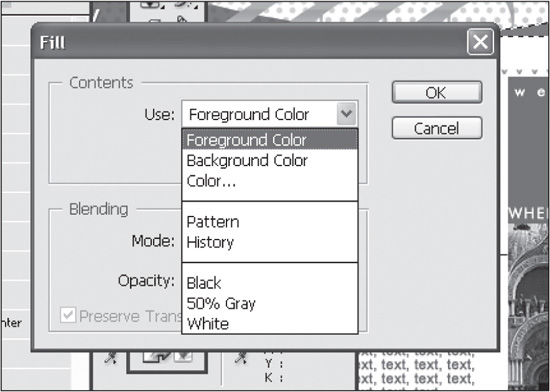
© 2014 Cengage Learning.
11. Deactivate the marching ants by pressing Ctrl-D for Windows or Cmd-D for Macintosh once the color has been replaced or “filled.” Figure 16.27 shows the design with many of the colors changed. Because it is a black-and-white image, the changes will appear mainly as tonal differences.
Figure 16.27
The design once many of the colors have been changed. Because the figure is black and white, the changes will appear only as tonal differences.
© 2014 Cengage Learning.
Undoing and Redoing Actions
The designer can undo and redo actions in Photoshop. This tutorial outlines the hot keys for undoing actions, but, more importantly, it shows how to configure Photoshop to allow for actions to be undone.
Undoing Actions
To undo an action using hot keys, the user needs to select Ctrl-Alt-Z for Windows or Cmd-Alt-Z for Macintosh. By holding down the Ctrl (or Cmd) and Alt keys, the user can repeatedly click the letter Z to undo as many actions as the program has been configured to allow.
Redoing Actions
After undoing actions, the user can click Ctrl-Z for Windows and Cmd-Z for Macintosh to redo all the actions. By repeatedly pressing this key combination, the user can toggle between the two different states of change, which is useful when deciding how a certain image or color will look compared to the older version.
Configuring the Undo Actions (History States) Setting
Undoing actions has a limit with the default settings of Photoshop, so the user needs to change the settings first to ensure that the settings will allow a certain number of changes. Following are instructions on how to do so:
1. Select Preferences, General under the Edit menu (see Figure 16.28). The Preferences dialog box will appear.
Figure 16.28
Selecting Preferences, General from the Edit menu.
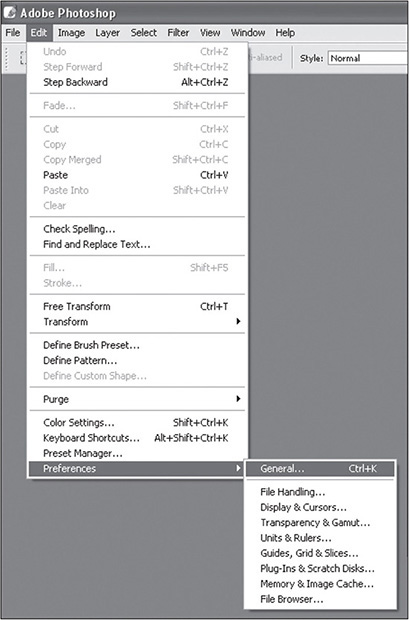
© 2014 Cengage Learning.
2. Change the History States setting to the number of changes Photoshop should be able to revert back to. The number of changes in this example is 20 (see Figure 16.29).
Figure 16.29
The History States option in the Preferences dialog box, which is set at 20.
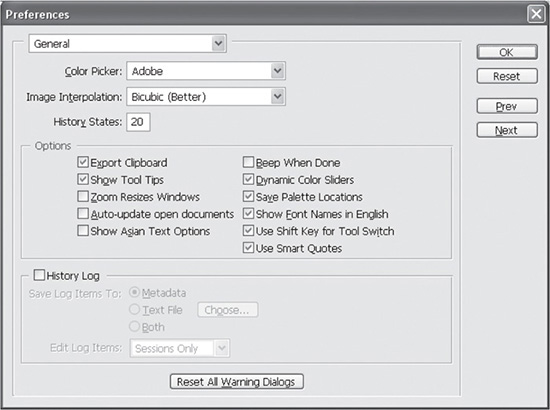
© 2014 Cengage Learning.
3. Click OK to confirm the changes.
SUMMARY
Because all the designs included in this book are built similarly, whether they use an XHTML table- or CSS-based design, they also are customized in very much the same way. This chapter not only explains the steps for customizing a design, but it also provides brief Photoshop tutorials on how to make changes in the software. These tutorials include replacing photos, resizing photos, changing colors, and undoing and redoing actions. Because it is filled with images, this chapter offers a quick read for fundamental Photoshop skills.