
CHAPTER 7
UNDERSTANDING GRAPHICS
One of the most important aspects of building mortised sites is to have properly saved and compressed graphics. Unlike working with XHTML, saving and compressing graphics leaves less to the imagination of the designer. Rather, the nature of the image will usually dictate how it should be saved, although there are times when the designer can be creative. This does not necessarily mean that the image will be saved as it should. The designer must understand how to best create, use, save, and compress images; and the first place to start is by understanding the two types of images used on the Web.
LEARNING ABOUT VECTOR AND BITMAP IMAGES
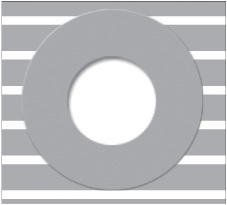
There are two general types of graphics used on the Web: vector and bitmap. Bitmap images, which are mainly composed of JPGs, PNGs, and GIFs, continue to be the most commonly used type of image on the Internet. The second type of graphics are vector images. These use mathematically based lines and curves to display images, as opposed to bitmap images, which use pixels to display images. The best way to understand the difference between the two types of images is to view an example. Figure 7.1 is an image of a circle.
Figure 7.1
Circle that could be created as both a vector or bitmap image.
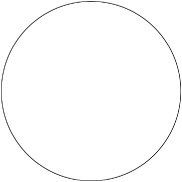
© 2014 Cengage Learning.
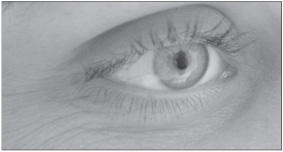
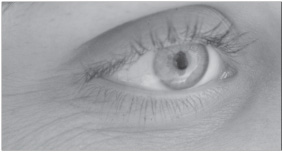
A designer could create the same image in both a vector-based program, such as Adobe Illustrator, or a bitmap-based program, such as Adobe Photoshop. (More recent versions of Photoshop now also support vector-based images.) When zooming in on the left-bottom corner of the circle in both programs, the difference between vector and bitmap images is apparent. Figure 7.2 is the vector image, and Figure 7.3 is the bitmap image. The vector image is smooth, while the bitmap image is jagged.
Figure 7.2
Corner of a circle that was saved as a vector image.
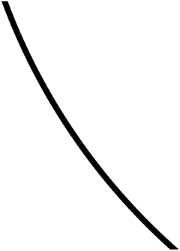
© 2014 Cengage Learning.
Figure 7.3
Corner of a circle that was saved as a bitmap image.
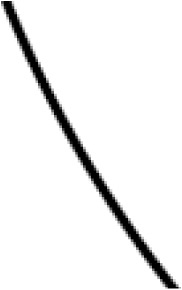
© 2014 Cengage Learning.
When viewing each image at 100 percent in Photoshop, the two images look fairly similar because individual pixels make up the different shades of black used in the bitmap image. Shades of gray soften the edges (called anti-aliasing) to give the illusion of one color. Despite anti-aliasing, vector images still appear sharper.
Not only are lines in vector images crisper, but they also have smaller file sizes than bitmap images, as long as they are kept simple. Vector images are also more easily resized with less degradation to the image. There are, however, two advantages of bitmap images over vector images:
![]() Bitmap images compress and display images with millions of colors much better than vector images.
Bitmap images compress and display images with millions of colors much better than vector images.
![]() Bitmap images are supported by all browsers, while most types of vector images still require a browser plug-in to view, unless they are saved as bitmap images.
Bitmap images are supported by all browsers, while most types of vector images still require a browser plug-in to view, unless they are saved as bitmap images.
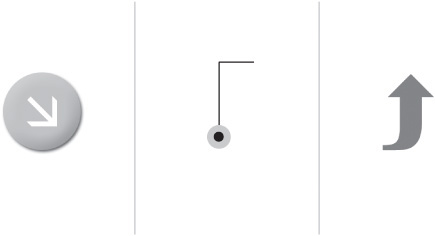
Many multimedia sites are vector-based. One example of vector-based graphics is Scalable Vector Graphics (SVG). This is a language that allows a designer to create vector-based images, vector shapes, and text. In other words, instead of a designer having to create Figure 7.4 as a traditional image, ASCII text can actually be used for text. This not only makes maintenance easier, but it also allows search engines to be able to index the text. Unfortunately, SVG graphics also require a plug-in. Another example, more commonly known, is Adobe Flash. While you can also embed bitmap images in it, the vector aspect allows for a designer to create much larger movies with vector technology than if it were to be bitmap-based.
Figure 7.4
Text saved as an image.
© 2014 Cengage Learning.
Once again, however, when considering the differences between bitmap and vector images, a designer must consider Rule 1 of Web design: just because you can does not mean you should. Bitmap images continue to be the images of choice for Web developers. This is not something that will change soon; it will be difficult to get the critical mass of Web users to either upgrade to a browser that supports vector images or download plug-ins that support the images.
This makes it important for a designer to understand and use currently supported image formats. Once a designer has a full understanding of bitmap images, it is possible to use them to create striking, fast, usable sites. Fortunately, there are only three bitmap formats that are necessary to learn in order to build or customize mortised sites—JPGs, PNGs, and GIFs.
LEARNING ABOUT JPGS, PNGS, AND GIFS
With as much incompatibility as there is with Web software and hardware, it is refreshing to know that JPGs, PNGs, and GIFs are fully supported by all significant graphical browsers. It is important, though, that a designer learn the strengths and weaknesses of the formats. Otherwise, image quality and size can be drastically compromised.
Using PNGs and GIFs
There are two types of PNGs—8 bit and 24 bit. 8-bit PNGs are generally very comparable to GIFs because they both support up to 256 colors. There are two major differences between 8-bit and 24-bit PNGs:
![]() 24-bit PNGs support as many colors as JPGs, except the PNG format is lossless, which means it maintains the actual colors and eliminates the issue of blurring of an image when it is overly compressed.
24-bit PNGs support as many colors as JPGs, except the PNG format is lossless, which means it maintains the actual colors and eliminates the issue of blurring of an image when it is overly compressed.
![]() 24-bit PNGs offer up to 256 transparent colors, compared with 8-bit PNGs or GIFs, which support only one color of transparency. This is extremely beneficial when layering images in a site because they don’t have a jagged edge around the image area that isn’t transparent.
24-bit PNGs offer up to 256 transparent colors, compared with 8-bit PNGs or GIFs, which support only one color of transparency. This is extremely beneficial when layering images in a site because they don’t have a jagged edge around the image area that isn’t transparent.
While it doesn’t sound impressive that 8-bit PNGs and GIFs support only 256 colors, these formats still have their benefits. Following are five advantages they offer over JPGs:
1. PNGs and GIFs do a better job of compressing large areas of solid color. They not only compress such images smaller, but the images also appear crisper.
2. GIFs support animation. Although animated GIFs have been overused and misused in the past and have been replaced mainly by Flash animation, there are still occasional, more obscure uses for them. One example would be using a “loading” image for an application site that doesn’t use Flash. Without motion, users may believe that the site, their connection, or their systems are locked up.
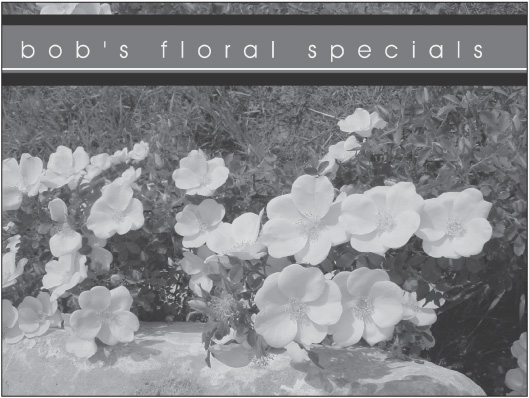
3. PNGs and GIFs allow for one color in an image to be transparent. This is beneficial for a designer when layering an image over various background images, such as in Figures 7.5 and 7.6, where the text “bob’s floral specials” is layered over the different floral JPGs.
However, there is a disadvantage in using transparent images. Because 8-bit PNGs and GIFs allow only one color to be transparent, they do not display anti-aliased images very well. In other words, the images appear jagged. This is an instance where the designer might want to consider using a 24-bit PNG.
4. PNGs and GIFs allow resizable color palettes. Pulling colors out of the color palette the image is using can reduce GIF file sizes further. If the colors are not in the actual image, they are unnecessary data and can be tossed without any loss of quality.
5. PNGs and GIFs maintain original color. Unlike JPGs, PNGs and GIFs are lossless, meaning they maintain the original colors of an image better than JPGs. A good example of this is a JPG that is compressed too far. The white can turn to an off tint on different monitors, many times disrupting the consistent flow of white in a design. This, at least, was the case with older versions of Photoshop. It does not occur that often anymore.
Figure 7.5
Image where the black strip and text on top is layered over a background image.
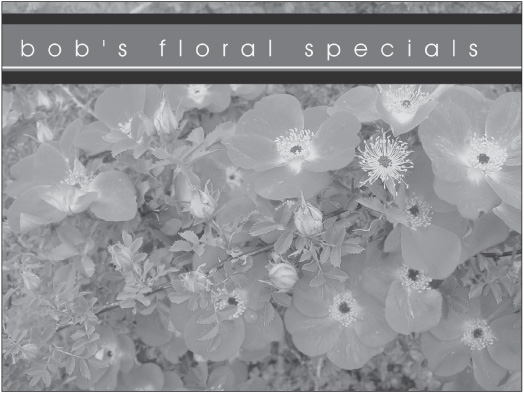
© 2014 Cengage Learning.
Figure 7.6
Image that uses the same layered black strip and text as in Figure 7.5.
© 2014 Cengage Learning.
Although a designer can save an 8-bit PNG or GIF with up to 256 colors, it is not always the wisest move. If that many colors are necessary to make a photo acceptable, then it is probably better to save the image as a JPG. Generally, it is good practice to save 8-bit PNGs or GIFs with a limited number of colors, anywhere from 2 to 64, depending on the physical size of the image. A designer should probably save an image as an 8-bit PNG or GIF when the following situations occur:
1. The image has a limited number of solid colors. The smaller the physical size of the image, the more colors a designer can use while maintaining an acceptable file size (see Figure 7.7).
Figure 7.7
Image that should most likely be saved as a PNG or GIF because of its limited colors.
© 2014 Cengage Learning.
While larger images, such as the one in Figure 7.8, can be saved as a PNG or GIF, they usually should not have too many colors. Of course, you must remember Rule 2 of Web design: there nearly always is an exception to a rule.
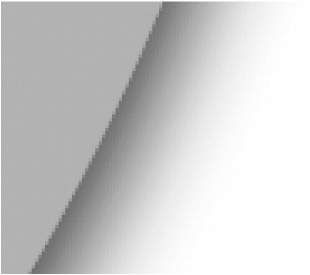
When saving images as 8-bit PNGs or GIFs, a designer should be aware of the fact that gradations, such as drop shadows, will increase the file size or not be displayed with strong enough quality. Due to the fact that there are a fewer number of colors available, an effect called banding can occur. This causes the gradations to be represented by solid bands of color instead of flowing into one another. There is a process called dithering, which causes the bands to be broken into different patterns of tiny dots to imitate shades of color by placing certain colors beside one another. Unfortunately, it increases file size significantly. Figure 7.9 is a zoomed-in view of the curved edge of Figure 7.8. It takes many shades of gray to make the image appear to be raised. While it is still possible to adequately compress Figure 7.8, the additional colors will increase the file size of the image.
Figure 7.8
Image that uses a drop shadow to give the illusion of being raised.
© 2014 Cengage Learning.
Figure 7.9
Zoomed-in view of the drop shadow in Figure 7.8.
© 2014 Cengage Learning.
2. The image is a line drawing. Although this technically falls into the previous category, it is differentiated for one reason—when saving an image as a PNG or GIF, the white is guaranteed to stay white, unlike a JPG. Figure 7.10 is a cartoon that is sharper and whiter when saved as a GIF, as opposed to a JPG.
Figure 7.10
Line drawing that should be saved as a PNG or GIF.
© 2014 Cengage Learning.
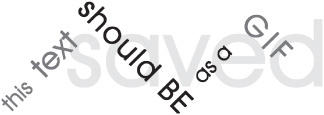
3. Text is saved as an image if it is not on a complex background, such as a photo. Generally, to make a site smaller, a designer should try to save text separately from images like photographs, which should be saved as JPGs. If the text is separate, it should be saved as a PNG or GIF, such as in Figure 7.11. Saving the image as a GIF in this image keeps the text nearly as crisp as when it was in the image editing software.
Figure 7.11
Text that should be saved as a GIF (or PNG) image.
© 2014 Cengage Learning.
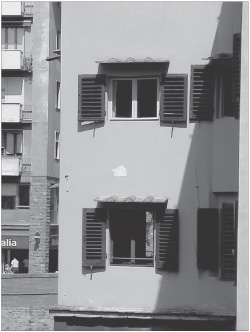
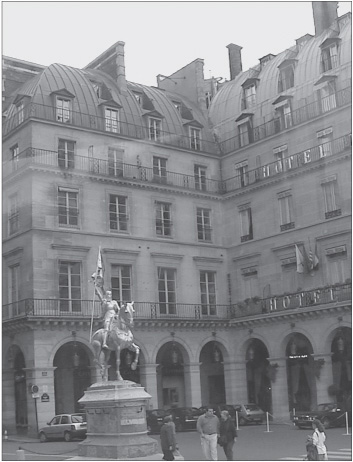
4. The image is a thumbnail photo. Depending on the physical size of the image and how many colors it uses, an 8-bit PNG or GIF will make a thumbnail appear sharper for about the same file size. If the number of colors is limited, such as in the photo of the house in Florence, Italy, shown in Figure 7.12, the image should be saved as an 8-bit PNG or GIF. If saved as a JPG at the same file size, the body of the house could become splotchy. Of course, this is not a hard and fast rule, especially with how the compression functionality of Photoshop has improved over the years.
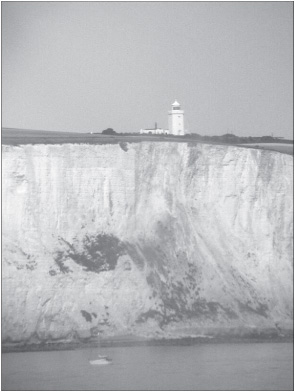
In contrast, the photo of the Dover Cliffs shown in Figure 7.13 uses many gradations throughout the sky, cliffs, and channel, which makes it a better candidate to be saved as a JPG.
Figure 7.12
Thumbnail that should be saved as an 8-bit PNG or GIF because of the solid colors.
© 2014 Cengage Learning.
Figure 7.13
Thumbnail that should be saved as a JPG because of the many gradations.
© 2014 Cengage Learning.
5. Small graphics are used. One way to keep a website small is to use and reuse small graphics, whether in the layout of the page or as a mouseover. Strictly because of their size, such images, including buttons, bullets, and mouseovers, should generally be saved as PNGs or GIFs (see Figure 7.14). The reason is that PNG and GIF compression handle a small number of colors much better than JPG compression does.
Figure 7.14
Small graphics that should be saved as PNGs or GIFs.
© 2014 Cengage Learning.
Knowing How PNG and GIF Compression Work
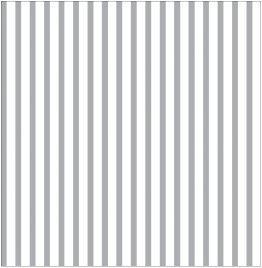
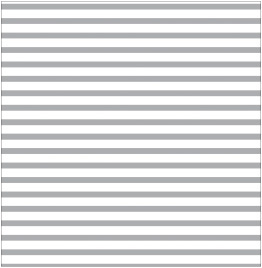
It is helpful for a designer to understand how PNG and GIF compression work. By creating and saving images a certain way, the designer can drastically reduce the download size of images. The secret of the two formats is that they compress as many pixels of one solid color at a time while running horizontally. In other words, if a designer creates an image where areas of one color run horizontally rather than vertically, the image will be compressed significantly smaller. Figure 7.15 is the exact same image as Figure 7.16; however, by rotating Figure 7.15 a mere 90 degrees and saving it so that the lines are horizontal, the image in Figure 7.16 can be compressed by more than 50 percent.
Figure 7.15
File size of image with vertical lines is 1KB.
© 2014 Cengage Learning.
Figure 7.16
File size of image with horizontal lines is .457KB.
© 2014 Cengage Learning.
Of course, this is a very specific example because not all images have lines. It does illustrate that the more you have solid colors run horizontally, the more the image can be compressed.
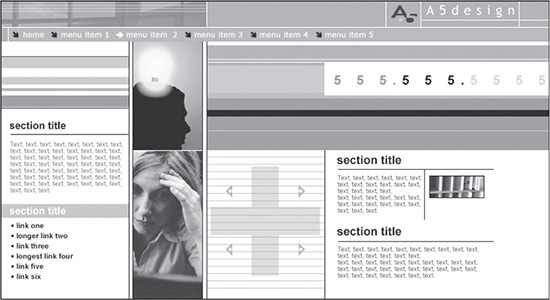
Unfortunately, if the image is already created, there is not much the designer can do. When starting a design from scratch, however, this can be helpful to know if the download size of the site is extremely critical. Figure 7.17 is a design that was created especially to benefit from GIF compression. Notice that nearly all the lines run horizontally. Not only does this take advantage of the GIF format’s best compression, but it also takes advantage of using the ability to repeat background images. In other words, each line that cannot be saved just as a background color can be saved as a background image, which can be repeated infinitely across the X axis (horizontal) using CSS. That way, the design requires a download of only a few images. It is then up to the browser to repeat the images, rather than making it necessary to download larger images.
Figure 7.17
Design that takes advantage of GIF horizontal compression.
© 2014 Cengage Learning.
Using JPGs
While the GIF format is useful for saving images with limited colors, the JPG format is just as powerful when saving images with hundreds, thousands, or millions of colors. Unlike multiple benefits from the 8-bit PNG and GIF formats, this one advantage of the JPG format makes it remarkably valuable when building mortised sites.
A designer should typically save an image as a JPG in the following situations.
Saving a Photograph
Other than in certain instances when saving thumbnails or dealing with flat planes of color, as outlined in the “Using PNGs and GIFs” section, photographs should almost always be saved as JPGs. The image in Figure 7.18 was saved as a GIF with 128 colors.
The same image was saved as a JPG in Figure 7.19 with the quality (compression) level set to 41 in Photoshop. There is no visible difference in the two photos. Note that the JPG photo is compressed to be more than 80 percent smaller.
Figure 7.18
GIF photo saved at 25KB.
© 2014 Cengage Learning.
Figure 7.19
JPG photo saved at 5KB.

© 2014 Cengage Learning.
The 24-bit PNG format can also save as many colors as JPG. Unlike the JPG format, the 24-bit PNG format will save the colors in a lossless method, which will maintain the original colors. The lossless method comes at a cost, though. The 24-bit PNG will typically be much larger than the JPG.
Saving an Image That Has Gradations
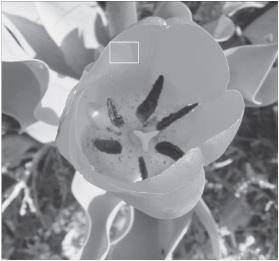
Although this is not an absolute rule, in most cases, the JPG format will compress images with gradations considerably better than the PNG and GIF formats, because gradations contain many colors. Depending on the area, gradations can range from a few colors to millions of colors. Figure 7.20 is an image of a tulip that is mainly comprised of gradations throughout the photo. Figure 7.21 is a zoomed-in view of the rectangle section shown in Figure 7.20.
Figure 7.20
Photo of a tulip that is made up of many gradations.
© 2014 Cengage Learning.
Figure 7.21
Zoomed-in view of the rectangle area in Figure 7.20.

© 2014 Cengage Learning.
The human eye cannot physically detect that there are 167 colors used to create the area. A computer, however, can detect those colors, and, unless otherwise directed when saving the image, will try to save each of those colors, considerably increasing the file size.
Some gradations can also be saved as GIFs. The rectangle that makes up Figure 7.21 is an example of this situation. When saved with the entire photo, the rectangle would need to be saved as a JPG. However, if the rectangle were to be cropped and saved on its own, it could be saved as a PNG or GIF with only 16 colors, as opposed to 167. Once again, this is because the human eye cannot physically detect that many colors in that small of an area. Viewing the image at 100 percent, it is difficult to detect more than a handful of colors. Thus, when a color is subtracted from the image, it is replaced with a color that is still present in the image. Therefore, using 16 colors would be more than adequate.
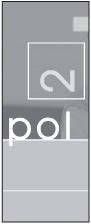
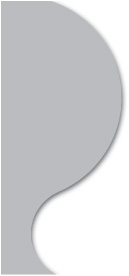
Figure 7.22 is an example of a gradated design. The gradated circles (see Figure 7.23) at the top and bottom of the design are saved as GIFs rather than JPGs for two reasons:
![]() Because they are small, fewer colors are needed, which keeps the file size small.
Because they are small, fewer colors are needed, which keeps the file size small.
![]() If they were saved as JPGs, the circles could lose their exact hue and the white in the image could have a pinkish tint, which would disrupt the design. This, though, is not that much of a problem anymore with the improvement of Adobe’s compression functionality in Photoshop.
If they were saved as JPGs, the circles could lose their exact hue and the white in the image could have a pinkish tint, which would disrupt the design. This, though, is not that much of a problem anymore with the improvement of Adobe’s compression functionality in Photoshop.
Figure 7.22
Design that uses gradated circles across the top and bottom of the image.
© 2014 Cengage Learning.
Figure 7.23
A zoomed-in view of some of the gradated circles in Figure 7.22.

© 2014 Cengage Learning.
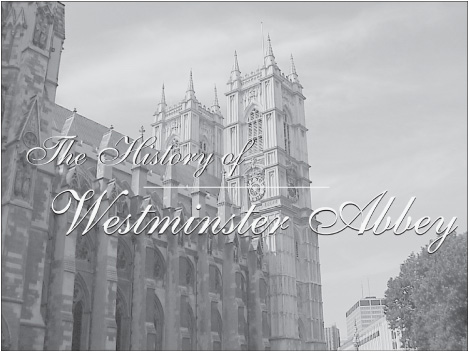
Saving Text on Top of a Photo
When creating a mortised site, the goal is to make it as fast as possible. This usually means creating designs where elements can be saved in their best possible formats. In other words, generally save text as PNGs or GIFs and photographs as JPGs. But this is not always possible. One instance is when a designer saves an image with text on top of a background, such as a photo (see Figure 7.24). The problem the designer runs into with this example is that if the photo is saved as a GIF to keep the text crisp, it could be as large as 70KB. However, if the entire image were compressed as a JPG with a smaller size, the text could be blurred and splotchy. There are only two solutions. The first is to save the text as a separate image with a transparent color and layer it over the church, which would be used as a background image. The other solution would be to simply save the image as a higher quality JPG, which is usually the best decision. Saving it this way, the designer can compress the image to around 15KB without compromising the quality of the text too much.
Figure 7.24
Photo with text layered on top that should be saved as a JPG.
© 2014 Cengage Learning.
Using the JPG file format considerably broadens a designer’s ability to build striking graphical sites. Figure 7.25 is a graphical site that has a total download of 35KB.
Figure 7.25
Graphical site that comes in under 35KB.
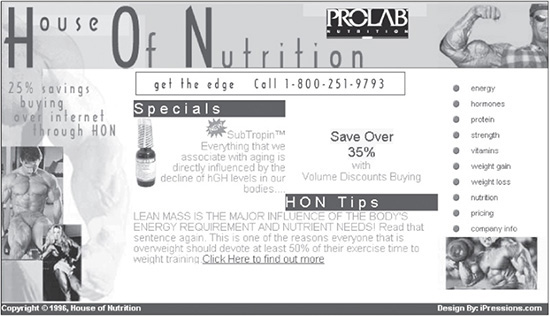
© 2014 House of Nutrition.
MISUSING IMAGE FORMATS
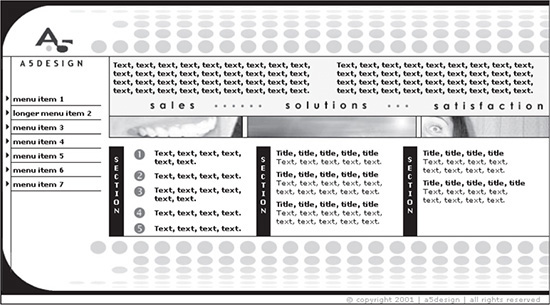
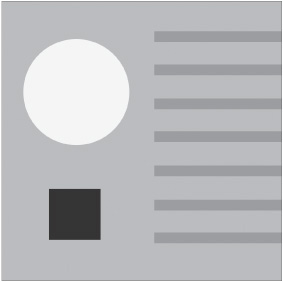
Properly creating, saving, and compressing images can make or break a site. Figure 7.25 was a perfect example of how small the download can be of a largely graphical site when properly using the JPG and GIF file formats. Figure 7.26, on the other hand, is at the other end of the spectrum. The site misuses images in enough instances to make the entire site download larger than 300KB.
Figure 7.26
Site that misuses graphics; the entire page download is larger than 300KB.
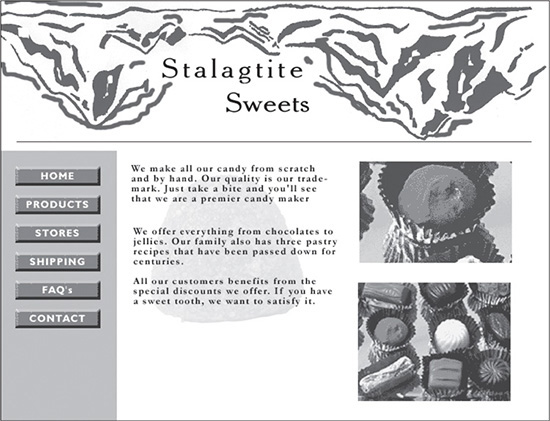
© 2014 Cengage Learning.
With today’s software and coding techniques, it is not always necessary, in most instances, to have a site come in at more than 50KB. Following are seven instances where a designer can compromise the quality of a site by incorrectly saving or compressing an image.
1. Saving an uncompressed image. This is the most common mistake made by designers. Just saving an image with the correct file format is not enough. The designer still needs to compress the image. Figure 7.27, for example, when saved at the absolute lowest JPG compression setting in Photoshop, comes in at 65KB, while saving it with the absolute highest compression, the file size is reduced to 5KB. This allows a lot of room for variation. While the quality would be severely compromised at 5KB, saving the image at 65KB, too, is a mistake. Most JPGs need only be saved with so much compression. After a certain quality has been met, decreasing the compression only creates a larger file size; it does not improve the quality of the image.
PNGs and GIFs, too, can be compressed many times. Because each color that is eliminated from a PNG or GIF during compression is replaced by another color, images that are saved as GIFs can be drastically reduced many times.
Figure 7.27
Photo after being compressed.
© 2014 Cengage Learning.
2. Photo saved as an 8-bit PNG or GIF. While this was more of an issue in years past, designers still save photos as GIFs. Figure 7.28 is a photo that, when saved as a GIF, is 54KB. If the image were saved as a JPG, a file size of 14KB would provide acceptable image quality.
Figure 7.28
Image that should be saved as a JPG rather than a GIF.
© 2014 Cengage Learning.
3. Solid colors saved as a JPG. The JPG format is ironic. Because it can compress millions of colors so easily, it is easy for a designer to believe it can do the same for limited colors. This is not the case. Figure 7.29 shows an image that was saved as a GIF.
Figure 7.29
Image saved as a GIF.
© 2014 Cengage Learning.
Figure 7.30 is the same image saved as a JPG. Following are three problems with the latter image:
![]() Although compressed nearly 80 percent, Figure 7.30 is still 4KB, as opposed to Figure 7.29, which is 2KB.
Although compressed nearly 80 percent, Figure 7.30 is still 4KB, as opposed to Figure 7.29, which is 2KB.
![]() The lines on the right in Figure 7.30 are completely splotchy, unlike the lines in Figure 7.29, which are crisp.
The lines on the right in Figure 7.30 are completely splotchy, unlike the lines in Figure 7.29, which are crisp.
![]() The level at which the JPG is compressed slightly changes the background color.
The level at which the JPG is compressed slightly changes the background color.
Figure 7.30
Image from Figure 7.29 saved as a JPG.

© 2014 Cengage Learning.
4. Mixing JPG, PNG, and GIF formats to maintain one color. When compressing an image as a JPG, the image sometimes loses its color accuracy. In other words, the colors do not always remain the same after being compressed. In Figure 7.31, a clock with a colored border was saved on a background with the same color as the border. The clock with the border was saved as a JPG, while the background was saved as a GIF.
Figure 7.31
Example of color loss between a GIF and a JPG.
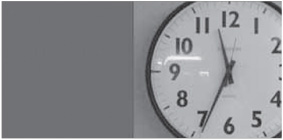
© 2014 Cengage Learning.
Taking a closer look at the seam where the two images were mortised together (Figure 7.32), it is apparent that the smoothness and clarity of the clock’s border becomes splotchy.
Figure 7.32
Zoomed-in view of splotchiness in Figure 7.31.
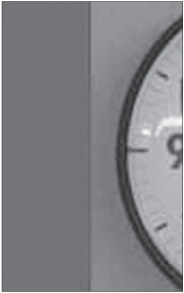
© 2014 Cengage Learning.
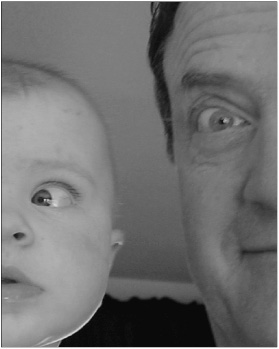
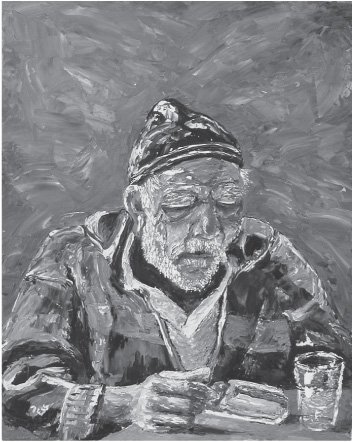
5. Overcompressing an image. While compressing an image is not overly complicated, obtaining an eye for it takes a little experimenting for some designers. What initially may look good to a designer one day, may look overly compressed the next. When a JPG is overly compressed (see Figure 7.33) from its original state (Figure 7.34), the image loses its crispness.
One of the first places to show degradation is in solid colors, such as people’s faces. All three faces and the lines on the floor in Figure 7.34 have lost their clarity.
Figure 7.33
Image saved as a JPG with proper compression.

© 2014 Cengage Learning.
Figure 7.34
Same image as Figure 7.33 saved as a JPG with too much compression.
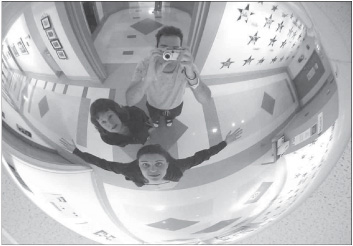
© 2014 Cengage Learning.
When a GIF is overly compressed, the image becomes pixilated in areas with more colors. Figure 7.35 is the original image, while Figure 7.36 is an overly compressed version.
Figure 7.35
Image saved as a GIF with the correct number of colors.

© 2014 Cengage Learning.
Notice how spotty the drop shadow within the inner white circle becomes in Figure 7.36.
Figure 7.36
Image saved as a GIF with too few colors.
© 2014 Cengage Learning.
6. Not saving images as PNGs, GIFs, or JPGs. As previously mentioned, the three main image file formats used with the Internet today are PNGs, GIFs, and JPGs. However, a Web page can also use BMP files, and the browser will display them. The header image of Figure 7.26 was saved as a BMP. It is 159KB, but if it had been saved as a GIF, it could have been saved at around 14KB.
Figure 7.37 is a photo saved as a JPG that is 4KB, while the same image saved as a BMP file (Figure 7.38) is 166KB. It is included more for historical purposes, since BMP files preceded the major waves of GIFs and then PNGs.
Figure 7.37
Image saved as a JPG (4KB).
© 2014 Cengage Learning.
Figure 7.38
Image saved as a BMP (166KB).
© 2014 Cengage Learning.
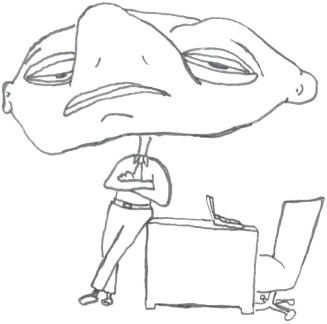
7. Saving large, animated GIFs. The GIF format is versatile in that a designer can not only create a regular GIF and a GIF with a transparent color, but he can also save a GIF that is animated. Unfortunately, just because a designer can save an animated GIF does not necessarily mean it should be done (Web design Rule 1).
Using an animated GIF can, at times, increase the usability of a site if the file is typically under 10KB. However, when animated GIFs are used to display several photos, a designer is not only incorrectly saving the photos as GIFs, but two, three, or four of them are being saved into one animated GIF, amplifying the mistake.
UNDERSTANDING GRAPHICS/COMPRESSION SOFTWARE
Prior to the considerable growth of the Internet in the early to mid-1990s, the goal of graphics software was to create high-quality images, such as TIF, BMP, and EPS files. The reason was that the graphics created by the programs were mainly used for printers. Unfortunately, this created a problem for Web designers. Because a minimum of 300dpi (dots per inch) to 600dpi was required by printers, designers had to try to compress images to work with monitors, which mostly show only 72dpi. Anything in excess of 72dpi for images used to increase the file size without improving the quality of the image. (While this is still the case for many existing monitors, the trend is slowly changing to allow for higher resolution images.)
Large images coupled with slow modems severely handcuffed designers because it was difficult to create fast-downloading sites. Although the software gave the designer the ability to compress images, opportunities were limited. To compress a GIF, the designer could assign only a certain bit depth to an image. In other words, the designer had the choice of saving the image with only 2, 4, 8, 16, 32, 64, 128, or 256 colors. To compress a JPG, the designer could assign compression in only increments of 10. In other words, the designer had the choice to save an image only at a level of 0, 1, 2, 3, 4, 5, 6, 7, 8, 9, or 10.
Fortunately, software companies have made great strides in offering designers more flexibility in compressing images. Today, not only have these companies created and improved their own image-compression software, but they also have included this functionality in their image editing programs.
Compressing images has never been more flexible. Now, instead of determining the compression of a PNG or GIF in groups of numbers, a designer can select the specific number of colors and even the specific colors themselves to include in an image. For even more control, the designer can even select certain colors that must remain in an image as the total number of colors is reduced. Figure 7.39 illustrates the compression component included with Photoshop. It not only shows a designer which colors are selected for the particular image, but it also allows the designer to compare the original version with the compressed version as changes are made.
Figure 7.39
Image-compression window in Photoshop.
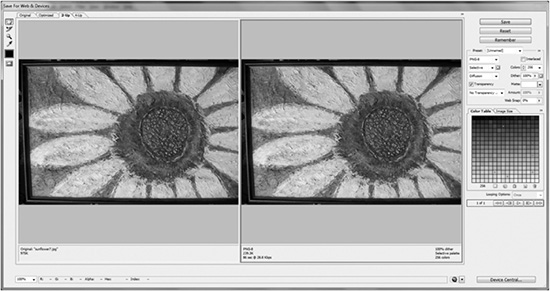
© 2014 Cengage Learning.
Compression Can Drastically Trim File Size
When choosing to compress an image with the JPG format, the designer now has the flexibility of increasing or decreasing compression by 1 percent instead of 10 percent at a time. This is incredibly useful because it allows the designer to take advantage of a unique characteristic of the JPG format. Sometimes when increasing the compression from, say, a quality level of 46 to 45, the quality of the image decreases. However, then when quality is dropped one more percent to 44, the image quality will shift enough to where it appears sharper than the lesser compression level of 45. This gives a designer the ability to trim the excess file size down to the bare-bones minimum.
SUMMARY
Much of the speed and quality of a site is determined by its graphics, which is why it is important for a designer to understand how to create, use, save, and compress images. While vector-based images are the newest technology available, traditional bitmap images, such as PNGs, GIFs, and JPGs, are the most widely and consistently supported.
PNGs, GIFs, and JPGs can do a good job of compressing images if the correct format is used. A designer can also use the formats incorrectly, which can compromise the quality of a site. If the designer understands how and when to use the formats along with compression software, sites can be highly graphical and yet fast at the same time.