Chapter 25. Undo
The ability to undo the most recent action is familiar from macOS. The idea is that, provided the user realizes soon enough that a mistake has been made, that mistake can be reversed. Typically, a Mac application will maintain an internal stack of undoable actions; choosing Edit → Undo or pressing Command-Z will reverse the action at the top of the stack, and will also make that action available for redo.
Some iOS apps may benefit from an undo facility. Certain built-in views — in particular, those that involve text entry, UITextField and UITextView (Chapter 10) — implement undo already. And you can add it in other areas of your app.
Undo is provided through an instance of UndoManager, which basically just maintains a stack of undoable actions, along with a secondary stack of redoable actions. The goal in general is to work with the UndoManager so as to handle both undo and redo in the standard manner: when the user chooses to undo the most recent action, the action at the top of the undo stack is popped off and reversed and is pushed onto the top of the redo stack.
In this chapter, I’ll illustrate an UndoManager for a simple app that has just one kind of undoable action. More complicated apps, obviously, will be more complicated! On the other hand, iOS apps, unlike macOS apps, do not generally need deep or pervasive undo functionality. For more about the UndoManager class and how to use it, read Apple’s Undo Architecture and the class documentation.
Tip
UIDocument (see Chapter 22) has an undo manager (its undoManager property), which appropriately updates the document’s “dirty” state for you automatically.
Undo Manager
In our artificially simple app, the user can drag a small square around the screen. We’ll start with an instance of a UIView subclass, MyView, to which has been attached a UIPanGestureRecognizer to make it draggable, as described in Chapter 5. The gesture recognizer’s action target is the MyView instance itself, and its action method is called dragging:
func dragging (_ p : UIPanGestureRecognizer) {
    switch p.state {
    case .began, .changed:
    let delta = p.translation(in:self.superview!)
        var c = self.center
        c.x += delta.x; c.y += delta.y
        self.center = c
        p.setTranslation(.zero, in: self.superview!)
    default:break
    }
}
Our goal is to make dragging of this view undoable. We will need an UndoManager instance. Let’s store this in a property of MyView itself, self.undoer:
let undoer = UndoManager()
Now we need to use the undo manager to register the drag action as undoable. I’ll show two ways of doing that.
Target–Action Undo
I’ll start with this UndoManager method:
-
registerUndo(withTarget:selector:object:)
This method uses a target–action architecture: you provide a target, a selector for a method that takes one parameter, and the object value to be passed as argument when the method is called. Then, later, if the UndoManager is sent the undo message, it simply sends that action to that target with that argument. The job of the action method is to undo whatever it is that needs undoing.
What we want to undo here is the setting of our center property — this line in the earlier code:
self.center = c
We need to express this as a method taking one parameter, so that the undo manager can call it (the selector:). So, in our dragging method, instead of setting self.center to c directly, we now call a secondary method:
var c = self.center
c.x += delta.x; c.y += delta.y
self.setCenterUndoably(c) // *
We have posited a method setCenterUndoably(_:). Now let’s write it. What should it do? At a minimum, it should do the job that setting self.center used to do. At the same time, we want the undo manager to be able to call this method. The undo manager doesn’t know the type of the parameter that it will be passing to us, so its object: parameter is typed as Any. Therefore, the parameter of this method also needs to be typed as Any:
func setCenterUndoably (_ newCenter:Any) {
    self.center = newCenter as! CGPoint
}
This works, in the sense that the view is draggable exactly as before; but we have not yet made this action undoable. To do so, we must ask ourselves what message the UndoManager would need to send in order to undo the action we are about to perform. We would want the UndoManager to set self.center back to the value it has now, before we change it as we are about to do. And what method would UndoManager call in order to do that? It would call setCenterUndoably(_:), the very method we are implementing:
func setCenterUndoably (_ newCenter:Any) {
    self.undoer.registerUndo(withTarget: self,
        selector: #selector(setCenterUndoably),
        object: self.center)
    self.center = newCenter as! CGPoint
}
That code has a remarkable effect: it makes our action not only undoable but also redoable! How can this be? Well, it turns out that UndoManager has an internal state, and responds differently to registerUndo(withTarget:selector:object:) depending on the state. If the UndoManager is sent registerUndo(withTarget:selector:object:) while it is undoing, it puts the target–action information on the redo stack instead of the undo stack (because redo is the undo of an undo, if you see what I mean).
Confused? Here’s how our code works to undo and then redo an action:
-
We set
self.centerby way ofsetCenterUndoably(_:), which callsregisterUndo(withTarget:selector:object:)with the old value ofself.center. The UndoManager adds this to its undo stack. -
Now suppose we want to undo that action. We send
undoto the UndoManager. -
The UndoManager calls
setCenterUndoably(_:)with the old value that we passed it in step 1. Thus, we are going to set the center back to that old value. But before we do that, we sendregisterUndo(withTarget:selector:object:)to the UndoManager with the current value ofself.center. The UndoManager knows that it is currently undoing, so it understands this registration as something to be added to its redo stack. -
Now suppose we want to redo that undo. We send
redoto the UndoManager, and sure enough, the UndoManager callssetCenterUndoably(_:)with the value that we previously undid. And, once again, we callregisterUndo(withTarget:selector:object:)with an action that goes onto the UndoManager’s undo stack.
Undo Grouping
So far, so good. But our implementation of undo is very annoying, because we are adding a single object to the undo stack every time dragging is called — and it is called many times during the course of a single drag! Thus, undoing merely undoes the tiny increment corresponding to one individual dragging call. What we’d like is for undoing to undo an entire dragging gesture. We can implement this through undo grouping. As the gesture begins, we start a group; when the gesture ends, we end the group:
func dragging (_ p : UIPanGestureRecognizer) {
    switch p.state {
    case .began:
        self.undoer.beginUndoGrouping() // *
        fallthrough
    case .began, .changed:
        let delta = p.translation(in:self.superview!)
        var c = self.center
        c.x += delta.x; c.y += delta.y
        self.setCenterUndoably(c)
        p.setTranslation(.zero, in: self.superview!)
    case .ended, .cancelled:
        self.undoer.endUndoGrouping() // *
    default:break
    }
}
This works: each complete gesture of dragging MyView, from the time the user’s finger contacts the view to the time it leaves, is now undoable (and redoable) as a single unit.
A further refinement would be to animate the “drag” that the UndoManager performs when it undoes or redoes a user drag gesture. To do so, we take advantage of the fact that we, too, can examine the UndoManager’s state by way of its isUndoing and isRedoing properties; we animate the center change when the UndoManager is “dragging,” but not when the user is dragging:
func setCenterUndoably (_ newCenter:Any) {
    self.undoer.registerUndo(withTarget: self,
        selector: #selector(setCenterUndoably),
        object: self.center)
    if self.undoer.isUndoing || self.undoer.isRedoing {
        UIView.animate(withDuration:0.4, delay: 0.1, animations: {
            self.center = newCenter as! CGPoint
        })
    } else { // just do it
        self.center = newCenter as! CGPoint
    }
}
Functional Undo
Starting in iOS 9, there’s a more modern way to register an action as undoable:
-
registerUndo(withTarget:handler:)
The handler: is a function that will take one parameter, namely whatever you pass as the target: argument, and will be called when undoing (or, if we register while undoing, when redoing). This gives us a far more idiomatic way to express registration of an action. In addition, setCenterUndoably(_:) no longer needs to take an Any as its parameter; it can take a CGPoint, because instead of asking Objective-C to call it for us, we are calling it directly:
func setCenterUndoably (_ newCenter:CGPoint) {
    let oldCenter = self.center
    self.undoer.registerUndo(withTarget: self) { myself in
        myself.setCenterUndoably(oldCenter)
    }
    if self.undoer.isUndoing || self.undoer.isRedoing {
        UIView.animate(withDuration:0.4, delay: 0.1, animations: {
            self.center = newCenter
        })
    } else { // just do it
        self.center = newCenter
    }
}
My handler: function refers to the parameter myself, rather than to self, even though these are the same object, so that I don’t accidentally capture self strongly in the closure; that is why I’ve arranged to be handed a reference to self as a parameter. The reason for setting the local variable oldCenter before calling registerUndo is to capture the value of self.center as it is now; if our handler: function were to call setCenterUndoably(myself.center), we’d be using the value that myself.center will have at undo time, and would thus be pointlessly setting the center to itself.
Our code works perfectly, but we can go further. So far, we are failing to take full advantage of the fact that we now have the ability to register with the undo manager a full-fledged function body rather than a mere function call. This means that the handler: function can contain everything that should happen when undoing, including the animation. But then why are we setting self.center here at all? We can do it back in the dragging gesture recognizer’s action method, just we were doing before we added undo to this app! And in that case, why do we need a separate undoable method? We still need a function that calls registerUndo with a call to itself, because that’s how we get redo registration during undo. But this can be a local function inside the dragging gesture recognizer action method.
Our dragging code can thus implement undo internally, giving us a much more legible and encapsulated architecture:
func dragging (_ p : UIPanGestureRecognizer) {
    switch p.state {
    case .began:
        self.undoer.beginUndoGrouping()
        fallthrough
    case .began, .changed:
        let delta = p.translation(in:self.superview!)
        var c = self.center
        c.x += delta.x; c.y += delta.y
        func registerForUndo() {
            let oldCenter = self.center
            self.undoer.registerUndo(withTarget: self) { myself in
                UIView.animate(withDuration:0.4, delay: 0.1, animations: {
                    myself.center = oldCenter
                })
                registerForUndo()
            }
        }
        registerForUndo() // *
        self.center = c // *
        p.setTranslation(.zero, in: self.superview!)
    case .ended, .cancelled:
        self.undoer.endUndoGrouping()
    default: break
    }
}
Undo Interface
We must also decide how to let the user request undo and redo. While I was developing the code from the preceding section, I used two buttons: an Undo button that sent undo to the UndoManager, and a Redo button that sent redo to the UndoManager. This can be a perfectly reasonable interface, but let’s talk about some others.
Shake-To-Edit
By default, your app supports shake-to-edit. This means that the user can shake the device to bring up an undo/redo interface. We discussed this briefly in Chapter 21. If you don’t turn off this feature by setting the shared UIApplication’s applicationSupportsShakeToEdit property to false, then when the user shakes the device, the runtime walks up the responder chain, starting with the first responder, looking for a responder whose inherited undoManager property returns an actual UndoManager instance. If it finds one, it puts up an undo/redo interface, allowing the user to communicate with that UndoManager.
You will recall what it takes for a UIResponder to be first responder in this sense: it must return true from canBecomeFirstResponder, and it must actually be made first responder through a call to becomeFirstResponder. Let’s make MyView satisfy these requirements. For example, we might call becomeFirstResponder at the end of dragging, like this:
override var canBecomeFirstResponder : Bool {
    return true
}
func dragging (_ p : UIPanGestureRecognizer) {
    switch p.state {
    // ... the rest as before ...
    case .ended, .cancelled:
        self.undoer.endUndoGrouping()
        self.becomeFirstResponder()
    default: break
    }
}
Then, to make shake-to-edit work, we have only to provide a getter for the undoManager property that returns our undo manager, self.undoer:
let undoer = UndoManager()
override var undoManager : UndoManager? {
    return self.undoer
}
This works: shaking the device now brings up the undo/redo interface, and its buttons work correctly. However, I don’t like the way the buttons are labeled; they just say Undo and Redo. To make this interface more expressive, we should provide a string describing each undoable action by calling setActionName(_:); we can do this at the same time that we register our undo action:
self.undoer.setActionName("Move")
Now the undo/redo interface has more informative labels, as shown in Figure 25-1.
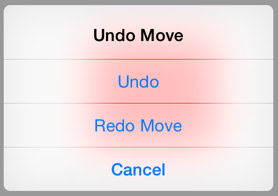
Figure 25-1. The shake-to-edit undo/redo interface
Undo Menu
Another possible interface is through a menu (Figure 25-2). Personally, I prefer this approach, as I am not fond of shake-to-edit (it seems both violent and unreliable). This is the same menu used by a UITextField or UITextView for displaying the Copy and Paste menu items (Chapter 10). The requirements for summoning this menu are effectively the same as those for shake-to-edit: we need a responder chain with a first responder at the bottom of it. So the code we’ve just supplied for making MyView first responder remains applicable.

Figure 25-2. The shared menu as an undo/redo interface
Let’s make a menu appear in response to a long press on our MyView instance. We’ll attach another gesture recognizer to MyView. This will be a UILongPressGestureRecognizer, whose action method is called longPress. Recall from Chapter 10 how to implement the menu: we get the singleton global UIMenuController object and specify an array of custom UIMenuItems as its menuItems property. We can make the menu appear by sending the UIMenuController the setMenuVisible(_:animated:) message. But a particular menu item will appear in the menu only if we also return true from canPerformAction(_:withSender:) for that menu item’s action. Delightfully, the UndoManager’s canUndo and canRedo properties tell us what value canPerformAction(_:withSender:) should return. We can also get the titles for our custom menu items from the UndoManager itself, through its undoMenuItemTitle and redoMenuItemTitle properties:
func longPress (_ g : UIGestureRecognizer) {
    if g.state == .began {
        let m = UIMenuController.shared
        m.setTargetRect(self.bounds, in: self)
        let mi1 = UIMenuItem(title: self.undoer.undoMenuItemTitle,
            action: #selector(undo))
        let mi2 = UIMenuItem(title: self.undoer.redoMenuItemTitle,
            action: #selector(redo))
        m.menuItems = [mi1, mi2]
        m.setMenuVisible(true, animated:true)
    }
}
override func canPerformAction(_ action: Selector,
    withSender sender: Any?) -> Bool {
        if action == #selector(undo) {
            return self.undoer.canUndo
        }
        if action == #selector(redo) {
            return self.undoer.canRedo
        }
        return super.canPerformAction(action, withSender: sender)
}
func undo(_: Any?) {
    self.undoer.undo()
}
func redo(_: Any?) {
    self.undoer.redo()
}