Firebase is considered a Backend as a Service, which is now part of the Google Cloud Platform while it’s still serving as an independent entity. It offers different services such as hosting, real-time databases, and cloud functions.
In this chapter, I am going to show you how we can deploy our app to Firebase. It’s important to mention that Firebase is not the only option. However, since it’s easy to set up and deploy, I encourage you to use Firebase as our host server.
Additionally, we may need to write a bit of back-end logic for our application; therefore, Firebase Function is one of the best choices, in order to leverage serverless architecture and reduce our concerns regarding a back-end system, while the front end will remain our main focus.
Last but not least, to persist our data, we will use Firebase Firestore, which gives us the best passivity to store and retrieve our data as quickly and possible with built-in JSON access to each collection and document where needed.
Setting Up Your Account
Let’s get started by opening firebase.google.com. Sign in with your Gmail credentials, but if you don’t have any, please continue by first registering a Google account.
After you have signed in, continue and hit “GO TO CONSOLE.” You will be redirected to your console where you can see your projects.
Creating a Project
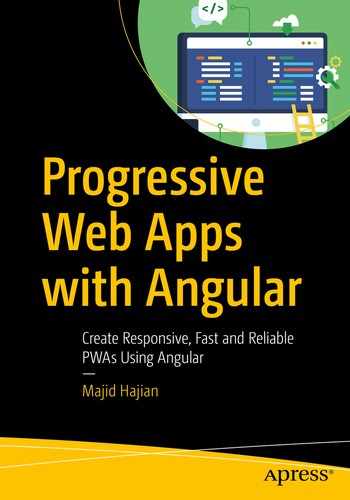
Now it’s time to add your project; simply click Add project, as shown in Figure 2-1.
Figure 2-1
Firebase console, where you should hit Add Project to create a new project
You should see a new view where it is going to ask you about your project details such as your project name. Awesome-Apress-PWA is what I have chosen to name my project.
You may need to change your organization or Cloud Firestore location; however, the default setting should be enough to get started. Keep in mind that if you change the Cloud Firestore location, you will not be able to alter it until your project is created.
I will leave “Use the default settings for sharing Google Analytics for Firebase data” and “Terms and Condition” checked. Now, it’s time to hit Create project button, as shown in Figure 2-2.
Figure 2-2
Firebase project detail modal
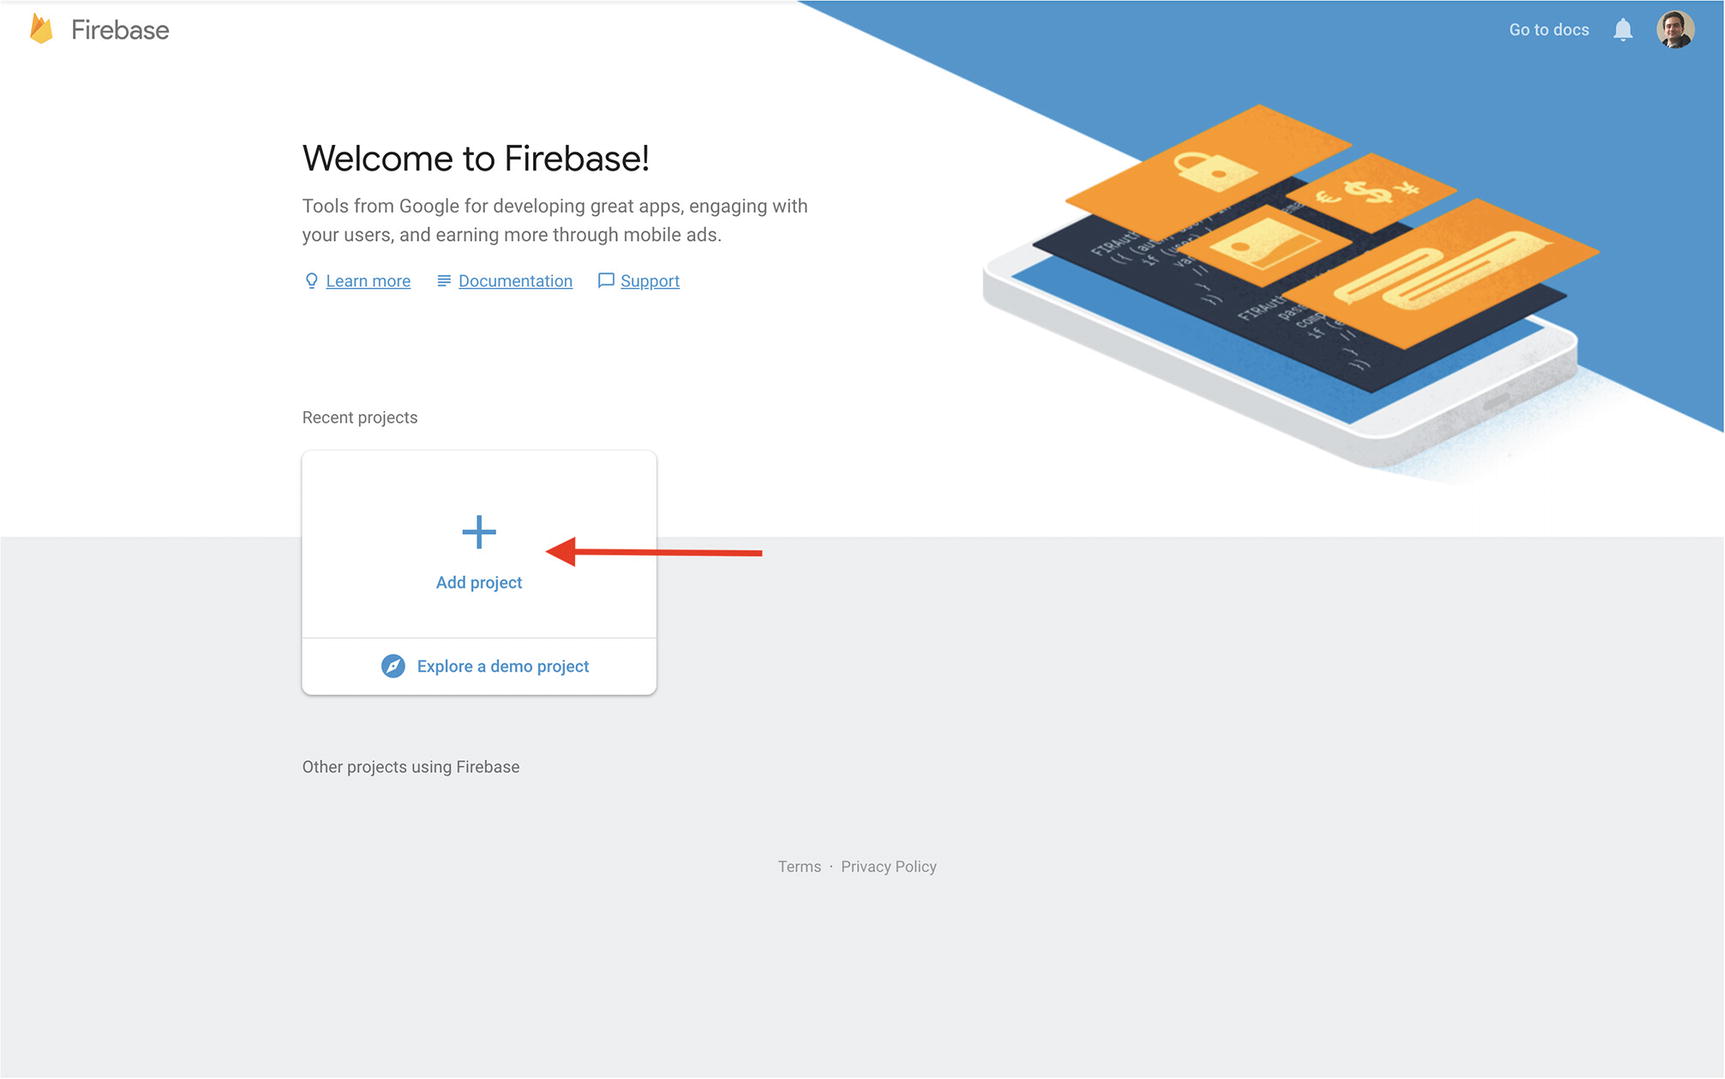
It may take several seconds before your project gets ready. As soon as the project is ready, you can continue to your project’s dashboard (see Figure 2-3).
Figure 2-3
After several seconds, the project is ready, so simply click on the “Continue” button to be redirected to the dashboard
Deploying to Firebase
We have chosen Firebase as it’s easy to work with for our project, and you’ll see in a minute how painless deployment is with Firebase CLI (Command-Line Interface).
Generating a New Angular App
Before we start, we need to generate a new Angular app using Angular CLI (Command-Line Interface). If you don’t have @angular/cli installed globally on your machine, you should run the following command first:
$ npm install -g @angular/cli
To generate a new Angular app with routing and scss set up, we can run:
$ ng new lovely-offline --routing --style=scss
Name of project enable routing styling with scss
After installing all NPM dependencies, you will have your app ready for building and then deploying.
The build is a success, and now it’s time to deploy our app to Firebase. Let’s install Firebase CLI.
$ npm install -g firebase-tools
Now the firebase command is available globally in our command line. Before we can deploy, we need to make sure we have enough privileges; thus, we should now log in to Firebase to set our credentials, so simply run:
$ firebase login
A questionnaire appears like that below:
Allow Firebase to collect anonymous CLI usage and error reporting information? (Y/n) Y
Visit this URL on any device to log in:
https://accounts.google.com/o/oauth2/........
Waiting for authentication...
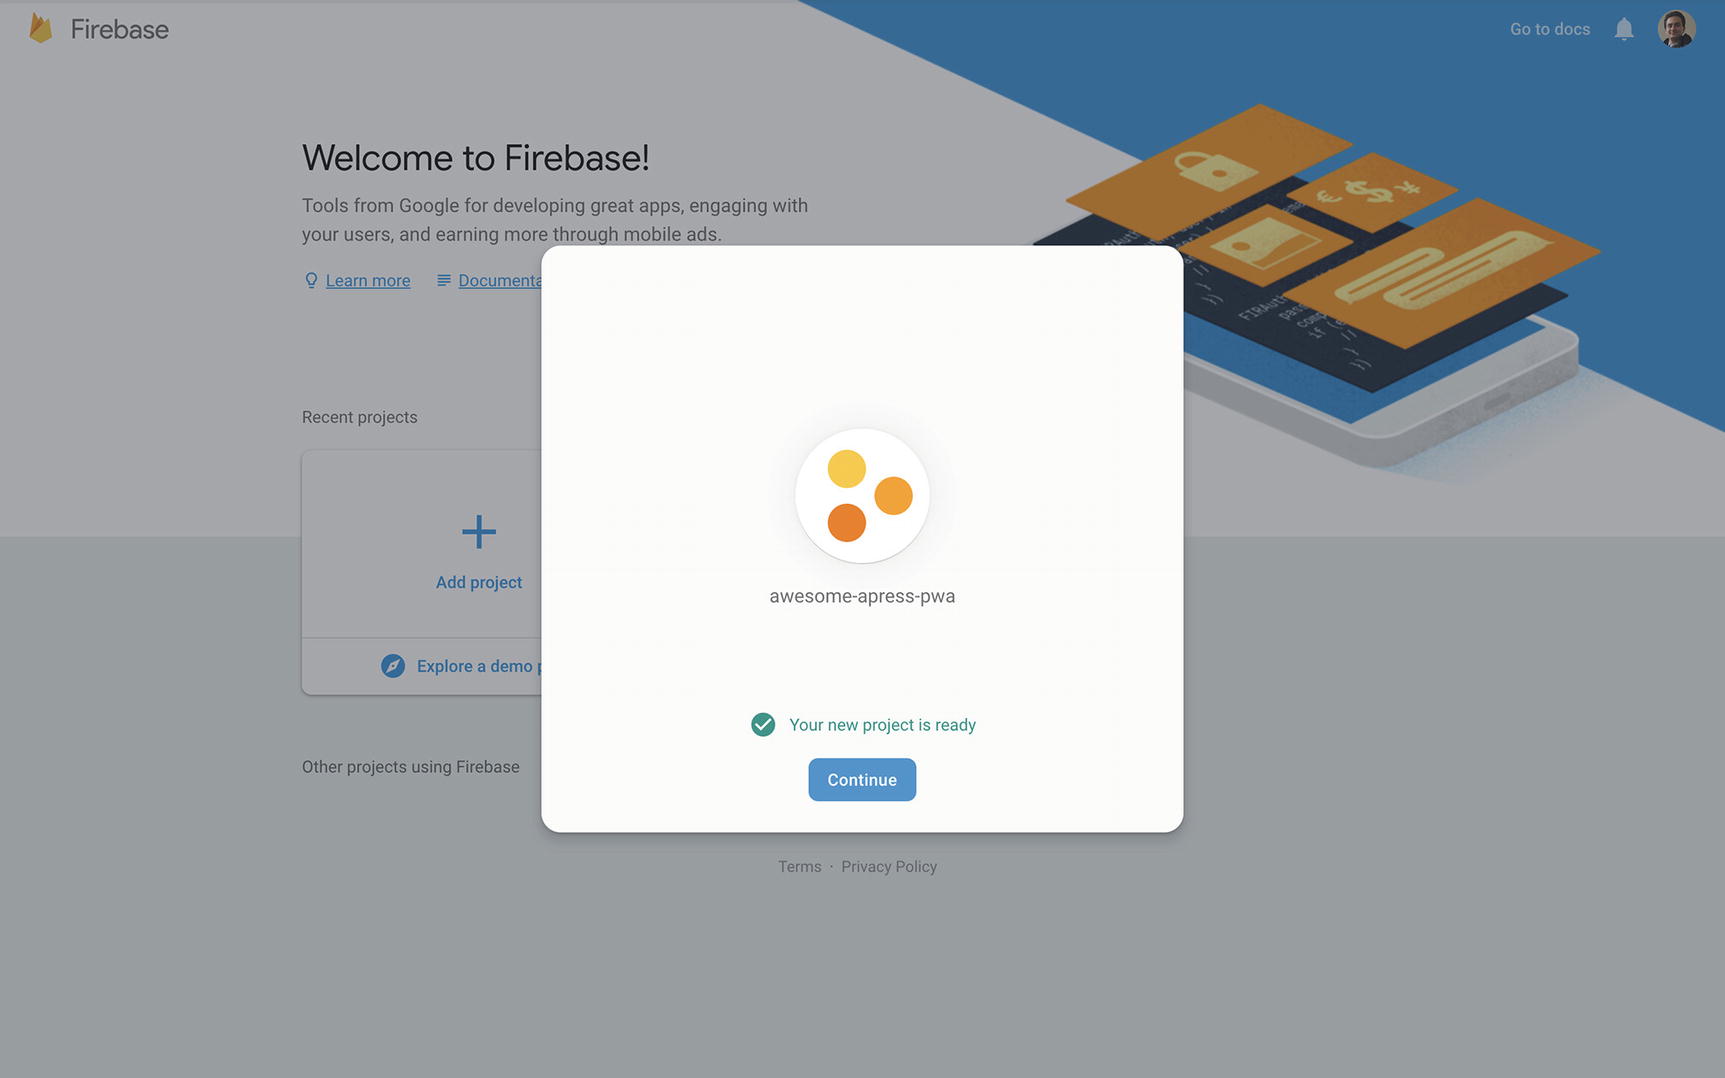
As soon as you see Authentication URL, you will be redirected to a browser in order to sign in to your Google account. Then, you should grant enough permission to Firebase CLI by clicking Allow access, as shown in Figure 2-4.
Figure 2-4
Click Allow to give Firebase CLI permission to access your account
As quickly as permission is given, you should see a success message in your browser, as shown in Figure 2-5.
Figure 2-5
Success message in your browser after giving permission to Firebase CLI
You will also see a success message as seen below in your terminal, which means that Firebase CLI now has enough access to your Firebase projects.
The next step is to initialize your Firebase project. This will link your local Angular app to the Firebase application that we just created. To do this, make sure you are in the root of the project and run:
$ firebase init
Once you hit the command above, Firebase CLI asks you a few questions, appearing in your terminal, in order to scaffold your Firebase project and create necessary requirements that are essential to deploy our application to Firebase. Let’s review each question step by step.
Features Selection
The first question, as shown below, is about which Firebase features we would like to use:
Which Firebase CLI features do you want to set up for this folder? Press Space to select features, then Enter to confirm your choices.
> ◉ Firestore: Deploy rules and create indexes for Firestore
◉ Functions: Configure and deploy Cloud Functions
◉ Hosting: Configure and deploy Firebase Hosting sites
◯ Storage: Deploy Cloud Storage security rules
Firebase Realtime Database1 and Firestore2 are two NoSQL databases services to store and sync data for client- and server-side development. Cloud functions for Firebase lets you automatically run back-end code in response to events triggered by Firebase features and HTTPS requests. Your code is stored in Google’s cloud and runs in a managed environment. Firebase Hosting provides fast and secure hosting for your web app, static and dynamic content, and microservices. Cloud storage is built for app developers who need to store and serve user-generated content, such as photos or videos.
I will select Firestore, Functions, and Hosting features for this project as I am going to use them throughout this book. Once you have selected what is needed, press enter to go to the next step.
Project Selection
The second question, as shown below, shows your projects in Firebase, and since we have created one project, I will select that one and continue by pressing enter. Note that you can also create a project in this step, too.
Select a default Firebase project for this directory: (Use arrow keys)
[don't set up a default project]
> awesome-apress-pwa (awesome-apress-pwa)
[create a new project]
Database Setup
Firebase Firestore is a scalable and flexible NoSQL3 real-time database to store and sync data for a client- or server-side app development. This database keeps our data in sync across multiple client apps and offers offline capabilities. Data in Firestore saves documents that contain fields mapping to values. Collections are containers of documents that allow us to not only organize our data but also to build queries.
Since we have selected Firestore service already in the step features selection step, the third question, as shown below, is about a database rules file to write all rules regarding our project database. I continue with the default name, which is database.rules.json:
What file should be used for Database Rules? (database.rules.json)
Functions Setup
Cloud functions in Firebase let us run back-end code over HTTPS requests without having an actual server to maintain and manage and store our code in Google’s cloud-managed environment. In order to achieve serverless4 architecture in our app, we are going to use Functions to write and run our essential back-end code.
Since we have selected to use the Firebase Functions feature already in the feature selection step, the fourth question, as shown below, asks to choose our desired language to write Functions.
What language would you like to use to write Cloud Functions? (Use arrow keys)
> JavaScript
TypeScript
JavaScript is my choice now as we are not going to have a lot of functions in this book; therefore, I kept it simple. Feel free to continue with TypeScript if this is what you like.
Followed by the language of choice, Firebase CLI offers to set up a linting tool to help us find possible bugs and styling issues in the next question, as shown below. If you like to enforce styling and catch possible bugs in your cloud functions, continue with Y.
Do you want to use ESLint to catch probable bugs and enforce style? (Y/N) y
Final Setup
I will continue for the last three questions in order to complete my project initialization.
If you like to install dependencies now, enter Y in the next question.
Do you want to install dependencies with npm now? (Y/n)
In the next step, we need to define where our ready-to-deploy app is located. By default, in Angular it’s dist directory; thus, I also enter dist to set my public directory. So, I will continue to answer the question as shown below:
What do you want to use as your public directory? (public) dist
Finally, our application is going to have a routing system in the front end, which means we are going to create a single-page application. Therefore, when Firebase CLI is questioned about rewriting all URLs to index.html, we should answer Y to make sure our front end is handling routes individually, regardless of our server routing.
Although we are moving forward with a single-page application, it’s definitely not required for creating a PWA. Notice that in this book, we will make a single-page PWA by Angular. Let’s continue the final question with Y as shown below:
Configure as a single-page app (rewrite all urls to /index.html)? (y/N) y
Initializing our app with Firebase CLI has been completed! Our app structure will look like the following tree after initialization.
.
├── README.md
├── angular.json
├── database.rules.json -> firebase databse rules
├── dist
├── e2e
├── firebase.json -> firebase configs
├── functions-> firebase cloud funtions directory
│ ├── index.js
│ ├── node_modules
│ ├── package-lock.json
│ └── package.json
├── node_modules
├── package-lock.json
├── package.json
├── src
│ ├── app
│ ├── assets
│ ├── browserslist
│ ├── environments
│ ├── favicon.ico
│ ├── index.html
│ ├── karma.conf.js
│ ├── main.ts
│ ├── polyfills.ts
│ ├── styles.scss
│ ├── test.ts
│ ├── tsconfig.app.json
│ ├── tsconfig.spec.json
│ └── tslint.json
├── tsconfig.json
└── tslint.json
Adjustment in Angular Project Settings
Before we can deploy our app, we need to apply a minor change to our Angular setting located in Angular.json. Angular CLI is capable of building multiple apps, and each app could simply be placed in a dist folder. However, we want to deal with only one app at the moment, and we need to build it in the dist folder where Firebase will find and deploy it. Therefore, we should change from
By removing our app name from outputPath, we enforce Angular CLI to build and place all files in the dist folder instead. Now it’s time to finally deploy our app to Firebase.
Deploying Our App
While we are in the root of the project directory, we can simply run the following command:
$ firebase deploy
Deployment starts…
> firebase deploy
=== Deploying to 'awesome-apress-pwa'...
i deploying database, functions, hosting
Running command: npm --prefix "$RESOURCE_DIR" run lint
> functions@ lint ~/awesome-apress-pwa/functions
> eslint .
✓ functions: Finished running predeploy script.
i database: checking rules syntax...
✓ database: rules syntax for database awesome-apress-pwa is valid
i functions: ensuring necessary APIs are enabled...
✓ functions: all necessary APIs are enabled
i functions: preparing functions directory for uploading...
i hosting[awesome-apress-pwa]: beginning deploy...
i hosting[awesome-apress-pwa]: found 14 files in dist
AngularFire2 is an official library for Angular to support Firebase functionalities. It is powered by observable, real-time bindings, authentication, and offline data support. I strongly recommend implementing this library in order to make it way easier for our development process to deal with Firebase.
To install, run the following command:
$ npm install firebase @angular/fire –-save
To add a Firebase configuration, open the /src/environment/environment.tsfile, and add the following setup:
export const environment = {
production: false,
firebase: {
apiKey: '<your-key>',
authDomain: '<your-project-authdomain>',
databaseURL: '<your-database-URL>',
projectId: '<your-project-id>',
storageBucket: '<your-storage-bucket>',
messagingSenderId: '<your-messaging-sender-id>'
}
};
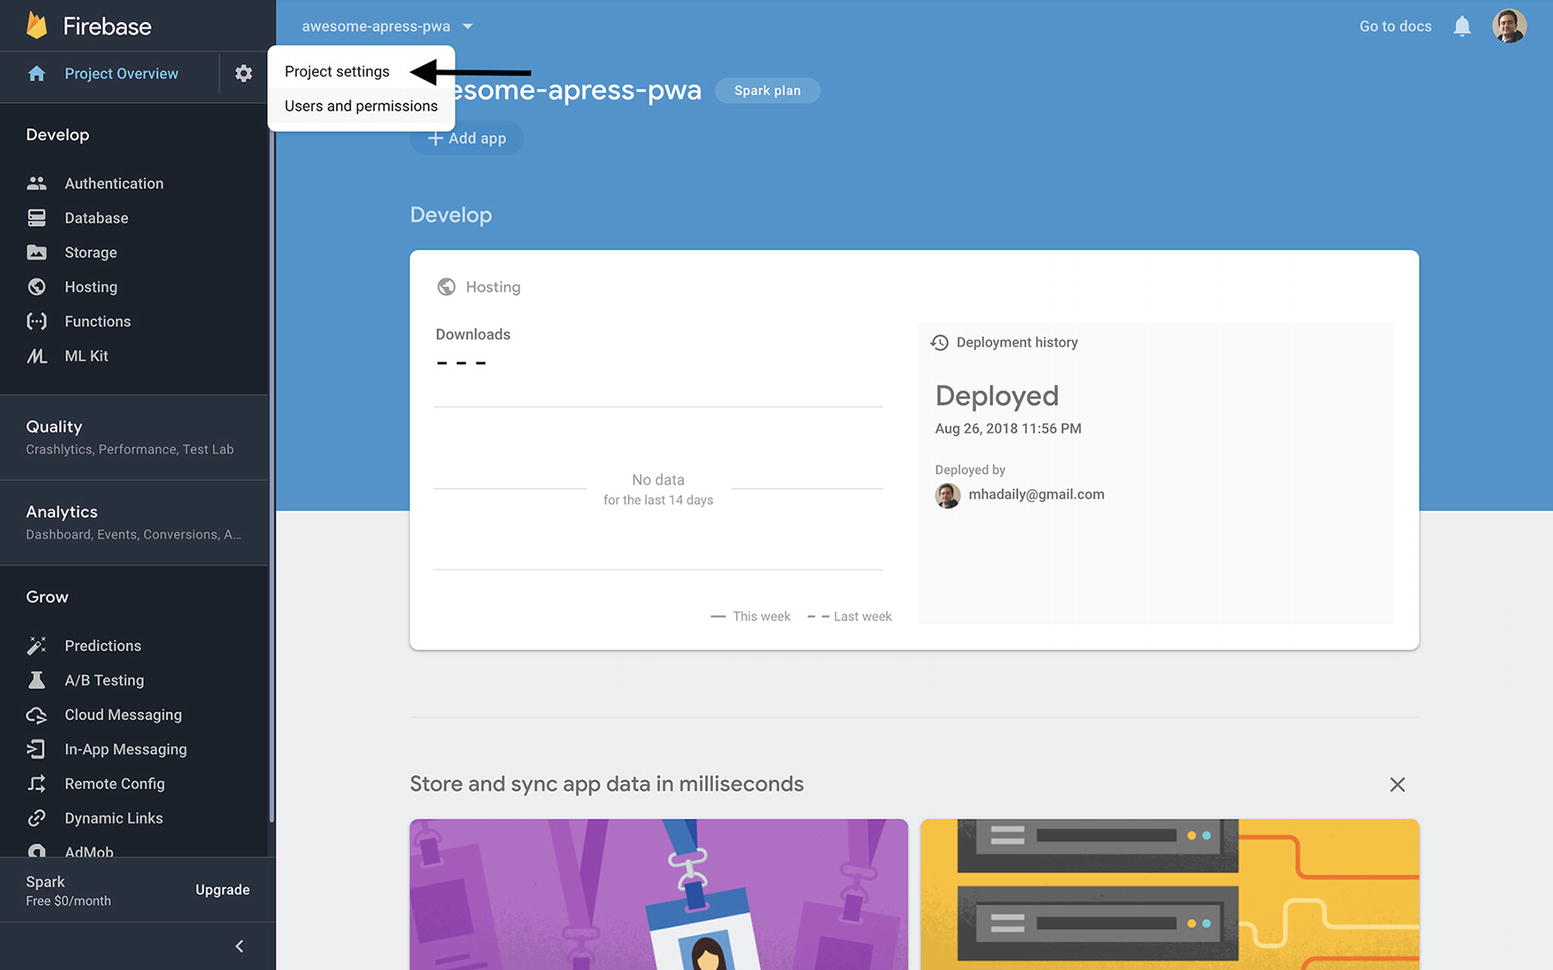
To find your app configuration, open the Firebase console and from the project overview page, click gear icon and click project settings, as shown in Figure 2-6.
Figure 2-6
Click the gear icon to see the project setting menu
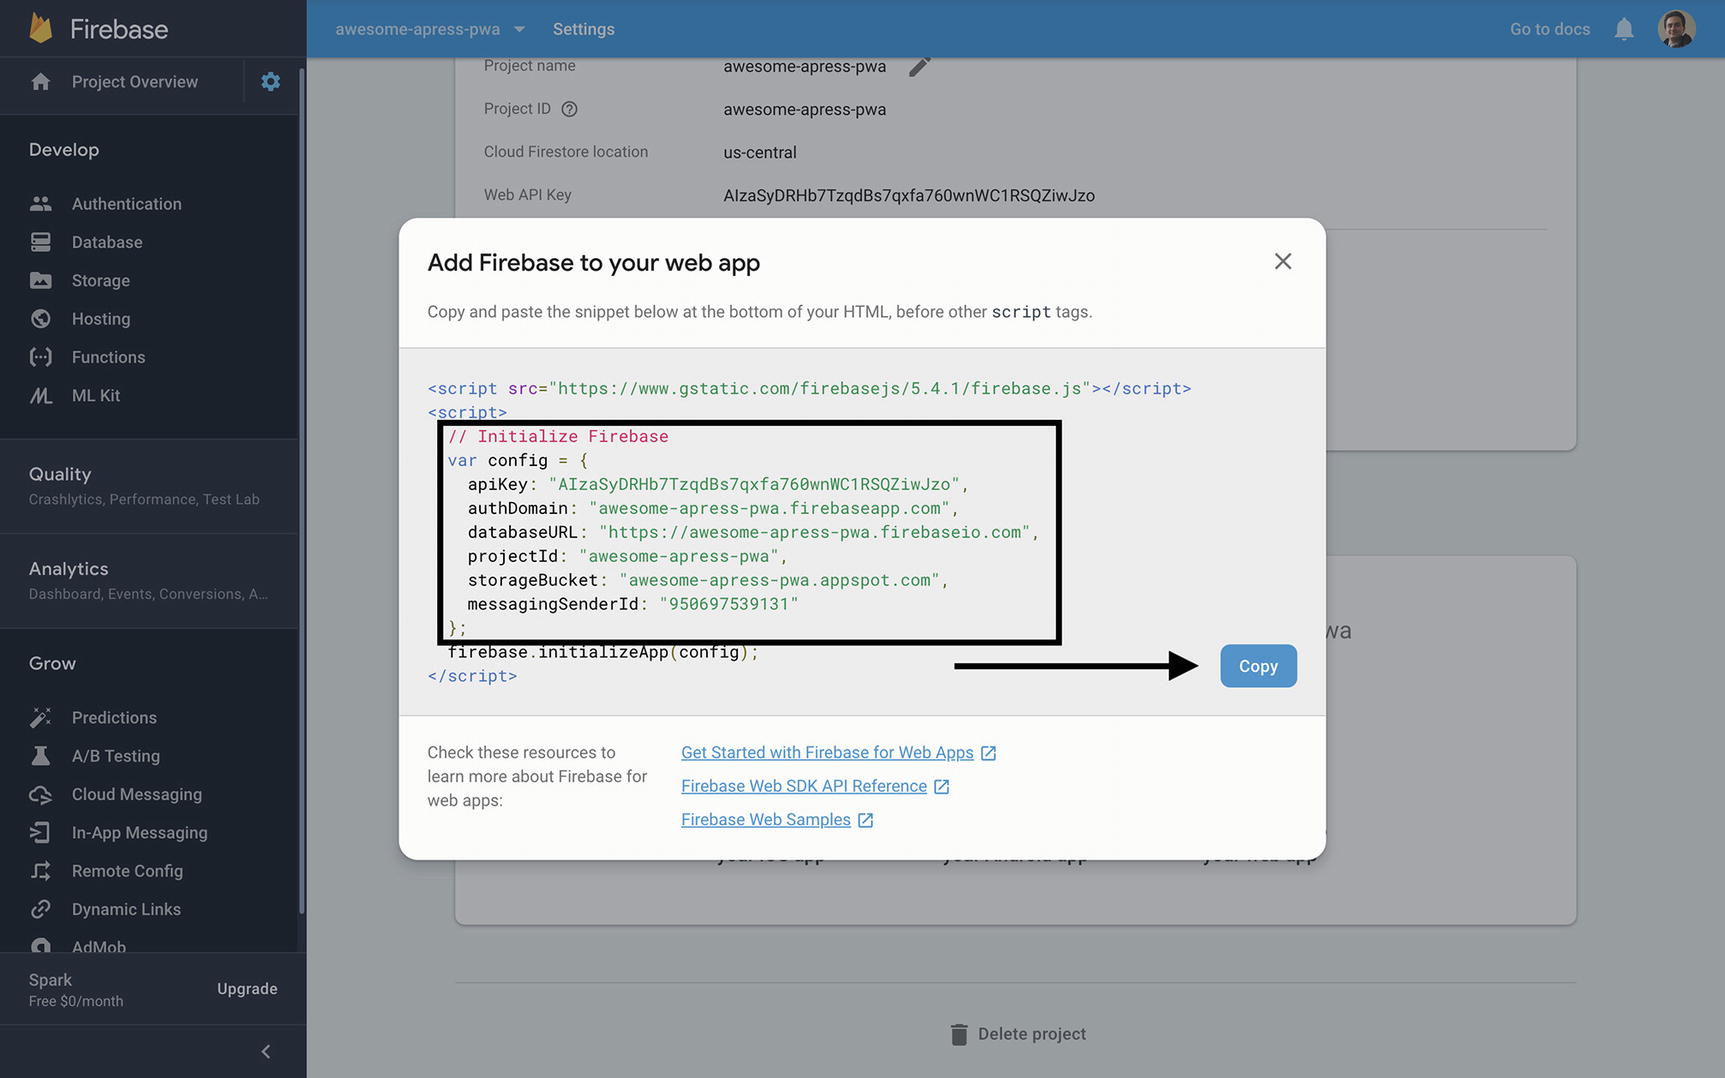
From the project setting view, find Add Firebase to your web app (see Figure 2-7).
Figure 2-7
Click Add Firebase to your app button to see project settings
Replace the project setting in environment.ts. (see Figure 2-8).
Figure 2-8
Copy your project setting to replace in environment.ts
Navigate to /src/app/app.module.ts and inject the Firebase provider. Injector makes sure that your Firebase configuration is specified correctly in the app.
import { BrowserModule } from '@angular/platform-browser';
import { NgModule } from '@angular/core';
import { AngularFireModule } from 'angularfire2';
import { AppRoutingModule } from './app-routing.module';
import { AppComponent } from './app.component';
import { environment } from '../environments/environment';
AngularFire is a modular package to support different Firebase features. AngularFirestoreModule, AngularFireAuthModule, AngularFireDatabaseModule, and AngularFireStorageModule are available individually to be added to @NgModules. For instance, in this app, we would add AngularFireStoreModule and AngularFireAuthModule, respectively, to get support for database and authentication features.
import { BrowserModule } from '@angular/platform-browser';
import { NgModule } from '@angular/core';
import { AngularFireModule } from 'angularfire2';
import { AngularFirestoreModule } from 'angularfire2/firestore';
import { AngularFireAuthModule } from 'angularfire2/auth';
import { AppRoutingModule } from './app-routing.module';
import { AppComponent } from './app.component';
import { environment } from '../environments/environment';
AngularFirestoreModule, // needed for database features
AngularFireAuthModule, // needed for auth features,
],
providers: [],
bootstrap: [AppComponent]
})
export class AppModule { }
Great, AngularFirestore provider is now available in order to get access to Firebase database collections to modify/delete or perform more actions. For example, open /src/app/app.component.ts and inject AngularFirestore.
import { Component } from '@angular/core';
import { AngularFirestore } from 'angularfire2/firestore';
@Component({
selector: 'app-root',
templateUrl: './app.component.html',
styleUrls: ['./app.component.scss']
})
export class AppComponent {
title = 'lovely-offline';
constructor(db: AngularFirestore) {
}
}
The nest step is to bind a particular Firestore collection. As an example, in the future, we will create a collection named notes. The following code demonstrates how we can get access to all data and show it in our view while it’s an observable.
import { Component } from '@angular/core';
import { AngularFirestore } from 'angularfire2/firestore';
import { Observable } from 'rxjs';
@Component({
selector: 'app-root',
template: `
<h1>Bind Firestore collection example</h1>
<ul>
<li class="text" *ngFor="let note of notes$ | async">
This chapter unfolds an easy way to deploy our Angular app to Firebase and introduced services such as Firestore Cloud functions to manage and run our back-end code. Even though we didn’t deep dive into each feature, it was enough to start and make the app live.
AngularFire2 is the official Angular library for Firebase, which has been set up in our app, and it was explained how to inject it in our component in order to get access to Firestore and other Firebase features later in the next chapters.
Now that we have prepared deployment requirements, we are ready to move on to the next chapter and create our app skeleton and make it ready to start building a PWA.