Up until this point in the book, we have focused on the core feature of Progressive Web App (PWA), Service Worker. It enables us to cache our static assets as well as dynamic content. The app will continue to work offline, which is especially important on mobile devices. However, an app’s “look and feel” is another important factor that enhances the user experience to truly delight users.
In this chapter, we focus on visual appeal and a few different ways that can help boost engagement on the app. We explore features such as Add to Home Screen and customization, which prompts a user to add the web to their device home screen.
The Web App Manifest
The Web App Manifest is a JSON text file following Web App Manifest specification that provides information about an application such as its name, author, icons, and description. But more importantly, this file enables an application to be installed by a user on their device and allows us to modify the theme, URL that should be opened, splash screen, icons on home page, and more.
Most of the properties are self-explanatory, but I will try to provide descriptive definitions. Each property in a manifest file has a role and tells the browser information regarding our app’s look and feel. Although default manifest.json added by Angular CLI should be fine for most use cases, there are more properties that we can add to better enhance the user experience depending our needs and requirements.
name:
a readable name for the app displayed to user or as a label for an icon.
short_name:
short name that replaces name if that doesn’t fit due to insufficient space.
theme_color:
defines the default theme color for the application to tint OS or browser-related UIs: for example, browser’s toolbar or Android’s task switcher. HEX code or color’s name can be used.
background_color:
defines the expected background color for the app even before user agent loads website style sheets. Usually, there is a short gap between launching the web application and loading the site’s content. This creates a smooth transition to fill the delay. You can use color HEX code or standard color’s name. Note that this background will not be used by the user agent after the style sheet is available.
display:
preferred display mode for the website. Four options are available as per spec, but it may not be available in all browsers:
fullscreen: All of the available display is used. if not supported, falls back to standalone mode.
standalone: most browser elements are hidden. Feels like a standalone application. In this mode, the user agent will exclude UI elements for controlling navigation but can include other UI elements such as a status bar. If not supported, falls backs to minimal-ui mode.
minimal-ui: this application looks like a standalone app; however, essential UIs of the browser are still visible such as navigation buttons. It not supported, fall backs to browser mode.
browser: just conventional browser tab or new window.
It’s interesting to know what there is a feature in CSS where you can detect display-mode. See code below:@media all and (display-mode: minimal-ui) {/* ... */}@media all and (display-mode: standalone) {/* ... */}scope:
more or less similar to service worker scope that defines the navigation scope of this website’s context. If a page is outside of this scope, it retunes to a normal web page inside a browser tab/window. In case of relative URL, the base URL will be the URL of the manifest. If omitted, default is everything under the manifest directory and all subdirectories.
start_url:
the URL that loads when a user launches the application. It can be different from the main page, for example, if you want your PWA users to go directly to login page or signup page instead of home page. For analytical purposes, start_url can be crafted to indicate that the application was launched from the outside of the browser, which can be translated to PWA. That is: "start_url": "/?launcher=homescreen"
icons:
an array of image files that specifics the app icons depending on the context. Each image has three properties:
src: path to the image file; in case of relative URL, the base URL will be the URL of the manifest.
sizes: specifies an icon size (even multiple sizes that are containing space-separate image dimensions). There are a variety of different screen sizes that we should support; the more dimensions we include, the better result we will get regarding the quality of icons.
type: the media type1 of image; if the user agent doesn’t support this type, they can quickly ignore it.
prefer_related_applications:
this asks the browser to indicate to the user a specified native application in which are recommended in the next property, over the PWA. Although it may sound silly, sometimes it happens that we have a very specific native feature that doesn’t exist on the web, so we want our user to use a native app instead. If omitted, the default value is false.
related_applications:
recommended native applications that are installable or accessible from underlying platform store. For example, link to an Android app from Google Play Store. The objects may contain platform, url, and id.{"platform": "play","url": "https://play.google.com/store/apps/details?id=com.example.app1","id": "com.example.app1"}, {"platform": "itunes","url": "https://itunes.apple.com/app/example-app1/id123456789"}orientation:
sets the app work on default orientation. Orientation may be one of the following values:any, natural, landscape, landscape-primary, landscape-secondaryportrait, portrait-primary, portrait-secondarydir:
specifies the primary text direction for the name, short_name, and description. There are two values: ltr, auto, and rtl. When the value is omitted, default is auto.
lang:
together with dir, it specifies correct display language. Default is en-US.2
description:
a general description of what the website does.
serviceWorker:
this member represents an intended service worker registration in form of a registration object."serviceworker": {"src": "sw.js","scope": "/foo","update_via_cache": "none"}
categories:
specifies an array of strings of the expected application categories to which the web application belongs, written in lowercase.
screenshots:
array of image resources that represent the web application in common usage scenarios. This might not work yet in any browser or platform.
iarc_rating_id:
represents the International Age Rating Coalition (IARC)3 certification code of the web application.
Debugging Web App Manifest
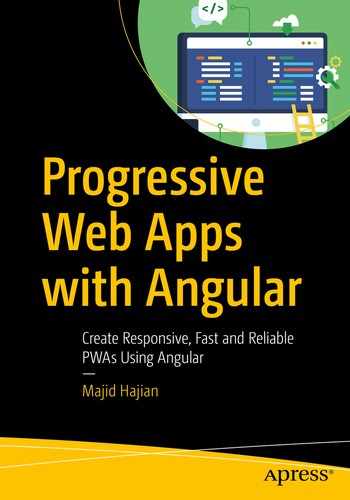
Now that I have covered the Web App Manifest and referenced the index HTML page, we should be able to run an application and then navigate to the app in the Chrome. In DevTools, go to Application tab and click on manifest option on the left side, right above Service Workers (see Figure 6-1).
App manifest details in DevTools
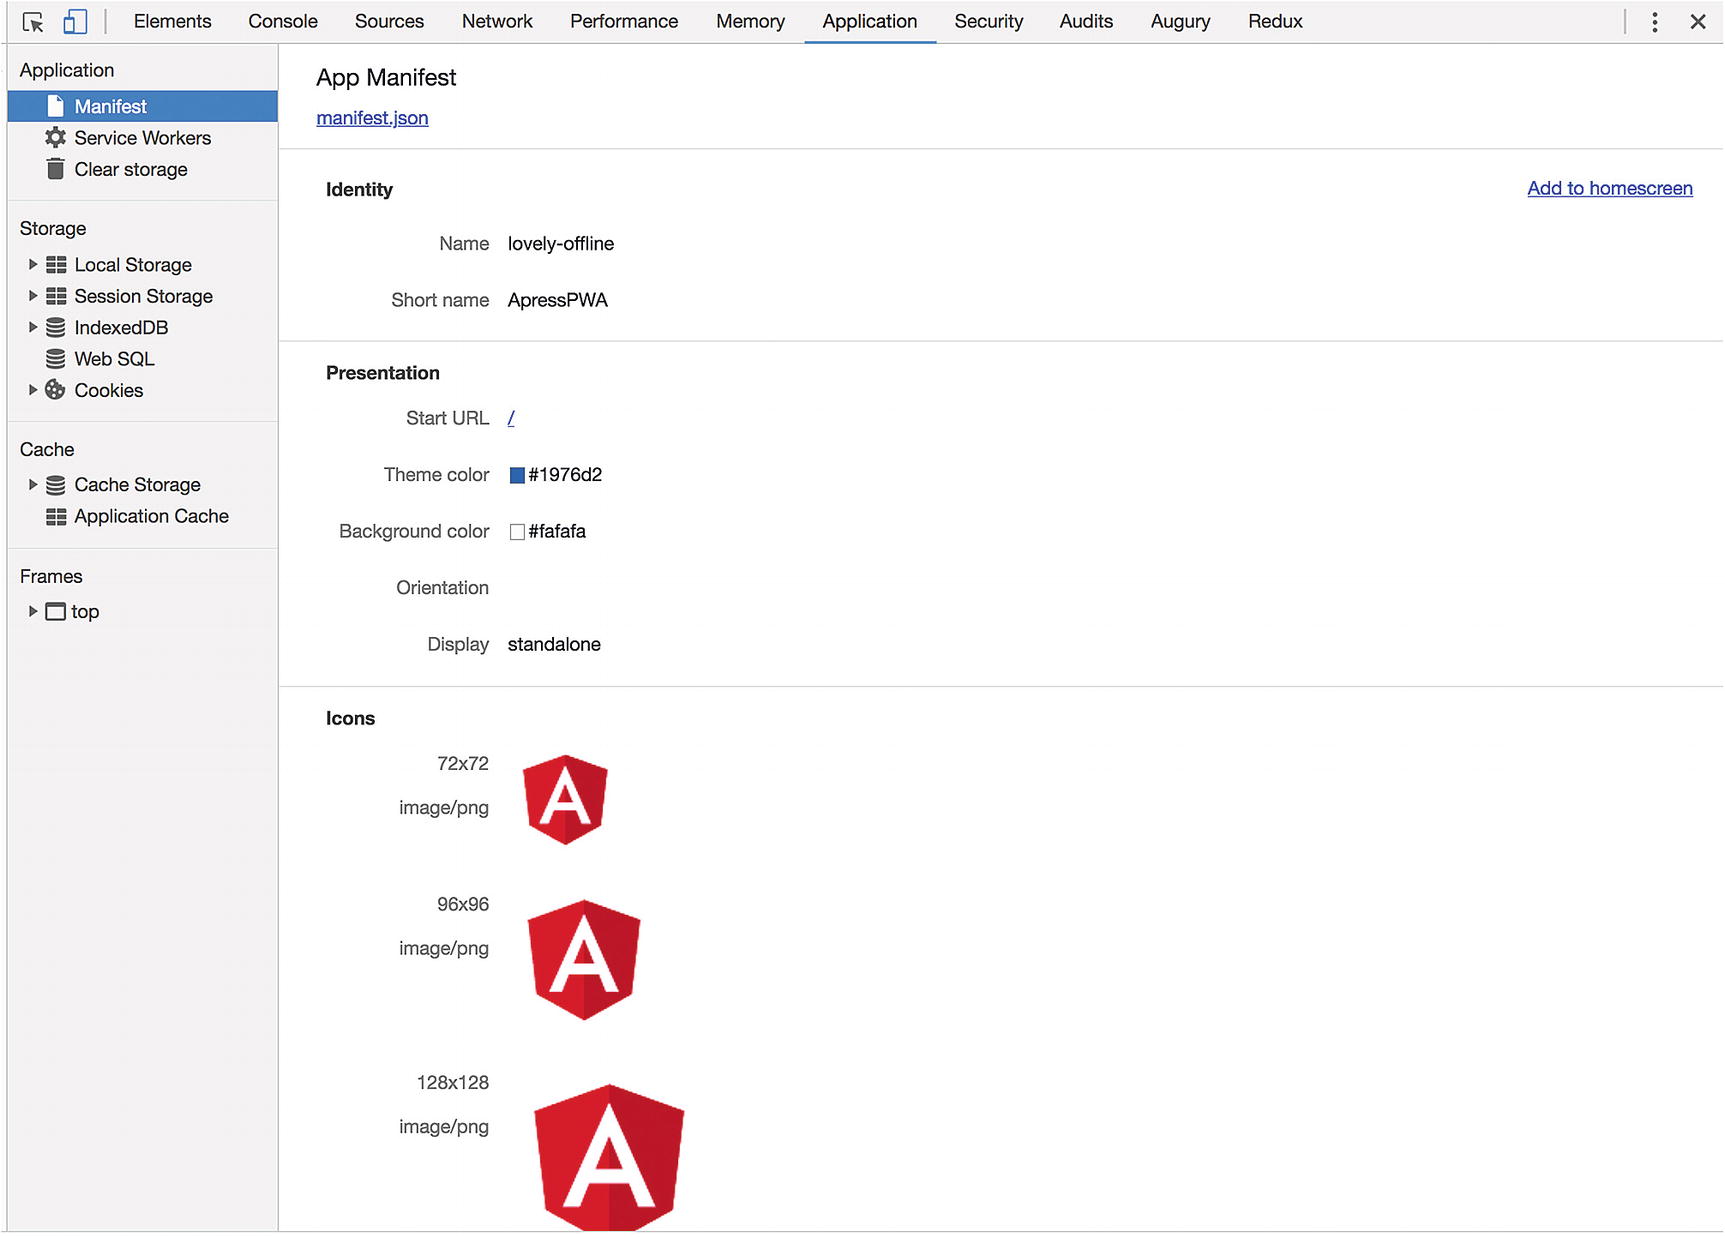
Web Manifest Validator is a tool where you can debug your manifest file
Adding to Home Screen
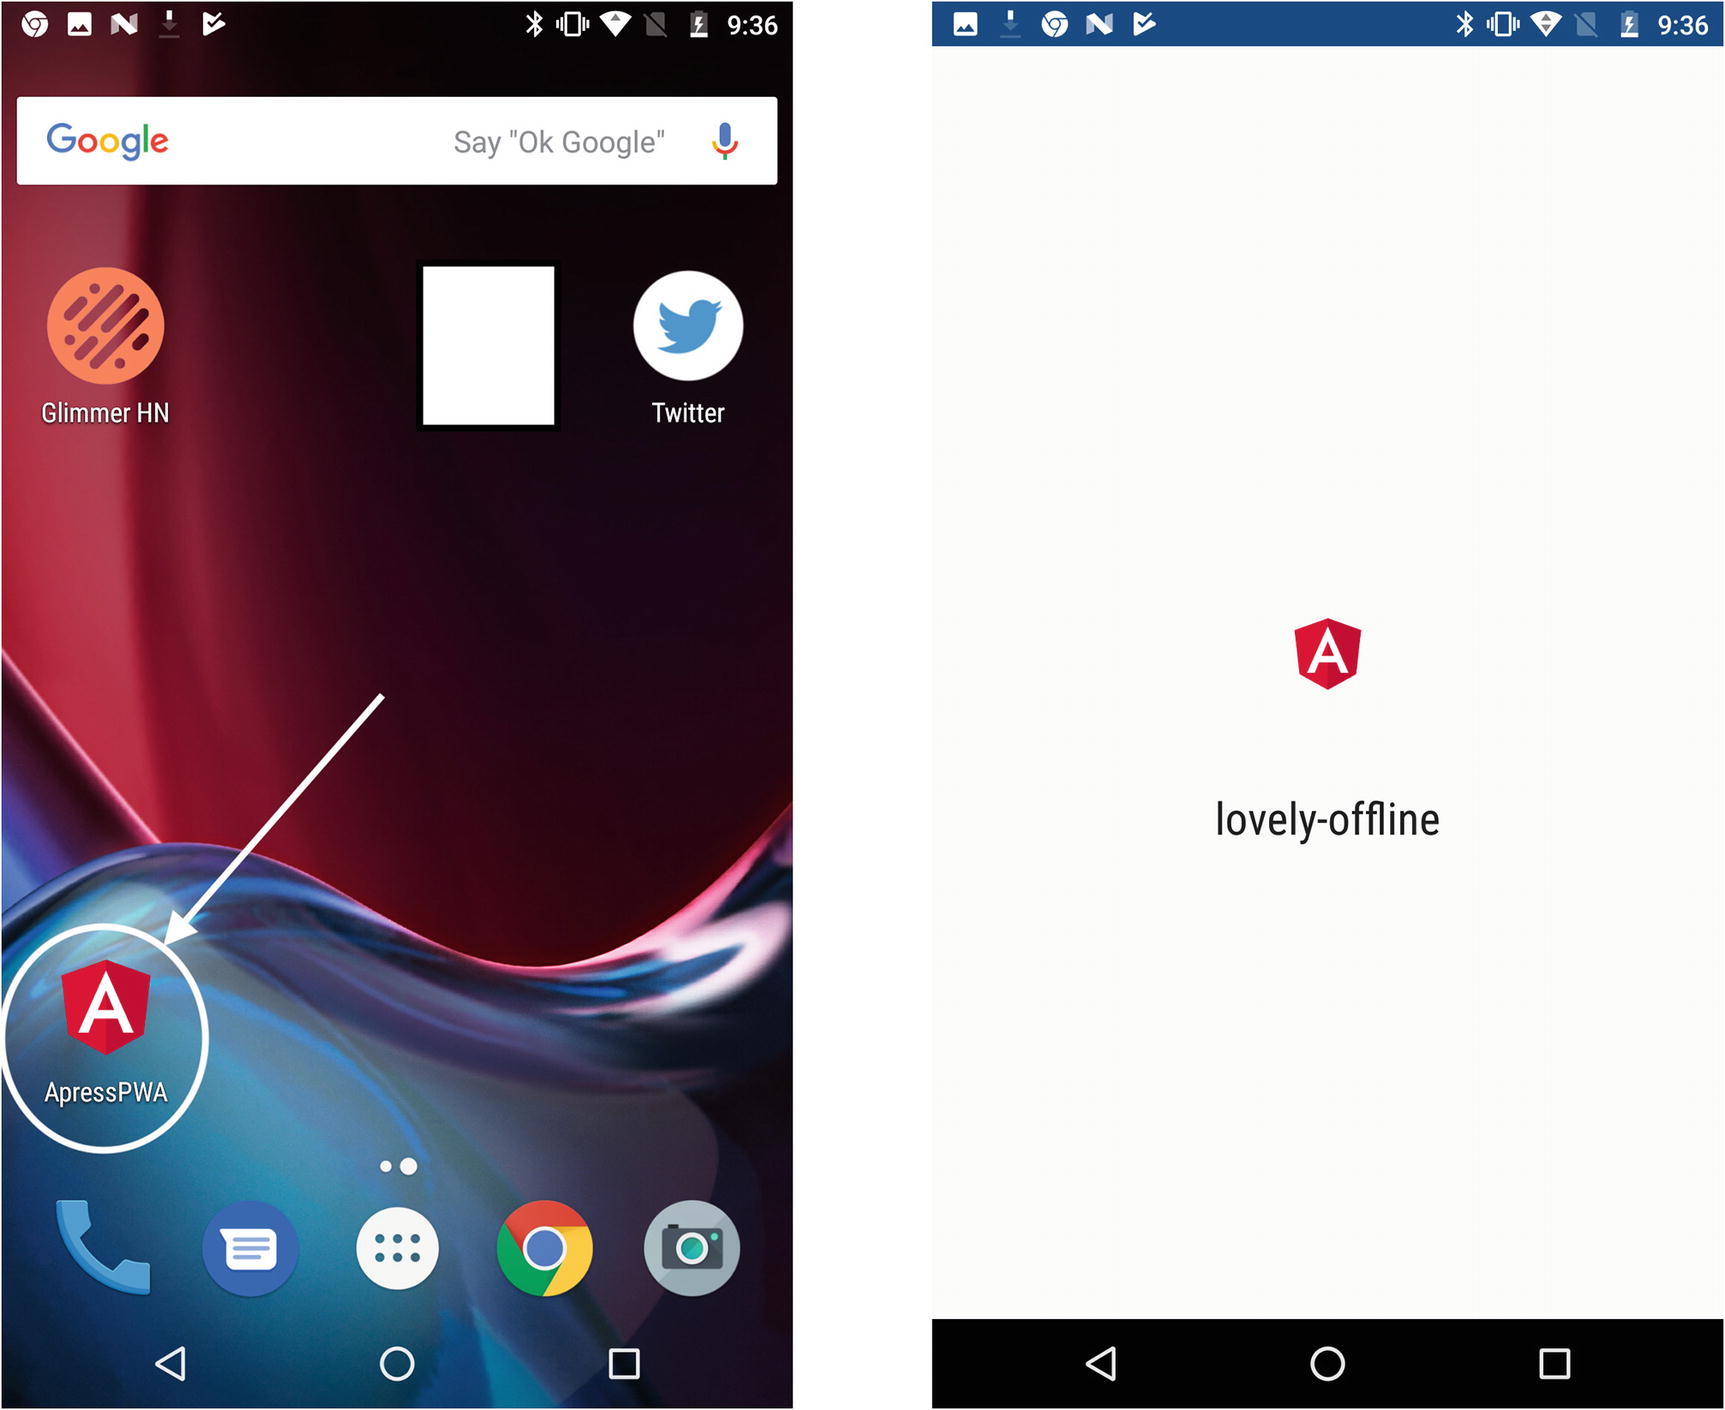
By default, a native app installs on your home screen. You will see an icon and short name, and when you need to run this application, it’s easy to come back to the home screen and tap on the icon to open up the app. As web developers, it is important to engage our users and keep them coming back to our app. So, functionality as a native app is one piece of the puzzle to tackle engagement. A great way to seamlessly allow our users to add our web’s app to their home screen is Add to Home Screen (you may see A2HS) capability, also known as a web app install banner.
This feature makes it easy to install a PWA on the mobile or desktop device. It displays a prompt and after the user accepts it, your PWA will added to their launcher or home screen. It will run like any other installed app and looks similar to native apps.
- 1.
Serve over HTTPS (this was one of the PWA core concepts and required for Service Worker).
- 2.Web App Manifest has to include:
- a.
short_name or name
- b.
icons must include a 192px and a 512px sizes icons
- c.
start_url must have a proper value
- d.
display must be one of the: fullscreen, standalone, or minimal-ui
- a.
- 3.
The web app is not already installed.
- 4.
An appropriate user engagement heuristic.
This item may change over time, so you should always keep yourself updated with the latest news and check different browsers’ criteria lists time to time. At the time of writing this book, a user must interact with the domain for at least 30 seconds.
- 5.
App has a registered Service Worker with a fetch event handler.
While this list is in a bit of flux and is updated frequently, if these criteria are met, Google Chrome will fire an event called beforeinstallprompt that we should use it to show the prompt to our user. Keep an eye on different browsers and check the latest news to see if they support this event or similar events.
Although Safari does not support the automatic Add to Home Screen prompt or beforeinstsallprompt event , the manually add to home screen is shown by tapping the share button, even though it behaves a bit differently compared with other browsers. I hope that by the time you read this book, an automatic version of this feature will be supported by Safari and all other browsers.
Note
Chrome 67 and earlier showed an “Add to Home Screen” banner. It was removed in Chrome 68 and a dialog will be shown if it is listened to beforeinstallprompt and the user taps on an element that has a proper gesture event.
Handling Installation Event (Deferring the Prompt)
As we have seen, when all the criteria are met, beforeinstallprompt event fires on the window object. It is crucial to listen to this event to indicate when the app is installable, and we need to act accordingly on the web app to show an appropriate UI to notify our user that they are able to install this app on their home screen.
- 1.
Sending user choice to our analytics system.
- 2.
Defer displaying the notification until we ensure that’s the best time to show in which user will tap or click.
It’s only possible to call prompt() on the deferred event once. If the user dismisses it, we need to wait until the browsers trigger beforeinstallprompt event on the next page navigation.
The Mini-Info Bar

The mini-info bar in Google Chrome on Android4
This is Chrome UI component and we are not able to control it. Once it has been dismissed by user, it will not appear again until a sufficient amount of time. Regardless of preventDefault() on the beforeinstallprompt event, if the website meets all the criteria above, this mini-bar will appear.
This experimental functionality may be controllable or completely eradicated in the future.
Implementing Functionality into Angular App
Let’s now implement the code above in our Angular sample project. Start off by creating a service called AddToHomeScreenService and import it to CoreModule.
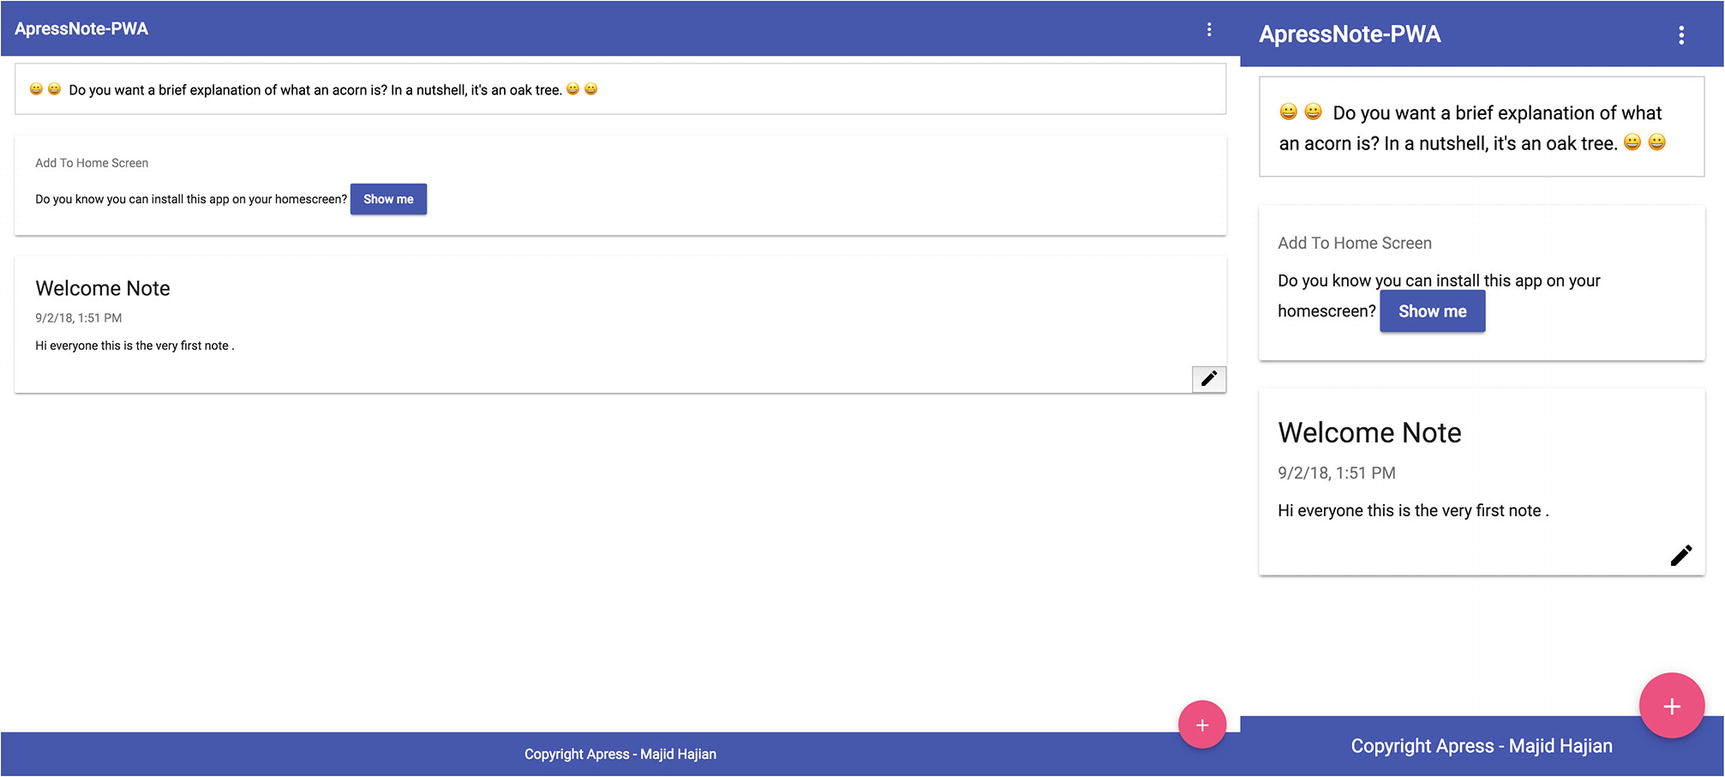
Next, I decided to show a notification box to my user on the notes list page. I think this is the best place to ask if the user would like to install the app since they have already benefited from the app, and it’s likely that they will accept the prompt. So, it’s good practice not to bother a user with an unwanted prompt or notification and ask them, instead, when it makes sense.
Put all of it together and build an application for production and then deploy to Firebase.
Adding to Home Screen on Mobile and Desktop
Now that we have implemented all the criteria, it’s time to test it on the mobile and desktop. Since Google Chrome has the best support for installing an app, you may ask what actually Google Chrome does when a user accepts the prompt?
Note
To test install flow for Desktop PWA on Mac, you’ll need to enable the #enable-desktop-pwas flag in Google Chrome. It may be the default in the future or when you are reading this book.
Notification is shown once beforeinstallprompt in Chrome on Android and Mac was fired

Prompt Dialog in Chrome on Mac

PWA was installed in Chrome apps on Mac
Microsoft Windows7
PWA in Edge is a first-class citizen. Once PWA was distributed through the Microsoft Store, the entire Windows 10 install base of 600+ million active monthly users are your potential app audience!
Standalone window
Independent process from browser (isolated cache, less overhead)
No storage quota (for IndexedDB, local storage, etc.)
Offline and background processes Access to native Windows Runtime (WinRT) APIs via JavaScript
Appearance in “app” contexts such as the Windows Start menu and Cortana search results

Context menu on Microsoft Edge and Windows App
Android and Chrome

Install app notification to user and add to home screen dialog
As soon as the user accepts it to install, App icon and short_name will have been placed just next to other native apps icons in the home screen as shown in Figure 6-9.
Note
Samsung internet browser behavior is similar to Chrome but reacts slightly differently.
App installed on home screen and once tapped to open, splash screen with configured background and icons is shown

PWA looks similar to native app once it opens
Manually Adding to Home Screen
Dialog prompt is not guaranteed to always be triggered. So, there are possibilities to manually add a PWA to the home screen. This feature is also available on Safari iOS.
In Chrome, if you click on menu context menu on the top-right side of the browser, you’ll see the menu options where you can find add to home screen, tap on it, and a prompt dialog UI appears.

Add to Home Screen buttons are available on Safari and Chrome
Further Enhancement
apple-mobile-web-app-capable: behaves similarly to display fullscreen mode if set to yes. We determine whether a web page is displayed in fullscreen mode using the window.navigator.standalone in Safari.
apple-mobile-web-app-status-bar-style: this meta tag has no effect unless you first specify fullscreen mode as described in apple-apple-mobile-web-app-capable. If content is set to default, the status bar appears normal. If set to black, the status bar has a black background. If set to black-translucent, the status bar is black and translucent. If set to default or black, the web content is displayed below the status bar. If set to black-translucent, the web content is displayed on the entire screen, partially obscured by the status bar. The default value is default.
apple-touch-startup-image: specifies a launch screen image that is displayed while your web application launches. By default, a screenshot of the web application the last time it was launched is used.
apple-mobile-web-app-title: specifies a web application title for the launch icon. By default, the <title> tag is used.
apple-touch-icon:8 specifies an icon to represent your web application or web page that user may want to add to the home screen. These links, represented by an icon, are called Web Clips.
application-name:9 the default name displayed with the pinned sites tile (or icon).
msapplication-starturl: the root URL of the pinned site similar to start_url in web manifest.
msapplication-TileColor: sets the background color for a live tile.
msapplication-TileImage: specifies a URI for the desired image in the background image for live tile.
While you can add all of the enhancements manually yourself, there is a library from Google Chrome Team that can help you mitigate this issue automatically.
PWACompat Library10
Create meta icon tags for all icons in the manifest (e.g., for a favicon, older browsers)
Create fallback meta tags for various browsers (e.g., iOS, WebKit/Chromium forks etc.) describing how a PWA should open
Sets the theme color based on the manifest
Sets apple-mobile-web-app-capable (opening without a browser chrome) for display modes standalone, fullscreen, or minimal-ui
Creates apple-touch-icon images, adding the manifest background to transparent icons: otherwise, iOS renders transparency as black
Creates dynamic splash images, closely matching the splash images generated for Chromium-based browsers
Sets the title bar color
Keep an eye on the library to see the latest version and features.
Summary
Advanced caching and the add to home screen have been implemented. We are one step closer to the native app counterparts. In the next chapter, we are going to boost Angular performance and work on App Shell to take our application to the next level.