In this chapter, we will go through the coding tools that are essential during a normal day of work for a Python programmer in Visual Studio.
First we will analyze how to handle projects and solutions in Visual Studio, and then we will go through the refactoring of functionalities. Finally, we will go through the debugger functions that are available.
One of the most important and useful features of Visual Studio is the solution and project handling. Since the whole workflow is integrated into the IDE, the developer does not have the burden of dealing with files, working paths, and libraries. All of these can be managed directly in the IDE with the powerful Visual Studio user interface.
Before we dig into the tools in detail, we will first take a look at the Visual Studio lingo relating to project handling. The two main concepts used in this chapter are the solution and the project.
A solution is essentially a container of projects that are bundled together to cover a unique scope. The projects can be referenced to each other and they can be of different types. For example, in a solution, you can mix a Python project with a C++ project while referencing the output of the project in the Python solution to use it as an external library. A solution also provides a way to group the whole code base of work in a single file/folder structure. You can then insert and manage the grouping in the versioning tool of your choice to share it quickly. A Visual Studio solution is also capable of maintaining shared configurations for the inner projects, while handing different commands and operations during different events (i.e. during the build of the solution).
A project is the classical definition of a bunch of files written in the same language and which covers a single scope. The types of projects can range from a website to a library or a console application.
Visual Studio projects for Python contain the environment definition: where to target the code, the references to external libraries, and the search paths that the compiler has to search in the libraries. The last one is particularly important since PTVS does not use the computer's PythonPath environment variable.
The deliberate and useful feature of ignoring system-wide settings allows you to reference different libraries in different projects for different Python versions. Furthermore, the dependency list in the code brings the added bonus of an easier debugging process and also provides an easy setup of a new development environment on other computers.
PTVS offers preconfigured Python projects called project templates, as we have seen in Chapter 1, Introduction to PTVS, which take care of creating the right project structure so that the developer can focus on the code.
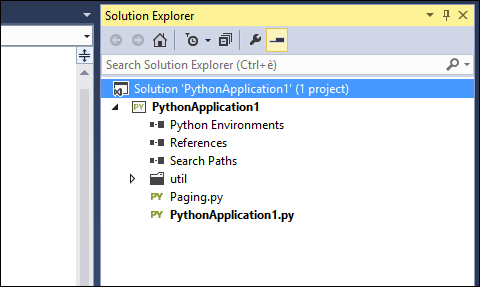
Let's take a look at the actual tools that will handle solutions and projects. The most important and powerful one is the Solution Explorer window tool. This tool gives a complete view of the solution composition and the files and configurations available in each project.
To add something or to perform actions on a Solution or a Project, select the Solution or Project node in the tree-view
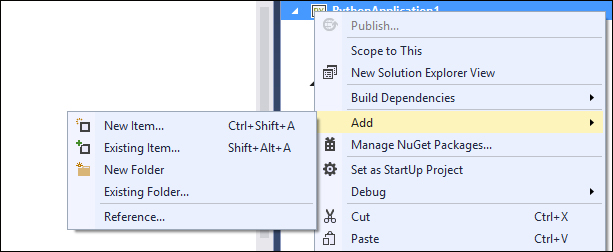
By now, you should already know how to navigate through the code using this tool, as we learned in Chapter 2, Python Tools in Visual Studio. The Solution Explorer window tool also provides file handling capabilities, giving us the ability to add or remove files directly in the project structure. Just select a folder item in the project structure to insert a new file. To add something in the project root, select the project item in Solution Explorer, right-click to open the contextual menu, and go into the Add submenu as shown in the following screenshot:
Here, you can choose to add either New Item, Existing Item, or New Folder. If you choose to add New Item, the Add New Item window will show up as follows:
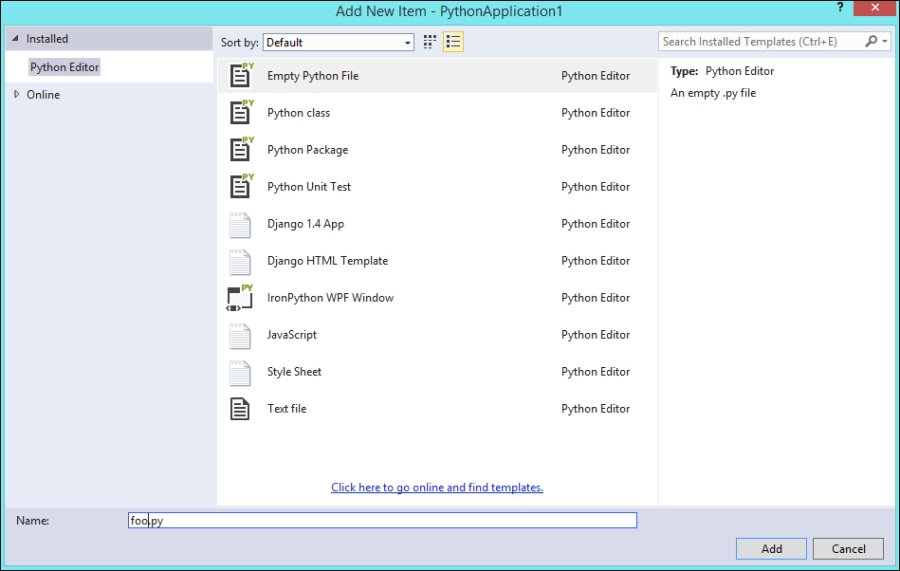
From here, you can create a new item from the various types that are available in the project.
If instead you want to add an existing file to the selected folder, select the Add existing item option from the contextual add menu. This will open a standard Windows browse file window; from here, you can navigate through the filesystem and select the file that you want to add to the selected folder. A copy of that file will be added to the folder.
To delete a file, just select the item in the project list and select the Delete menu item from the contextual menu.
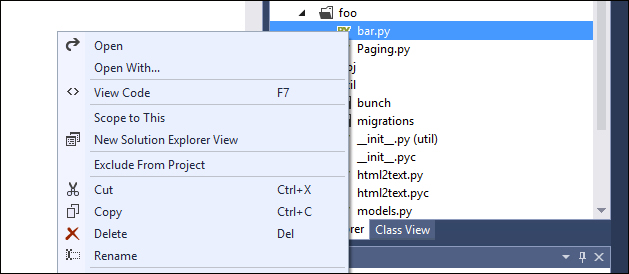
The file contextual menu in the Solution Explorer window offers lots of functions on file, like "Delete", "Rename" and others
Now that we have more confidence in Solution Explorer, let's dig a little deeper into the Python-specific options that Solution Explorer offers. In the following sections, you will learn more about the configuration of a Python project: the environment, the references, and the search path.
It's possible to specifically define a Python environment version for a project instead of using the default Python version installed on the machine. This is particularly important for projects that we work on with other developers. By default, Visual Studio uses the default Python version installed on the machine when starting a new project. To link a project to a given Python version (environment), right-click on the Python Environment item in Solution Explorer to see the contextual menu. This is shown in the following screenshot:
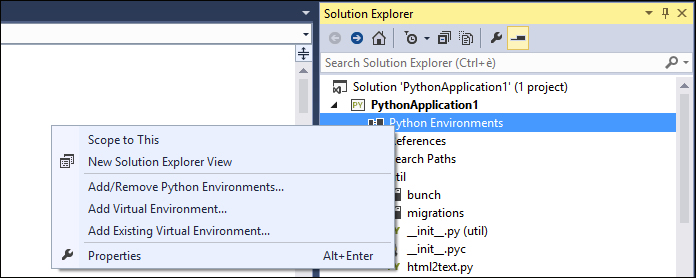
The Python Environments contextual menu in the Solution Explorer window
This contextual menu provides various functionalities such as adding or removing a Python environment and linking the project to either a virtual Python environment or an existing one. The last two options are very useful when you need to have a project running in a completely isolated environment space on the machine. The project can then be run with all of its dependencies and libraries in an isolated place, without interfering with the existing Python installations and Python path configurations on the machine.
Creating a virtual environment in Visual Studio is straightforward. Click on either Add Virtual Environment or Add Existing Virtual Environment and follow a few steps to complete the setup.
As an example, we will create a virtual environment for our project. Clicking on Add Virtual Environment will show the following modal window:
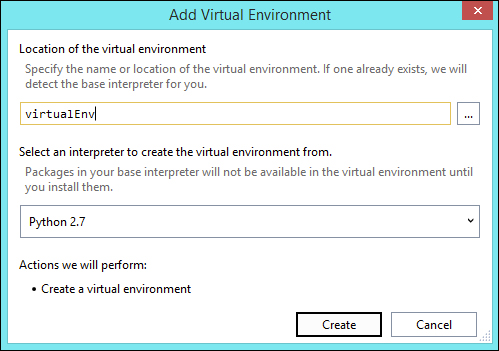
You can define the name of the virtual environment and the targeted Python version in this window. Once the Create button is pressed, Visual Studio will create the virtual environment. As a nifty bonus, if the necessary Python libraries are not installed on the machine—essentially pip, setuptools, and virtualEnv—PTVS will take care of this by downloading and installing them. Like other generic Python packages, they will be installed in the system-defined site-packages folder.
To link a project to a given Python version, just click on the Add Python Environment option in the contextual menu and the following helper box will show up:
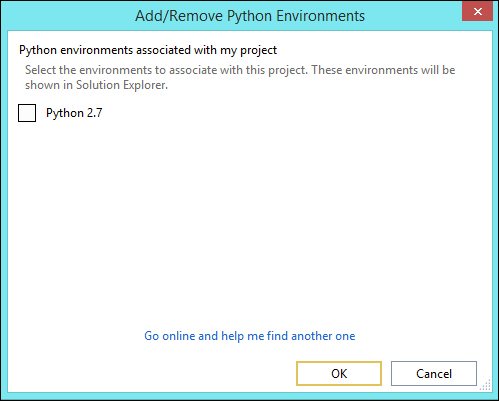
This helper box shows a list of the Python versions installed on the machine and which are available for you to choose. Once a Python version is selected, the reference will show up in Solution Explorer.

The References item elements in a project provide the ability to tightly link a library in your project or reference to packages compiled in the .pyd files
Right-click on the Reference option and then click on Add Reference to bring up the following helper window:
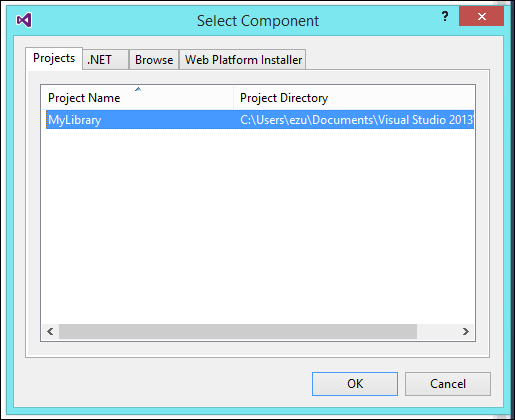
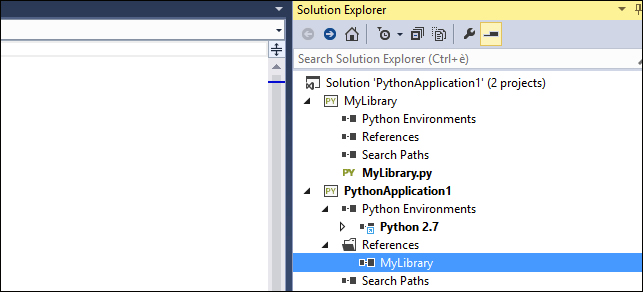
We will focus on the Projects tab, which shows all the other projects in your solution. If you wish to use another library project to handle a subscope of the application, select the desired project and click on OK. This creates a reference in your project. You can find the list of references under the reference option in the Solution Explorer window:
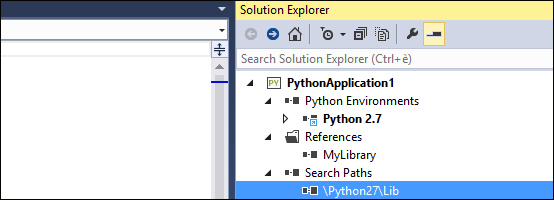
The Search Paths functionality basically tells Visual Studio where to search for additional libraries that will be used in the project. You can reference a folder in the system or a .zip file that contains the libraries:
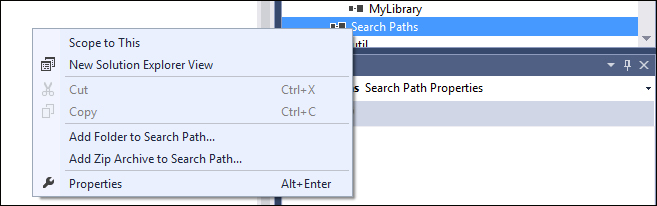
The Search Path contextual menu, with the "Add Folder" and "Add Zip Archive" options
Once the folder of the .zip file is selected, you can find the libraries in the window: