
Developed by the Python community, South is a Django library that brings schema migration to Django applications. The South library's main objective is to provide a simple, stable, and database-independent migration layer to prevent all the hassles of schema changes.
The key features of South are as follows:
- Automatic migration creation: South can detect what's changed in your application model by analyzing your
model.pyfiles and automatically creating the migration code—basically the SQL commands for the database you are using—that matches the changes in the models. - Database independence: South is database agnostic, supporting different database backends. Currently, South supports PostgreSQL, MySQL, SQLite, Microsoft SQL Server, Oracle, and Firebird (beta support).
- App-savvy: South knows and works with the concept of Django applications, allowing developers to use migrations on only some of the applications and not on the whole project.
- VCS-proof: South will notice when someone else commits migrations to the same application and can check if there are conflicts.
One of the most interesting parts of Django is its Object-relational mapping (ORM), which creates a consistent abstraction of the database structure. This is a very powerful tool that allows programmers to focus on the Python code. Django takes good care of the database structure management only for new models (for example, when creating them). It doesn't have an out-of-the-box solution to manage updates in the models that can be applied to existing database schemas.
It's usually a painful operation to change the model during the application lifecycle. Technically, when changing the schema of the model or when migrating the schema, whether you are modifying a field or adding another one, the database structure needs to be recreated. This means that all the data of that model is lost, or a manual migration needs to be done to move the data from the old version of the tables to the new one on the database. This is especially time consuming if you have to align that database from a development server environment to a production server environment.
Let's see how to bring South into PTVS. Like other Python libraries, we can install it from the Solution Explorer window by right-clicking on the environment of your choice (Python 2.7) and selecting Install Python Package to bring up the following installation dialog box:
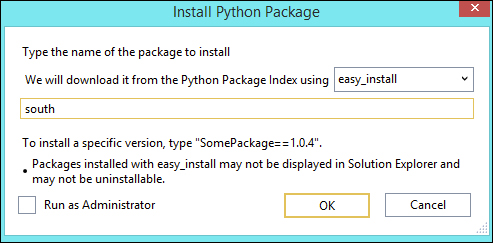
As stated in the South documentation, you have to use the easy_install Python Package Index; be sure to select it.
Once the package is installed, it's important to make sure that it's activated in the settings file. To do so, add south at the end of the code for Installed_Apps.
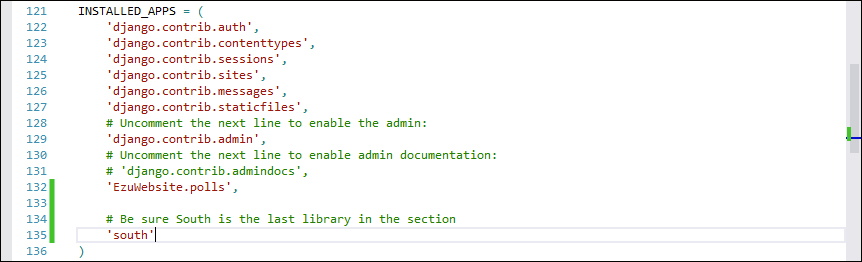
Be sure that the "south" library is the last in the "Installed_Apps" section in Settings.py
South needs to be the last package of the list due to the fact that when Django executes the library, all the models of the Django project are already created and are discoverable by South.
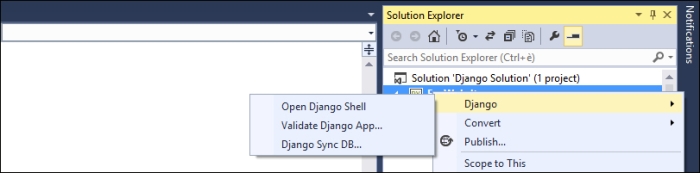
To test if everything is working, navigate to the Django shell and try to import the library. Ordinary Python developers will go to the command line and run the manage.py shell, but in PTVS, there's a panel for this. To open it, quickly right-click on the Django project entry in the Solution Explorer window and select the Open Django Shell option in Django:
This opens a new Django Management Console panel, which is basically a REPL but with Django integration. From here, it's possible to see if the South library is working correctly by trying to import the library:
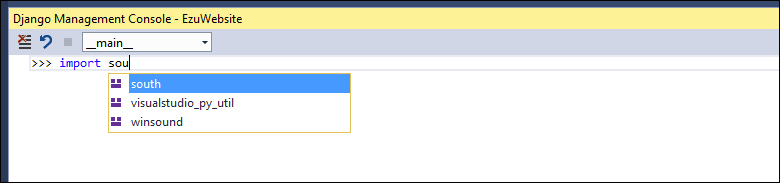
IntelliSense is active in the Django shell, so if you see south appear, then everything is working fine.
To finish the initialization process, run sync_db for South to create the migration-tracking tables. This can also be done from the Django contextual menu as seen earlier: just select the Django Sync DB command in the Django menu.
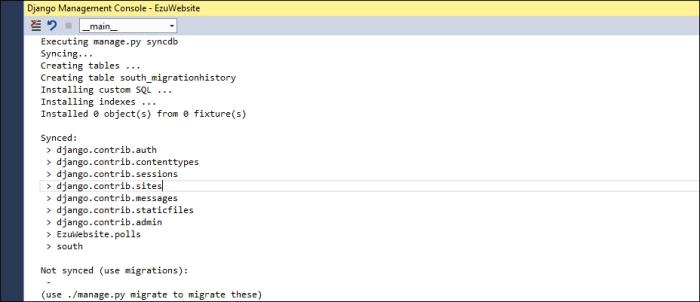
As shown in the preceding screenshot, this starts the synchronization process of the current models in your application on South.
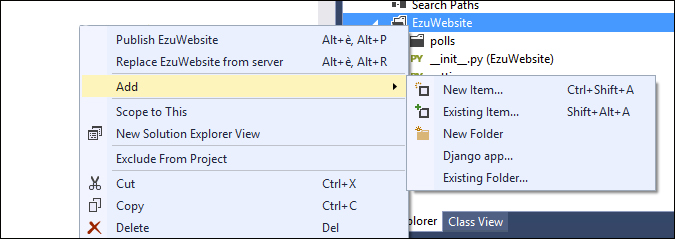
Now that we have south installed and working in our solution, let's try to create something to test the migration. Create a new application in your project and call it south2ptvs by using the Django app command in the Add menu, as shown in the following screenshot:
Don't forget to register the new application in the settings.py file, and make sure that south remains as the last entry of the Installed_Apps section:

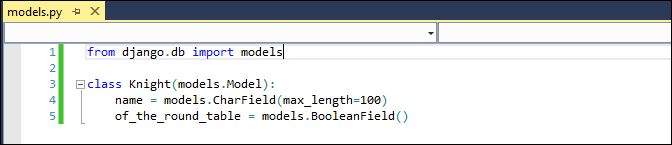
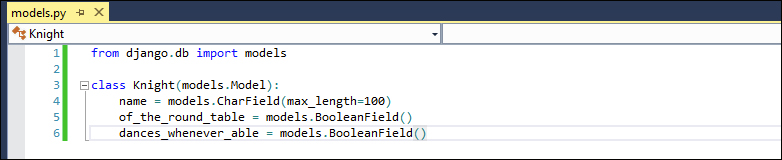
Then, open the models.py file of the newly created application in which we are going to define our testing model:
Instead of using the standard Django sync_db command to create the schema of the model in the database, let's set up a migration for the model Knight. This operation will be the entry point for the entire migration history of the model.
Navigate to the command line and execute the initialization migration by executing the following command:
python manage.py schemamigration south2ptvs –-initial
This will execute South's schemamigration command on the south2pvts application for the initialization process. Here is what is going to happen:
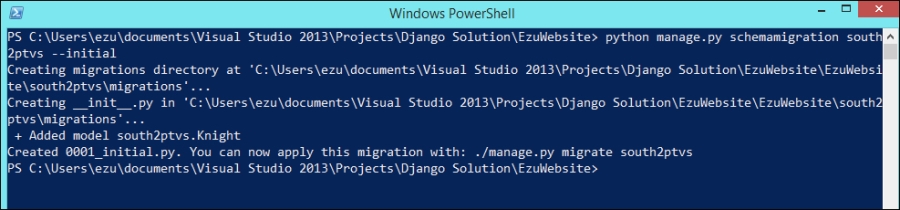
We have successfully created the migration file but haven't applied it to db. Since South works on one application at a time, the migration file in which the information of the migration is stored is created inside the south2ptvs folder.
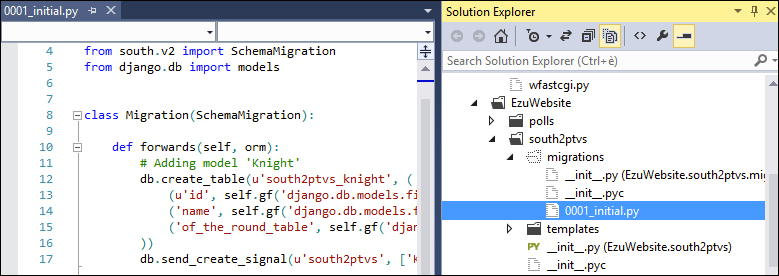
The content of the migrations folder in the Django app
The migration files are plain files written in Python. They can be edited, but you should do it with caution and only do so when necessary.
The only thing left to do is to apply the migration to the database by calling the South library's migrate command on the app with the following command:
python manage.py migrate south2ptvs

Execution of South's migration command
This will finalize the migration; now our model is ready to be modified. Future updates to the model can be easily applied to the database by South using migrations.
Update the model by adding a new field as follows:
So, now we have to create a new migration file and then apply it to the database. To create the migration file, use the schemamigration command again as shown in the following command. However, instead of the –-initial parameter, use –-auto, since a migration is already defined in the model.
python manage.py schemamigration south2ptvs –-auto

To obtain the result of the migration file creation state to apply the migration to db, just run the following migrate command:
python manage.py migrate south2ptvs

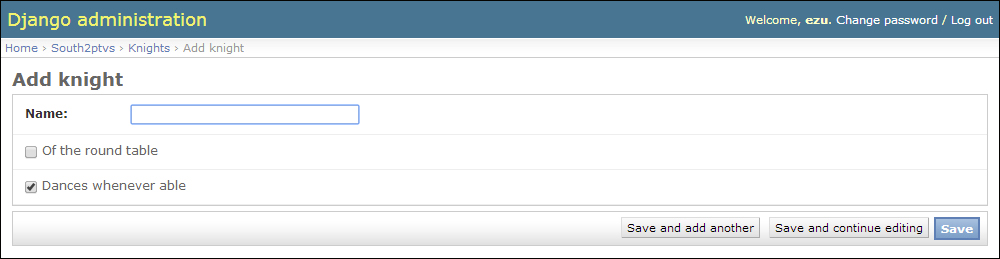
If we register the model in the admin interface, we can go to the admin section of our website and see if the new field appears in the model:
Since the migrations are stored on the files, you can apply the changes on the remote server by just copying the migration files to the server and then applying the migration on the remote system (maybe with Fabric).
For more details and insights into this powerful tool, visit the official documentation website for South at http://south.readthedocs.org/.