
Cloud platforms are complex systems that provide ways to scale web applications across multiple server instances based on the traffic the application is receiving. They also offer an abstraction of the server environment in a way that developers do not need to deal with the hardware and software architecture of the system, but only with the resources and services. This is an advantage because with this in place, the developer does not actually need to configure and manage the server; however, at the same time, it also proves to be a disadvantage, since not all software components are able to work in such systems.
Azure is a cloud-hosting platform by Microsoft that enables developers to quickly build, deploy, and manage applications across a global network of Microsoft-managed data centers. It is tightly integrated in Visual Studio; also, the Python language is covered by this service.
We are going to see how to deploy a Django project on Azure by using the tools that Visual Studio provides.
To use Microsoft Windows Azure, first we need to create an Azure account via http://www.windowsazure.com/.
After the account is created, you can access the Portal section that brings you to your Azure services portal in which you can find all the services available on the left-hand side menu. Now we'll create a website:
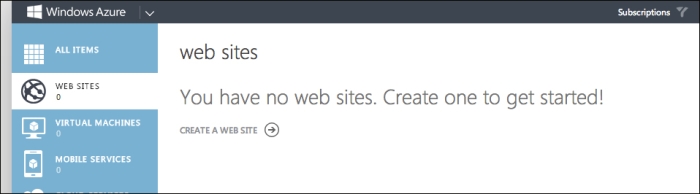
To create a new website, click on the CREATE A WEB SITE link; this will open the NEW tab at the bottom of the page:
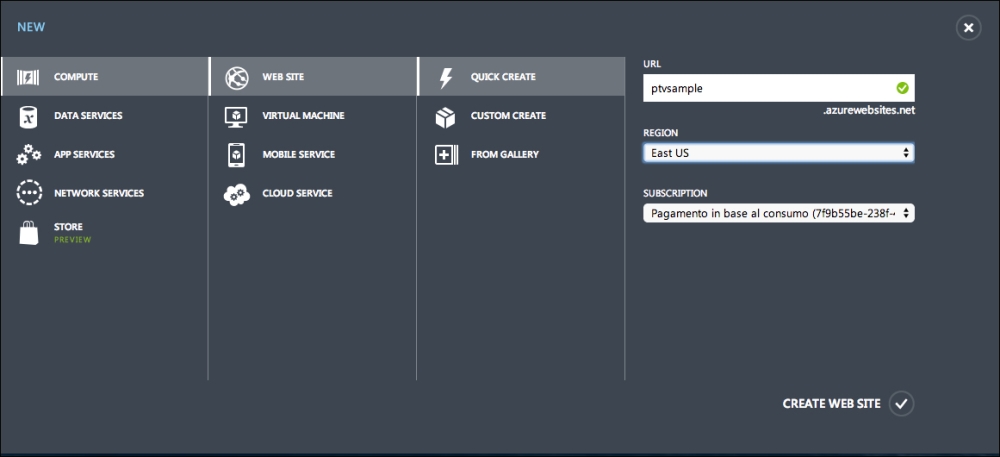
Just insert the name of the website that you want to create in the URL textbox; if the name is available, click on the CREATE WEB SITE button to create the website. This will initiate the website generation process, at the end of which you will see the created website:

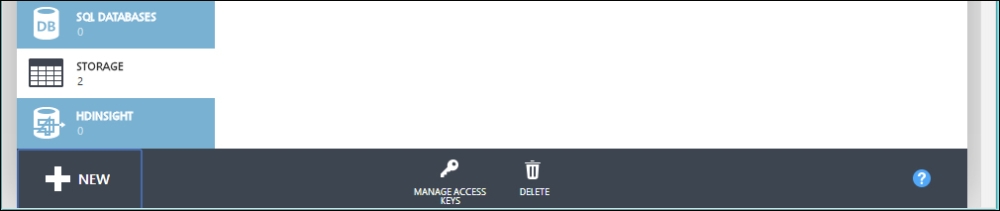
Besides the website service, we also need to create a storage entry where the website files can be uploaded to. To create a storage entry, click on the Storage item on the left-hand side menu and click on NEW:
This will open the storage creation area at the bottom of the page:
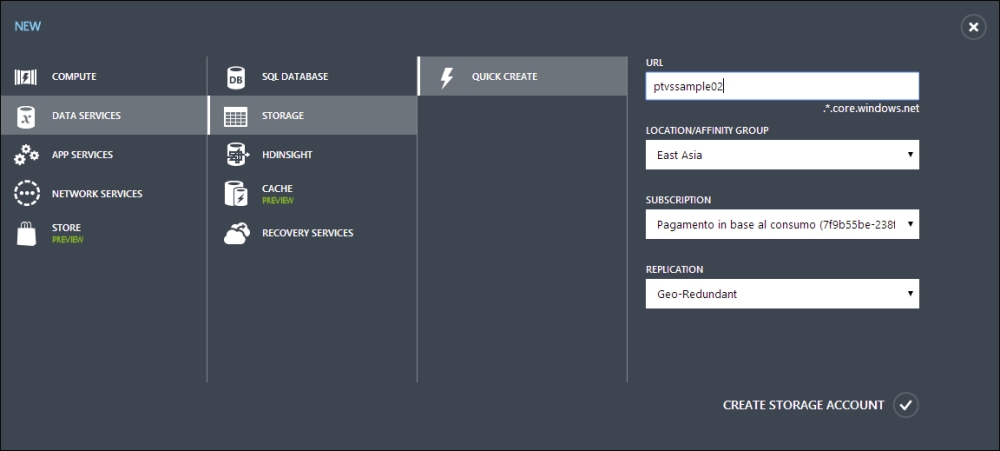
As for the website service, we just need the name of the storage service in the URL textbox; once you have this, click on the CREATE STORAGE ACCOUNT button to create the storage service instance.
Now we have all the elements needed to deploy our Django project to Azure. However, before going ahead, we need to ensure that our project is ready for it. Azure needs all the files related to the project that reside in the project folder, since it needs to ensure that all the Python libraries are present. To ensure that these requirements are met, the Django project needs to be created in a virtual environment. This will keep all the files to be included in the project folder; otherwise, the libraries just reside in the site-packages folder of the system.
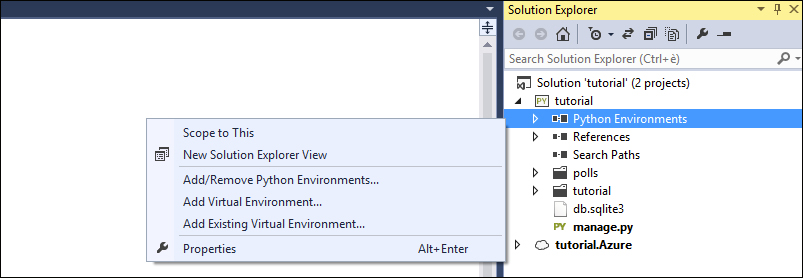
A virtual environment is an isolated working copy of the Python environment, which allows you to work on a specific project without worrying about affecting other projects. At the same time, it keeps together all the dependencies in the same folder structure. Creating a virtual environment is easy in PTVS; you can do this by selecting the Add Virtual Environment command from the Python Environments contextual menu, as shown in the following screenshot:
This will open the Add Virtual Environment window:
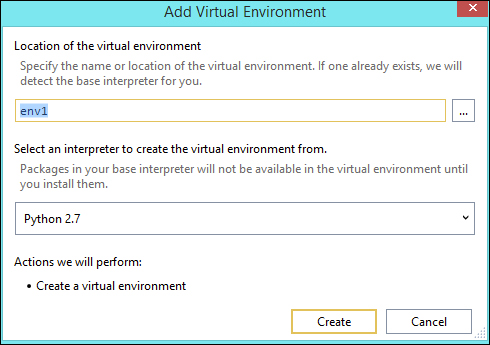
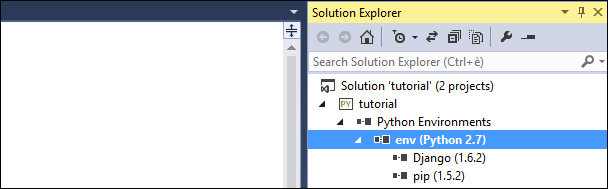
Once you enter the name of the virtual environment and click on the Create button, the virtual environment is created in the project. Now, all the packages that you include in the project will be copied into it, so all the dependencies will be available inside the project folder, which doesn't rely on the system's site-packages folder:
Once we have ensured that our project is contained in a virtual environment, we can go ahead and configure Visual Studio in a way to be ready to deploy our Django project to Azure.
The deployment procedure starts by invoking the Publish command from the contextual menu of the Django website node in the Solution Explorer tree view:

This will open the Publish Web wizard window, which will guide you through the deployment process of the Django project:
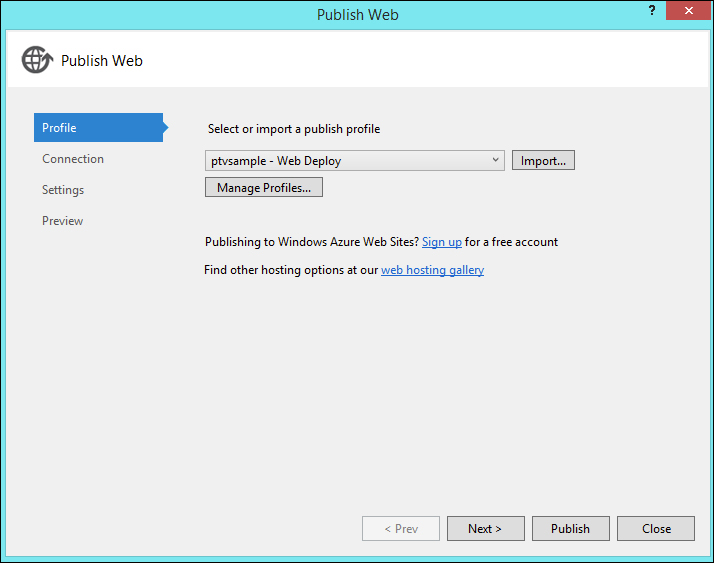
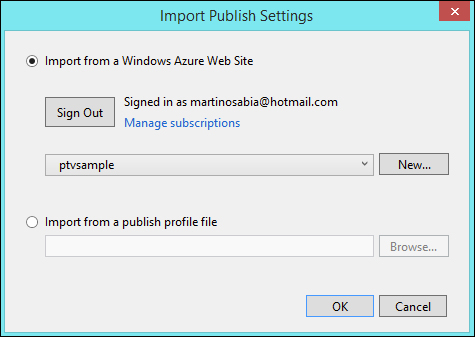
To link Visual Studio to the Azure website we created earlier, click on the Import button; once you are certain about being able to log in with your Azure account, select the name of the website you want the Django application to be deployed to:
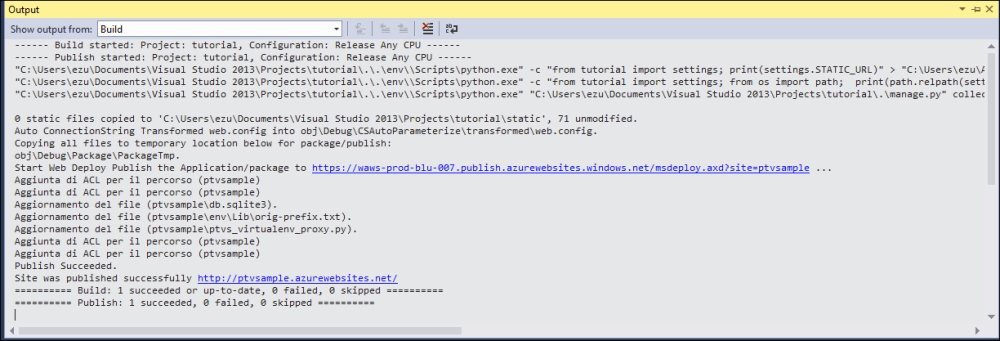
At this point, follow the other wizard entries and click on Publish. With this, Visual Studio will start the process of deploying all the files to the Azure platform; you can follow the deployment process from the Output window:
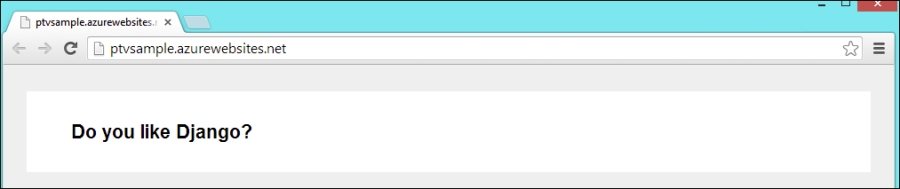
Once the deployment process finishes, Visual Studio will open in the default browser of the deployed website on Azure:
For further documentation about Python on Windows Azure, refer to the Windows Azure website at http://www.windowsazure.com/en-us/develop/python/.