
The relative performance of Ruby on Rails compared to other languages and web frameworks is still a topic of debate. A quick Google search reveals that many people feel Ruby on Rails is slow.
Newer versions of the Ruby interpreter have made great strides where performance is concerned. Ruby 2.0 included garbage collection optimizations and other improvements that made it much faster than older versions. Ruby 2.1 introduced a generational garbage collector that was even faster still.
As the Ruby language has improved, so has Ruby on Rails. The Rails framework now includes several features designed specifically to improve application performance. This chapter starts with discussions of two of those built-in features and then moves on to cover some things you can do to improve performance. Finally, I’ll talk about the caching techniques supported by Rails.
The asset pipeline and turbolinks are two built-in Rails performance optimizations you’ve been using since creating your original blog. Both of these features are enabled by default on new Rails applications, and we’ll explore how they work here.
The asset pipeline is a Rails feature that combines all of the individual JavaScript and CSS files used by your application into one JavaScript and one CSS file, reducing the number of requests a browser makes to render a web page because your application uses more than one file of each type. Web browsers are limited in the number of requests they can make in parallel, so fewer requests should result in faster loading pages.
The asset pipeline also minifies, or compresses, JavaScript and CSS files by removing whitespace and comments. Smaller files load faster, so your web pages load faster.
Finally, the asset pipeline preprocessor also enables you to use higher-level languages such as CoffeeScript instead of JavaScript and Sass instead of plain CSS. Files in these higher-level languages are precompiled to plain JavaScript and CSS using their respective compilers before being served so web browsers can understand them.
As you generate controllers for your application, Rails also generates a corresponding JavaScript and CSS file in the app/assets/javascripts and app/assets/stylesheets directories. Rather than link to each of these files separately in your application, Rails uses a manifest file. As mentioned in Chapter 5, a manifest file is a list of other files needed by your application.
Manifest files use directives, instructions specifying other
files to include, in order to build a single file for use in the production
environment. The require directive includes a single file in the
manifest. The require_tree directive includes all files in a
directory. The require_self directive includes the contents of the
manifest file.
To see an example, open the default CSS manifest at app/assets/stylesheets/application.css:
  /*
   * This is a manifest file that'll be compiled into application.css,
   * which will include all the files listed below.
   *
  --snip--
   *
➊  *= require_tree .
➋  *= require bootstrap
➌  *= require_self
   */
This file first uses the require_tree . directive
➊ to include all CSS files in the current directory. It then includes the
Bootstrap stylesheets using the require bootstrap directive
➋ you added in Chapter 9. Finally, the
require_self directive ➌ includes the contents of this
file below the comment block. Currently, nothing appears below the comment
block.
The asset pipeline searches for assets in three different locations by default. You know about one of them already: The app/assets directory is used for CSS, JavaScript, and image files owned by your application.
The lib/assets directory is for assets needed by libraries you have written. Because you haven’t written any libraries yet, this directory is currently empty. The vendor/assets directory is for assets created by third parties, such as code for JavaScript plug-ins and CSS frameworks.
Ruby gems can add their own directories to the list of locations that the asset pipeline searches. You can see this in the JavaScript manifest at app/assets/javascripts/application.js:
  // This is a manifest file that'll be compiled into application.js,
  // which will include all the files listed below.
  //
  --snip--
  //
➊ //= require jquery
  //= require jquery_ujs
  //= require turbolinks
➋ //= require_tree .
➌ //= require bootstrap
This file uses the require directive ➊ to include the
jQuery, jQuery UJS, and Turbolinks libraries that are part of the jquery-rails and
turbolinks gems included in your application’s
Gemfile.
It then uses require_tree ➋ to include all JavaScript
files in the current directory. Finally, it requires the JavaScript files ➌
needed by the Bootstrap CSS framework.
You won’t find jquery, jquery_ujs, turbolinks, or bootstrap in the vendor/assets/javascripts directory. Instead, the gems that provide these files have updated the asset pipeline search path to include their own directories.
You can see the complete list of asset pipeline search paths by entering
Rails.application.config.assets.paths in the Rails console. This
statement returns an array of paths. In this list, you should find paths such as
jquery-rails-3.1.0/vendor/assets/javascript,
turbolinks-2.2.2/lib/assets/javascripts, and
bootstrap-sass-3.1.1.0/vendor/assets/javascripts.
As you’ve seen, CSS and JavaScript files are served as separate, uncompressed files in the development environment. Your social media application is serving 31 separate CSS and JavaScript files according to the server output. An asset pipeline configuration called debug mode controls how assets are handled in each environment.
In the development environment, debug mode is turned on. That means the files referred to in the CSS and JavaScript files are served separately, which is useful if you need to debug an issue with a file using your browser’s development tools.
If you want to force assets to be combined and preprocessed so you can see how
they are served in the production environment, you can turn off debug mode. Just
change the value of config.assets.debug near the bottom of the
development environment configuration file
config/environments/development.rb:
config.assets.debug = falseWhen debug mode is off, Rails concatenates and runs preprocessors, such as the CoffeeScript or Sass compiler, on all files before serving them. Restart the Rails server after modifying this file, and then check the server output in your terminal to see the difference:
  Started GET "/login" for 127.0.0.1 at 2014-03-16 20:38:43 -0500
  Processing by SessionsController#new as HTML
    Rendered sessions/new.html.erb within layouts/application (1.5ms)
  Completed 200 OK in 5ms (Views: 4.5ms | ActiveRecord: 0.0ms)

➊ Started GET "/assets/application.css" for 127.0.0.1 at ...

➋ Started GET "/assets/application.js" for 127.0.0.1 at ...
Only two files (➊ and ➋) are served now—the CSS and JavaScript
manifest files. This setting can actually slow down page loads in development because
the files are combined for every request, so change
config.assets.debug back to true before
continuing.
In the production environment, you should precompile your application’s
assets and serve them as static files by your web server. You can precom-pile assets
in several ways. When you deployed your blog to Heroku in Chapter 6, you precompiled assets during deployment. Rails also includes a
rake task to precompile assets.
The rake task compiles all files from your CSS and JavaScript
manifests and writes them to the public/assets directory. You can
precompile assets for the production environment with the following command:
$ RAILS_ENV=production bin/rake assets:precompileDuring precompilation, an MD5 hash is generated from the contents of the compiled files and inserted into the filenames as the files are saved. Because the filename is based on the contents of the file, you can be sure the correct version of the file is served if you update a file.
For example, after precompilation, the file
app/assets/stylesheets/application.css might be named
public/assets/application-d5ac076c28e38393c3059d7167501
838.css. Rails view helpers use the correct name automatically in
production. You don’t need the compiled assets for development, so when
you’re finished looking at them, remove them using the assets:clobber
rake task:
$ RAILS_ENV=production bin/rake assets:clobberThis command deletes the public/assets directory and all of its contents.
In Chapter 15, you’ll learn how to deploy your application to your own server using a program called Capistrano. You can configure Capistrano to precompile assets automatically during deployment just as you did when you deployed the blog to Heroku.
The asset pipeline reduces the number of requests the web browser makes for assets, but the browser still needs to parse and recompile the CSS and JavaScript for every page. Depending on the amount of CSS and JavaScript your application includes, this could take a significant amount of time.
Turbolinks is a Rails feature that speeds up the process of
following links in your application by replacing the contents of the current
page’s body and the title with the data for
the new page instead of loading an entirely new page. With turbolinks, CSS and
JavaScript files are not even downloaded when a link is clicked.
Turbolinks is on by default in new Rails applications. You’ve been using it without even knowing since you built your first application in Chapter 2. You can see it working by watching the output from the Rails server. Go to http://localhost:3000/ in your browser and check the output in your terminal:
Started GET "/" for 127.0.0.1 at ...
Processing by PostsController#index as HTML

--snip--

Started GET "/assets/bootstrap.js?body=1" for 127.0.0.1 at ...

Started GET "/assets/application.js?body=1" for 127.0.0.1 at ...
After the GET request for the posts index page, the browser
fetches all of the CSS and JavaScript files needed by your application. Now click a
link such as New Text Post on the index page and check the output again:
Started GET "/text_posts/new" for 127.0.0.1 at ...
Processing by TextPostsController#new as HTML
  User Load (0.2ms) SELECT "users".* FROM "users"
    WHERE "users"."id" = ? LIMIT 1 [["id", 7]]
  Rendered text_posts/_form.html.erb (2.4ms)
  Rendered text_posts/new.html.erb within layouts/application (3.3ms)
Completed 200 OK in 38ms (Views: 36.5ms | ActiveRecord: 0.2ms)
The browser only makes a GET request for the New Text
Post page. It does not fetch the CSS and JavaScript files because they are already
loaded in memory. Finally, click the Back button in your browser.
This time there is no output in the terminal window. The index page was cached in the browser and no requests were sent to the server. Turbolinks caches ten pages by default.
If your application includes JavaScript code that uses jQuery’s
ready function to attach event handlers or trigger other code,
the JavaScript needs to be modified to work with turbolinks. Because turbolinks
doesn’t reload the entire page when a link is clicked, the
ready function is not called.
Instead, the page:load event is fired at the end of the loading
process. You can see this in action by adding the following CoffeeScript code to
app/assets/javascripts/posts.js.coffee:
  --snip--

  $(document).ready ->
➊   console.log 'Document Ready'

  $(document).on 'page:load', ->
➋   console.log 'Page Load'
Unfortunately, CoffeeScript is beyond the scope of this book, but you might recognize what this code snippet does if you’re already familiar with JavaScript. It prints “Document Ready” ➊ in your browser’s JavaScript console when the page first loads, and “Page Load” ➋ when you click a link that uses turbolinks.
Because you aren’t currently using $(document).ready() to
trigger any JavaScript code, you don’t need to worry about this right now. But
you should revisit this section if you ever start using the ready
function.
Now that you’ve seen a few of the built-in optimizations provided by Rails, let’s look at extra things you can do to improve performance. I’ll cover some techniques you can use to reduce the number of database queries your application makes and improve the performance of slow queries.
Rails models make accessing data so easy that you might forget you’re actually querying a database. Luckily, the Rails server shows SQL statements in the terminal. Look at this output as you navigate your application to spot possible inefficiencies.
Make sure your server is running, and keep an eye on your terminal output as I walk you through a few examples. Be sure you are logged out of the application before you start. First, browse to the login page at http://localhost:3000/login and check the server output:
Started GET "/login" for 127.0.0.1 at 2014-03-18 18:58:39 -0500
Processing by SessionsController#new as HTML
  Rendered sessions/new.html.erb within layouts/application (2.0ms)
Completed 200 OK in 12ms (Views: 11.8ms | ActiveRecord: 0.0ms)
This page doesn’t produce any SQL queries.
Now log in to the application:
  Started POST "/sessions" for 127.0.0.1 at 2014-03-18 18:59:01 -0500
  Processing by SessionsController#create as HTML
    Parameters: ...
➊   User Load (0.2ms) SELECT "users".* FROM "users"
      WHERE "users"."email" = '[email protected]' LIMIT 1
  Redirected to http://localhost:3000/
  Completed 302 Found in 70ms (ActiveRecord: 0.2ms)
This page produces one SQL query ➊ as Rails loads the user matching the
email address you entered on the previous page. The create method
in SessionsController uses this record to authenticate the password
you entered.
After you log in to the application, you should be redirected to the posts index page. Your server output for that page should look something like this:
  Started GET "/" for 127.0.0.1 at 2014-03-18 18:59:02 -0500
  Processing by PostsController#index as HTML
➊   User Load (0.1ms) SELECT "users".* FROM "users"
      WHERE "users"."id" = ? LIMIT 1 [["id", 1]]
➋    (0.1ms) SELECT "users".id FROM "users" INNER JOIN
      "subscriptions" ON "users"."id" = "subscriptions"."leader_id"
      WHERE "subscriptions"."follower_id" = ? [["follower_id", 1]]
➌   Post Load (0.2ms) SELECT "posts".* FROM "posts"
      WHERE "posts"."user_id" IN (2, 1)
      ORDER BY created_at DESC
➍   User Load (0.1ms) SELECT "users".* FROM "users"
      WHERE "users"."id" = ? LIMIT 1 [["id", 2]]
    User Load (0.1ms) SELECT "users".* FROM "users"
      WHERE "users"."id" = ? LIMIT 1 [["id", 1]]
    CACHE (0.0ms) SELECT "users".* FROM "users"
      WHERE "users"."id" = ? LIMIT 1 [["id", 1]]
    Rendered collection (2.7ms)
    Rendered posts/index.html.erb within layouts/application (3.8ms)
  Completed 200 OK in 13ms (Views: 11.0ms | ActiveRecord: 0.6ms)
This page produces six queries. It first finds the user with id 1
➊; this query looks up the current_user inside the
authenticate_user! call in PostController.
Next, the page finds the ids ➋ of the users the current user is following in
the call to current_user.timeline_user_ids. It then finds posts
➌ where the user_id matches the id of the
current_user or one of his or her followers.
Finally, the page queries for a user ➍ matching an id
with SELECT "users".* FROM "users" three times in a row. That looks
a little strange to me. My index page has three posts, but there are three extra
queries. Let’s look at the index action in
app/controllers/posts_controller.rb and see what’s
happening:
  class PostsController < ApplicationController
➊   before_action :authenticate_user!

    def index
➋     user_ids = current_user.timeline_user_ids
➌     @posts = Post.where(user_id: user_ids)
                 .order("created_at DESC")
    end

  --snip--
This code calls authenticate_user! ➊ before each action. The index action finds the user_ids ➋ that current_user wants to see and then finds the posts ➌ matching those users. You’ve already accounted for those queries in the previous server output. Since the index action isn’t creating the three user queries, they must be coming from the view.
The index view renders the collection of posts. That means the
source of these queries must be in the TextPost partial in
app/views/text_posts/_text_post.html.erb:
  --snip-
    <div class="panel-body">
➊     <p><em>By <%= text_post.user.name %></em></p>
--snip--
Here’s the problem. The name ➊ of the user who created each post is displayed by calling text_post.user.name. If you check the ImagePost partial, you can verify it does the same thing. For every post displayed, an extra query is generated, which explains the three extra queries you saw in the SQL output.
Code that creates an extra database query for each record in a collection falls into a category of problems called N + 1 Queries. These problems are common in Rails applications, and they occur when associations on a collection are referenced without first loading the associated models.
In this case, I loaded a collection of posts into
@posts. I then referenced the name for the
user who created each post. Because I didn’t load all of
those users in advance, Rails fetches them one at a time from the database as the page
is rendered. These extra queries meant the three posts on the index page resulted in
four queries. The number of queries is always one more than the number of items in the
collection.
Luckily, this problem is easy to fix. In Rails, you can specify in advance all
associations that are going to be needed with the includes method.
This technique is called eager loading.
Let’s update the index action in
PostsController to use eager loading now:
  --snip--
    def index
      user_ids = current_user.timeline_user_ids
➊     @posts = Post.includes(:user).where(user_id: user_ids)
                 .order("created_at DESC")
    end
  --snip--
Here, I chain the includes(:user) method ➊ to the query that sets @posts. The symbol passed to includes must match the name of an association on the model. In this case, post belongs_to :user.
With the includes method, Rails ensures that the specified
associations are loaded using the minimum number of queries. After you save this file,
refresh the index page in your browser and check the SQL output in your
terminal:
  --snip--
    Post Load (0.3ms) SELECT "posts".* FROM "posts"
      WHERE "posts"."user_id" IN (2, 1) ORDER BY created_at DESC
➊   User Load (0.3ms) SELECT "users".* FROM "users"
      WHERE "users"."id" IN (2, 1)
  --snip--
The three queries to find each user have been replaced with ➊ a single query that finds all users at once.
Watch out for extra queries as you build applications. Look for calls like
text_post.user.name in the view. Notice the two dots in that
call. The two dots mean you’re accessing data in an associated model, which can
introduce an N + 1 Queries problem, so you should preload the association before the
view is rendered.
You’ve reduced the number of database queries needed to load posts for the index page, but think about what happens when you have thousands of posts. The index page tries to show them all, increasing your application’s load time by a lot. You can use pagination, the process of splitting a collection of records into multiple pages, to alleviate this problem.
The will_paginate gem can do all the pagination for you. First, add
will_paginate to your application’s
Gemfile:
--snip--

gem 'bootstrap-sass'

gem 'will_paginate'

--snip--
Remember to always update installed gems after changing the Gemfile:
$ bin/bundle installNext, update the index action in
app/controllers/posts_controller.rb to add a call to the
paginate method:
  --snip--
    def index
      user_ids = current_user.timeline_user_ids
      @posts = Post.includes(:user).where(user_id: user_ids)
➊                .paginate(page: params[:page], per_page: 5)
                 .order("created_at DESC")
    end
  --snip--
The paginate method is chained with the other methods that set
the instance variable @posts ➊. The will_paginate gem adds
params[:page] automatically. I specified per_page:
5 so you can see the pagination working with only 6 posts in your database.
The default is 30 records per page.
The paginate method adds the correct limit and
offset calls to the database query automatically so the minimum
number of records are selected.
Finally, open the index view at
app/views/posts/index.html.erb and add a call to
will_paginate at the end of the page:
  --snip--

➊ <%= will_paginate @posts %>
The will_paginate view helper ➊ accepts a collection of
records, in this case @posts, and renders the correct links to
navigate through the pages of this collection.
To see this working, you need to restart your Rails server since you added a new gem. Then create new posts until you have at least six, and browse to a user page. If you click through to the second page, as in Figure 12-1, you should see the new links.
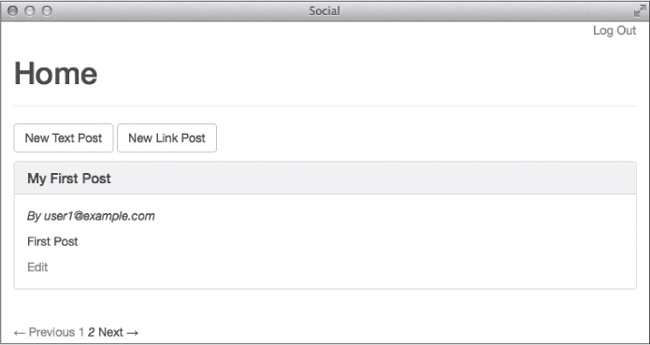
The will_paginate view helper added links to
Previous and 1, which you can click to go
back to the first page from the second.
Check the server output again to see the query used to retrieve posts from the database:
  Started GET "/posts?page=2" for 127.0.0.1 at 2014-03-26 11:52:27 -0500
  Processing by PostsController#index as HTML
    Parameters: {"page"=>"2"}
  --snip--
➊   Post Load (0.4ms) SELECT "posts".* FROM "posts"
      WHERE "posts"."user_id" IN (2, 1)
      ORDER BY created_at DESC LIMIT 5 OFFSET 5
  --snip--
The query for page two ➊ now includes LIMIT 5 OFFSET 5 as
expected. This query only fetches posts that are needed to render the page.
In programming, caching is the process of storing frequently used data so additional requests for the same data will be faster. Rails calls the place where data is stored a cache store. Rails applications commonly use two types of caching.
Low-level caching stores the result of time-consuming calculations in the cache—useful for values that are frequently read, but rarely change. Fragment caching stores parts of a view in the cache to speed up page rendering. Rendering a large collection of models can be time consuming. If the data rarely changes, fragment caching can increase your application’s page load speed.
Caching is disabled, by default, in the development environment, so before you can start learning about it, you need to enable it. Leaving the cache disabled in development is a good idea because you always want to work with the latest version of data while in development. For example, if you store a value in the cache, then change the code that calculates that value, your application could return the cached value instead of the value calculated by the new code.
You’ll enable caching in development for this chapter, so you can see how it
works and learn about the types of caching used in Rails applications. Open
config/environments/development.rb and change the value of
config.action_controller.perform_caching to
true:
Social::Application.configure do
  --snip--

  # Show full error reports and disable caching.
  config.consider_all_requests_local       = true
  config.action_controller.perform_caching = true

  --snip--
end
Once you’re finished with this chapter, change this value back to
false to disable caching in the development environment.
Rails supports several different cache stores. The default, ActiveSupport::
Cache::FileStore, stores cached data on the filesystem. A popular choice for
production applications is ActiveSupport::Cache::MemCacheStore, which
uses the memcached server to store data. The memcached server is a high-performance cache
store that supports distributed caching across several computers.
Now that you’ve enabled caching, let’s specify a cache store for your
application to use. Rather than install memcached on your computer, you can use the
ActiveSupport::Cache::MemoryStore to demonstrate caching. This option
also stores cached objects in your computer’s memory, but doesn’t require the
installation of additional software. Add this line to
config/environments/development.rb under the line you just
changed:
Social::Application.configure do
  --snip--

  # Show full error reports and disable caching.
  config.consider_all_requests_local       = true
  config.action_controller.perform_caching = true
  config.cache_store = :memory_store

  --snip--
end
Storing the cache in memory is faster than storing it on disk. The memory store allocates 32MB of memory, by default. When the amount of cached data exceeds this amount, the memory store runs a cleanup process that removes the least recently used objects, so you never need to worry about manually removing objects from the cache.
Restart the Rails server for these changes to take effect.
Everything in the cache is referenced by cache key. A cache key is a unique string that identifies a particular object or other piece of data.
Active Record models include the cache_key method for generating
a key automatically. You can try it in the Rails console by calling
cache_key on an instance of a model:
  2.1.0 :001 > post = Post.first
    Post Load (0.2ms) SELECT "posts".* ...
   => #<TextPost id: 1, title: ...>
  2.1.0 :002 > post.cache_key
➊  => "text_posts/1-20140317221533035072000"
The cache key for this post is the pluralized version of the class name, followed by
a slash, then the post id, a dash, and finally the
updated_at date as a string ➊.
Using the updated_at date as part of the key solves the cache
invalidation problem. When the post is modified, the updated_at date
changes, so its cache_key also changes. This way you don’t have
to worry about getting out of date data from the cache.
Low-level caching is useful when you need to perform a time-consuming calculation or
database operation. It is frequently used with API requests that might take a while to
return. Low-level caching in Rails uses the Rails.cache.fetch
method.
The fetch method takes a cache key and attempts to read a
matching value from the cache. The fetch method also takes a block.
When given a block of Ruby code, if the value is not already in the cache, the method
evaluates the block, writes the result to the cache, and returns the result.
To demonstrate low-level caching, let’s show the number of comments for each
post on the index page. To do this, first edit
app/views/text_posts/_text_post.html.erb and add the comment
count below the text_post.body:
--snip--

    <p><%= sanitize text_post.body %></p>

    <p><%= pluralize text_post.comments.count, "Comment" %></p>

--snip--
This new line of code uses the pluralize helper method to
pluralize the word “Comment” correctly based on the number of comments. For
example, if the post has no comments, it prints “0 Comments”. Make a similar
change to app/views/image_posts/_image_post.html.erb, replacing
text_post with image_post.
Now refresh the posts index page in your browser and look at the server output:
  Started GET "/posts" for 127.0.0.1 at 2014-03-26 15:15:05 -0500
  Processing by PostsController#index as HTML
  --snip--
➊    (0.1ms) SELECT COUNT(*) FROM "comments"
        WHERE "comments"."post_id" = ? [["post_id", 6]]
     (0.1ms) SELECT COUNT(*) FROM "comments"
        WHERE "comments"."post_id" = ? [["post_id", 5]]
     (0.1ms) SELECT COUNT(*) FROM "comments"
        WHERE "comments"."post_id" = ? [["post_id", 4]]
     (0.1ms) SELECT COUNT(*) FROM "comments"
        WHERE "comments"."post_id" = ? [["post_id", 3]]
     (0.1ms) SELECT COUNT(*) FROM "comments"
        WHERE "comments"."post_id" = ? [["post_id", 2]]
  Rendered collection (5.4ms)
  Rendered posts/index.html.erb within layouts/application (10.1ms)
Completed 200 OK in 22ms (Views: 16.8ms | ActiveRecord: 1.5ms)
This change adds five new queries ➊ to count the number of comments for each
post. Those extra queries take up valuable loading time, but you can improve performance
by getting rid of them. One way to remove such queries is by caching the values you need
(in this case, the number of comments per post) using
Rails.cache.fetch.
You can perform the caching by adding a method to the Post model.
Edit app/models/post.rb and add the
cached_comment_count method, as shown here:
  class Post < ActiveRecord::Base
    --snip--

    def cached_comment_count
➊     Rails.cache.fetch [self, "comment_count"] do
        comments.size
      end
    end
  end
This method passes the array [self, "comment_count"] ➊ to
the Rails.cache.fetch method. Here, self
represents the current post. The fetch method combines these values
into a single cache key. The block still calls comments.size as
before.
Now update the TextPost and ImagePost
views to use this new method:
--snip--

    <p><%= pluralize text_post.cached_comment_count, "Comment" %></p>

--snip--
When you refresh the index page in your browser, the six comment count queries are executed one more time and the values are cached. Refresh the page again, watch the server output, and note the queries are no longer executed.
This caching solution has one small problem. The Rails cache_key
method uses the post id and updated_at date to
create the cache key, but adding a comment to a post does not change the post
updated_at date. What you need is a way to update the post when a
comment is added.
Rails provides the touch option to associations just for this
purpose. When you specify touch: true on an association, Rails
automatically sets the updated_at value of the parent model to the
current time when any part of the association changes. This happens when a model is
added or removed from the association or when one of the associated models is
changed.
Open app/models/comment.rb and add touch:
true to the belongs_to association, as shown here:
class Comment < ActiveRecord::Base
  belongs_to :post, touch: true
  belongs_to :user

  validates :user_id, presence: true
end
Now the updated_at value on the post changes whenever one of its
comments is updated or deleted or when a new comment is created for it. If you add a
comment to a post, then reload the index page, the comment count query is executed for
this post again and the new count is cached.
Note
You can also solve this problem using a Rails counter cache. With a
counter cache, Rails keeps track of the number of comments associated with each post
automatically. Enable this feature by adding a column named
comments_count to the Post model and adding
counter_cache: true to the belongs_to :post
declaration inside the Comment model.
Besides low-level caching of values, you can also use a Rails feature called fragment caching to cache parts of a view. Caching the view decreases your application’s page load time by storing the rendered view data in the cache. Fragment caching is usually done inside a partial.
To demonstrate fragment caching effectively, I need a slow page. Using a
slow page makes the impact of fragment caching obvious. Let’s use the Ruby
sleep method to render posts more slowly. Obviously, you would
never do this in a real application—this is only for demonstration.
Open the app/views/text_posts/_text_post.html.erb partial and
add the call to sleep on the first line as shown here:
➊  <% sleep 1 %>
   <div class="panel panel-default">
     --snip--
</div>
This call to sleep ➊ tells Ruby to pause for 1 second.
Make the same change to the ImagePost partial at
app/views/image_posts/_image_post.html.erb.
Now when you refresh the index page, it should take much longer to display. Check the server output for the exact time:
  Started GET "/posts" for 127.0.0.1 at 2014-03-26 16:03:32 -0500
  Processing by PostsController#index as HTML
    --snip--
➊   Rendered collection (5136.5ms)
    Rendered posts/index.html.erb within layouts/application (5191.6ms)
  Completed 200 OK in 5362ms (Views: 5263.1ms | ActiveRecord: 11.8ms)
Rendering those five posts took more than five seconds ➊, which makes sense
with those five sleep calls.
Now let’s add fragment caching to the partials. Edit
app/views/text_posts/_text_post.html.erb again and add the
cache method call and block, as shown here:
➊  <% cache text_post do %>
     <% sleep 1 %>
     <div class="panel panel-default">
       --snip--
     </div>
    <% end %>
The cache method ➊ calls cache_key on
the text_post automatically. I also indented all of the code inside
the block. Make the same change to the ImagePost partial.
Now when you refresh the page in your browser, you should see some new output from the Rails server:
  Started GET "/posts" for 127.0.0.1 at 2014-03-26 16:18:08 -0500
  Processing by PostsController#index as HTML
  --snip--
➊ Cache digest for text_posts/_text_post.html: 3e...
➋ Read fragment views/text_posts/5-2014... (0.0ms)
➌ Write fragment views/text_posts/5-2014... (0.1ms)
  --snip--
  Rendered collection (5021.2ms)
  Rendered posts/index.html.erb within layouts/application (5026.5ms)
Completed 200 OK in 5041ms (Views: 5035.8ms | ActiveRecord: 1.1ms)
Rendering the index page now generates several lines of output about the cache. First, a digest is generated ➊ for the partial. This digest is the same every time this partial is rendered. Next, Rails reads the cache ➋ to see if this partial is already there. Finally, since the partial was not found in the cache, it is rendered and then written to the cache ➌.
Refreshing the page again should read all of the partials from the cache, rendering the page much more quickly. Check the server output to be sure:
  Started GET "/posts" for 127.0.0.1 at 2014-03-26 16:29:13 -0500
  Processing by PostsController#index as HTML
  --snip--
  Cache digest for text_posts/_text_post.html: 3e...
➊ Read fragment views/text_posts/22-2014... (0.1ms)
  --snip--
➋   Rendered collection (25.9ms)
    Rendered posts/index.html.erb within layouts/application (31.5ms)
  Completed 200 OK in 77ms (Views: 73.1ms | ActiveRecord: 1.0ms)
You only see cache reads ➊ now, and the collection renders very quickly
➋, in a fraction of the time it took after you added the sleep
calls. Caching can obviously result in dramatic performance improvements.
You should remove the calls to sleep from the
TextPost and ImagePost partials now, but leave
the caching in place in the views.
Caching is a great way to make your application faster, but it can also cause some issues. Unless the cache key for a code block or view fragment includes a user id, then the same cached data is sent to every user.
For example, the TextPost and ImagePost
partials both contain code that checks to see if the post belongs to the current user.
If so, it displays a button linked to the edit action.
  <% cache text_post do %>
    <div class="panel panel-default">
      --snip--
➊       <% if text_post.user == current_user %>
          <p><%= link_to 'Edit', edit_text_post_path(text_post),
                  class: "btn btn-default" %></p>
        <% end %>
      </div>
    </div>
  <% end %>
The conditional statement in the TextPost partial at
app/views/test_posts/_text_post.html.erb shows the Edit button if
the post belongs to current_user ➊. The owner of a post is probably going to be the first user to view the post.
After the owner views the post, the view fragment is cached with the Edit button. When
another user views the same post, the fragment is read from the cache and the other user
also sees the Edit button.
You can correct this issue in a couple of ways. You could include the user id in the cache key, but that would create a separate copy of the post in the cache for each user and remove the benefit of caching for many users. A simpler solution is to move the button outside the fragment being cached, as shown here:
<% cache text_post do %>
  <div class="panel panel-default">
    --snip--
  </div>
<% end %>

<% if text_post.user == current_user %>
  <p><%= link_to 'Edit', edit_text_post_path(text_post),
          class: "btn btn-default" %></p>
<% end %>
Once the Edit button is moved outside the cache block, the conditional is evaluated
for every user viewing the post and the Edit button is shown only if the current user is
the owner of the post. Make the same change to the ImagePost partial
at app/views/image_posts/_image_post.html.erb.
Remember to edit config/environments/development.rb, as shown at the beginning of this section, and disable caching in the development environment after you complete the exercises at the end of this chapter.
No one likes slow web applications! This chapter covered techniques for speeding up your application, from Rails built-in features like the asset pipeline and turbolinks to database query optimization, pagination, and caching. Now try the following exercises, and make your application even faster.
When you’ve completed the exercises, change
config.action_controller.perform_caching back to
false in config/environments/development.rb.
Leave caching turned off during development. Otherwise you’ll need to remember to
clear the cache any time you make a change to a cached view partial.
The next chapter covers debugging strategies you can use to track elusive problems with your application. You’ll look through server output and logs for clues and finally dive into a running application to see exactly what’s happening.