
Ruby on Rails is an open source web framework. Like the Ruby language, it emphasizes programmer happiness and productivity. As you’ll see, it includes sensible defaults that allow you to spend less time dealing with configuration and more time writing code. It also creates a directory structure for your application with a place for every file you need.
Rails was created by David Heinemeier Hansson. He extracted the framework from the project management application Basecamp that he built for 37signals. It was first released as open source in July 2004.
Rails is also a full-stack web framework. This means it contains everything you need to build web applications that accept user requests, query databases, and respond with data rendered in templates.
Enter the following command in a terminal to ensure that Rails is installed:
$ rails --versionThis should display Rails 4.0.0 or greater. If not, check the installation instructions for Rails in Ruby, Rails, and Git.
Rails makes getting started easy, so let’s dive right in. You’re only five commands away from having a running Rails web application.
Just like Jedi Knights build their own lightsabers, I think web developers should build their own personal websites, so that’s where we’ll start. I use my website as a playground for testing new ideas. In the fast-moving world of Ruby on Rails, keeping your own site up-to-date also helps you learn to use new features as they are released.
Open a terminal window and create a directory for your Rails projects. I call mine code, but you can use any name you like.
$ mkdir code
$ cd code
Now use the rails new command to create a new application. Our
first application will be a simple weblog, so let’s just call it
blog.
$ rails new blogThis command creates all of the files your new application needs and then runs the
bundle install command to download and install any other gems needed
by Rails. (Gems are packaged Ruby applications or libraries.)
Depending on your connection speed, this may take a few minutes. When the install is
complete, use the cd command to move to the newly created
blog directory:
$ cd blogFinally, use the rails server command to launch a server so you can
see your new application. When you created this application, a directory called
bin was also created inside blog. The
bin directory is where you’ll find rails
and other commands you’ll need later.
$ bin/rails serverThis command starts the WEBrick server that is built in to Ruby. Once the server has started, open your web browser and go to this address: http://localhost:3000. If everything worked correctly, you should see a web page like the one in Figure 2-1.

Congratulations! You’re officially a Ruby on Rails developer. The page you just created includes some tips for getting started with your application, but before we get into that, let’s learn a little more about Rails.
The Rails framework is based on two well-known software engineering principles. Understanding these principles will help you understand the “Rails way” of building applications.
You didn’t have to configure anything to get a basic Rails application up and running. In Rails, this concept is known as convention over configuration. As long as you follow the Rails conventions, everything should just work.
Rails makes many choices for you when you create an application. Those choices include which web server and database server to run in development mode and which JavaScript library and testing library your application will use. Even the names of your application’s database tables and models are chosen automatically based on convention. You can certainly break convention and change those settings if you’d like, but then you’ll have to configure some things for yourself.
The other key principle in Rails is don’t repeat yourself, often abbreviated DRY. In Rails, you avoid duplicating knowledge within your application. Specifying the same information in more than one place can lead to errors when you change one instance and not the other.
You’ll see several examples of the DRY principle as we work our way through the Rails architecture and directory structure. There is a single, specific place for each part of a Rails application. Things that can be inferred from another source, such as the names of columns in a database table, don’t need to be specified anywhere.
Rails applications are structured around the model-view-controller (MVC) software engineering pattern. The MVC pattern is designed to separate an application’s data from a user’s interaction with it. This separation of concerns usually results in an application that is easier to understand and maintain.
The model represents your application’s data and the rules for manipulating that data. The application’s data is sometimes referred to as the application’s state. The rules for manipulating this data are also known as business logic. All changes to your application’s state must pass through the model layer.
Rails models contain code for data validation and associations between models. Most of the code you write will be inside of a Rails model, unless it is directly involved with the user’s view of the data.
The view is the user interface for your application. Because we are building web applications, the view will consist mainly of HTML. Rails uses a template system called Embedded Ruby (ERB) by default.
Embedded Ruby allows you to include Ruby code for accessing data within an HTML template. When the user requests a page, the Ruby code in the template is evaluated by the server, and the resulting HTML page is sent to the user.
The ability to embed Ruby code inside a view can sometimes lead programmers to include too much code inside a view. Doing this is problematic because if you add another view, then that code will need to be duplicated. Code used only by the view can be moved to a helper, which is a method meant specifically for use in the view. In general, a view should never contain code more complex than a simple conditional statement.
The controller is like the glue that holds together the model and the view. The controller is responsible for accepting a request from the user, gathering the necessary data from the model, and rendering the correct view. This sounds like a lot of work, but thanks to the conventions used in Rails applications, the process happens almost automatically.
In Rails, the controller is simply a Ruby class with methods that correspond to the
various actions in your application. For example, in your blog application, you have a
method named show for displaying a blog post and a method named
new for adding a new post.
Now that you’re familiar with the principles and architecture used by Rails,
let’s see where these pieces live within the directory structure created by the
rails new command. Inside the blog directory, you should find 10
subdirectories.
The app directory is where you’ll spend most of your time while building your application. It contains subdirectories for each part of the MVC architecture discussed previously, as well as assets, helpers, and mailers.
The assets directory holds the images, JavaScript files, and CSS style-sheets used by your application. The helpers directory contains Ruby files with methods used by your views. The mailers directory is for Ruby classes used to send email.
The bin directory holds simple Ruby scripts for accessing the bundle, rails, and rake command-line programs used while building your application. These scripts ensure that the three programs run in the context of the current Rails application. You can have multiple versions of these programs installed at the same time, which can lead to errors if you don’t use the scripts in bin to access them.
Rails makes heavy use of convention over configuration, but sometimes configuration is unavoidable. In those cases, look to the config directory.
The environments subdirectory contains configuration files for the three different environments created automatically by Rails. An environment is a collection of settings used for a specific purpose such as development or testing. These settings are stored in development.rb (used while developing your application), test.rb (used while running automated tests), and production.rb (used after your application is deployed and running in production).
The file application.rb contains the settings for all environments. Information in one of the specific environment files just mentioned will, however, take precedence over settings here.
The file database.yml holds database configuration for each of
the three environments. Rails creates a SQLite database, by default, when you run
rails new, so the default settings in
database.yml are for that SQLite database. This database is a
single file that you will use during development. You usually want to specify a
different database server to use in production.
The file routes.rb maps the web address entered by the user to a specific controller and action in your application. As you add resources and actions to your application, you need to update this file to reflect the changes. I cover resource-based routing during the discussion of controllers in Chapter 4.
The db directory initially contains only a single file called seeds.rb. Use this file to create your application’s default data. For example, in an application with user accounts, you may want to include a special “admin” user here.
As you build your application, you will create database migrations, Ruby scripts that create and modify the tables in your database. A directory named migrate is created to hold these database migration files. The file schema.rb, which shows the current state of your application’s database, is created as well. If you use the default SQLite database in your application, the database itself is also placed in this folder.
The lib directory is the place to put any reusable library code
you write. This directory is initially empty except for two subdirectories: assets and
tasks. Assets are images, CSS stylesheets, and JavaScript files.
Tasks are Ruby scripts used to automate actions such as managing
your application’s database, clearing log and temporary files, and running tests.
These tasks are executed using the rake command.
As your application runs, data is written to a file in the log directory. When you run your code in the development environment, this file is named development.log. Separate files will be created for the test and production environments.
Files in the public directory are sent to users as if the files were in the root directory of your application. For example, three files in this directory are for error messages—404.html, 422.html, and 500.html. You can see one of these files in your browser by adding its name to your address bar. If you visit http://localhost:3000/404.html, for example, you should see the default “page does not exist” error page.
This directory also holds a default favicon.ico, the image that appears in the address bar of most browsers, and a robots.txt file that controls how search engines index your application. You can modify all of these files for your application. You’ll probably want to customize the error pages with your own branding and add a custom favicon for your site.
The test directory contains subdirectories with automated tests for each part of your application. It also holds the script test_helper.rb, which loads the test environment settings in config/environments/test.rb and adds helper methods used in your tests.
Some Rails developers practice test-driven development (TDD). In TDD, you first write an automated test describing a new feature; then you add just enough code to make the test pass; and finally you refactor, or restructure, the code as needed to improve readability and reduce complexity.
The tmp directory contains ephemeral files. Here, you find cached copies of your application’s assets, process id files (pids) for running programs (such as your web server), user sessions, and files representing sockets being used by your application.
You use four different command-line programs when building Rails applications. These can sometimes be confusing to new Rails developers.
The gem command installs Ruby gems. The Rails framework is
actually distributed as a collection of gem files.
Your newly created Rails application is made up of over 40 gems. Maintaining the
correct versions of these gems and dependencies between them can get complicated. For
this reason, you rarely use the gem command directly; instead, you
usually rely on a tool called Bundler to manage gems and keep your dependencies up to
date. You interact with Bundler using the bundle command.
The bundle command is used to install and update the gems
needed by your application. It installs gems by reading the Gemfile
that was automatically created by the rails new command in the root
directory of your Rails application. It stores the version numbers of gems you’re
using and their dependencies in the file Gemfile.lock.
The bundle list command displays the names and versions of all
gems currently being used by your application:
$ bin/bundle listAs mentioned earlier, we are using the copy of bundle inside the
bin directory.
The rake command is an automated build tool used to run tasks
related to your application. (If you are familiar with the make
command, rake is the Ruby version.) Enter this command to obtain a
list of the available tasks for your application:
$ bin/rake --tasksThis command prints a list of tasks your application can use along with a short description of each to your terminal. Some gems add tasks to your application, and you can also add your own tasks by writing Ruby scripts and saving them in the lib/tasks directory.
You used the rails command earlier to create an application and
start the server. You can also use this command to generate new code and launch the
console. Enter the rails command by itself to list the available
options:
$ bin/railsIn addition to the new command that you used to build your
application and the server command that starts a web server, Rails
also provides several other helpful commands. These include the
generate command (generates new code), the
console command (starts an interactive Ruby console with your Rails
application preloaded), and the dbconsole command (starts a
command-line interface for the currently configured database).
Now that you’ve seen some Rails command-line tools, let’s use a few of them to add some functionality to the blog application we created.
We’re going to use a Rails feature known as scaffolding. Rails scaffolding is a sometimes-controversial feature that generates application code for you. This single command creates a model, a set of views, and a controller automatically.
Many developers believe that you should write all of your own code. I agree with them, but Rails scaffolding is helpful for bootstrapping an application, especially for developers new to Ruby on Rails. We will explore the generated code over the next few chapters. By the end, you will understand each file and be able to write those files by hand.
Open a new terminal window (or a new tab in your current one). Change to your
code/blog directory if necessary. Then, use the rails
generate command to add posts to the blog:
$ bin/rails generate scaffold Post ➊title:string ➋ body:text
Here, we’ve asked Rails to generate a scaffold for a blog Post. We specified that a Post should have a title ➊ and a body ➋.
The title will be a string, and the body will be a text field in the database. As this command runs, you should see a flurry of activity in your terminal as files are generated and placed in the correct folders.
The previous command should have generated a database migration. Use the
rake command to run that migration:
$ bin/rake db:migrateThis command should create a table named posts with fields named
id, title, body,
created_at, and updated_at. The
title and body fields will store data entered by
the user. Rails adds the id, created_at, and
updated_at fields automatically. The id field is a
unique, auto-incrementing integer that represents each row in the database. The
created_at and updated_at fields are timestamps
representing when the row was created and when it was last updated. Rails keeps track of
these values automatically.
To see the results, go to http://localhost:3000/posts in your web browser. You should see a page like the one in Figure 2-2.
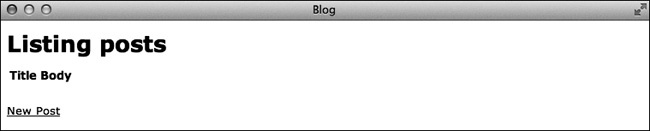
This page certainly won’t win any awards for design, but it is functional. Click the New Post link to see a form for adding a new blog post. After you add a post, click the Back link to return to the home page.
By default, Rails shows your data in a table with links for Show, Edit, and Destroy. Feel free to try these links and verify that the application is working.
As you play with the application, be sure to look at the output in the terminal window where the server is running. This is a copy of the development log generated by your application. You’ll find a wealth of information here, such as the URL requested, the Ruby method being run, and the SQL commands being executed.
This chapter covered the basic principles, architecture, directory structure, and commands used to build Rails applications. In the next chapter, we’ll dig in to the Rails code we just generated, starting with models, and you’ll learn to write your own code.