
A view is the user interface to your application. Typically, views include web pages for displaying database records and forms for creating and updating those records. Views also sometimes take the form of responses to API requests.
This chapter covers the most common Rails view template type, called Embedded Ruby, as well as view-specific helpers and layouts. You’ll also learn how to avoid duplication in your HTML code with partials and how to generate forms to accept user input.
Enter bin/rails server to start
the Rails server now. And keep it running in a terminal window as you work through the
examples in this chapter, so you can see the changes you make to the application in your web
browser and watch the server output.
Embedded Ruby (ERB), the default template type in Rails, is used to build view templates. An Embedded Ruby template contains a mixture of Ruby code and HTML that is similar to ASP, JSP, or PHP.
Templates are stored in a subdirectory of app/views named after
the controller. For example, you’ll find the templates for the posts controller in
app/views/posts. The Rails convention is to name templates after
the action they represent, with the file extension .html.erb. The
default template for the index action is
index.html.erb.
Embedded Ruby contains three special tags for executing Ruby code. These tags are used for output, control flow, and comments. Let’s take a look at each of these.
The <%= %> tag (also called the output
tag) executes the code it contains and prints the return value on the page.
Open the file app/views/posts/show.html.erb in your editor to see
several examples of this tag.
For instance, this tag prints the title of the current post:
<%= @post.title %>
Note that any HTML in the title is escaped by default. That is, any reserved characters are converted to character references and displayed on the page instead of being interpreted as HTML. This safeguard prevents malicious users from entering HTML code on your page that could cause a page to break or even a cross-site scripting attack. Cross-site scripting attacks and other security concerns are covered in Chapter 11.
The <% %> tag executes the code it contains without
printing anything on the page. This tag is useful for control flow statements such as
loops or conditionals. Open the file app/views/posts/index.html.erb
to see this tag in action.
This example uses the each method to loop over an array of
posts:
<% @posts.each do |post| %>
  <tr>
    <td><%= post.title %></td>
    <td><%= post.body %></td>
    <td><%= link_to 'Show', post %></td>
    <td><%= link_to 'Edit', edit_post_path(post) %></td>
    <td><%= link_to 'Destroy', post, method: :delete,
              data: { confirm: 'Are you sure?' } %></td>
  </tr>
<% end %>
Output tags are used inside the loop to print the values of
post.title and post.body. This example also
shows three instances of the link_to helper. These helpers create
links to the show, edit, and
destroy actions for each post. We’ll discuss helpers in the
next section.
Finally, the <%# %> tag is used to enter comments.
Comments are usually notes to yourself or other programmers
describing what your code does. Unlike HTML comments (which start with
<!-- and end with -->), ERB comments will
not appear in the HTML source. Use ERB comments for notes that you don’t want to
be visible in the HTML generated by the view template.
The ERB templates you’ve looked at so far were generated by the Rails scaffold when we first created our blog. They’re uncommented, but you can easily add your own comments. Here’s one:
<%# This code is crazy %>
In addition to notes to the programmer, you can also use ERB comments to remove code
temporarily from the page. Add a hash sign (#) after the first
percent sign (%) in any other ERB tag, and the code inside that tag
will not be executed.
Helpers are Ruby methods that simplify the code inside your views, making it easier to read. Rails includes helpers for creating links to resources, formatting numbers, and other common tasks. You can also easily write your own helper methods.
By using helpers, you can avoid placing too much logic in your view. If it takes more than a single line of code to display a value, then that code should probably be in a helper method.
Create links with the link_to helper method:
link_to 'Show', post
This example generates an HTML link like this: <a href="/posts/1">
Show</a>, assuming post has an
id of 1.
You can also use the URL and path helpers you saw in the last chapter to create links:
link_to 'Edit', edit_post_path(post)
This example generates a link like this: <a
href="/posts/1/edit">Edit</a>.
You can also include the HTTP verb to use for the link as well as additional data attributes. Use this for links that change state on the server, such as a link to destroy a resource. Remember that GET requests should not be used to change state.
link_to 'Destroy', post, method: :delete,
  data: { confirm: 'Are you sure?'}
This example generates a link with data-method="delete" and
data-confirm="Are you sure?". Rails includes the jQuery unobtrusive
Java-Script library (jquery_ujs.js) by default. This library uses the method and confirm
attributes to build a hidden form at run-time that creates a confirmation window and
then submits the destroy link using a proper DELETE request. Aren’t you glad you
don’t have to do that yourself?
Rails includes several handy methods for displaying numbers:
number_to_currency
number_to_human
number_to_human_size
number_to_percentage
number_with_delimiter
number_with_precision
Each method accepts a number and returns a string representing that number with some formatting applied. That formatting is related to the word at the end of the method.
The number_to_currency method, shown next, rounds the given
number to two decimal places and prepends a dollar sign:
number_to_currency 100
So this example returns "$100.00".
The methods number_to_human and
number_to_human_size convert numbers into easy-to-read string
representations.
number_to_human 1000000
number_to_human_size 1024
So these examples return "1 million" and "1
KB", respectively.
Format percentages with number_to_percentage. This method
rounds the number to three decimal places, by default, and appends a percent sign. You
can specify a precision as an option.
number_to_percentage 12.345
number_to_percentage 12.345, precision: 1
These examples return "12.345%" and "12.3%",
respectively.
In addition to URL and number helpers, Rails also has built-in helpers for working with dates and assets such as images, CSS files, and JavaScript files. Later in this chapter, I cover helpers for creating forms and form fields.
I can’t cover all of the helpers in Rails here, so for now, let’s see how to add your own helper methods.
You can easily create your own helpers by adding methods to the appropriate file in the app/helpers directory. The Rails scaffold generator has created a couple of mostly empty files in that directory for you automatically.
Add helpers that are only needed in a single controller to the helper file for that
controller. For example, helpers that are only used in posts views should be added to
the PostsHelper module in
app/helpers/posts_helper.rb.
Add helpers used throughout the application to the
ApplicationHelper module in
app/helpers/application_helper.rb. Open this file and let’s
see how it works:
module ApplicationHelper
  def friendly_date(d)
    d.strftime("%B %e, %Y")
  end
end
This code defines a new helper method called friendly_date. You
can use this method in any view in your application to format a date for display.
friendly_date Time.new(2014, 12, 25)
This example returns "December 25, 2014". If you later decide to
display dates in a different format throughout your application, you only have to change
this method instead of changing all of your views.
Now that you know more about how views work in Rails, let’s update the index view to look more like a blog. Go to http://localhost:3000/posts in your browser to see the index page, shown in Figure 5-1.
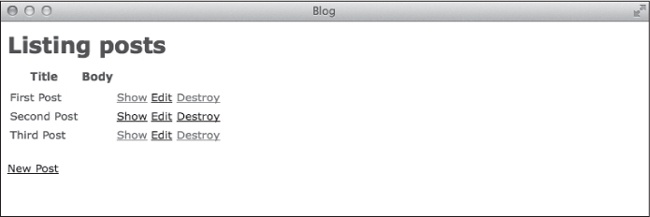
Your blog posts are currently displayed in a table. Open the file app/views/posts/index.html.erb in your editor:
  <h1>Listing posts</h1>

➊ <table>
    <thead>
      <tr>
        <th>Title</th>
        <th>Body</th>
        <th></th>
        <th></th>
        <th></th>
      </tr>
    </thead>

    <tbody>
➋     <% @posts.each do |post| %>
        <tr>
          <td><%= post.title %></td>
          <td><%= post.body %></td>
          <td><%= link_to 'Show', post %></td>
          <td><%= link_to 'Edit', edit_post_path(post) %></td>
          <td><%= link_to 'Destroy', post, method: :delete,
                    data: { confirm: 'Are you sure?' } %></td>
        </tr>
       <% end %>
      </tbody>
    </table>

    <br>

    <%= link_to 'New Post', new_post_path %>
This template first creates an HTML table ➊ and adds a table header to the page. It then loops over each post ➋ and displays that post’s attributes in a table row.
A proper blog would display each post title as a heading followed by the post body in a paragraph. Update the index view to look like this:
  <h1>Listing posts</h1>

➊  <% @posts.each do |post| %>
➋  <h2><%= link_to post.title, post %></h2>
➌  <p><i><%= friendly_date post.created_at %></i>
 <p><%= post.body %>
➍  <p>
   <%= link_to 'Edit', edit_post_path(post) %>
   <%= link_to 'Destroy', post, method: :delete,
         data: { confirm: 'Are you sure?' } %>
  </p>
  <% end %>

  <br>

  <%= link_to 'New Post', new_post_path %>
The template still loops over each post ➊ as before. Instead of displaying the
post attributes in table cells, however, it now shows the title
➋ in a second-level heading and uses the friendly_date helper
➌ you added in the previous section to format the created_at
date. The links ➍ to edit and destroy the
post are now at the bottom, and the link to show the post is now around
the post title. Refresh the page in your browser to see the changes,
shown in Figure 5-2.

Our blog still won’t win any design awards, but it’s looking better!
You may have noticed that the views you’ve seen so far only include the
contents of the web page without the other required elements such as
html, head, and body. These
elements are the basic structure of all web pages.
Check the server output in your terminal to see what’s happening when you load the index page:
   --snip--
➊  Started GET "/posts" for 127.0.0.1 at 2014-03-09 18:34:40 -0500
➋  Processing by PostsController#index as HTML
     Post Load (0.2ms) SELECT "posts".* FROM "posts"
➌    Rendered posts/index.html.erb within layouts/application (62.5ms)
   Completed 200 OK in 92ms (Views: 91.2ms | ActiveRecord: 0.2ms)
   --snip--
Here, we have a GET request ➊ for the path /posts. It is processed by the index method ➋ in PostsController. Finally, the server renders posts/index.html.erb within layouts/application ➌.
In Rails, a layout is a file containing the basic HTML required for every page on your site. Rather than repeat the same HTML in every view, you only write it once inside the layout file. This is another way that Rails removes needless duplication.
Let’s jump right in and dissect the layout for your blog. The server output
calls it layouts/application, so open
app/views/layouts/application.html.erb to see the layout for your
application:
➊ <!DOCTYPE html>
  <html>
  <head>
    <title>Blog</title>
    <%= stylesheet_link_tag 'application', media: 'all',
➋         'data-turbolinks-track' => true %>
    <%= javascript_include_tag 'application',
➌         'data-turbolinks-track' => true %>
➍   <%= csrf_meta_tags %>
  </head>
  <body>

➎ <%= yield %>

</body>
</html>
This file contains the basic HTML for every page on your site: the HTML5
doctype ➊ followed by the head section and
body section.
The head section sets the title of the page. It then includes Rails
helpers for linking to your site’s CSS ➋ and JavaScript ➌ files. It
also includes a helper ➍ that protects your application from cross-site
request forgery (CSRF) attacks, which I’ll cover in Chapter 11. The body section includes the
yield statement ➎.
The rest of this section covers these helper methods and the
yield statement.
In a Rails application, files such as CSS, JavaScript, and images are called assets. Assets are external files needed by the web browser accessing your application. These files are stored in subdirectories of the app/assets directory.
As your application grows, you may need several CSS and JavaScript files to control your site’s appearance and client-side functionality. The Rails server output also lists the CSS and JavaScript files your application is already using:
  --snip--
➊ Started GET "/assets/scaffolds.css?body=1" for 127.0.0.1 at ...

➊ Started GET "/assets/application.css?body=1" for 127.0.0.1 at ...

➋ Started GET "/assets/turbolinks.js?body=1" for 127.0.0.1 at ...

➋ Started GET "/assets/jquery.js?body=1" for 127.0.0.1 at ...

➋ Started GET "/assets/posts.js?body=1" for 127.0.0.1 at ...

➋ Started GET "/assets/jquery_ujs.js?body=1" for 127.0.0.1 at ...

➋ Started GET "/assets/application.js?body=1" for 127.0.0.1 at ...

➊ Started GET "/assets/posts.css?body=1" for 127.0.0.1 at ...
As you can see, our simple blog is already using three different CSS files ➊ and five JavaScript files ➋. Rather than list each of these files separately in the layout, Rails uses CSS and JavaScript files called manifests to require individual CSS and JavaScript files. A manifest file is simply a list of other files needed by your application.
A Rails feature known as the asset pipeline combines these CSS and JavaScript files together into two files and compresses them when your application is running in the production environment. These files are named application.css and application.js. By combining these files, your application receives fewer requests from users, which should improve its performance.
The head section of the layout contains ERB tags for adding the
CSS and JavaScript manifest files that your application needs.
The stylesheet_link_tag method adds an HTML link tag for the
default CSS manifest, application.css, and each of the CSS files
referenced in the manifest. Open the file
app/assets/stylesheets/application.css to see how it
works.
 /*
  --snip-
  *

➊ *= require_tree .
➋ *= require_self
  */
This file starts with a block of comments explaining its purpose as well
as the lines starting with require_tree ➊ and
require_self ➋. The require_tree.
statement includes all other CSS files in the
app/assets/stylesheets directory and subdirectories. The
require_self statement means the contents of this CSS file are included at the
bottom.
The javascript_include_tag method adds a script tag for the
default JavaScript manifest, application.js, and each of the
JavaScript files listed in the manifest. Now open the JavaScript manifest
app/assets/javascript/application.js.
--snip-
//
//= require jquery
//= require jquery_ujs
//= require turbolinks
//= require_tree .
This file is similar to the CSS manifest. It starts with a block of comments
explaining its purpose and then includes the JavaScript libraries,
jquery, jquery_ujs, and
turbolinks by default, as well as any other JavaScript files in
the app/assets/javascript directory and subdirectories.
Note
The asset pipeline, turbolinks, and other performance issues are discussed in more detail in Chapter 12.
The csrf_meta_tags method adds two meta tags to the head of each
web page. These tags are designed to protect your application from CSRF attacks.
If you view the source on any page of your application, you should see a meta tag
named csrf-token that contains a long string of random hexadecimal
digits. This token is unique to your current session and is passed to your application
any time a form is submitted.
<meta content="authenticity_token" name="csrf-param" />
<meta content="..." name="csrf-token" />
In a CSRF attack, a trusted user of your application visits a malicious site. The malicious site then attempts to submit requests to your application as that trusted user. Because the malicious site has no way of knowing this secret token, these requests fail. CSRF and other security concerns are covered in Chapter 11.
In a layout, the yield statement identifies where content from
the view should be inserted. In this case, the HTML generated by
app/views/posts/index.html is inserted between the
body tags to form the complete web page that is sent to the
user.
The yield statement is not required to be the only statement in
the body element. You can add other elements to the body as needed.
For example, you might add a common header or footer here that appears on each page of
your application.
Like helpers, partials are used to extract code into meaningful units and to avoid duplicating code that is common to multiple views. The difference is that whereas helpers contain shared Ruby code, partials contain shared HTML code.
Partials are stored in view templates with filenames that begin with an underscore. For example, app/views/posts/_form.html.erb is a partial that renders a post form.
Code that is repeated across multiple pages is commonly separated out into partials to make the template code easier to follow. If you look at the new post and edit post templates, app/views/posts/new.html.erb and app/views/posts/edit.html.erb, respectively, you’ll see they both render the same form partial with this line of code:
<%= render 'form' %>
Here, the partial is named _form.html.erb but is referred to
simply as form when rendered.
If you find yourself repeating the same HTML code on more than one page, or in more
than one place on a single page, you should copy that code into a partial and replace it
with a render statement.
Partials can also be used to eliminate loops in view templates. When you use the
:collection option, a corresponding partial is inserted into the
template for each member of the collection. Using :collection
doesn’t necessarily remove code duplication entirely, but it can simplify the
template.
For example, you could move the code inside the <% @posts.each
... %> block in index.html.erb into a new file named
app/views/posts/_post.html.erb. You could then replace the block
with a single line of code like this one:
<%= render :partial => 'post', :collection => @posts %>
In this example, Rails understands that @posts is an array of
post objects, so it looks for a partial named
app/views/posts/_post.html.erb and renders it on the page once
for each object in the array. Because this action is so common, you can simplify even
further to this:
<%= render @posts %>
Let’s get some hands-on experience with partials by adding comments to the post show page.
You added a model for comments in Chapter 3 and a controller in Chapter 4, but you still can’t see them on the page. Nearly every post should have comments, and you don’t want to repeat that code in every single page, so this is a perfect opportunity to put partials to work.
To get started, open app/views/posts/show.html.erb in your editor:
<p id='notice'><%= notice %></p>

<p>
  <strong>Title:</strong>
  <%= @post.title %>
</p>

<p>
 <strong>Body:</strong>
 <%= @post.body %>
</p>

<%= link_to 'Edit', edit_post_path(@post) %> |
<%= link_to 'Back', posts_path %>
Let’s first clean up this page a bit like we did the posts index page by
wrapping the title in a heading tag and the body
in a paragraph, as shown here:
<p id='notice'><%= notice %></p>

<h2><%= @post.title %></h2>

<p><%= @post.body %></p>

<%= link_to 'Edit', edit_post_path(@post) %> |
<%= link_to 'Back', posts_path %>
Now add a heading and a render statement for the comments at the bottom of the page:
--snip--

<h3>Comments</h3>

<%= render @post.comments %>
This code shows the comments under the heading by rendering the
@post.comments collection with a partial. For this to work,
you’ll also need to create a partial for rendering a single comment. Create a new
file named app/views/comments/_comment.html.erb containing
this:
<p><%= comment.author %> said:</p>

<blockquote>
  <%= comment.body %>
</blockquote>
If you added any comments earlier using the Rails console, you should now see them at the bottom of the page. Of course, you can’t ask your users to add comments using the console; they expect a comment form. Let’s see how forms are created in a Rails application.
Accepting input from users can be one of the more difficult parts of building a web application. Rails includes an elegant system for generating forms.
Rails provides helper methods for the various form controls. When bound to a model, these helper methods generate the correct HTML markup for passing values back to the controller automatically.
Go to http://localhost:3000/posts/new in your browser to see the New Post form created by the Rails scaffold generator, as shown in Figure 5-3.
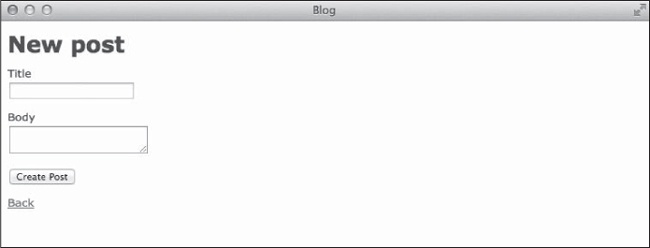
This simple form consists of a text box for the post title,
a text area for the post body, and a button labeled Create Post to
submit the form.
You can use helpers to generate a form and all of the necessary fields and labels. Open the file app/views/posts/_form.html.erb to see an example of a Rails form:
➊ <%= form_for(@post) do |f| %>
➋   <% if @post.errors.any? %>
➌     <div id="error_explanation">
        <h2><%= pluralize(@post.errors.count, 'error') %>
          prohibited this post from being saved:</h2>

        <ul>
        <% @post.errors.full_messages.each do |msg| %>
          <li><%= msg %></li>
        <% end %>
        </ul>
      </div>
     <% end %>

➍    <div class='field'>
       <%= f.label :title %><br>
       <%= f.text_field :title %>
     </div>
     <div class='field'>
       <%= f.label :body %><br>
       <%= f.text_area :body %>
     </div>
     <div class='actions'>
       <%= f.submit %>
     </div>
   <% end %>
This partial is used when creating a new post and editing an existing post. The form
begins with a call to the form_for method ➊ with a block that
contains the rest of the form. Next an if statement ➋ checks
to see if the post contains any errors. If the form has errors, the
error_explanation div ➌ appears before the rest of the form.
Otherwise, nothing is shown here. Finally, you’ll see the form controls
➍.
Let’s first look at the code for displaying errors like the one shown in Figure 5-4. Remember from our discussion of controllers that if a
create or update action fails, the form will be
rendered again. Try creating a new post with a blank title to see the error.

Figure 5-4 shows the error_explanation
div with the number of errors in a heading followed by a bulleted list of
the actual errors. Also, the label for the title field now has a red
background and the text box for the title is outlined in red. Rails
does this by wrapping these elements in a div with class
field_with_errors.
Now that you know how to display errors, let’s look at the
form_for method and other helper methods for creating form
controls.
Use the form_for block to create a form bound to a model. For
example, this particular form is bound to the model stored in
@post:
<%= form_for(@post) do |f| %>
Within this block, you have access to helper methods to add controls such as labels,
text fields, and buttons to the form. Use the form builder object
(in this case f) to call these methods.
<%= f.label :title %>
The label helper is used to create a label tag for the specified
field. The previous statement will generate this HTML: <label
for="post_title"> Title</label>. Rails converts the field name to a
string and capitalizes the first letter. Your users can click this label to focus the
cursor in the text field for the title. Of course, you still have to create that text
field, and Rails has a helper for that, too.
<%= f.text_field :title %>
The text_field helper generates the following HTML:
<input id= "post_title" name="post[title]" type="text" />.
Note that the id of this input (post_title)
matches the for value of the label tag in the previous paragraph.
Also notice the name of this field. Rails sets names on form fields to indicate both the
model (post) and the attribute to modify
(title).
The next few lines of code add a label for the post
body followed by a text_area for entering the
body text. These controls work the same as the
title fields. The text_area helper generates
this HTML: <textarea id= "post_body"
name="post[body]"></textarea>.
Besides controls for entering the title and
body text, you need a button to submit the form:
<%= f.submit %>
The submit helper generates a submit button. The button’s
label is based on the class name of the current model and whether the model has been
saved to the database. In the case of a new post, the value will be "Create
Post" and the HTML looks like this: <input name="commit"
type="submit" value="Create Post" />. If the post has already been saved
to the database, the value is "Update Post".
Rails includes form helpers for every field you need, and you can always add your
own helpers to create custom fields. Built-in examples include
check_box, hidden_field,
password_field, radio_button, and
text_area.
Helper methods for HTML5 field types, such as email_field,
phone_field, and url_field, are also included.
These fields look like regular text fields, but on mobile devices, you’ll see an
alternate keyboard. Use these field types to ensure that your application is
mobile-friendly.
Now let’s put your new form knowledge to work and add the comment form. First, add another heading to the end of the post show page at app/views/posts/show.html.erb:
<h4>New Comment</h4>
Add the form for creating a comment underneath that new heading, as shown next. The
array being passed to the form_for method contains both
@post and @post.comments.build. Because every
comment belongs to a post, you must pass the post and comment to the method. In this case,
you’re using the current post and a new comment created by
@post.comments.build.
<%= form_for [@post, @post.comments.build] do |f| %>
  <div class='field'>
    <%= f.label :author %><br>
    <%= f.text_field :author %>
  </div>
  <div class='field'>
    <%= f.label :body %><br>
    <%= f.text_area :body %>
  </div>
  <div class='actions'>
    <%= f.submit %>
  </div>
 <% end %>
The rest of the comment form should look similar to the post form; even the field names are the same. Refresh the page in your browser and make sure the form renders like the one shown in Figure 5-5.
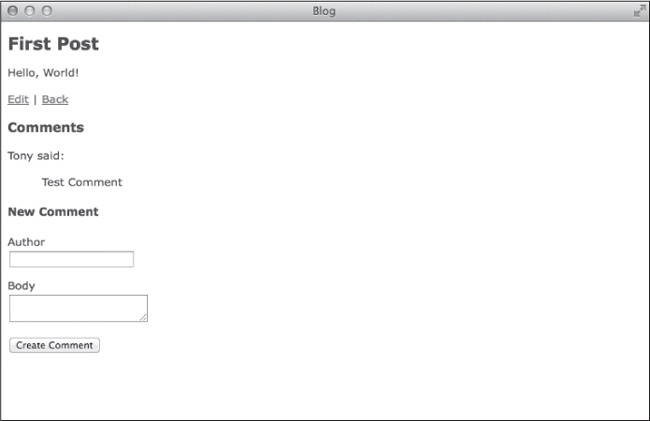
Now enter an author name and comment body and click the Create Comment button. Submitting the form should display your new comment and add a flash message to the top of the page that says “Comment was successfully created.”
Check the output of the rails server command in your terminal to
see exactly what happened. Assuming your post has an id of 1, you
should first see a POST to the path /posts/1/comments. This calls the
CommentsController#create method.
You added this controller and method in the last chapter; recall that the
create method builds and saves a new comment and then redirects the
user back to the post. You should see this redirect as a GET request for
/posts/1 in the output. This happens when the user is redirected back
to the post show page.
Spend some time working on your application’s views. We cleaned up the index page a little, but I recommend you improve it further. The other pages could also use some work. The following exercises should give you some ideas.
In the next chapter, you’ll set up Git for version control and deploy your application to the web for everyone to see.
Q: | 1. Our blog’s heading only appears on the |
Q: | 2. In Chapter 3, you added an |
Q: | 3. Users can create comments now, but you have no way to remove them. You need
to be able to remove the inevitable spam posts! First, update the comment resource
in config/routes.rb to add a route for the
|
<%= link_to 'Destroy', [comment.post, comment],
  method: :delete, data: { confirm: 'Are you sure?' } %>