
Identity is a core concept in any social network, and authentication is the act of identifying yourself to a system. You want users to be able to sign up for new accounts and log into your application. Although gems like devise and authlogic provide complete authentication systems for Rails applications, in this chapter, you’ll get your hands dirty by building your own system instead.
In addition to the signup, login, and logout actions, you’ll also add methods for getting the current logged-in user’s identity and redirecting anonymous users to the login page. This authentication system will require controllers and views, so before starting, let’s take a moment to add a little style to your site with the Bootstrap framework.
The purpose of the authentication system is to identify the current user and only display pages the user wants to see or is authorized to see. You’ll use a combination of an email address and password to identify users. Email addresses are a good choice because they are globally unique. No two people have the same email address.
In your application, anonymous users are only allowed to see pages for logging in or signing up for a new account. Every other page should be restricted.
Before you start building the authentication system, you need data to protect from
anonymous users. Let’s add the index and
show pages for the Post models created in the
last chapter. First, you need to add controller actions. Open the file
app/controllers/posts_controller.rb in your editor and add these
index and show methods:
  class PostsController < ApplicationController
➊   def index
         @posts = Post.all
    end

➋   def show
         @post = Post.find(params[:id])
    end
  end
These two actions are similar to the index and
show actions in the blog from Chapter 4. The
index action ➊ retrieves all posts from the database and
assigns them to the @posts variable. It then renders the view at
app/ views/posts/index.html.erb. The show
action ➋ finds the requested post using the id from the
params hash, assigns it to @post, and renders
the view at app/ views/posts/show.html.erb.
Now you need to create corresponding view templates for these actions. Create a new file named app/views/posts/index.html.erb and add the following code:
➊ <div class="page-header">
    <h1>Home</h1>
  </div>

➋ <%= render @posts %>
The index view adds a header ➊ using the Bootstrap
page-header class and renders the collection
@posts ➋ using partials.
Because you’re using partials to render the posts, add those next; you’ll need a partial for each post type—of which there are two—so you need two partial files.
First, create the file app/views/text_posts/_text_post.html.erb and open it for editing:
➊ <div class="panel panel-default">
➋   <div class="panel-heading">
      <h3 class="panel-title">
➌       <%= text_post.title %>
      </h3>
    </div>

➍ <div class="panel-body">
    <p><em>By <%= text_post.user.name %></em></p>

    <%= text_post.body %>
  </div>
</div>
This partial uses Bootstrap’s panel component to display a
TextPost. The panel class ➊ adds a gray
border around the content. The panel-heading class ➋ adds a
light gray background. The title is then rendered inside an
h3 element with <%= text_post.title %>
➌. The panel-body class ➍ adds padding to match the
heading. The post author and body are rendered in this section.
Then create the file app/views/image_posts/_image_post.html.erb
with the following content. The ImagePost partial is just a slight
variation on the TextPost partial:
  <div class="panel panel-default">
    <div class="panel-heading">
      <h3 class="panel-title">
        <%= image_post.title %>
      </h3>
     </div>

     <div class="panel-body">
       <p><em>By <%= image_post.user.name %></em></p>

➊       <%= image_tag image_post.url, class: "img-responsive" %>

       <%= image_post.body %>
   </div>
 </div>
This partial uses the ERB image_tag helper to add an image tag
with the source set to image_post.url ➊, the location of the
image. This line also adds Bootstrap’s img-responsive class to
the image, which causes it to scale automatically based on the browser width.
With these views in place, start the Rails server and look at the application:
$ bin/rails serverNow go to http://localhost:3000/posts in your web
browser. The Post index view should look similar to Figure 9-1, depending on how many posts you created in the Rails
console.
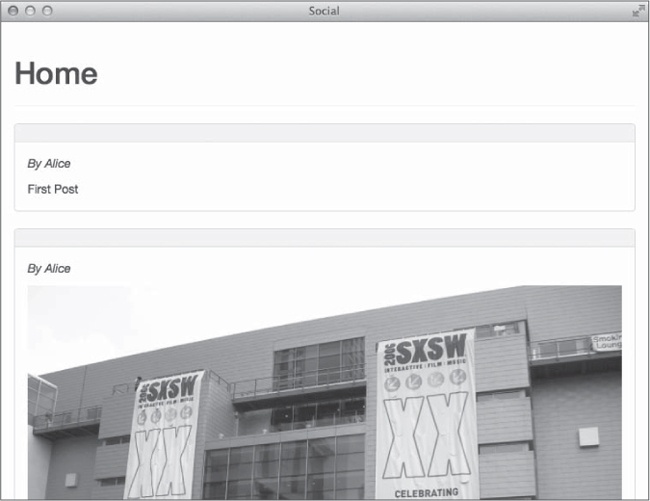
You created two posts in the previous chapter, and your application’s
Post index view currently shows those two posts. You didn’t
add titles in the last chapter, so the headings are blank.
Now that the Post partials have been created, the Post
show view can also use those partials. Create the new file
app/views/posts/show.html.erb with the following content:
<div class="page-header">
<h1>Post</h1>
</div>
➊ <%= render @post %>
<%= link_to "Home", posts_path,
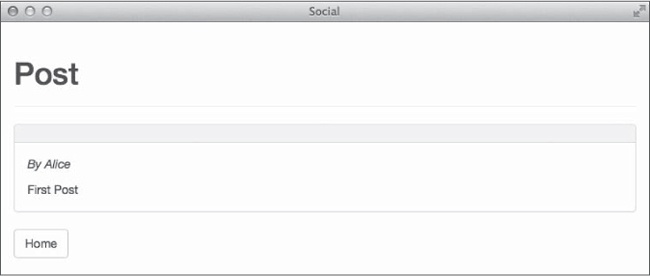
➋ class: "btn btn-default" %>The show view is similar to the index view
with two exceptions. It renders a single post ➊ instead of a collection of posts,
and it includes a button ➋ that links back to the posts index page.
Go to http://localhost:3000/posts/1 to see it in action, as in Figure 9-2.
Now that the application has actions and views for displaying posts, let’s move on to adding authentication to protect these actions from anonymous users.
Here, you’ll implement a user sign-up process that asks for an email address,
password, and password confirmation. If the user enters an email address that
isn’t already in the database and provides passwords that match, the system will
create a new User and thank the user for signing up.
You can already store the new user’s email address because you have a string
field named email in the users table. You need to
be more careful, however, with passwords. Never store a user’s password in plain
text. Instead, store a hashed version of the password, known as a password
digest. The secure password feature in Rails provides built-in support for
password hashing, using a hashing algorithm called bcrypt. Bcrypt is a secure one-way
hash.
You can enable the secure password feature by calling the method
has_secure_password in a Rails model. This method adds the
password and password_confirmation attributes to
the model and expects the model to have a string field named
password_digest. It adds validations that require matching
password and password_confirmation attributes on
creation. If these attributes match, it automatically hashes the password and stores it
in the password_digest field.
First, edit your application’s Gemfile and add the bcrypt gem. Because many applications include an authentication system, a commented-out line is already available for this gem. Remove the hash mark at the beginning of that line and save the file.
gem 'bcrypt', '~> 3.1.7'
Anytime you change the Gemfile, you also need to run the
bin/bundle install command to update the gems installed on your
system:
$ bin/bundle installThe next step is to add the password_digest field to the
users table and run the database migration with bin/rake
db:migrate so you can store the user’s hashed password:
$ bin/rails g migration AddPasswordDigistToUsers password_digestNow you need to turn on the secure password feature for the User
model. Open app/models/user.rb and add the line
has_secure_password below the has_many
associations you added in the last chapter. While you’re editing that file, also
add presence and uniqueness validations for the
email field:
class User < ActiveRecord::Base
  --snip--

  has_secure_password

  validates :email, presence: true, uniqueness: true
  --snip--
end
The default route for creating a new user is http://localhost:3001/users/new. That works, but a custom route such as http://localhost:3001/signup might be easier to remember.
Edit config/routes.rb and add a route for the sign-up page.
After a user signs up for an account or logs in to your application, you want to
redirect the user to the home page. So set the root route to the
posts index page while you’re editing this file.
Rails.application.routes.draw do
  resources :comments
  resources :image_posts
  resources :text_posts
  resources :posts
  resources :users

  get 'signup', to: 'users#new', as: 'signup'

  root 'posts#index'
end
Open app/controllers/users_controller.rb and add the necessary
actions to UsersController for creating new
Users:
  class UsersController < ApplicationController
➊   def new
      @user = User.new
    end

➋   def create
      @user = User.new(user_params)
      if @user.save
      redirect_to root_url,
        notice: "Welcome to the site!"
    else
      render "new"
    end
  end

  private

  def user_params
    params.require(:user).permit(:name, :email, :password,
                                 :password_confirmation)
  end
end
The new method ➊ instantiates an empty new
User object and renders the sign-up form. The
create method ➋ instantiates a User
object using the parameters passed from the form. Then, if the user can be saved, it
redirects the user to the root of the site and displays a welcome message. Otherwise, it
renders the new user form again.
Now that the controller actions are in place, add the sign-up form in app/views/users/new.html.erb:
   <div class="page-header">
    <h1>Sign Up</h1>
  </div>

  <%= form_for(@user) do |f| %>
➊   <% if @user.errors.any? %>
      <div class="alert alert-danger">
        <strong>
          <%= pluralize(@user.errors.count, "error") %>
          prevented you from signing up:
        </strong>
        <ul>
          <% @user.errors.full_messages.each do |msg| %>
            <li><%= msg %></li>
          <% end %>
        </ul>
      </div>
    <% end %>

➋   <div class="form-group">
      <%= f.label :email %>
➌     <%= f.email_field :email, class: "form-control" %>
    </div>
    <div class="form-group">
      <%= f.label :password %>
      <%= f.password_field :password, class: "form-control" %>
    </div>
    <div class="form-group">
      <%= f.label :password_confirmation %>
      <%= f.password_field :password_confirmation,
        class: "form-control" %>
    </div>

    <%= f.submit class: "btn btn-primary" %>
  <% end %>
The first half of this form displays error messages ➊, if any. The
form uses a div with the Bootstrap class
form-group to group labels and inputs ➋, and adds the class
form-control to input controls ➌. Bootstrap uses these
classes to apply styles to the form.
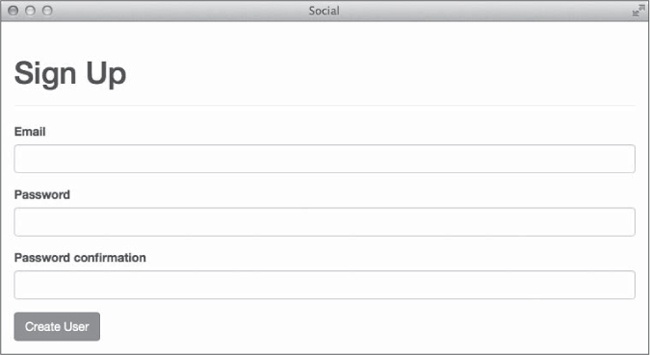
Go to http://localhost:3000/signup in your web browser to see the sign-up form, as in Figure 9-3.
In the create action, you added a flash message to welcome new
users, but your views don’t have a place for displaying flash messages yet.
Bootstrap includes an alert class that’s perfect for displaying
flash messages. Open the application layout at
app/views/layouts/application.html.erb and add a section for
flash messages, as shown here:
 --snip--
 <body>
   <div class="container">
➊    <% if notice %>
       <div class="alert alert-success"><%= notice %></div>
     <% end %>
➋    <% if alert %>
       <div class="alert alert-danger"><%= alert %></div>
     <% end %>

     <%= yield %>
   </div>
 </body>
 </html>
This application uses two different kinds of flash messages: A
notice message ➊ indicates success. A
notice is shown in green using Bootstrap’s
alert-success class. An alert message ➋
indicates an error. An alert is shown in red using the Bootstrap
alert-danger class.
In the last chapter, you didn’t add email addresses or passwords to the users
you created. If you want to log in using alice or
bob, you can update their accounts in the Rails console.
➊ irb(main):001:0> alice = User.find(1)
    User Load ...
   => #<User id: 1, name: "Alice", ...>
➋ irb(main):002:0> alice.email = "[email protected]"
   => "[email protected]"
  irb(main):003:0> alice.password = "password"
   => "password"
  irb(main):004:0> alice.password_confirmation = "password"
   => "password"
➌ irb(main):005:0> alice.save
    --snip--
   => true
After starting the Rails console with bin/rails console, find the
User by id ➊. Then assign values for the
email, password, and
password_confirmation ➋. Finally, save the
User with alice.save ➌. Repeat these
steps for the other User. Make sure the email for
each user is unique.
Now that you’ve seen how to create a form for users to sign up for an account, let’s explore how to let them log in.
A user signing up for an account fills out a form like the one in Figure 9-3 and creates a new user record in the database. On the other hand, there is no model that represents a login, and a login doesn’t create a record in the database. Instead, the user’s identity is stored in the session, a small amount of data used to identify requests from a particular browser to the web server.
In general, web servers are stateless. That is, they
don’t remember the identity of a user from one request to the next. You must add
this functionality, which you do by storing the currently logged-in user’s
user_id in the session.
Rails stores session information in a cookie by default. Session cookies are signed and encrypted to prevent tampering. Users can’t see the data stored in their session cookie.
Session values in Rails are stored using key-value pairs, and they’re accessed like a hash:
session[:user_id] = @user.id
This command stores @user.id in a cookie on the current
user’s computer. That cookie is automatically sent to the server with every
request to your application.
When a user successfully logs in to your site, you need to store the
user_id in the session. Then you look for a
user_id in the session on every request. If a
user_id is found and a User record matches
that id, then you know that user is authenticated. Otherwise, you
should redirect the user to the login page.
Now let’s implement the login process. First, use the Rails generator to
create a sessions controller:
$ bin/rails g controller SessionsNext, open config/routes.rb. Add a new resource called
:sessions and add routes for login and logout:
Rails.application.routes.draw do
  resources :comments
  resources :image_posts
  resources :text_posts
  resources :posts
  resources :users
  resources :sessions

  get 'signup', to: 'users#new', as: 'signup'

  get 'login', to: 'sessions#new', as: 'login'
  get 'logout', to: 'sessions#destroy', as: 'logout'

  root 'posts#index'
end
Now, create a new file named app/views/sessions/new.html.erb and add the login form:
  <div class="page-header">
    <h1>Log In</h1>
  </div>
➊ <%= form_tag sessions_path do %>
    <div class="form-group">
      <%= label_tag :email %>
      <%= email_field_tag :email, params[:email],
        class: "form-control" %>
    </div>
    <div class="form-group">
      <%= label_tag :password %>
      <%= password_field_tag :password, nil,
        class: "form-control" %>
    </div>
    <%= submit_tag "Log In", class: "btn btn-primary" %>
<% end %>
Notice that I’m using form_tag ➊ here
instead of form_for. The sign-up process used
form_for because that form was associated with the
User model. Use form_tag now because the login
form is not associated with a model.
The sessions controller handles login and logout. Edit app/controllers/ sessions_controller.rb to add these actions:
  class SessionsController < ApplicationController
➊   def new
    end

➋   def create
      user = User.find_by(email: params[:email])
      if user && user.authenticate(params[:password])
        session[:user_id] = user.id
        redirect_to root_url, notice: "Log in successful!"
      else
        flash.now.alert = "Invalid email or password"
        render "new"
      end
    end

➌   def destroy
      session[:user_id] = nil
      redirect_to root_url, notice: "Log out successful!"
    end
  end
The new method ➊ renders the login form. The controller
action doesn’t need to do anything. Remember that actions render a view file
matching their name by default. In this case, the new method
renders the view at /app/views/sessions/new.html.erb. The
create method ➋ looks for a user record by email address.
If it finds a matching user and that user can be authenticated with the provided
password, it stores the user_id in the session and redirects to the
home page. Otherwise, it adds an error message to the flash and redisplays the login
form. The destroy method ➌ clears the
user_id stored in the session and redirects to the home
page.
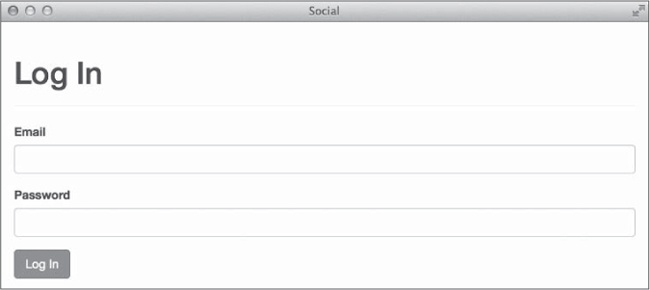
Go to http://localhost:3000/login to see the login form shown in Figure 9-4.
Users can log in and log out now, but the rest of the application has no way to know anything about the current user. As you add features to the application, the identity of the current user will be used frequently. For example, the application uses the current user to decide which posts to display and to assign ownership to any new posts or comments created. Now let’s add the methods needed to make the authentication system available to the rest of the application.
First, you need to be able to identify the currently logged-in user. Add the
current_user method to ApplicationController in
app/controllers/application _controller.rb and make it a
helper method. That way, it will be available in all controllers
and views, laying the groundwork for other parts of the app to access the currently
logged-in user:
class ApplicationController < ActionController::Base
  # Prevent CSRF attacks by raising an exception.
  # For APIs, you may want to use :null_session instead.
  protect_from_forgery with: :exception

  private

  def current_user
    if session[:user_id]
       @current_user ||= User.find(session[:user_id])
    end
  end
  helper_method :current_user
end
The current_user method returns a User
object representing the currently logged-in user. This method returns
nil when no one is logged in, so you can also use it in conditional
statements that should have different results when no user is logged in.
For example, use the current_user method to add a logout link
when a user is logged in or show links to log in and sign up when no one is logged in.
Open app/views/layouts/application.html.erb and add this code just
above the yield statement:
    --snip--
    <div class="pull-right">
      <% if current_user %>
        <%= link_to 'Log Out', logout_path %>
      <% else %>
        <%= link_to 'Log In', login_path %> or
        <%= link_to 'Sign Up', signup_path %>
      <% end %>
    </div>

    <%= yield %>
  </div>
</body>
</html>
Now logged-in users should see a link to log out, and anonymous users should see links to either log in or sign up.
In any social app, certain pages should not be available to anonymous users. The
last thing you need is a way to restrict pages so only authenticated users can view
them. You can do this with the Rails before_action method.
A before_action is a method that runs automatically before any
other action in the controller. These methods are sometimes used to remove duplication
by loading data needed by several different actions. A before_action
can also halt the current request by rendering or redirecting to another
location.
Create a method named authenticate_user! that redirects to the
login page if there is no current user. Add this method to the
ApplicationController in
app/controllers/application_controller.rb so it is available in
all controllers:
class ApplicationController < ActionController::Base
  # Prevent CSRF attacks by raising an exception.
  # For APIs, you may want to use :null_session instead.
  protect_from_forgery with: :exception

  private

  def current_user
    if session[:user_id]
      @current_user ||= User.find(session[:user_id])
    end
  end
  helper_method :current_user

  def authenticate_user!
    redirect_to login_path unless current_user
  end
end
Because you set the posts index page as the home page of
your application, let’s try this method in the posts controller. Open the file
app/controllers/posts_controller.rb and add a
before_action:
class PostsController < ApplicationController
  before_action :authenticate_user!

  --snip--
end
Now if an anonymous user tries to access the home page, he or she should be
redirected to the login page automatically. Be sure you don’t add this
before_action to the sessions page. If you do, anonymous users
won’t be able to access the login page!
Now that your application knows who’s logged in, you can change the home page to display only posts authored by the current user or anyone the current user is following. This type of home page is usually arranged in chronological order and called a timeline.
The first thing you need to do is add a method to the User model
to return a user_id list that you can use to query posts. Let’s
call this method timeline_user_ids. Open the file
app/models/user.rb and add this method near the end:
--snip--

  def timeline_user_ids
➊   leader_ids + [id]
  end
end
The has_many :leaders association added in Chapter 8 automatically adds a method called
leader_ids that returns an array of the id
values of this user’s leaders—or the people whose posts the user is
following. The timeline_user_ids method adds the current user’s
id to the array returned by leader_ids and
returns the new array ➊, which should contain every user you want to display on
the timeline.
Now open app/controllers/posts_controller.rb and update
the index action to use this method:
def index
  user_ids = current_user.timeline_user_ids
  @posts = Post.where(user_id: user_ids)
             .order("created_at DESC")
end
Instead of just fetching every post with Post.all, the
index action first obtains the list of user_ids
returned by current_user.timeline_user_ids. It then initializes
@posts to include every post that should be in the timeline based
on those ids. Also add an order clause because timelines are shown in
reverse chronological order.
Log in to see the Post index page in Figure 9-5.
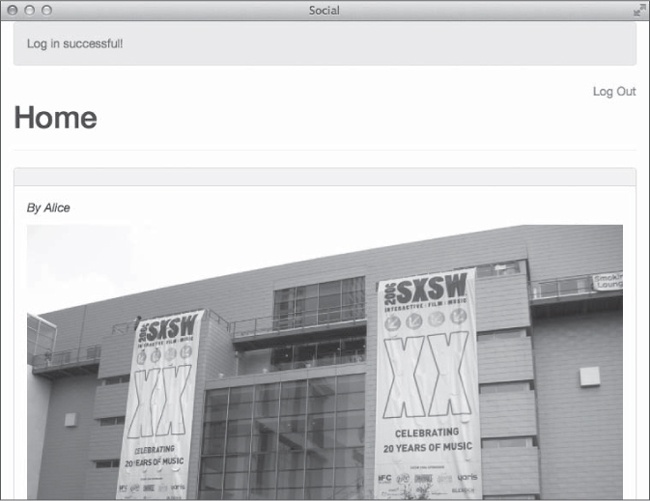
Click the Log Out link and confirm that you’re redirected to the Log In page.
Your application is really starting to take shape now. You have some pretty good-looking styles in place thanks to Bootstrap. Users can now sign up, log in, and log out. You can also restrict access to pages based on whether a user is authenticated.
You’ve written a lot of code, but so far you’ve only tested it by clicking around in the browser. This isn’t too bad when you only have a few actions to test. As the number of actions in your application grows, however, this sort of testing gets tedious.
In the next chapter, you’ll learn about automated testing of models and controllers. We’ll look at the default test framework already included by Rails, write tests for various parts of the application, and learn a little about test-driven development.
Q: | 1. You added a post |
Q: | 2. Add comments to posts. The process is similar to adding comments to the blog
at the end of Chapter 5. First, update the post
  --snip--

  <h3>Comments<h3>
  <%= render @post.comments %>

  <h4>New Comment</h4>
  <%= form_for @post.comments.build do |f| %>
    <div class="form-group">
      <%= f.label :body %><br>
      <%= f.text_area :body, class: "form-control" %>
    </div>
➊   <%= f.hidden_field :post_id %>
    <%= f.submit class: "btn btn-primary" %>
  <% end %>
The form includes the def create @comment = current_user.comments.build(comment_params) if @comment.save redirect_to post_path(@comment.post_id), notice: 'Comment was successfully created.' else redirect_to post_path(@comment.post_id), alert: 'Error creating comment.' end end Also add the private def comment_params params.require(:comment).permit(:body, :post_id) end Make sure only authenticated users can access this controller. Finally, create the comment partial app/views/comments/_comment.html.erb. This partial needs to show the name of the user who added the comment and the comment’s body. |
Q: | 3. How secure is the authentication system? Look at the
|