
The journey of a thousand miles begins with one step.
—Lao Tzu
Introduction to React
Virtual Document Object Model (DOM)
One-way data flow
React installation and setup
Creating a first React Hello World app
Introduction to components
Props and state
Let’s get started! React is different from most popular web technologies, and you will learn why as you move through this chapter. Its core concepts will open your mind to a new way of thinking if you have spent a considerable amount of time with traditional frameworks; this new way of thinking is sometimes called the React way of thinking. You might have heard the phrase “Write once, run everywhere,” but dismissed it as nearly impossible due to the explosion of different form factors (web, mobile, tablets). React has a different guiding principle: “Learn once, write anywhere.” That seems quite different, and liberating. We begin this first chapter with a quick tour of React, which will help prepare you for React Native. If you have an elementary knowledge of React, you can skip this chapter and move on to Chapter 2.
According to the official documentation, React is a JavaScript (JS) library (not framework) for creating user interfaces (UIs). It was built in a combined effort by teams from Facebook and Instagram. React was first introduced to the world in 2013, and has taken it by storm, with community-wide acceptance and the benefit of being the technology at the heart of Facebook. According to official documentation, some consider React to be the V in a model-view-controller (MVC) framework, because React makes no assumptions about the rest of the technology stack used. You can use whatever technology you wish and you can create a single section of your app with React or React Native; you can also conveniently make changes in an already created application by incrementally adding React to it.
Why React?
Do we really need another JavaScript library in a world full of JavaScript libraries and frameworks? There is hardly a month that goes by without a new JavaScript framework introduced.
React came into existence because its creators were faced with a significant problem: how to build large applications in which data change frequently. This problem occurs in almost any real-world application and React was created from the ground up to solve it. As you know, many popular frameworks are MVC or model-view-wildcard (MV*), but here’s a point to be noted and reiterated: React is not an MV* framework. It’s a just a library for building composable UIs for UI components with data that change over time. Unlike popular JS frameworks, React does not use templates or Hypertext Markup Language (HTML) directives. React builds UIs by breaking the UI into many components. That’s it, nothing else. This means that React uses the full features of programming languages to build and render views.
React uses JavaScript extensively: Traditionally the views in HTML are separated from the functionality in JavaScript. With React, components are created and there is one monolithic section where JavaScript has intimate knowledge of your HTML.
Extendable and maintainable: Components are formed by a unified markup with its view logic, which actually makes the UI easy to extend and maintain.
Virtual DOM: React applications are blazing fast. The credit for this goes to the virtual DOM and its diffing algorithm.
One-way data flow: Two-way data binding is a great idea, but in real-world applications it produces more pain than benefit. One of the common drawbacks with two-way data binding is that you have no idea how your data get updated. With one-way data flow, things are simple: You know exactly where data are mutating, which makes it easier to maintain and test your app.
To have a strong foundation with a new technology, it’s necessary to understand its core concepts. The next section explores a few unique concepts of React, which will bring you one step closer to understanding this amazing technology.
Virtual DOM

Virtual DOM and diffing algorithm operations
Manual DOM manipulation is messy, and keeping track of the previous state of the DOM is very hard. As shown in Figure 1-1, React solves this problem by keeping two copies of a VDOM. Next, a diffing algorithm is applied on these two VDOMs, which essentially checks for the changes that occurred and returns a stream of DOM operations. These DOM operations are then applied to the actual browser DOM.

Components with virtual VDOM
This feature of VDOM is not just important, but a killer feature of React. DOM access is super slow, and honestly speaking, the world has made it worse by hitting the DOM again and again in most applications. To make your application fast, you should access the DOM as little as possible, and this is beautifully handled by the implementation of VDOM. You won’t notice this with a small and trivial application, but once your app grows to include thousands of DOM elements all trying to get updated, React will not let your performance suffer.
One-Way Data Flow
React is primarily the V in an MVC pattern, but before you dive into the idea of one-way data flow in React, you must understand the challenges of MVC frameworks. One of the biggest challenges of an MVC framework is managing the view. As you know, the view component of the MVC framework is mainly the DOM representation. It is simple when you write code that interacts with the DOM, but it is very complicated for the framework to handle various DOM manipulations.

Two-way data binding
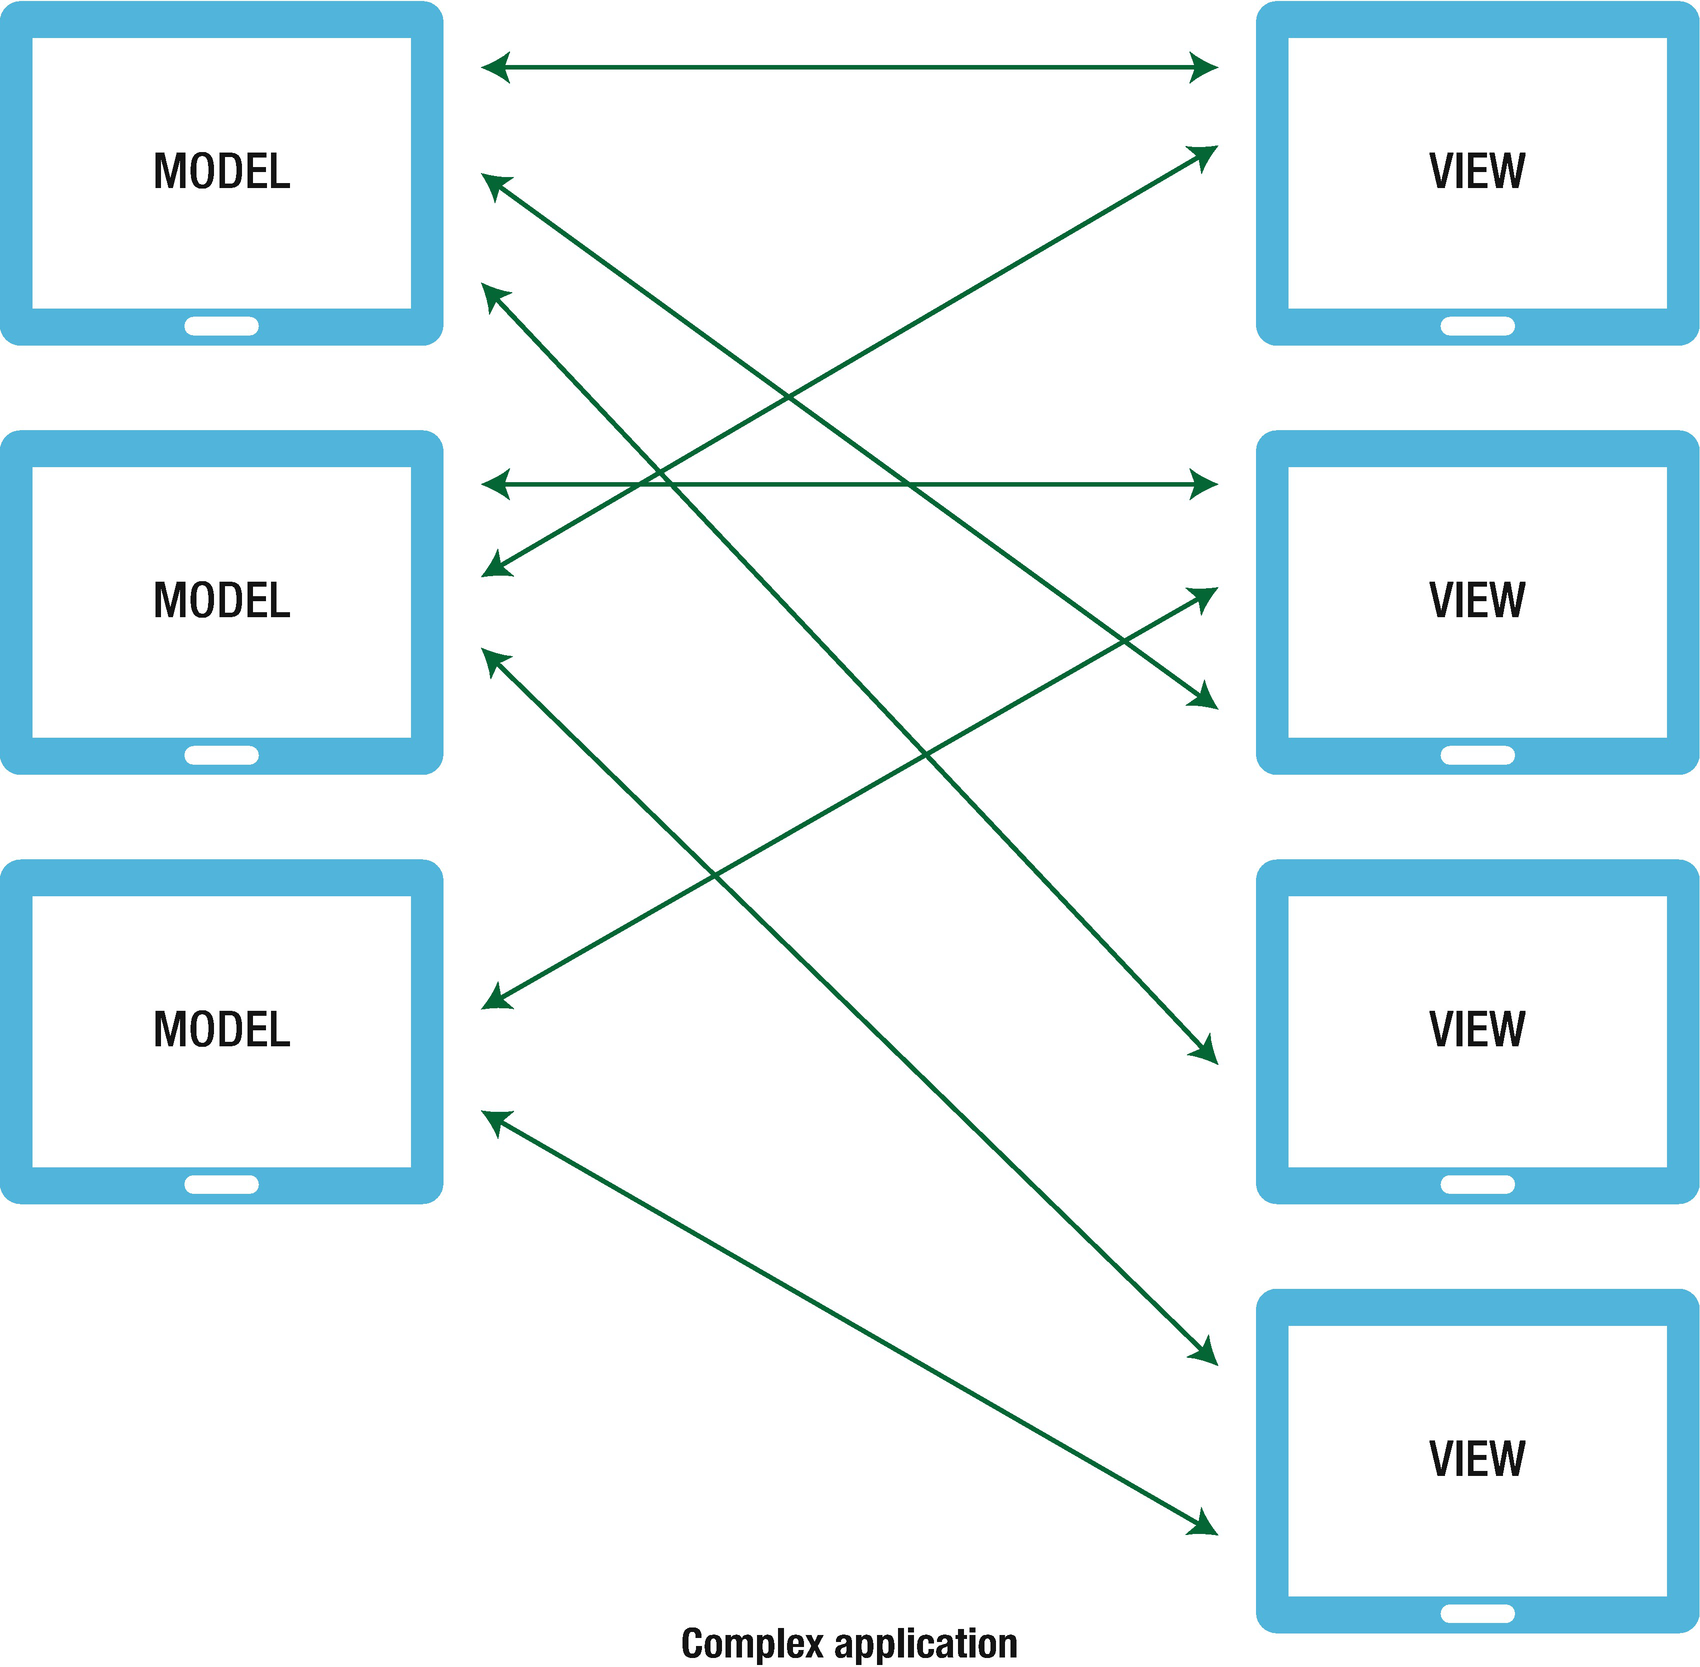
Unwanted spaghetti relationship
Another issue with this system is that making changes comes at a very high cost. When you introduce a new developer to an application that is this complex, it’s tough to understand the impact one change might have in this abyss of spaghetti relationships.
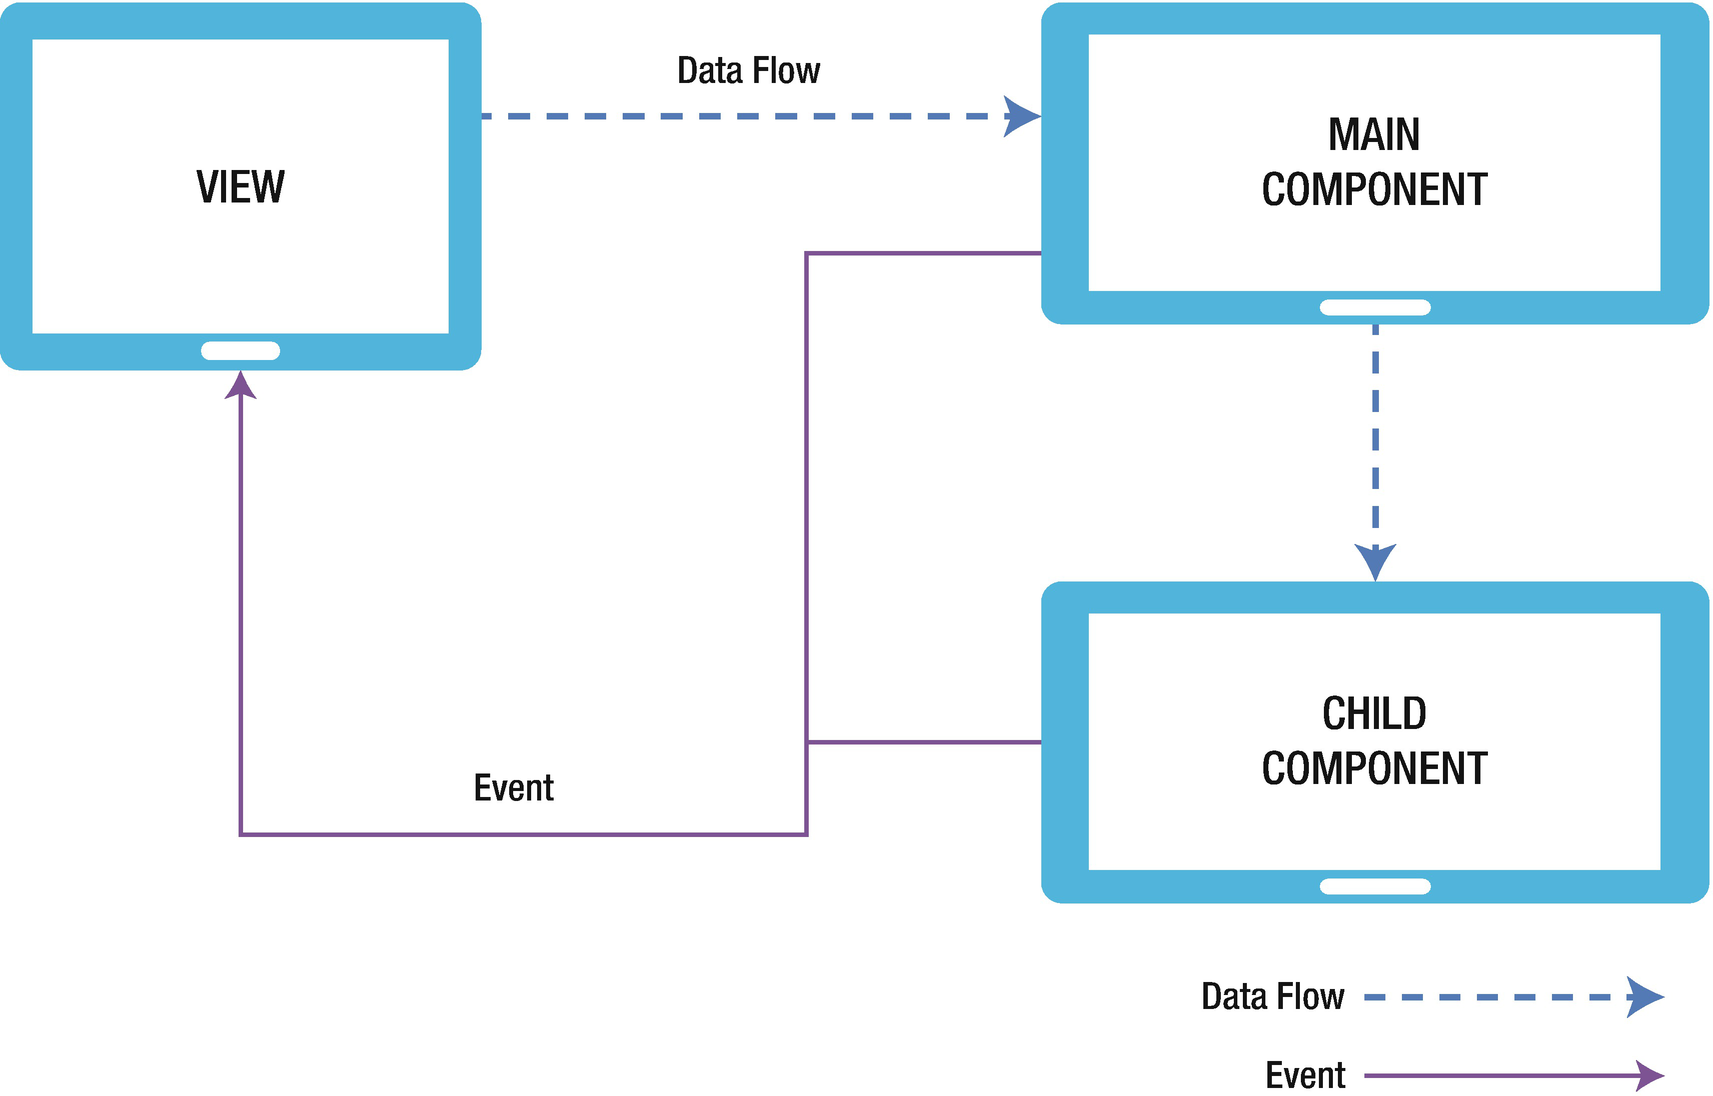
React Native’s one-way data flow
Installation and Setup
To understand practical examples, you must first set up your environment to run your React code. Because React is just a node module, there are lot of different ways to set up a React project. We can include React in existing projects using npm or yarn and start using it. If you are starting a new project, we recommend using the create-react-app npm package. It is an out-of-the-box command-line interface (CLI) created by Facebook that creates a basic structure for the React app and takes care of ES7+ translation though Babel and Webpack. You don’t need to focus on configuration; instead you can focus on writing React code. You can find more details about this module on its official npm page. If it interests you, you can also check its github repo from here to look at its documentation: https://www.npmjs.com/package/create-react-app .
This command installs create-react-app globally.
Note
If you want to use the multiple-node version on the same machine, we can use nvm: https://github.com/creationix/nvm
where application name is the desired name of the application. We need to use npm naming conventions, so the name should be in lowercase and cannot start with a dot or underscore.
Create a Hello World Application
Running that command installs the dependencies needed to build your project, and it generates the initial project structure. Create React App installs the latest version of React and React-DOM, as well as the latest version of react-scripts, a development dependency that manages all other development dependencies that include starting, testing, and building your app. Create React App uses Webpack and Babel under the hood, but it generates only the files you need to work on your React project.
It will automatically open http://localhost:3000/ in your default web browser and you can see the first page of our app.
yarn is a package manager like npm. It was created by Facebook and is the default that comes packaged with create-react-app. It is up to you to choose whether you want to use yarn or npm.
One of the advantages of yarn over npm is that npm always requires an Internet connection, whereas yarn can be used offline if you have installed it at some point in the past. Yarn is also very fast when it comes to package installations, which saves a lot of time in day-to-day development.
Introduction to Components
Components are the smallest units in React application development; they are indeed the most fundamental part of React. React is a library for building UIs and components are the key for creating any UI in React. You might think of it as widgets (like in Flutter) that you can plug in anywhere. These components define how DOM elements are created and how users can interact with them. The whole concept of components is that they are totally encapsulated, making them easy to test and reuse.
Creating reusable components is a work of art, and React provides many features for you. We will do a deep dive into them soon, but first let’s open the hello world app we created.
This is the main App component. As you can see, it’s just a JavaScript file that contains some HTML code. If you have been building software for some time, you know it is a best practice to keep your HTML and JavaScript code separate. Looking at this example, it goes against this fundamental best practice. The reason this best practice exists is to decrease coupling and increase cohesion, which means we write the UI in HTML and logic in JavaScript. The challenge with this approach is that we can only attach behavior to HTML through HTML elements (like ID, class, etc.). A library like jQuery is a good example of this. As your files grow, it becomes difficult to manage and test your code. React components solve this problem very well.
It lets you create JavaScript objects using HTML syntax. Components serve two purposes: templates and display logic. Therefore, markup and code are tied together intimately. Display logic often is quite complex and to express it using template languages does become difficult. The best way to solve this problem is to generate HTML and components from JavaScript itself. React JSX solves these problems with its HTML-type syntax by creating React tree nodes.
Going back to the preceding code snippet, App is a JavaScript class that is inherited from the React Component class API. Components can be created in two ways: one using class and the other using function. Components created using function are also called stateless components. We discuss this in detail in later chapters.
The App class has a render function or method. As the name suggests, it is used for rendering of our content, JSX markup. render is always a pure function, which means it is immutable. It’s like a single frame in a movie, as it represents the UI at a certain point in time. Updating the state inside a render will again call the render function, which once again, triggers render(), which then does the same thing, infinitely.
We are also importing Cascading Style Sheets (CSS) in the App component. Create React App uses Webpack, which takes care of importing CSS in the final bundle.

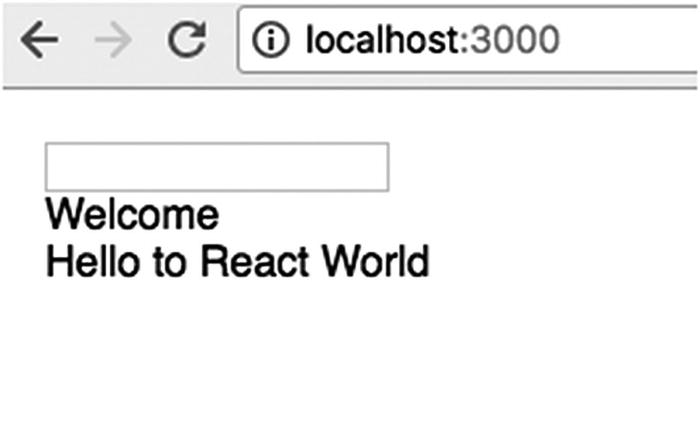
Browsing for the default message
This is the preferred way of creating a component if your state is not changing. It eliminates the class-related extra code like extends And constructors and makes the code more testable.
Deep-Dive into Components
In this section, we explore the vital concepts of components, which will help you work with them easily. We will learn about Props and State, which help manage the flow of data or state. The Props and State objects have one important difference. Inside a class component, the State object can be changed, whereas the Props object cannot. Now let’s take a deeper look into both Props and State.
Properties
Props is simply shorthand for properties. Props are how components talk to each other and the data flow is immutable. Props are passed down the component tree from parent to children and vice versa. One key point to remember is that props cannot be mutated when referenced from a parent component.
If you refresh your browser, you will see a message from the property for your inner HTML.

Checking the console log
Prop validation is a great module that can help developers to hunt down bugs. Here, the propType keyword signifies a hash of prop names and their types.
The defaultProps will be used to ensure that this.props.text will have a value if it was not specified by the parent component.
State
In the last section, you learned about properties, which are static values that are passed into your component. State, on the other hand, is maintained and updated by the component. State is used so that a component can keep track of information in between any renders that it does. When you setState it updates the state object and then rerenders the component. We can think of props variables used for component initialization, whereas state is like internal data that affects the rendering of components and is considered private data.
Resulting message using state
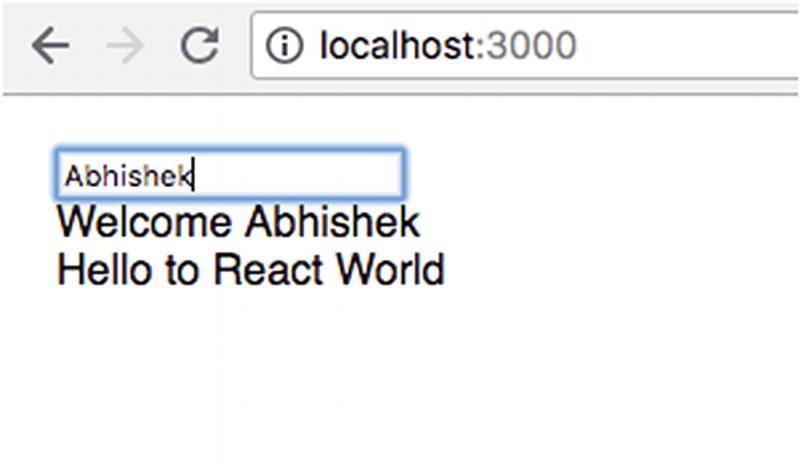
Autopopulating the label
Like any other language, JavaScript class has constructors, a function that will get called whenever a new object is created. It’s important to call a super if we want to update the constructors. Calling this function will call the constructor of our parent class and allows it to initialize itself.
Note
The constructor is only the place where you can change or set the state by directly overwriting the this.state fields. In all other instances you have to use this.setState.
This new function, handleChange, takes an event called (e) and updates the value text state.
The input box has an onChange event that calls your custom method handleChange whenever the state gets updated. As you type in the text box, your printed message gets updated instantaneously.
Summary
This chapter provided a quick tour of React. Before you begin with the next chapter, let’s recap what you have learned so far. We introduced the React library and the reasons behind its invention. Then you learned how to install and set up React. You studied the fundamentals of this technology, such as VDOM, one-way data flow, and JSX. You also got an introduction to components, and took a closer look at components, understanding how to use states and props with components.
Now that you are equipped to code and work in the React ecosystem, the your journey begins in the next chapter as we start working with React Native.