Big things have small beginnings.
—Prometheus
In the last chapter, you got a good overview of the React ecosystem. Now it’s time to get your hands dirty with React Native. In this chapter, you will set up your development environment by installing the prerequisites and then you will create your first React Native application.
The best way to learn is through practical examples. We continue this theme throughout the book, as you will follow simple examples to learn React Native by programming yourself to understand the key concepts.
An introduction to React Native
The essentials of React Native
The installation of React Native
Your first application
The anatomy of a React Native application
How to debug your application
Note
You might face a situation where different projects work on different Node versions. Therefore, it’s recommended you install Node Version Manager (NVM) to help keep multiple node versions that can be switched between projects.
What Is React Native?
React Native is an open source platform for developing native mobile applications; it was developed largely by a team at Facebook. The cool part of working with React Native is that your program uses standard web technologies like JavaScript (JSX), CSS, and HTML, yet your application is fully native. In other words, your application is fast and smooth, and it is equivalent to any native application built using traditional iOS technologies like Objective-C and Swift. However, React Native does not compromise in terms of performance and overall experience, like popular hybrid frameworks that use web technologies to build iOS apps.
React Native aims to bring the power of React, which was explained in Chapter 1, to mobile development. In the words of the React team, “Learn once, write anywhere.” Working with React and React Native, you will see how many of your components built for the Web using React can be easily ported to your React Native iOS apps with little or no modification. React Native introduces a highly functional approach to constructing UIs that is very different from the traditional iOS development approach.
Although React Native was built by Facebook developers, it’s an open source project. The code is available at https://github.com/facebook/react-native .
Installation
Let’s do a quick, one-time setup of React Native. React Native is an assortment of JavaScript and Swift code, so you need tools that create, run, and debug your native application written in JavaScript. Let’s go one by one.
Installing Node and npm
If you don’t want to use nvm, you can also install Node.js by running the following command in terminal:
>brew install node.
Homebrew is the package manager for Mac. You can also download the Node installer from https://nodejs.org and install it manually if you are using another operating system. For Windows operating systems you can visit https://nodejs.org and install Node using a wizard.
npm is also installed along with node, which is a package manager for Node.js. If you’re from the iOS world, it’s similar to CocoaPods.
Installing the React Native Package
Updating React Native
For more information on React Native upgrades, you can refer to the Facebook official documentation at https://facebook.github.io/react-native/docs/upgrading .
Note
You should only need to update the global installation of create-react-native-app very rarely, and ideally never.
Your First App
Now that you are all charged up about React Native and have your system set up, it’s time to create your first application. To keep things simple, in the beginning just follow along. Sometimes you might feel disconnected by monotonously typing in the code, but following along is enough for now. Remember that mimicry is a powerful form of learning; it’s how we learned most of our skills, such as talking, reading, and writing, and it’s how you will learn to program with React Native. As you proceed, this method will help you understand thoroughly why you authored certain pieces of code.
Throughout the book, you will create one application and take it from just Hello World to a full-blown, distribution-level application, except in a few places, where we need to digress to explore a concept independently. Before you set it up, then, let’s talk about the problem you plan to solve. The app you will create during the course of this book plans to solve a few housing problems; it will be a very primitive version of any popular property search application. Let’s call it HouseShare. It will have some rudimentary features like listings, creating an entry, geolocating a property, and a few more. As you move along, you will see how various React Native features fit with your application.
That’s quite a lot, but in this chapter you just create the basic structure for your project using React Native and some Hello World code.
Creating a Basic Skeleton
Happy hacking!
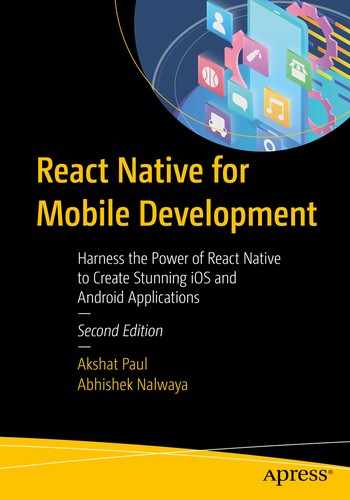
So far we have used Expo a few times, so what is Expo? Expo is an open source tool chain that is built around React Native to help build iOS and Android apps. Expo is the fastest way to kickstart your React Native development. Because it comes out of the box with React Native, you don’t need to perform any additional setup on your machine. The only extra thing you need to do is to install the Expo application from the Apple App Store for iOS and the Google Play Store for Android. Using this app, you will be able to test and interact with the application you are building during the development stages.
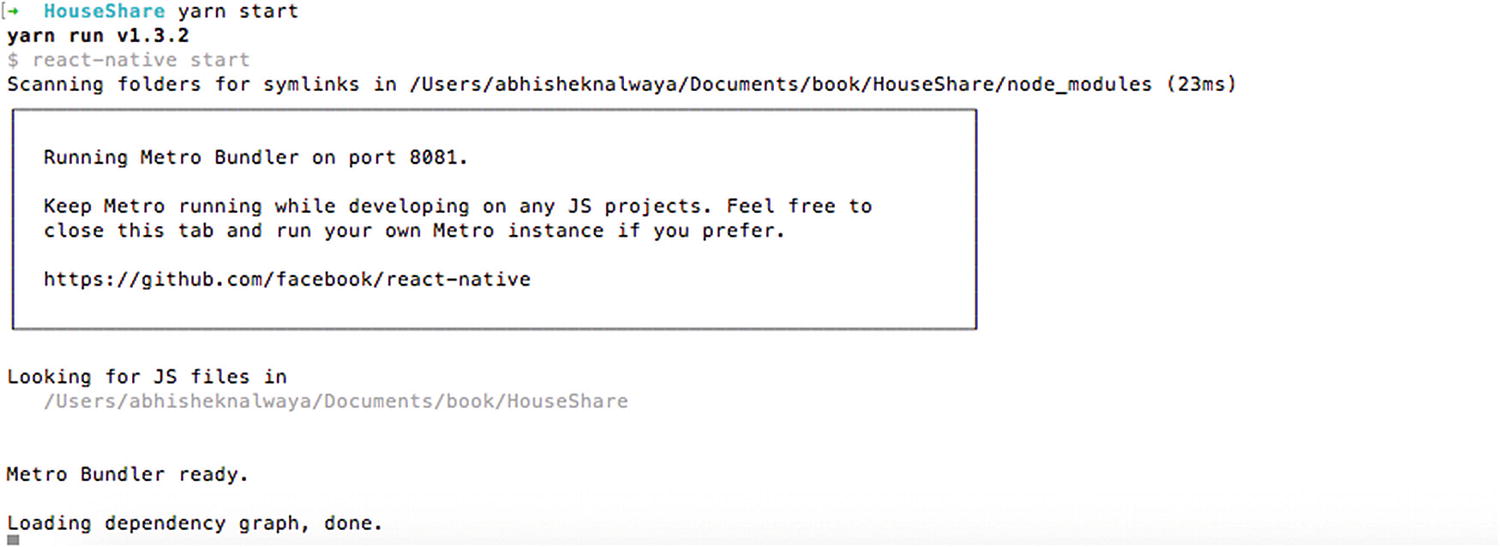
You should see output similar to Figure 2-1.
Terminal output when we build a React Native application
To use this QR code, download the Expo app ( https://expo.io/ ) for iOS or Android on your device.
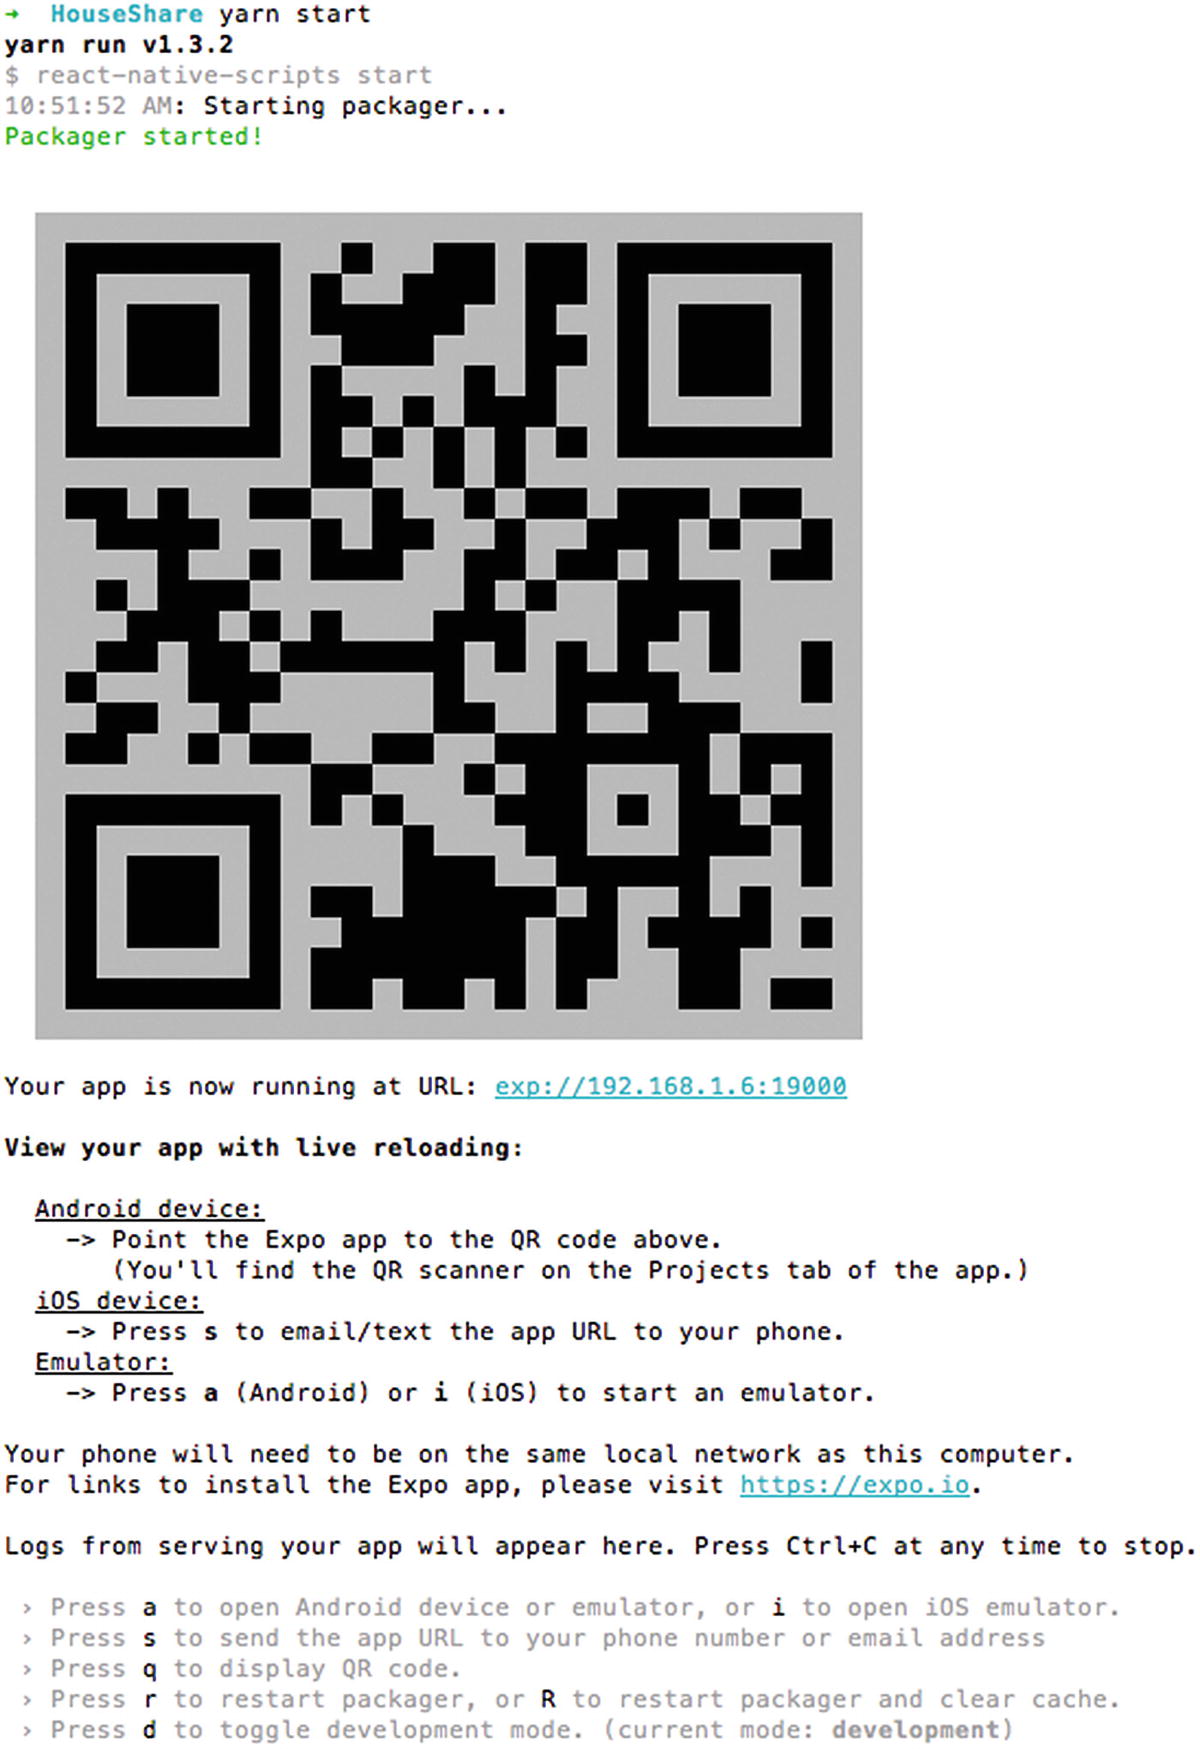
If you are using Android, just scan the QR code in your terminal from the Expo app and your app we automatically load. If you are using iOS, select “s” in your terminal, as shown in Figure 2-2.
Press the s key if you are using iOS

Expo link received in e-mail
Note
Your mobile device needs to be connected to the same wireless network as your computer. Otherwise you will not able to open the app.

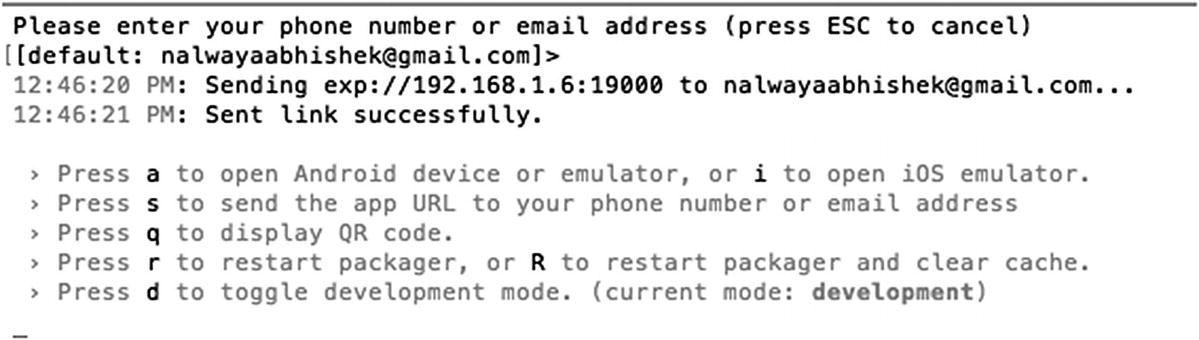
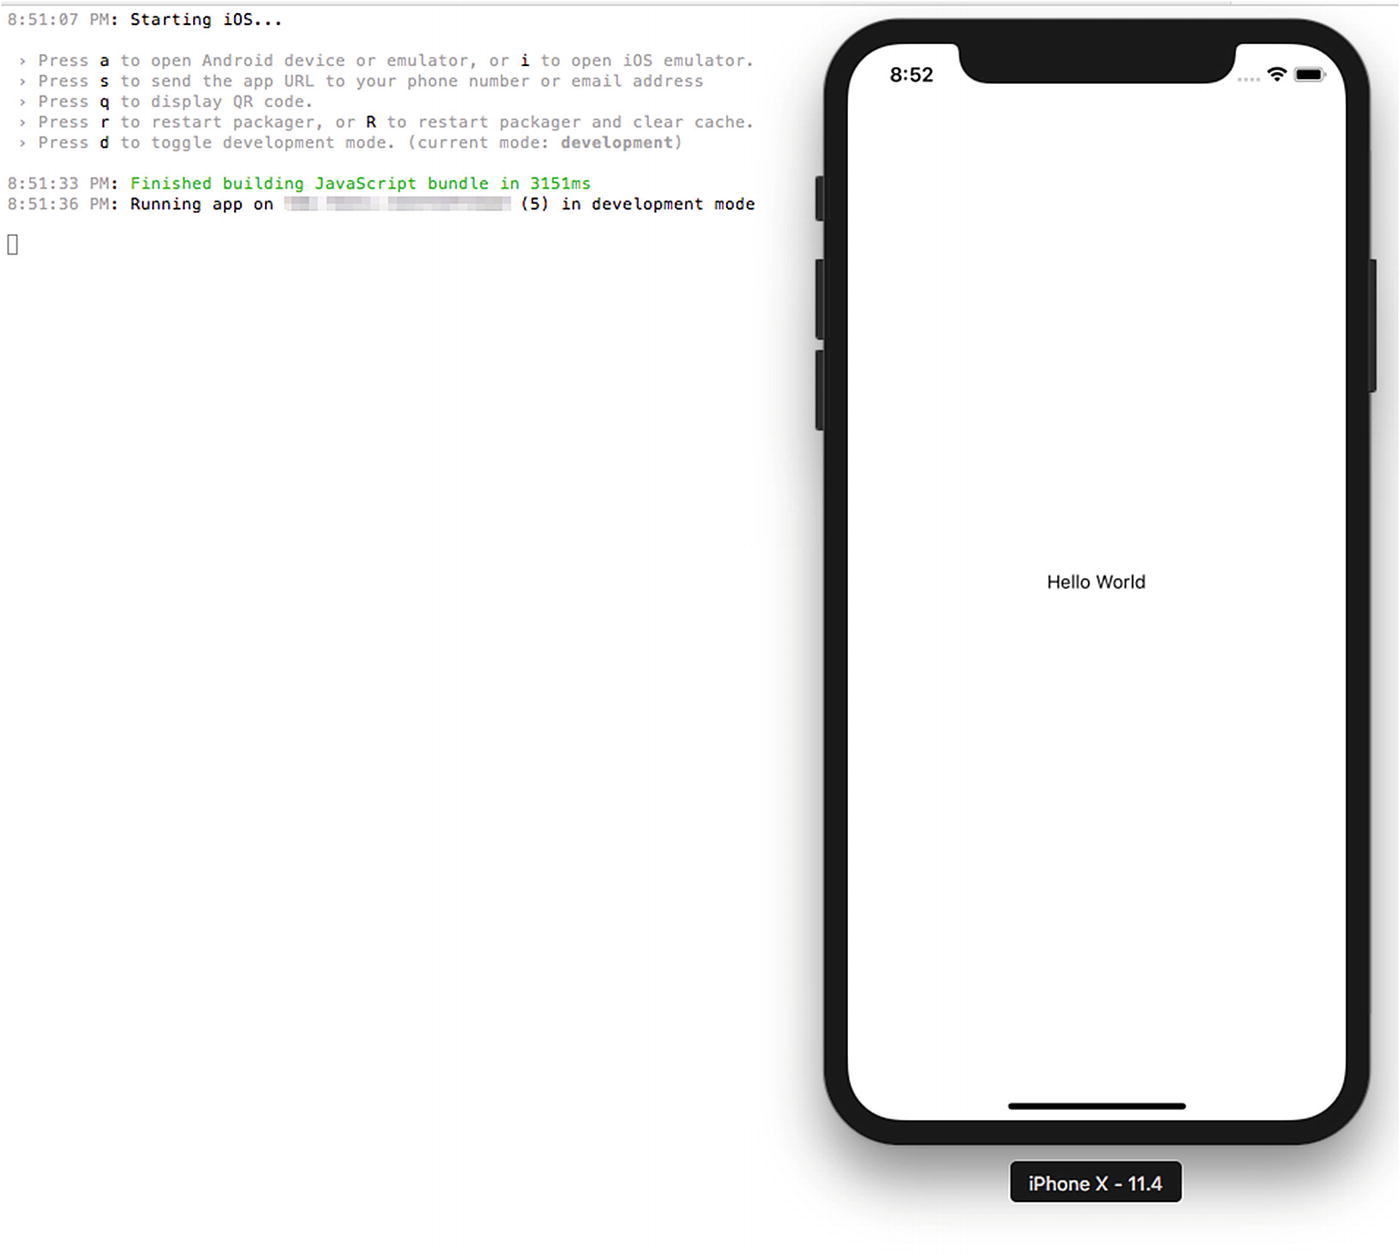
React Native application opened in Expo app
That was really quick and easy. Without installing the iOS and Android software development kit (SDK), we can run the app on our device using Expo.
Thanks to a single command, the basic structure of your project is in place and your application is loaded in the device. Also note that the terminal always needs to be open. This is the Node package manager for React Native. If you kill this, the app will stop working.
Terminal is opened to start the React Native Packager and a server to handle the preceding request. The React Native Packager is responsible for reading and building the JSX (you’ll look at this later) and JavaScript code.
Set up your project in any editor you prefer. React Native does not force you to use nor does it have a preference for any specific editor, so you can continue to use your favorites.

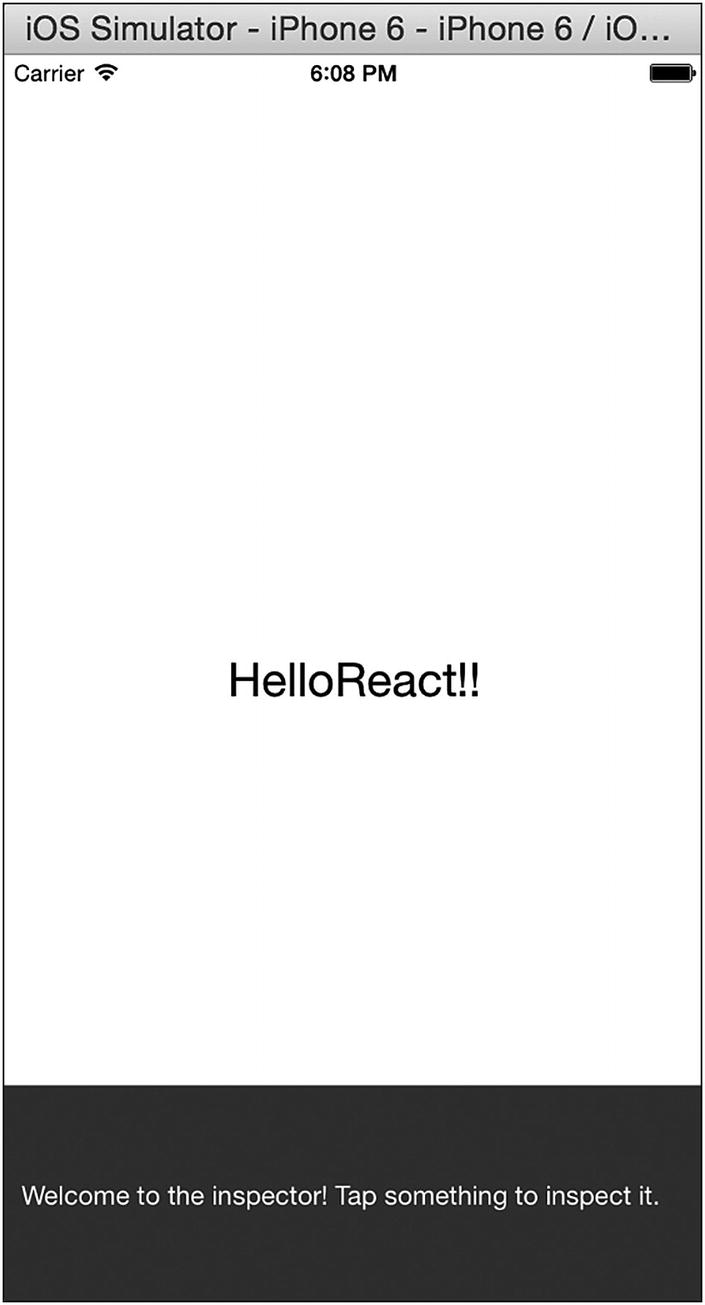
Updated text component appears on the screen on save
That was quick! In a fraction of a second you can see the changes you applied. You don’t need to compile the code and restart the simulator for React Native changes. If you have done any native iOS app development before, pressing Refresh to see the changes might seem like a miracle.
This loads the React module and assigns it to a React variable that can be used in your code. React Native uses the same module-loading technology as Node.js; this is roughly equivalent to linking and importing libraries in Swift.
You are assigning multiple object properties to a single variable; this is called destructuring the assignment. This cool feature is in there in versions of JavaScript after ES6. Although it is optional, it’s very beneficial; otherwise, every time you use a component in your code, you would have to use a fully qualified name for it, such as React.Stylesheet, and so on. This saves quite a bit of time.
React basic building blocks are called components. You can use the React.Component method to create custom component classes. This class has just one function, render(), which is responsible for what is shown on the screen. You use JavaScript syntax extensions (JSX) for rendering the UI. JSX is a JavaScript syntax extension that looks similar to XML.
You can see that this styling is very similar to CSS; you can define font size, alignment, and so on.
Prerequisites for Running App on a Simulator
Using the Expo iOS or Android application to test your app, there is a downside: You can’t always carry your devices for testing your application. For such purpose there are simulators provided by both iOS and Android to be set up on your development machine. The following are few prerequisites to set them up.
iOS apps can be developed only on an Apple Mac with OSX installed. You need OSX version 11 or above.
You need Xcode 9 or above, which includes the iOS SDK and simulators. React Native only supports iOS7 or above. Xcode can be downloaded from the Apple App Store.
- It’s helpful if you are enrolled in the Apple iOS Developer Program. If you’re not in the iOS Developer Program, you won’t be able to do the following:
Test applications on actual devices.
Access beta OS releases.
Test flight for beta testing.
Submit your app to the App Store.
React Native requires a recent version of the Java SE Development Kit (JDK).
- Download and install Android Studio. Choose a Custom setup when prompted to select an installation type. Make sure the check boxes next to all of the following are selected:
Android SDK
Android SDK Platform
Performance (Intel ® HAXM)
Android Virtual Device
Install Android Virtual Devices (AVDs) by opening the AVD Manager from within Android Studio. You can also use genymotion.
Running the App on a Simulator
Running demo application on simulator
This will install Expo client on the emulator and run your React Native app. You can also use commands like yarn ios or yarn android to start the simulator with the app installed in it rather than loading the app inside the Expo simulator app.
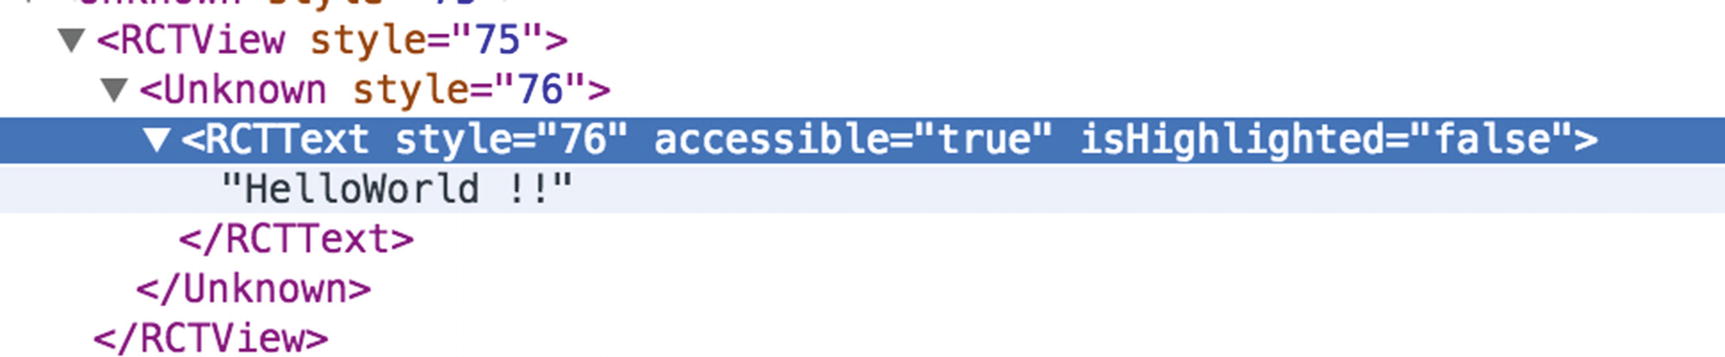
It’s Not a UIWebView
Using the Native component
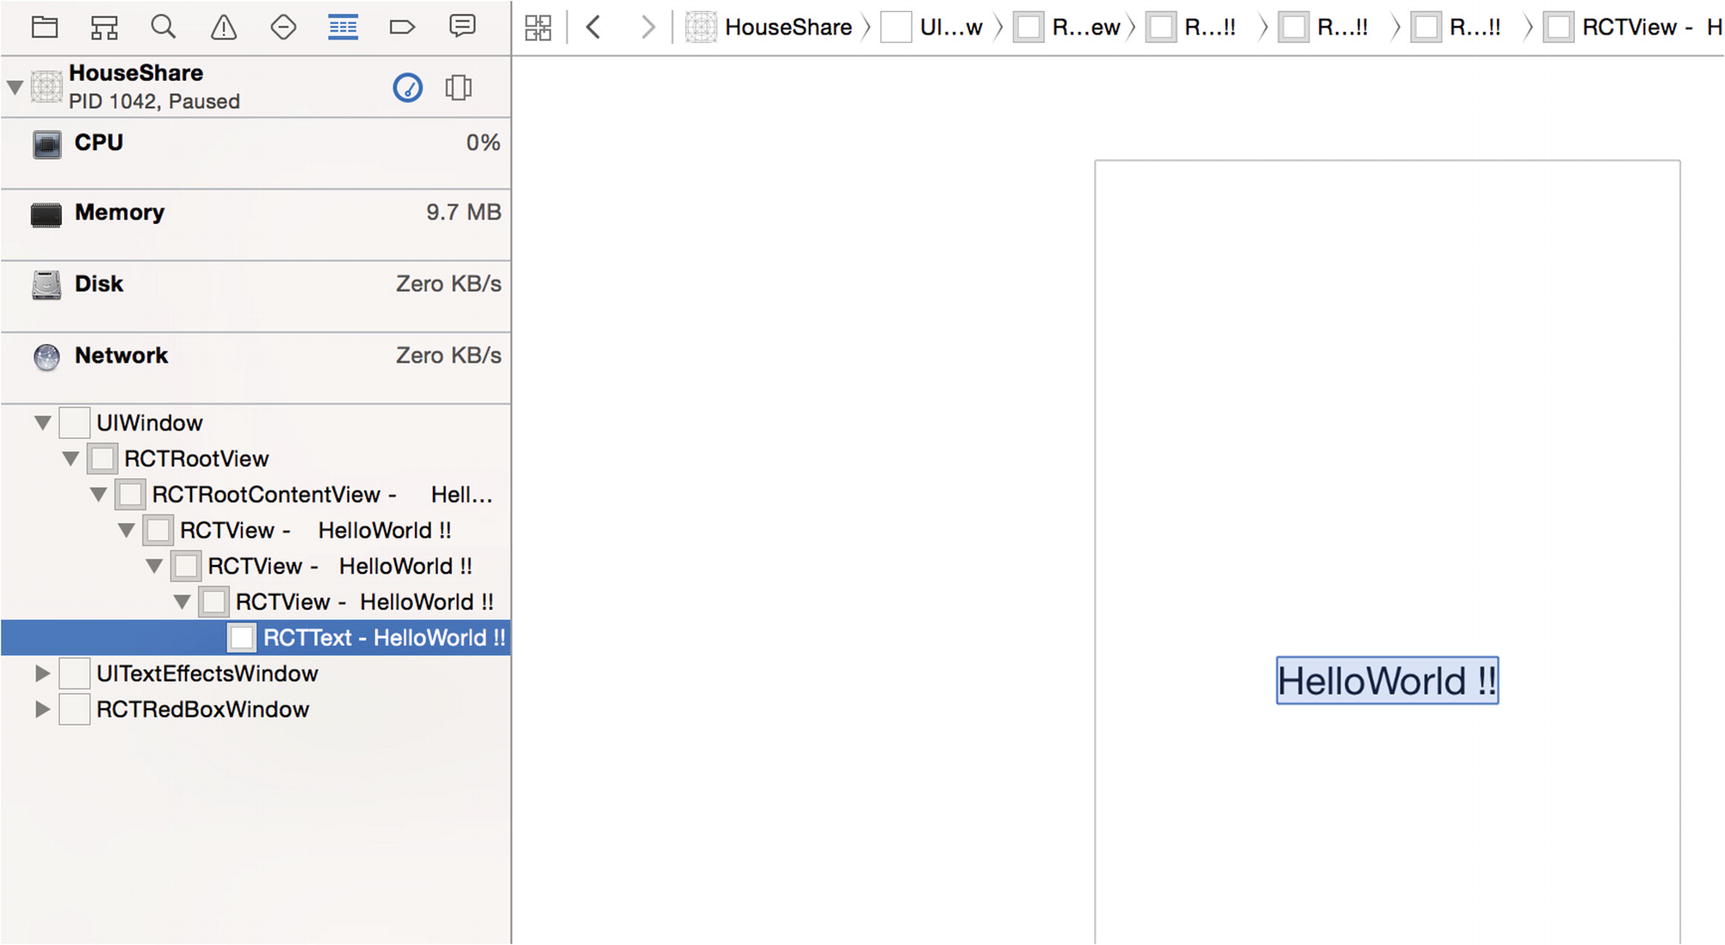
“Hello World !!” is the call of RCTText
Enabling Live Reload
Another cool feature of React Native is live reload. It reloads your application view inside the iOS simulator the moment there is a change. By default it is active. To deactivate this option, you need to access the developer menu from the application opened in the iOS simulator by shaking the device and then selecting the Disable Live Reload option.
What Makes React Native Different?
WebView-based: These frameworks use common web technologies like HTML and JavaScript and use WebView to load the application. An example is the popular framework Phonegap.
Native apps using web technologies: These frameworks again use common web technologies like HTML and JavaScript (to be precise, they imitate using JavaScript and HTML) to create native apps. An example is the popular framework Titanium Appcelerator.
Apps created using these strategies have performance issues. WebView-based apps are slow because they use the DOM, and DOM manipulations are expensive, which leads to performance issues. As stated in a blog post at Flipboard (see http://engineering.flipboard.com/2015/02/mobile-web/ ), “You cannot build a 60fps scrolling list view with DOM.” This is one of the fundamental problems with apps developed through this technique: Although development time might be quick, you end up with a sluggish experience.
The other strategy, where the framework imitates JavaScript and HTML, and converts them to native code, has other challenges. Although the final app is native in nature, there is a basic issue during this conversion from JavaScript to native: It runs on the main thread. In these apps, you interface directly with native objects all the time, which leads once again to a slow and sluggish experience.
React Native is fundamentally different from these two approaches. It runs all layouts on separate threads, and your main thread is free to update the UI, which makes the animation and UI rendering smooth, just like 100 percent pure native apps.
React Native uses the JavaScriptCore framework to run JavaScript. In iOS 7, Apple introduced a native Objective-C API for JavaScriptCore. This framework allows JavaScript and Objective-C to talk to each other. This means you can create and call JavaScript functions from Objective-C or call back into Objective-C from JavaScript. It all works like a charm.
React Native is different in one more aspect. As seen in your Hello World example, you write a component in JavaScript just like you would with React, except that instead of using an HTML div, you use tags like View and Text. In the case of an iOS application, a View is basically a UIView.
Ejecting a React Native Application

Ejecting Expo application
Note
The folder structure defined here might be changed or modified as the framework evolves, but the majority of the functionality remains the same.
iOS: The iOS folder has two folders and one file. As seen earlier, there is a HouseShare folder, which has all the Objective-C code, such as AppDelegate, Images.xcassets, Info.plistLaunchScreen.xib, and other files. Another folder is HouseShareTests, which is where all your test cases reside. Finally, there is your Xcode project file, HouseShare.xcodeproj, which is used to load into Xcode to build your application.
package.json: This folder contains metadata about your app, and it will install all dependencies when you run the npm install. If you’re familiar with Ruby, it’s similar to a Gemfile.
node_modules: All of the Node modules mentioned in package.json will be downloaded to this folder. This folder also contains the code for the React Native framework.
App.js: This is the file where you begin programming your application.
AppDelegate.m: This is the starting point of any iOS app.
Android: React Native also supports development for Android. All your native Android code resides in this folder.
RCTRootView is a Swift class provided by React Native, which is inherited from the iOS UIView Class. It takes your JavaScript code and executes it. It also loads the index bundle URL, which has your code written in App.js and also a program added by the React Native framework.
Note
After ejection, you need to use Xcode to run the iOS app and Android Studio to run the Android app.
Starting the application without Expo

Building the application using Xcode
This will open the simulator and you can see the app running.
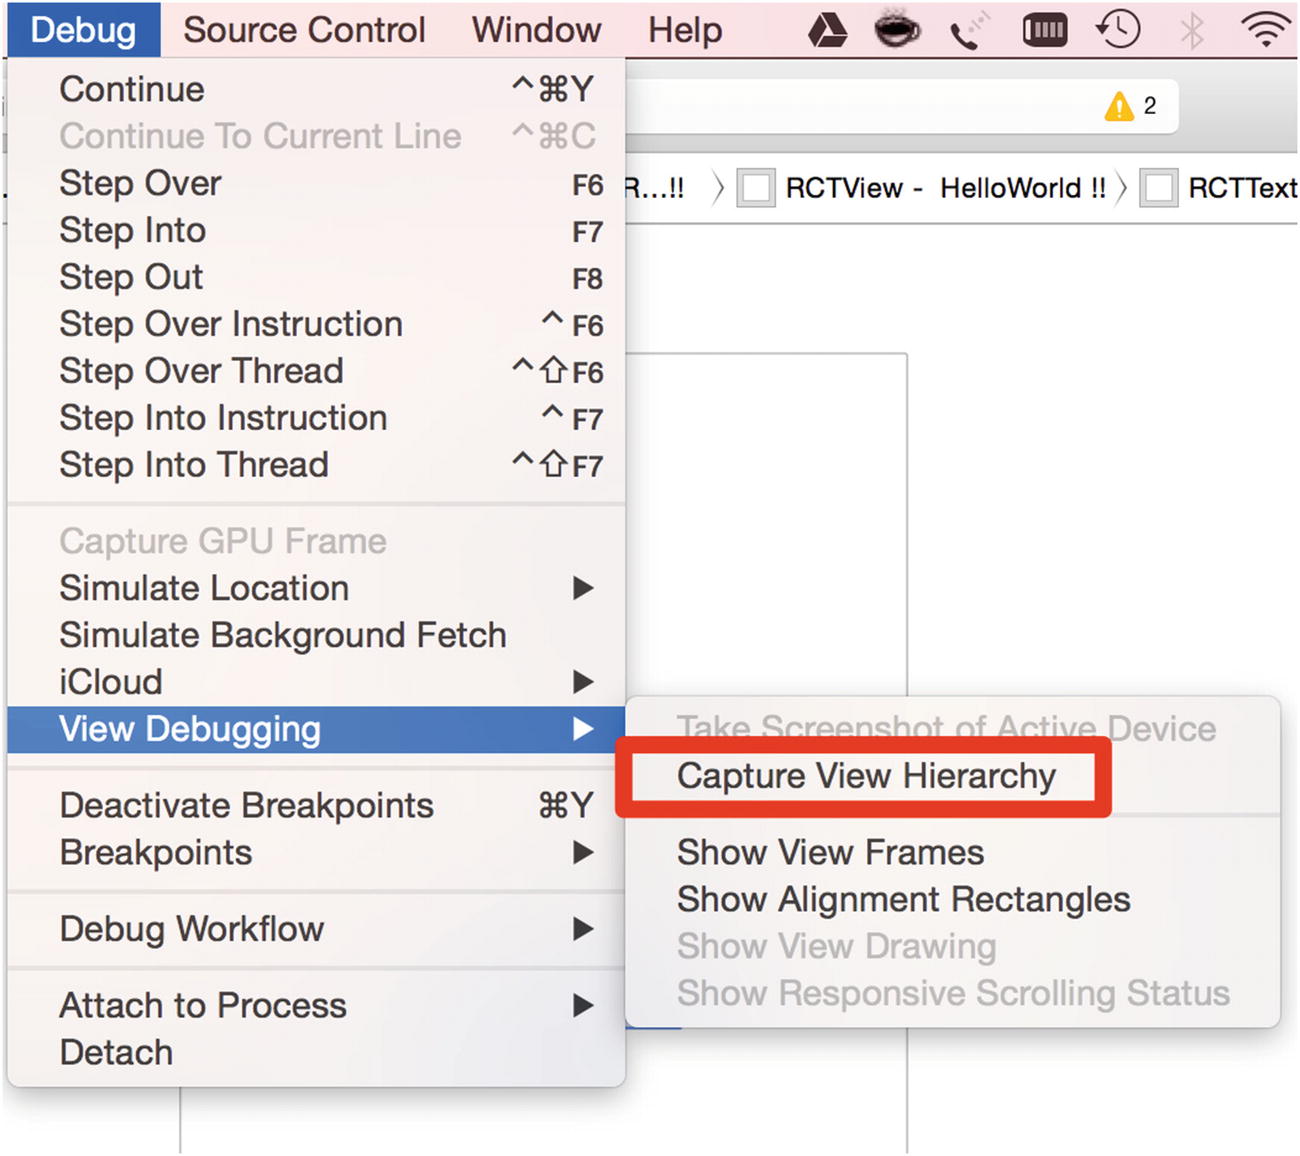
Debugging

Debugging options for React Native applications
You must disable this menu for the final build because your end user should not see these options. To disable it, open the project in Xcode and select Product ➤ Scheme ➤ Edit Scheme (or press Command + <). Then select Run from the menu on the left and change the Build Configuration to Release.
Let’s review each of the options shown in Figure 2-12.
Reload
The Reload option refreshes the screen in the simulator with the latest React Native code without compiling the project again. This can be done in two ways: selecting the Reload option from the menu or pressing Command + R. This will reload all the changes made in the JavaScript code.
Any changes made in your Swift or Objective-C files will not be reflected because these changes require recompilation. Also, if you add any assets like images, the app needs to be restarted.
Debugging in Chrome

Debugging in Chrome
Install the React Developer Tools, which is a Chrome extension for debugging both your React application and React Native code. It allows you to inspect the React Native component hierarchies in the Chrome Developer Tools. To install it, please visit the Chrome webstore or go to https://chrome.google.com/webstore/detail/react-developer-tools/fmkadmapgofadopljbjfkapdkoienihi?hl=en .
Once the extension is installed, press Command + Option + J or select View ➤ Developer ➤ Developer Tools in your Chrome browser to access the Developer Tools console.
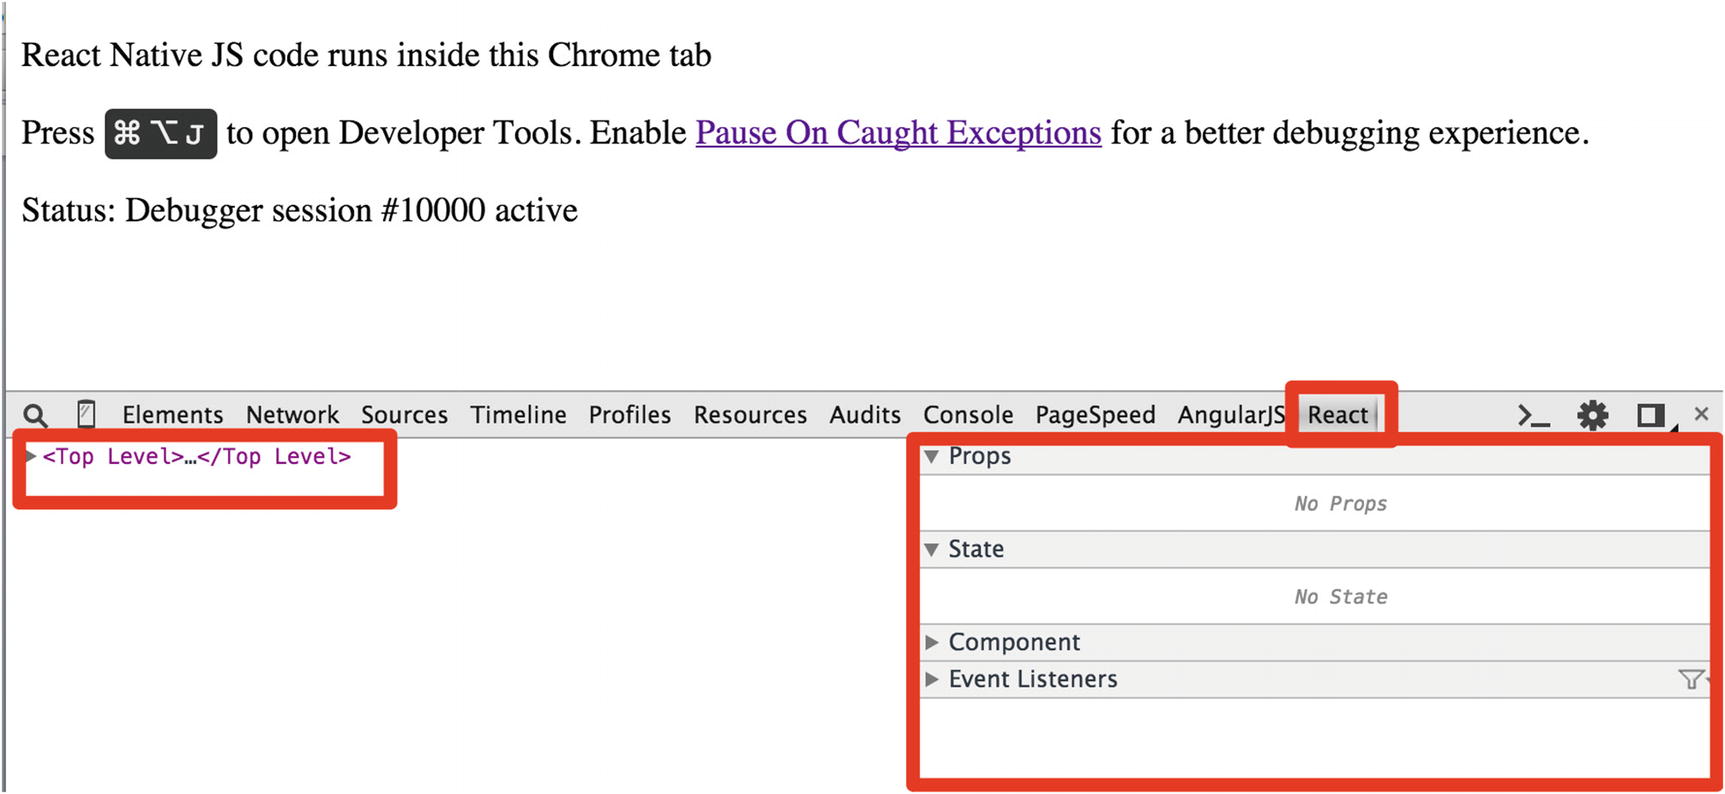
Debugging in Chrome DevTools
Debugging the app with the React tab in Chrome DevTools
Debugging in Safari
If you do not have Chrome, you can also use Safari for debugging, but Chrome is preferred for debugging React Native apps.
Showing Performance Monitor

Additional properties in the simulator
The Inspect Element
Click the text to see element details

Font details
You can see that the font size for Hello World is 25 and it is center aligned.
Summary
In this chapter, you were introduced to React Native. You learned how to set up the React Native development environment and you wrote your first application. You also learned about Expo and the folder structure of React Native applications and how to debug. You are now all set to explore creating a UI with React Native for your iOS application.
Chapter 3 introduces about Flux and Redux, a pair of very important design patterns that are commonly used with React Native applications.