Software will give you respect, but hardware will give you the power.
—Akshat Paul
Mobile devices are not just limited to making phone calls; they are some of the most advanced pieces of consumer technology ever invented. Their real power lies in the various capabilities that reside in a smartphone. The iOS and Android platforms allow us to use various device features to make a more captivating application experience for our users. This chapter explores the following device capabilities:
MapView and GeoLocation
AsyncStorage
Native Alert
WebView
Deep linking
MapView and GeoLocation
In this section, we will learn how to use iOS and Android location services with a React Native application. Location services are used very often in many popular apps, especially in travel, navigation, ride sharing, and so on. This single feature significantly improves the user experience and the bonus is that it’s very easy to implement.
Before we learn about GeoLocation, though, we need to learn about MapView, which is essentially designed to show a location on a map. We use the react-native-maps npm module(https://www.npmjs.com/package/react-native-maps), which is a component for iOS and Android to show maps. Access your terminal to create an application to implement this capability:
$ expo init GeoLocationMaps
This creates a React Native app with Expo CLI. Next, add the react-native-maps npm module, using yarn:
$ yarn add react-native-maps
react-native-maps (https://github.com/react-community/react-native-maps) is one of the best modules for map views. It includes numerous customization options available to help you design the best possible experience with maps.
Because App.js is the entry point in a React Native app, update the following code in that file:
GeoLocationMaps/App.js
import React from 'react';
import { StyleSheet, Text, View } from 'react-native';
import MapView from 'react-native-maps';
export default class App extends React.Component {
constructor(props) {
super(props);
this.state = {
region: {
latitude: 37.3230,
longitude: -122.0322,
latitudeDelta: 0.0922,
longitudeDelta: 0.0922,
}
};
}
render() {
return (
<MapView
style={styles.container}
initialRegion={this.state.region}
/ >
);
}
}
const styles = StyleSheet.create({
container: {
flex: 1,
},
});
Now build your application by executing following the command, and open an iOS or Android simulator:
Let’s now understand what we have done in this part of our program.
import React from 'react';
import { StyleSheet, Text, View } from 'react-native';
import MapView from 'react-native-maps';
We have imported the MapView component from react-native-maps. Next, we used the MapView component to plot a map:
export default class App extends React.Component {
constructor(props) {
super(props);
this.state = {
region: {
latitude: 37.3230,
longitude: -122.0322,
latitudeDelta: 0.0922,
longitudeDelta: 0.0922,
}
};
}
render() {
return (
<MapView
style={styles.container}
initialRegion={this.state.region}
/ >
);
}
}
Here, we have set the initial state for the region with certain latitude, longitude, latitudeDelta, and longitudeDelta parameters, which will be later set when we render the function with the MapView component. In the MapView component, we are using the region state, which is supplied with latitude, longitude, longitudeDelta, and latitudeDelta. These should always be numbers (integer or float), as they help us plot a specific region on the map. Finally, we have added some style with Flex and registered our component.
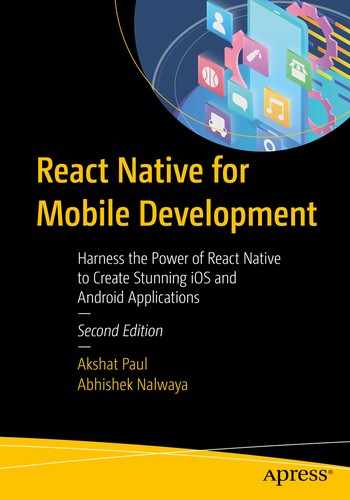
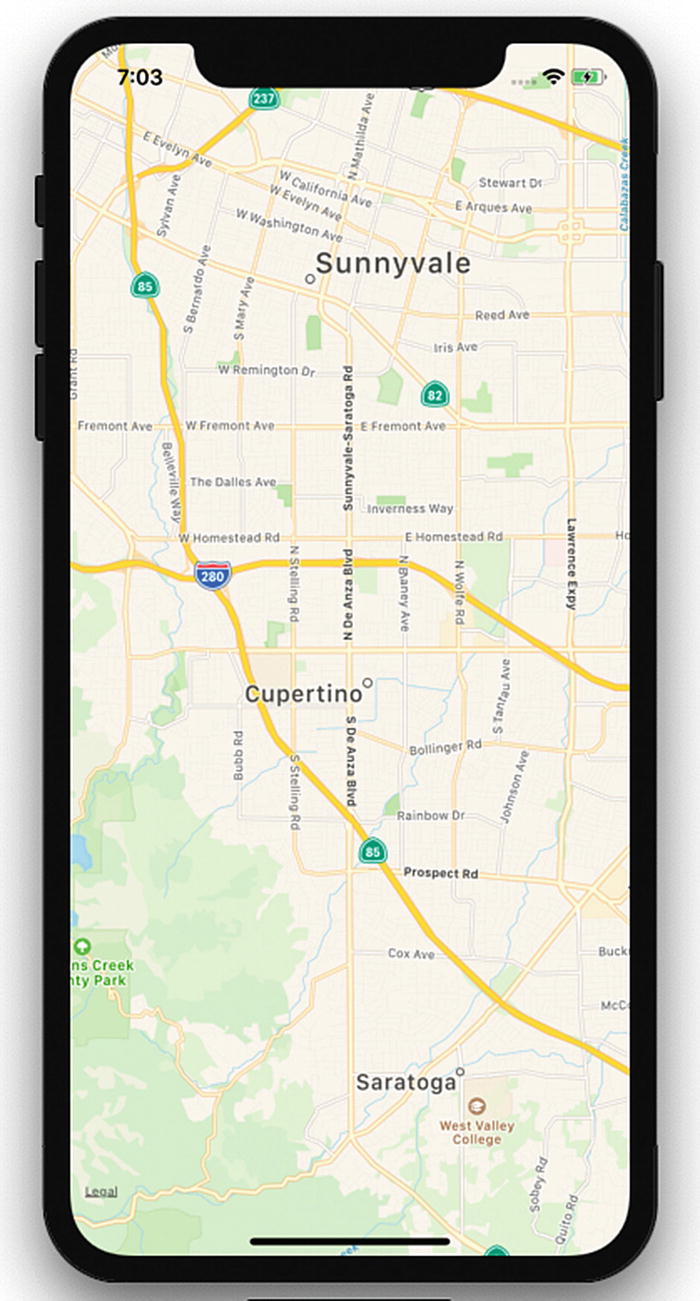
iOS devices show Apple Maps by default. We can choose to use a different provider like Google. Update provider to google with this code:
<MapView
style={styles.container}
provider="google"
initialRegion={this.state.region}
/ >
Now run the application. You can see that instead of Apple Maps, it loads Google Maps (Figure 5-2).
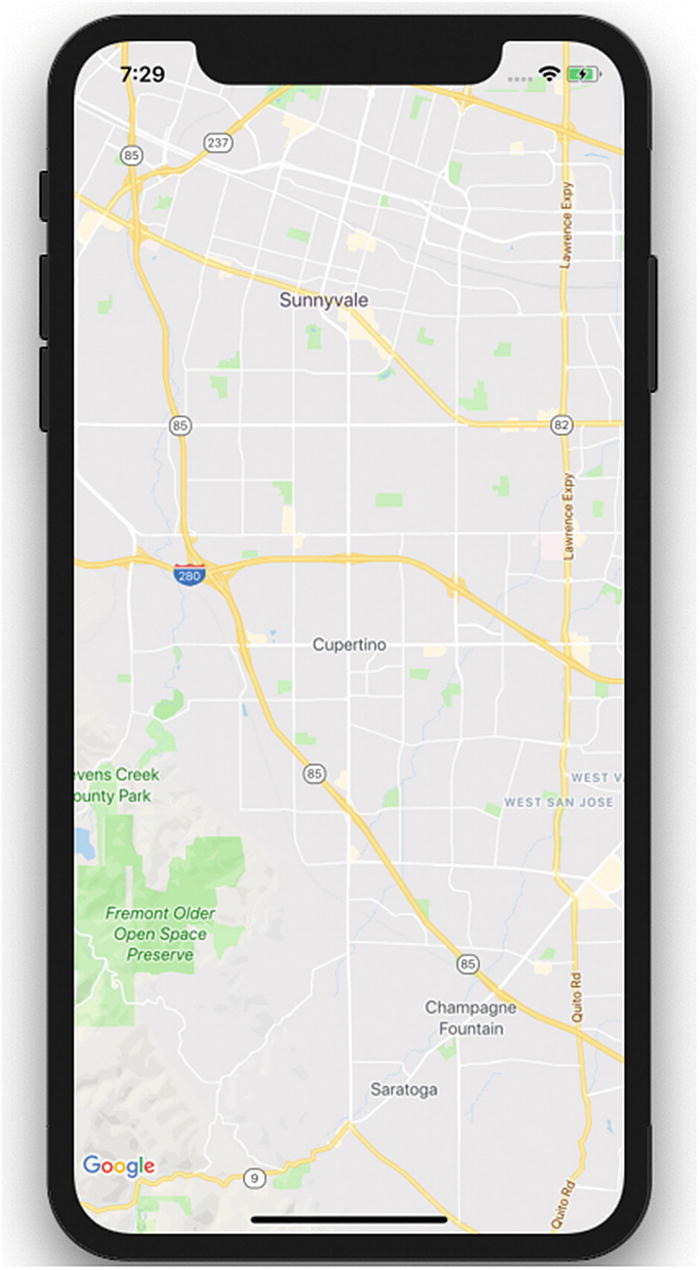
Annotations provide a way to highlight specific coordinates on a map. This valuable information is commonly added for any mobile application using a geolocation feature. Let’s add an annotation marker to our application and update initial state with the new state annotations, with parameters latitude and longitude for the marker.
constructor(props) {
super(props);
this.state = {
region: {
latitude: 37.3230,
longitude: -122.0322,
latitudeDelta: 0.0922,
longitudeDelta: 0.0922,
},
coordinate: {
latitude: 37.3230,
longitude: -122.0322,
},
};
}
Now update the MapView component with the new prop called coordinate:
<MapView
style={styles.container}
provider="google"
initialRegion={this.state.region}
>
<Marker coordinate={this.state.coordinate} />
</MapView>
Refresh and observe the changes. You will see something like the screen shown in Figure 5-3.
Figure 5-3.
MapView with added parameters
Displaying the Latitude and Longitude of the Current Location
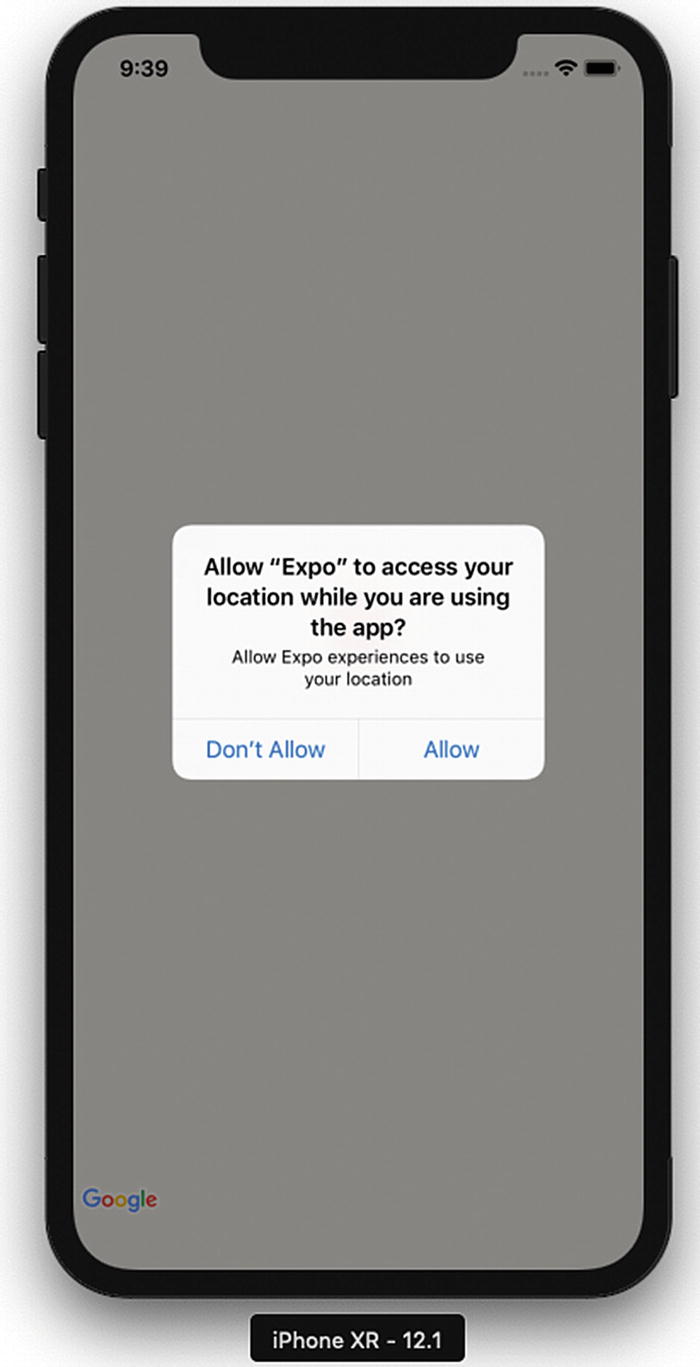
In this final part of our geolocation application, we will display our present latitude and longitude on the screen. In the previous example, we had a constant location; in this part, we will move to our current location in real time. That sounds like something exciting, so let’s start building it. There are two ways to check for the current location on our maps. One is to simply add showsUserLocation={true} to the MapView component. Another way is to use NSLocationWhenInUseUsageDescription geolocation. Let’s try the first option. If you are using gelocation on an existing project, you need to update NSLocationWhenInUseUsageDescription in info.plist for iOS and <uses-permission android:name="android.permission.ACCESS_FINE_LOCATION" /> in AndroidManifest.xml for Android. Because we have created a project with Expo, which initially uses react-native init, gelocation is enabled by default.
Update the App.js Marker component with the following code:
<MapView
style={styles.container}
provider="google"
showsUserLocation={true}
initialRegion={this.state.region}
>
<Marker coordinate={this.state.coordinate} />
</MapView>
Now refresh the application to load it on the iOS simulator and you will see something similar to Figure 5-4.
Figure 5-4.
Access location prompt
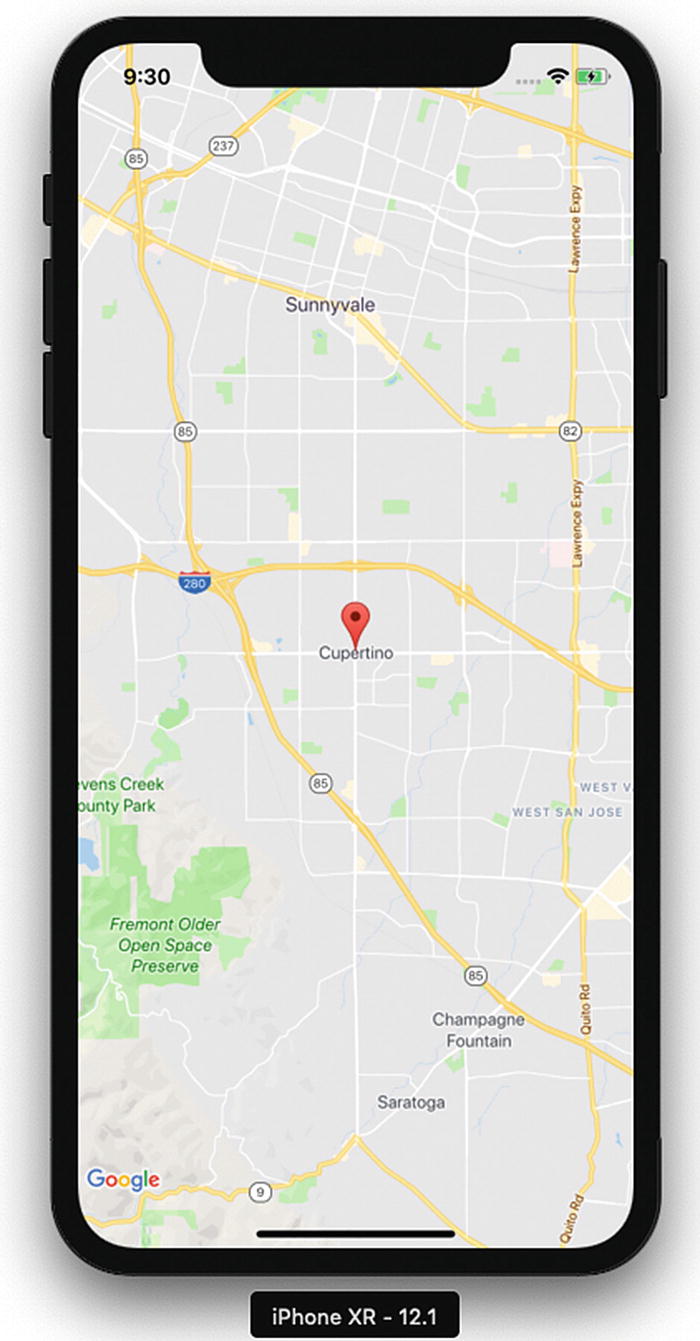
If we allow this request, the map will move to the location we specified in our code; in this case it’s Apple’s headquarters in Cupertino, California (Figure 5-5).
Figure 5-5.
Moving to a specified map location in the code
Now let’s use the other method to get the user’s current location, using the Geolocation API, which is extended from the Geolocation web spec (https://developer.mozilla.org/en-US/docs/Web/API/Geolocation). Let’s first update the ref for MapView to this.map, so that we can use it:
<MapView
ref={ref => { this.map = ref; }}
style={styles.container}
provider="google"
showsUserLocation={true}
followUserLocation={true}
loadingEnabled={true}
initialRegion={this.state.region}
>
<Marker coordinate={this.state.coordinate} />
</MapView>
Now add navigator.geolocation.watchPosition in the same file:
Here, in componentDidMount, we get the current position from the watchPosition function in navigator.geolocation, which continuously checks for location because we’ll need to get the location coordinates as the user moves. The Google Maps geolocation API has a watchPosition method that will help us get the location coordinates whenever they change. There are also other functions available like getCurrentPosition, which checks the current location just once when the app is refreshed (Figure 5-6).
Figure 5-6.
Map showing the current location
Because we have a console log, we can see the position as it appears in the console, as shown in Figure 5-7.
Figure 5-7.
Current location displayed in the console log
We can now see the current location. Next, let’s try to change the location. To change a location, from the Simulator menu bar, select Debug ➤ Location ➤ Freeway Drive (see Figure 5-8). Freeway Drive will continuously change the simulator location.
Figure 5-8.
Change location using Simulator
We can see that the location is changed dynamically in the app. Because we chose to use Freeway Drive, we can see that the location and maps continuously move along a freeway (Figure 5-9).
Figure 5-9.
Location changed to freeway
AsyncStorage
AsyncStorage is a key/value-based storage system. It can be easily implemented and is globally available to the app. This persistence system is simple and asynchronous, and also a recommended way to store data. To create an AsyncStorage example application, execute the following command:
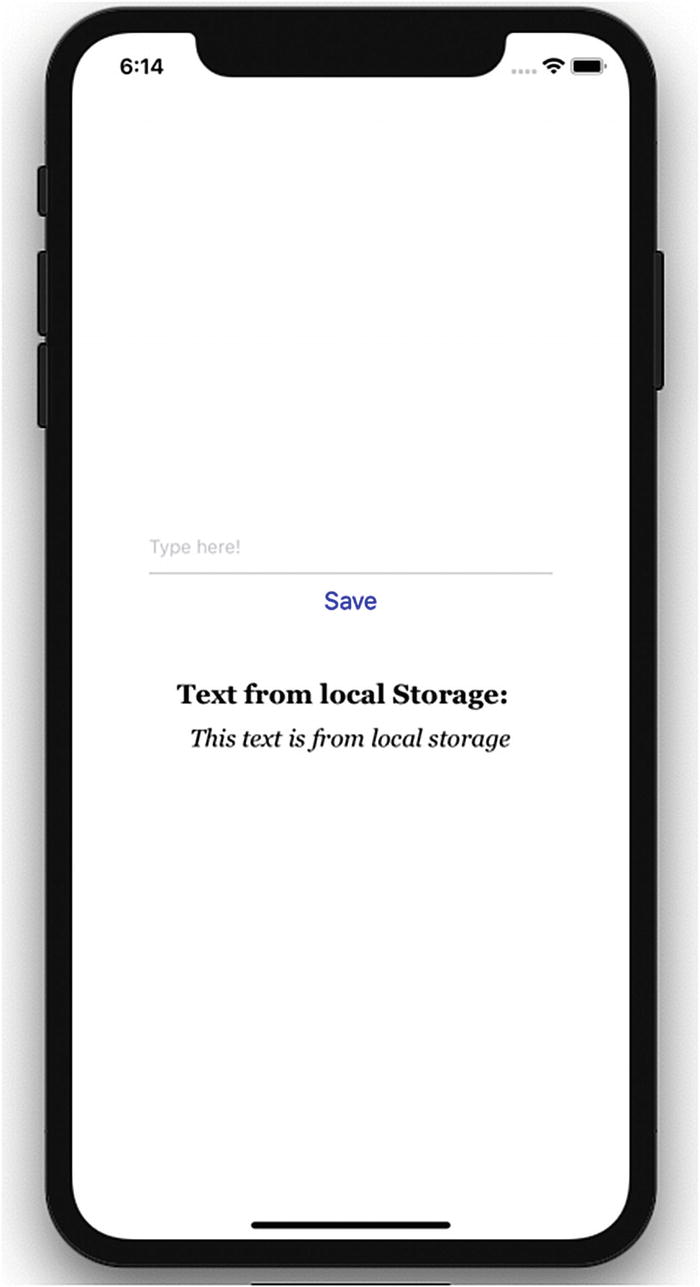
Let’s build our application to see the results. You can enter the text in a text box as shown in Figure 5-10 and then click Save.
Figure 5-10.
Storage is updated
Once that is done, refresh for the result shown in Figure 5-11.
Figure 5-11.
Text from the AsyncStorage mechanism
This time the text below, “This text is from local storage,” is coming from the AsyncStorage mechanism that we have put in place.
Reviewing the AsyncStorage Code
In this example, we have included the AsyncStorage default component in our list of components to be used for the sample application. Let’s go through how exactly the code for this example works.
We use this AsyncStorage React component within our App component. Previously, we also specified a key that we will use with AsyncStorage.
Inside our App component we have set up constructor and componentDidMount methods and also created onPressSave and retrieveData methods. Let’s discuss them one by one.
constructor(props) {
super(props);
this.state = {storedText: '', inputBoxText: ''}
}
In constructorwe have specified blank values for storedText and inputBoxText, which we will keep updating as and when their state changes.
componentDidMount is invoked only at the .time of initial rendering and is responsible for showing the text below “This text is from local storage,” once we have updated the storage and refreshed the app again. We have used async and await for calling retrieveData, which means the execution will wait until the function is completely executed.
retrieveData = async () => {
try {
const value = await AsyncStorage.getItem('@AsyncStorageExample:someKey');
return value;
} catch (error) {
console.log("Error in Fetching Data")
}
}
The method retrieveData is used to retrieve the value stored in local storage. Calling AsyncStorage.getItem retrieves the value stored in local storage.
The preceding code sets up various sections of our AsyncStorageExample component. Here, we can change a text input field to update the textInputMessage state. We also have an onPress prop for the TouchableHighlight component, which calls the updatedStorage method and persists the values permanently. In the end, we display the saved message by accessing the present state of the message.
const styles = StyleSheet.create({
container: {
flex: 1,
backgroundColor: '#fff',
alignItems: 'center',
justifyContent: 'center',
},
header: {
fontFamily: 'Georgia',
fontSize: 20,
fontWeight: 'bold',
paddingTop: 40,
},
text: {
fontFamily: 'Georgia',
fontSize: 18,
fontStyle: 'italic',
paddingTop: 10,
},
textField: {
height: 40,
width: 300,
borderColor: '#C0C0C0',
borderBottomWidth: 1,
}
});
Finally, we set up a UI style with some self-explanatory Flex settings and register our AsyncStorageExample component.
Native Alert
Alerts are used to provide important information to application users. Basic alerts consist of a dialog box with a specific title, message, and buttons. Occasionally alert boxes appear in an application to display a piece of important information. The buttons for an alert could either be a simple OK to proceed with the app, or OK, Cancel, Ask Me Later, and so on, which require the user to make a decision. Tapping this button could be linked to execute an inPress callback to execute a piece of code. By default an alert dialog box will have one button.
Let’s create a project to understand more about Native Alert:
$ expo init NativeAlertApp
React Native provides the component Alert that works for both iOS and Android. Let’s add a button that will open an alert box when clicked. Update App.js with the following code:
import React from 'react';
import { StyleSheet, Text, View, Button, Alert } from 'react-native';
export default class App extends React.Component {
onPressButton1() {
Alert.alert(
'Alert Title',
'Alert Message',
)
}
render() {
return (
<View style={styles.container}>
<Button
onPress={this.onPressButton1}
title="Button 1"
color="#841584"
accessibilityLabel="Learn more about Button 1"
/>
</View>
);
}
}
const styles = StyleSheet.create({
container: {
flex: 1,
backgroundColor: '#fff',
alignItems: 'center',
justifyContent: 'center',
},
});
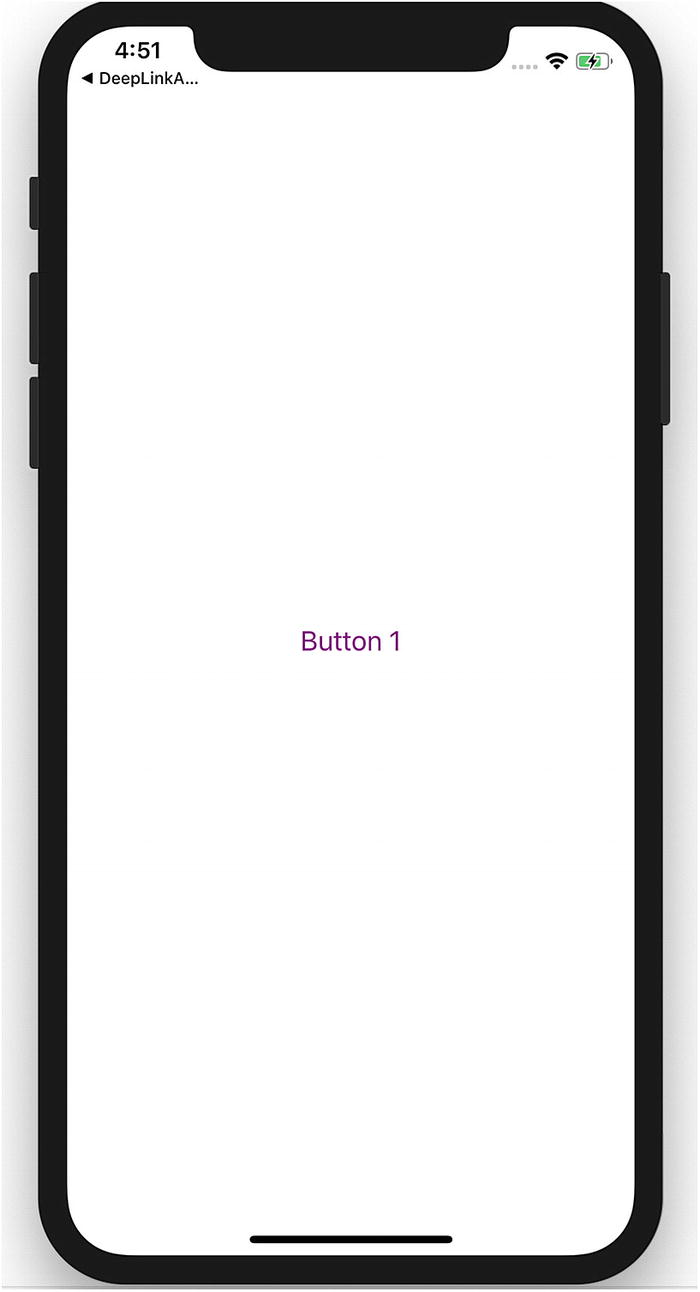
Let’s build this application and test it in the simulator. Figure 5-12 shows the result.
Figure 5-12.
A button that will open an alert dialog box when clicked
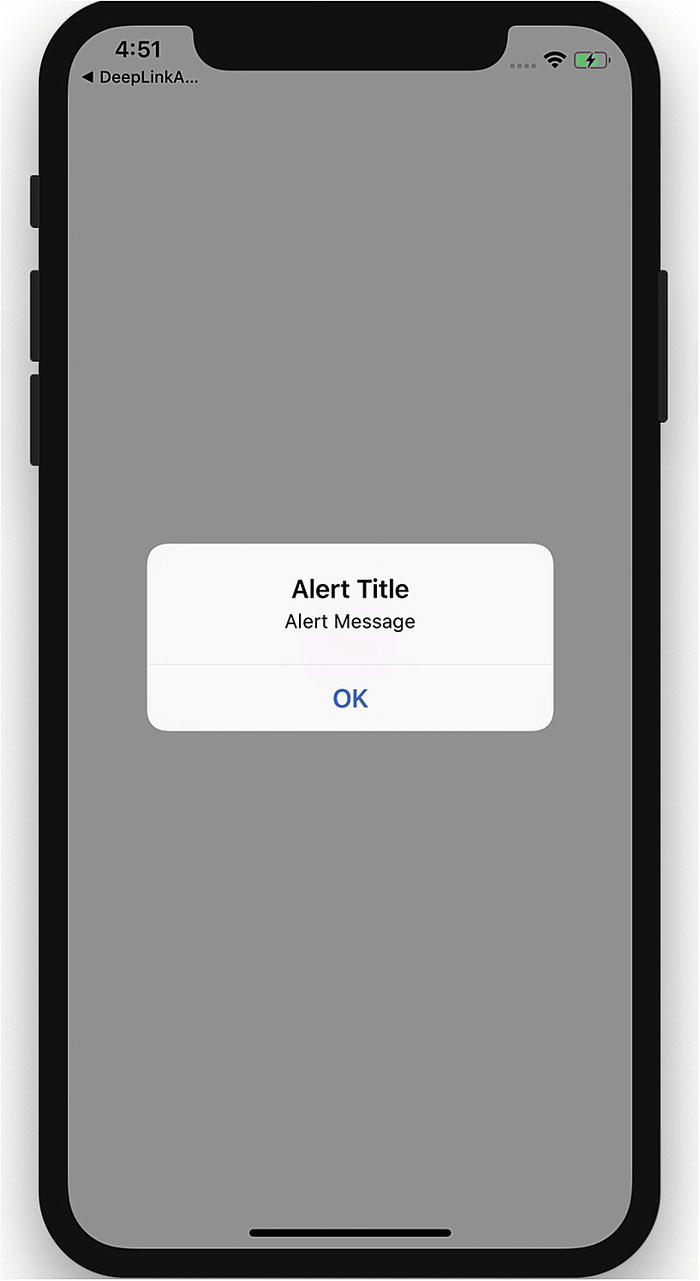
Tap the Button 1 button to see an alert box, as shown in the example in Figure 5-13.
Figure 5-13.
An alert dialog box
Reviewing the NativeAlert Code
Now that you have created a new NativeAlert project, create a new NativeAlert component:
export default class App extends React.Component {
onPressButton1() {
Alert.alert(
'Alert Title',
'Alert Message',
)
}
render() {
return (
<View style={styles.container}>
<Button
onPress={this.onPressButton1}
title="Button 1"
color="#841584"
accessibilityLabel="Learn more about Button 1"
/>
</View>
);
}
}
In the component NativeAlert, we have used onPress callback. The Alert method passes the strings 'Alert Title' and 'Alert Message', which produce an alert dialog box containing a title, a message, and a button. Alert provides two methods, alert and prompt, as shown next. Alert creates and displays an alert, whereas prompt creates and displays a prompt to enter some text.
Let’s refresh our view to see the changes made in Figure 5-14.
Figure 5-14.
Two buttons added on the screen
Click Button 2 to view the result shown in Figure 5-15.
Figure 5-15.
Select Button 1, Button 2, or Cancel
Tapping Button 2 fires an onPress callback that uses the alert method of Alert to set title, message, and buttons for our alert box. In this part of the NativeAlert component we have three buttons.
WebView
WebView is responsible for rendering web content in a Native view. That simply means WebView is an environment for loading a web URL inside your React Native application. WebView allows you to display web content as part of your app, but it lacks some of the features of fully developed browsers. Let’s begin by generating an application for this:
$ react-native init WebViewApp
$yarn add react-native-webview
$react-native link react-native-webview
Now use one of the following commands to build the app. The first command is for an iOS simulator and the second one is for an Android simulator.
$react-native run-ios
$react-native run-android
Next, open App.js and replace its code with the following code:
import React, {Component} from 'react';
import {StyleSheet, SafeAreaView} from 'react-native';
import { WebView } from "react-native-webview";
export default class App extends Component<Props> {
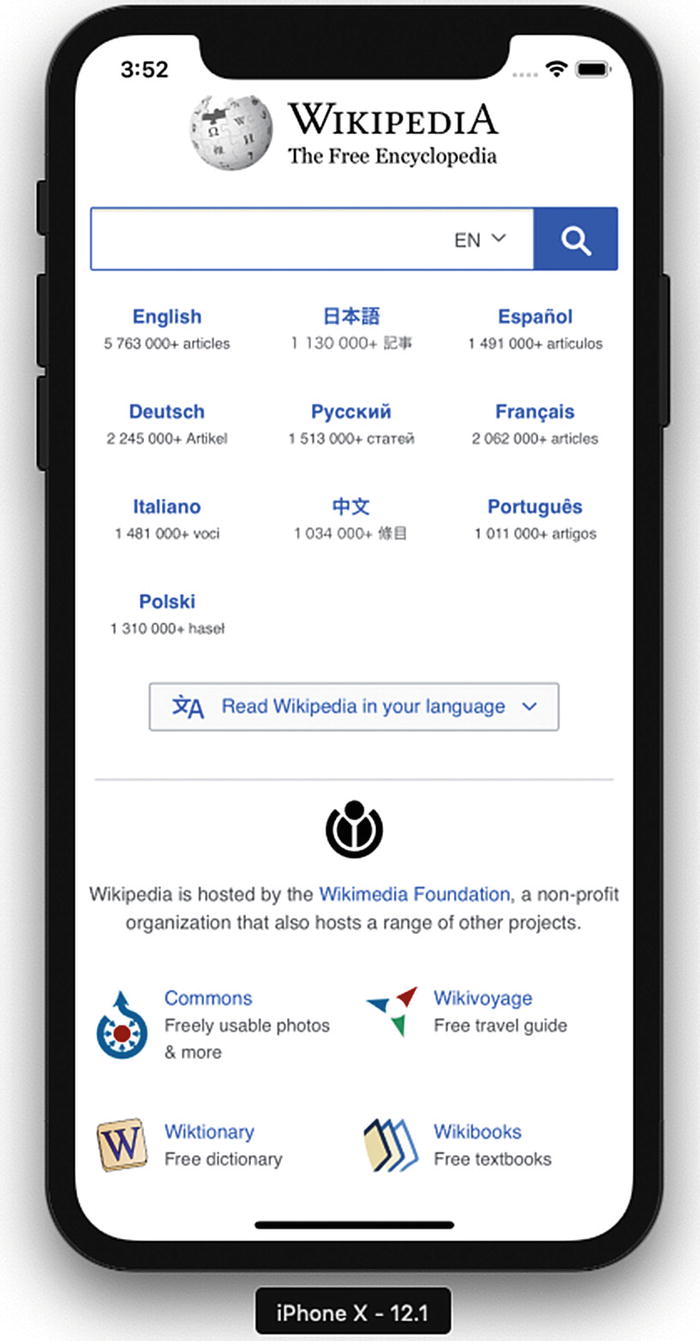
In this example, we have created a component App that returns a WebView. The following code creates a view with our desired URL loaded in the WebView.
export default class App extends Component<Props> {
render() {
return (
<WebView
style={{marginTop: 20}}
source={{ uri: "https://www.wikipedia.org" }}
/>
);
}
}
Deep Linking
Deep linking is a technique that allows an app to be opened to a specific UI or resource, in response to some external event. The deep refers to the depth of the page in an app’s hierarchical structure of pages. This is a very important feature for user engagement, as it also makes an app more responsive and capable of navigation to arbitrary content in response to external events like push notifications, e-mails, web links, and so on.
There are two ways of implementing deep linking: using a URL scheme or universal links. Although URL schemes are a well-known way of using deep linking, universal links are the new method Apple has implemented to easily connect your web page and your app under the same link. We implement URL schemes in our example that will handle external URIs. Let’s suppose that we want a URI like myapp://article/4 to open our app and link straight into an article screen that shows article number 1.
We are using The React Native CLI instead of Expo CLI because we want to use customization in iOS and Android code. We can create the project using Expo and can then eject also.
$ react-native init DeepLinkApp
$ yarn add react-navigation
$ react-native link react-native-gesture-handler
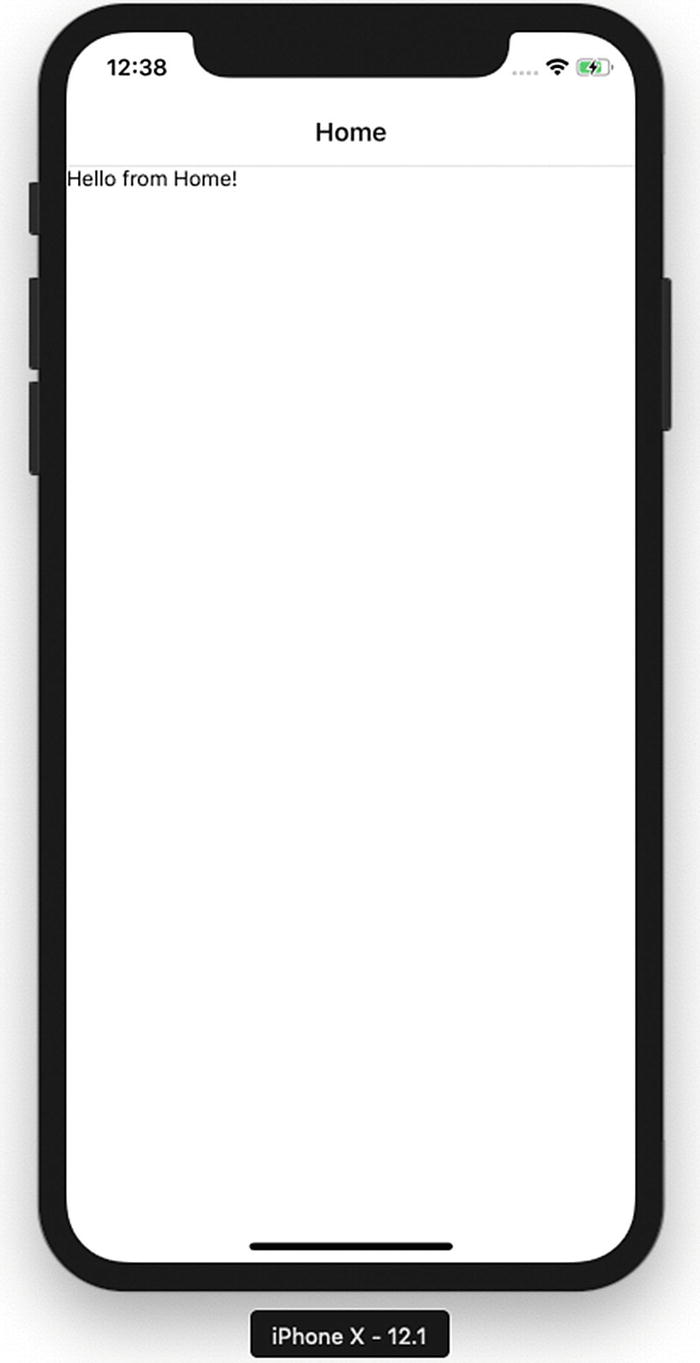
After creating the project, we will add React Navigation and then use the link command to link React Native gesture handling. Create an src folder in the root folder and add the Article.js and Home.js files. Next, add following code in Home.js:
import React from 'react';
import { Text } from 'react-native';
class Home extends React.Component {
static navigationOptions = {
title: 'Home',
};
render() {
return <Text>Hello from Home!</Text>;
}
}
export default Home;
We have created a simple React component that rendered Text Hello from Home!. We next create a file Article.js in the src folder and add the following code:
import React from 'react';
import { Text } from 'react-native';
class Article extends React.Component {
static navigationOptions = {
title: 'Article',
};
render() {
const { id } = this.props.navigation.state.params;
return <Text>Hello from Article {id}!</Text>;
}
}
export default Article;
We have now created two components, Home.js and Article.js, and we can add this in React Navigation routes. Open App.js and update the following code:
import React, {Component} from 'react';
import {Platform, StyleSheet, Text, View} from 'react-native';
import { createAppContainer, createStackNavigator} from "react-navigation";
We have thus far created React Navigation and created routes for two pages. We have configured our navigation container to extract the path from the app’s incoming URI. On Android, the URI prefix typically contains a host in addition to the scheme, so we have used myapp://myapp/.
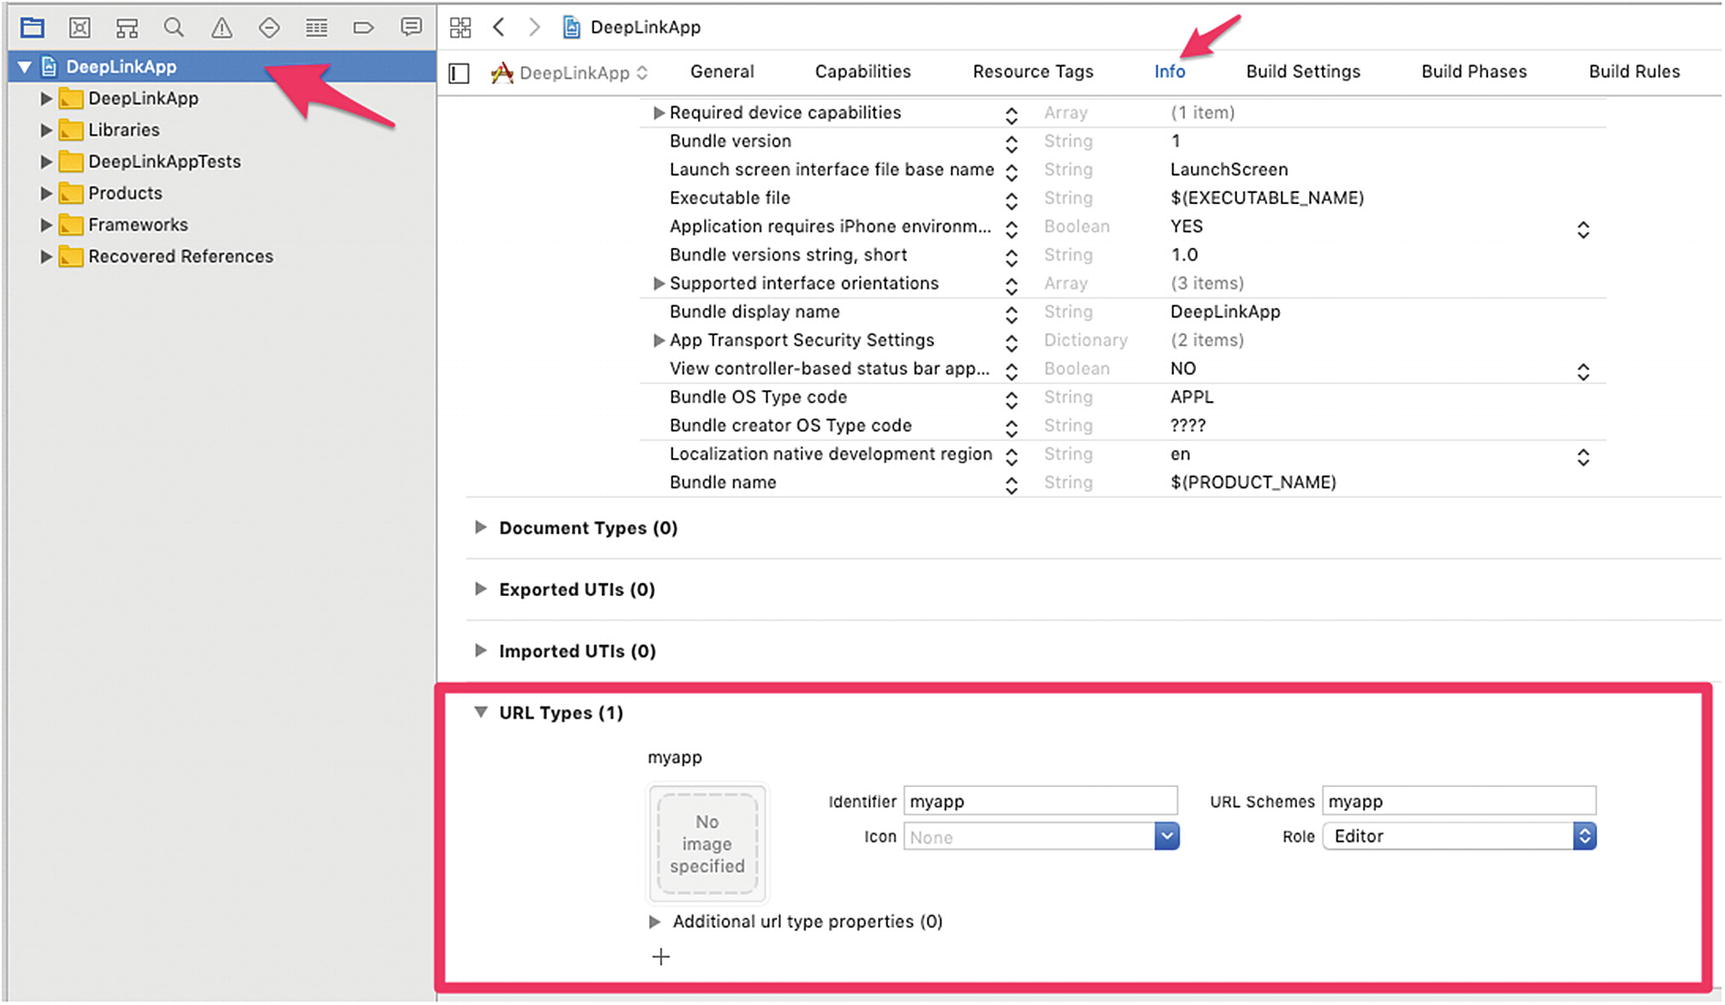
Now we have to write custom code for iOS and Android. First, open the iOS project in the iOS folder by clicking DeepLinkApp.xcodeproj. Select the project title from the folder list and navigate to the Info tab as shown in Figure 5-17. Scroll down to the URL Types section and add one. For the new URL type, set the Identifier to mychat and the URL Scheme to mychat.
Figure 5-17.
Deep linking using Xcode
Open AppDelegate.m in the root folder and add the following code before @end.
Now let’s update the code for Android. To configure the external linking in Android, we need to create a new intent in the manifest. Open /src/main/AndroidManifest.xml to add the new intent-filter inside the MainActivity entry with a VIEW type action:
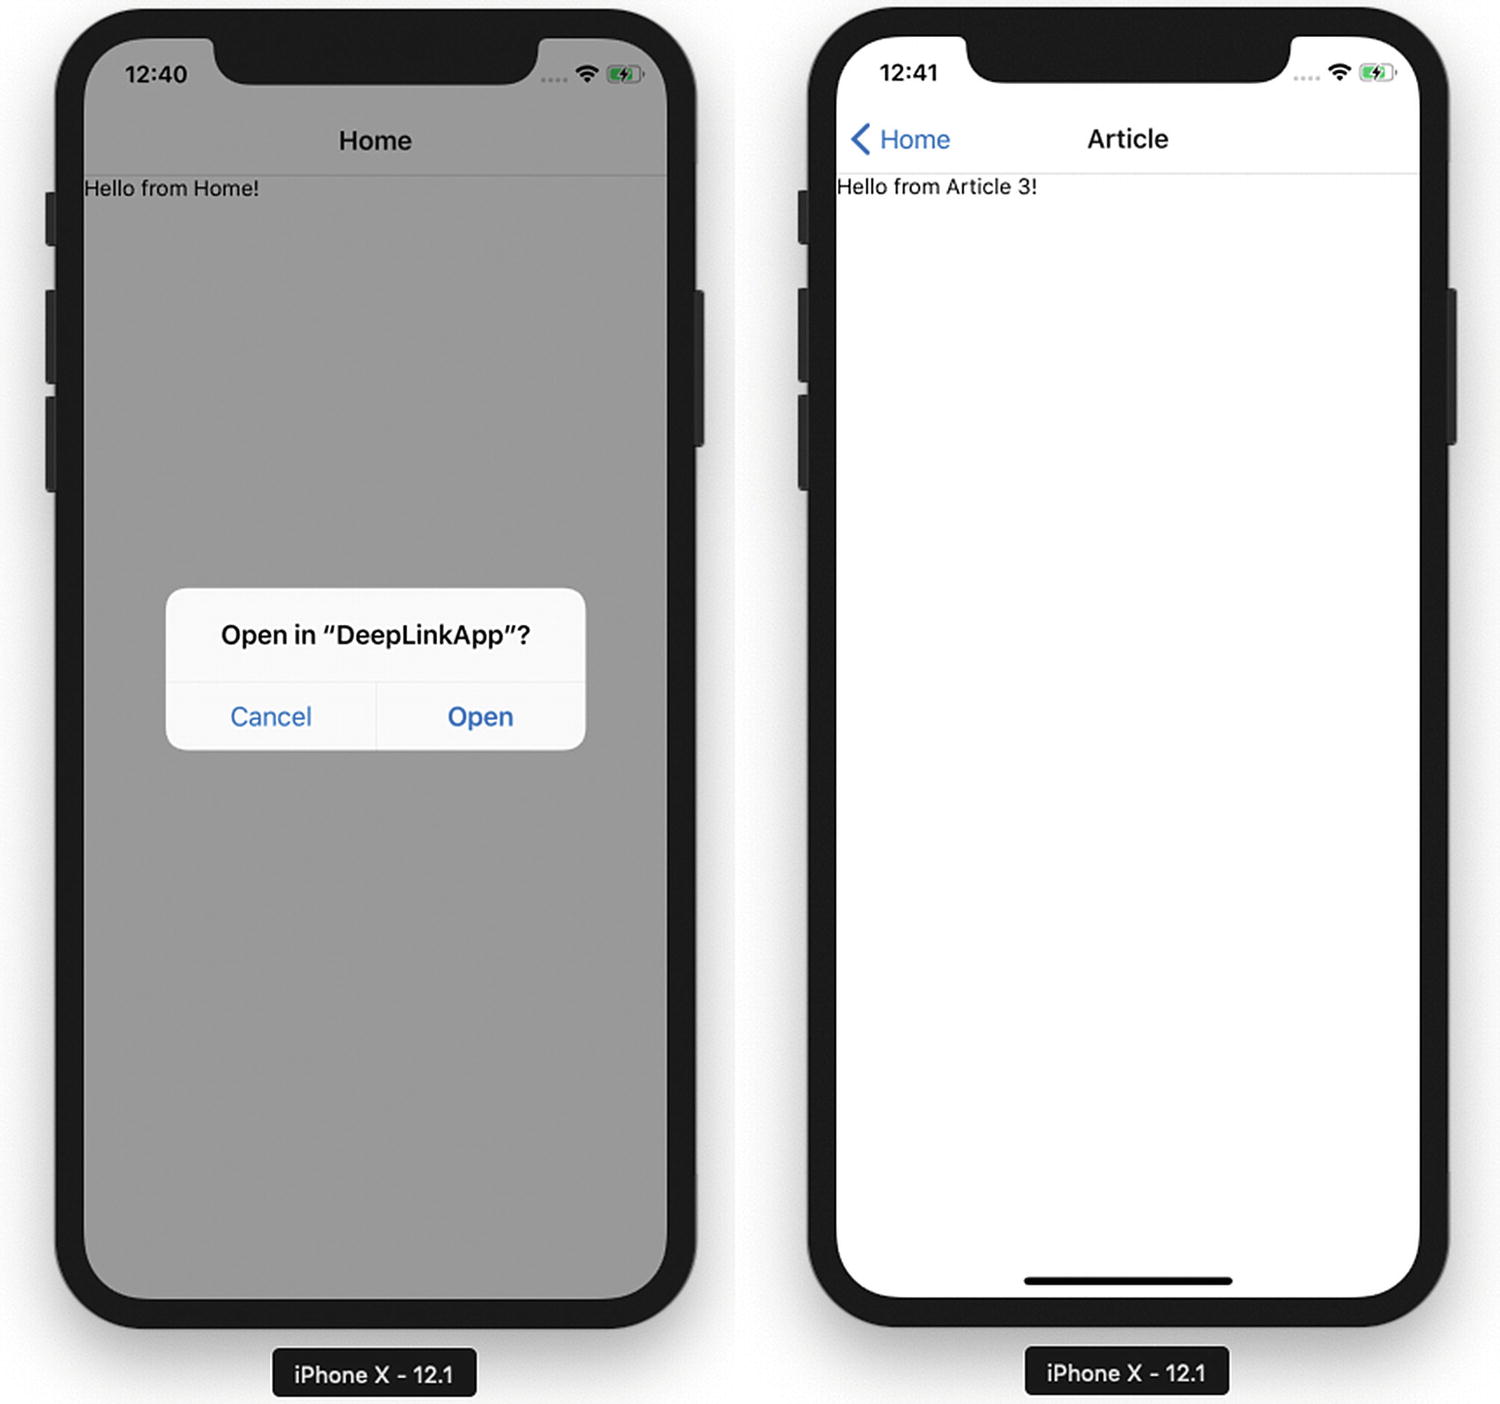
To test the DeepLink, open the Safari browser and type myapp://article/4. That will automatically open the app and open Article 4 (Figure 5-19).
Figure 5-19.
Traversing to the DeepLink page
You can also open the DeepLink page by running this command on your terminal (Figure 5-20):
xcrun simctl openurl booted myapp://article/3
Figure 5-20.
Traversing to the DeepLink page
Summary
This chapter covered various capabilities of iOS and Android devices using React Native. These capabilities helped us build features beyond just a UI. We learned how to use GeoLocation and loading maps for your app, AsyncStorage to persist data, Native alerts to share important info in your app, WebView to load HTML5 content, and finally deep linking.
Chapter 6 discusses how to interact with a back-end server because no real-world application is complete without connecting to a back end and consuming APIs.