A user interface is the process of shifting from chaotic complexity to elegant simplicity.
—Akshat Paul
Chapter 3 introduced React Native state management using Flux and Redux, and you created your first React Native application. Now that you have a skeleton for your project, let’s fill it out with a stunning UI. This chapter covers the following topics:
React Navigation
Flexbox
TouchableHighlight
ListView
ScrollView
Animations
Any experienced software professional will agree: The success of an app depends on the fact that it not only works flawlessly, but also looks great. Therefore, a great UI can make a huge difference in the success of your app.
The layout system is a fundamental concept that needs to be mastered to create great applications. Let’s begin by understanding how to navigate within iOS and Android applications using React Native.
React Navigation
React Navigation is one of the popular JavaScript libraries for handling routing in React Native applications. iOS and Android have different ways to handle navigation, and react-navigation takes care of this for both platforms.
To start, we need to install the react-navigation npm module. Let’s build on the HouseShare application we created in Chapter 2:
yarn add react-navigation
Let’s create a screen that we will use to render through react-navigation. We will create a new folder with the name screens in the root directory and create a HomeScreen.js file inside the same folder. Add the following code in Homescreen.js:
import React from 'react';
import { StyleSheet, Text, View, Button } from 'react-native';
export default class HomeScreen extends React.Component {
render() {
return (
<View style={styles.home}>
<Text>Home Screen</Text>
</View>
);
}
}
const styles = StyleSheet.create({
home: {
flex: 1,
alignItems: 'center',
justifyContent: 'center',
},
});
We just created a HomeScreen React component, which shows text that is center aligned. Because this component exported from App.js is the entry point for your app and other components descend from it, we need to update App.js to include Navigation. Let’s import the HomeScreen component in App.js and update the following code:
import React from 'react';
import { StyleSheet, Text, View } from 'react-native';
import { createStackNavigator } from 'react-navigation';
import HomeScreen from './screens/HomeScreen';
const AppNavigator = createStackNavigator({
Home: {
screen: HomeScreen
},
});
export default class App extends React.Component {
render() {
return <AppNavigator />;
}
}
Now run the app in a simulator:
$ yarn start
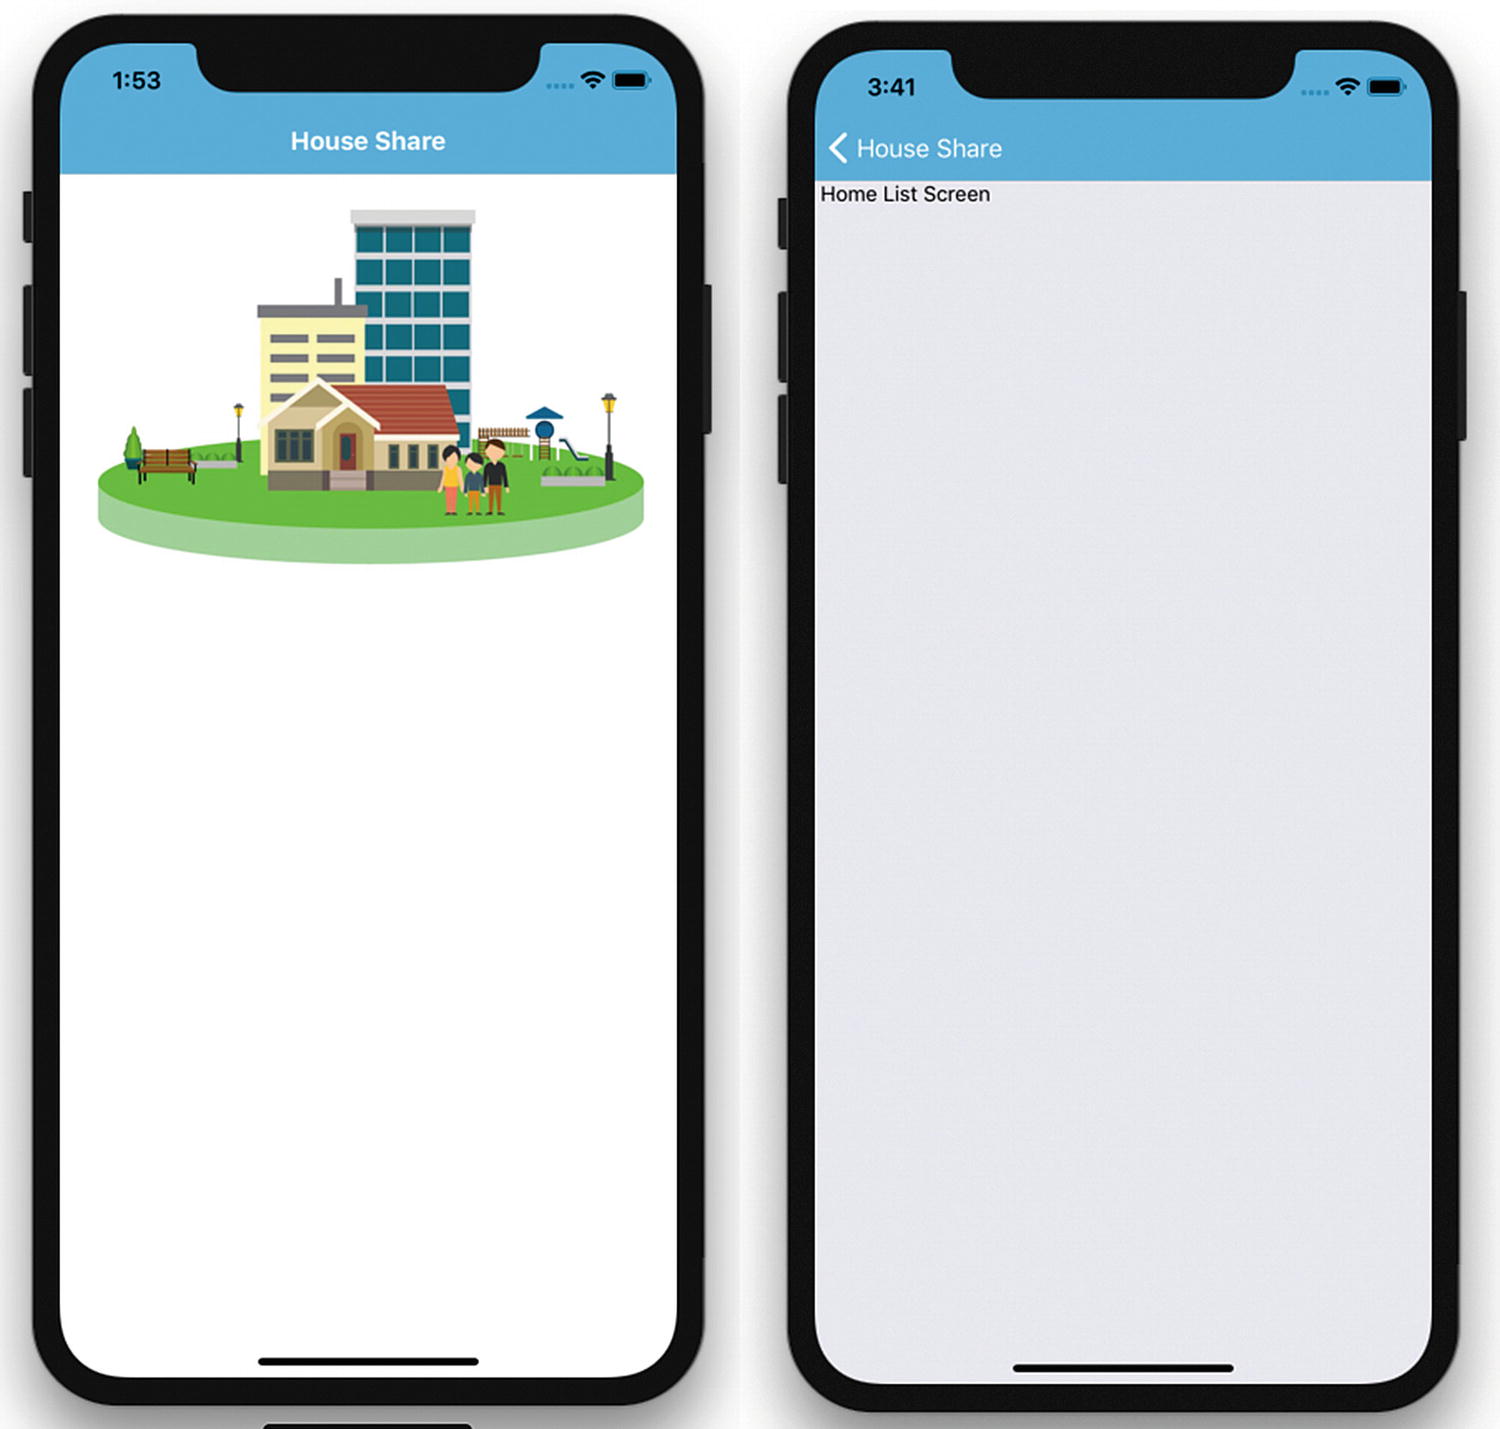
Figure 4-1 shows a HomeScreen rendered using react-navigation. We have used createStackNavigator, which returns a React component.
Figure 4-1
HomeScreen React component loaded
createStackNavigator takes a route configuration object and because it returns a React component, we can use this in the App component. It provides a way for your app to transition between components and manage navigation history, gestures, and animations, which is natively provided in Android and iOS.
Right now, we have used just the HomeScreen component. Let’s add one more screen and use react-navigation to route to this new screen.
Let’s create the AboutScreen.js component inside the screens folder and add the following code in it:
import React from 'react';
import { StyleSheet, Text, View } from 'react-native';
export default AboutScreen = () => {
return (
<View style={styles.about}>
<Text>About Screen</Text>
</View>
);
}
const styles = StyleSheet.create({
about: {
flex: 1,
alignItems: 'center',
justifyContent: 'center',
},
});
Here we have created a stateless React component, which shows text that is center aligned. Now we update StackNavigator to add this screen to the stack. Open App.js and add this route:
const AppNavigator = createStackNavigator({
Home: {
screen: HomeScreen
},
About: {
screen: AboutScreen
}},
{
initialRouteName: 'Home',
}
);
export default class App extends React.Component {
render() {
return <AppNavigator />;
}
}
We have also defined an initalRouteName, which will be opened as the first screen of the application. Now let’s add a button to HomeScreen. The purpose of this button will be to traverse to AboutScreen when clicked. We will do this by using react-navigation prop this.props.navigation.navigate('TargetRoute'), which is automatically injected into your component. Let’s update HomeScreen.js with the following code:
import React from 'react';
import { StyleSheet, Text, View, Button } from 'react-native';
export default class HomeScreen extends React.Component {
static navigationOptions = {
title: 'Welcome',
};
render() {
const { navigate } = this.props.navigation;
return (
<View style={styles.home}>
<Text>Home Screen</Text>
<Button
title="Go About Page"
onPress={() =>
navigate('About')
}
/>
</View>
);
}
}
const styles = StyleSheet.create({
home: {
flex: 1,
alignItems: 'center',
justifyContent: 'center',
},
});
Let’s test our app in in the simulator:
$ yarn start
Figure 4-2 shows the two screens and how users can navigate between them.
Figure 4-2
Navigating using React Navigation
We have used createStackNavigator, which has created screens as a stack that can be navigated with the back button at the top. It manages a stack of screens to provide a drill-down interface for hierarchical content.
Let’s customize the header next. You can do this on a global level as well as at the screen level. We start with the global level. Update App.js with
}
}
}
);
Run the app. Figure 4-3 shows the updated header styling for all the screens, but you can override this for a specific screen by adding this in a component as a static variable.
Figure 4-3
Header styling updated
NavigatorIOS
If you are only targeting iOS you can also use NavigatorIOS. It wraps UIKit navigation and allows you to add a backswipe feature to your app. NavigatorIOS manages a stack of view controllers to provide a drill-down interface for hierarchical content. Now that we know what NavigatorIOS does, let’s implement it in our project.
Note
NavigatorIOS helps with the most basic iOS routing. A route is an object that describes each view in the navigator.
<NavigatorIOS
initialRoute={{
component: HomeScreen,
title: 'Title for screen',
passProps: {myProp: 'foo'},
}}
/>
We have done a little bit of styling in this section, which might be something new for you if you come from a grid-layout background. React Native uses Flexbox for styling, which is discussed in detail next.
Flexbox
In creating the layout in the previous example, you must have seen the flex property mentioned in the styles. This appears because React Native apps use the Flexbox layout model.
The React Native Flexbox layout model is inspired by the CSS Flex Box Layout from CSS3. The React Native team has rewritten this feature specifically for iOS. The main idea behind Flexbox is being able to create a layout without worrying about different screen sizes or device orientation. A flex container expands items to fill available free space or shrinks them to prevent overflow. Let’s get some basic knowledge of Flexbox to expedite our layout development. First, let’s update the view in HomeScreen.js:
Houseshare/screens/HomeScreen.js
export default class HomeScreen extends React.Component {
static navigationOptions = {
title: 'House Share',
};
render() {
const { navigate } = this.props.navigation;
return (
<View style={styles.container}>
<View style={styles.topBox} />
<View style={styles.bottomBox} />
</View>
);
}
}
We have created one main view with a style container and two subviews with the styles topBox and bottomBox. Now, let’s create the styles:
var styles = StyleSheet.create({
container: {
flex: 1,
flexDirection: 'column'
},
topBox: {
flex: 2,
backgroundColor: '#CCE5FF'
},
bottomBox: {
flex: 1,
backgroundColor: '#FFFFCC'
}
});
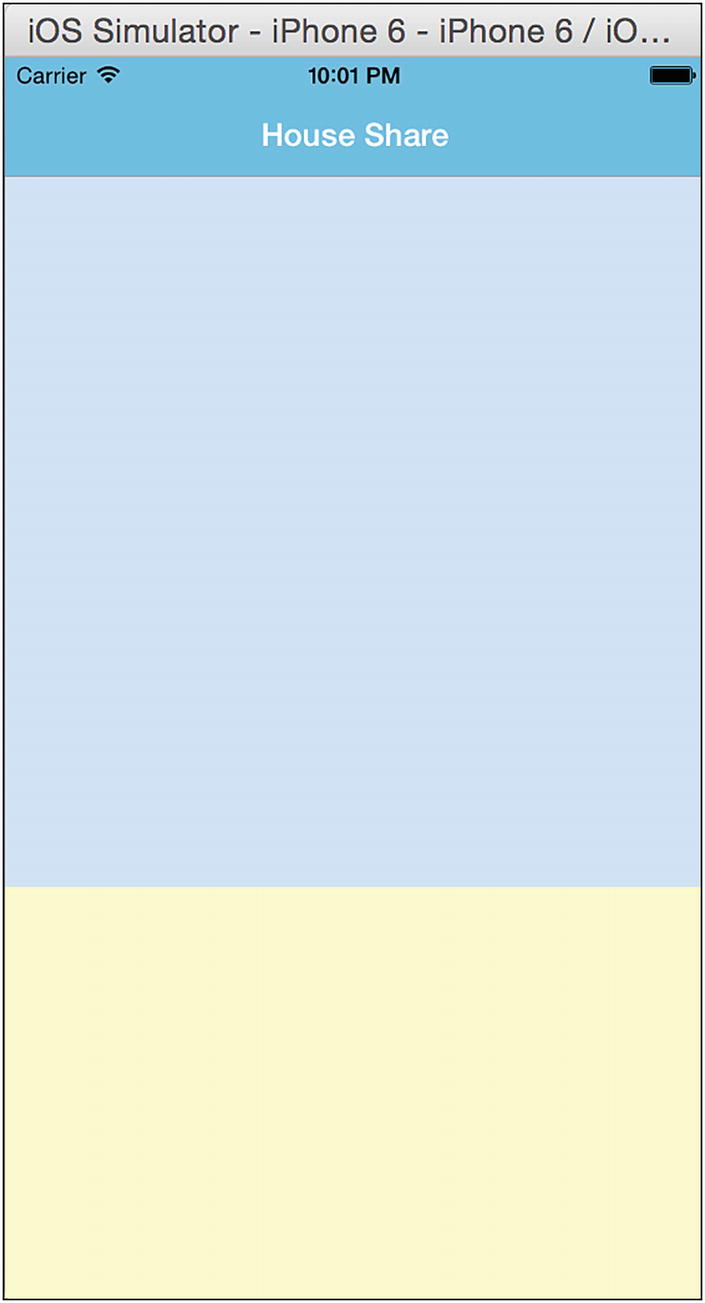
Turn back to the simulator and refresh the view using Command + R. Now, rotate the simulator, and you will see it automatically adjust the size of these colored boxes. Figure 4-4 shows the simulator in portrait mode.
Figure 4-4
Screen in portrait mode
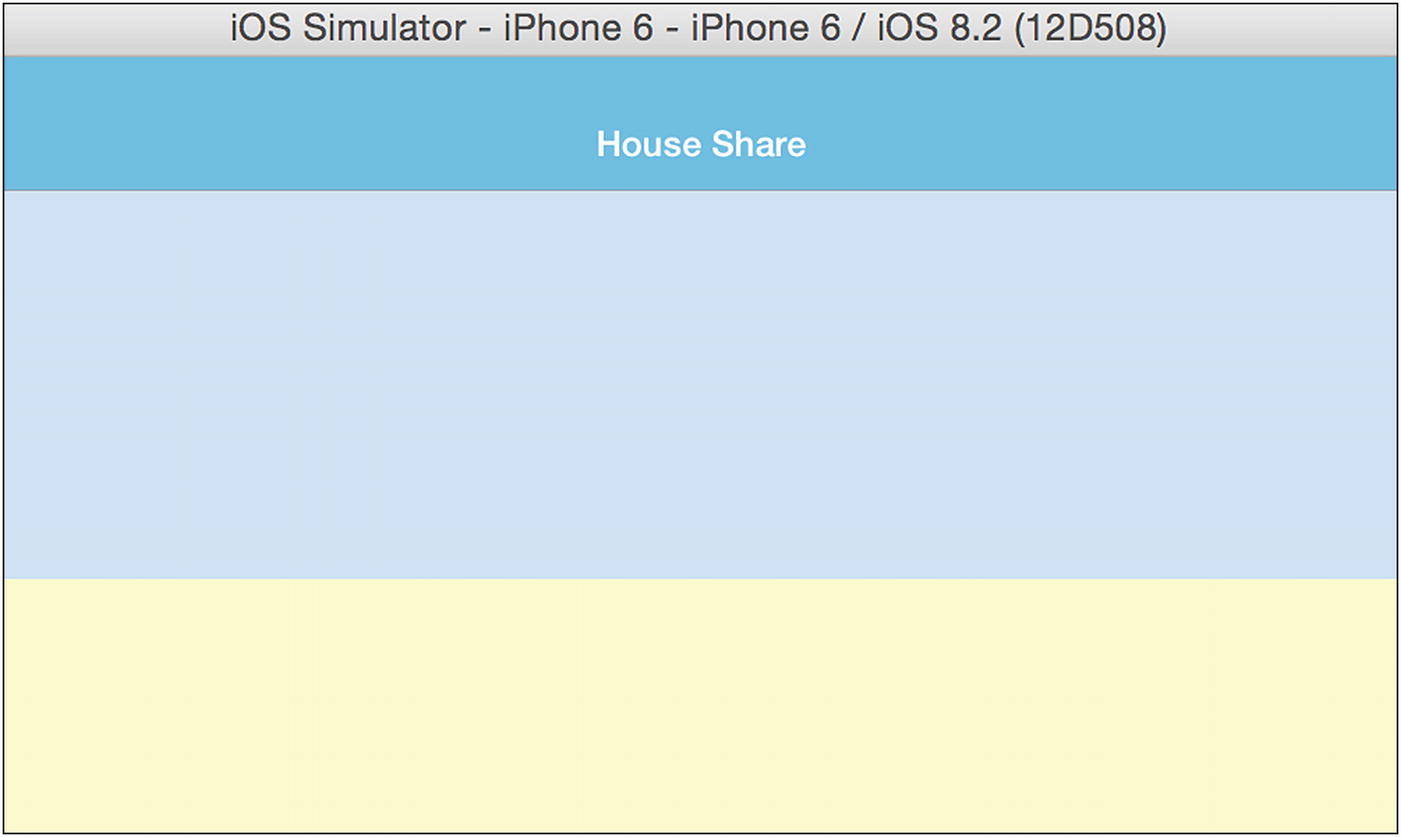
Let’s change the simulator to landscape mode (see Figure 4-5). This can be done easily using Command + Right/Left arrow key (⌘ + Left Arrow). You can see how the box has adjusted its size, and how the title adjusted its width to use all the available space. Thanks to Flexbox, a pretty laborious task is simplified.
Figure 4-5
Screen in landscape mode
Now, let’s review the flex properties Flex-direction and flex.
flexDirection
Flexbox is a single-direction layout concept. flexDirection allows you to define the direction in which the child elements are going to flow. It can have two values, row and column. In the previous example we used column. Let’s change it to row here:
container: {
flex: 1,
flexDirection: 'row'
}
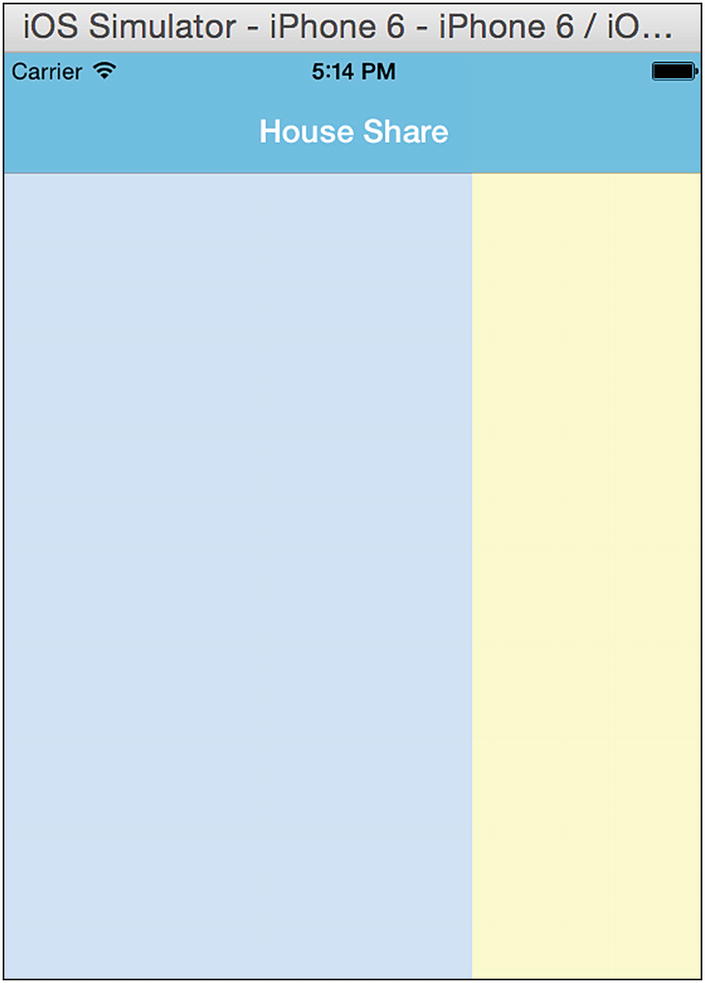
Turn back to the simulator and refresh the view with Command + R (see Figure 4-6).
Figure 4-6
Changing the orientation of the box
You can see how the orientation of the box has changed. Now change the property flexDirection to column (see Figure 4-7).
Figure 4-7
Changing the property to column
Flex
You must have seen the flex value in the stylesheet; it can be either integers or decimals, indicating the relative size of the box:
container: {
flex: 1,
flexDirection: 'column'
},
topBox: {
flex: 2,
backgroundColor: '#CCE5FF',
},
bottomBox: {
flex: 1,
backgroundColor: '#FFFFCC'
}
Our view says:
<View style={styles.container}>
<View style={styles.topBox} />
<View style={styles.bottomBox} />
</View>
flex thus defines the size percentage for the box. We can see that the container has two views inside, topBox and bottomBox, with flex values of 2 and 1, respectively (see Figure 4-8).
Figure 4-8
Container in 2:1 ratio
Now, update the view and add one topBox view inside the container view:
<View style={styles.container}>
<View style={styles.topBox} />
<View style={styles.bottomBox} />
<View style={styles.topBox} />
</View>
Refresh the view. The container has three views now: topBox, bottomBox, and then topBox again (see Figure 4-9).
Figure 4-9
Container with three views
This will divide the view into a 2:1:2 ratio, because their flex values are in the ratio 2:1:2.
To get a better sense of how this works, let’s change the flex values and see how that changes our screen. Let’s change the flex value of topBox to 1. Update the CSS to:
container: {
flex: 1,
flexDirection: 'column'
},
topBox: {
flex: 1,
backgroundColor: '#CCE5FF',
},
bottomBox: {
flex: 1,
backgroundColor: '#FFFFCC'
}
Refresh the view to see the changes, as shown in Figure 4-10.
Figure 4-10
View in 1:1:1 ratio
We can see that now the screen is divided in a ratio of 1:1:1, because the flex values of the views are in a ratio of 1:1:1. With Flexbox, it is easy to create layouts that can resize according to screen size and orientation. This is just an introduction to Flexbox; we explain more properties throughout the book as and when needed. You can also find more options at https://facebook.github.io/react-native/docs/flexbox.html.
Images
React Native has a built-in component, Image, that will help us to display images, including network images, temporary local images, and also images from a local disk, such as the Camera Roll. To start, we display local images.
Copy a home image from the assets folder and update HomeScreen.js:
import React from 'react';
import { StyleSheet, Text, View, Button, Image} from 'react-native';
export default class HomeScreen extends React.Component {
static navigationOptions = {
title: 'House Share',
};
render() {
const { navigate } = this.props.navigation;
return (
<View style={styles.container}>
<View style={styles.topBox} >
<Image
style={styles.homeBanner}
source={require('../assets/house.png')}
/>
</View>
<View style={styles.bottomBox} />
</View>
);
}
}
const styles = StyleSheet.create({
container: {
flex: 1,
flexDirection: 'column'
},
topBox: {
flex: 1,
backgroundColor: '#C0C0C0'
},
bottomBox: {
flex: 2,
backgroundColor: '#fff'
},
homeBanner: {
bottom:0,
flex: 1,
alignSelf: 'stretch',
width: undefined,
height: undefined,
}
});
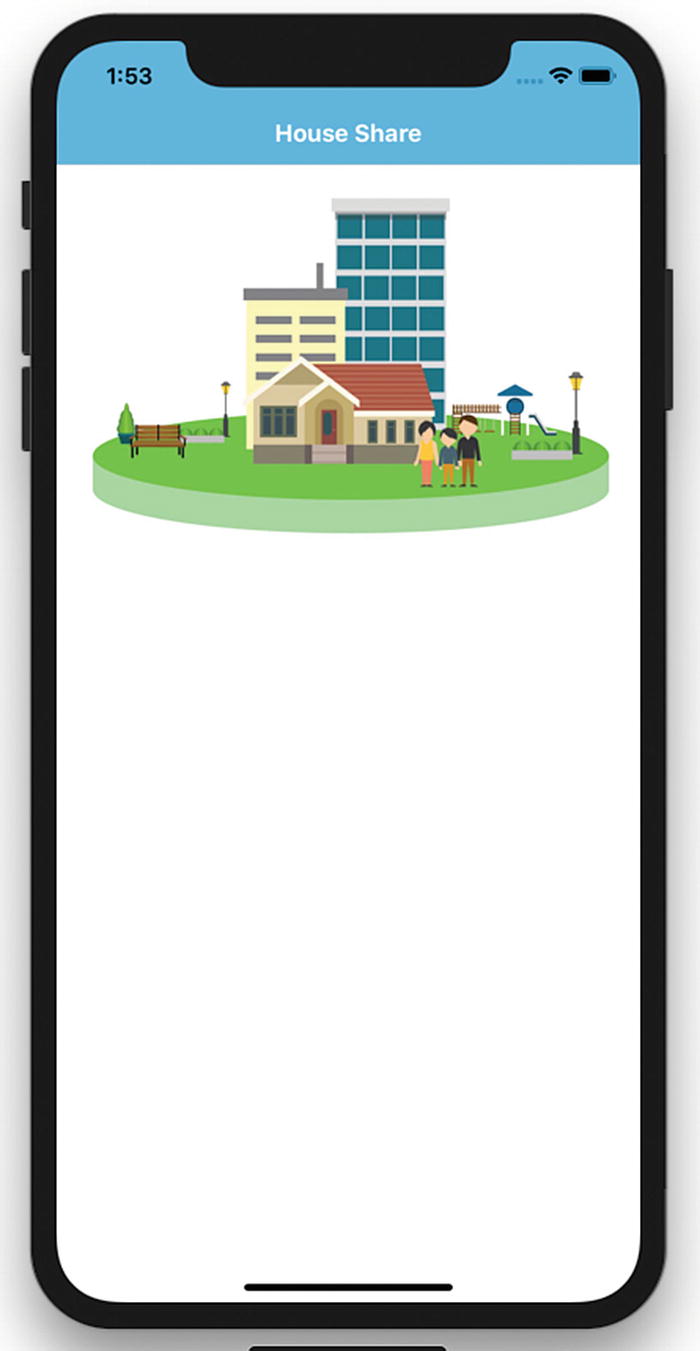
Now run the simulator. The results are shown in Figure 4-11.
Figure 4-11
Adding images
We can also give any server image URL as the source, and the Image component will take care of loading it from the network. For a different screen size you can also give images of a different density by using the @2x and @3x suffixes in the same folder. We will load an image from a server later in this chapter.
TouchableHighlight
Touch is one of the ways to interact with a view in an application. TouchableHighlight is a React Native component that helps us create clickable views that give a proper response in the event of a touch. To understand TouchableHighlight with an example, let’s continue building our app by adding one more view to list the housing options. This will be done by clicking on the show house image, which will redirect to another component.
Let’s add the TouchableHighlight component, making the image we have added into a clickable view. Update the view, remove View, and add TouchableHighlight in HomeScreen.js:
Let us review what we have done here; we have added an onPress attribute to our TouchableHighlight component for the List Properties section. Whenever someone presses the List Properties image, it calls navigate('HomeListScreen').
We have also created a HomeListScreen.js page in the screens folder:
import React from 'react';
import { Text, View} from 'react-native';
export default HomeListScreen = () => {
return (
<View>
<Text> Home List Screen </Text>
</View>
);
}
Finally, update this page in App.js:
import HomeListScreen from './screens/HomeListScreen';
const AppNavigator = createStackNavigator({
Home: {
screen: HomeScreen
},
About: {
screen: AboutScreen
},
HomeListScreen: {
screen: HomeListScreen
}
},
{
initialRouteName: 'Home',
navigationOptions: {
headerStyle: {
backgroundColor: '#48BBEC',
},
headerTintColor: '#fff',
headerTitleStyle: {
fontWeight: 'bold',
}
}
}
);
Refresh the app in the simulator and you’ll see the image. When you click that image the new page shown in Figure 4-12 appears.
Figure 4-12
Clickable View with TouchableHighlight
Now we will load the image from a server and then create a nice-looking property view. This will look something like Figure 4-13.
Figure 4-13
Property name and address
Create a components folder in the root folder and create HouseItem.js inside the components folder:
import React from 'react';
import { StyleSheet, Text, View, Image } from 'react-native';
Let’s refresh our application in the iOS simulator to see the changes (see Figure 4-14).
Figure 4-14
Thumbnail image with property name and address
ListView
In the previous section, we populated one element. In this section, we populate a list of data using ListView. Before we embark on that, let’s learn a bit more about a different way to show the ListView component in React Native. React Native has two components: FlatList and SectionList.
FlatList is a component designed for populating vertically scrolling lists of dynamic data. The minimal steps are to create a FlatList data source and populate it with an array of data similar to the native TableView data source.
ListView looks very similar to TableView, but the implementation doesn’t actually use TableView. Rather, it uses ScrollView behind the scenes. Features like swipe to delete, reordering, and so on, cannot be used directly through ListView.
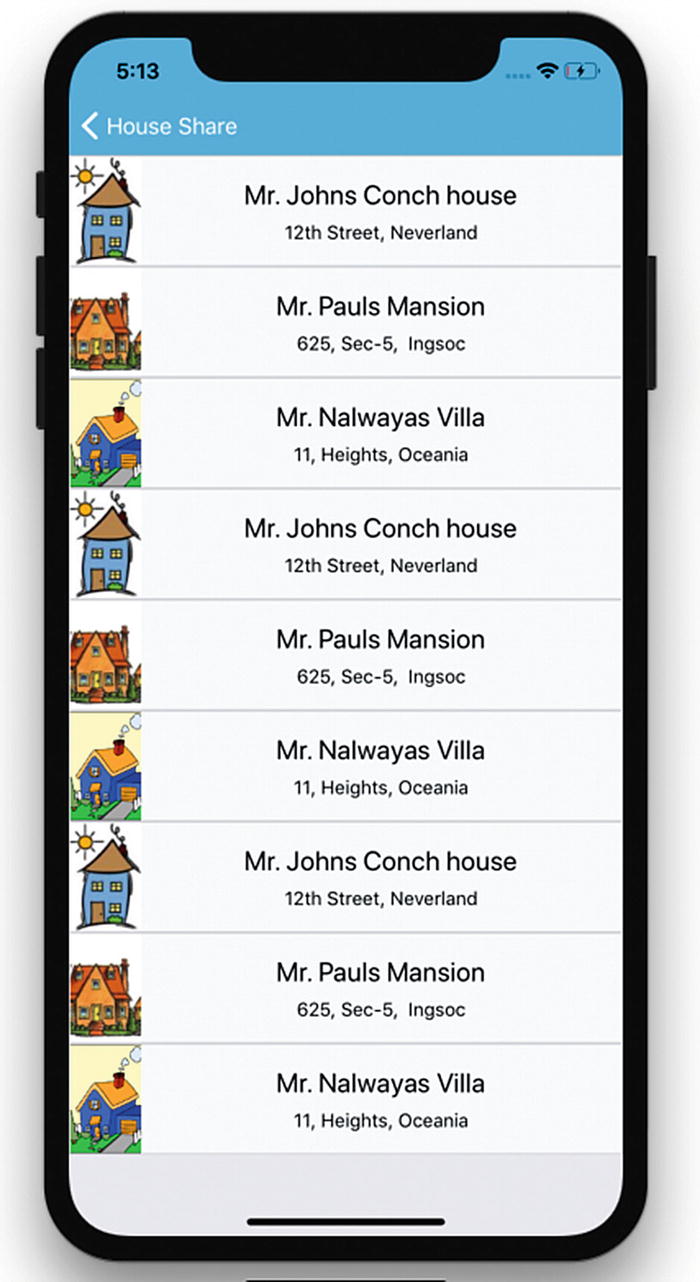
We will show the list of house address, as an example of the most common representation of data in mobile devices. With our HouseShare app, we will create a table view showing a list of properties, each of which has a thumbnail image to the left side. The rest of the details should appear next to it.
To keep things simple for this chapter, we mock up data instead of pulling them from some external service (later, you will learn how to pull the same data from an external API). With these data, we will show the name of the property, its address, and a thumbnail picture. Replace the following code in HouseListScreen.js:
HouseShare/screens/HomeListScreen.js
import React from 'react';
import { Text, View, FlatList } from 'react-native';
In this code we added more entries to create a FlatList view. Now, let’s look at the changes we made in our component:
<FlatList
data={MOCK_DATA}
renderItem={({item}) => <HouseItem {...item}/>}
keyExtractor={(item, index) => index.toString()}
/>
We have passed three props in the FlatList component: data, renderItem, and keyExtractor:
data is the source of information for the list.
renderItem takes one item from the source and returns a formatted component to render.
keyExtractor tells the list to use the IDs for the React keys instead of the default key property.
ScrollView
Although we are not using ScrollView in our HouseShare application, it can be used as an alternate way to populate a list just like we used ListView. ScrollView is one of the most versatile and useful controls, as it is a great way to list content that is greater in size than the screen size.
We can add a basic ScrollView by using the following code:
ScrollView is easy to use and it simply renders all its React child components at once, whereas FlatList renders items lazily, just when they are about to appear, and removes items that scroll far off screen to save memory and processing time.
Animations
Animations are crucial when it comes to creating a good user experience. If you think of any popular mobile app, you will likely find animation at the center of an immersive user experience. React Native provides an animation API to perform different types of animations with ease.
There are many different Animated methods that you can use to create animations, including these:
Animated.timing(): Animation based on time range.
Animated.decay(): Animation starts with an initial velocity and gradually slows to a stop.
Animated.spring(): This is a simple single-spring physics model that tracks velocity state to create fluid motions as the toValue updates, and can be chained together.
Animated.parallel(): This starts an array of animations all at the same time.
Animated.sequence(): We can perform an array of animations in order, waiting for each to complete before starting the next.
Let’s add some animation in our HouseShare app. Create a file FadeInView.js in the components folder and add the following code:
HouseShare/components/FadeInView.js
import React from 'react';
import { Animated, Text, View } from 'react-native';
export default class FadeInView extends React.Component {
state = {
fadeAnim: new Animated.Value(0),
}
componentDidMount() {
Animated.timing(
this.state.fadeAnim,
{
toValue: 1,
duration: 4000,
}
).start();
}
render() {
let { fadeAnim } = this.state;
return (
<Animated.View
style={{
...this.props.style,
opacity: fadeAnim,
}}
>
{this.props.children}
</Animated.View>
);
}
}
We have defined a state this.state.fadeAnim, which is the opacity value. We have defined this value from 0 as initial state. The opacity property on the View is then mapped to this animated value. We have used Animated.timing to increase the opacity from 0 to 1 in 4,000 ms. Next we wrap FadeInView with any View and it can FadeIn that View for 4,000 ms. Let’s open HomeItem.js and replace the root View with FadeInView, as shown: