Imagine a world in which your entire possession is one raspberry, and you give it to your friend.
—Gerda Weissmann Klein, All But My Life (Hill and Wang, 1995)
In Chapters 1 and 2, you saw how to get up and running with computer vision using Java on a regular desktop computer. The setup was a bit manual, but all the different building blocks were freely available, so it was just a matter of putting those blocks together.
In this chapter, you’ll add one more block to the mix, the Raspberry Pi 4. The first goal of the chapter is to perform the same kinds of tasks that you did on a computer but run as much as possible on the IoT device, while typing code and controlling the code execution from your local desktop. In other words, you’ll write on your computer but execute on the Raspberry.
For the code execution part, you need to have some specific hardware and cabling, so you should prepare yourself to go shopping. We’ll provide a shopping list and then move on to the setup.
Specifically, we will go through creating the SD card and setting up the Raspberry Pi, but it is assumed that most of those steps are already properly covered in other books and blogs, so you can go and read those if you need more than the basics presented here.
At the end of this chapter, you will have good grasp of the Raspberry, its speed, and its energy consumption while running the different vision operation and detection algorithms. You will also be ready to integrate this functionality on a larger scale into a voice-controlled home assistant of your design and thus expand your personal home or work office automation.
Bringing the Raspberry to Life
“Man,” I cried, “how ignorant art thou in thy pride of wisdom!”
—Mary Shelley, Frankenstein (1818)
We’re no Doctor Frankenstein, but to bring the Pi to life, we will have to work as if we are designing one: plugging in the cables, assembling, and turning on the power of the little device. Some shopping will be needed, and we have to gather the physical hardware before doing anything useful. Luckily, most of the things to buy are cheap and can be reused from other people’s old computers or from your grandma’s attic. She won’t notice.
Once the shopping is done and the Raspberry Pi and all the essential parts are assembled, we will move to putting in place the same vision setup on Visual Studio Code as in Chapter 1 and learn how to program OpenCV in Java again.
Shopping
While the Raspberry Pi is a solid computer on its own, most of the time you will not be able to do anything with it without a few other extra pieces. In this chapter, you will need a few accessories.
Table 3-1 provides a shopping list, but you can decide what type and where to buy things.
There are a wide range of cables and power adapters these days. Be sure to buy a power adapter that gets around 4.8A to 5A output if you want to do overclocking. Your chosen USB cable should also be able to carry the electrical current, but these days most of them do.
Shopping List
Name | What | Approximate Price (USD) | Required? | Always Needed? | |
|---|---|---|---|---|---|
Raspberry Pi 4 4GB | Main computer | $55 | Yes | Yes | □ |
USB-C to USB-A cable | Connect the computer to power | $6 | Yes | Yes | □ |
Power adapter with USB-A (at least 4.8A or even 5A for overclocking) | Electric power | $10 | Yes | Yes | □ |
HDMI cable | Connect to screen | $7 | Yes | No | □ |
SD card 128GB | Hard disk | $10 | Yes | Yes | □ |
ReSpeaker microphone | Recommended microphone for snips (Chapter 3) | $25 | No | If bought, yes | □ |
Display with HDMI port | Display for initial debugging | $25 | Yes | No | □ |
USB webcam | Record video | $20 | Yes | Yes | □ |
Keyboard and mouse | $20 | Maybe | No | □ | |
Total | $180 |

Raspberry Pi 4, power adapter, webcam, screen, etc
Downloading the OS
The Raspberry Pi will refuse to even look at a beautiful cat like Marcel without an operating system. There are a few operating systems readily available on the Raspberry web site.
Ubuntu Mate
Ubuntu Core
Windows 10 IoT Core
Noobs
Raspbian (the official operating system)
Ubuntu Mate and Ubuntu Core are new and good alternatives, but we will focus on the official operating system, Raspbian, because most of the documentation available for the Raspberry is based on it. It’s also quite easy to get started with it.
Raspbian is a Debian-based operating system, so most Linux aficionados will be at ease with it and its included aptitude package manager. Even though packages have to be compiled specifically for the ARM-based CPU of the Raspberry, the package list is quite up-to-date and mostly in sync with the main Debian line.
To be able to use the operating system as a bootable image that the Raspberry can use, we first need to download the image file onto a local computer and create a bootable disk specifically for the Raspberry Pi.

Raspbian icon

Torrent or zip file for Raspbian
We don’t need a full desktop install and all the proposed software, but we will aim for simplify so “Raspbian Buster with desktop” will be sufficient for us now.
Creating the Bootable SD Card
With the OS file on your computer, you are ready to create the bootable device. As noted on the Raspberry web site, the easiest way to get the OS on the Pi is by using Etcher, which is software to create the bootable SD card from a zip file or an .img file.
Etcher is available from https://www.balena.io/etcher/, and it can run on any platform, such as macOS, Windows, and Linux. The screenshots in this book were taken on Windows.

Selecting the image file

Selecting the micro SD card

The SD card is big

Flashing

Validating

Don’t be scared…
The card is here, so let’s now plug in the cables of the Pi.
Connecting the Cables
Electricity can be dangerous. My nephew tried to stick a penny into a plug. Whoever said a penny doesn’t go far didn’t see him shoot across that floor. I told him he was grounded.
—Tim Allen
I have found plugging things together to be quite fun and relaxing and could actually be used in personal therapy for the tough world we live in.
What to Plug Where Checklist
From | To | Why | |
|---|---|---|---|
Power AC | Power adapter | Get some power | □ |
USB-A | Power adapter | Power to the Pi | □ |
Webcam | Pi USB port | Get some video stream | □ |
Mouse | Pi USB port | Use a pointer | □ |
Keyboard | Pi USB port | Use a keyboard | □ |
Screen HDMI | Pi Micro HDMI | Display | □ |
USB-C | Raspberry Pi | Power to the Pi | □ |
Make sure to plug either the power adapter or the USB-C to Raspberry adapter in last; otherwise, the power will turn the board on without anything to do.

Original blueprints of the Raspberry Pi 4 and what to connect to
Finally, with the micro SD card inserted into the Raspberry Pi 4, you are ready to power things on (or have you already?).
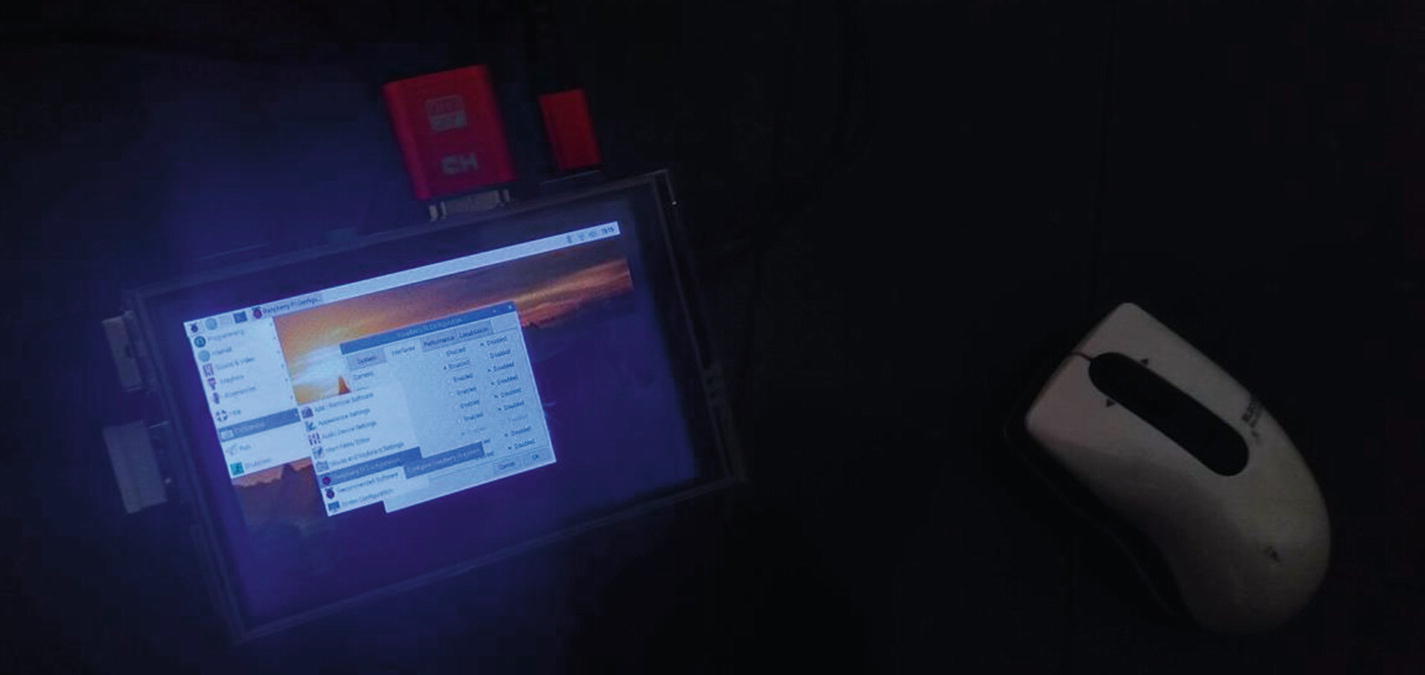
First Boot

First boot
With the keyboard, mouse, and screen plugged in, you can do quite a bit, but for most of the tasks we are going to do in this chapter, we want to work over SSH, which requires a network connection.

Setting up the WiFi
Enabling the installed SSH server
Now let’s connect to the Raspberry via SSH.
Finding Your Raspberry Using nmap
This will display the IP address you need to use to connect to the Raspberry Pi.
If you’re out of luck and without a keyboard, a screen, a mouse, or all of these, you can revert to some simple commando countermeasures and use nmap to find all the Raspberry Pis on the network (and all the computers and Chinese smartphones for that matter).
Here, 192.168.1.∗ is the start of your own desktop IP address and where the Raspberry would be. Note that for this to work, we’re assuming that your computer and the Raspberry are on the same network.
What does the command actually do? In short, nmap simply scans the local network for available machines and open ports.
The -p switch scans for a given port, and the -O switch says to gather as much information as possible about each found host.

Looking for your Raspberry Pi
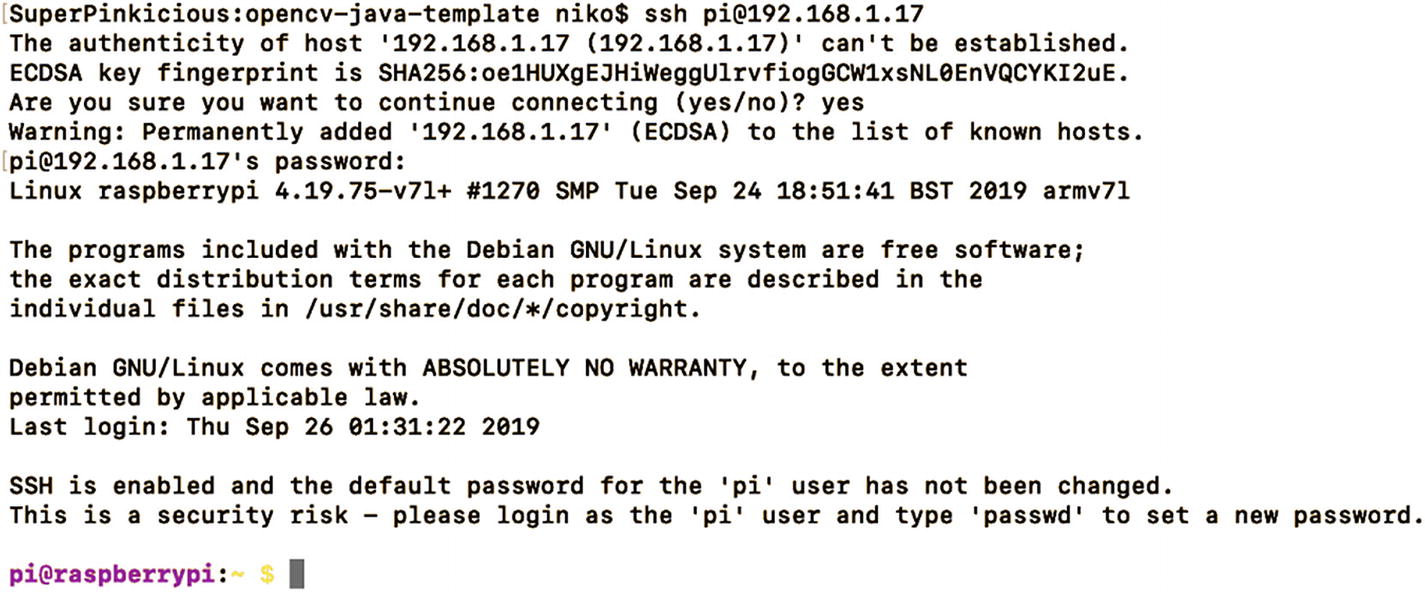
Starting an SSH connection
We made one connection, but we’re going to have to repeat those connection steps over and over, so let’s save a few SSH settings for later by modifying a configuration file both locally and on the remote Raspberry.
Setting Up SSH Easily
Usually when connecting via SSH , you disable password authentication, especially the default authentication of the Raspberry Pi, and set up a key from your local machine to connect to the remote machine and then set up that remote machine to accept only one key, or a limited number of them, so as to prevent random security attacks.
- 1.
Create your personal key pair to use with SSH. One private key stays on your computer, and one public key is added as a known entity on the remote machine. Until quantum computing comes in, that key pair is said to be secure, and it’s close to impossible to guess one’s private key by just knowing the public key. For more information on this, read Joshua Davies’ article at https://commandlinefanatic.com/cgi-bin/showarticle.cgi?article=art054.
- 2.
Register the public key that got generated on the remote device, here the Raspberry Pi. Go ahead and give the public key to as many people as you want; by default, this is the file ending with the .pub extension.
- 3.
Add some configuration for SSH to use that generated private key when connecting to the Raspberry through a shortcut. That private key, though, is yours, so make sure you don’t give it to anyone!
On Amazon Web Services (AWS), you usually get a .pem file to connect through a new running instance. That .pem file is automatically registered for you on the new VM, so only you can access that newly created VM, thus allowing a secure access to your in-the-cloud machines.
Once the command has run successfully, two files are generated: an id_rsa.pub file and an id_rsa file. pub is your public key that you can give to anyone, and id_rsa is your private key and should be handled with the utmost care.
To tell the Raspberry Pi about your public key and recognize you, you add it as a one-liner to the /home/pi/.ssh/authorized_keys file, creating the file and the .ssh parent folder if needed.
pi4 is the shortcut that we will use to connect to the Raspberry from now on.
User is the default user on the Raspberry Pi and usually is pi.
IdentifyFile is the path to the private key of your computer that will be used to authenticate you; this is the file you created a few moments ago.
HostName is the IP address of the Raspberry. Use nmap again if you forgot it.
ForwardX11 and ForwardX11Trusted are required because we will redirect the video stream to the main computer in a few seconds.
With all these settings, you may be wondering if this was all worth it. Let’s get a bit of instant gratification to prove that it was. Via an SSH connection, we will now open an application with a UI, for example the included Chromium browser.
To display the Raspberry Pi screen, use export DISPLAY=:0.
To display the local computer screen, use export DISPLAY=:10.

Opening a remote application
Setting Up Visual Code Studio for Remote Use
One of the main concepts of this book is that you will be able to write code on a machine with a big screen and then get it to run on a remote device, redirecting the visual output to the big screen.
Up to now, you have been writing code in Visual Studio Code and running it locally. From now on, you’ll write code locally and run it remotely.
All those SSH setup efforts earlier in the chapter were made because Visual Studio Code has a plugin named Remote-SSH that, once you have the SSH setup done, does all the rest for you and fully integrates with the editor’s ecosystem.
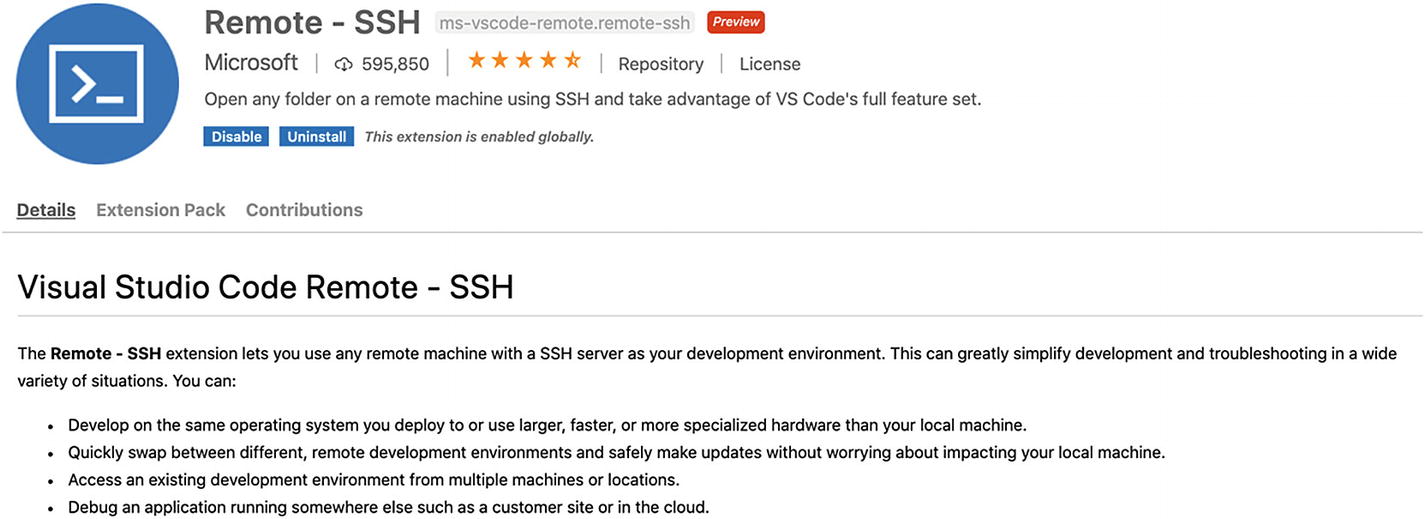
Installing the Remote-SSH plugin
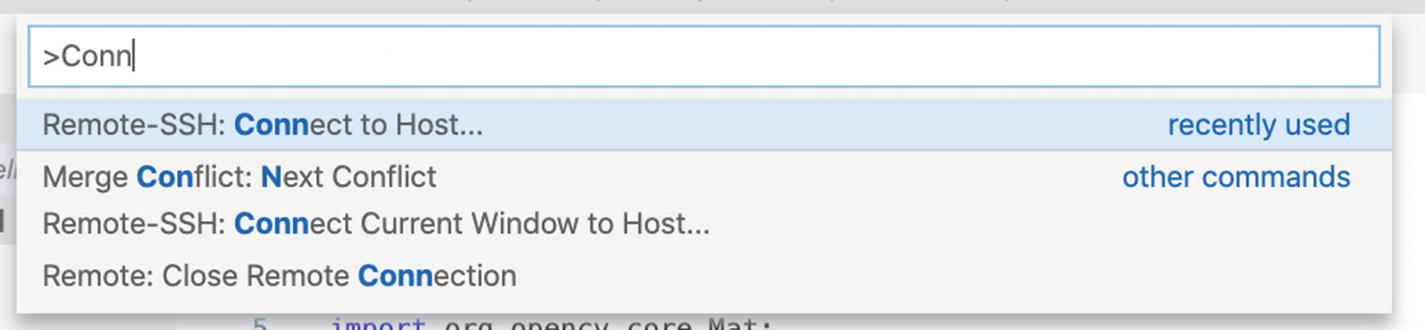
Connecting to the host
The Remote-SSH plugin may not work properly if the current project has too many files. If that seems to be the case, make sure to open a new blank window in Visual Studio Code before opening a new Remote-SSH session.

Choosing pi4

Setting up the SSH host
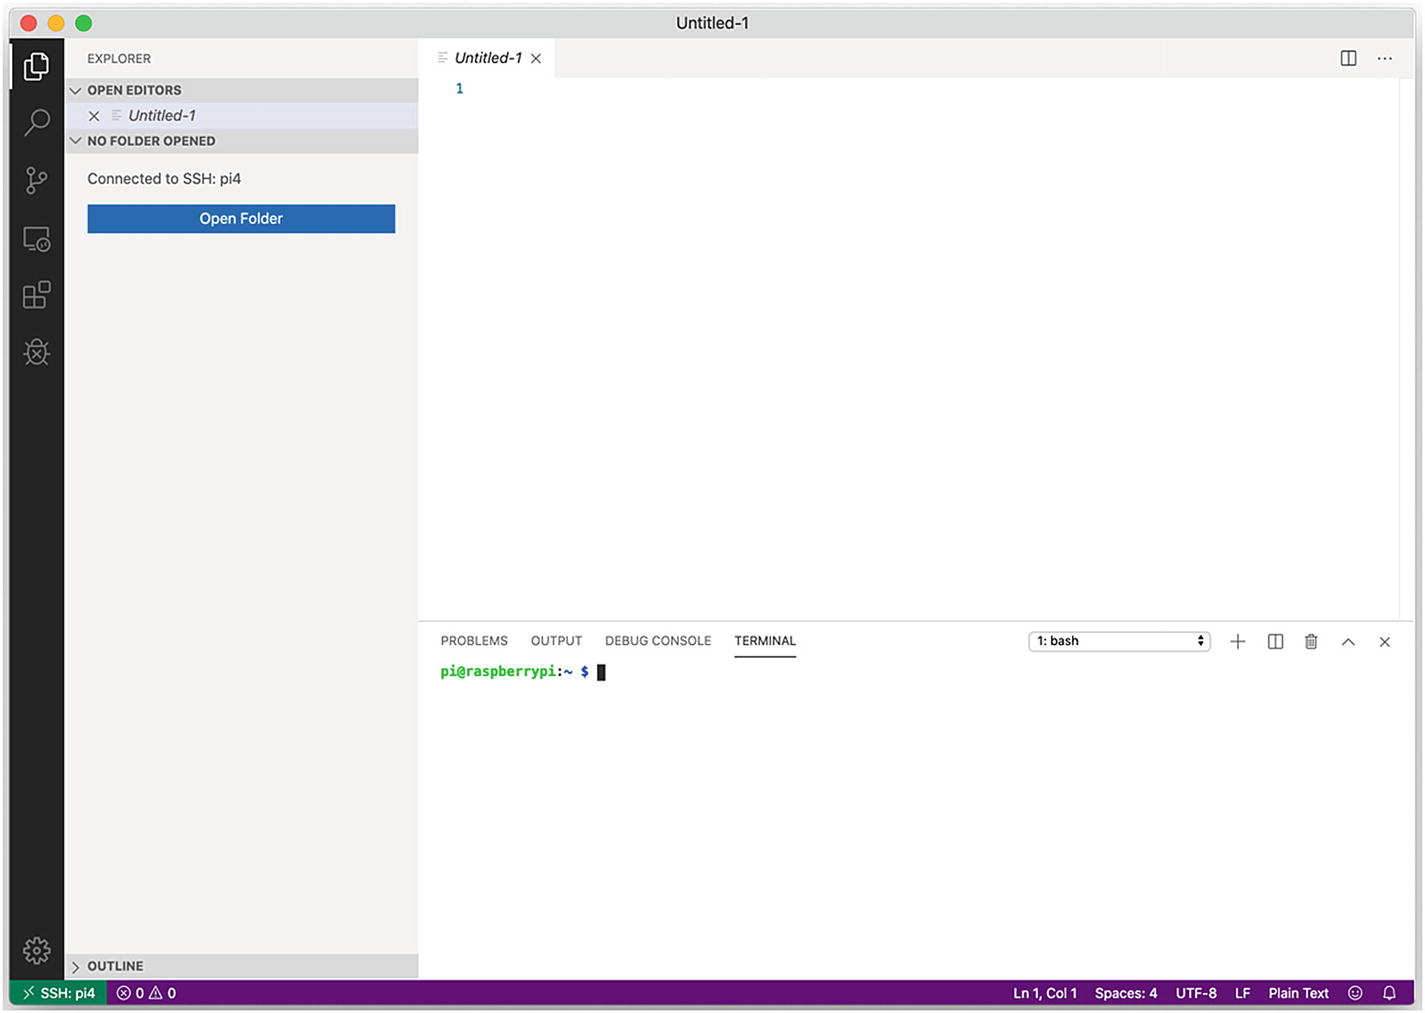
Connected to the Raspberry Pi from Visual Studio Code
At this stage, from inside Visual Studio Code, you have a terminal remotely connected to your Raspberry Pi. That means you can launch remote commands at will, but you can also unplug the keyboard and the mouse from your Raspberry Pi; the rest will pretty much be done from your local computer.
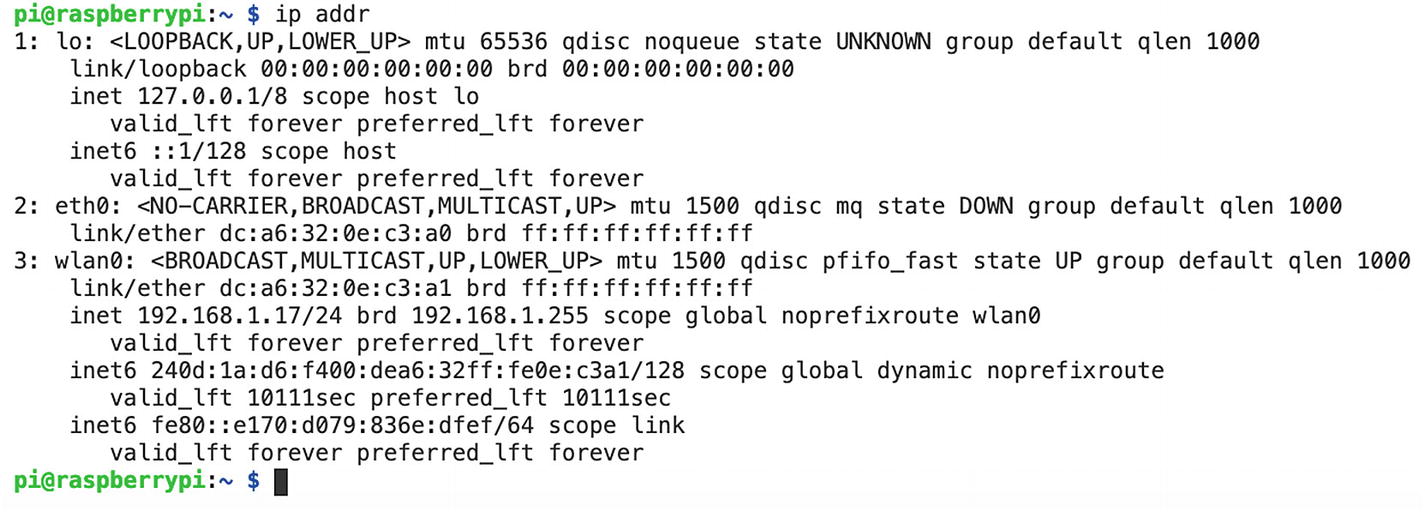
Confirming the IP address on the Terminal tab
Outputting the IP address is obviously not the main thing we can do with that terminal, so let’s move on and install the required Java Development Kit now.
Setting Up the Java OpenJDK
All the code in this book is Java code, so we’ll need to install the Java Development Kit and runtime on the Raspberry Pi.
As an optional dependency, you can also install Maven. Maven is not really required for most of the examples of the book, but this will stop Visual Studio Code from displaying annoying messages that it cannot find the (unnecessary) Maven executable.
sudo at the start of each command line is used to get the required escalated privileges to install new software with apt.

Installing Java
Alternative to Setting Up the Java SDK
The current selection of JDK on Raspberry Pi 4 running Buster (the latest Raspbian version) is quite impressive. Sometimes, however, especially on older versions of Raspbian, you could be stuck with an outdated JDK for quite some time.
It’s worth noting that companies like Azul and Bellsoft have released up-to-date versions of the JDK specifically compiled for the ARM CPU, the processor running on the Raspberry Pi.
With the Java Development Kit now installed on your Raspberry Pi, let’s move on to the meat of this chapter, running OpenCV code in Java and on the Pi.
Checking Out the OpenCV/Java Template
Directly perform a Git clone of the template
Download the zip file from the Git project template
Generate the templated project using Maven
Let’s quickly review these three one by one.
Performing a Git Clone
It is possible and convenient to simply check out code from Visual Studio Code straight to your Pi. This is done via the command palette and typing anything starting with git.

Git:Clone option in Visual Studio Code

Entering the template URL

Of course, open the cloned repository
The project is now checked out on the Raspberry and ready to be executed.
Downloading the Zip File

Downloading the zip file from the Pi
This has the advantage of not being reliant on Git but has the consequence that it is harder to share updates between different Raspberry Pis.
Using Maven
A third way to set up the project is the same technique that was used to originally create the Git template repository: using the build tool Maven. In the Java ecosystem, quite a few people are a bit afraid of going the Maven way, but for a set of given tasks, Maven is a pretty solid choice.
Maven , once installed, can create a project for you with all the required files through the Maven archetypes.
archetypeVersion: This is the version of the project structure, here 1.0. There may be a few updates soon, but don’t expected too many. It’s better to create your own.
version: This is the version of your project; it usually starts at 1.0-SNAPSHOT.
groupId: This is the Maven group of your project, like com.google, etc.
artifactId: This is the name of the project within the groupId. It must be unique.
Here we are using an older version of the archetype plugin; with this version, it is easier to retrieve artifacts from the custom Maven repository at repository.hellonico.info.
Later versions of the archetype plugin require a deeper knowledge of the Maven framework, which is out of the scope of this book.

Project files on the Raspberry Pi
Again, the files are located on the Raspberry Pi, the Java code will be executed on the Raspberry Pi, but the editor is effectively running on your local computer.
Installing the Visual Code Java Extension Pack Remotely
If you remember from Chapter 1, we installed plugins to get Visual Studio Code to understand and run Java. We’ll do the same here, but this time on the Raspberry Pi.

“SSH. PI4” has no extension yet

Looking for the Java Extension Pack again

Finding the Java Extension Pack again

Editor reload required again

Familiar Run and Debug buttons showing
All the steps were quite long the first time around, but now you’re ready for some good times. You are all set up for running some OpenCV/Java on the Raspberry Pi.
Running the First OpenCV Example
Without further ado, let’s click the Run button and get the program to execute.

The code has executed on the Raspberry Pi
Note that various downloads are done in the background on the first run, so the command takes a bit of time. On the second run, things are quicker.

Debugging and displaying java.vm.vendor
Running on Linux or a VM with AWS Instead
So, what if you were actually not running on a Raspberry Pi but on a remote Linux server or a cloud virtual machine ?
All the setup you have done up to now was actually very generic, so you could have been connecting to a standard box running Linux, provided you have SSH access to it.

Connecting remotely to a running Linux box
To give you some more creative ideas, I am also using that same setup to connect to remote machines on Amazon Web Services.
Capturing a Video Live Stream
If your webcam is plugged in properly via the USB port, you are now ready to write some code to capture the video stream straight from your IoT device.
OpenCV’s VideoCapture Java class to get the hardware to the software (or more precisely, from the video stream to the OpenCV Mat objects). In this example, the VideoCapture object takes an int as the ID of the video capture device to use.
The ImShow class, which is not part of the core OpenCV Java package. It’s a small class similar to OpenCV’s HighGui class (https://docs.opencv.org/master/javadoc/org/opencv/highgui/HighGui.html), but it makes it easier to just plug into video streams and show them on the screen.
We also use init OpenCV with a convenient method called Origami.init(), which searches for and loads the proper binary OpenCV library for us.
Accessing and Displaying the Video Stream

Video stream without frame rate
Adding the Frame per Second on the Frame

Video stream with the frame rate
Usually between 15 and 20 frames per second is an expected value for this exercise.
No X11 DISPLAY Set
<empty>, which is not so good. You need to set the value yourself.
:0, or localhost:0, which means any visual frame will be shown in the Raspberry screen. This is OK for debugging the setup, but it’s not the one you usually want when working from your computer.
:10, or localhost:10, which means the frames will be shown on your computer. On macOS, this is done via the XQuartz application, which runs a graphical environment compatible with the one from the Raspberry Pi. On Windows, the equivalent is Xming: https://sourceforge.net/projects/xming/.

Remote Raspberry Pi stream straight to your computer
You know everything about setting up the Pi for remote development. Let’s move on to some recipes to analyze the content of video streams.
Playing a Video
This code is the same as playing a stream taken from a webcam, except the file name is a parameter to the VideoCapture constructor.

Marcel in the morning
If you try to enter an http:// URL as a path to VideoCapture, you will see that things do not work as you probably expected. The remote video you wanted to play will not load.
A URL in the path is used to play streams from a network webcam, not static files. If you have one on hand, it’s a good exercise to plug the web URL of the webcam directly into the VideoCapture object.